
First Steps
Articles
Setup WhatsApp Profile
To set up your WhatsApp profile on WhatCX follow the below steps
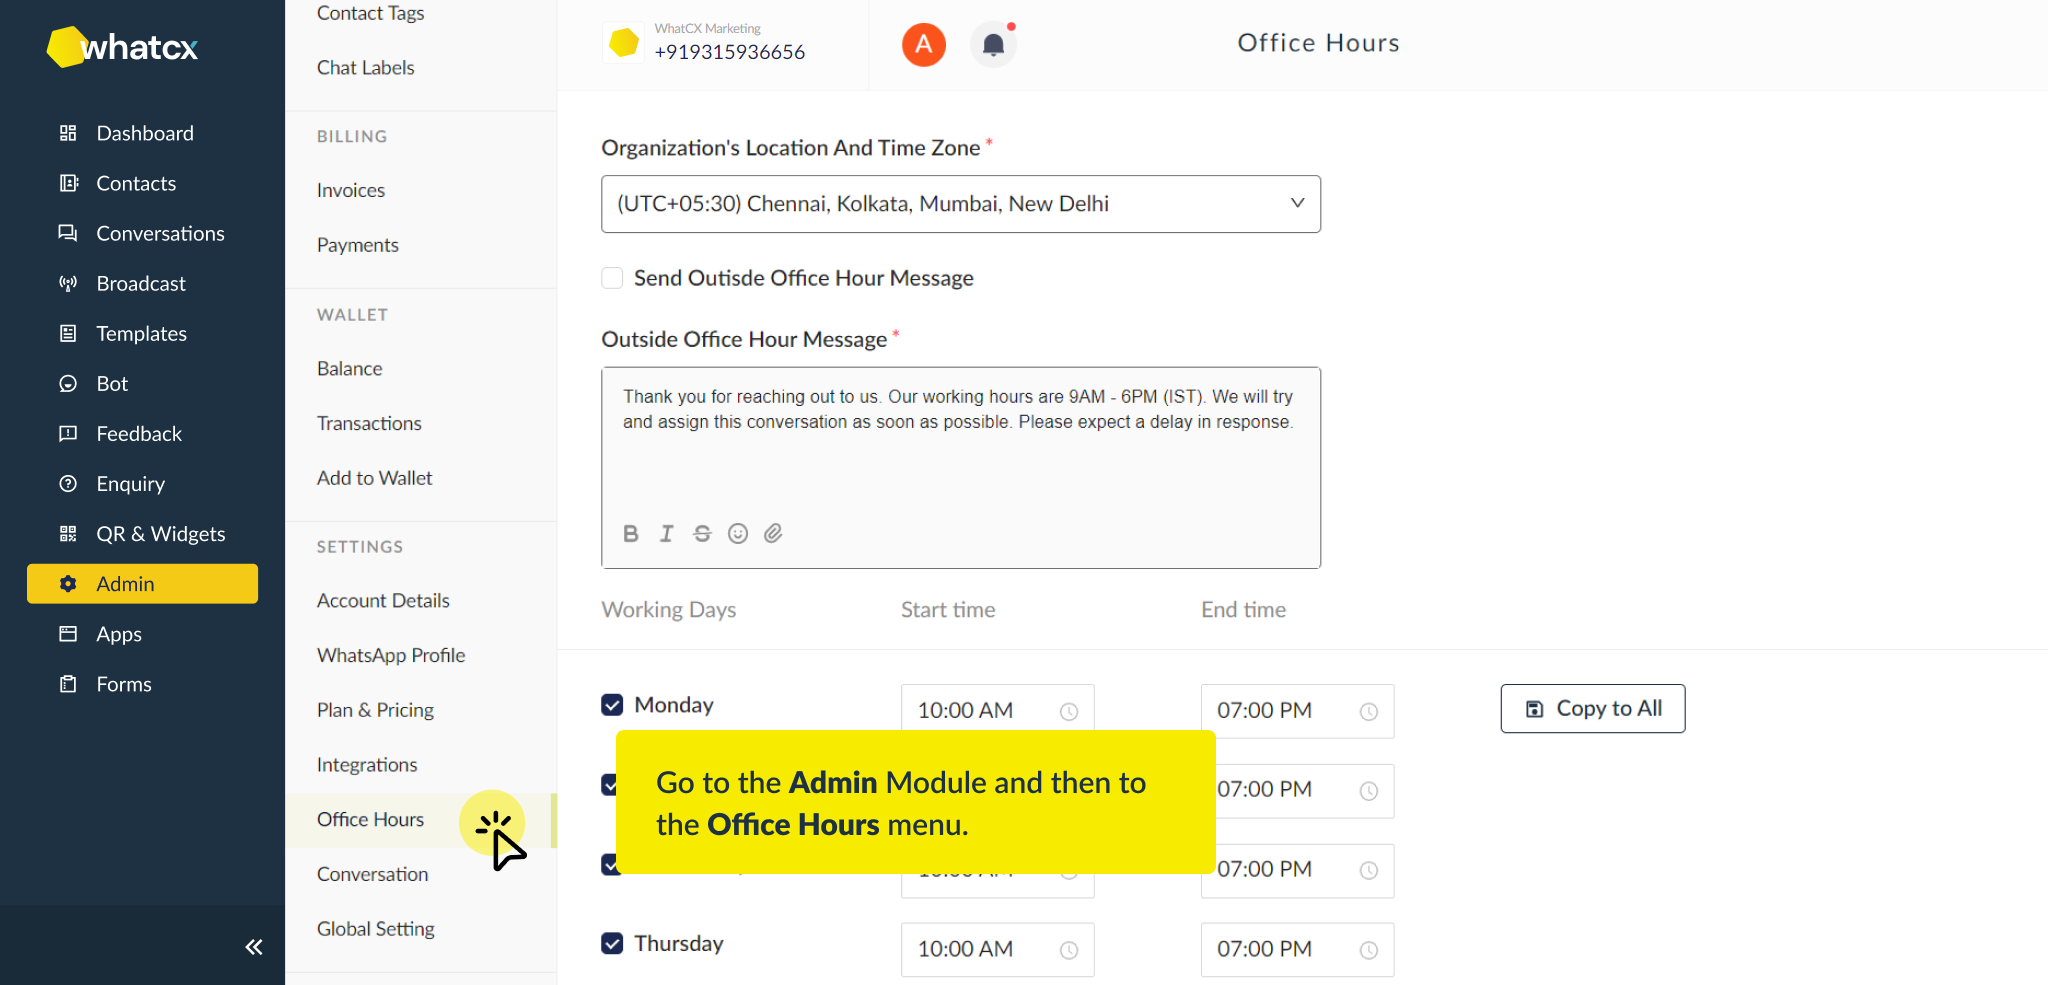
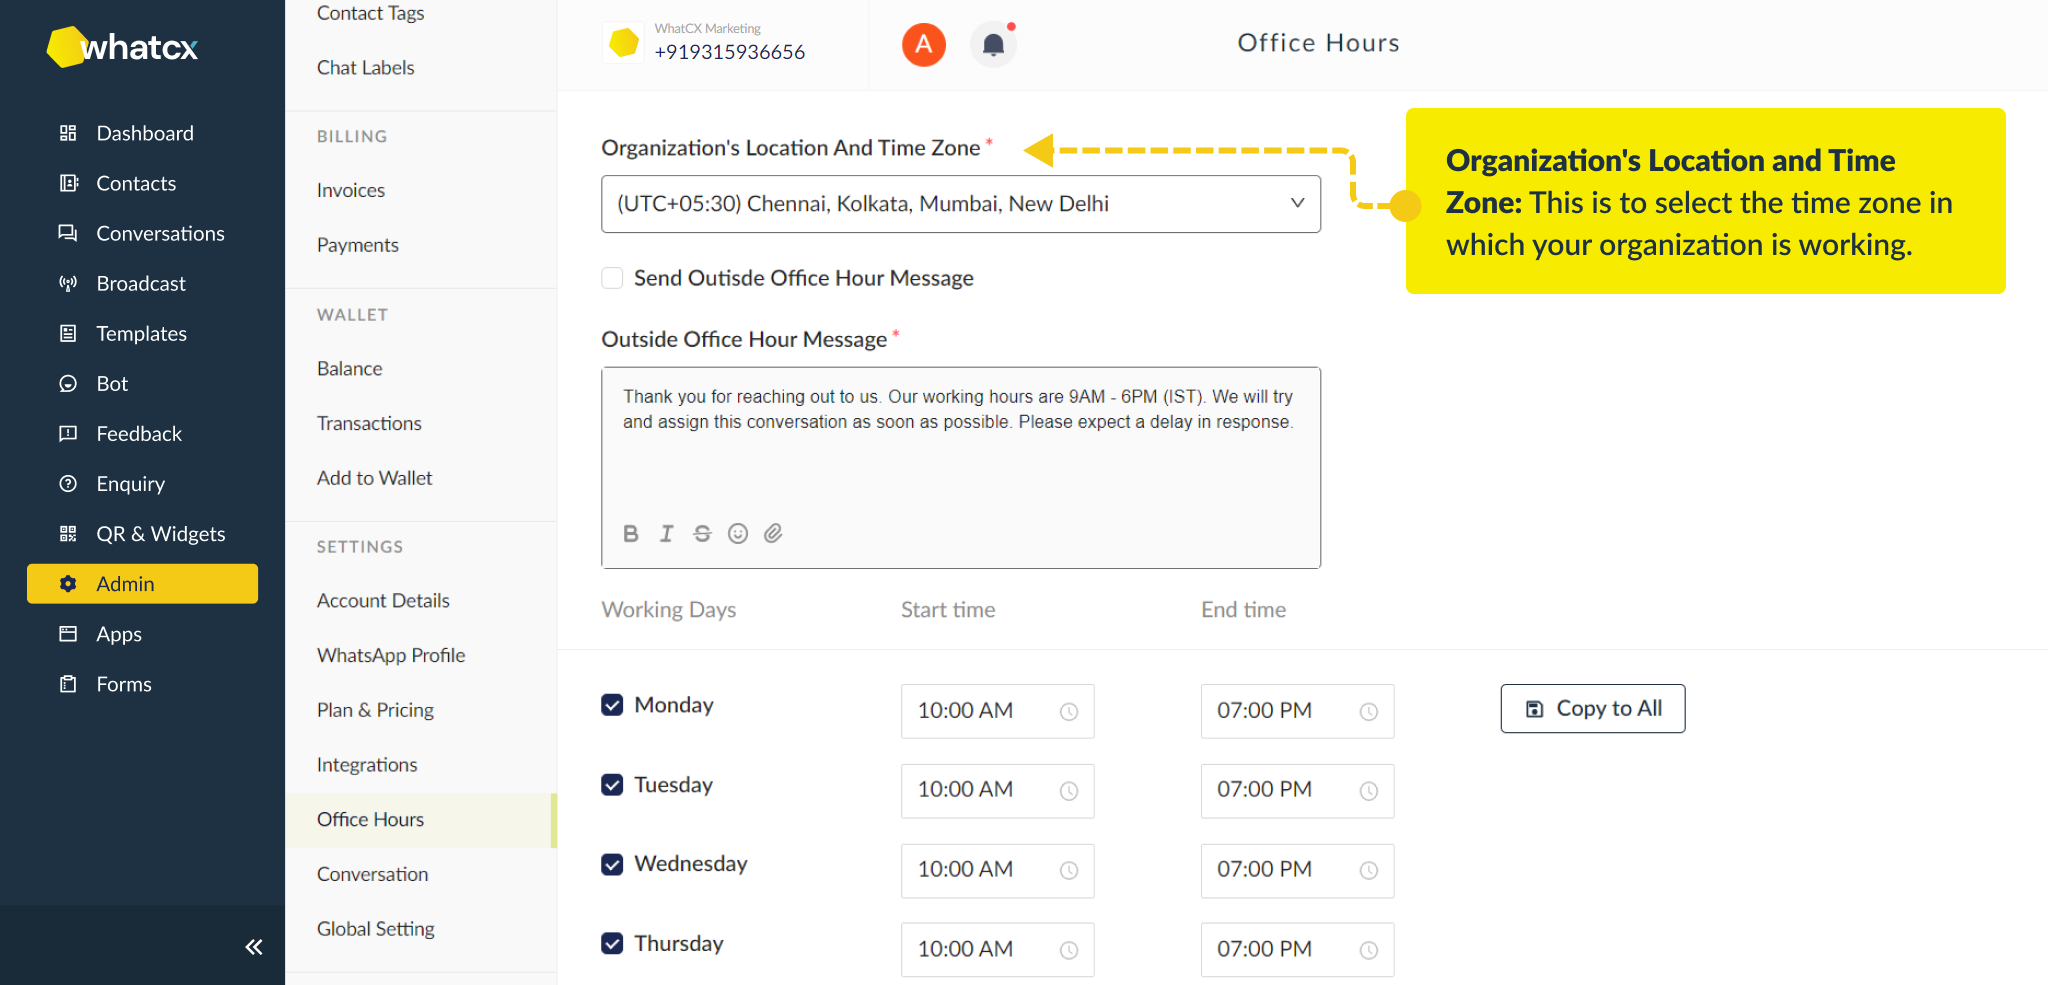
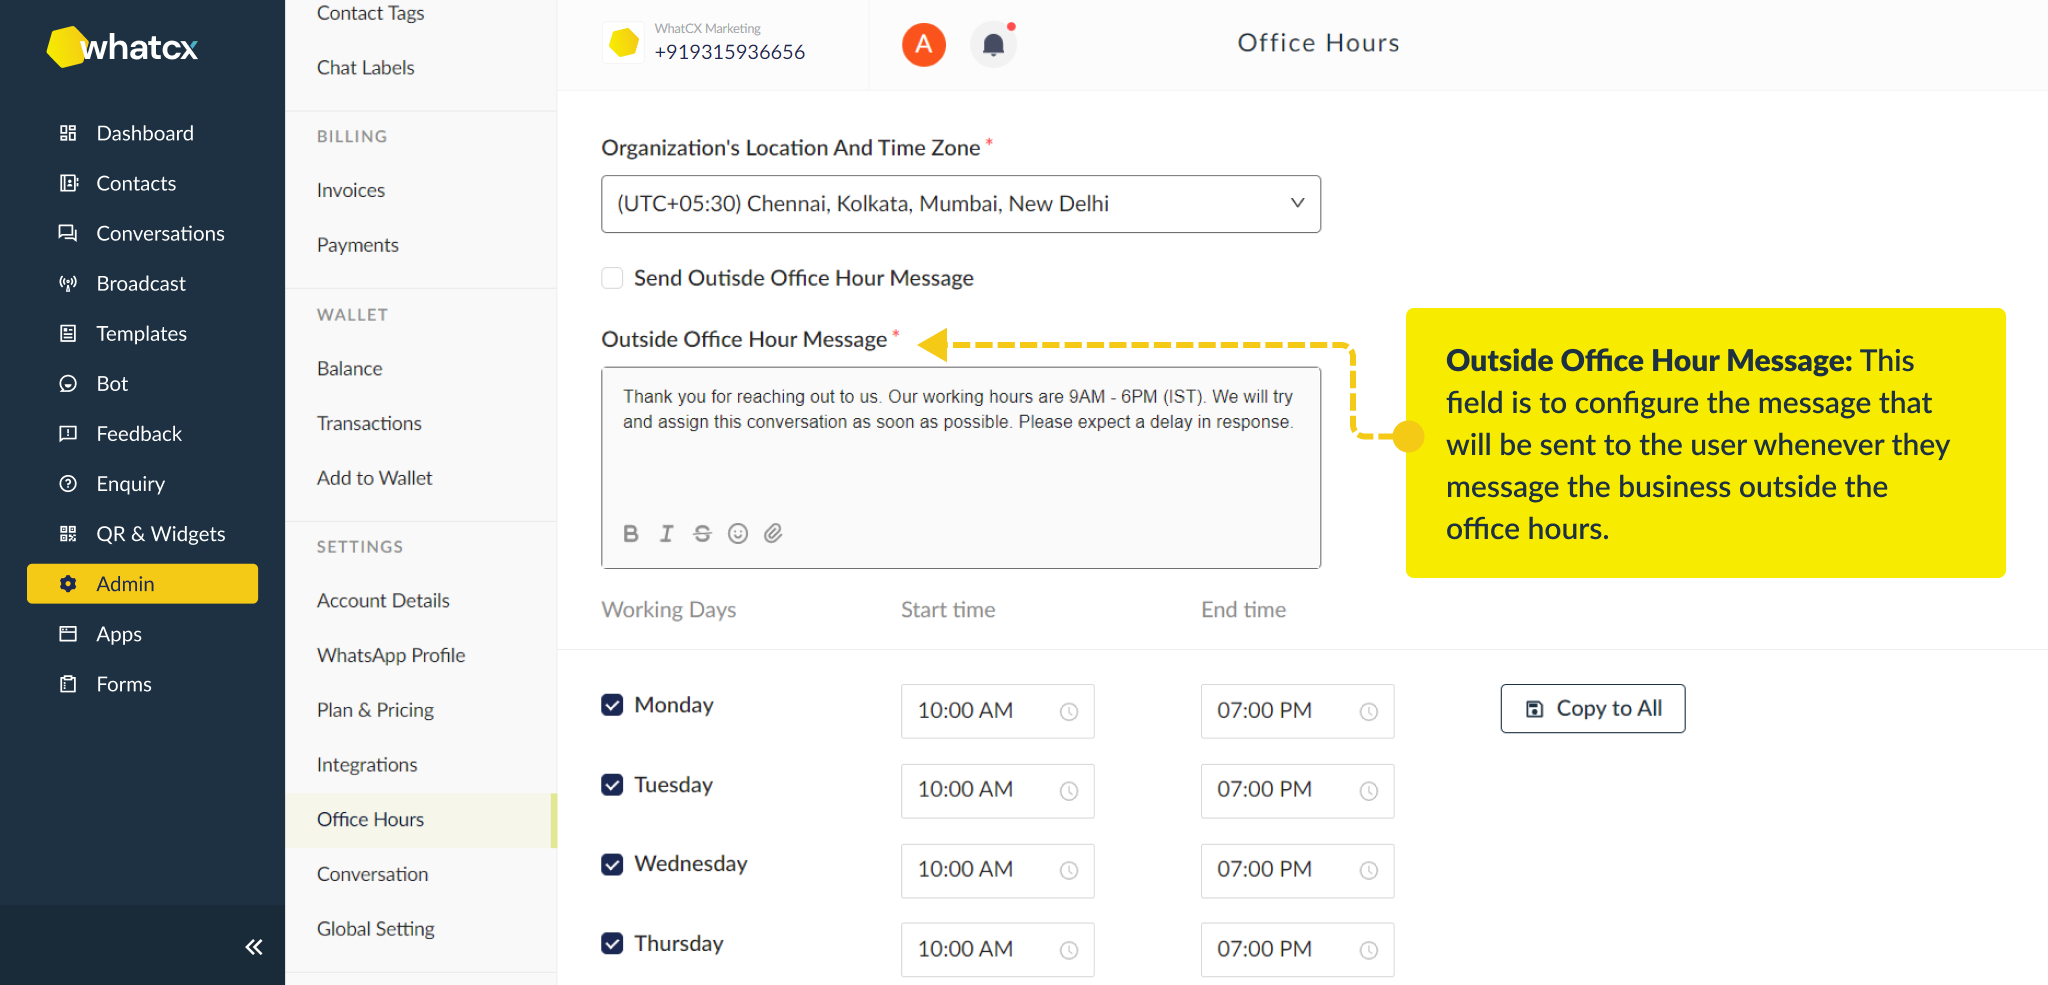
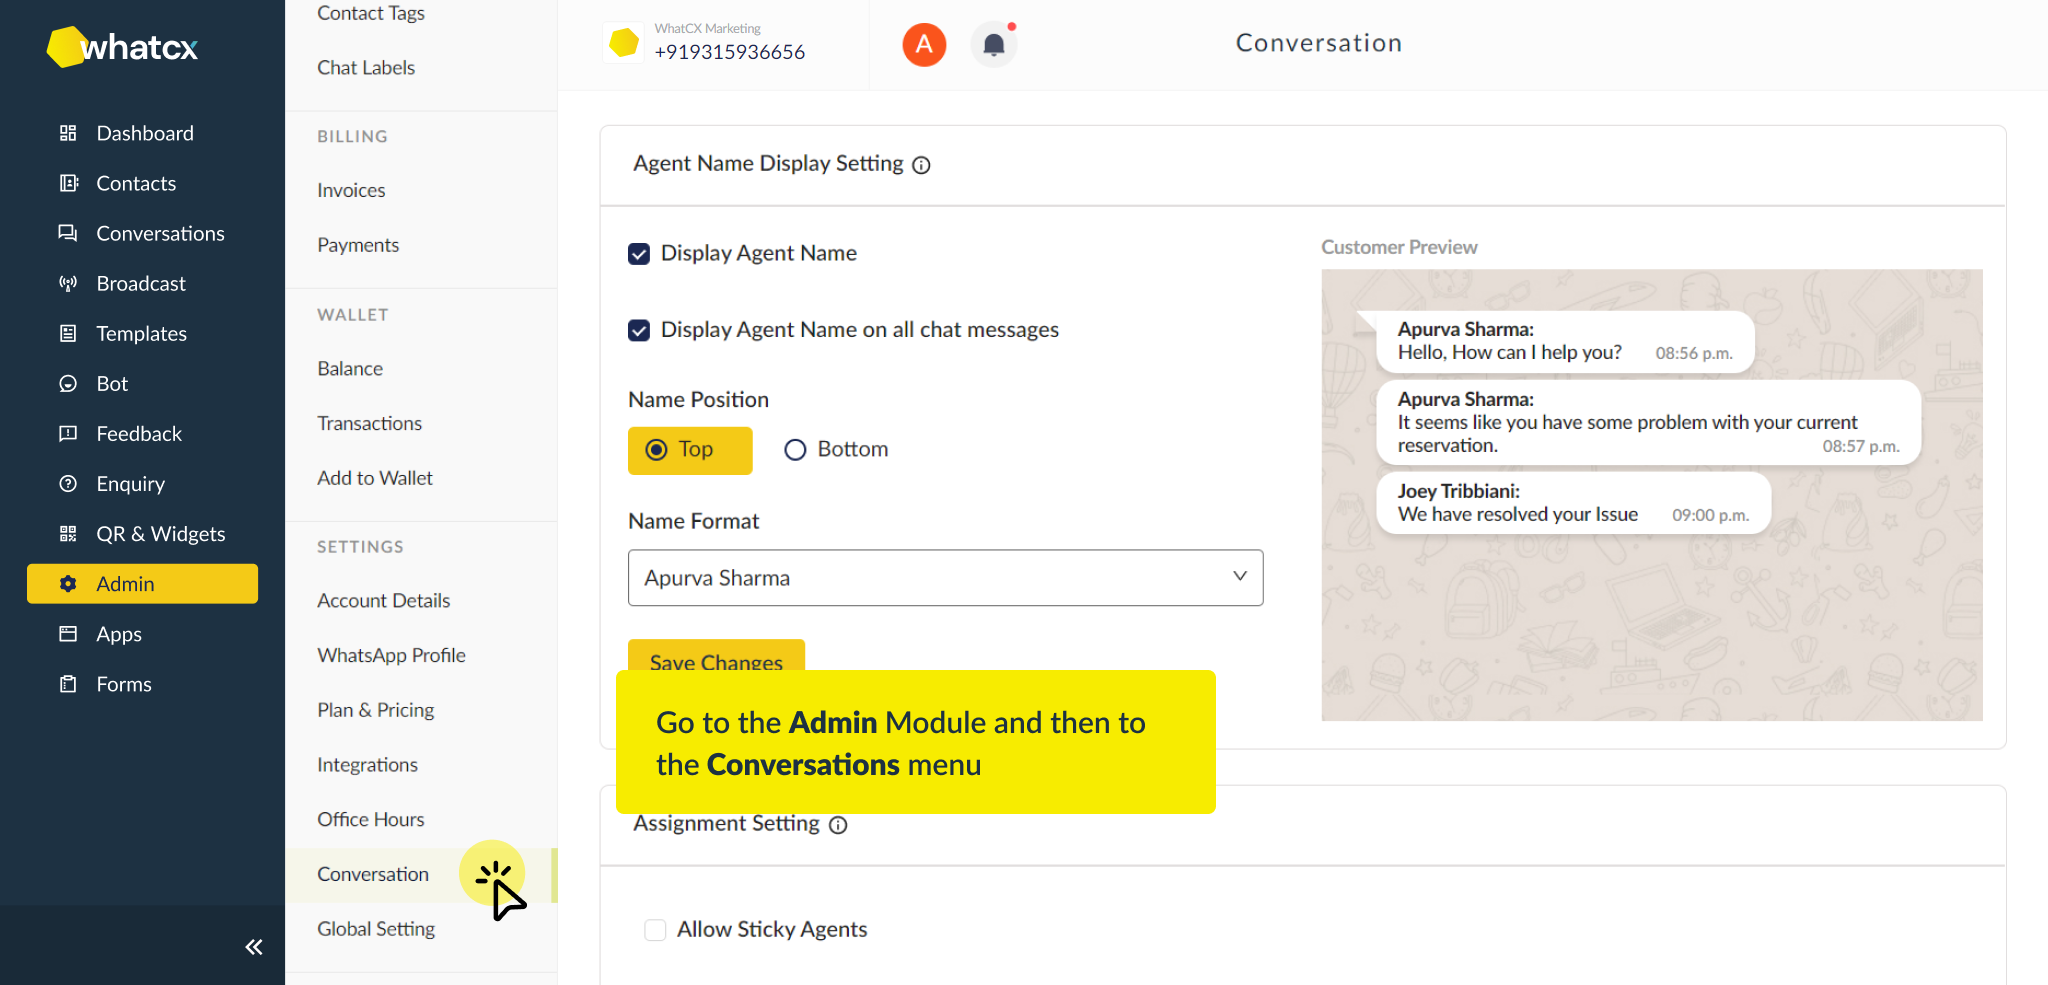
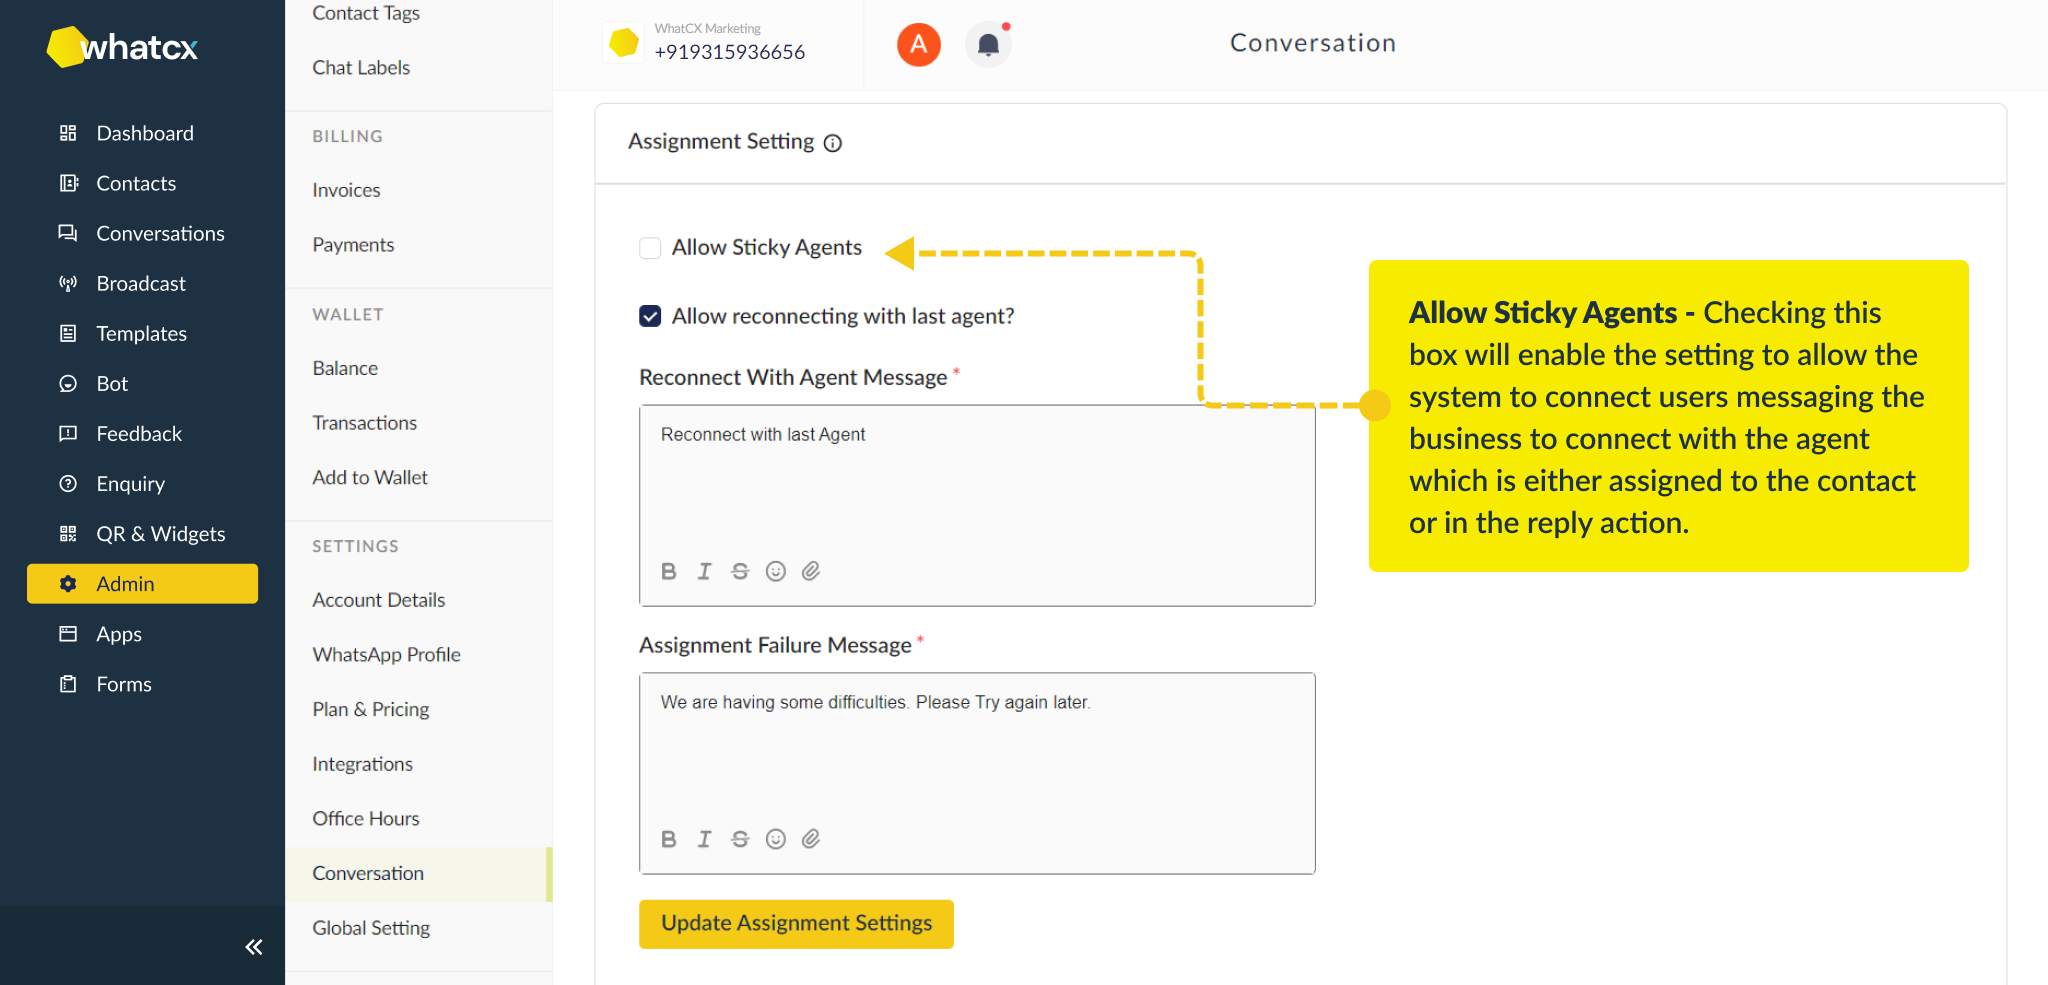
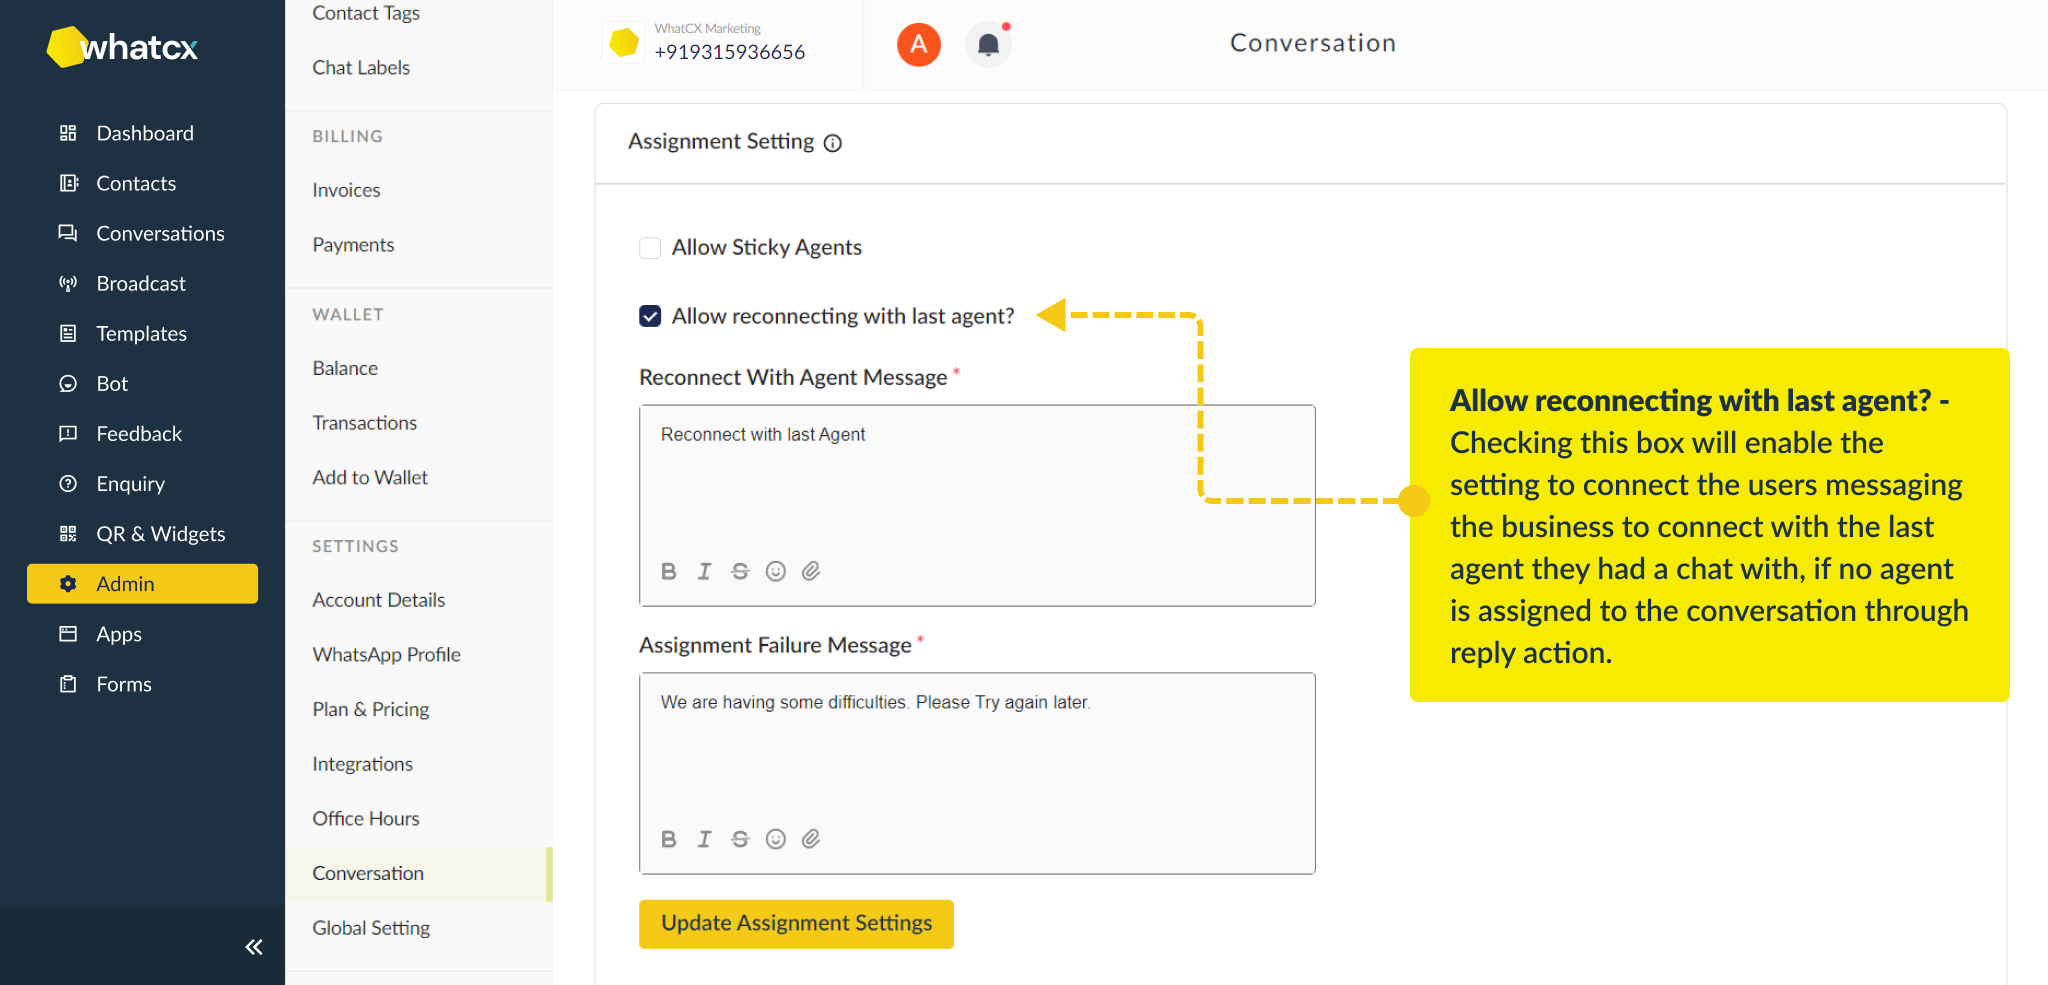
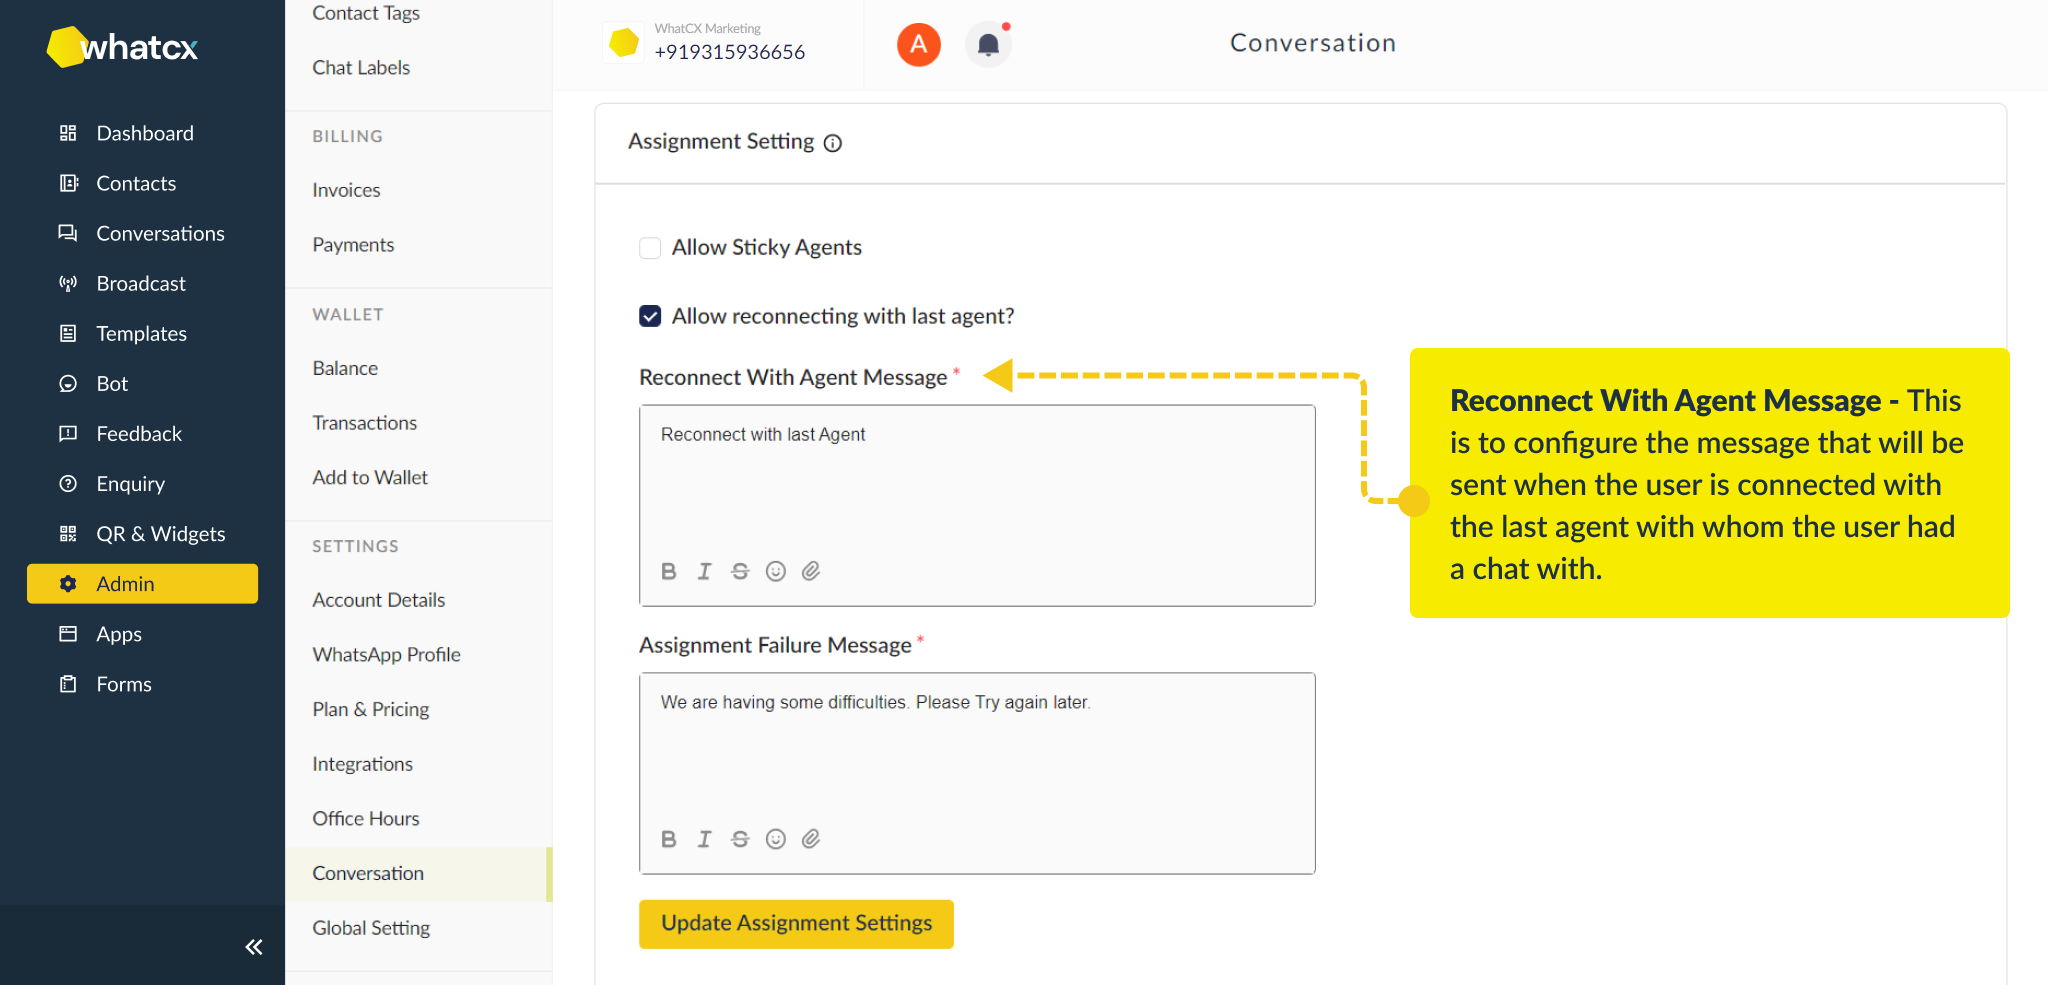
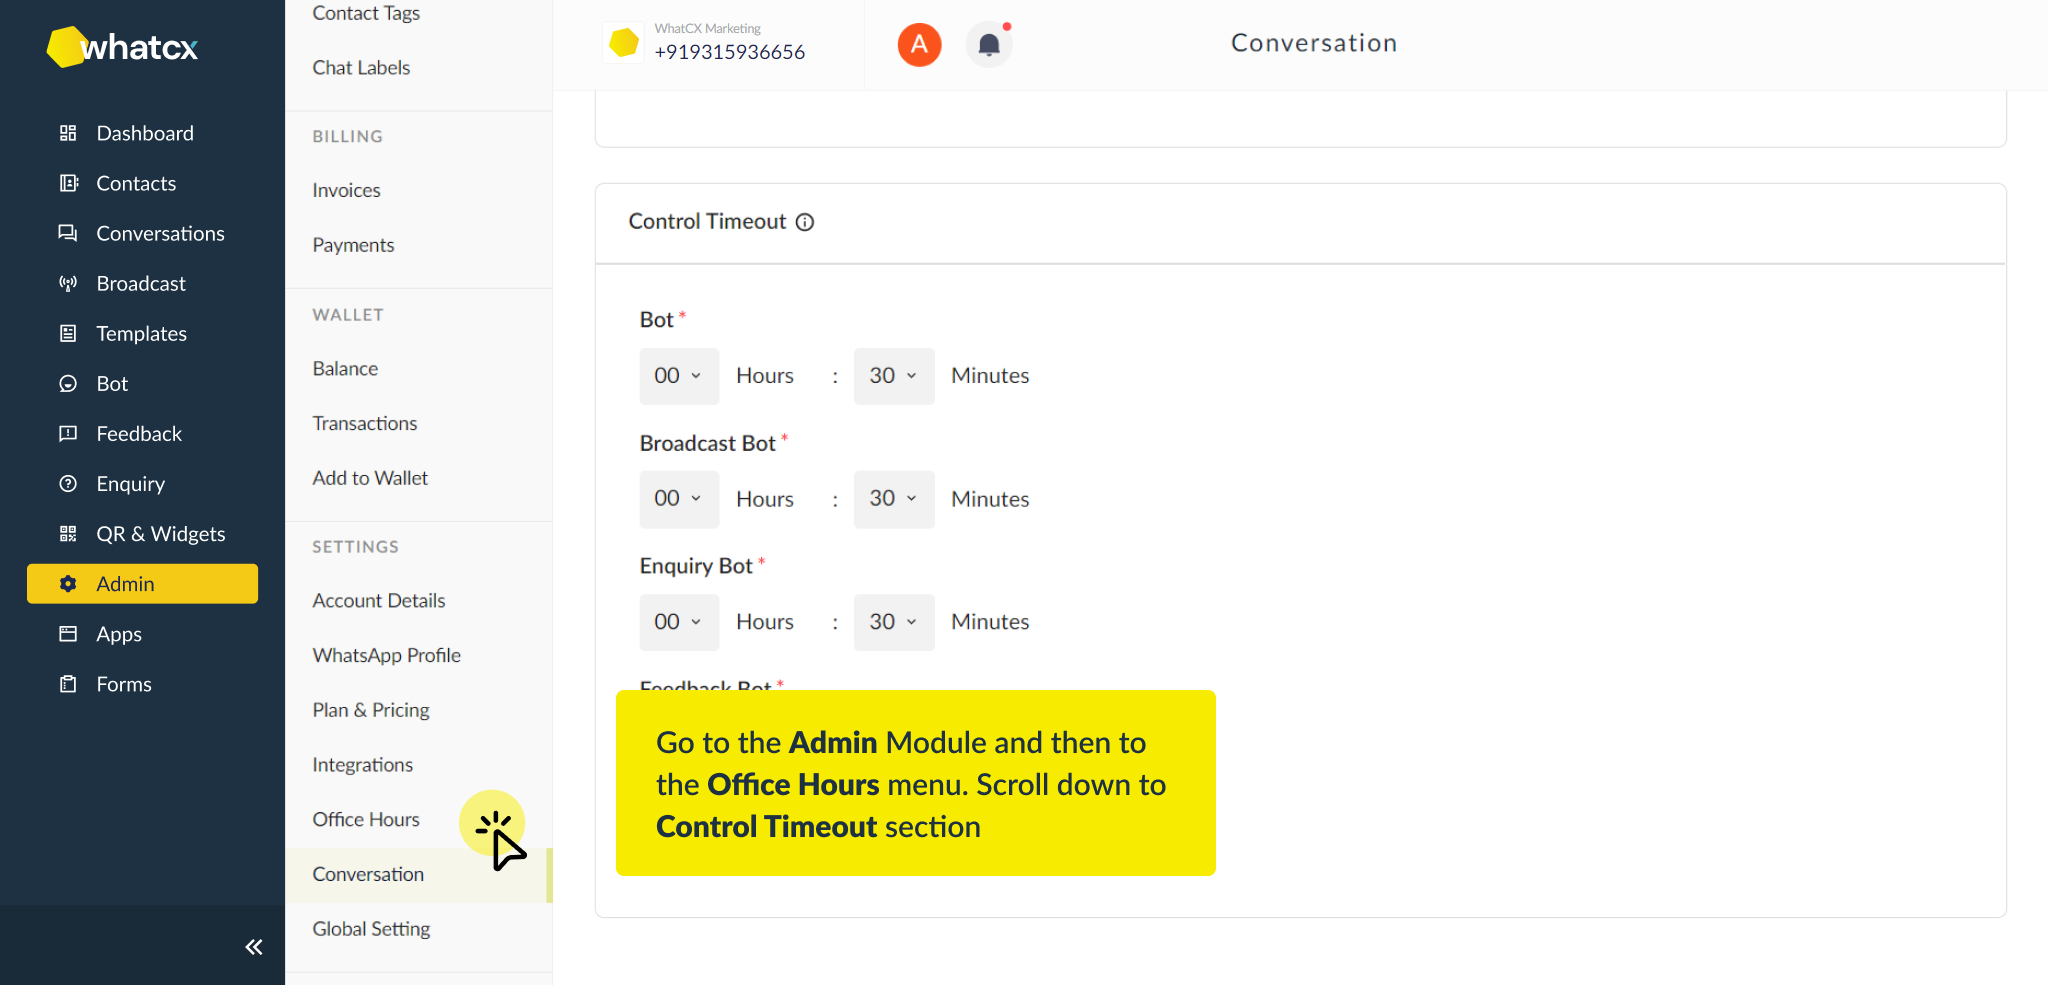
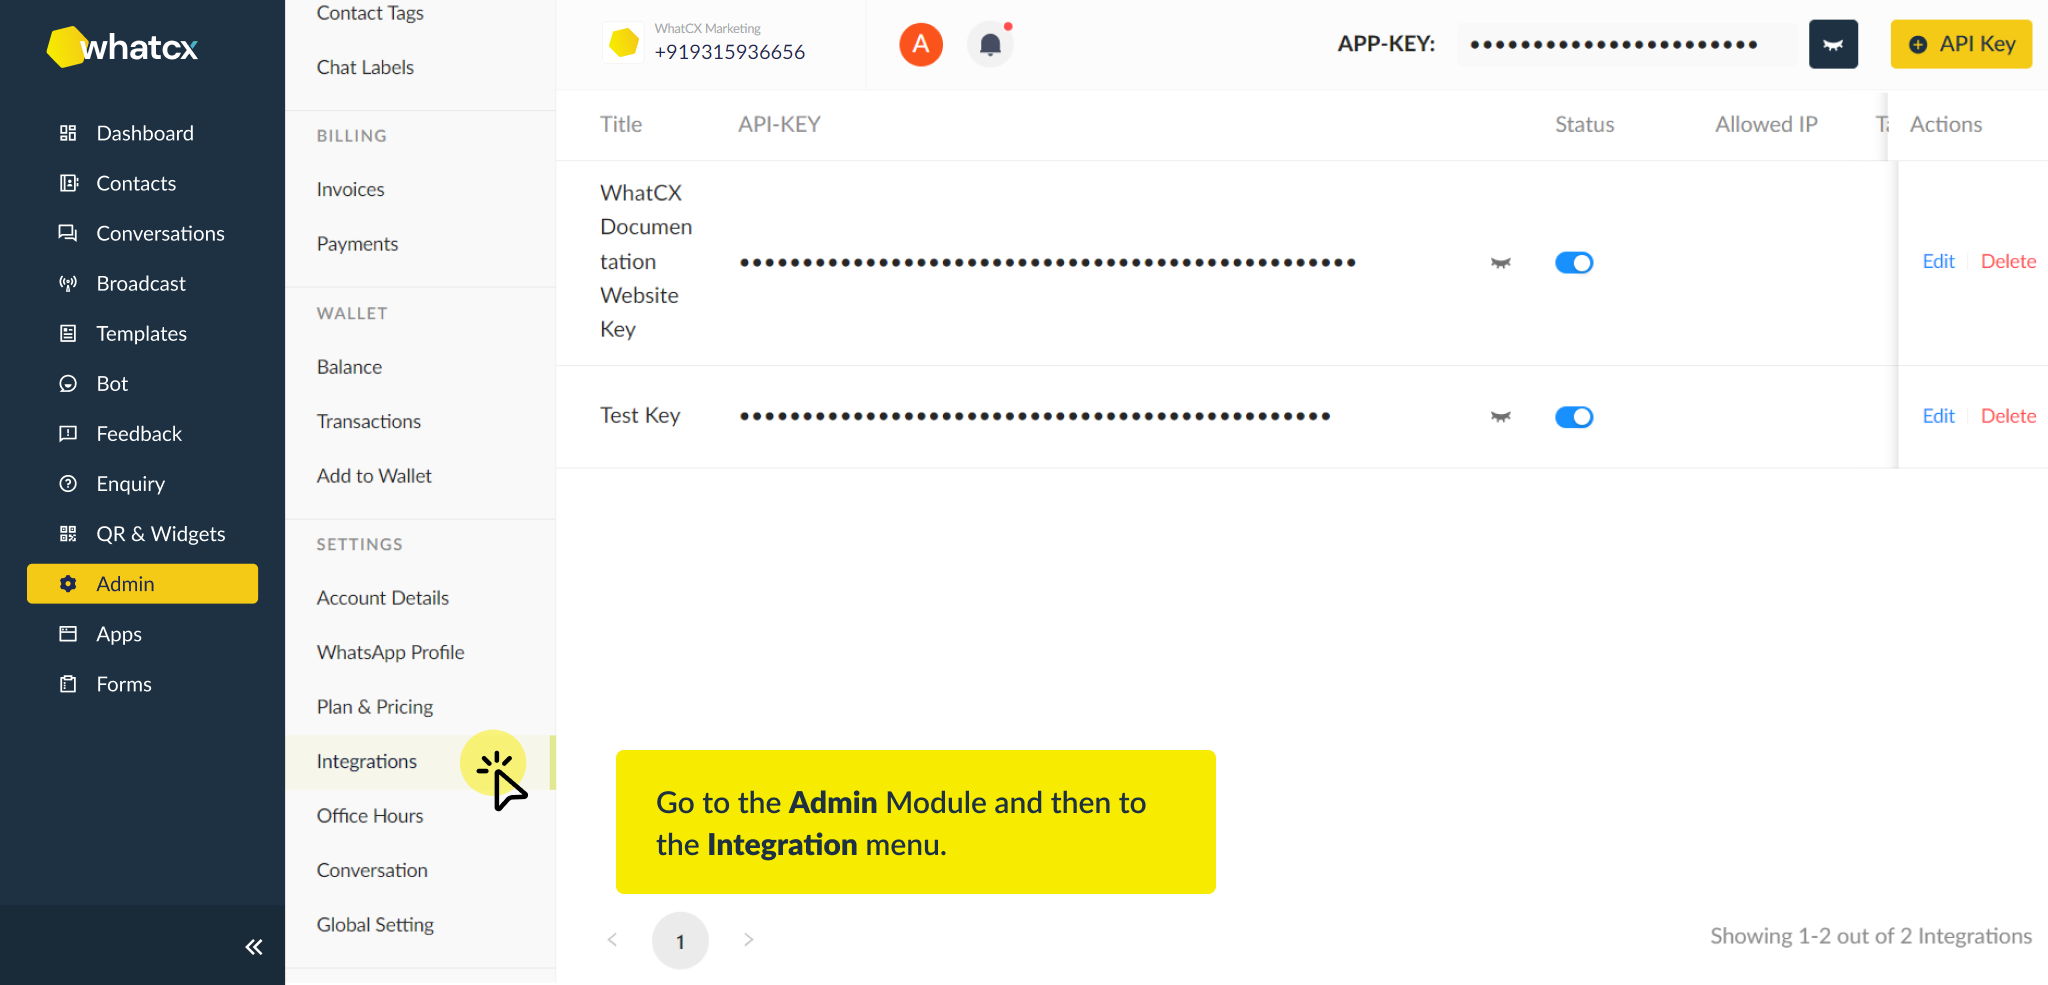
1. Login to WhatCX, Click on Admin in the left navigation
2. Under Settings, you’ll find WhatsApp Profile as an option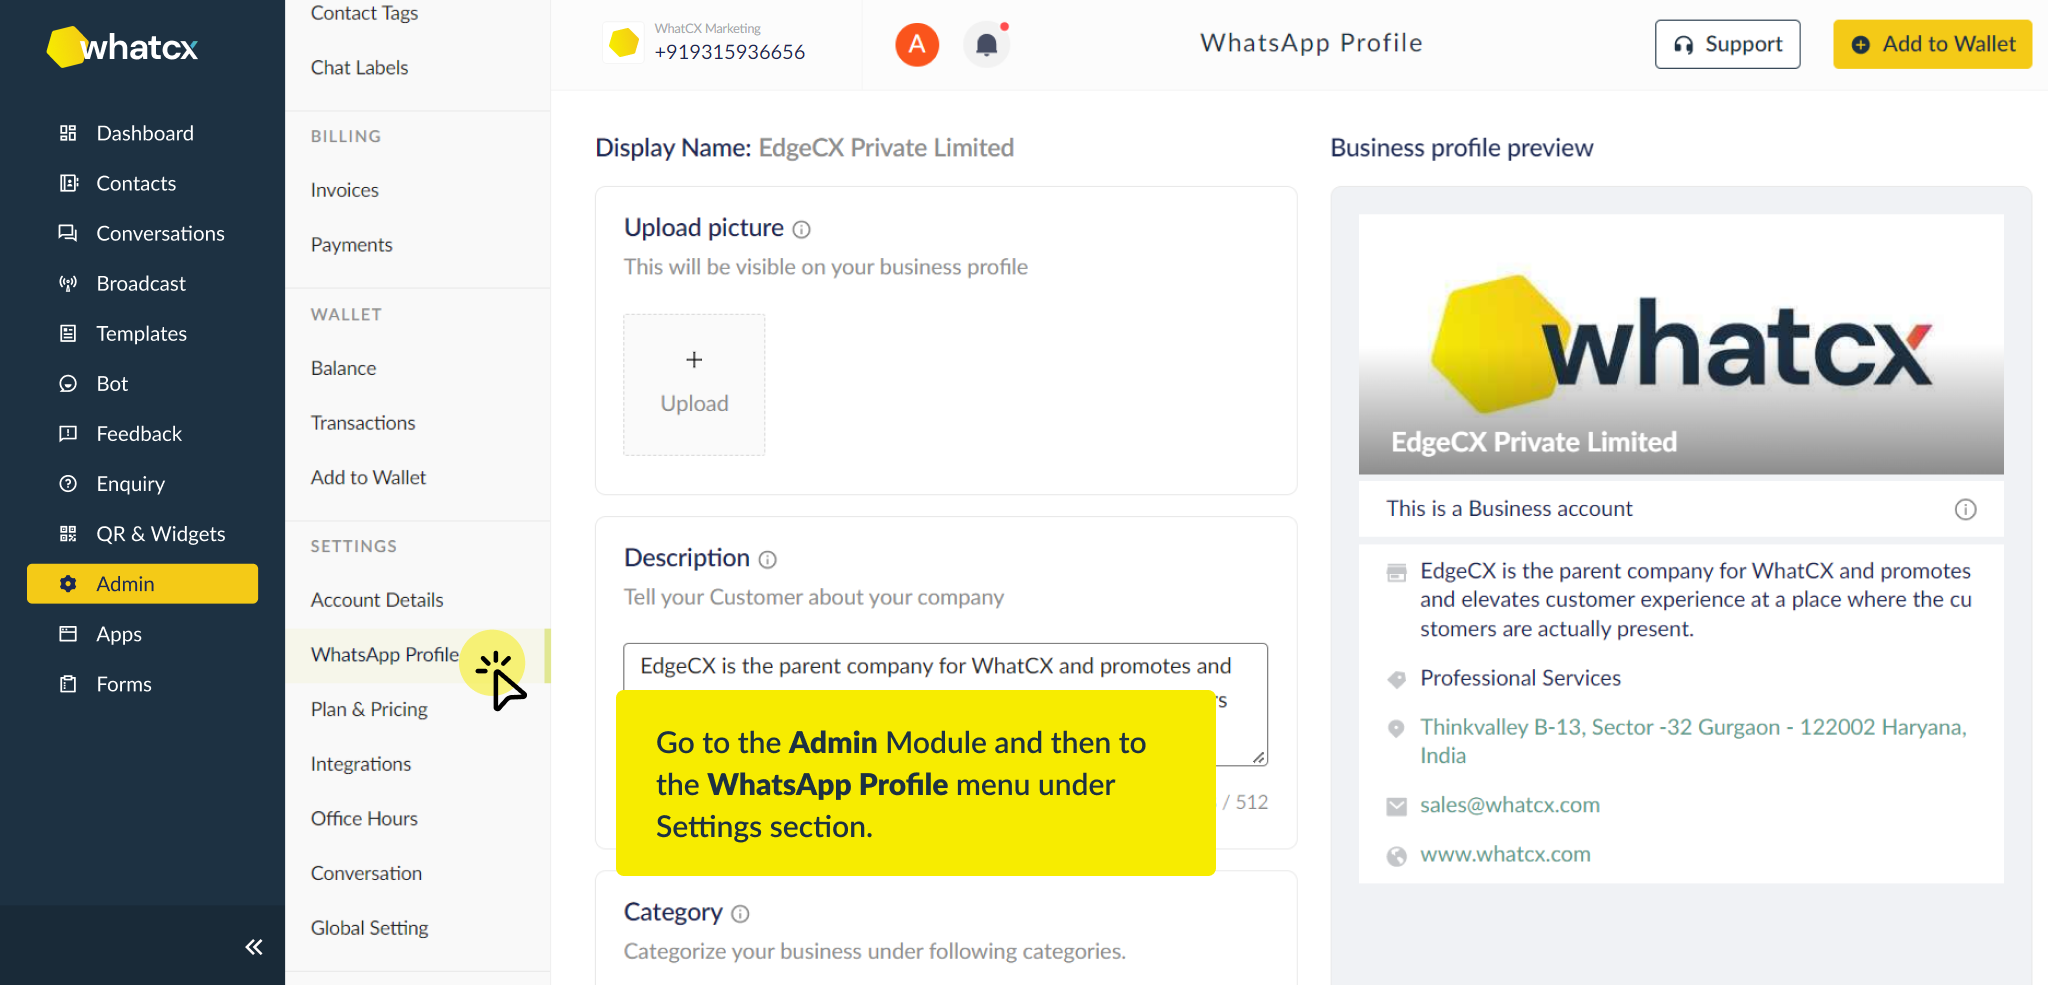
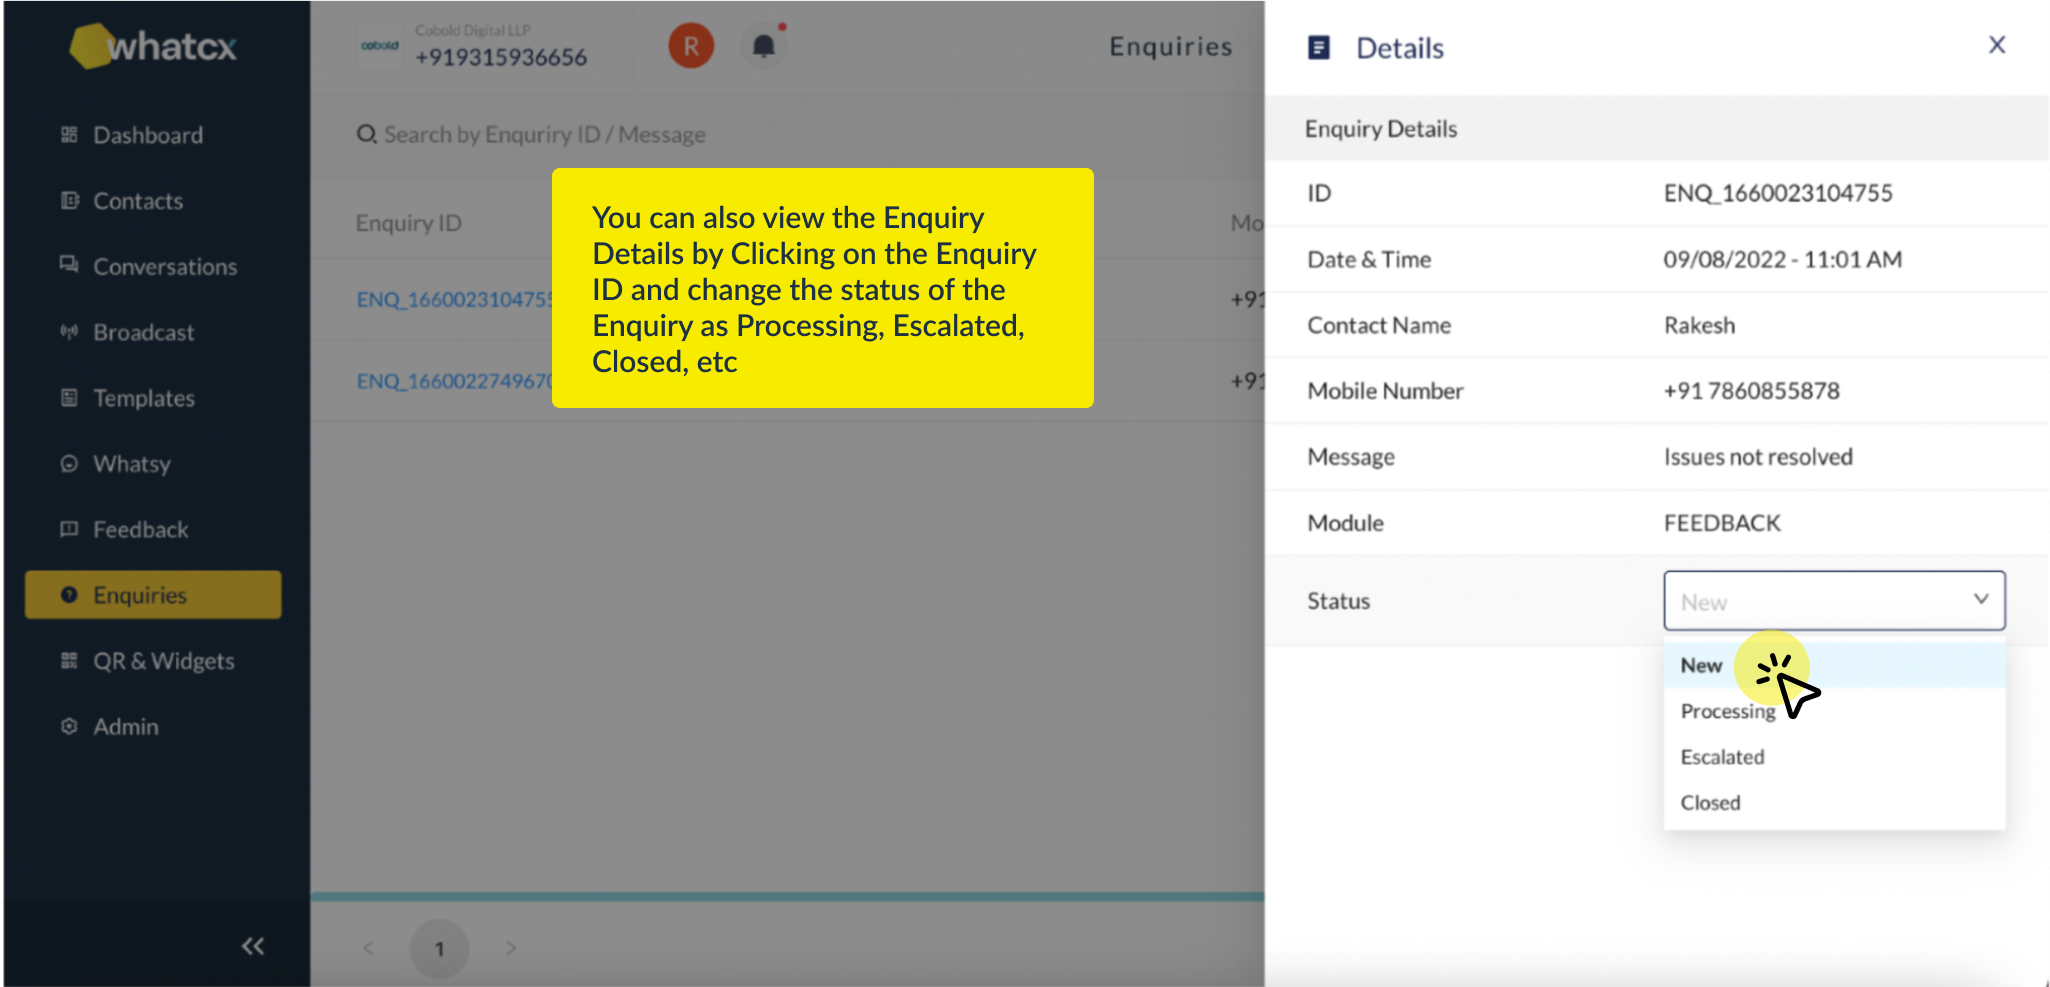
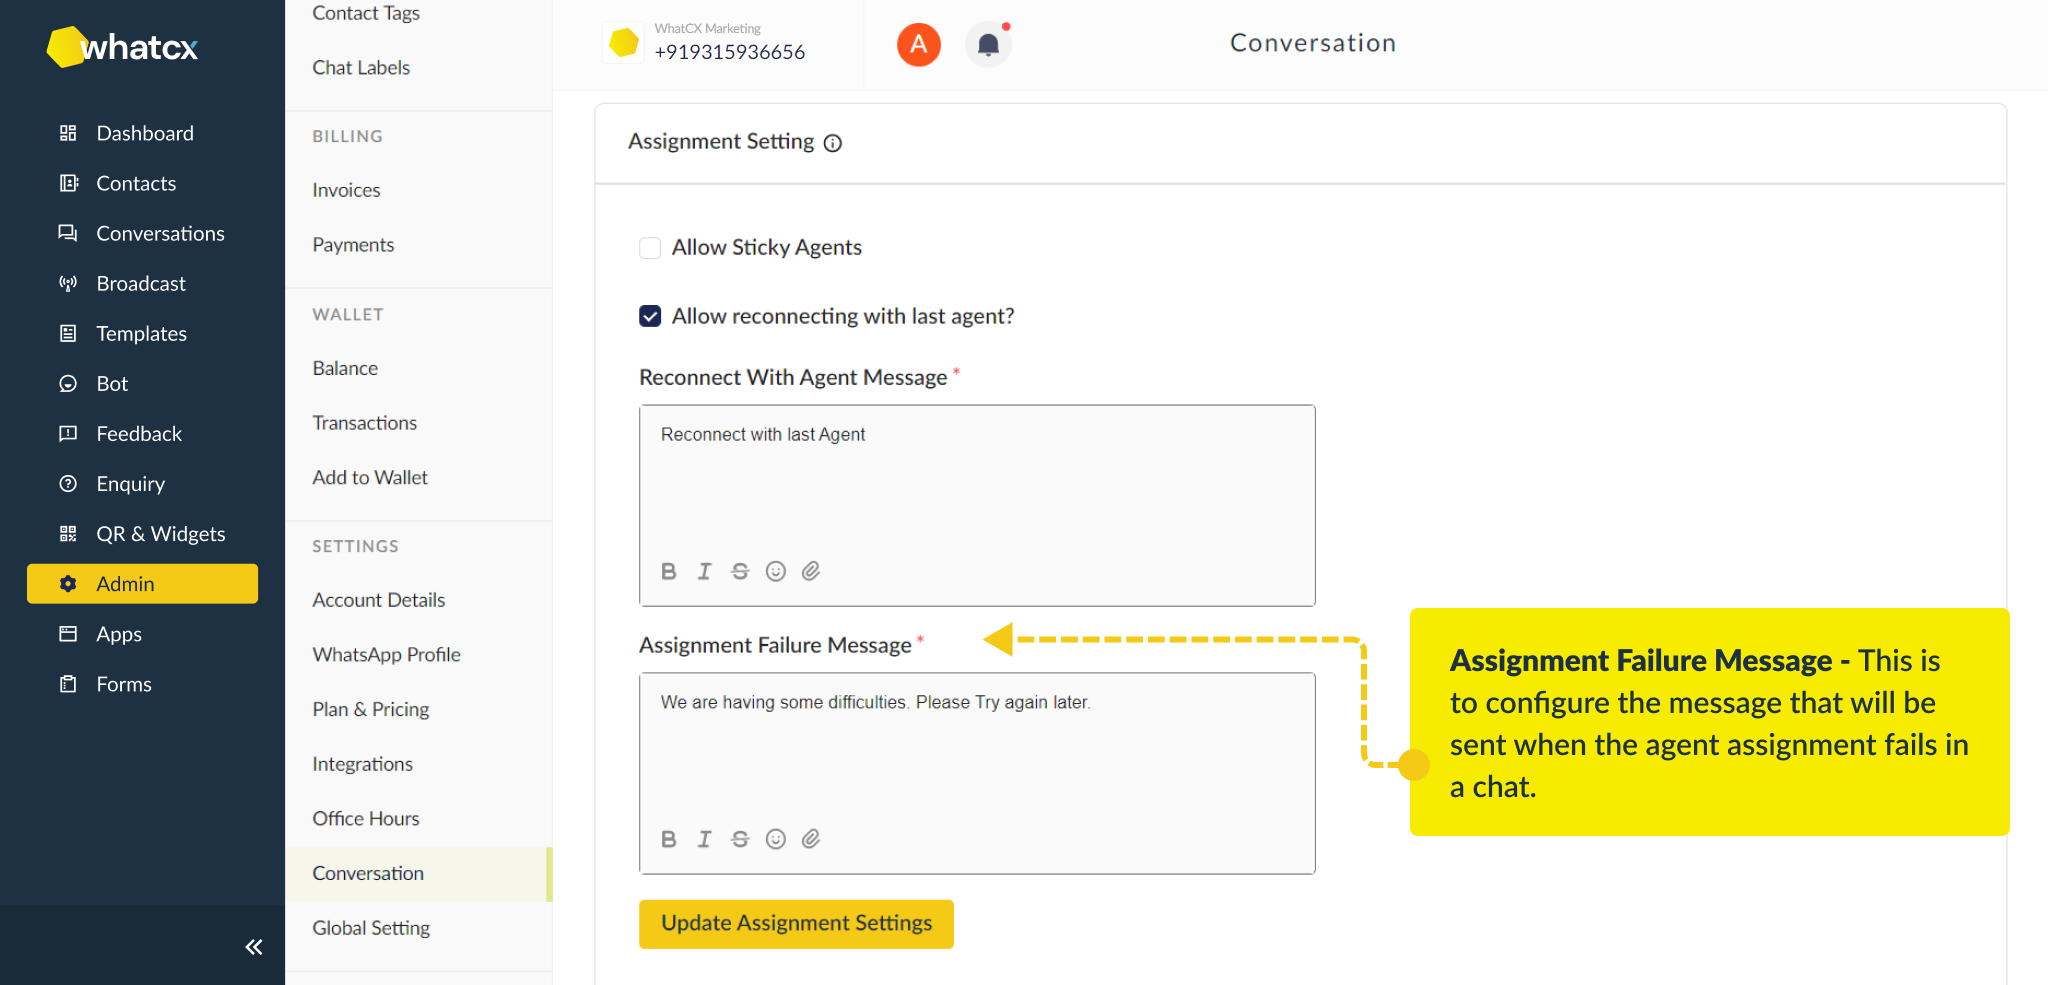
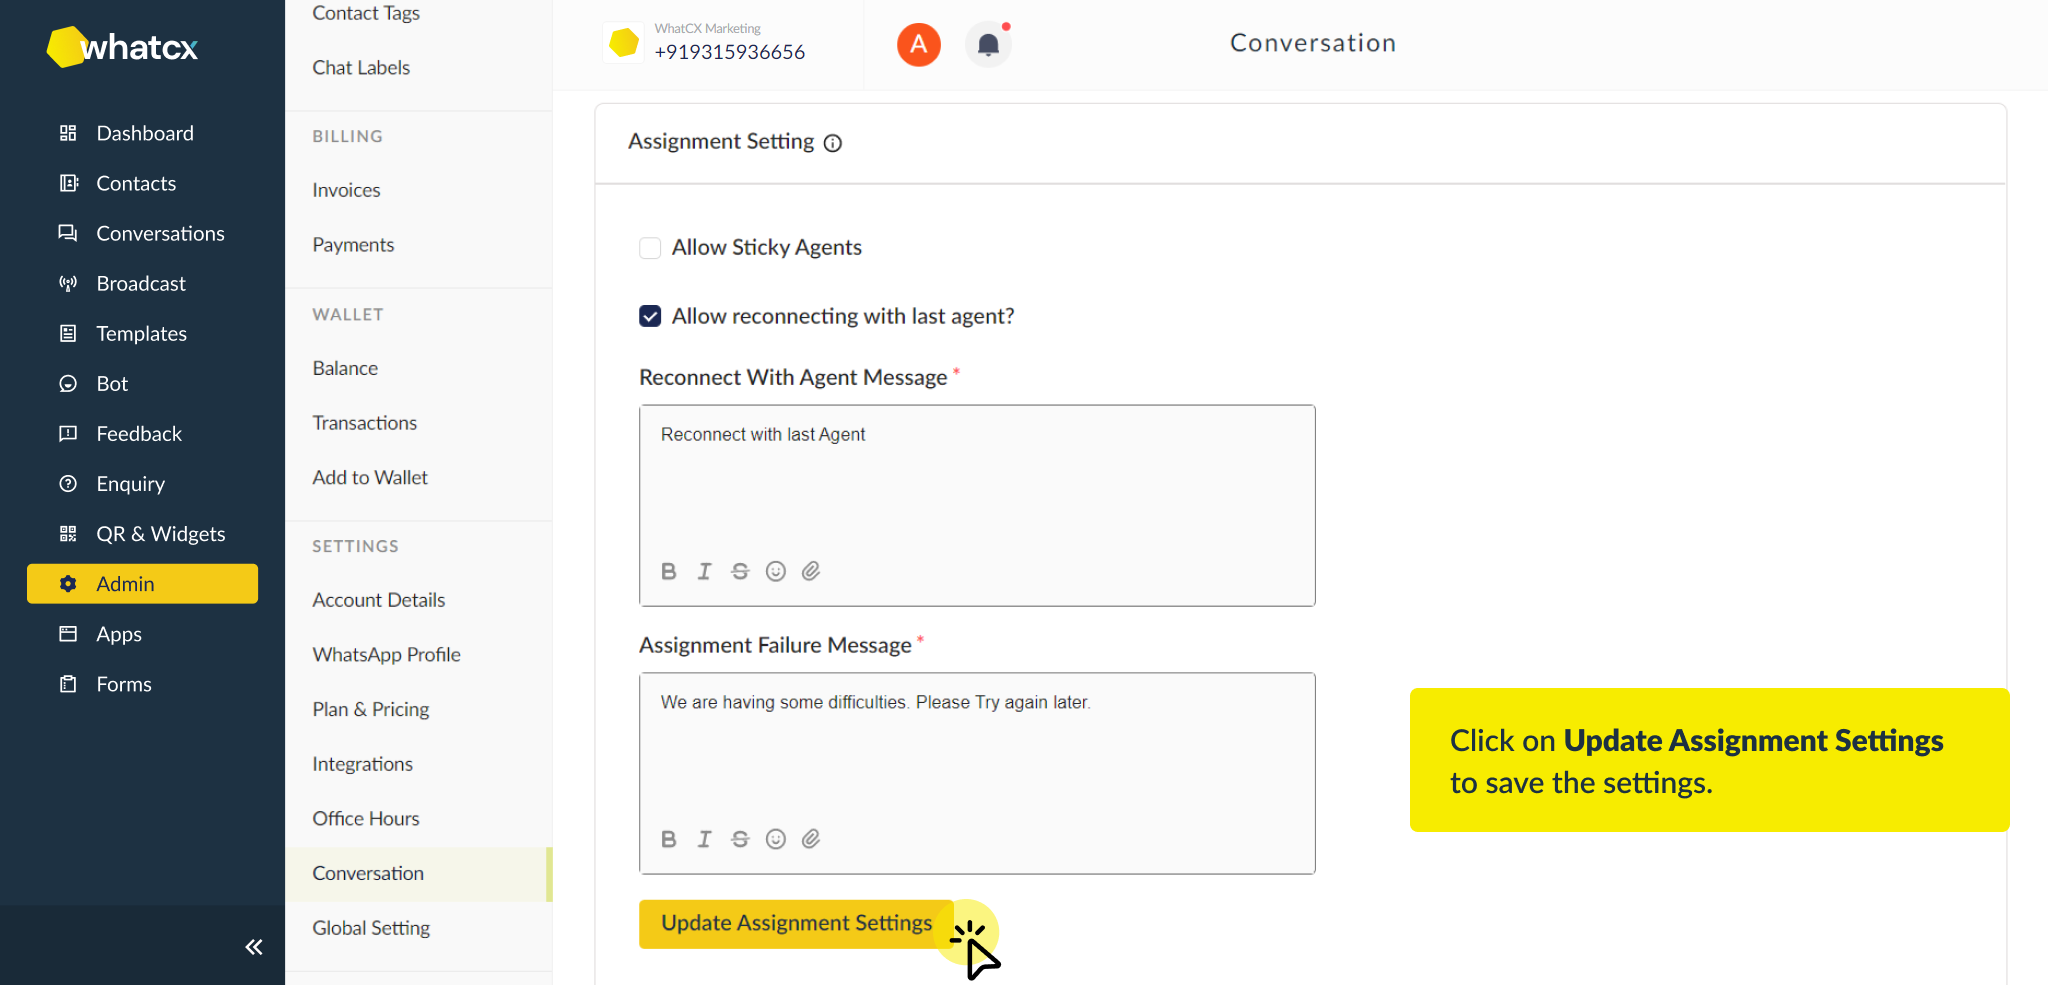
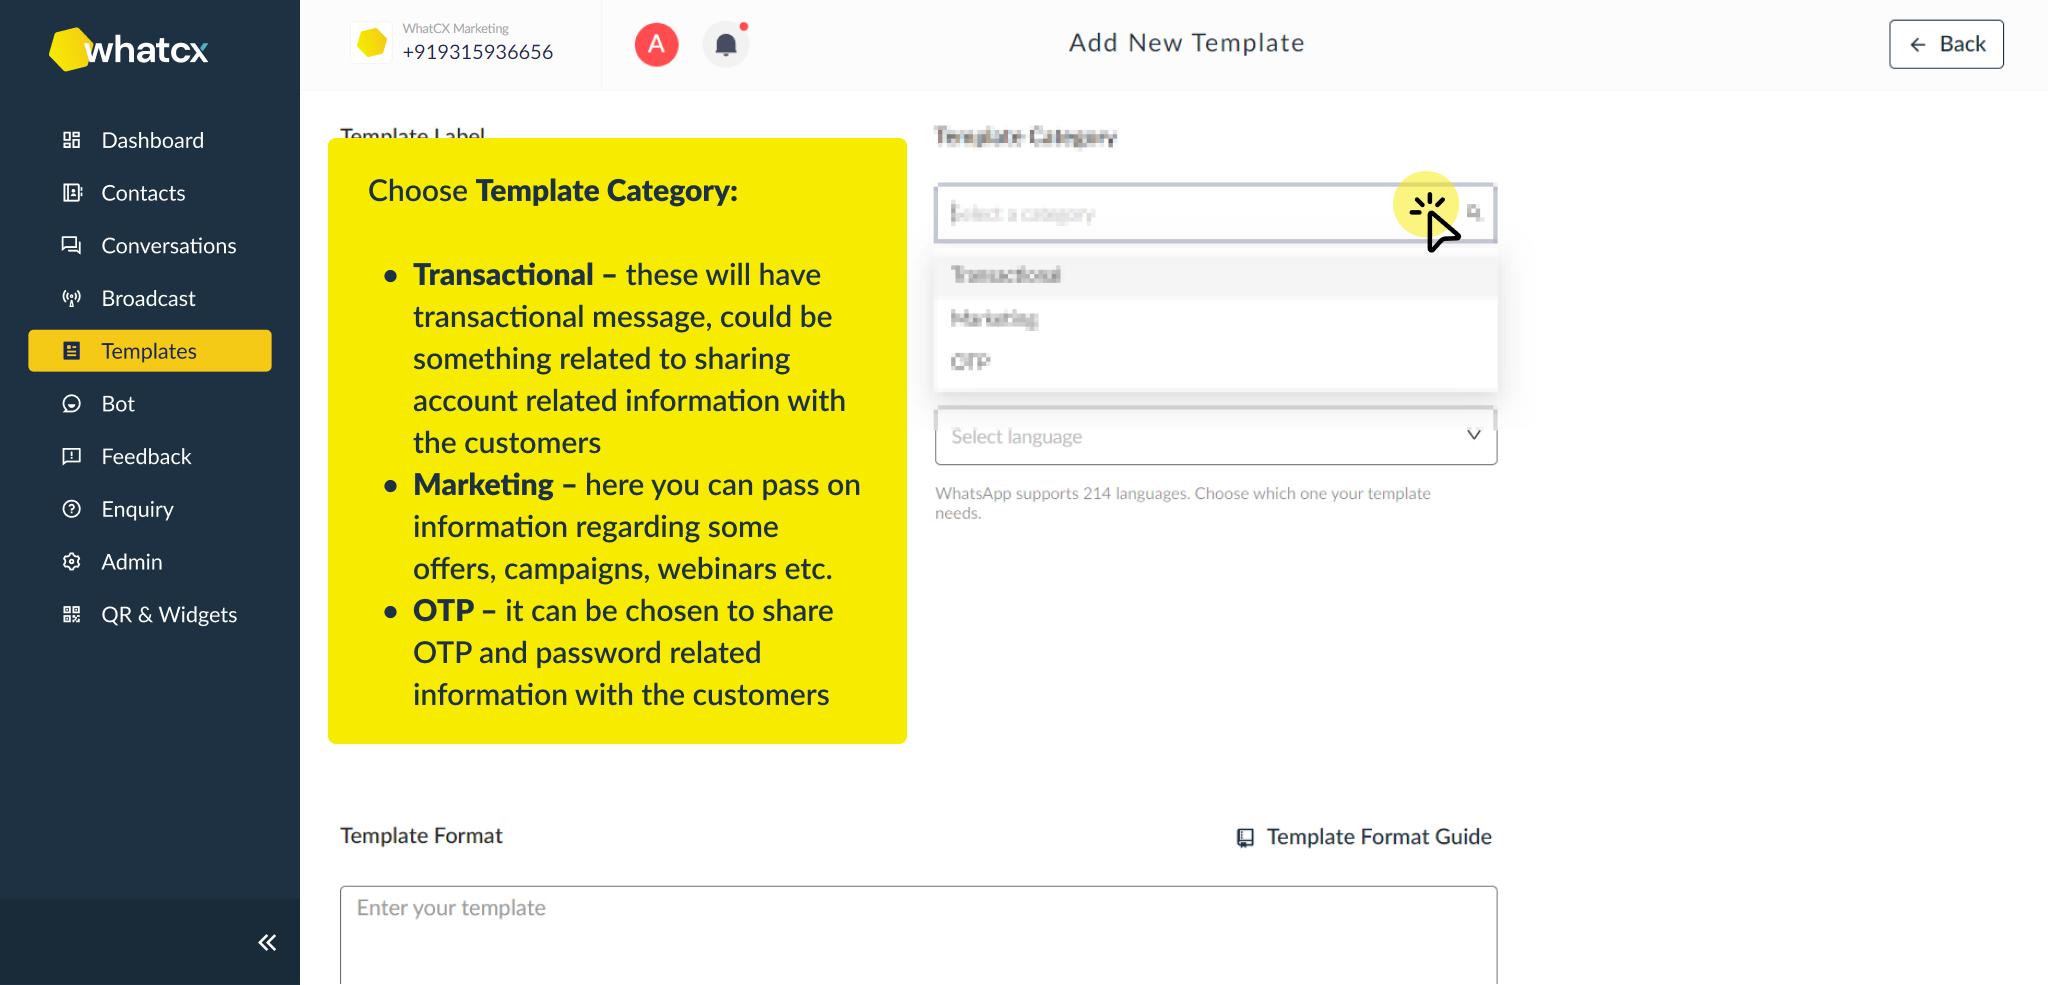
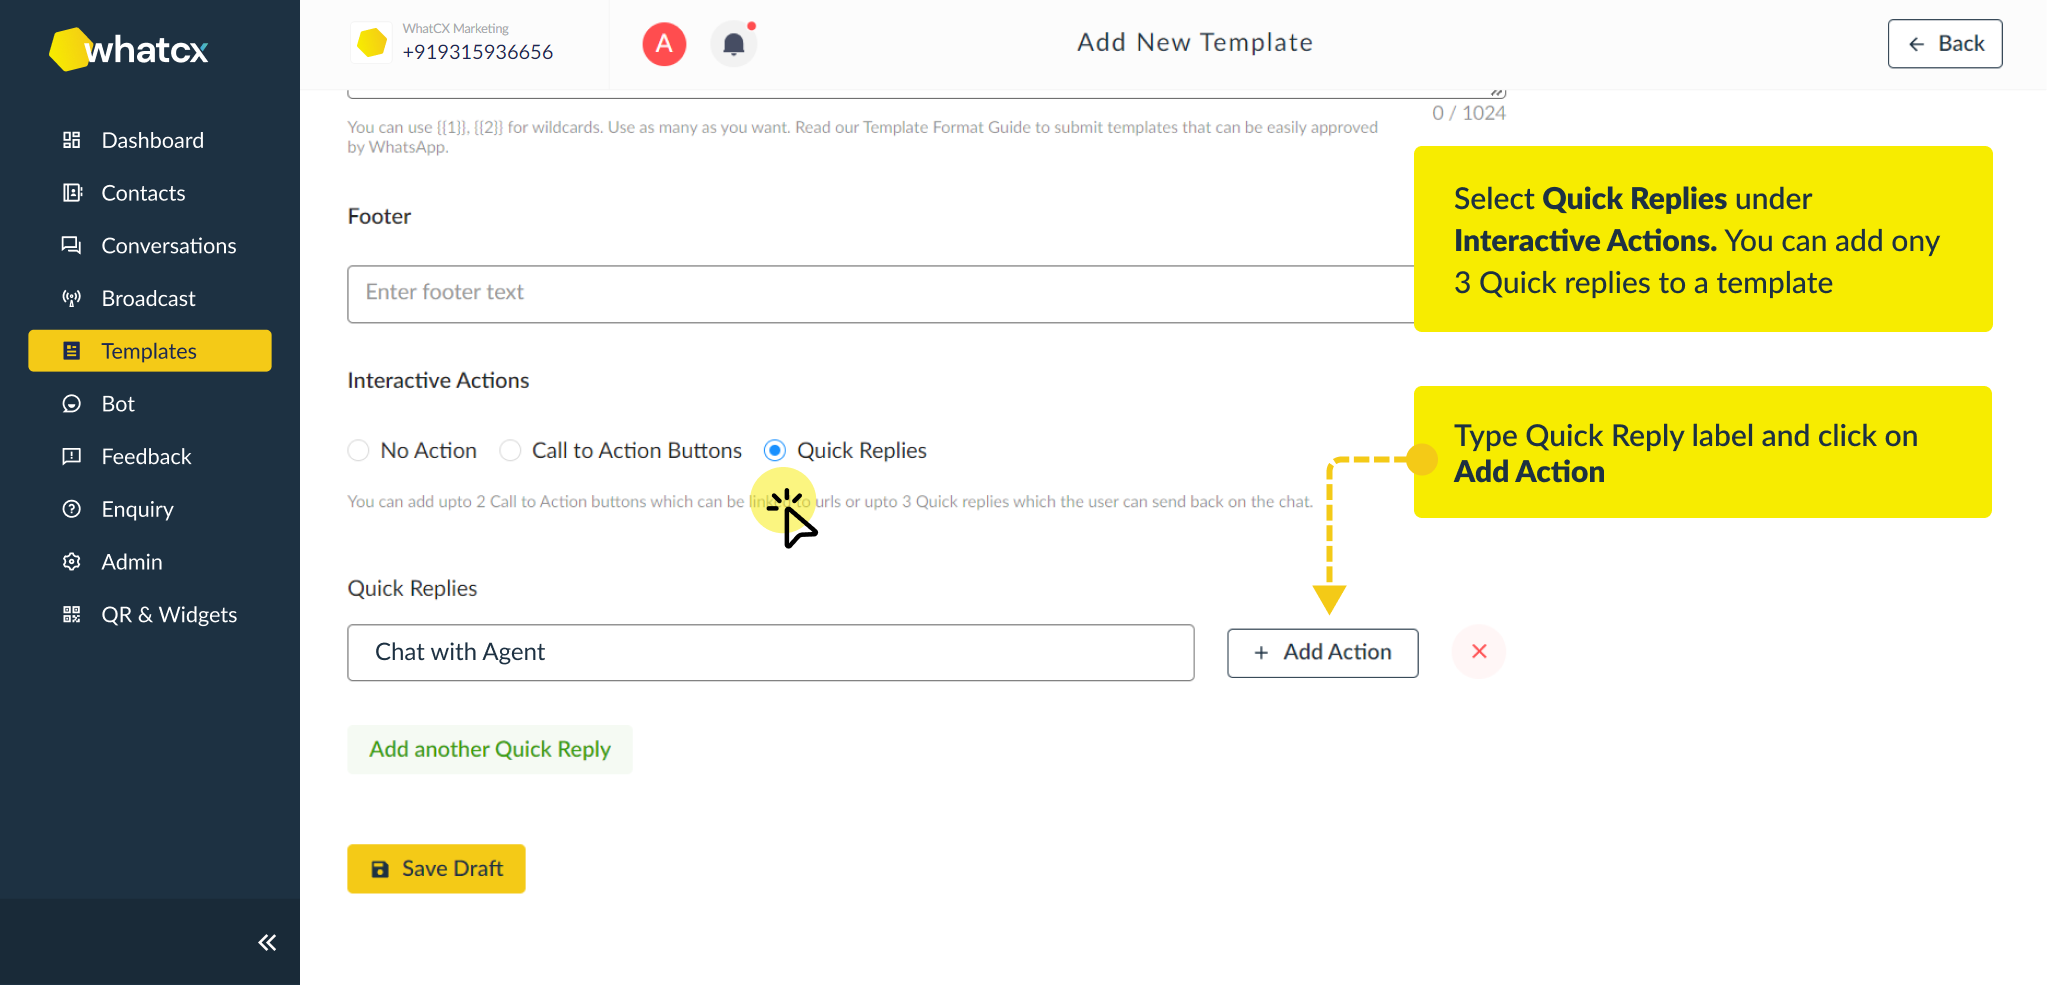
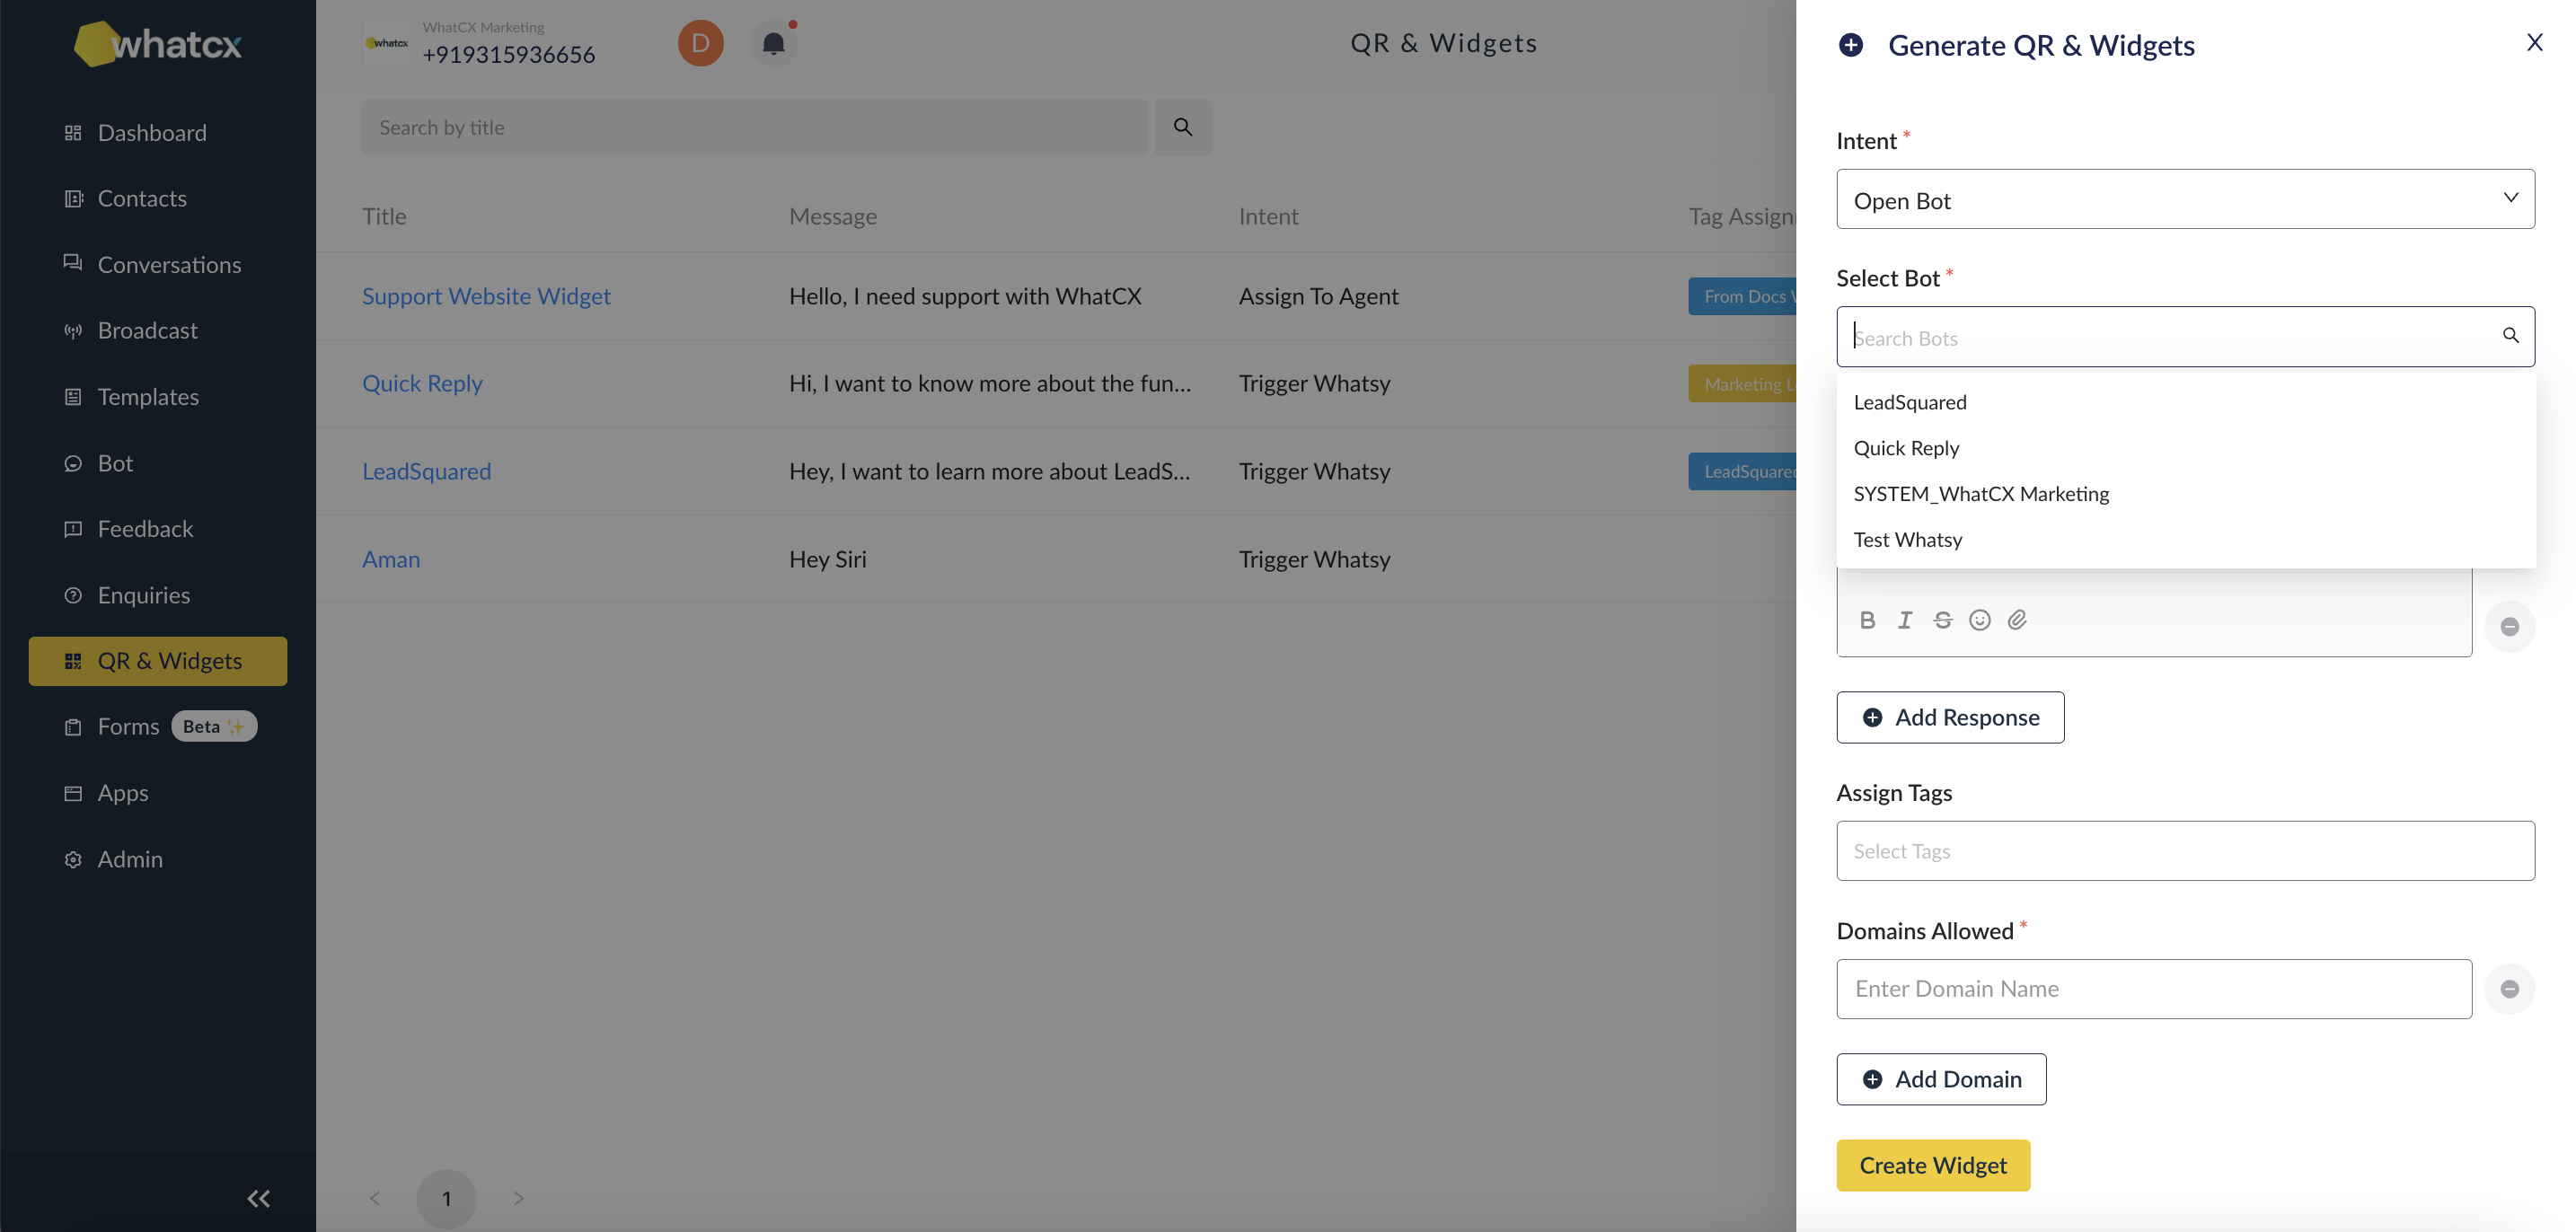
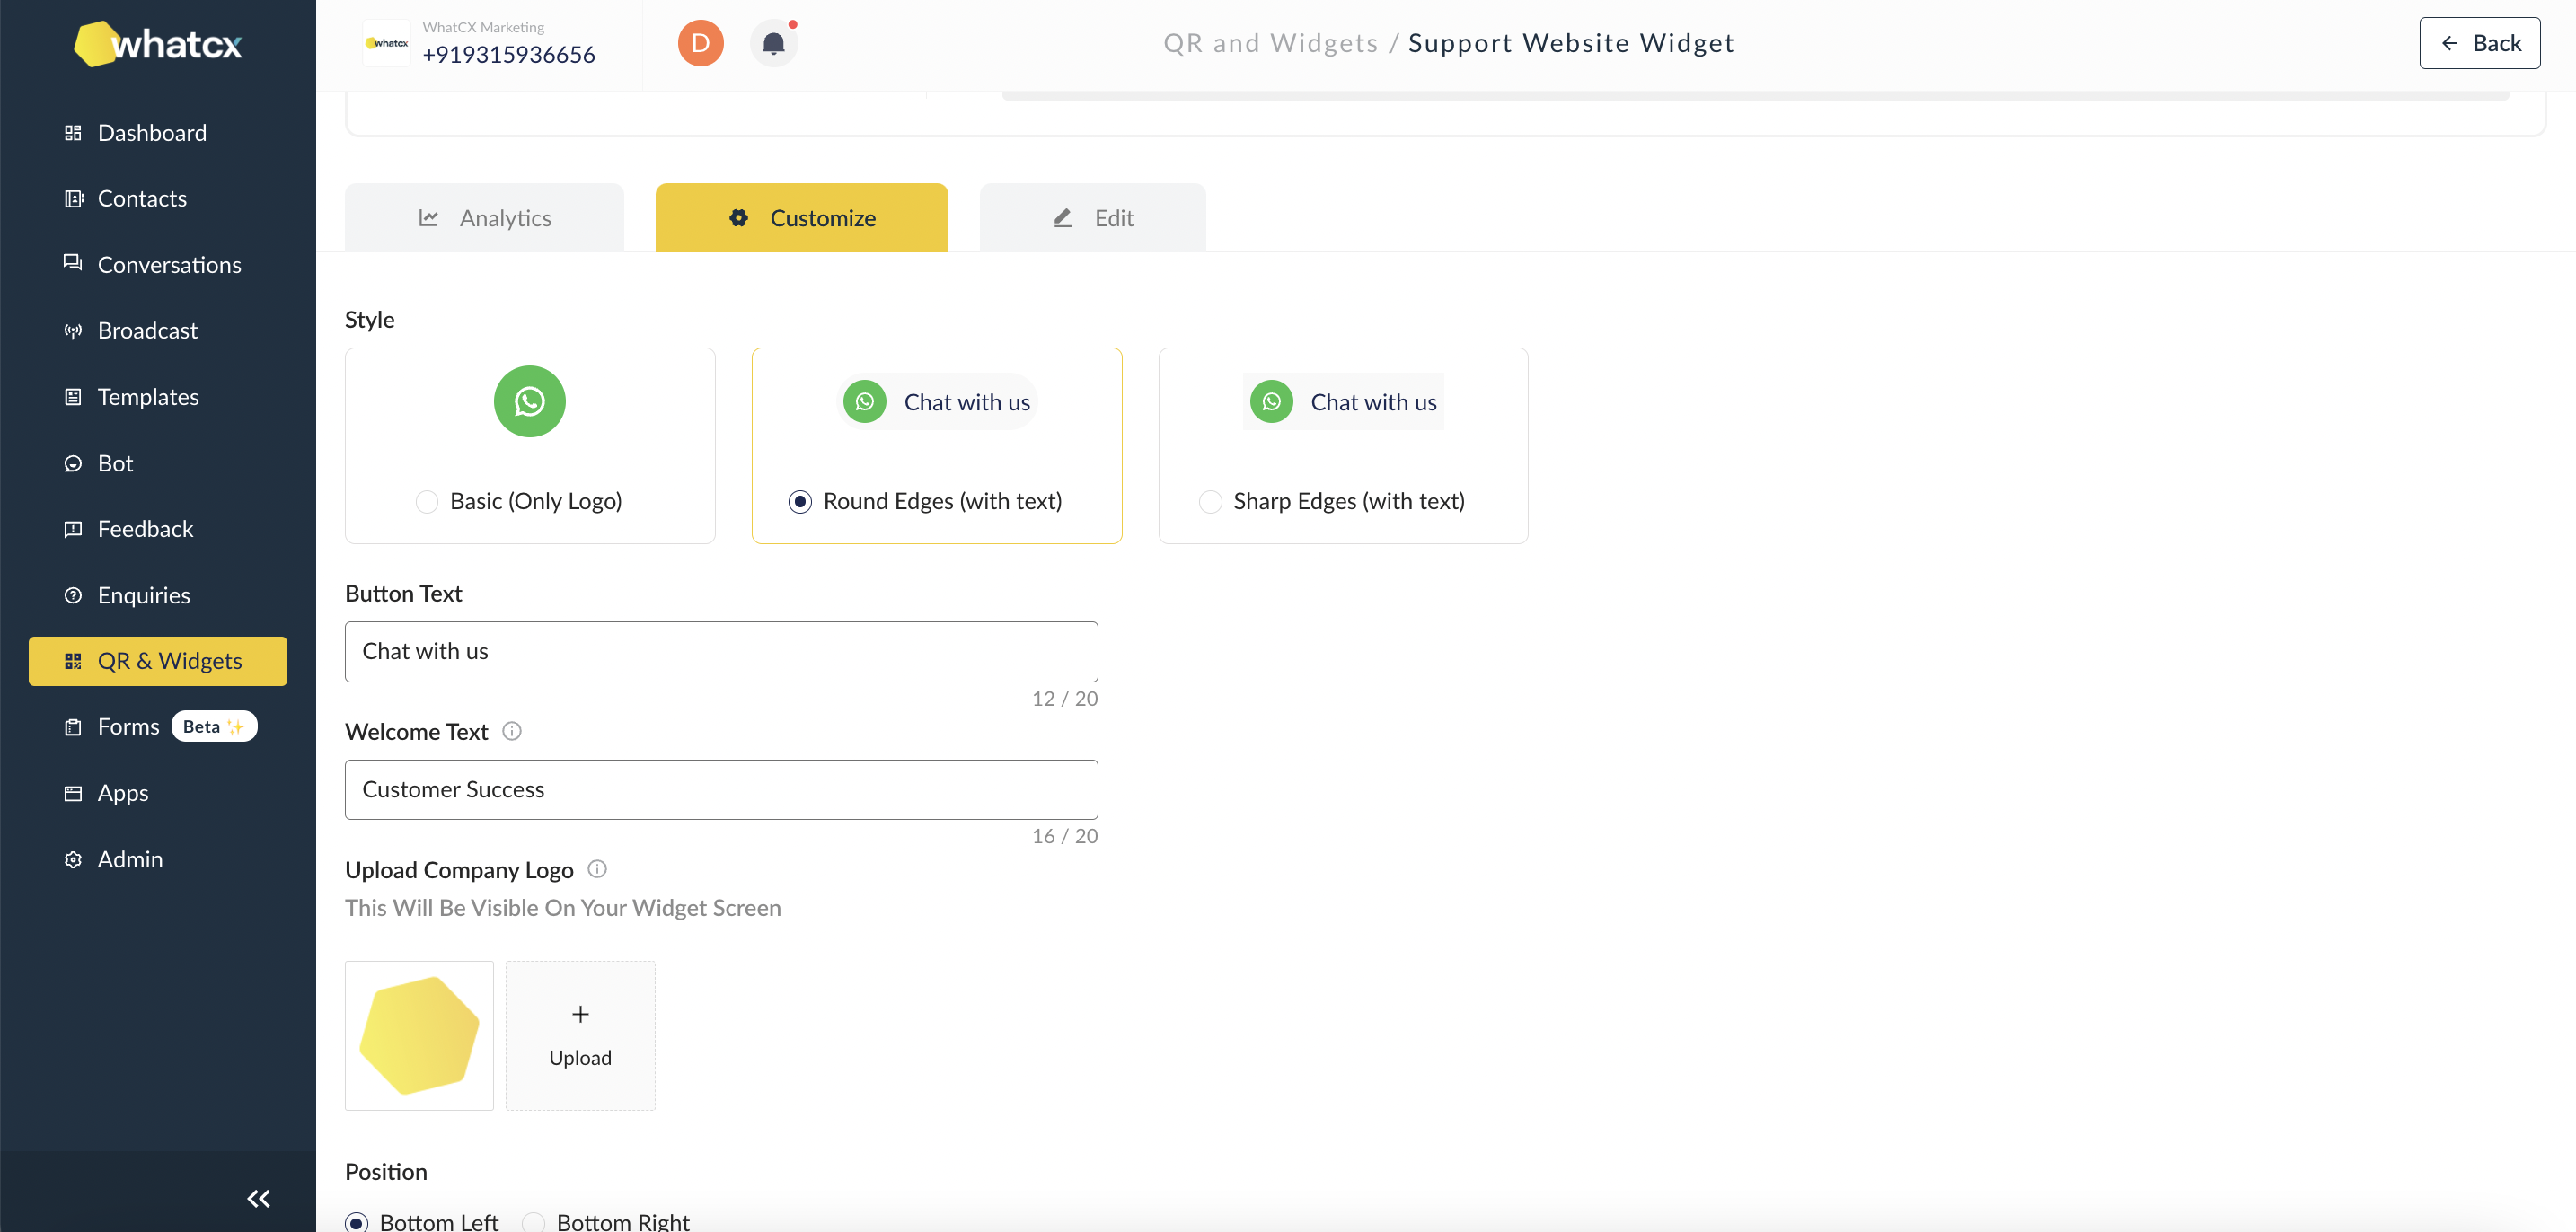
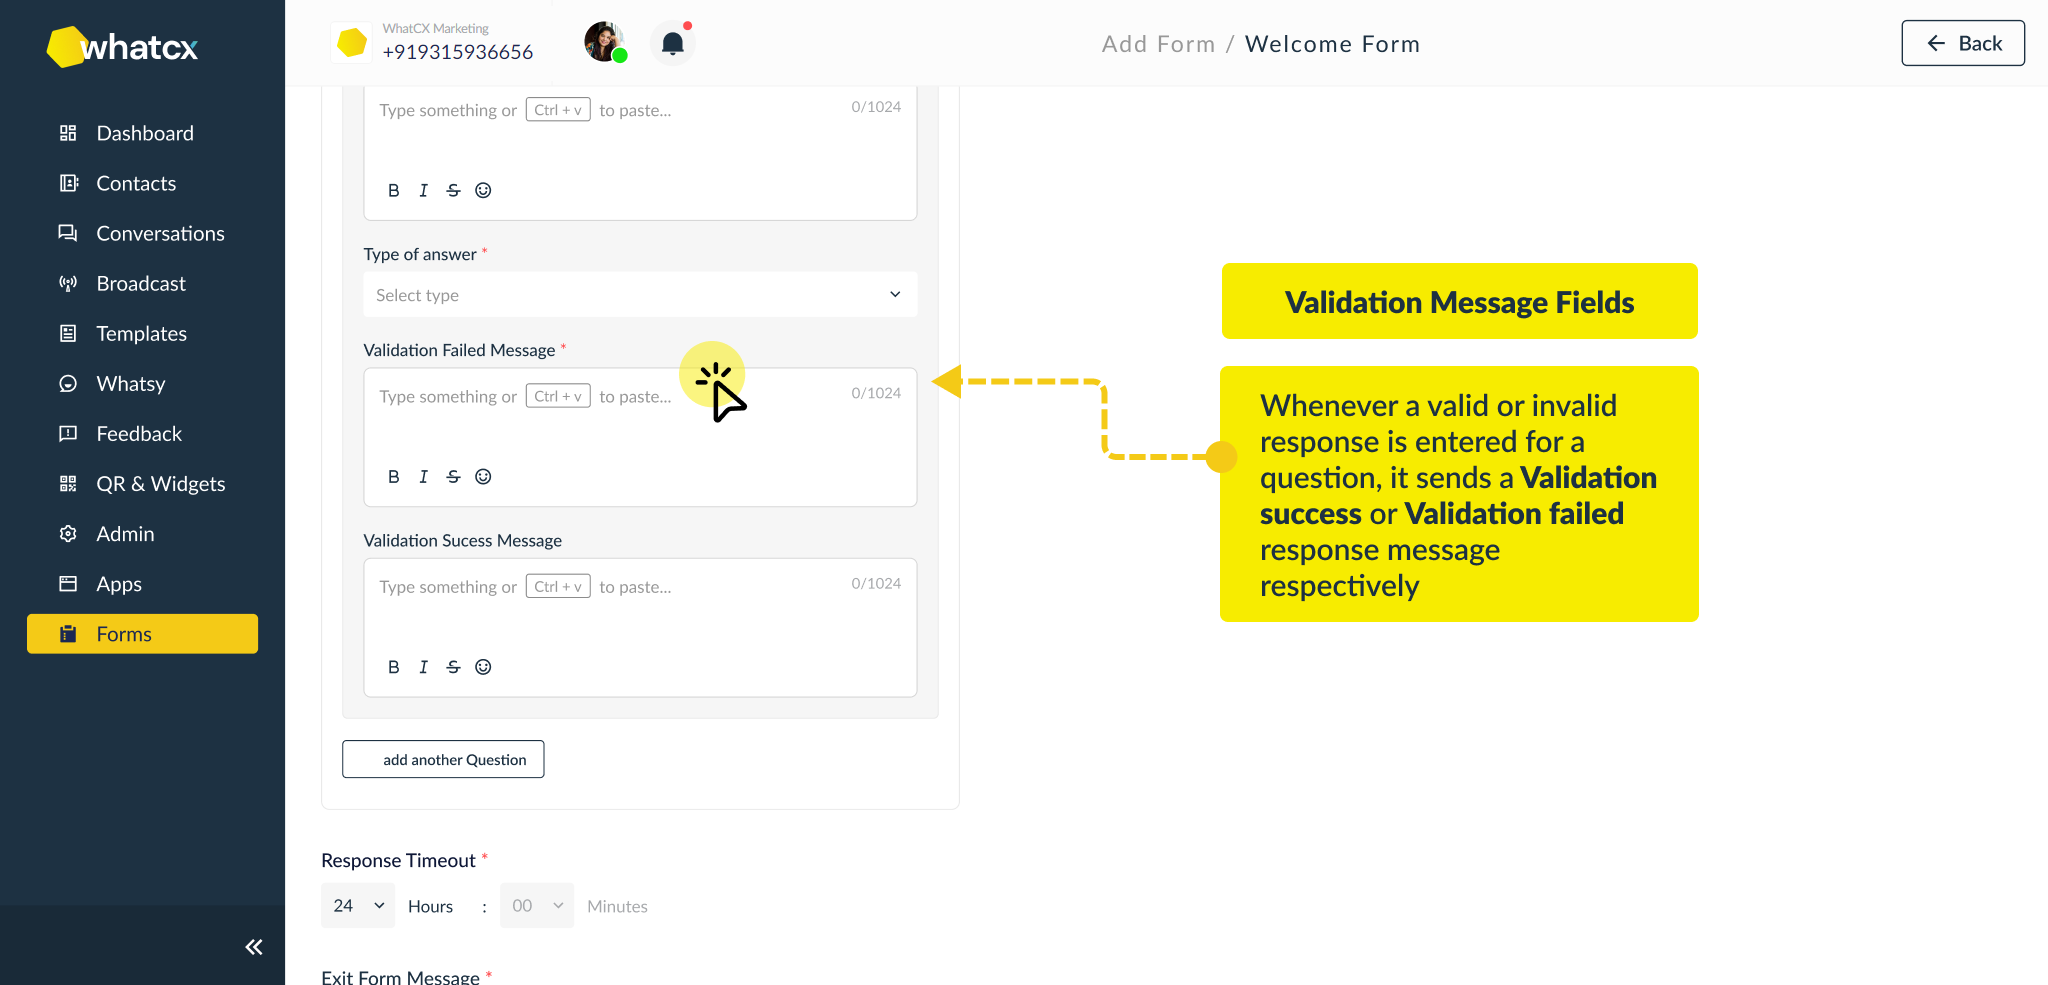
3. Click on WhatsApp Profile, you’ll have to update the below
a. Upload Picture – Here you need to upload the brand logo of the company for which you are using WhatCX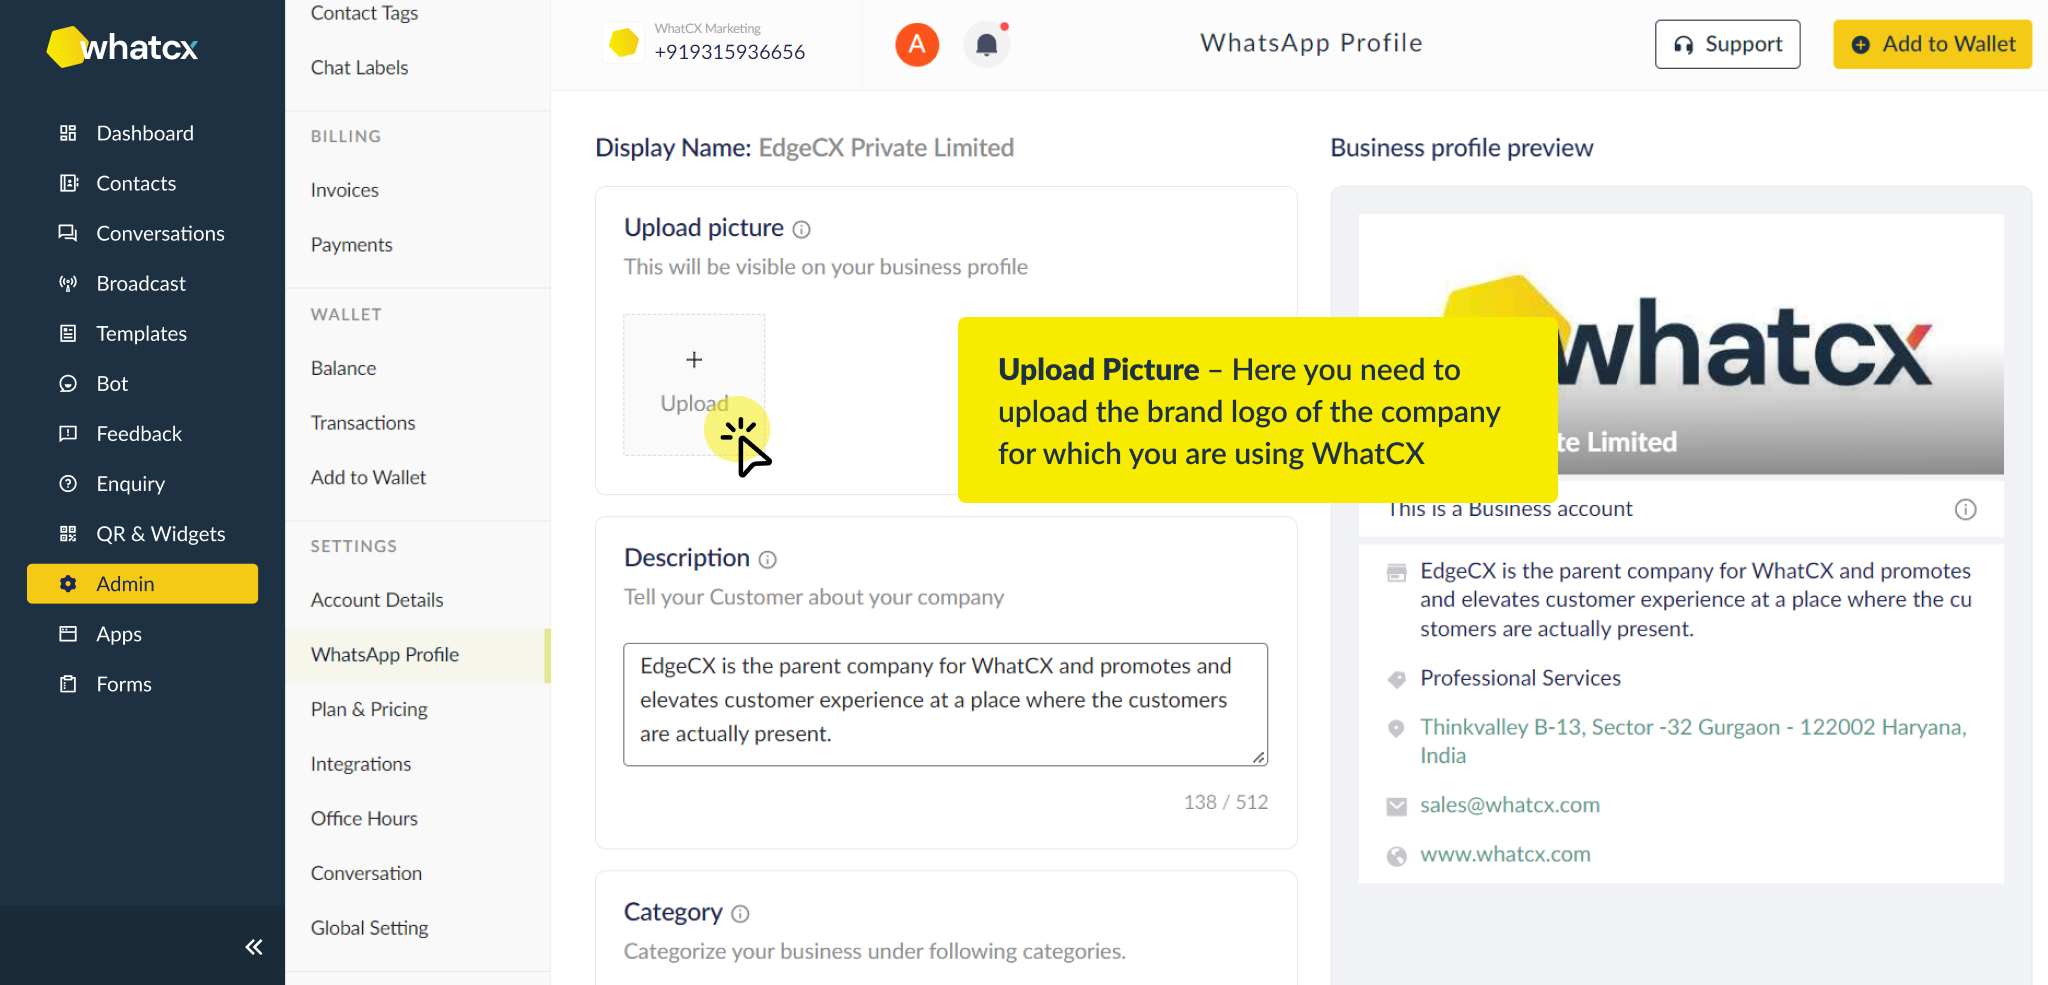
b. Description – Here you write about the company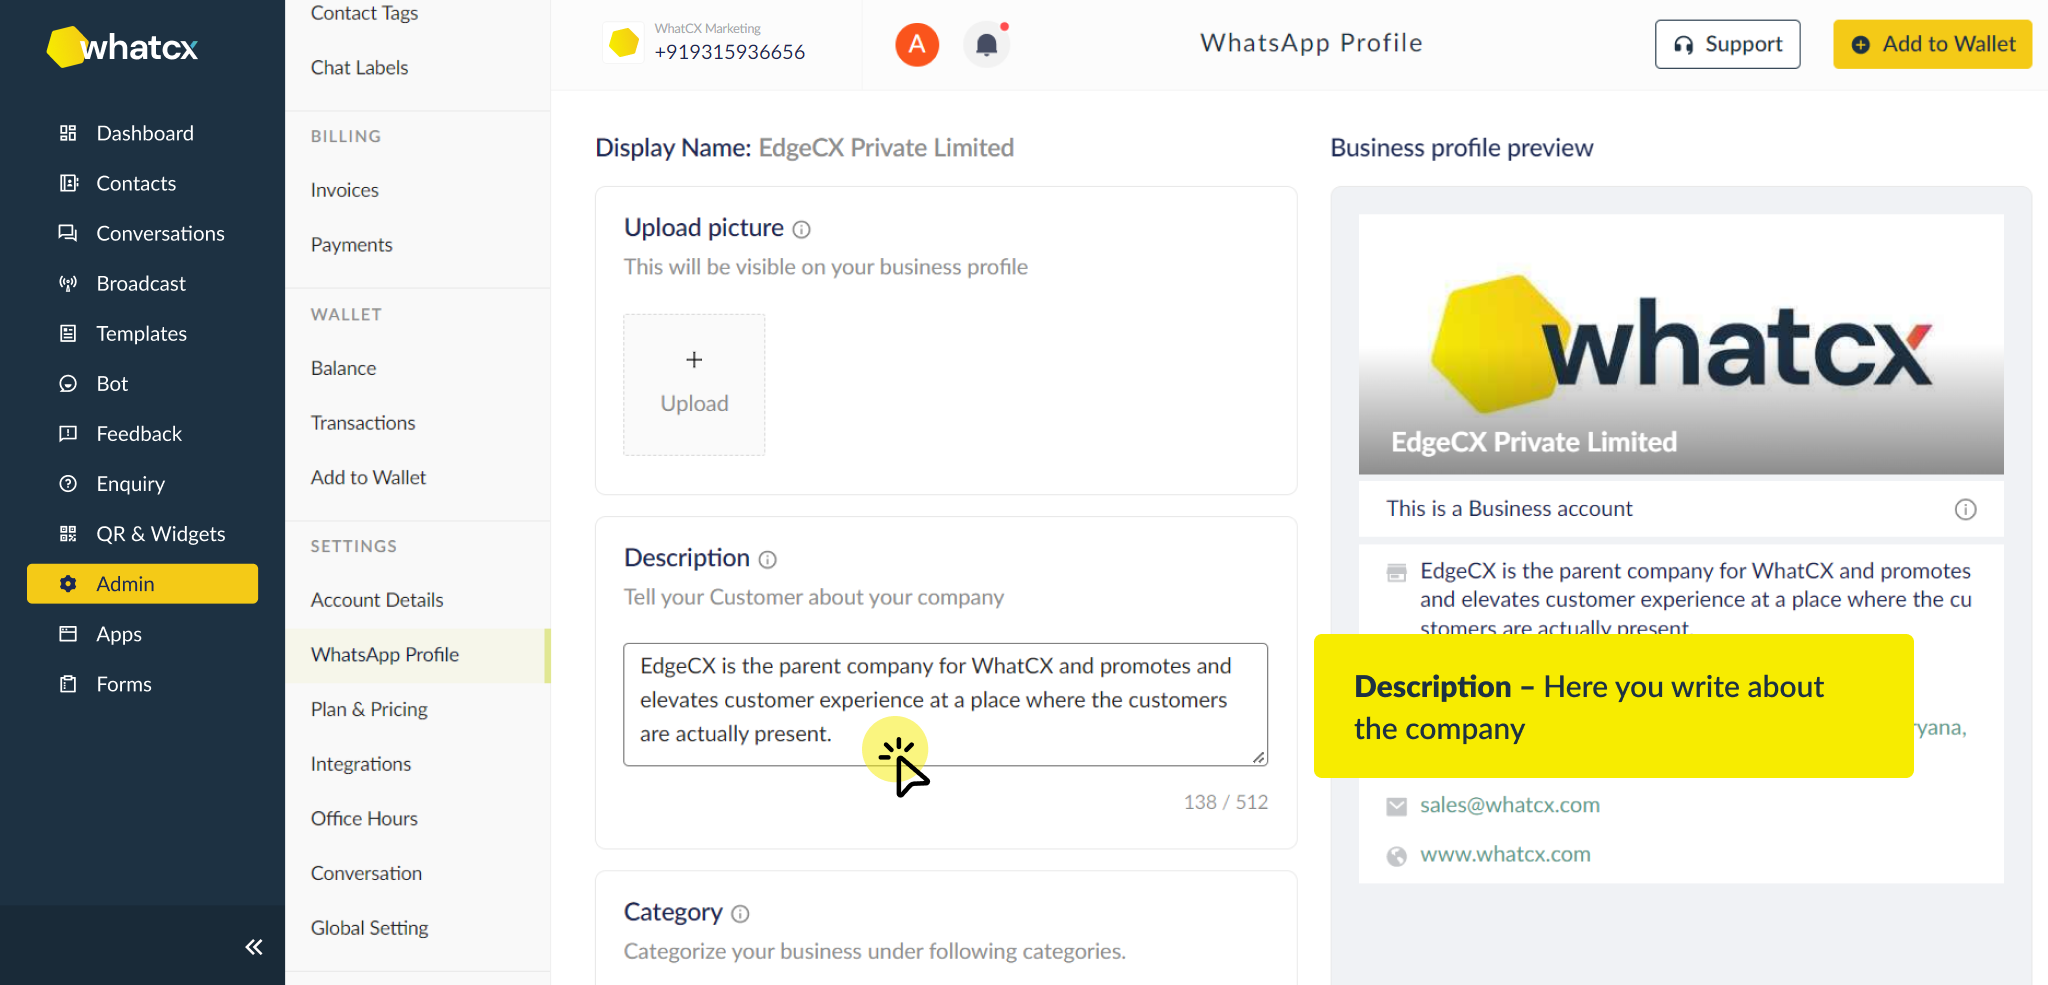
c. Category – Under Category you can mention the category your business falls under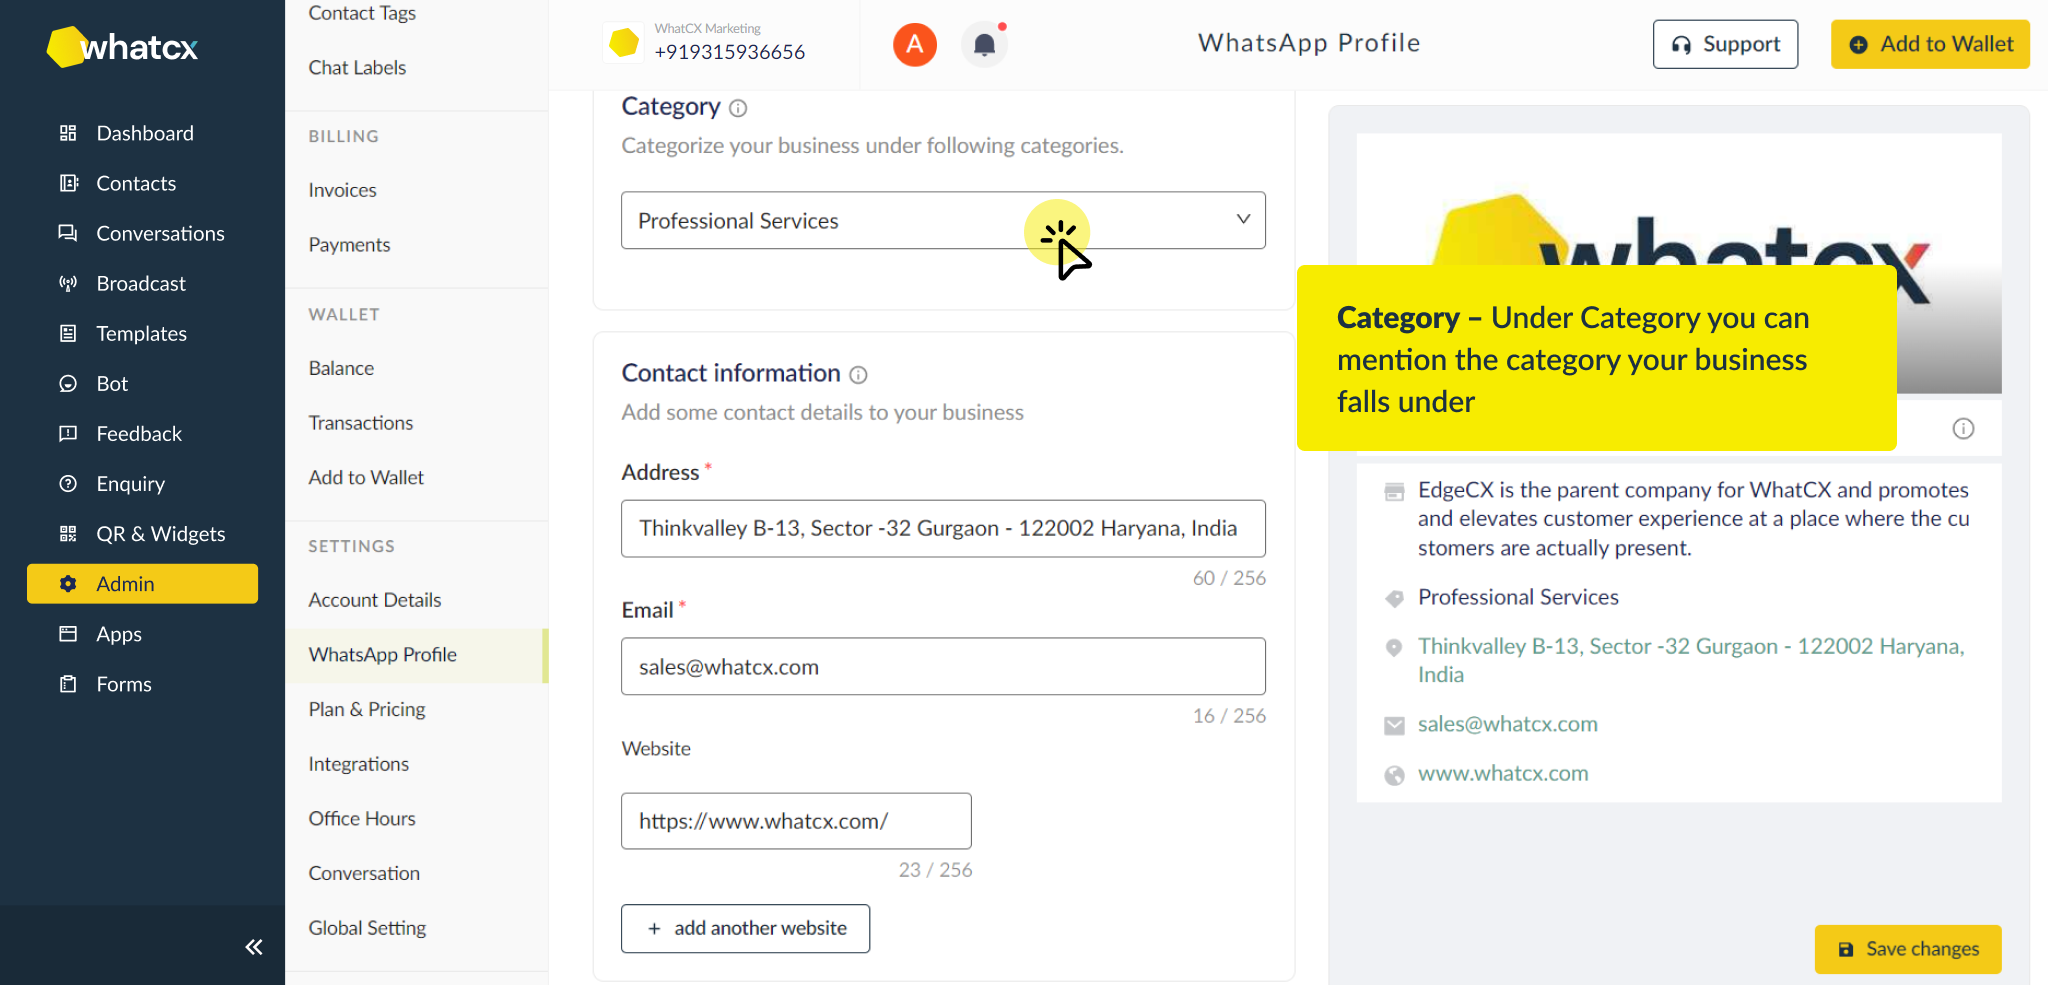
d. Contact Information
i. Address – Write the company’s address here
ii. Email – Here you can give the company’s email id where people can reach you
iii. Website – Here you can link the link of the website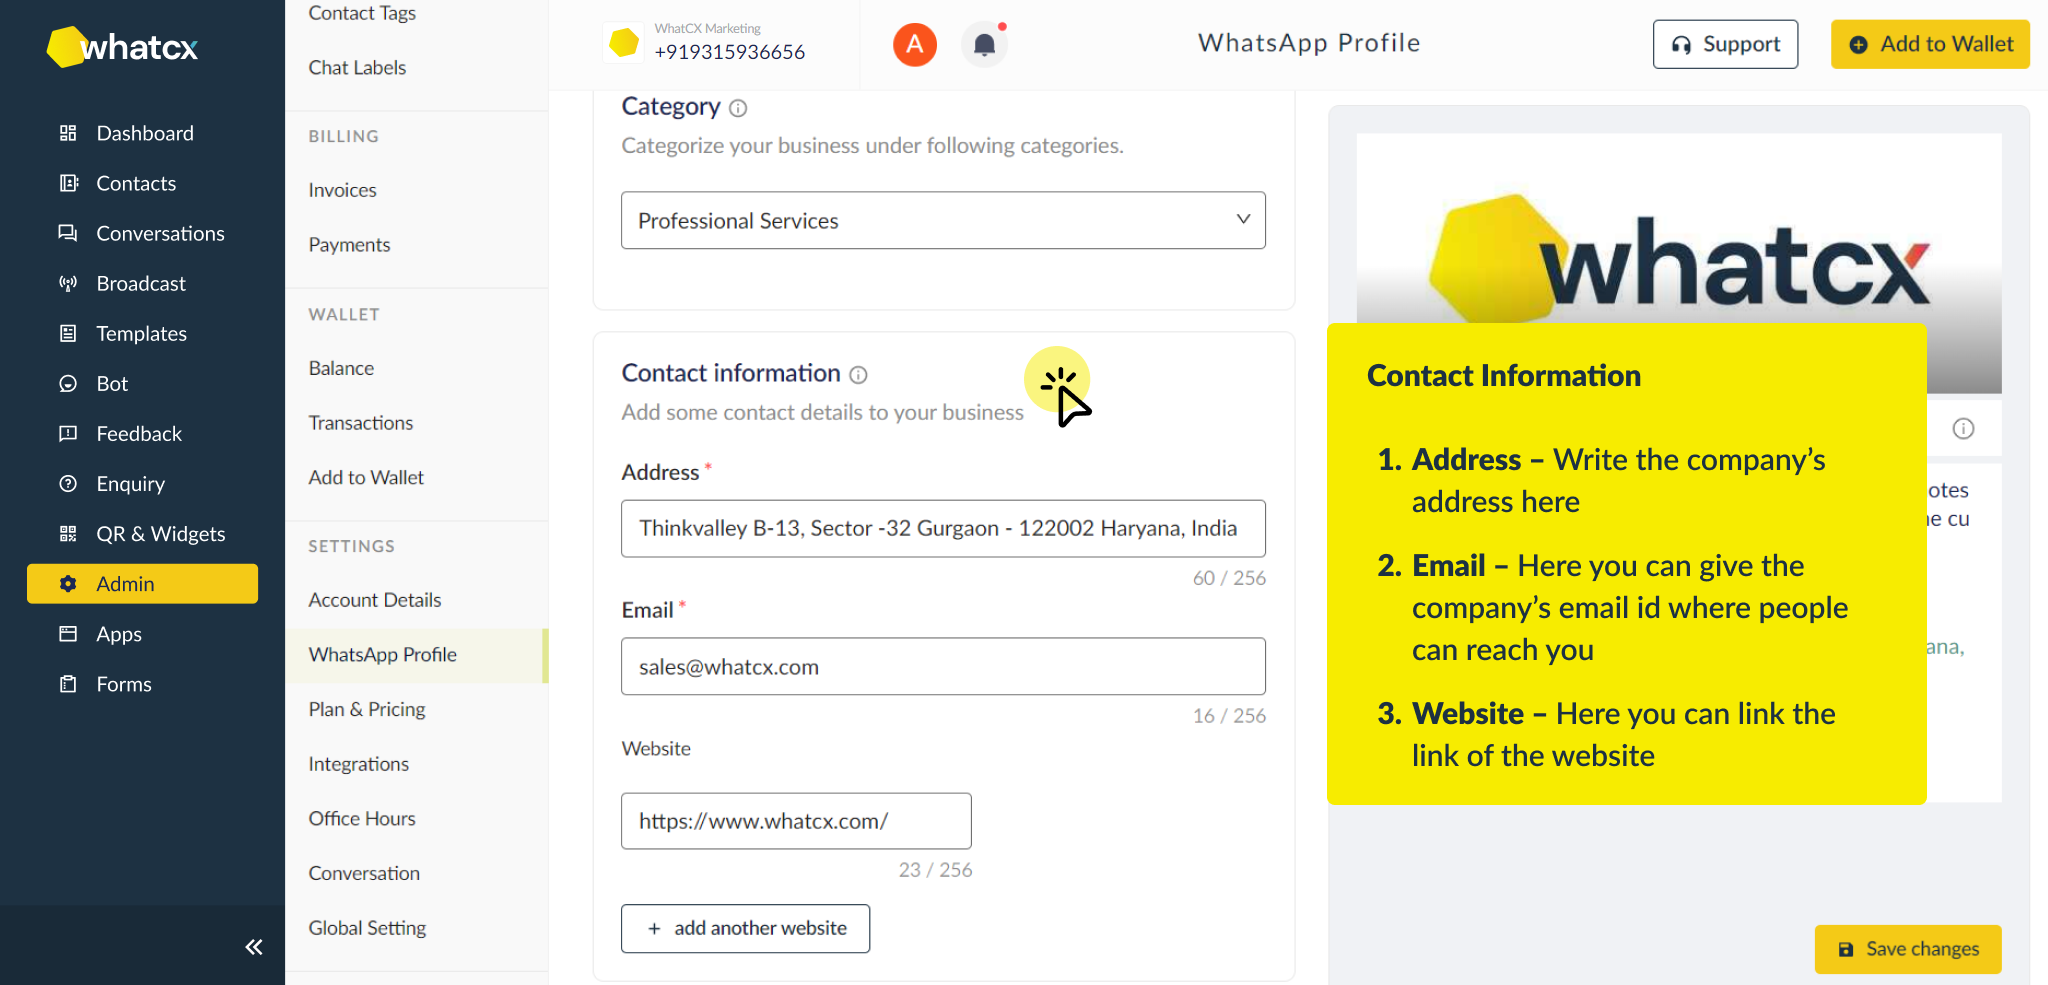
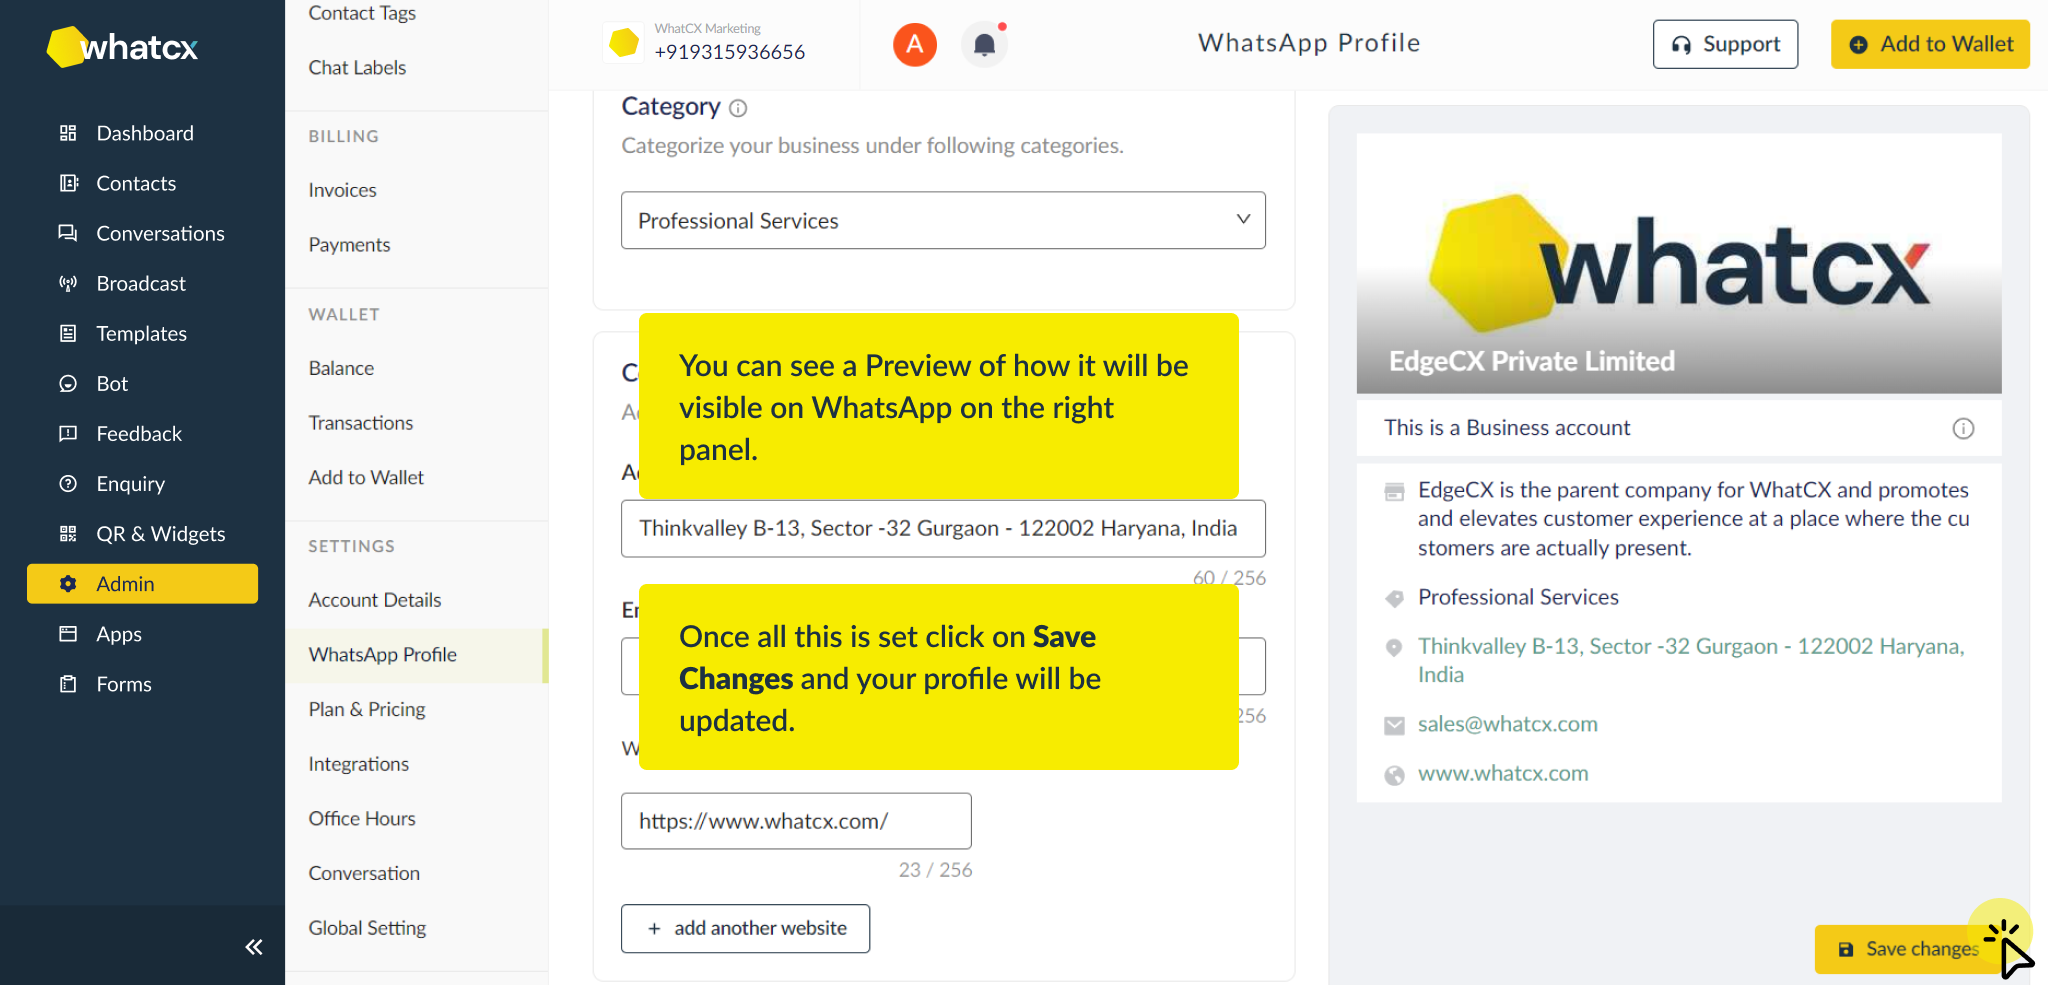
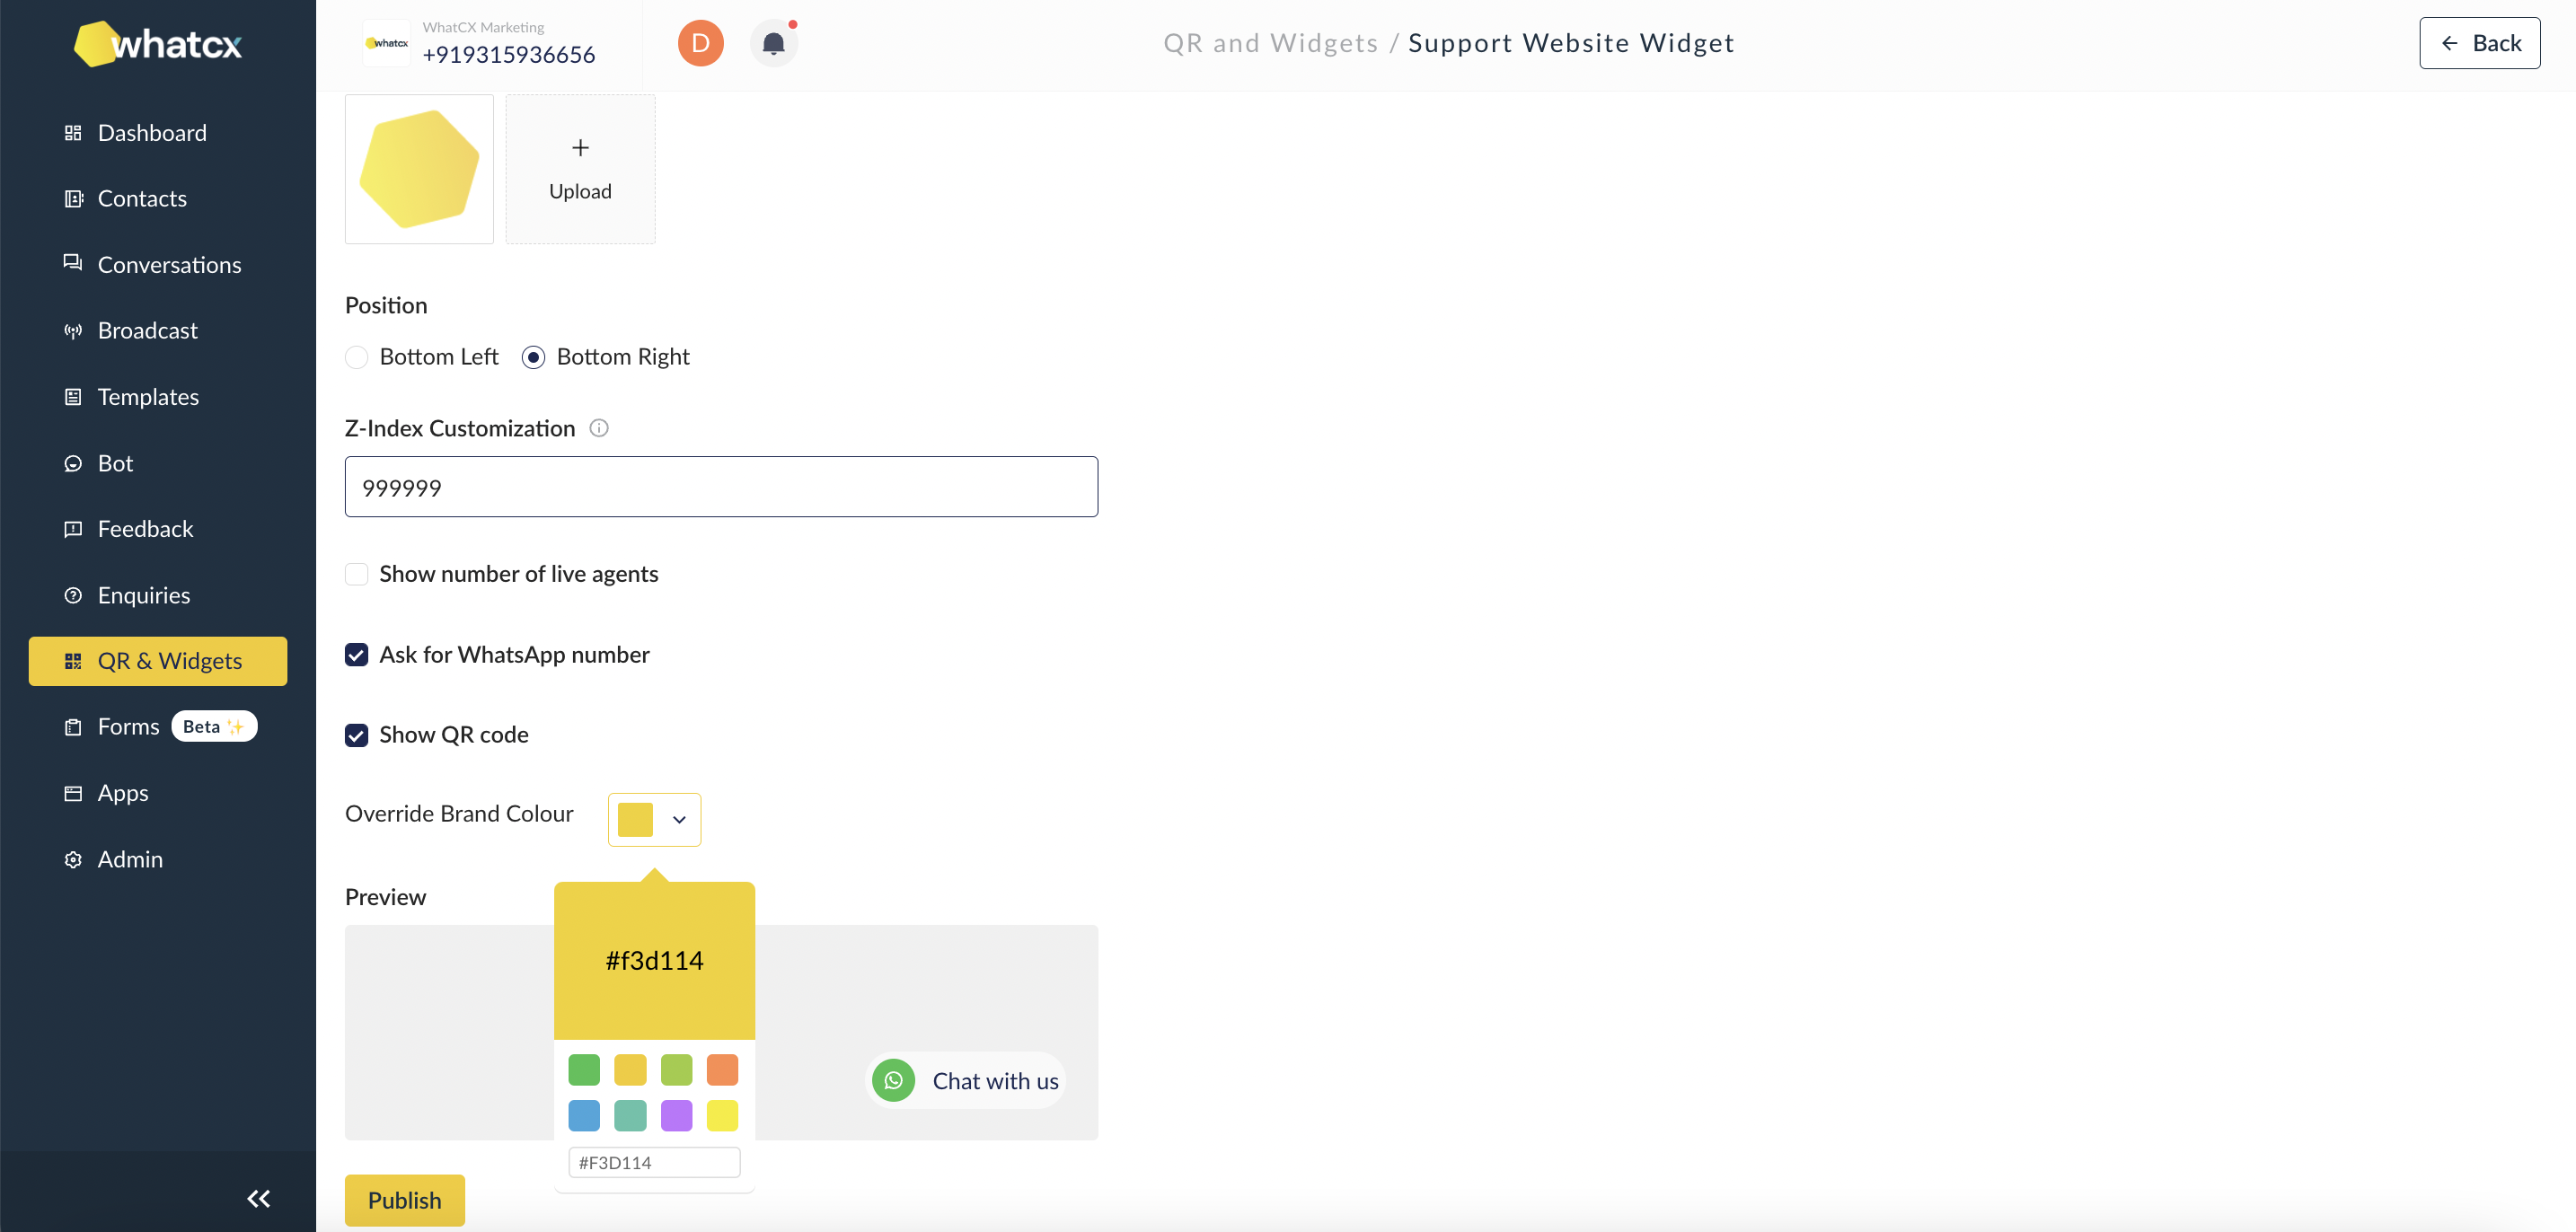
You can see a Preview of how it will be visible on WhatsApp on the right panel.
Once all this is set click on Save Changes and your profile will be updated.
Invite Users & Setup Teams
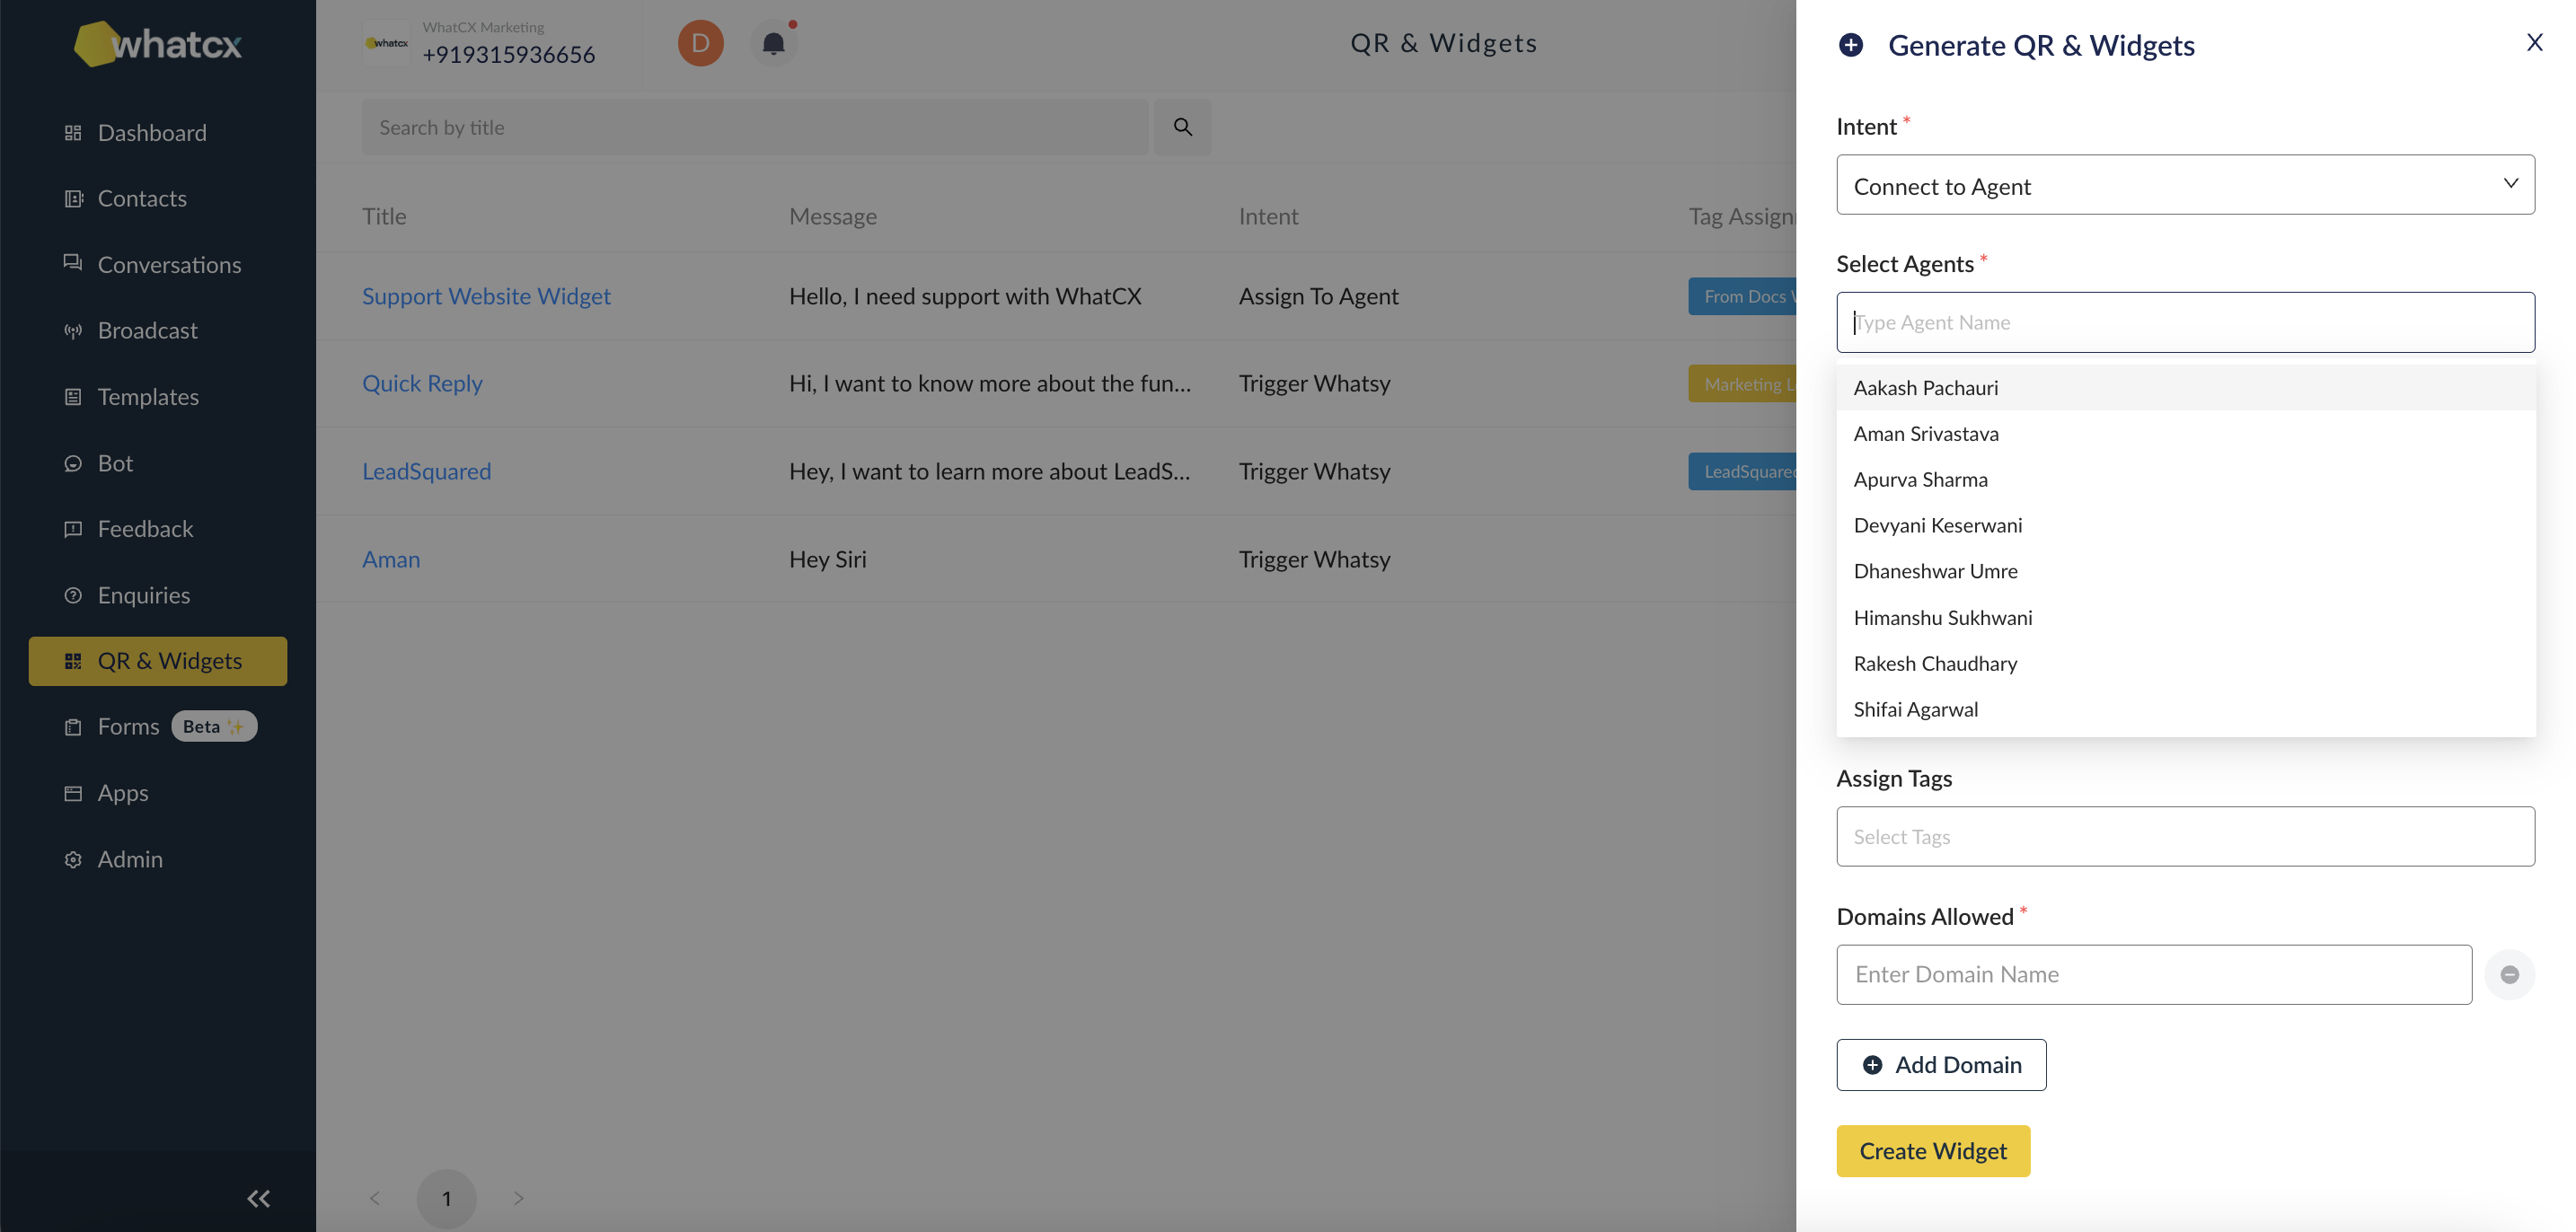
To create Users/Agents follow the below steps –
1. Login to WhatCX and click on Admin in the left panel
2. Under Manage Users, you will find the option Users
3. Click on Add User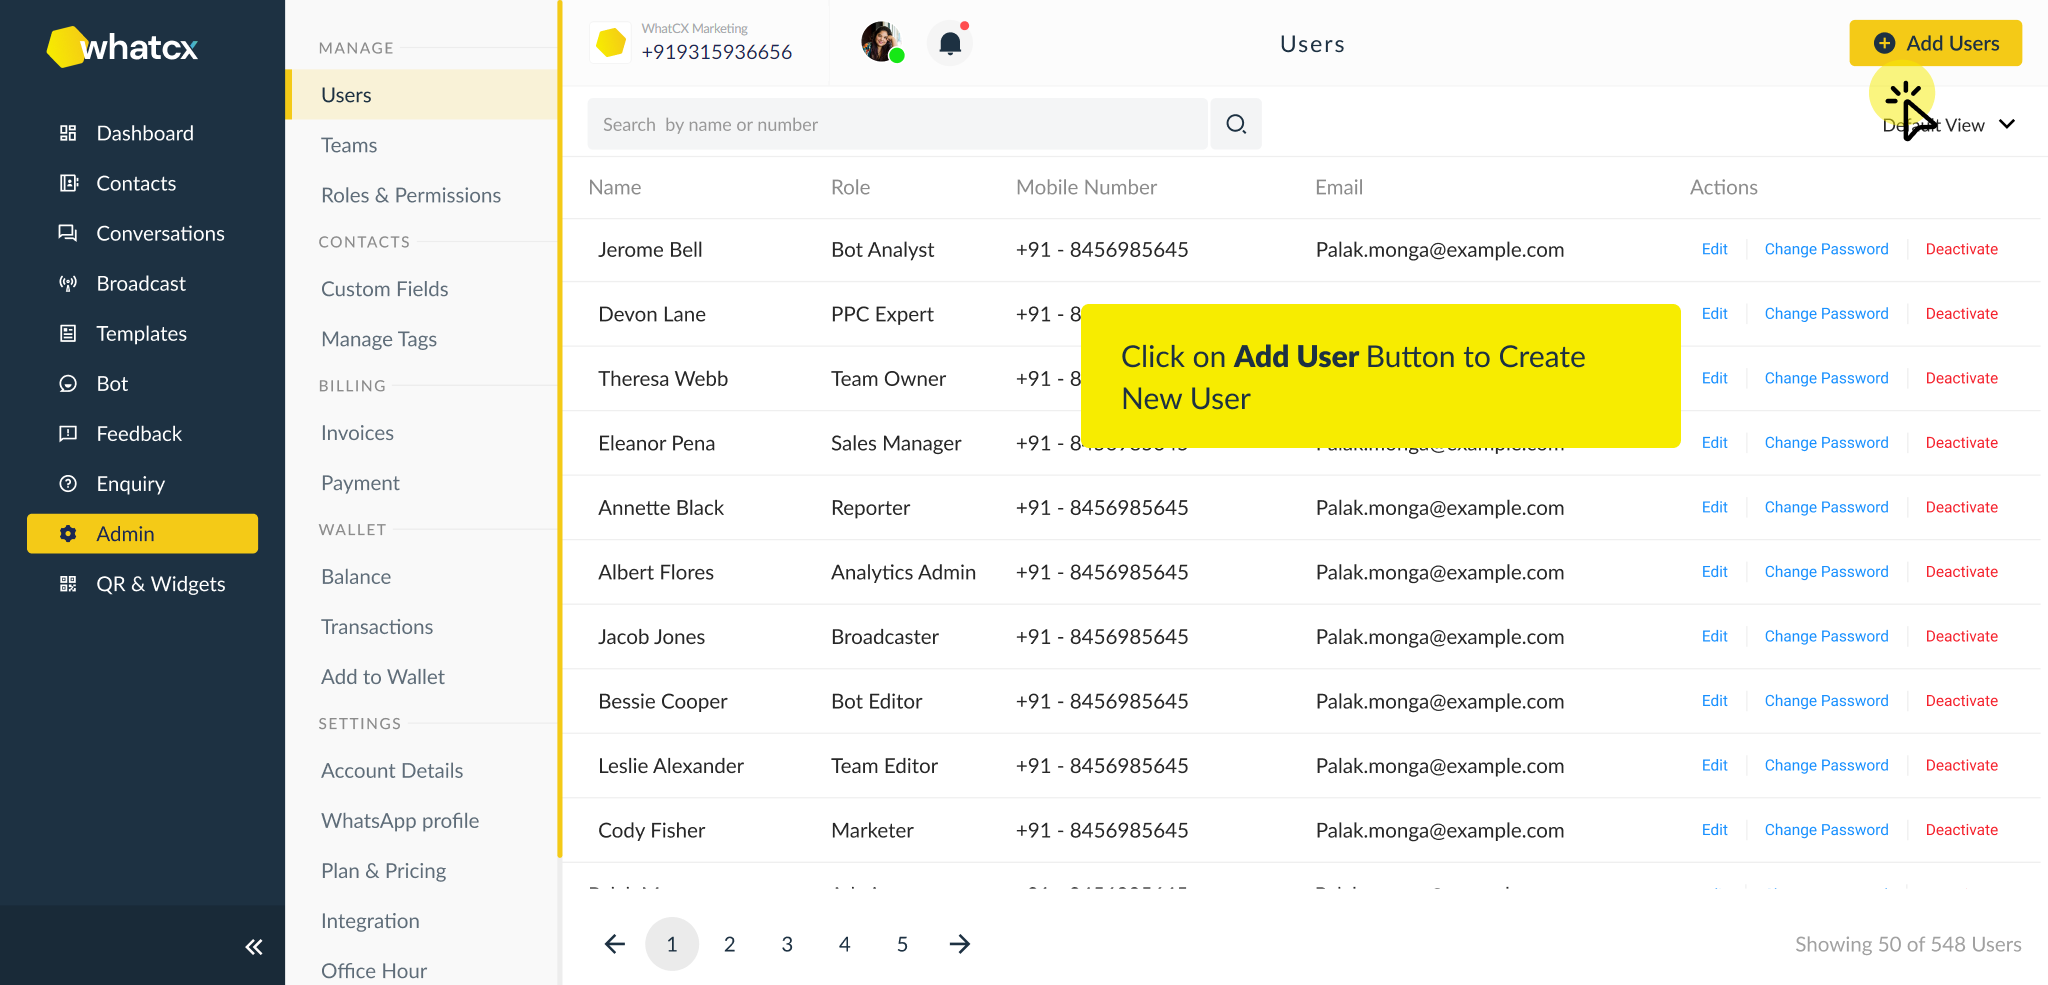
4. Enter the details and click on Add User, a new user will be created. 
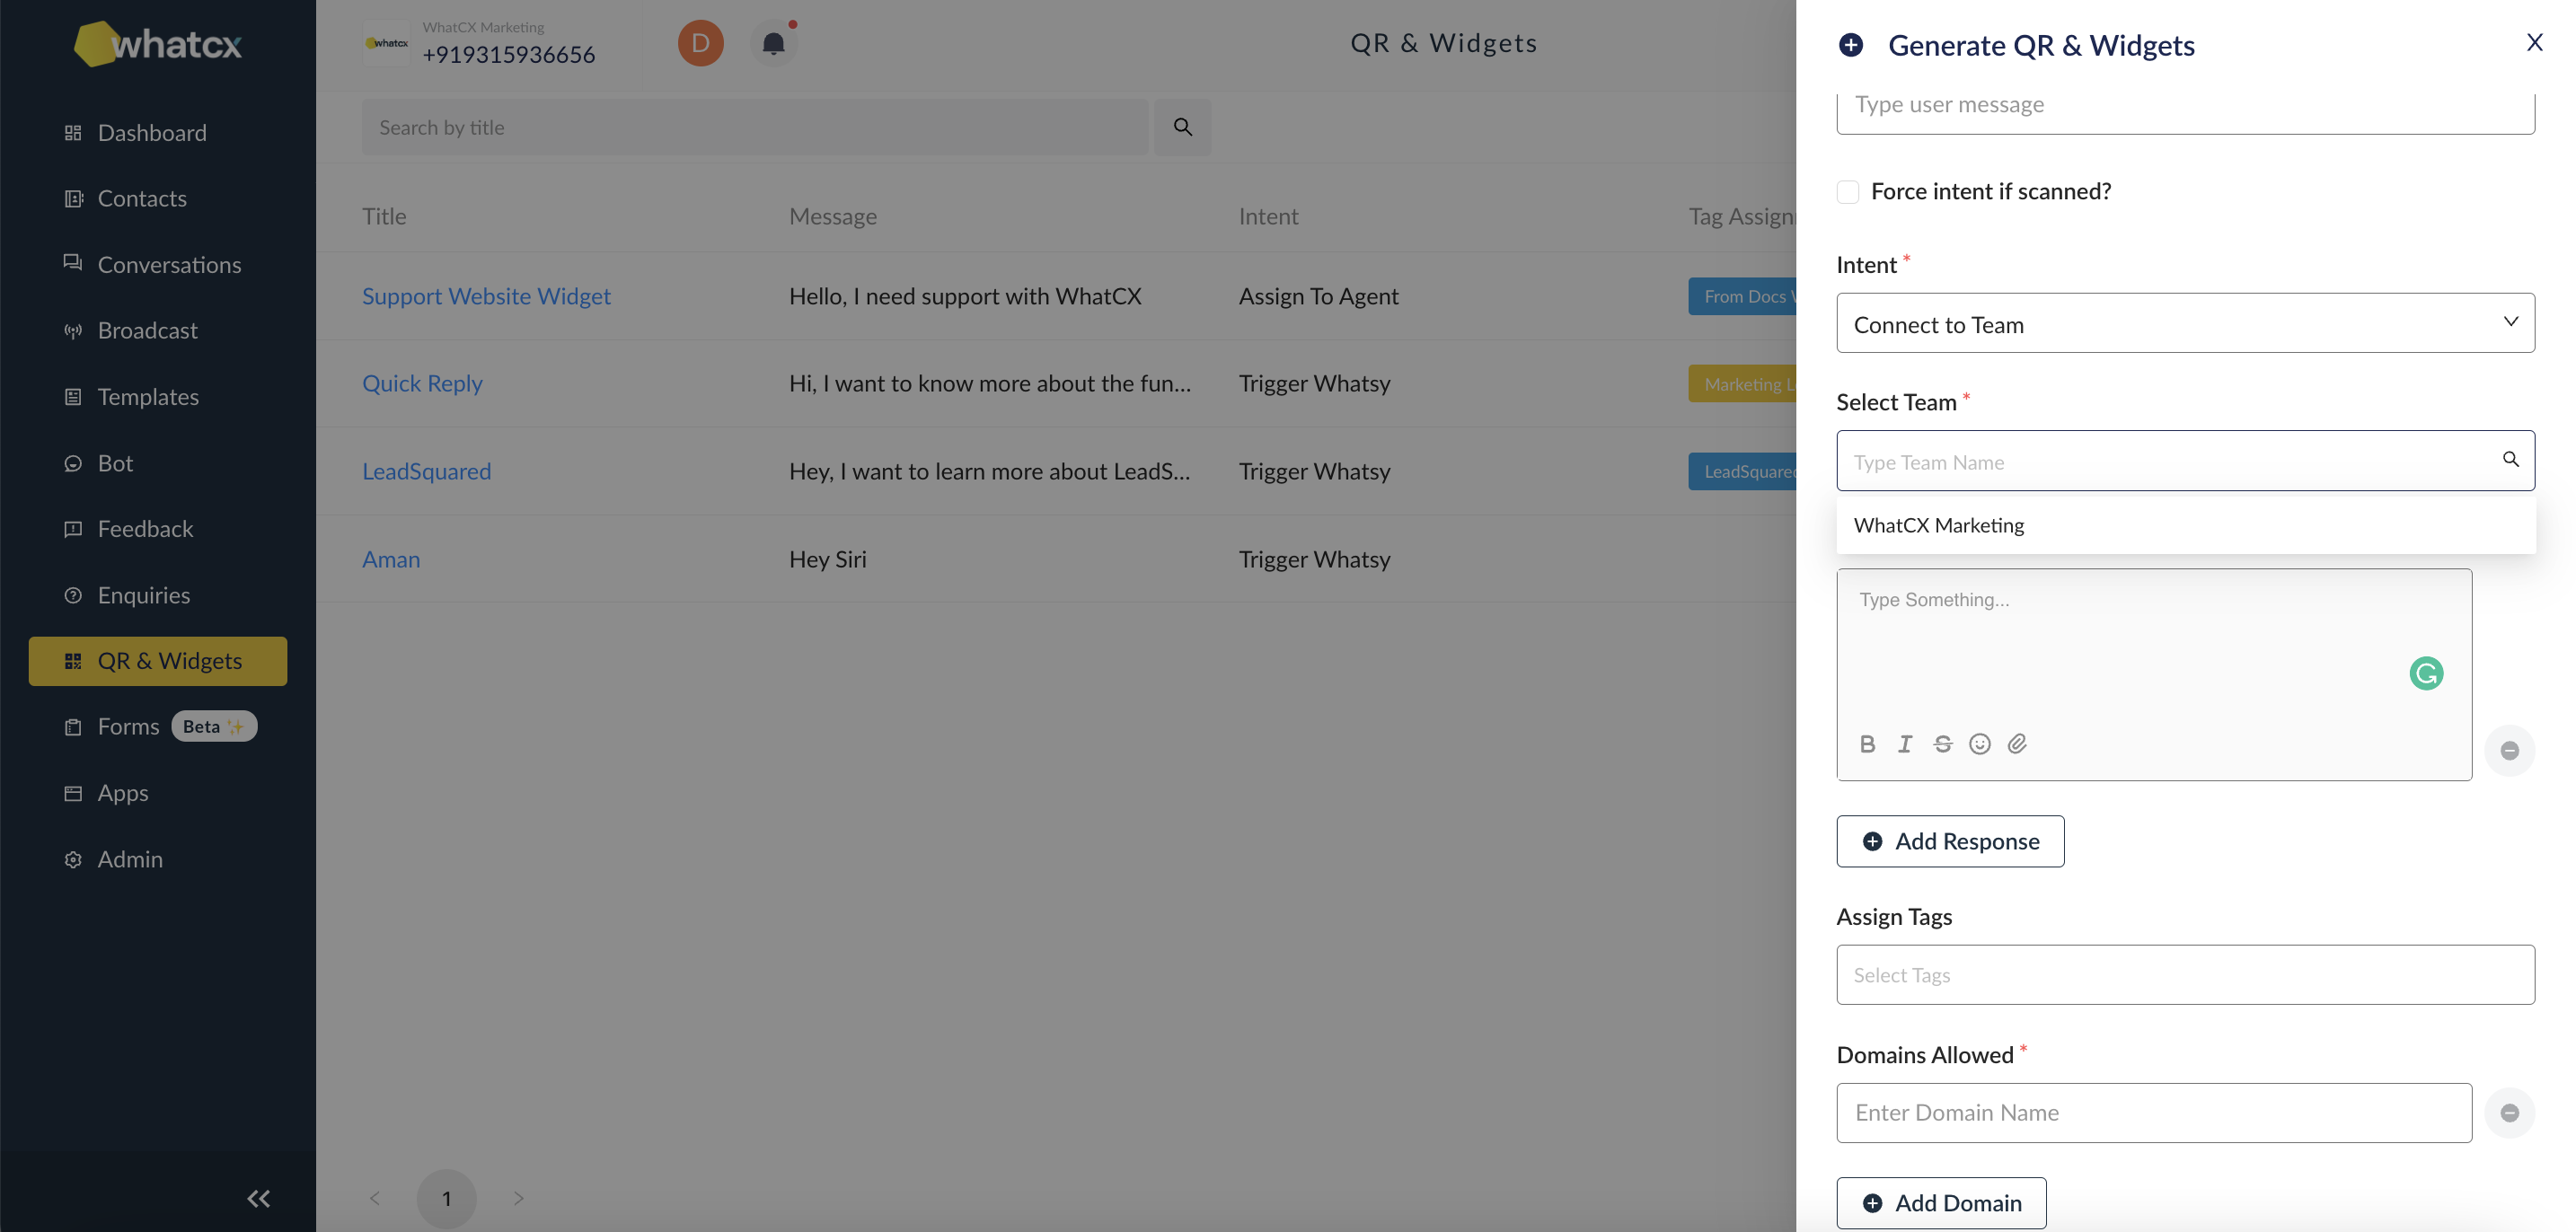
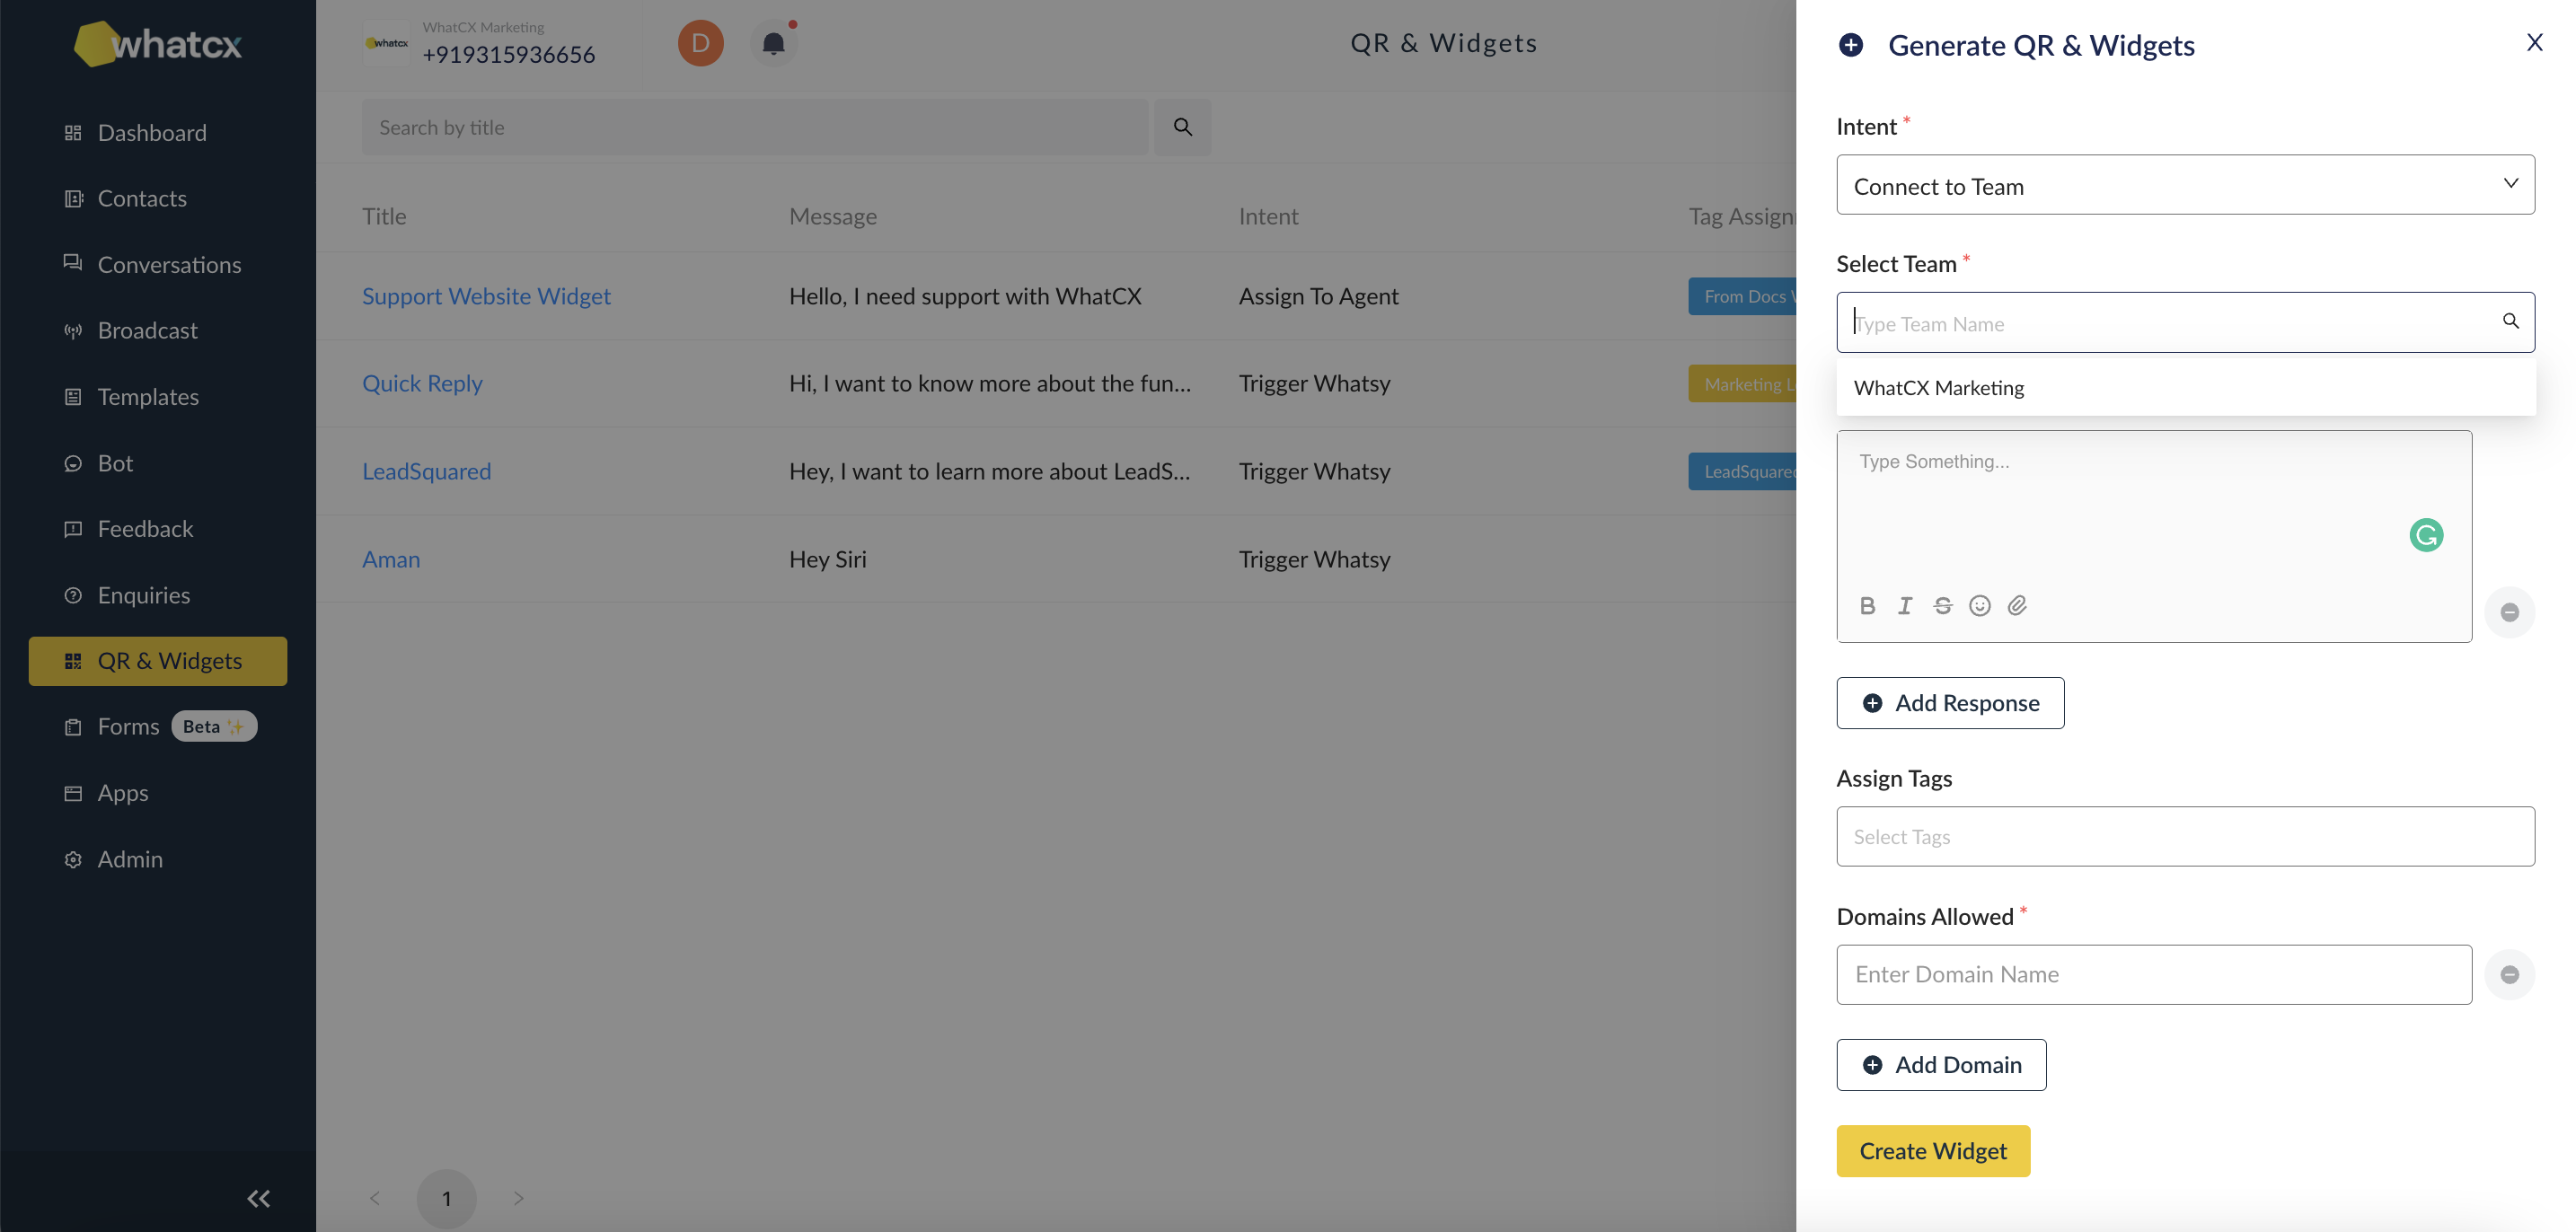
To create Teams, follow the below steps –
1. Login to WhatCX and click on Admin in the left panel
2. Under Manage Users, you will find the option Teams 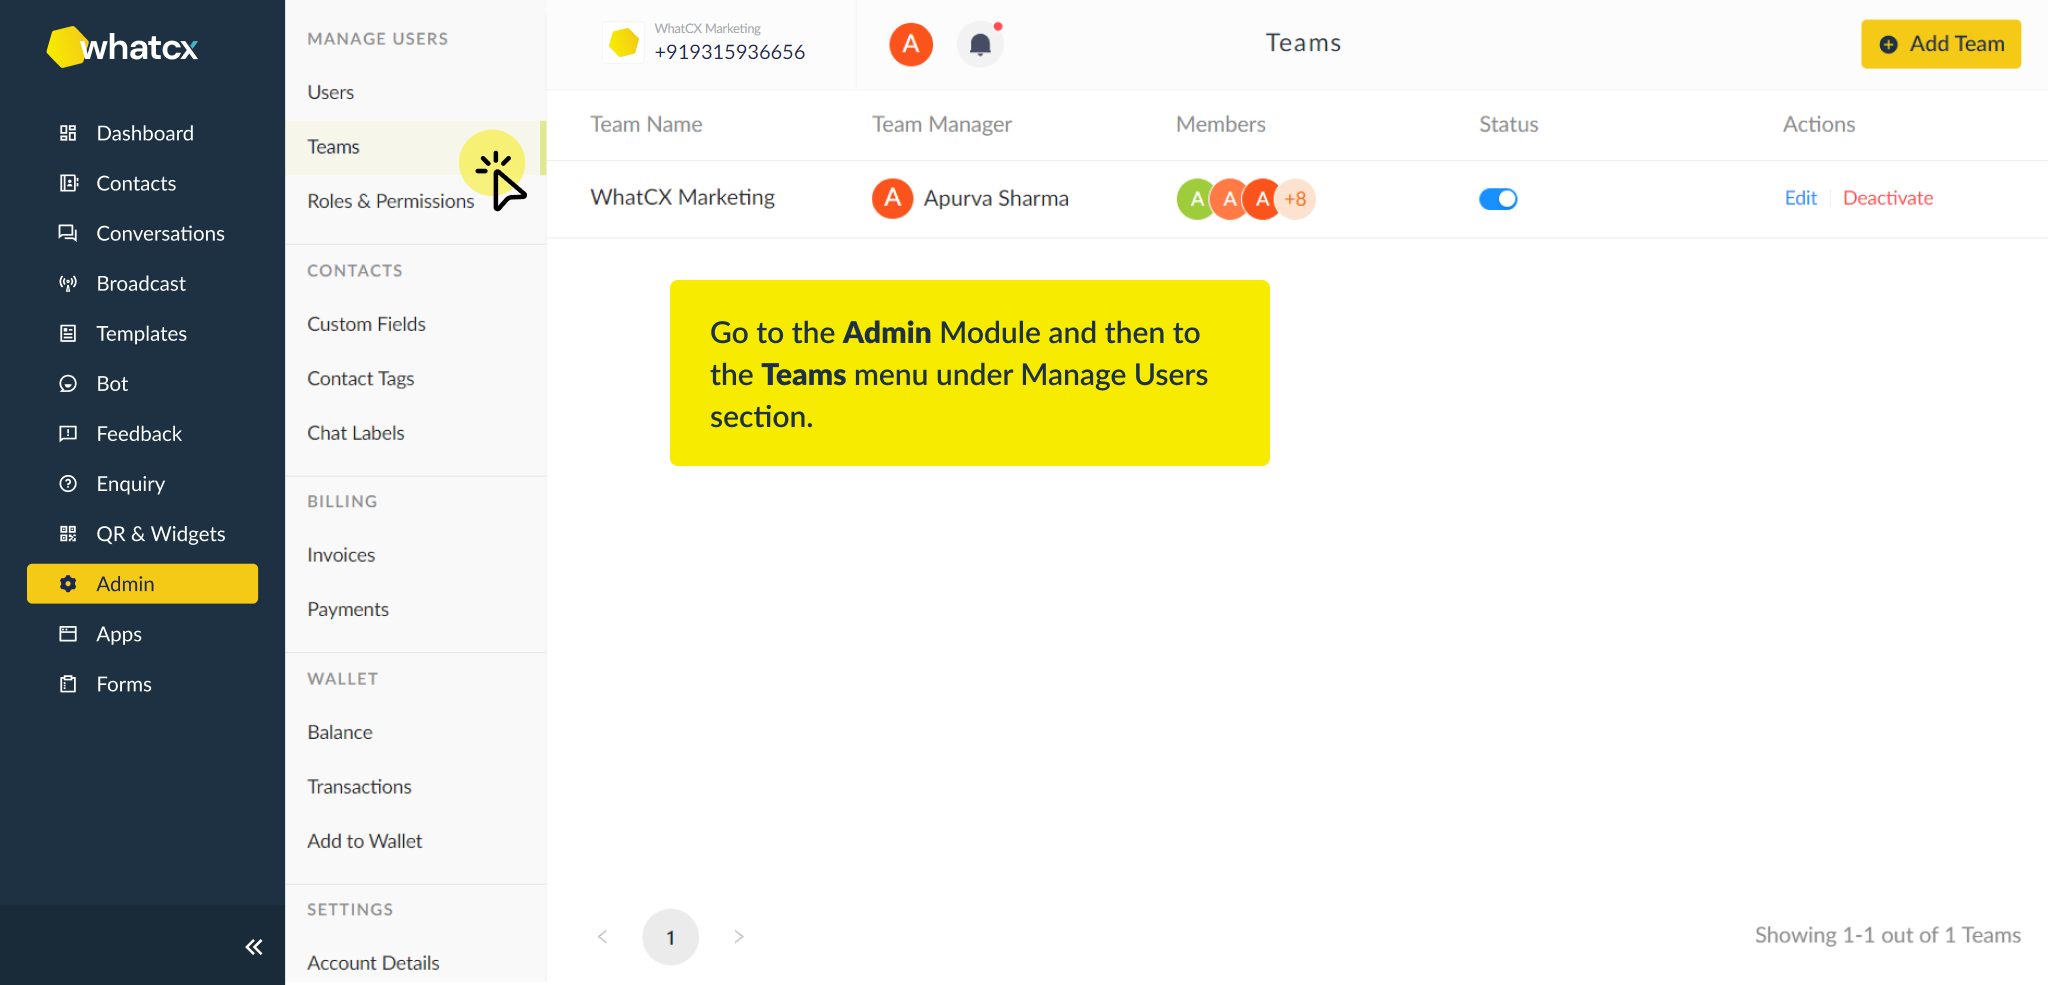 3. Click on Add Teams
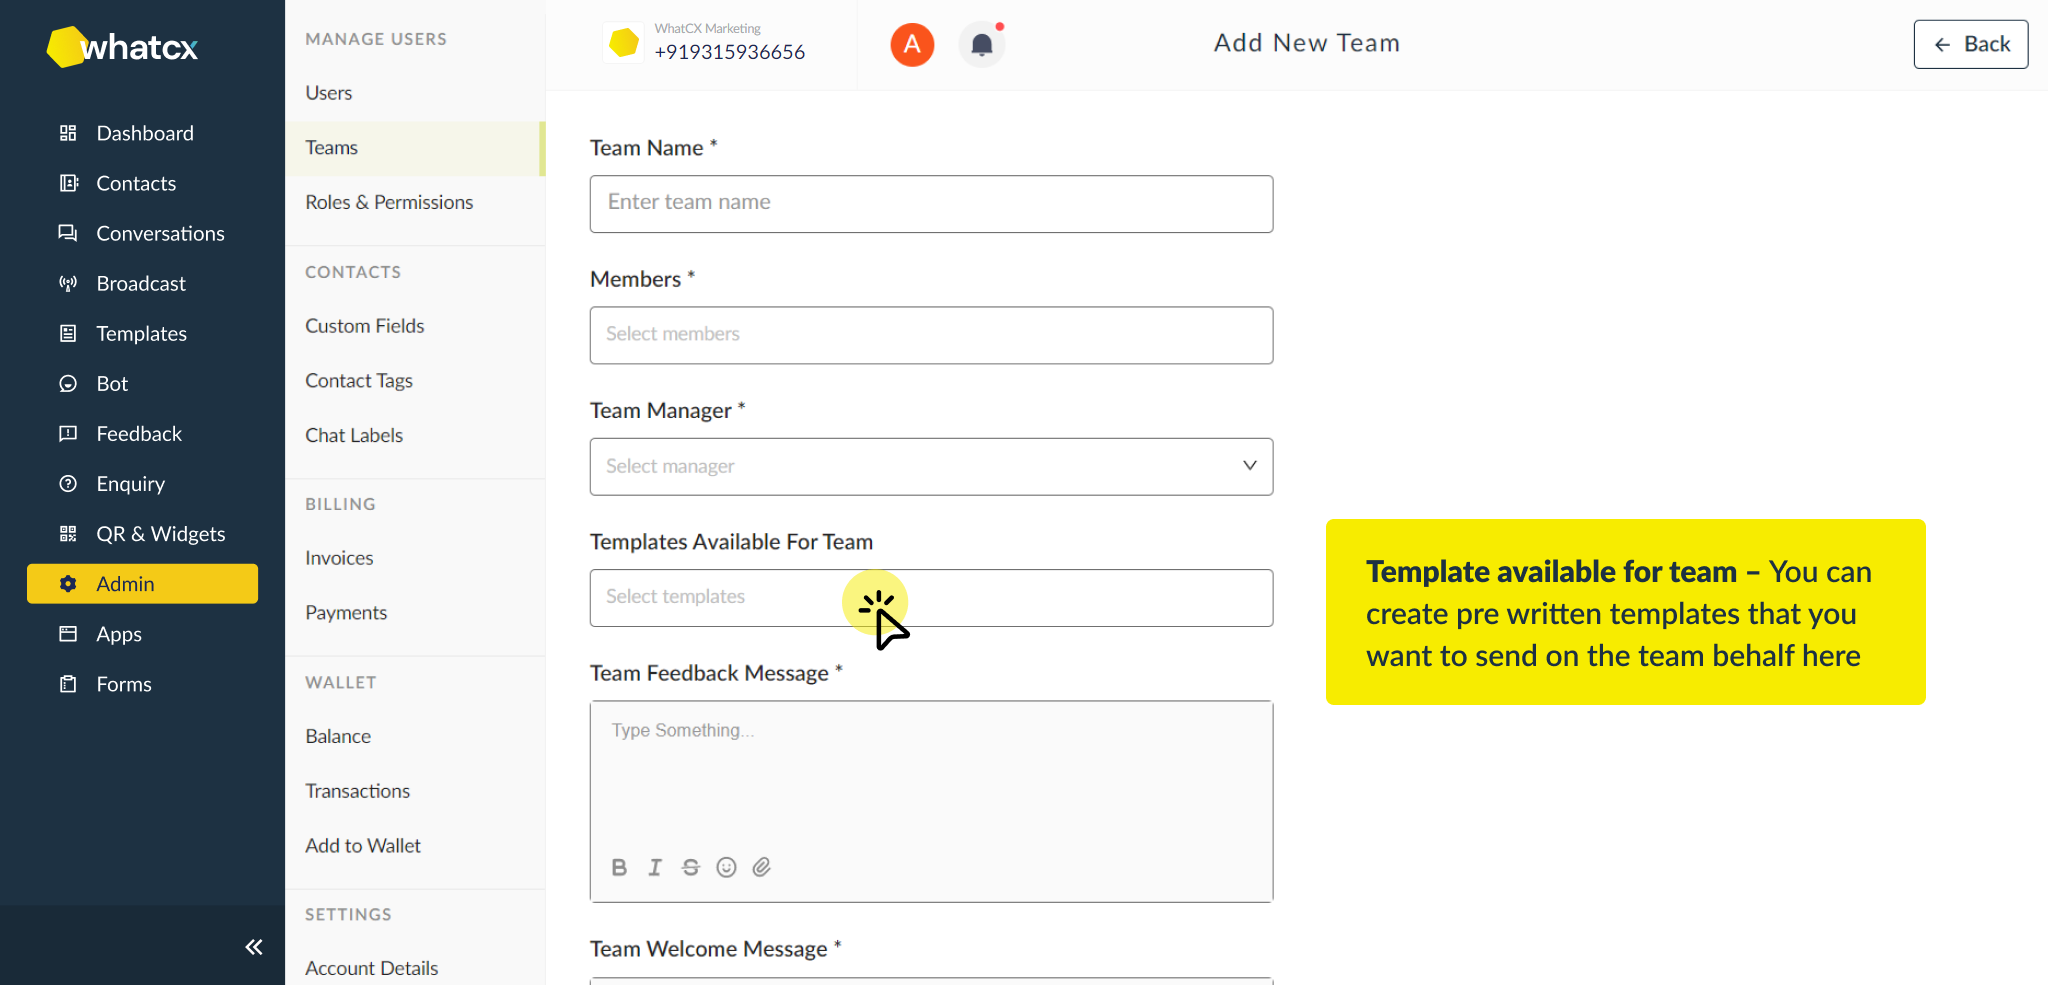
- Team Name – Here you can give your team a name
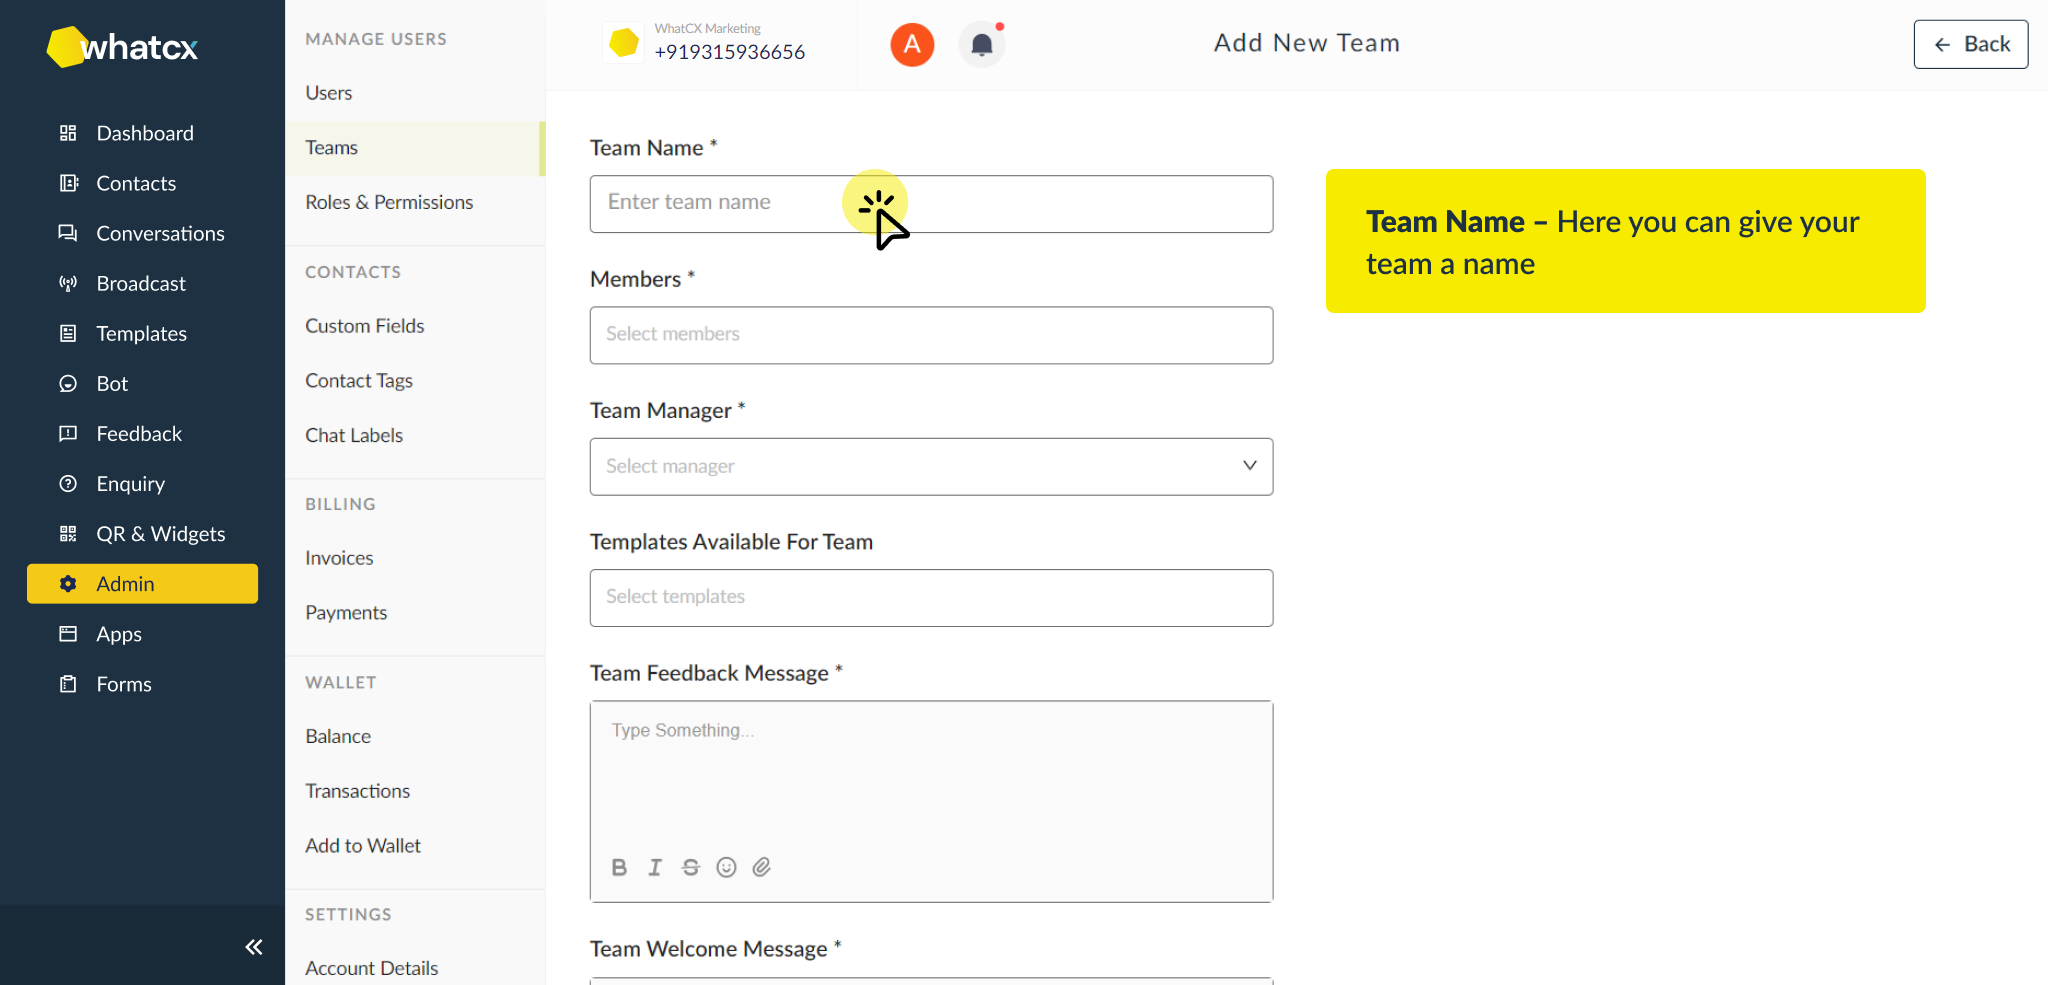
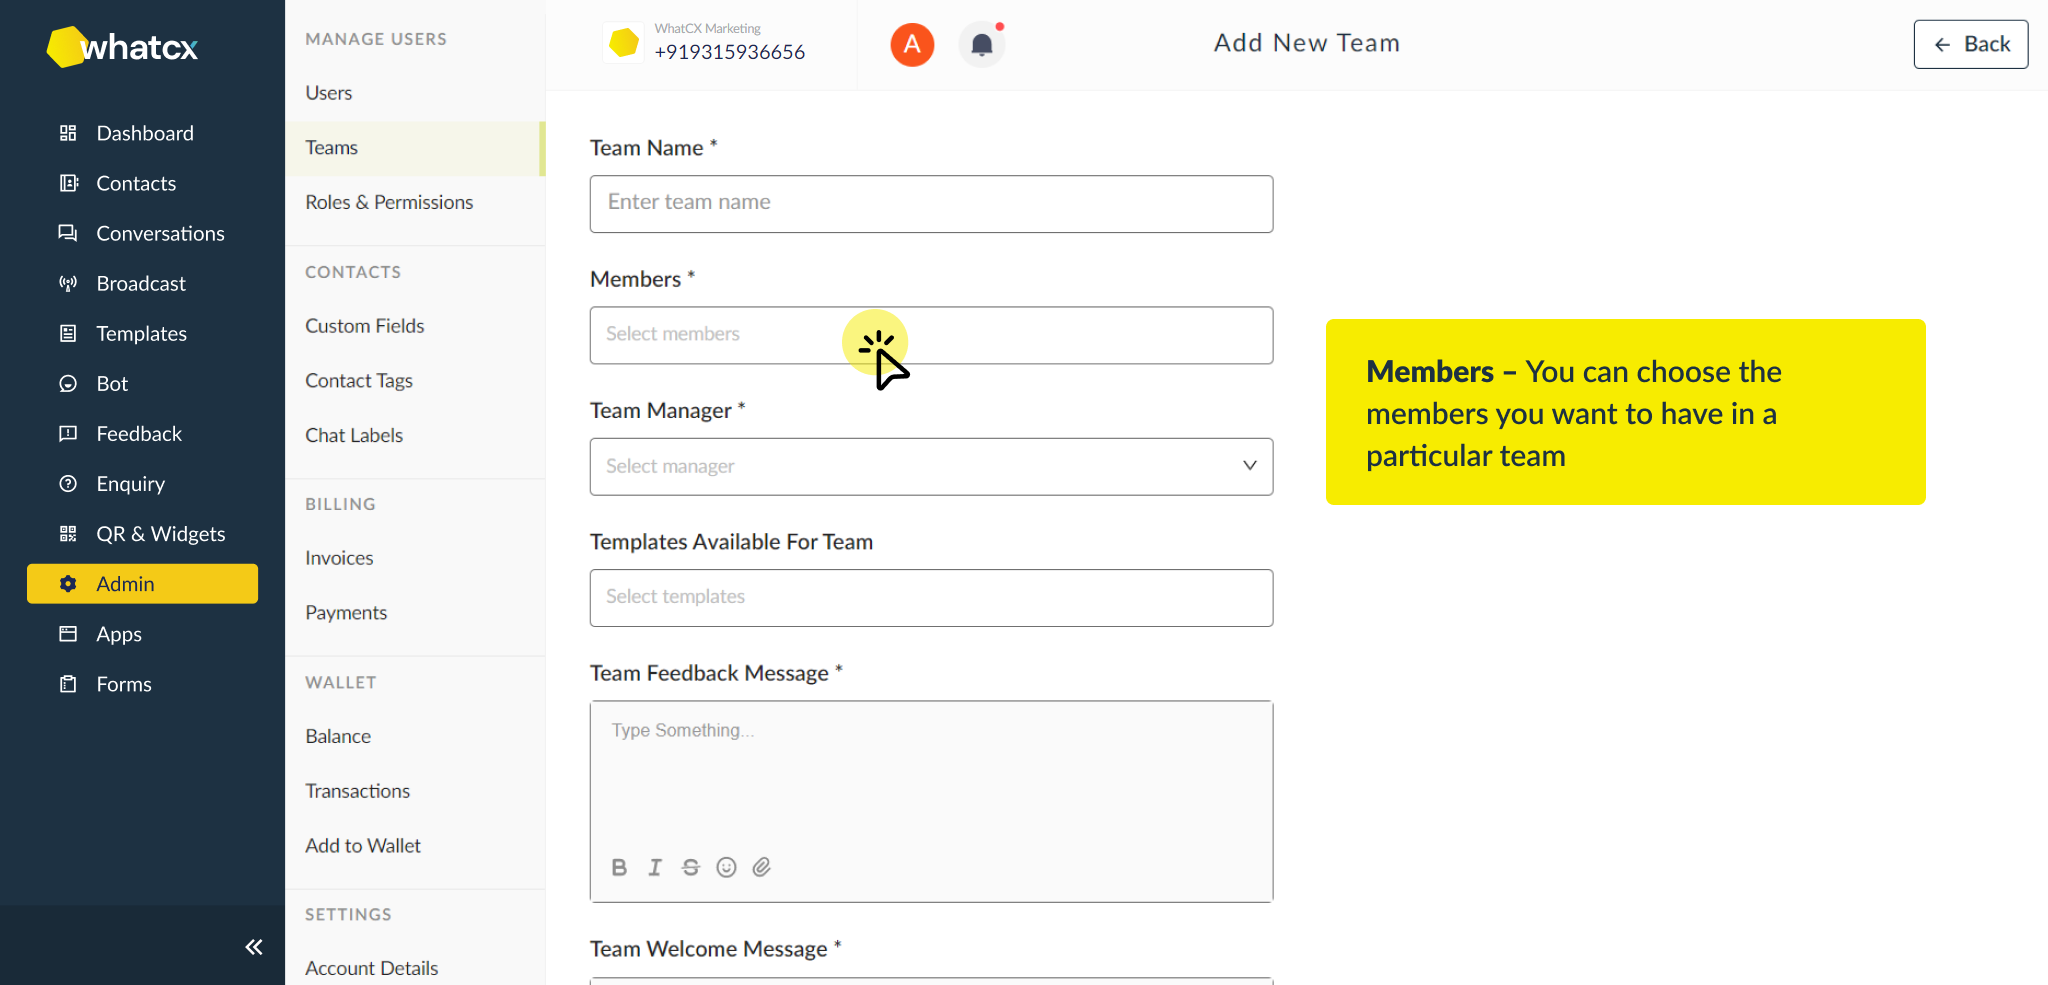
- Members – You can choose the members you want to have in a particular team
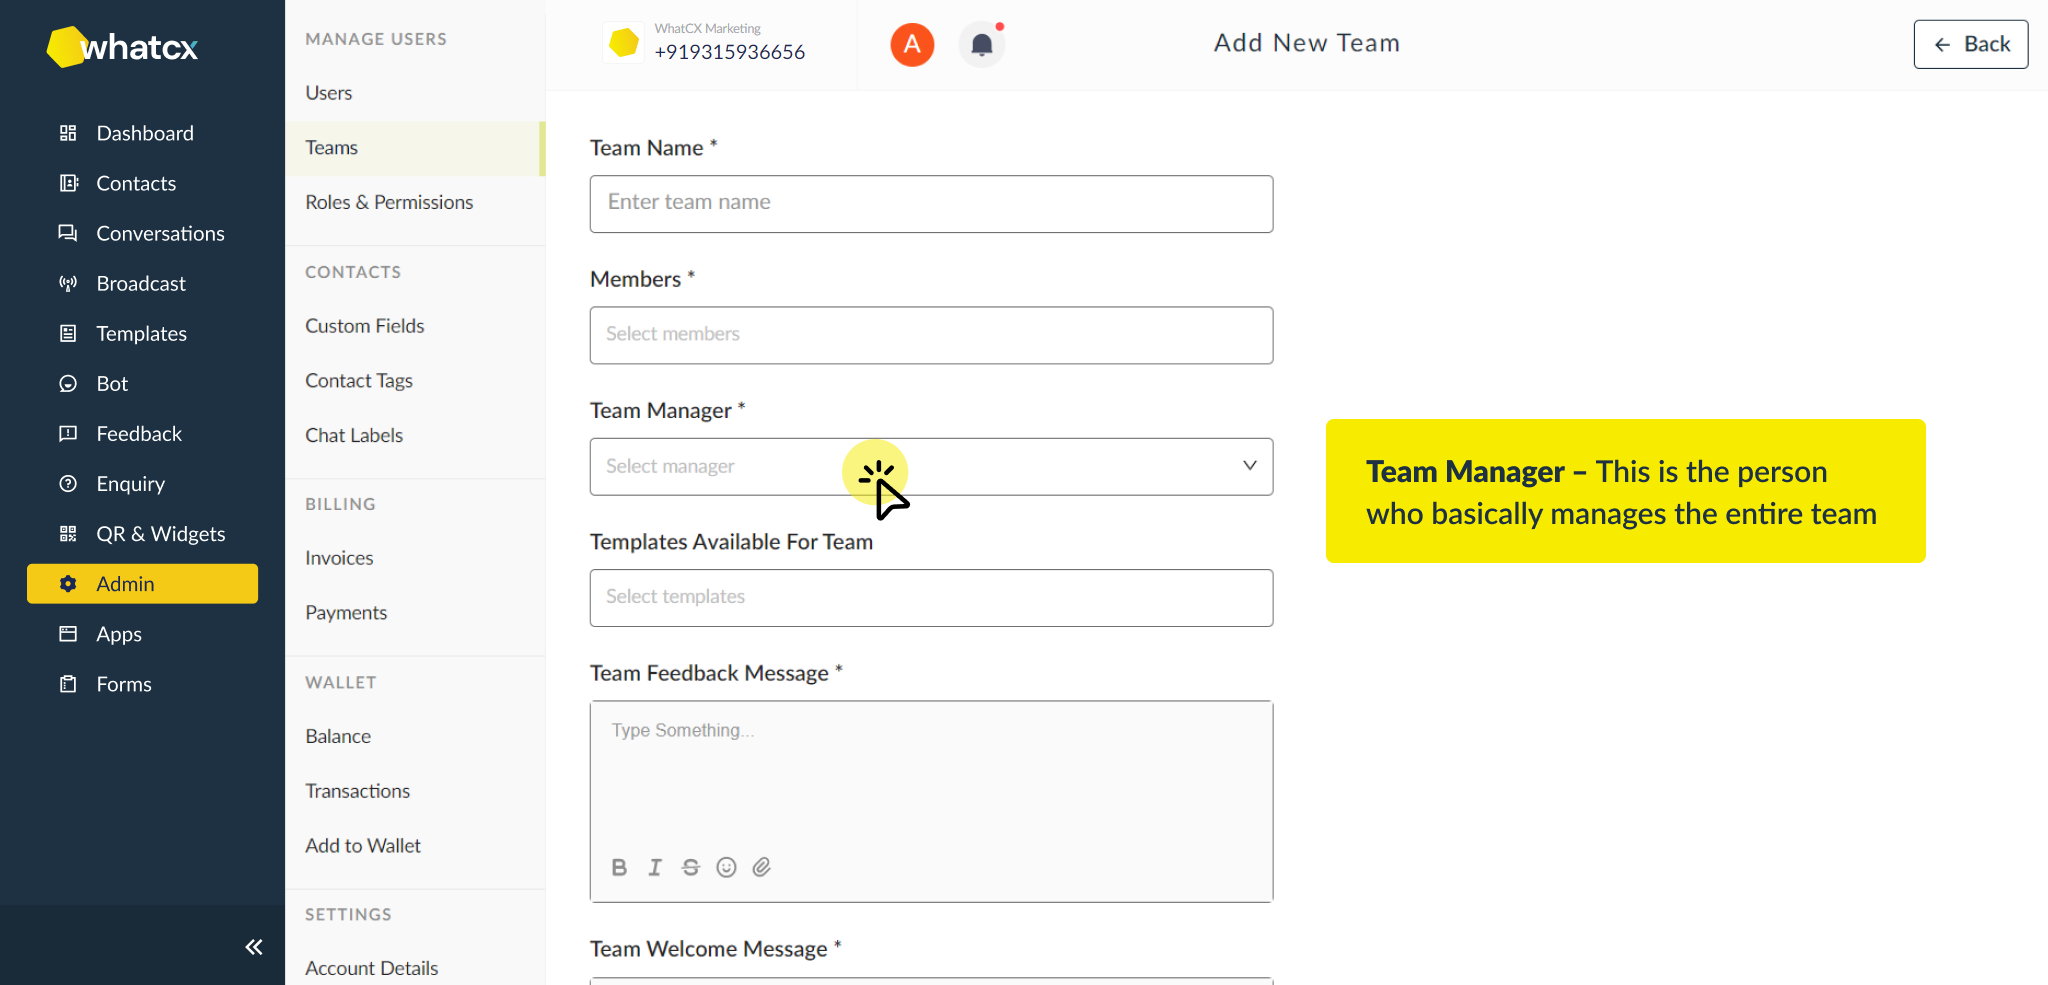
- Team Manager – This is the person who basically manages the entire team
- Template available for team – You can create pre written templates that you want to send on the team behalf here
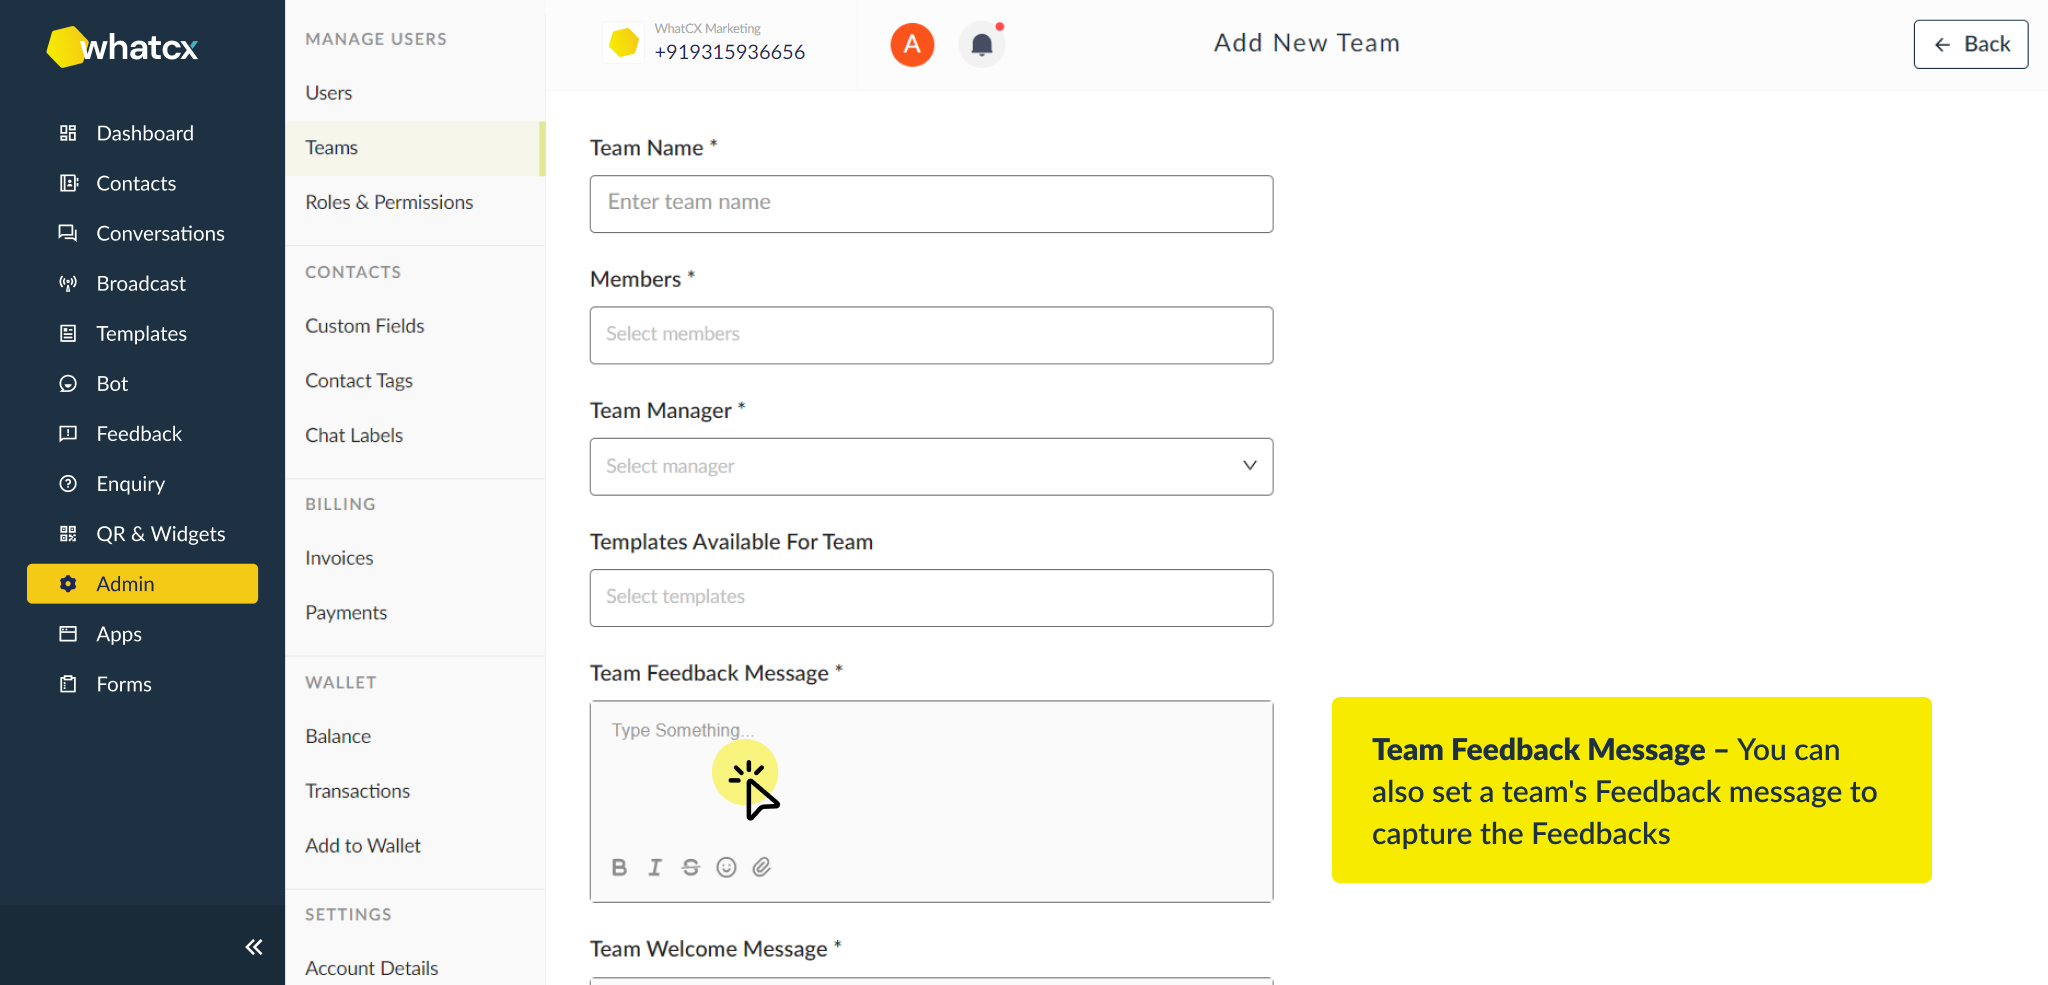
- Team Feedback Message – You can also set a team’s Feedback message to capture the Feedbacks
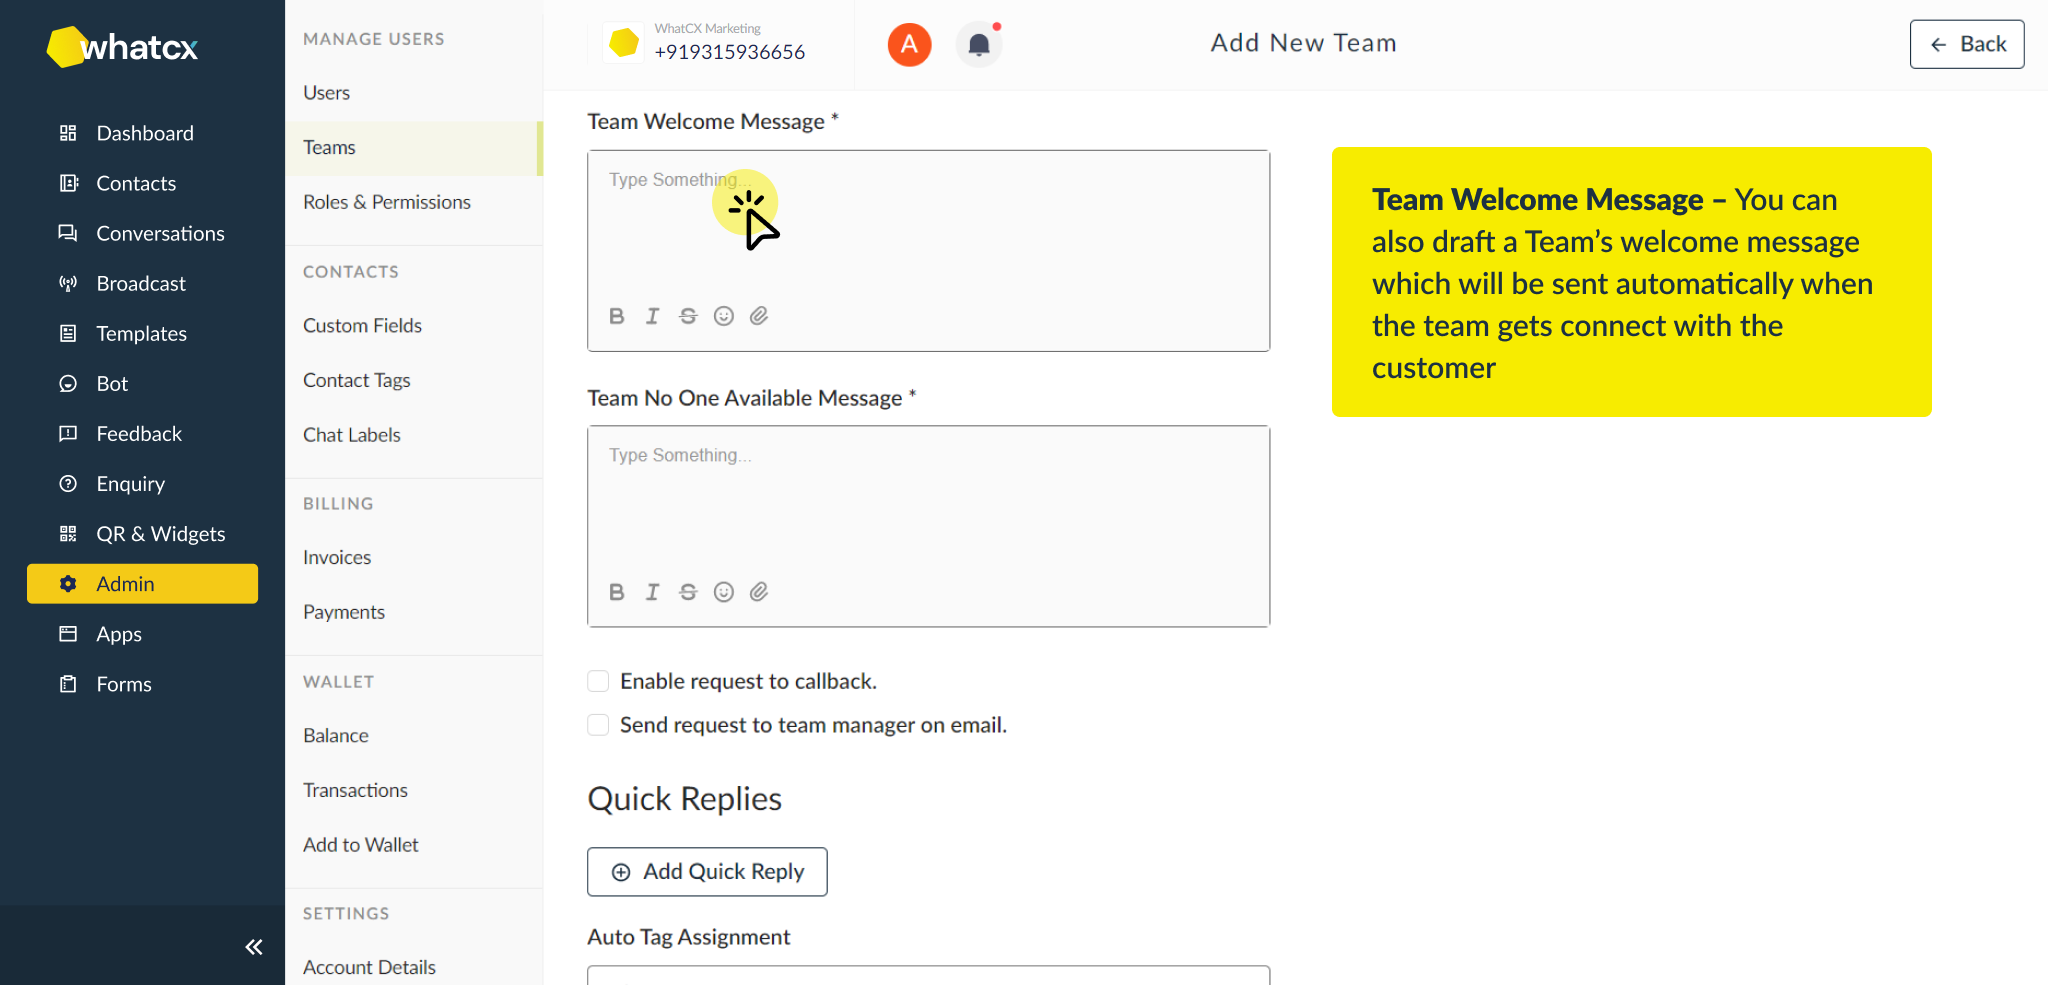
- Team Welcome Message – You can also draft a Team’s welcome message which will be sent automatically when the team gets connect with the customer
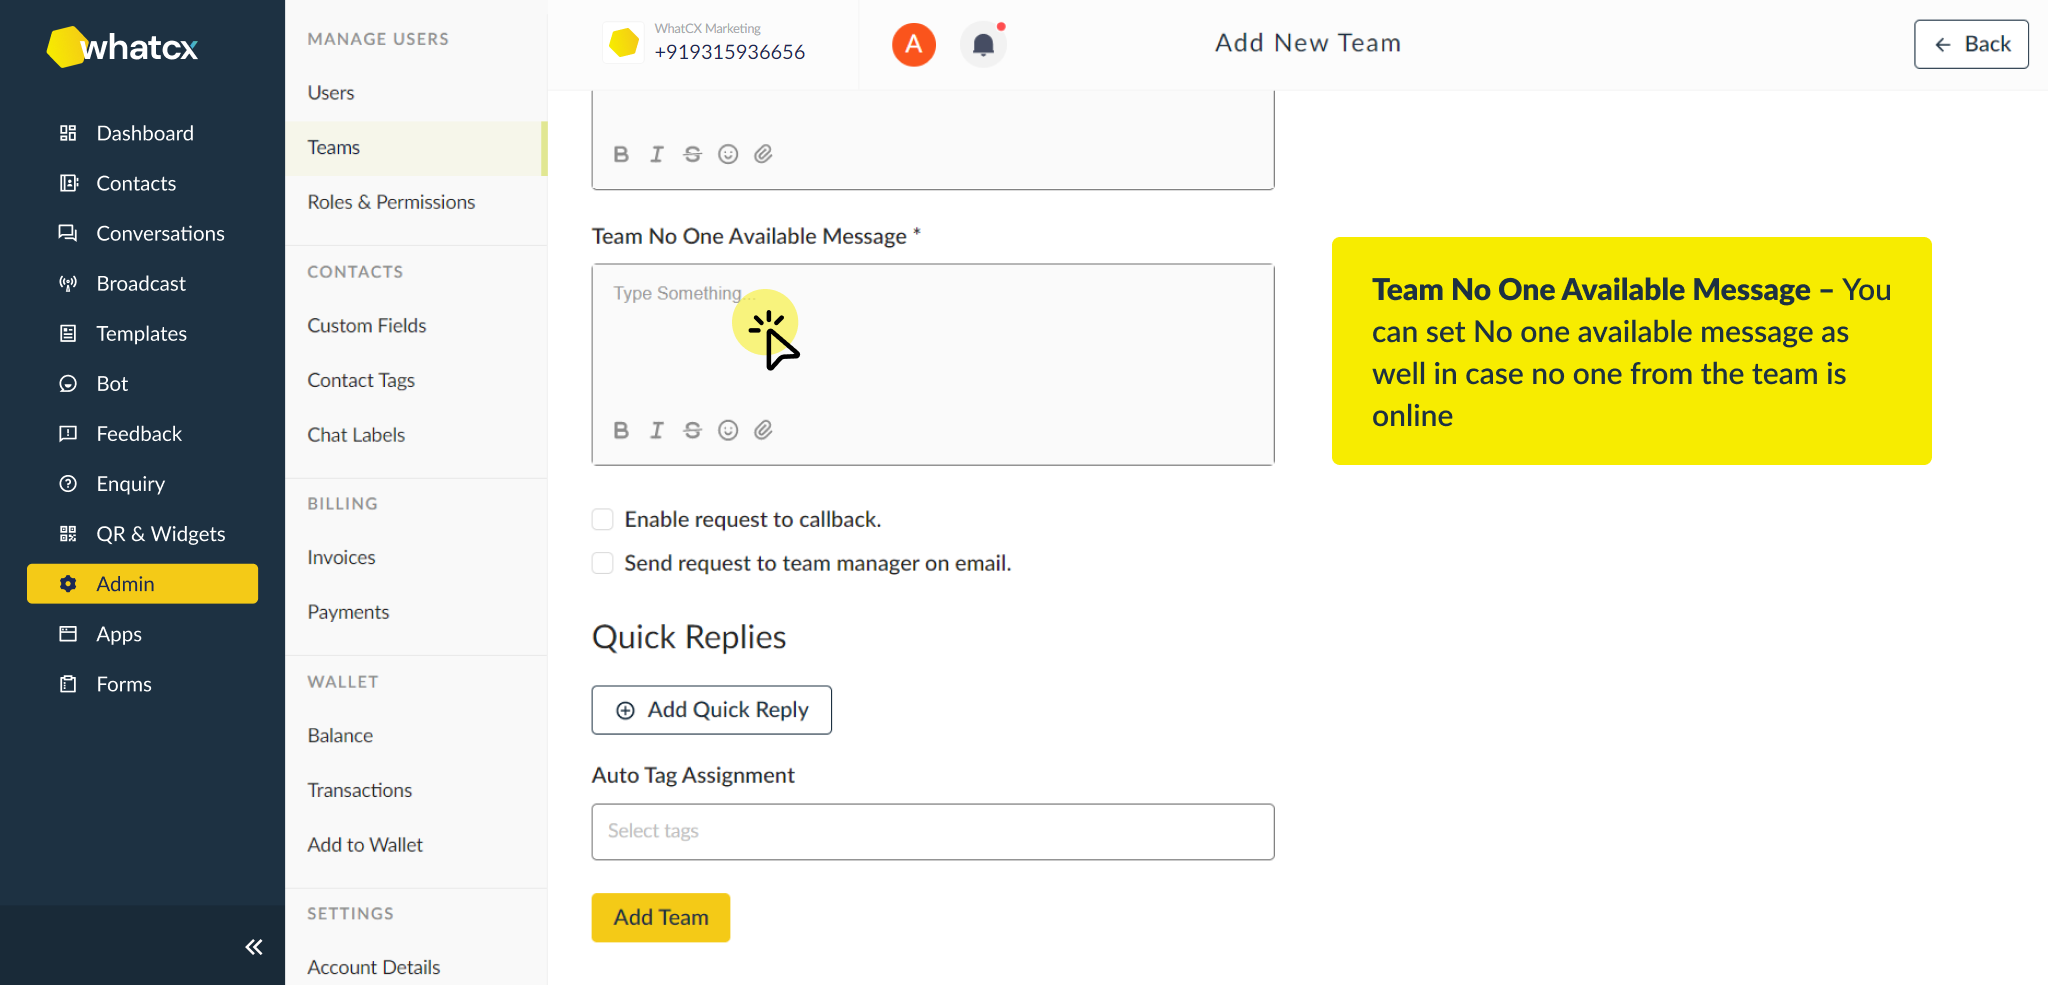
- Team No One Available Message – You can set No one available message as well in case no one from the team is online
4. You can also set Quick Replies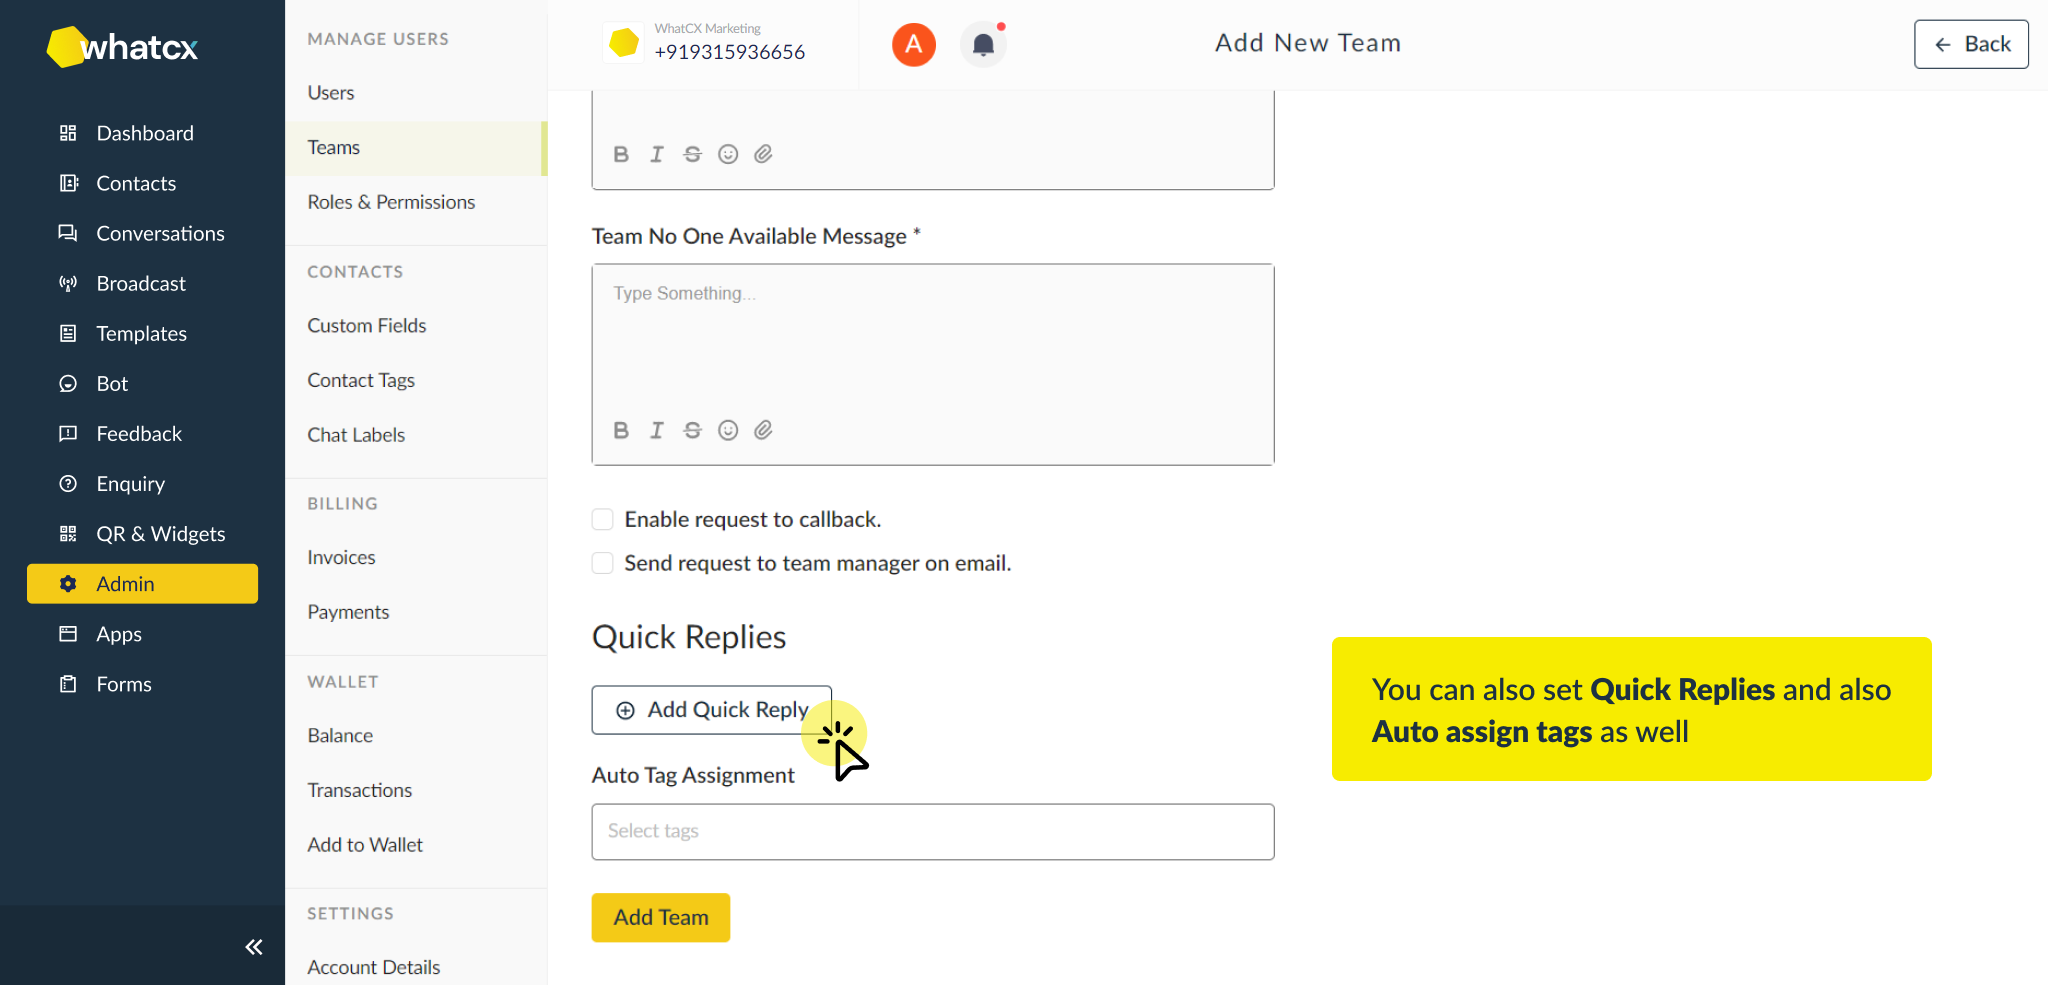
5. You can also Auto assign tags as well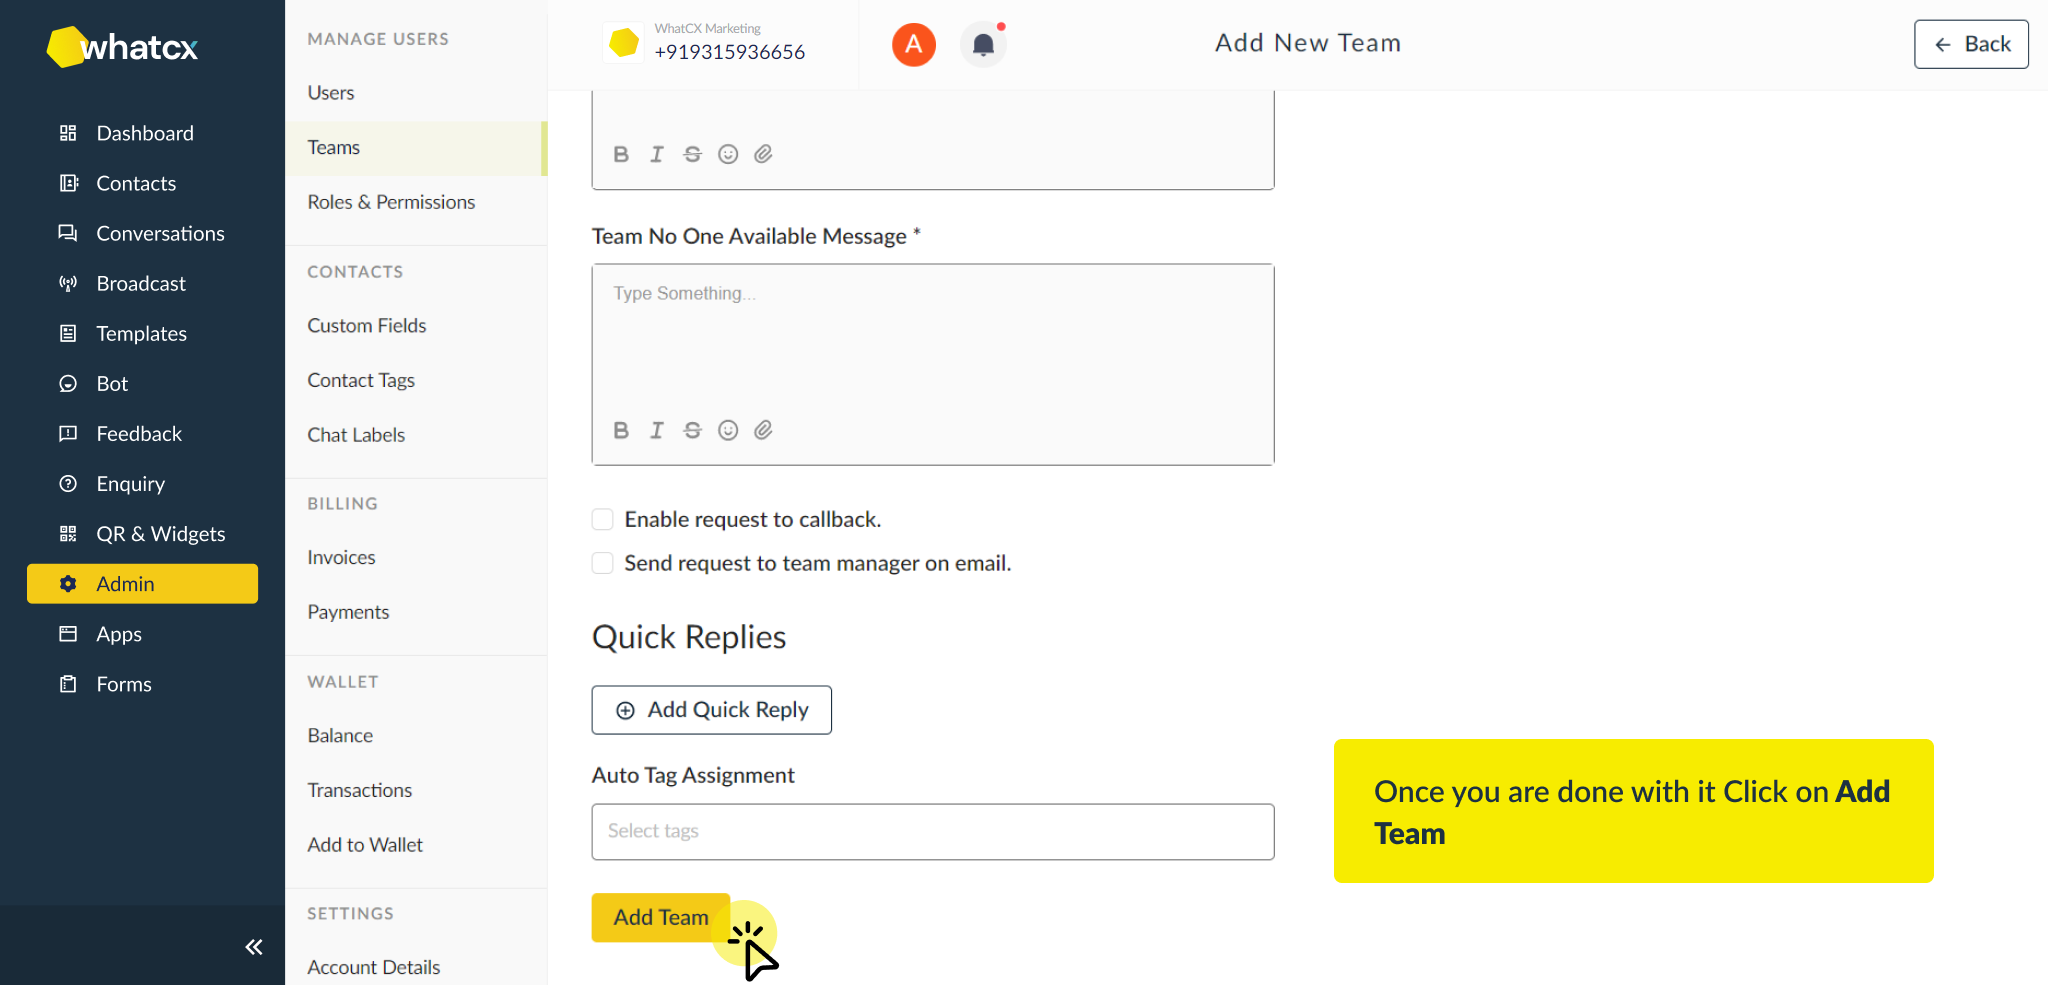
Once you are done with it Click on Add Team and you’ll be able to see it in your Teams list.
Add money to your Wallet
To Add money to your WhatCX wallet follow the steps –
1. Login to WhatCX, Click on Admin in the left navigation
2. Under Wallet, click on Add to Wallet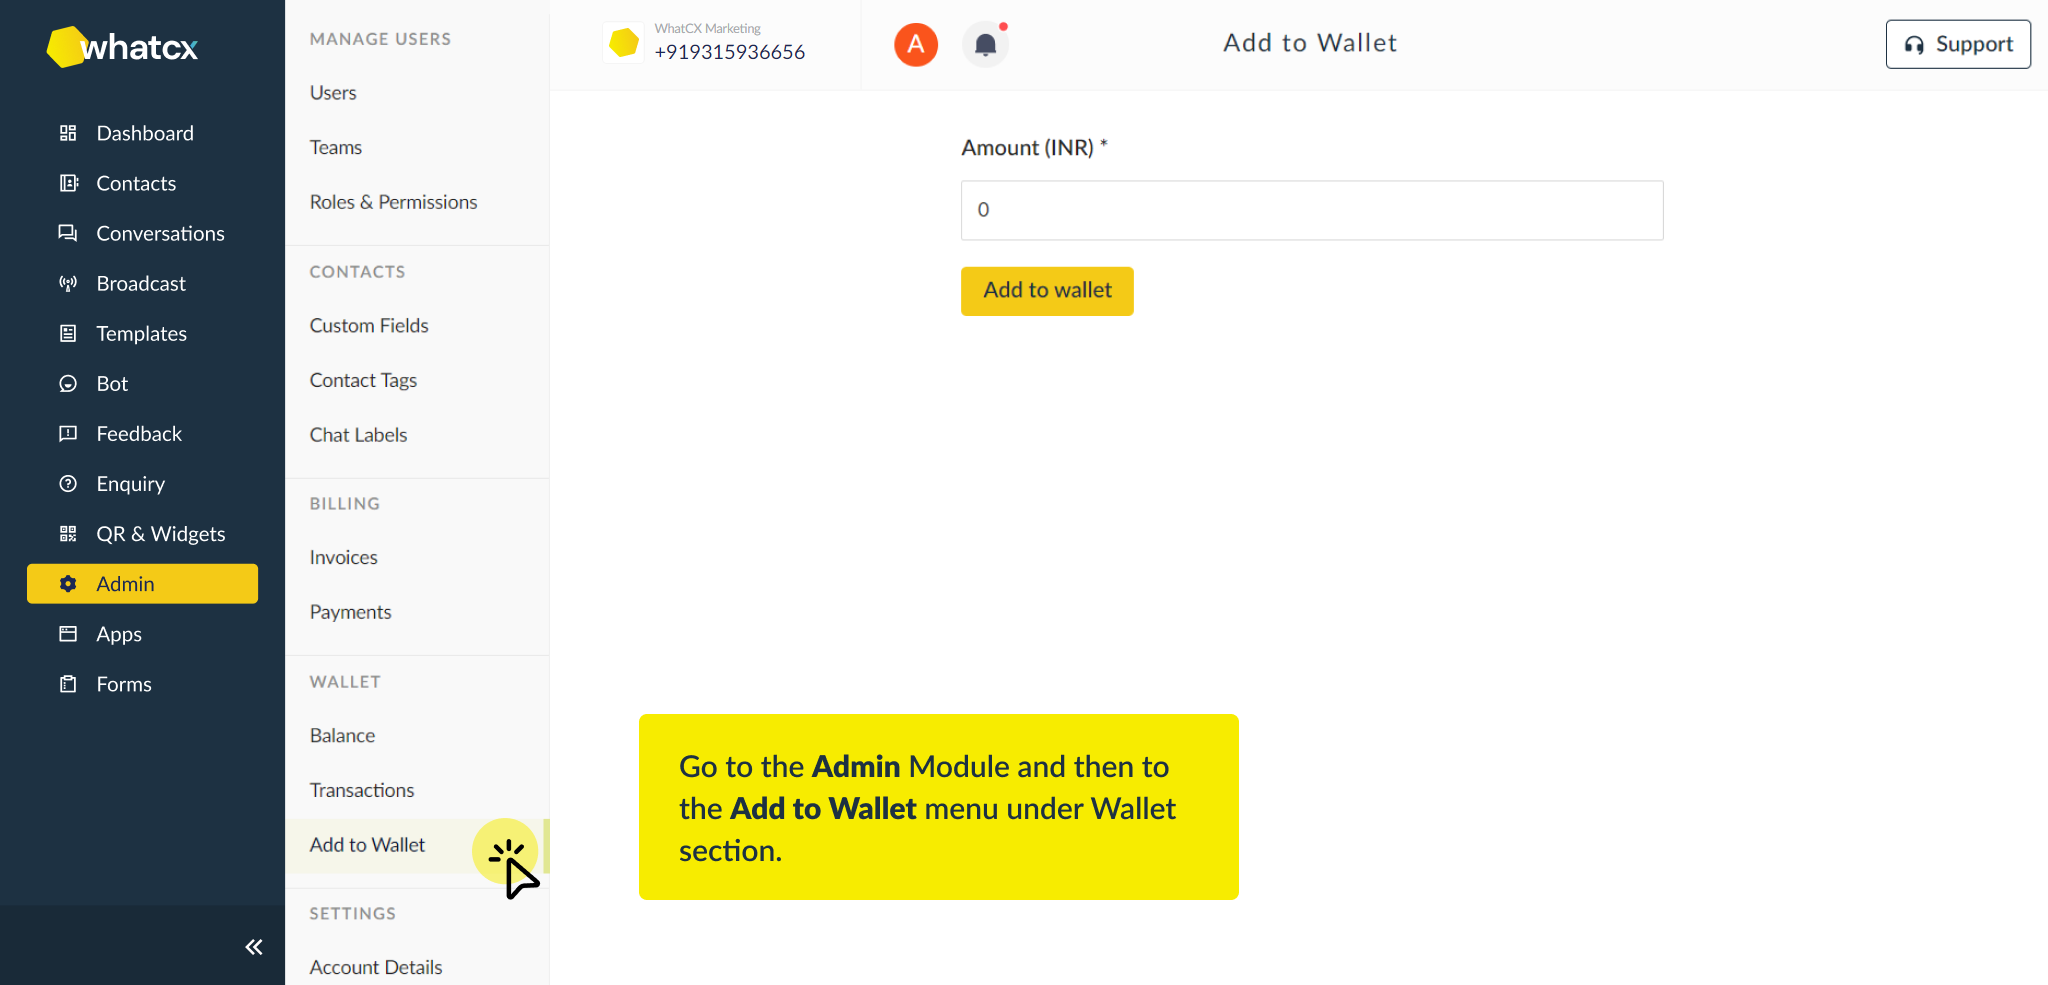
3. Enter the amount you want to make the recharge for and click on the Add to Wallet Button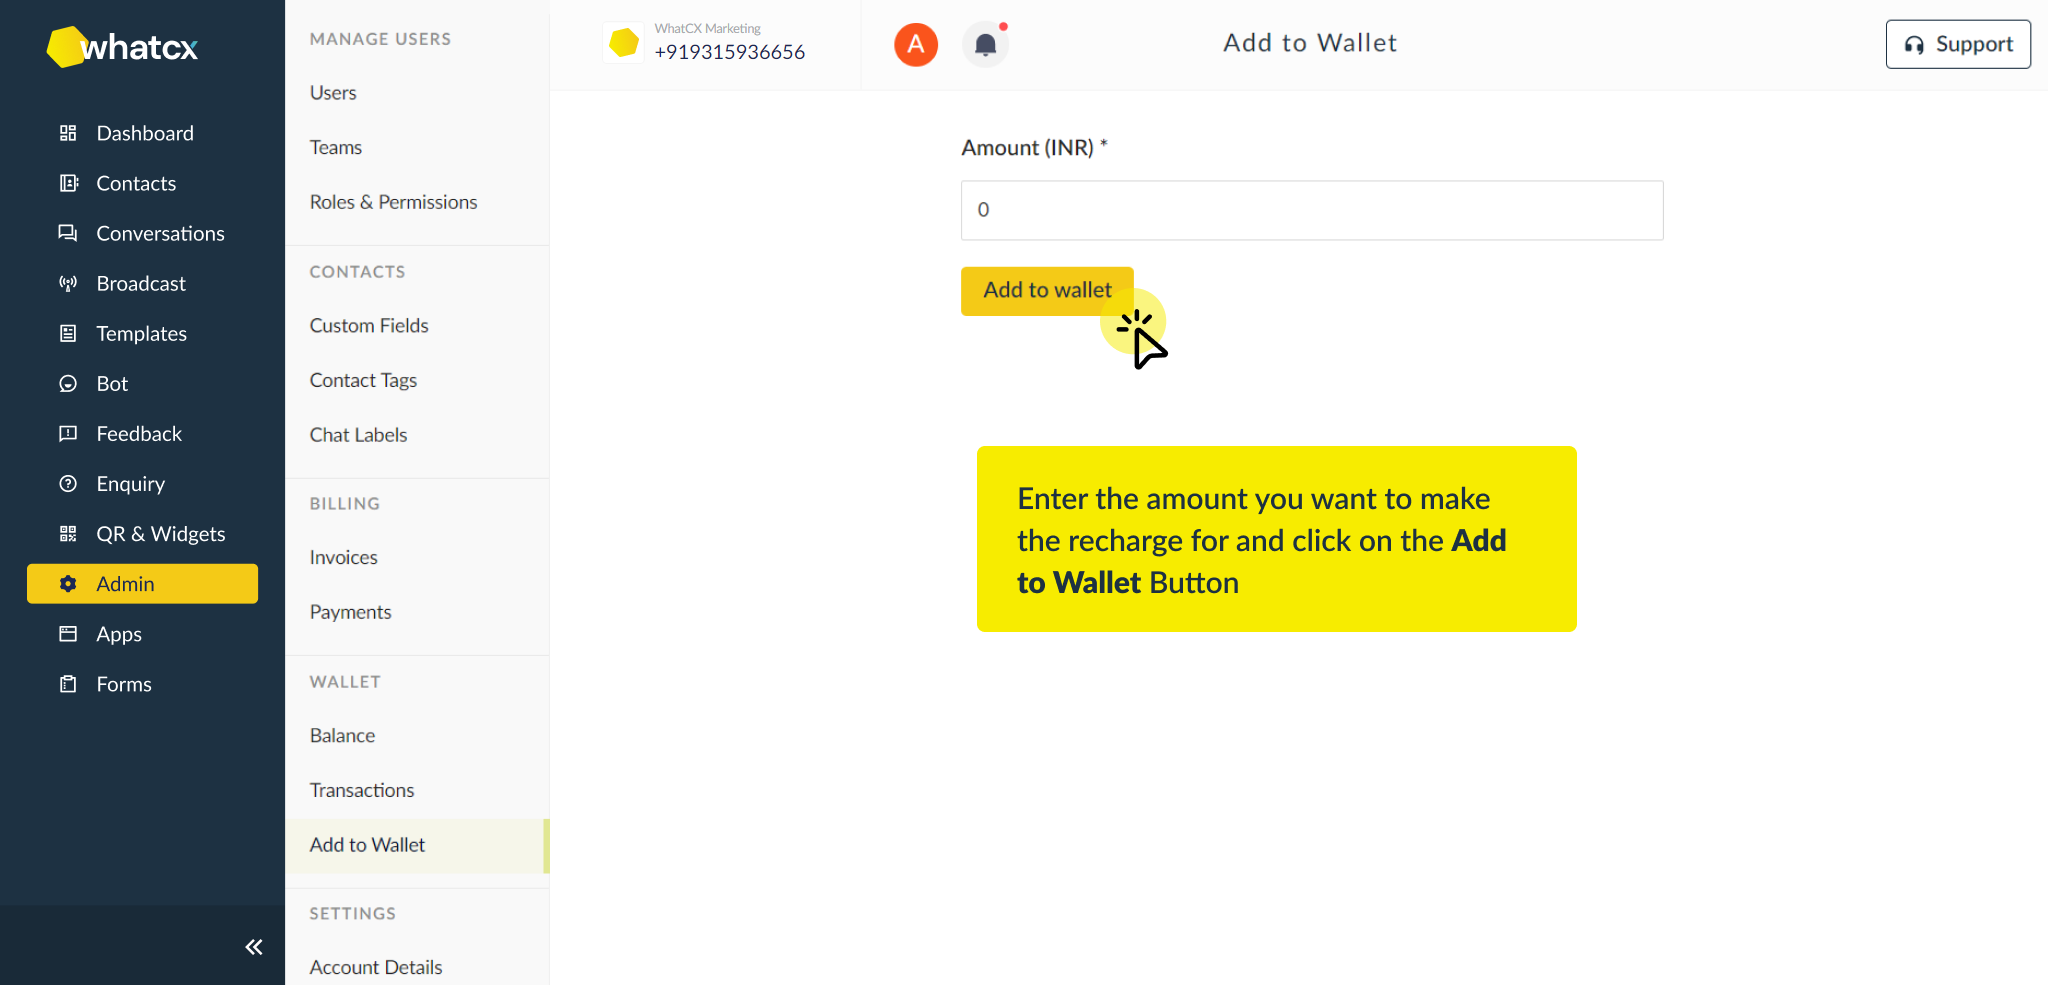
4. You will be redirected to adding a payment method, you can either scan the QR code or add your card or choose Net banking or wallets to make the payment.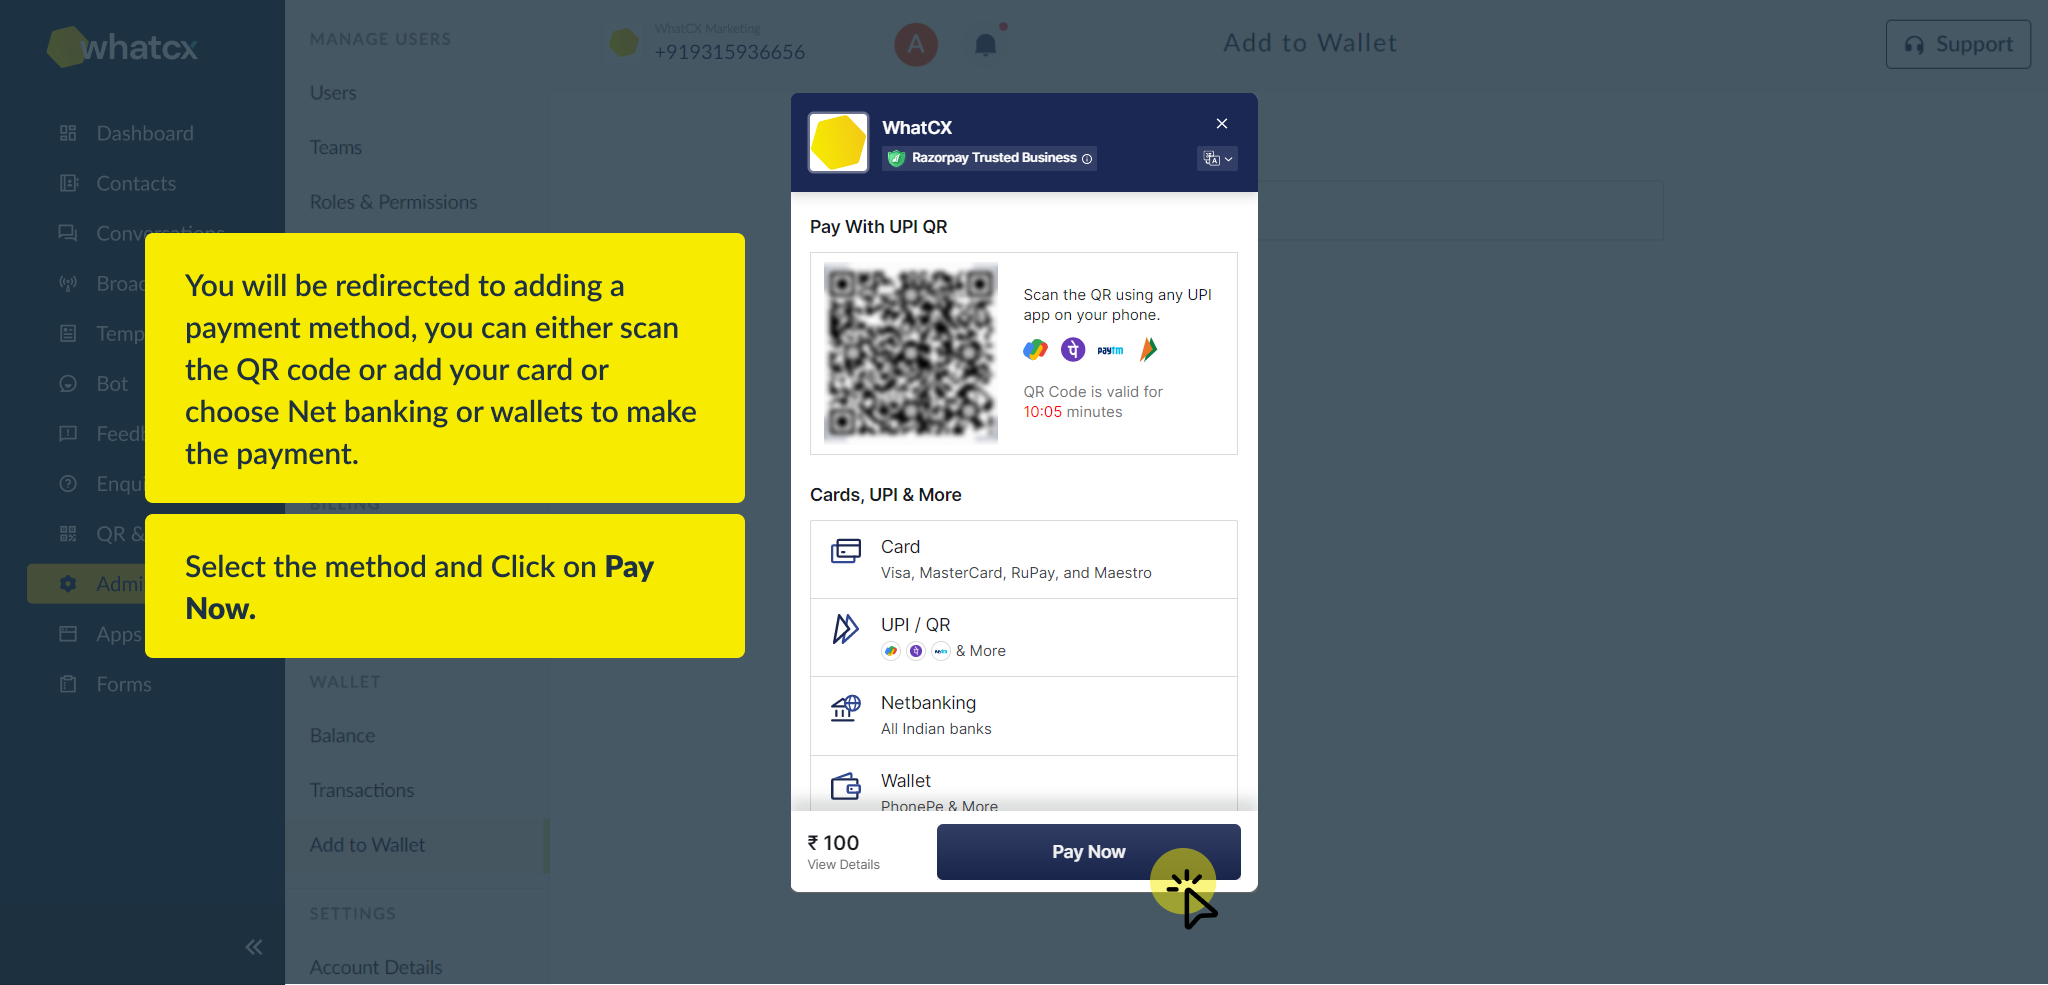
5. Select the method and Click on Pay Now.
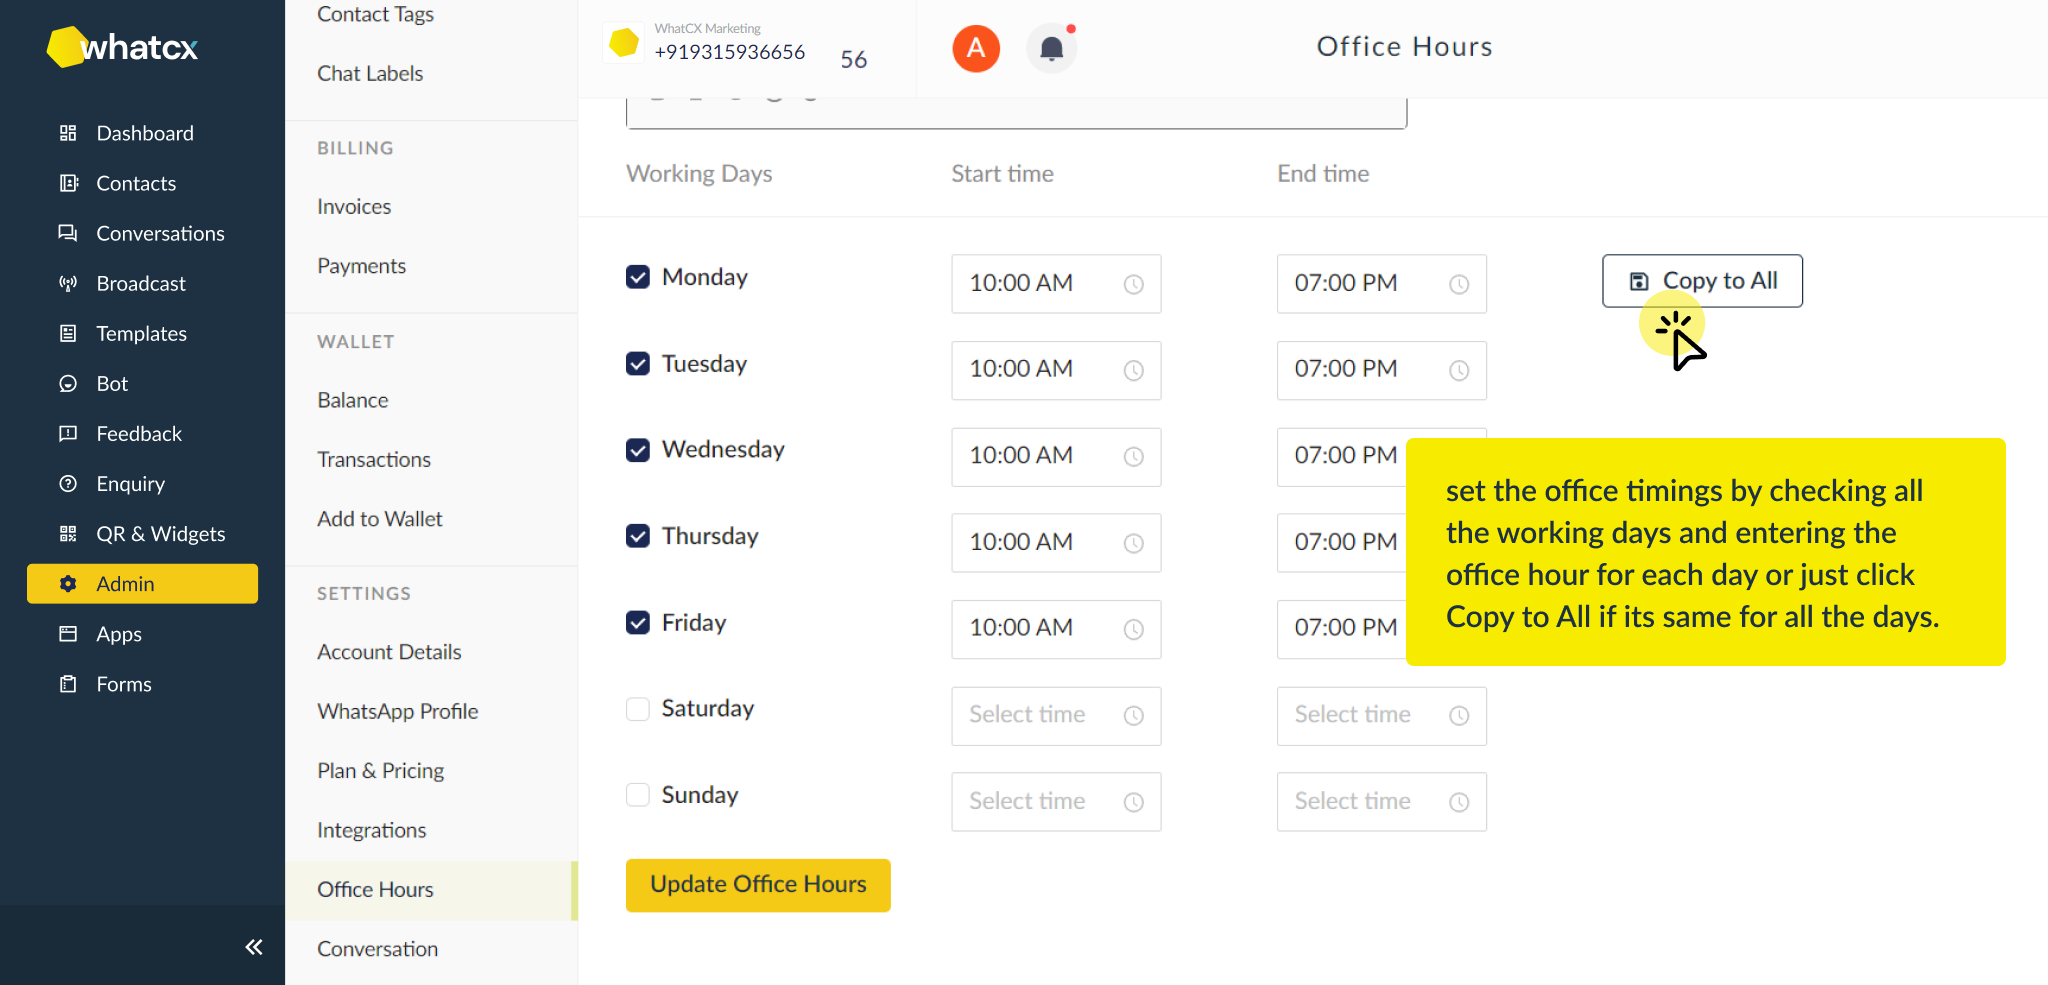
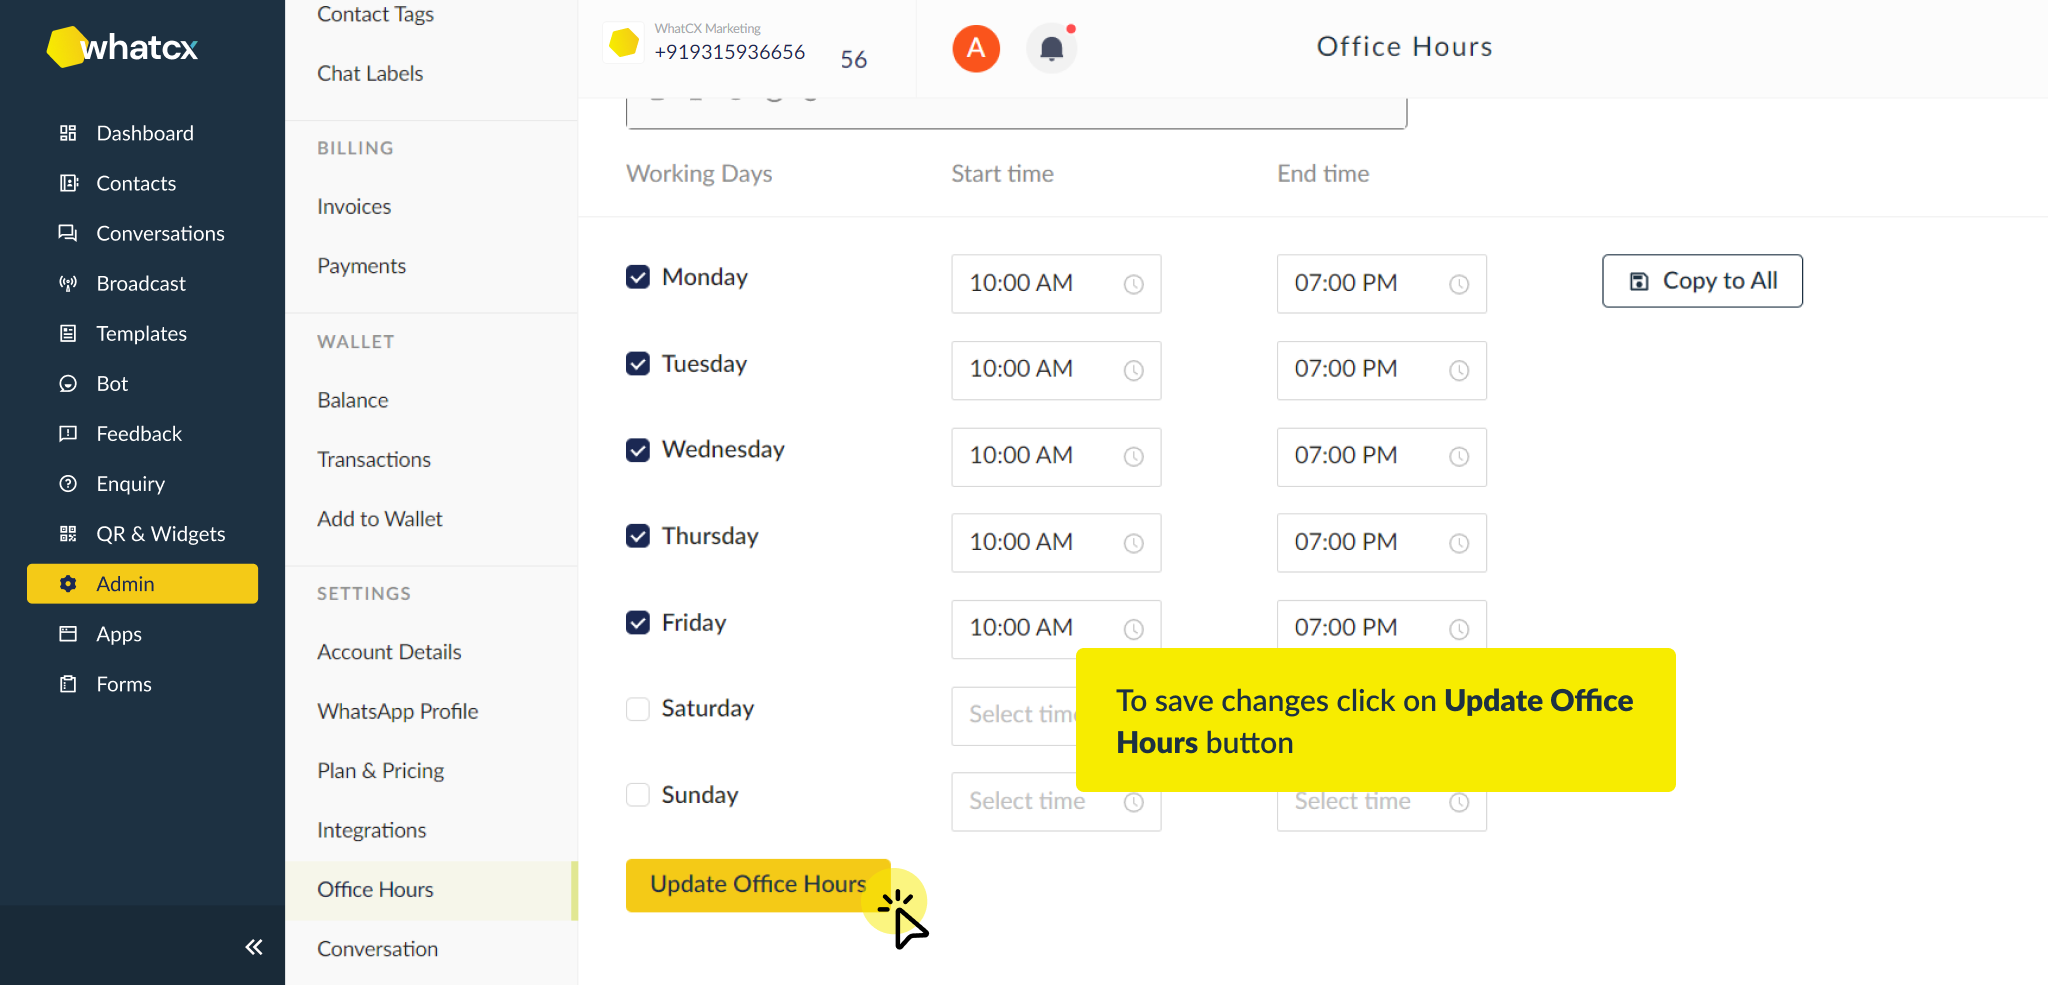
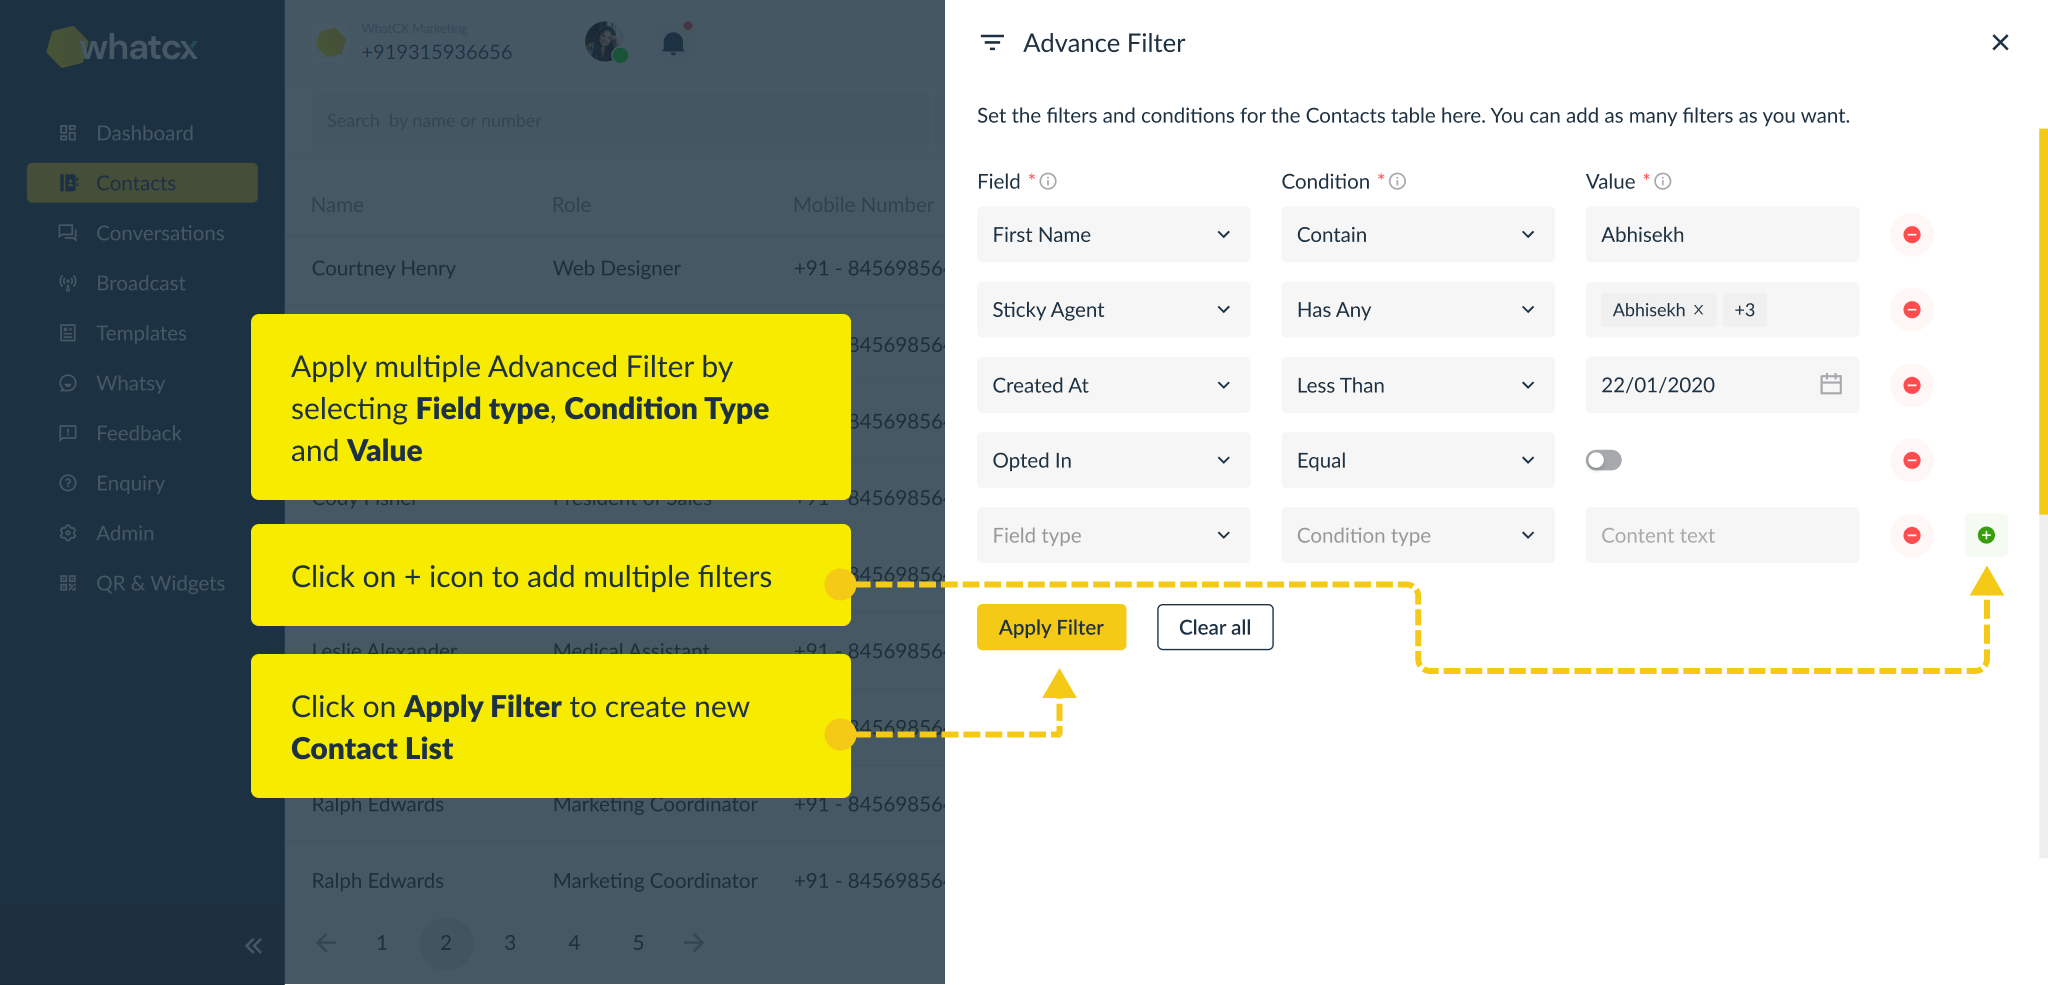
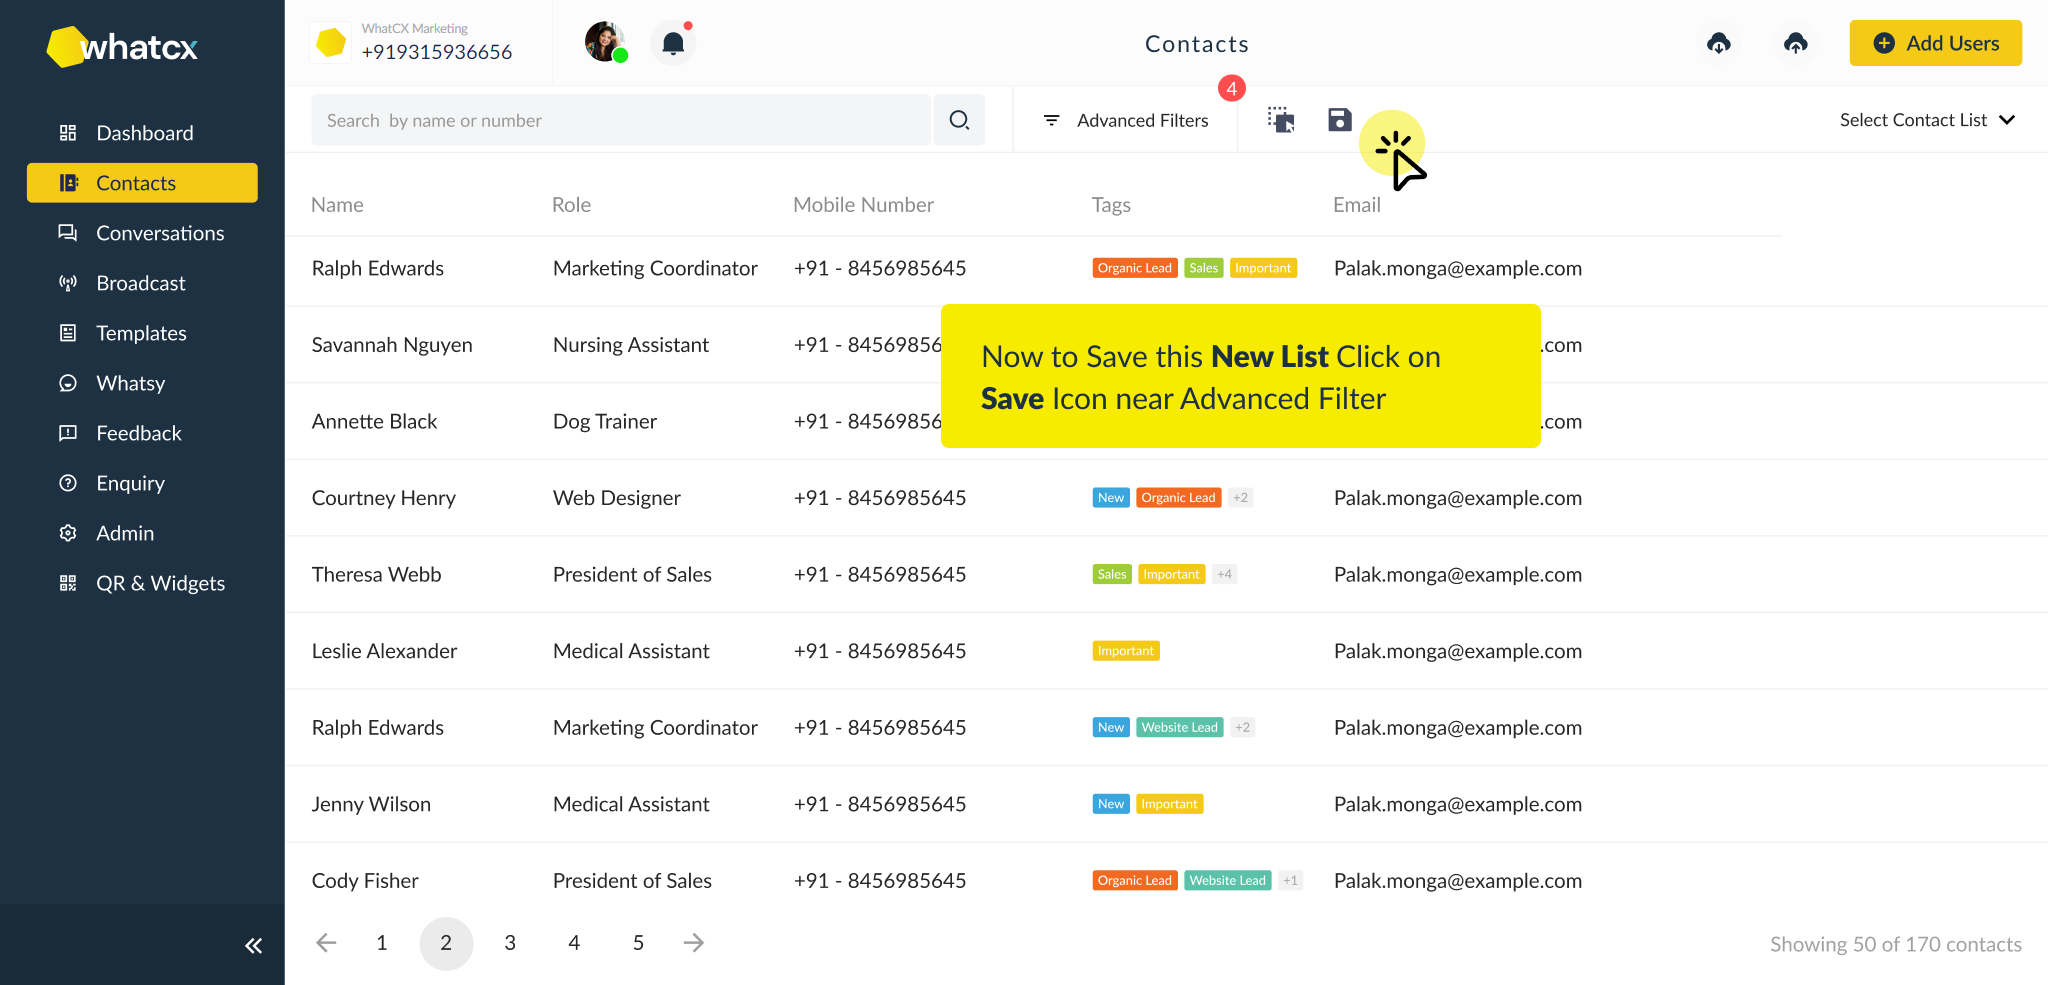
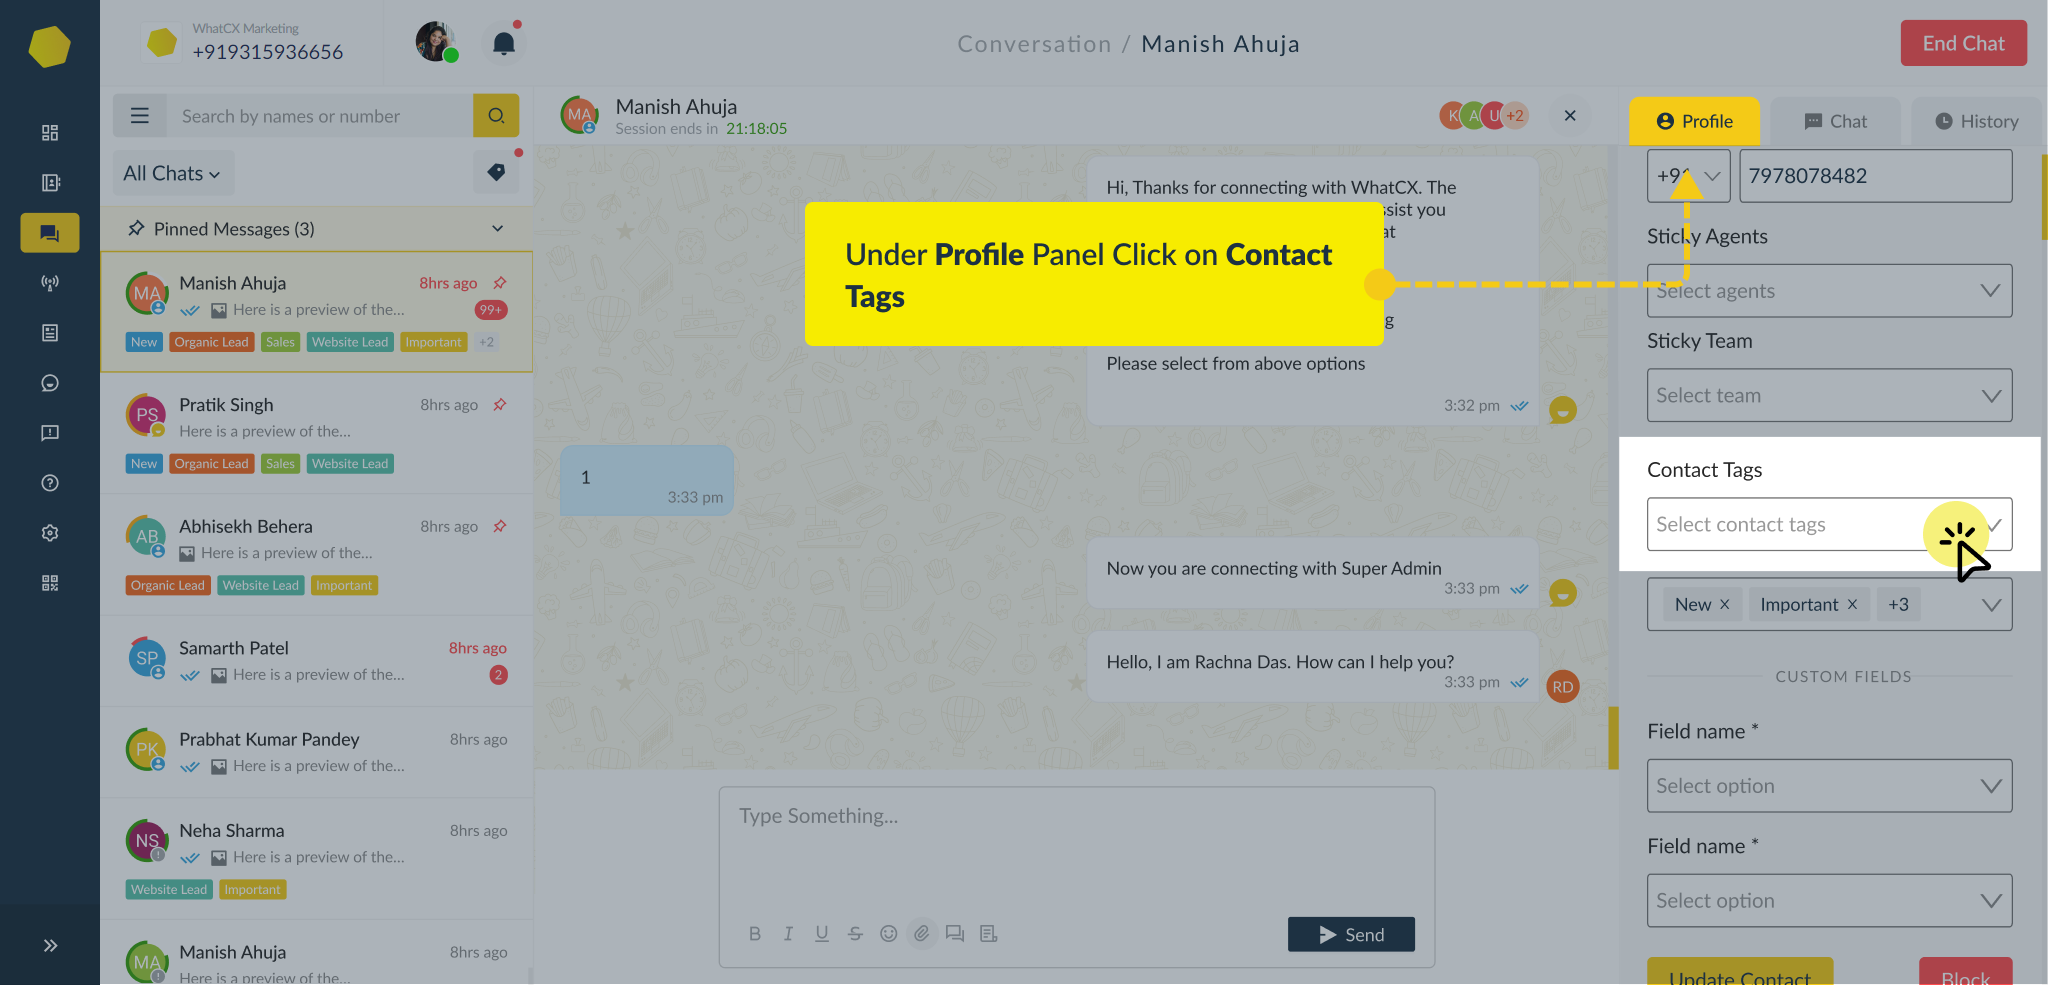
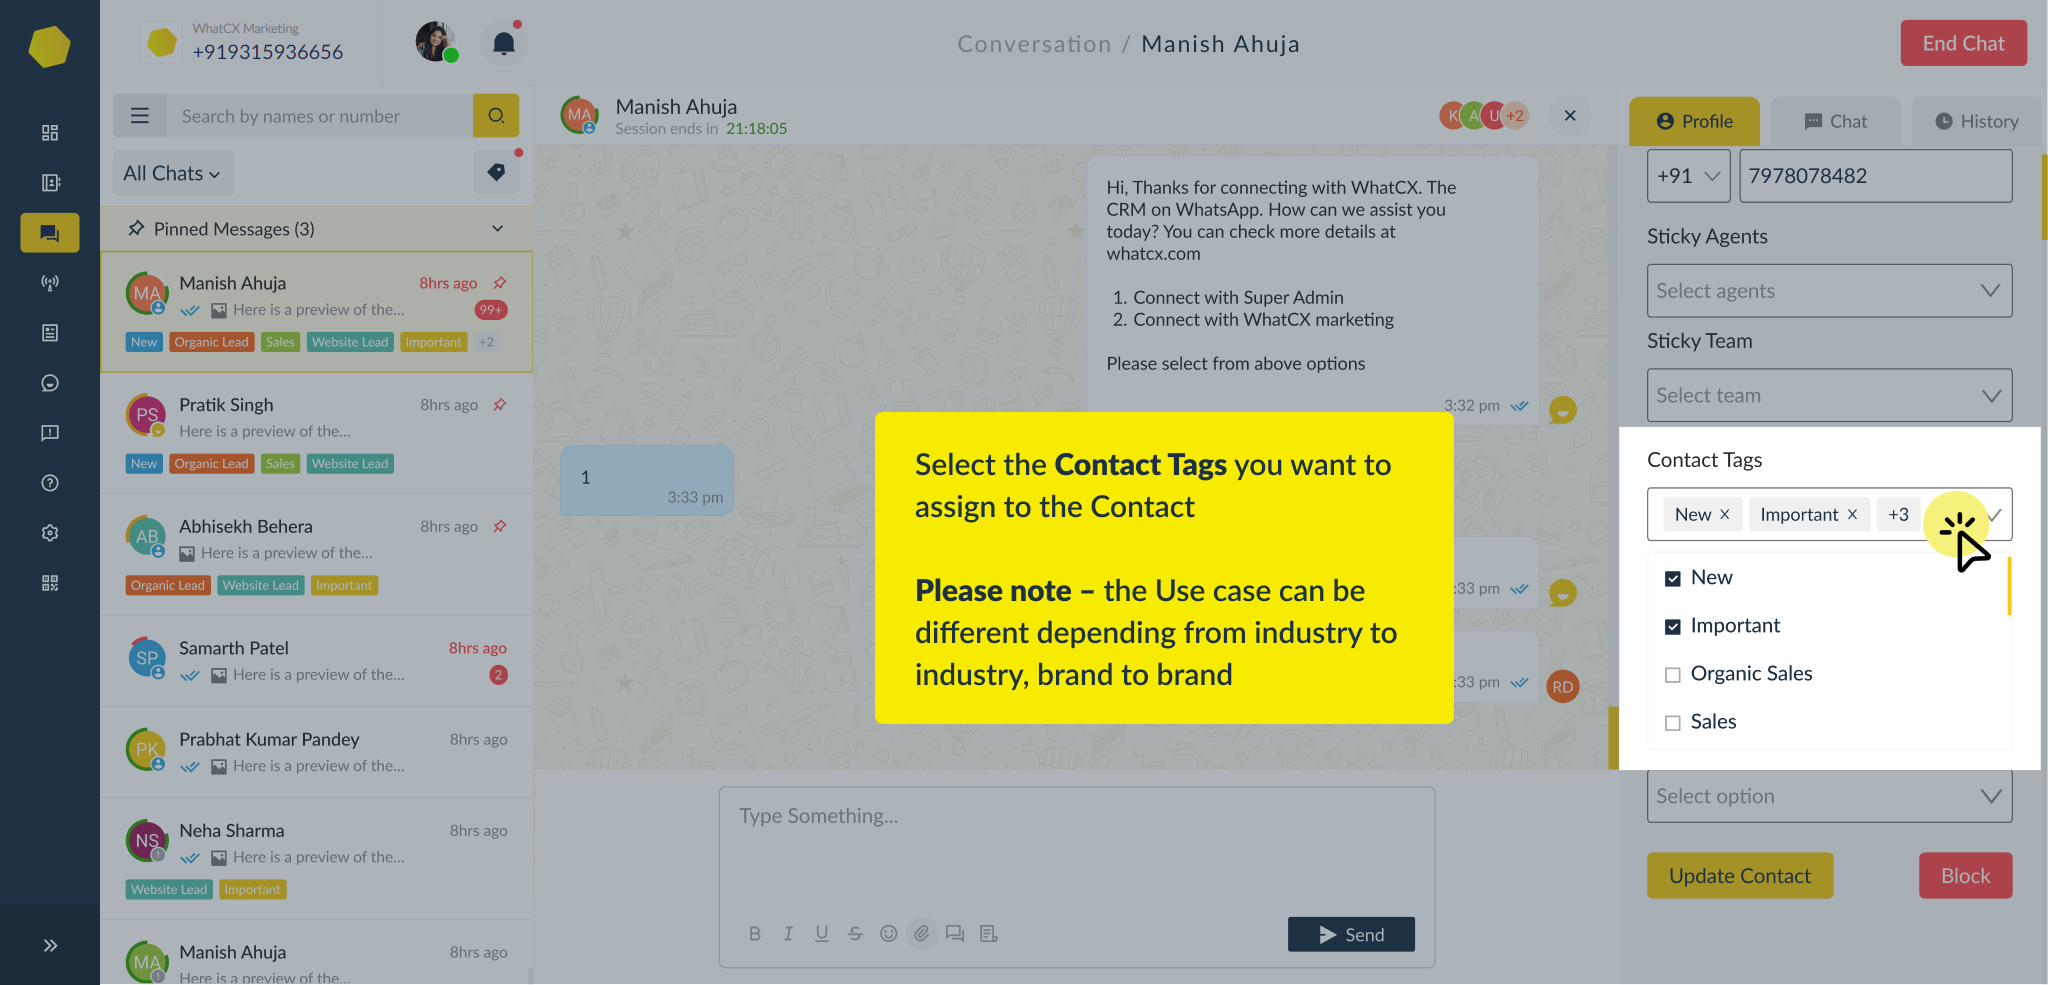
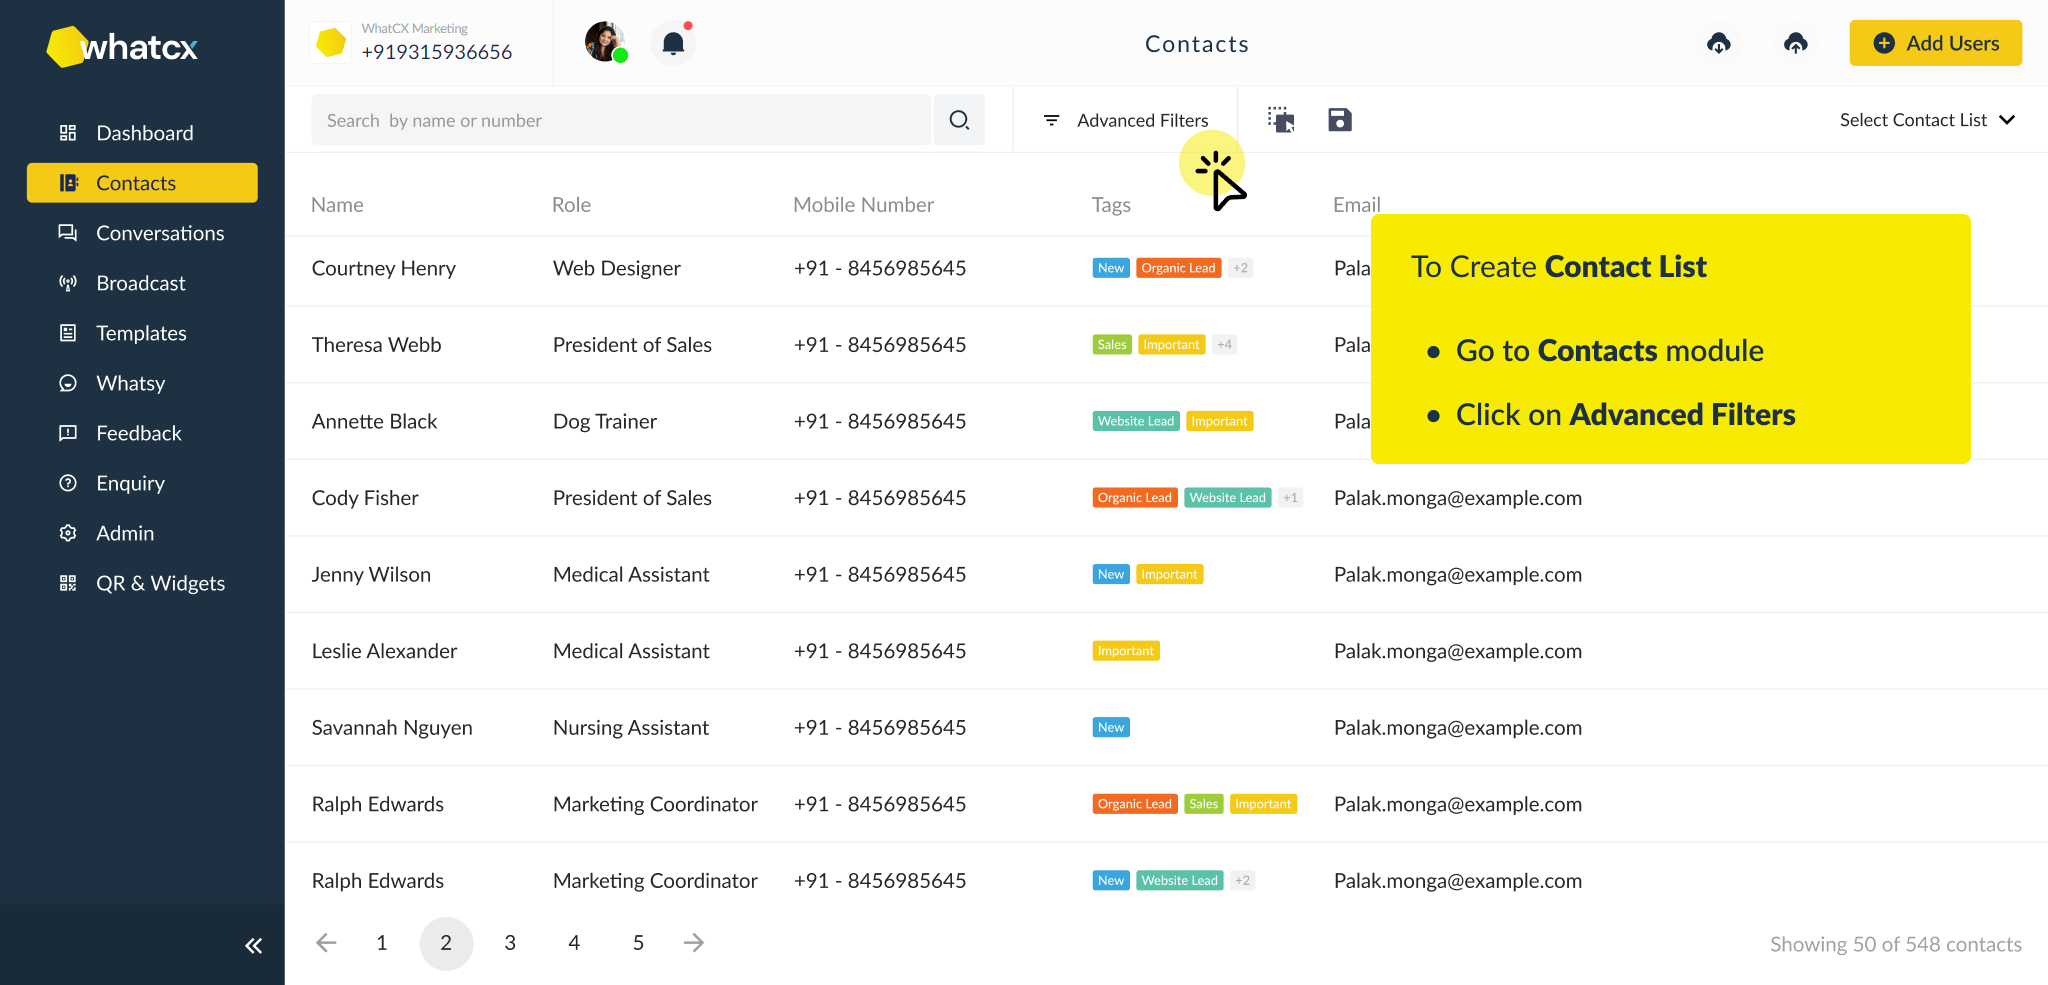
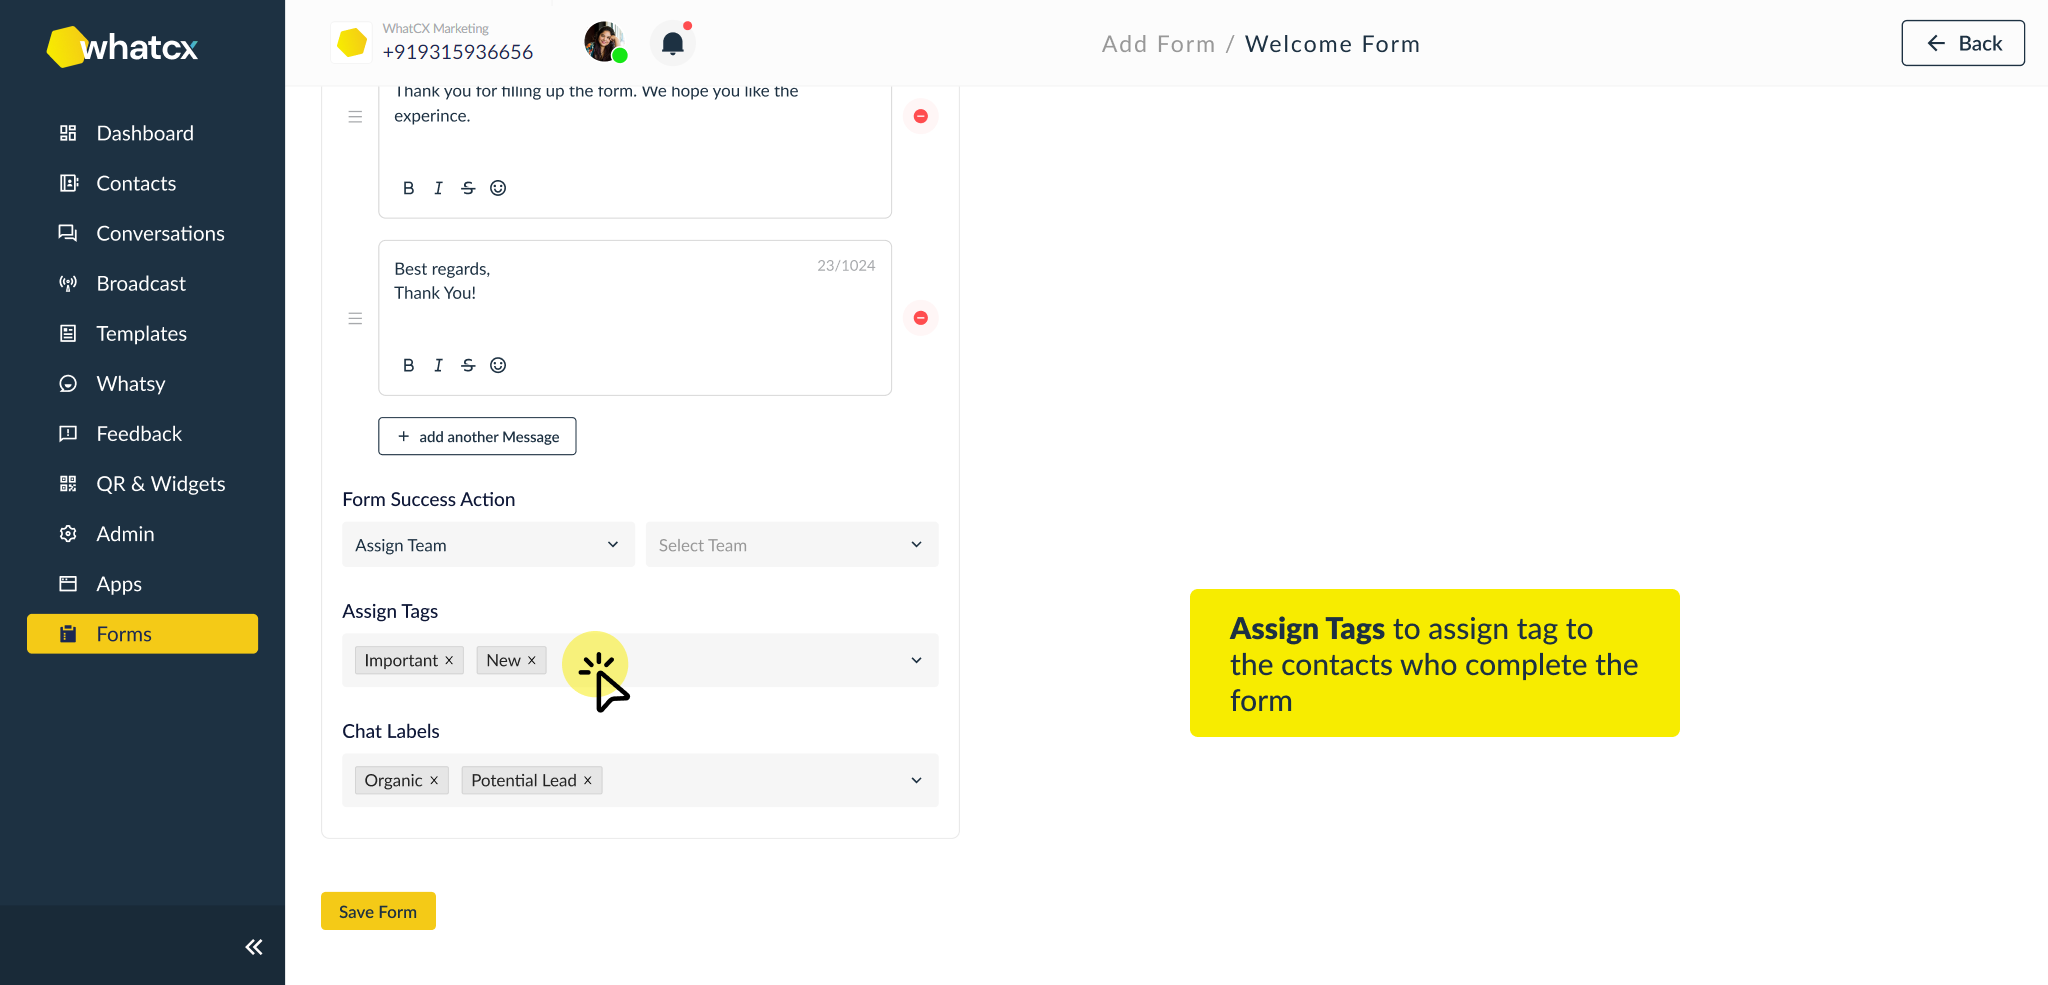
Setup Contact Tags & Custom Fields
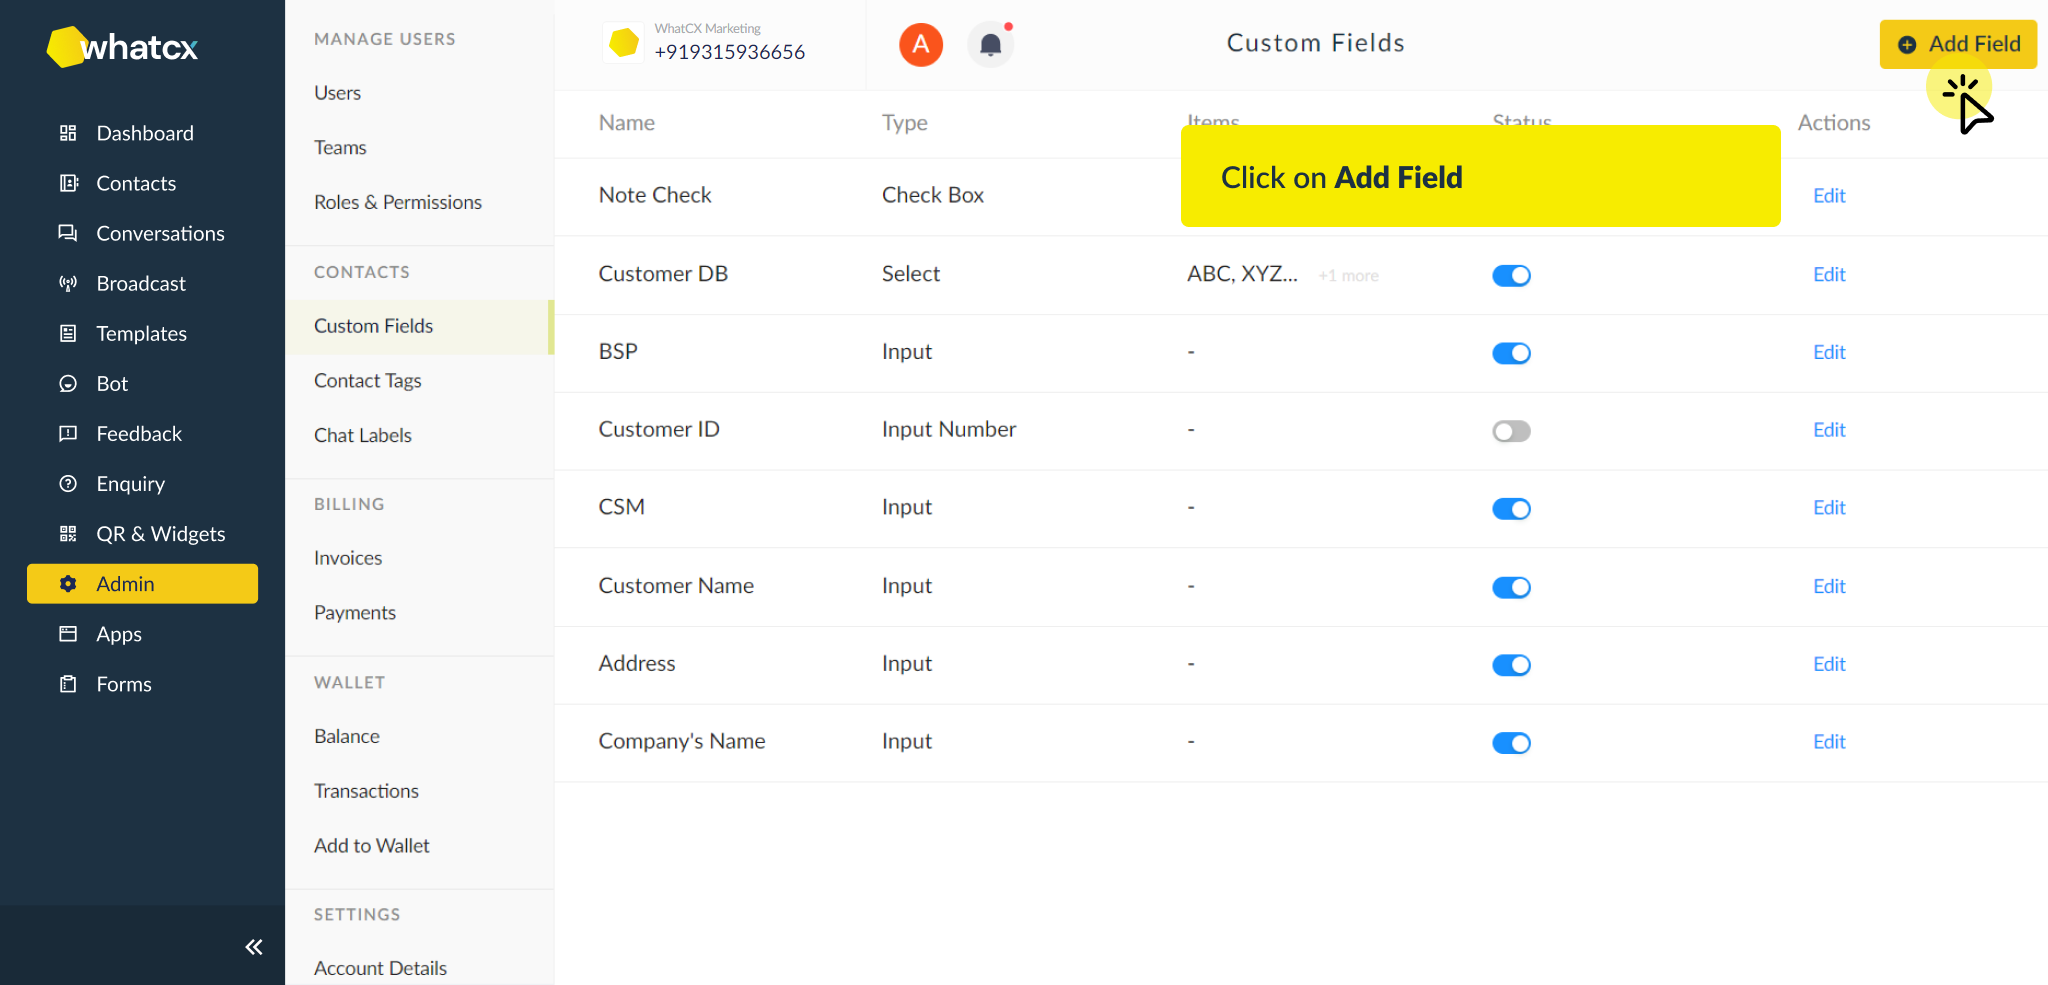
1. Login to WhatCX and click on Admin in the left panel
2. Under Contacts, you will find the option Contacts Tags.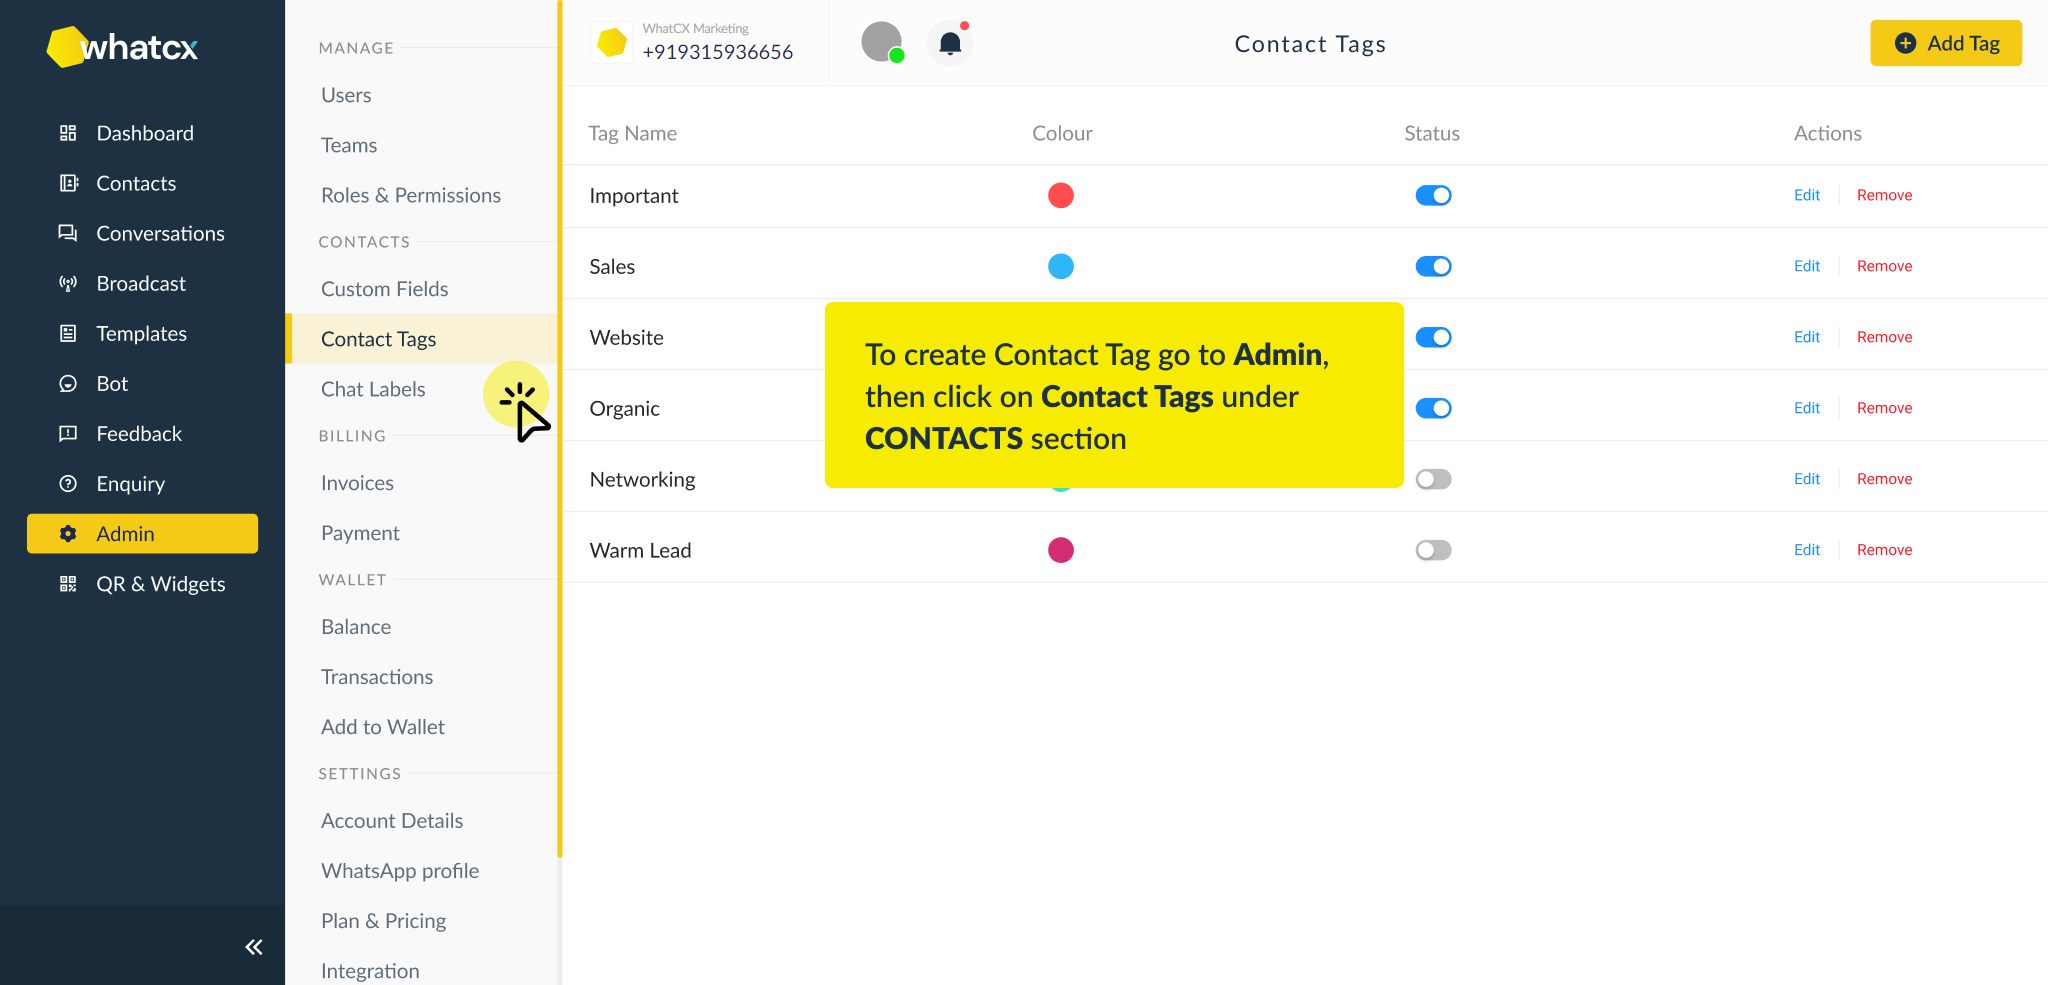
3. Click on Add Tags, Give your Tag a Title. It could be anything depending on your business needs. You can choose the Tag colour by clicking on ‘Color’ and then Click ‘Create Tag’.
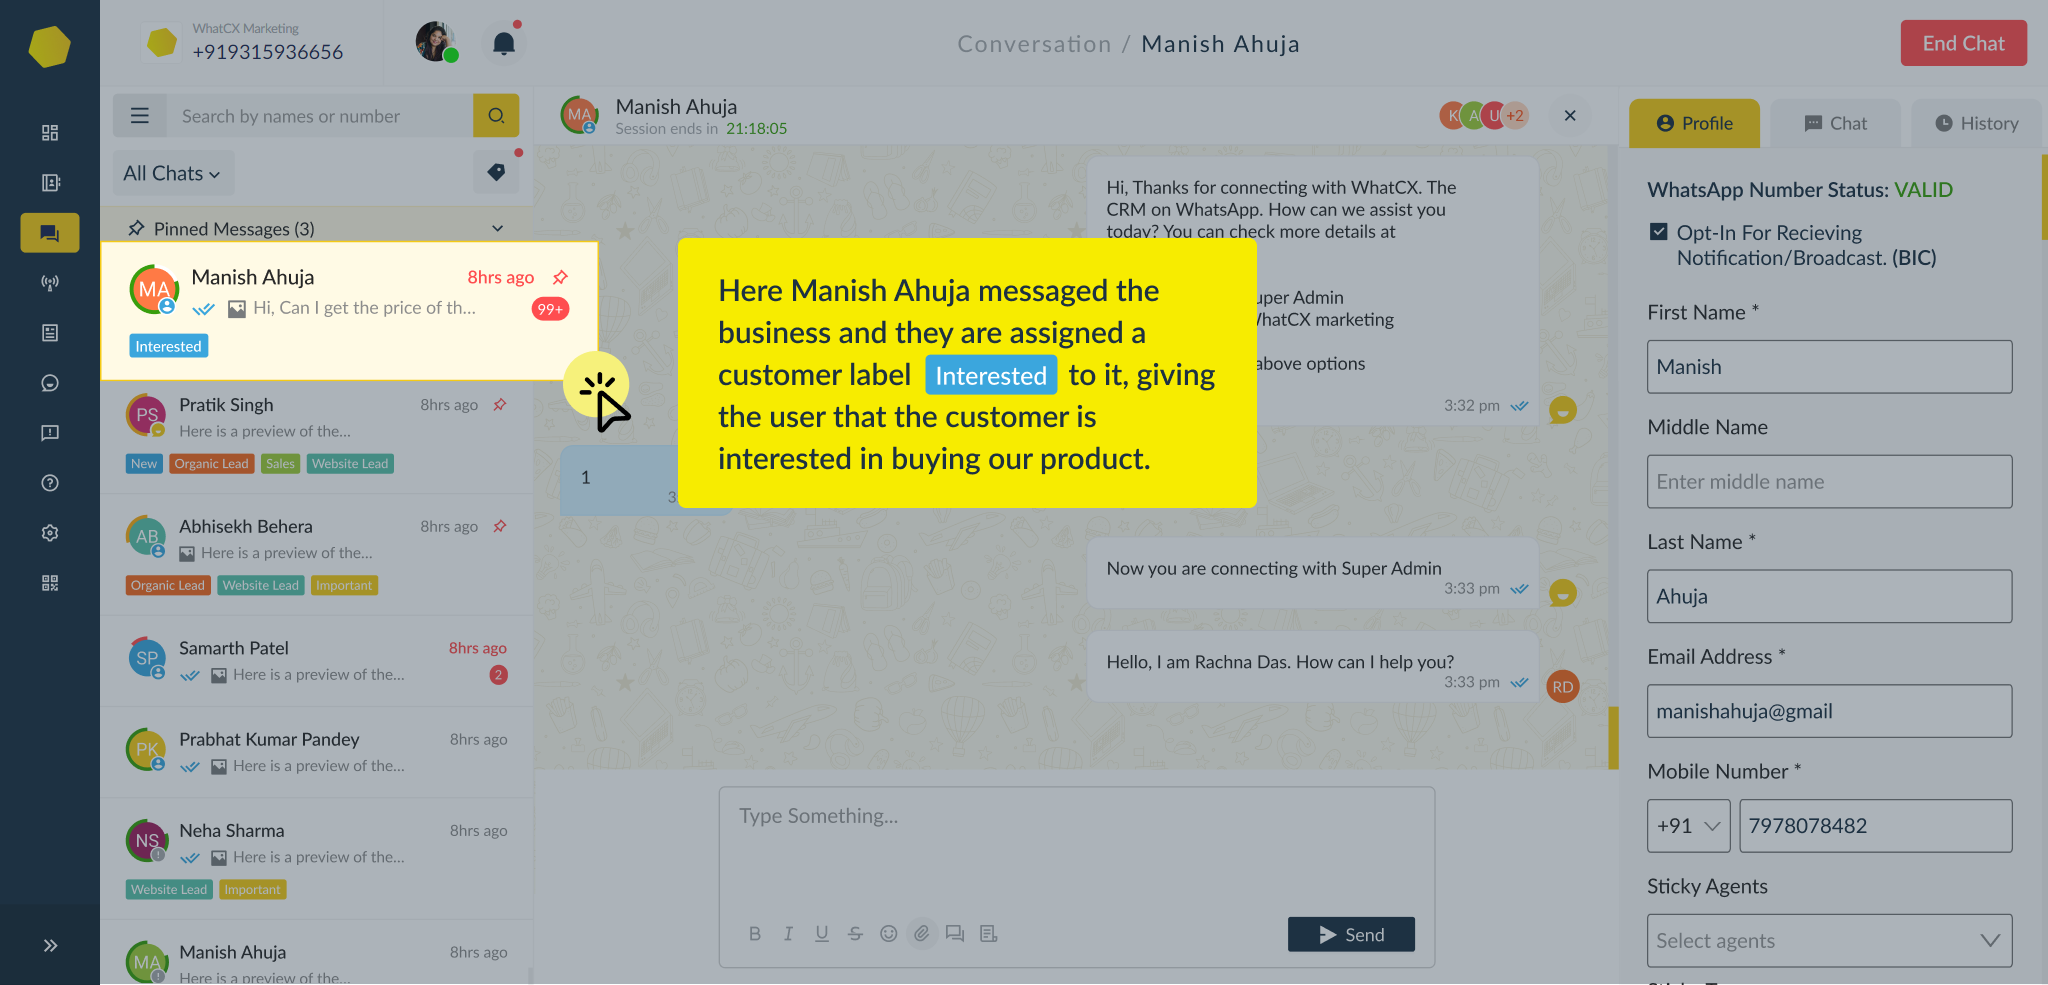
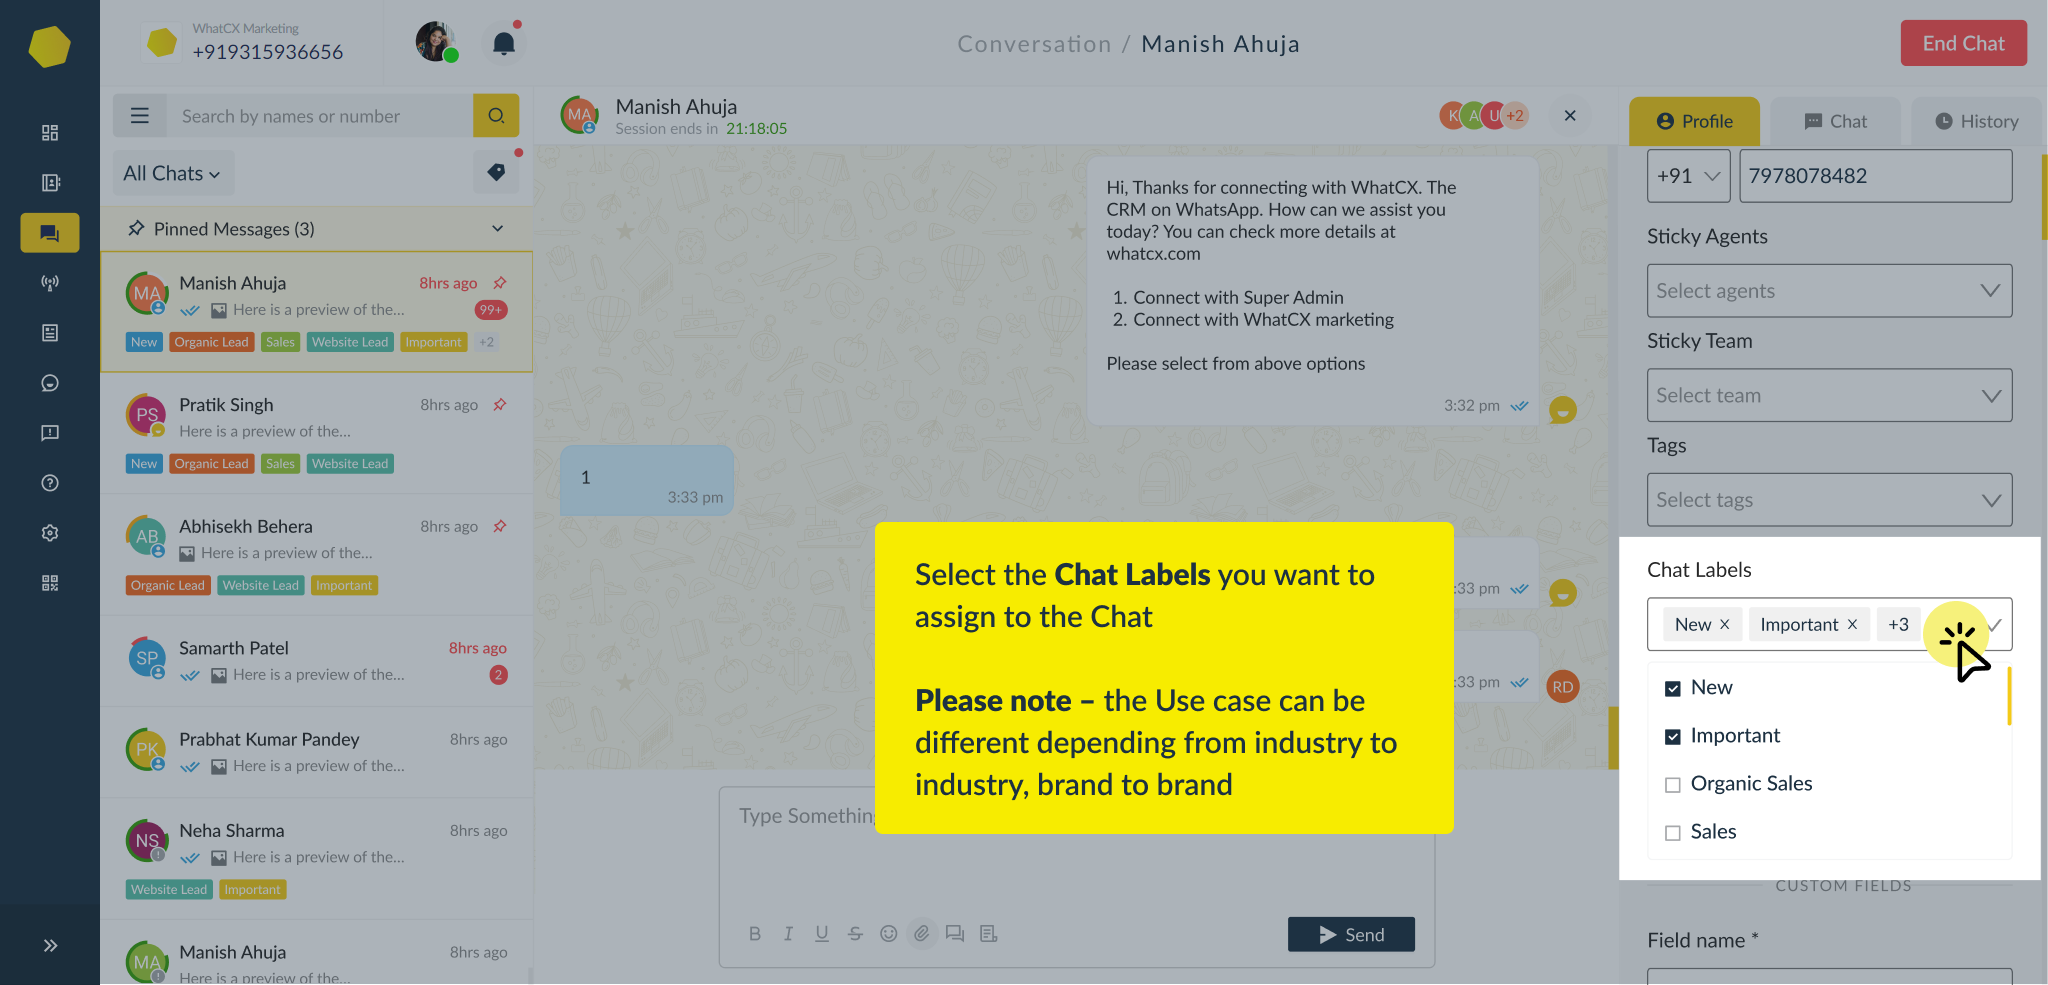
Once you click on Create Tag and proceed to conversations. You can use the Chat Labels to distinguish between your conversations by priority, lead quality etc. 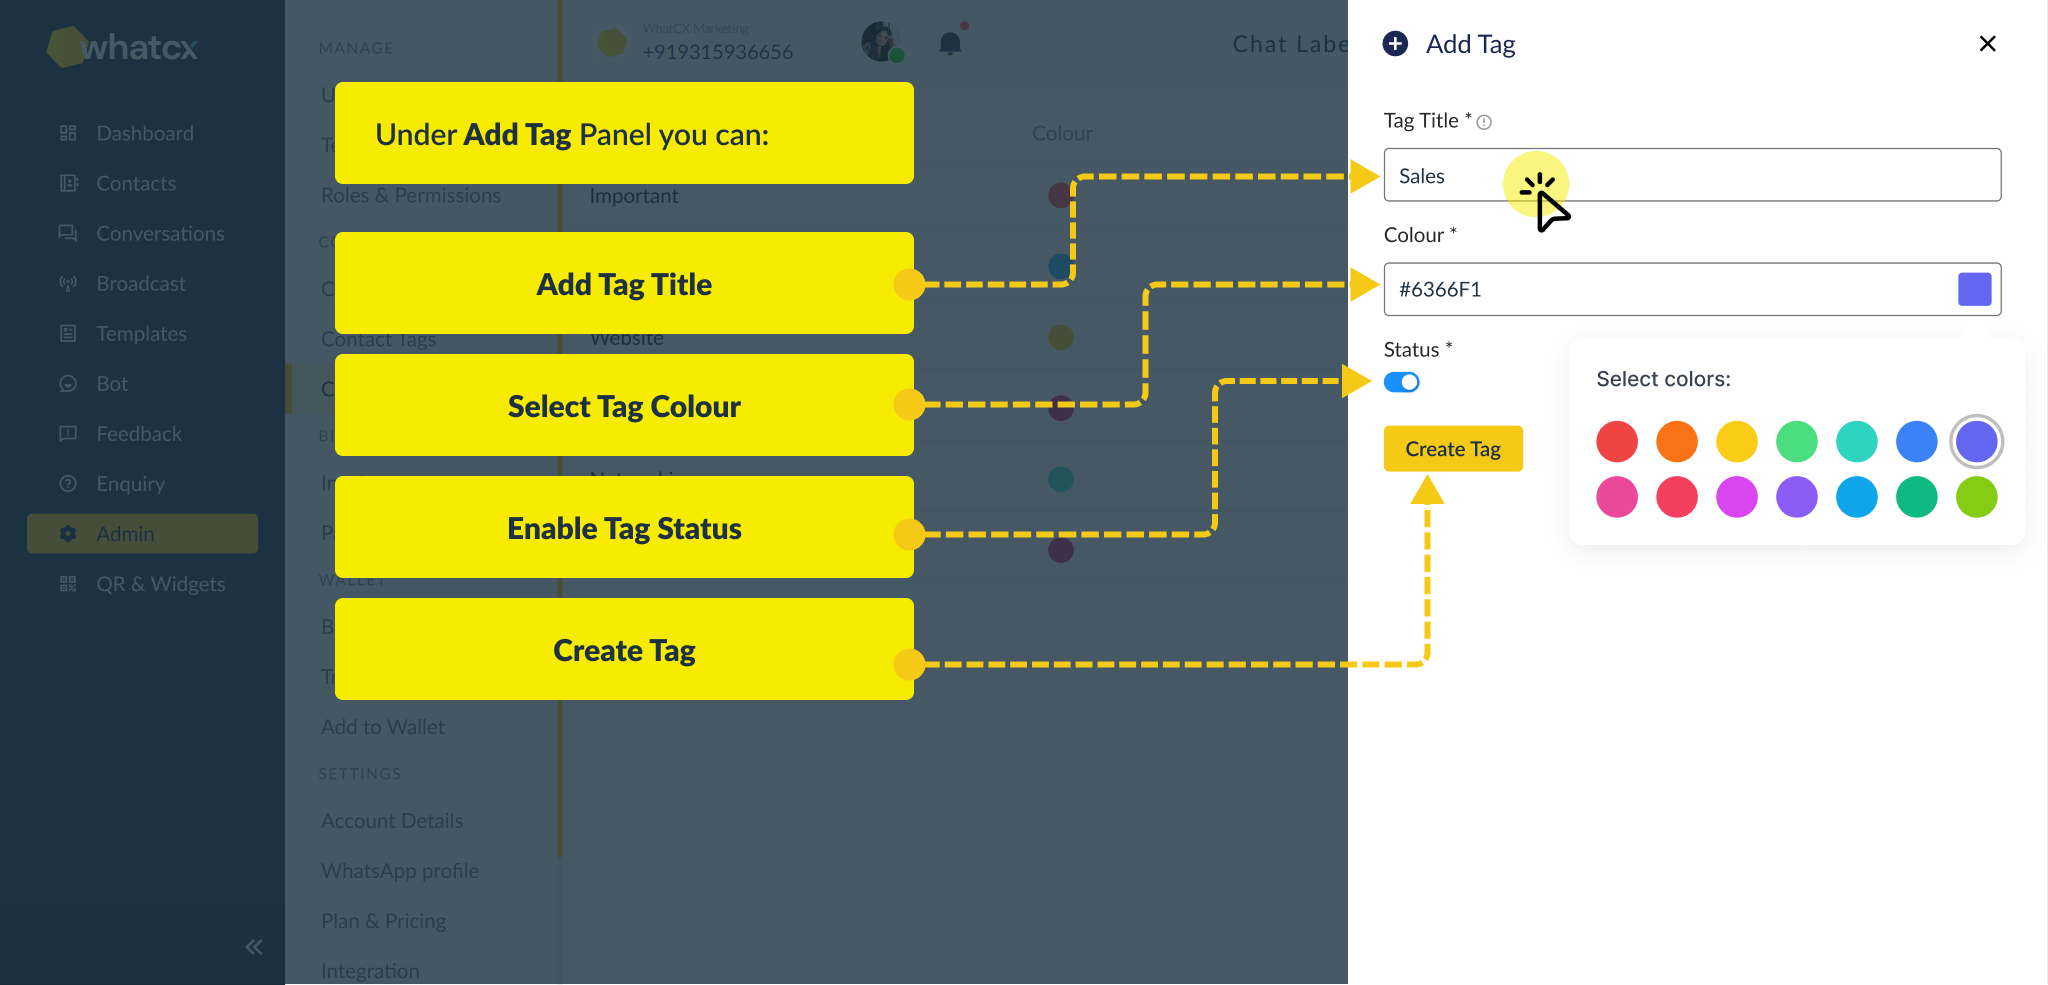
1. Login to WhatCX and click on Admin in the left panel.
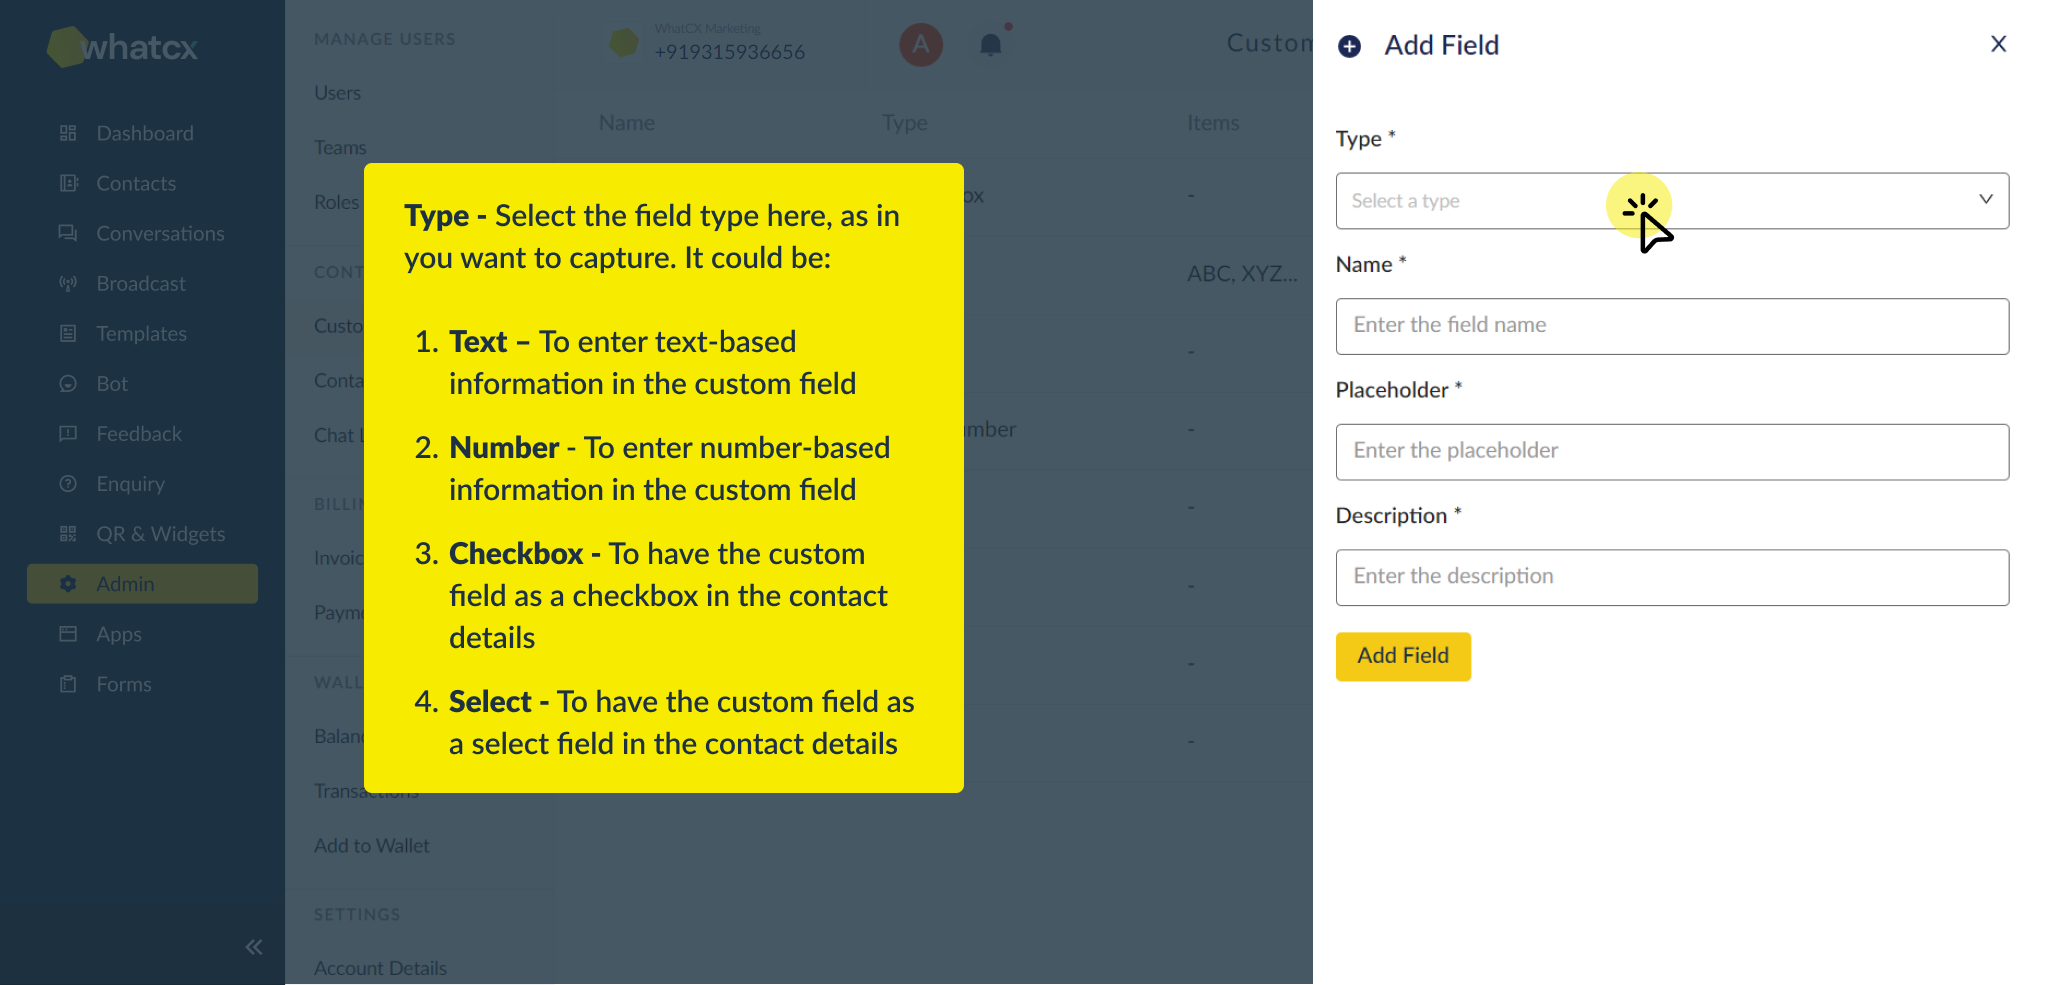
2. Under Contacts, click on Custom Fields > Add Field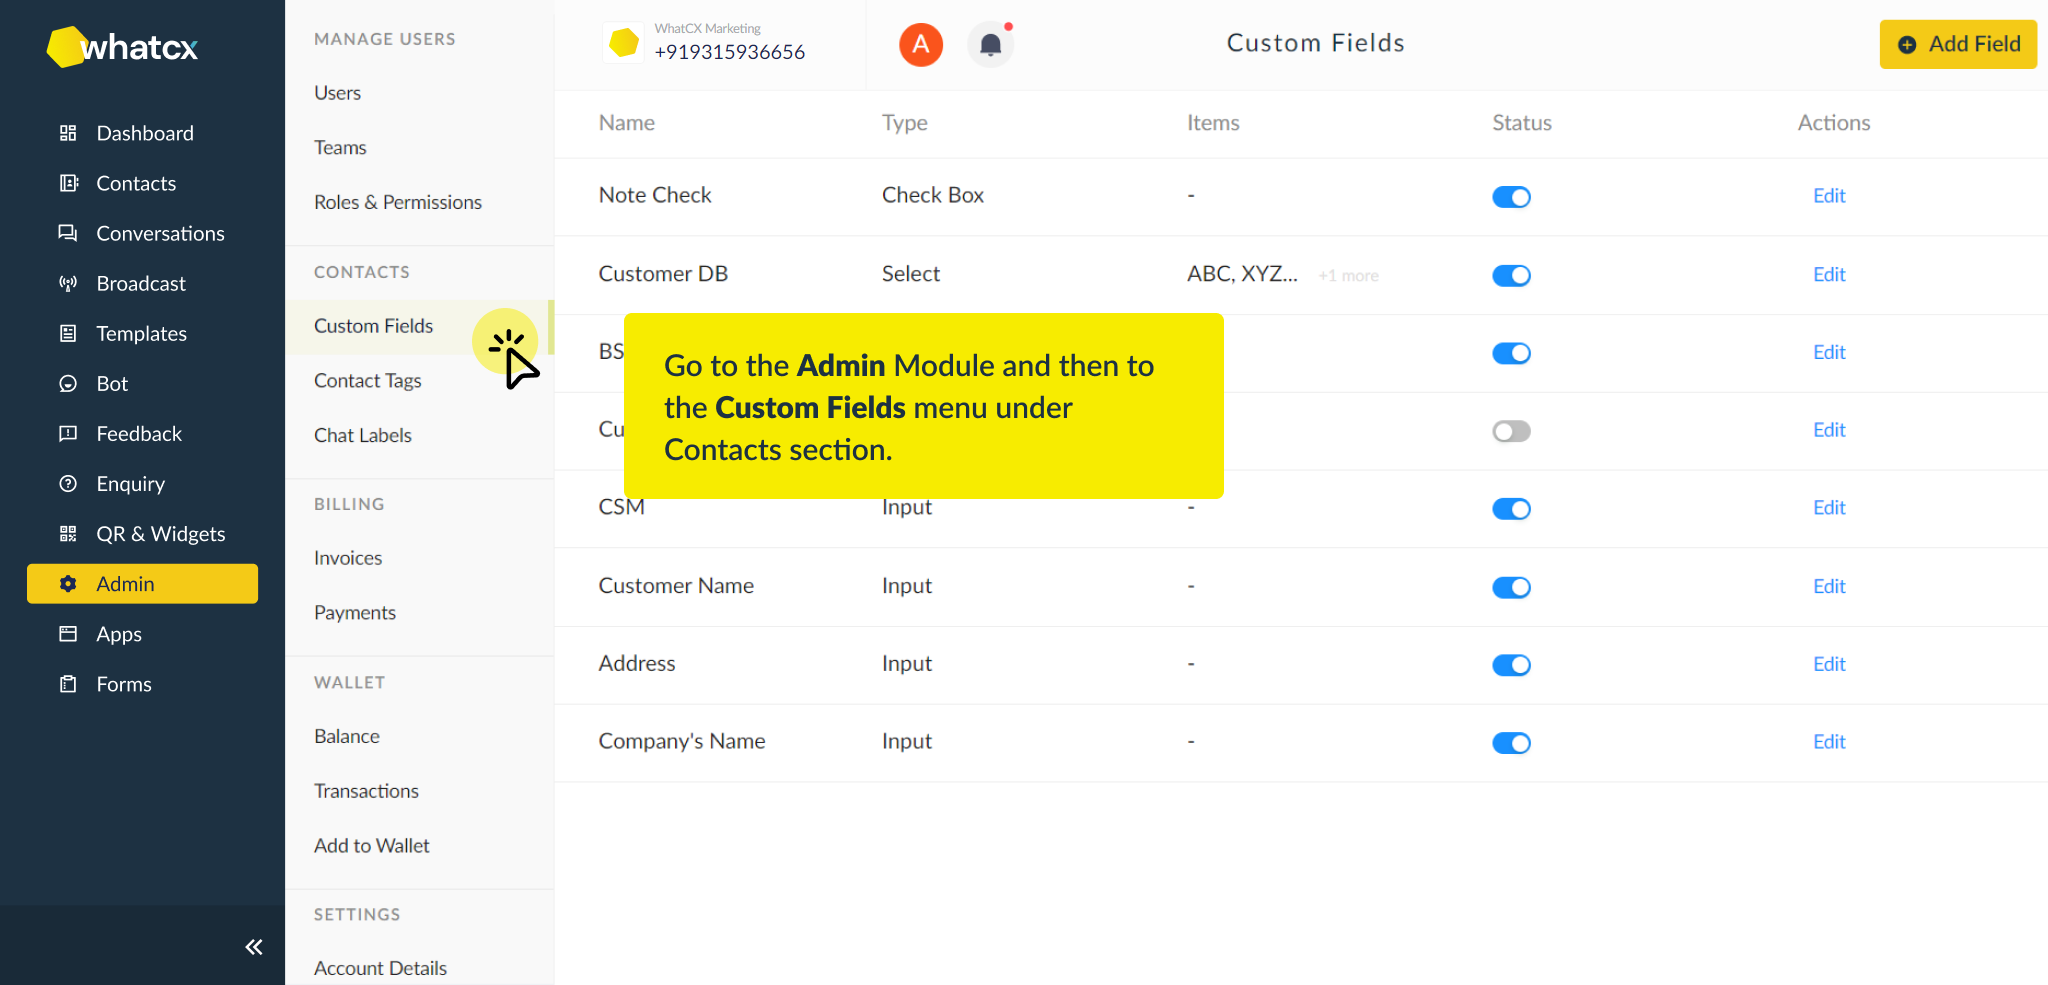
a). Type – Select the field type here, as in you want to capture. It could be:
- Text – To enter text-based information in the custom field
- Number – To enter number-based information in the custom field
- Checkbox – To have the custom field as a checkbox in the contact details
- Select – To have the custom field as a select field in the contact details
b) Name – Enter the desired name of the Custom Field.
c) Placeholder – Enter the desired name of the placeholder you want to put.
d) Description – Enter the desired description for the custom field.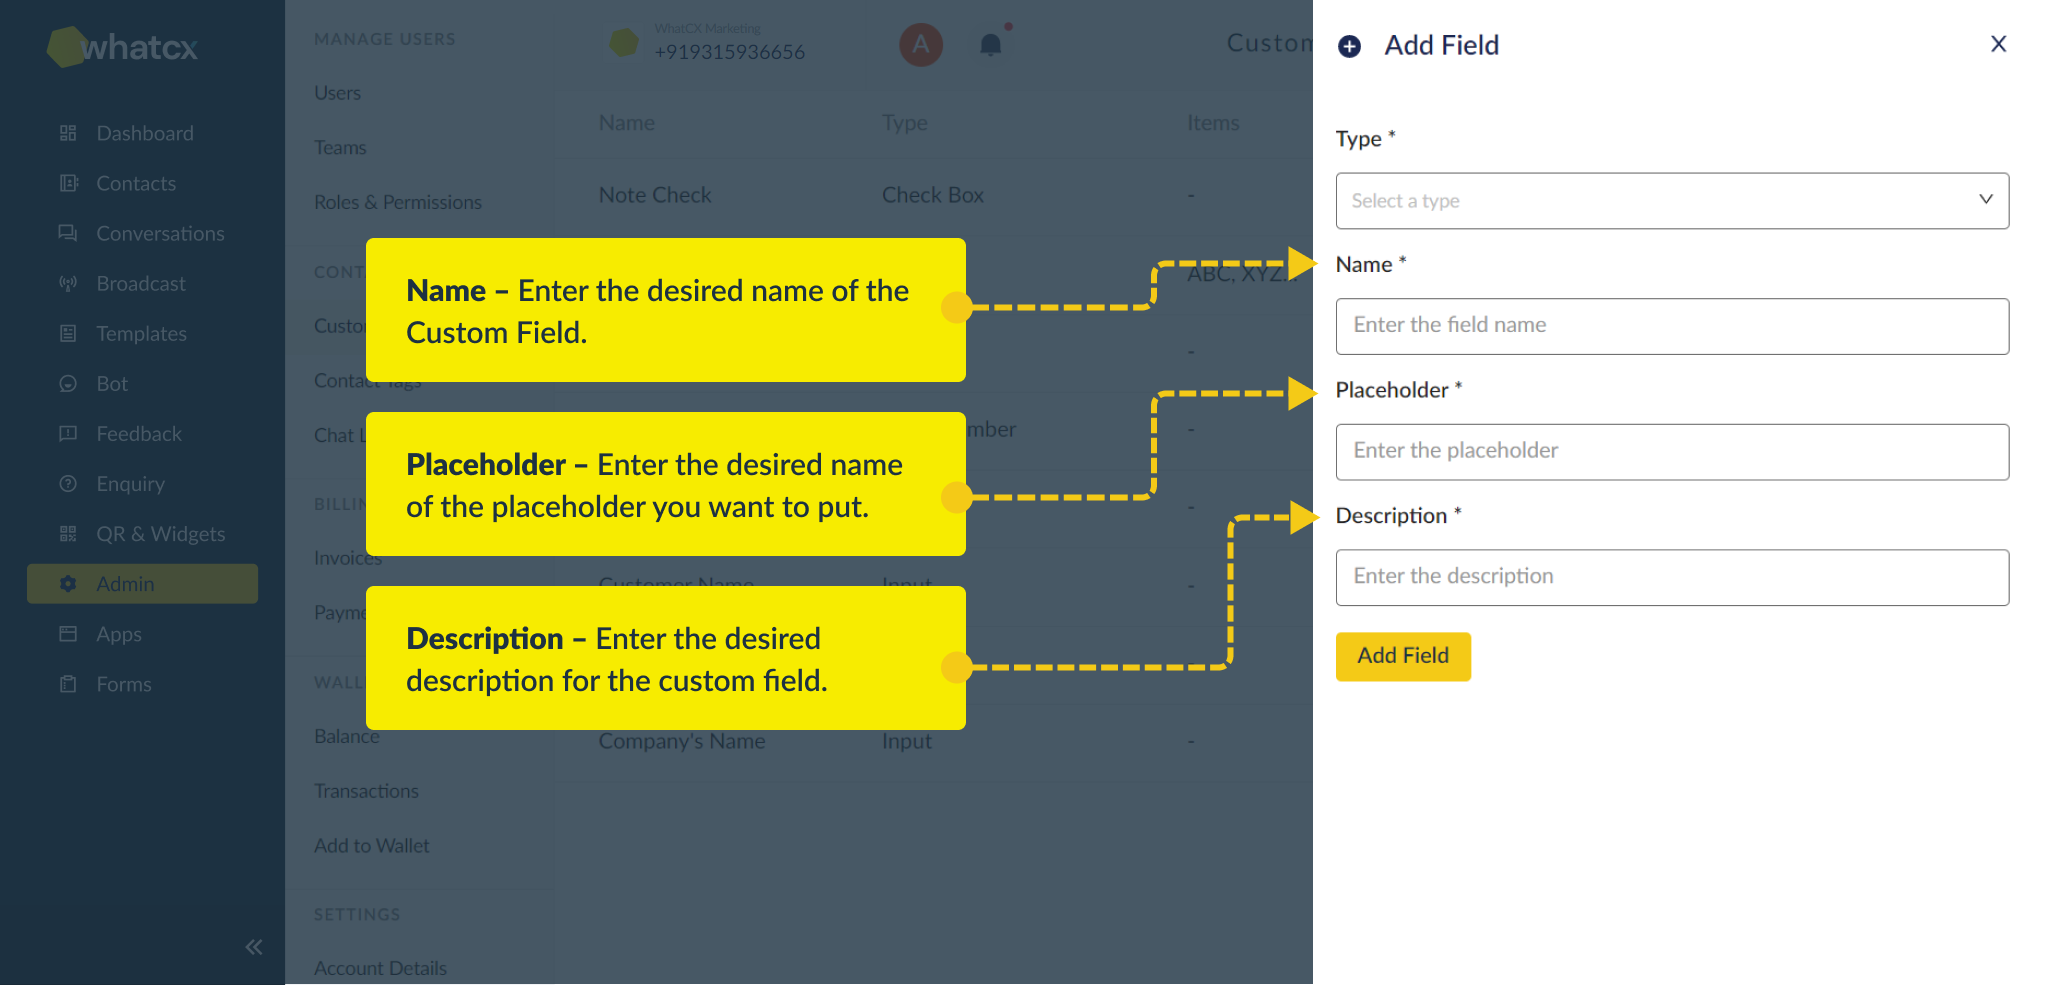
3. Click on Add Field and your custom field will be created. 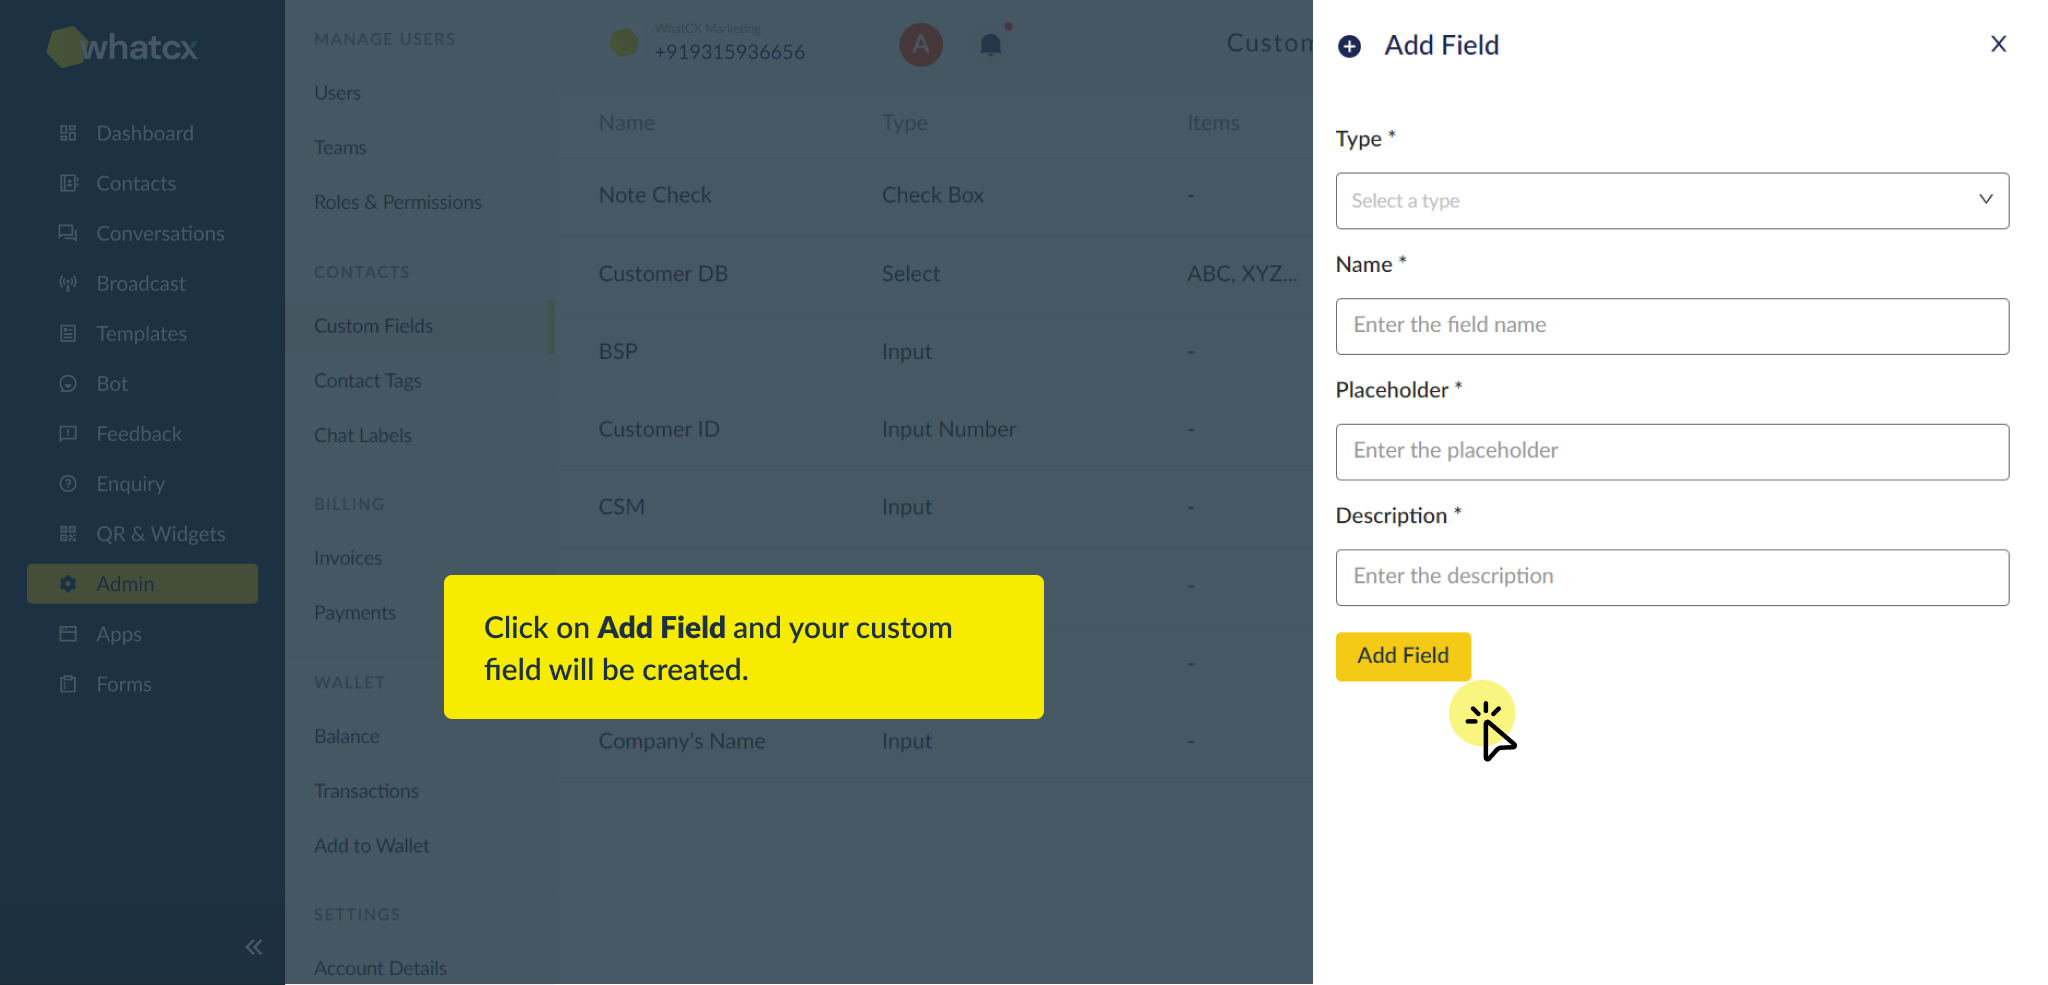
Once done, you can add and use custom field in your contact’s table and conversations pane. Custom Fields can help you sort your contacts and leads in a more arranged manner.
Create & Import Contacts
To create a contact manually, follow the steps –
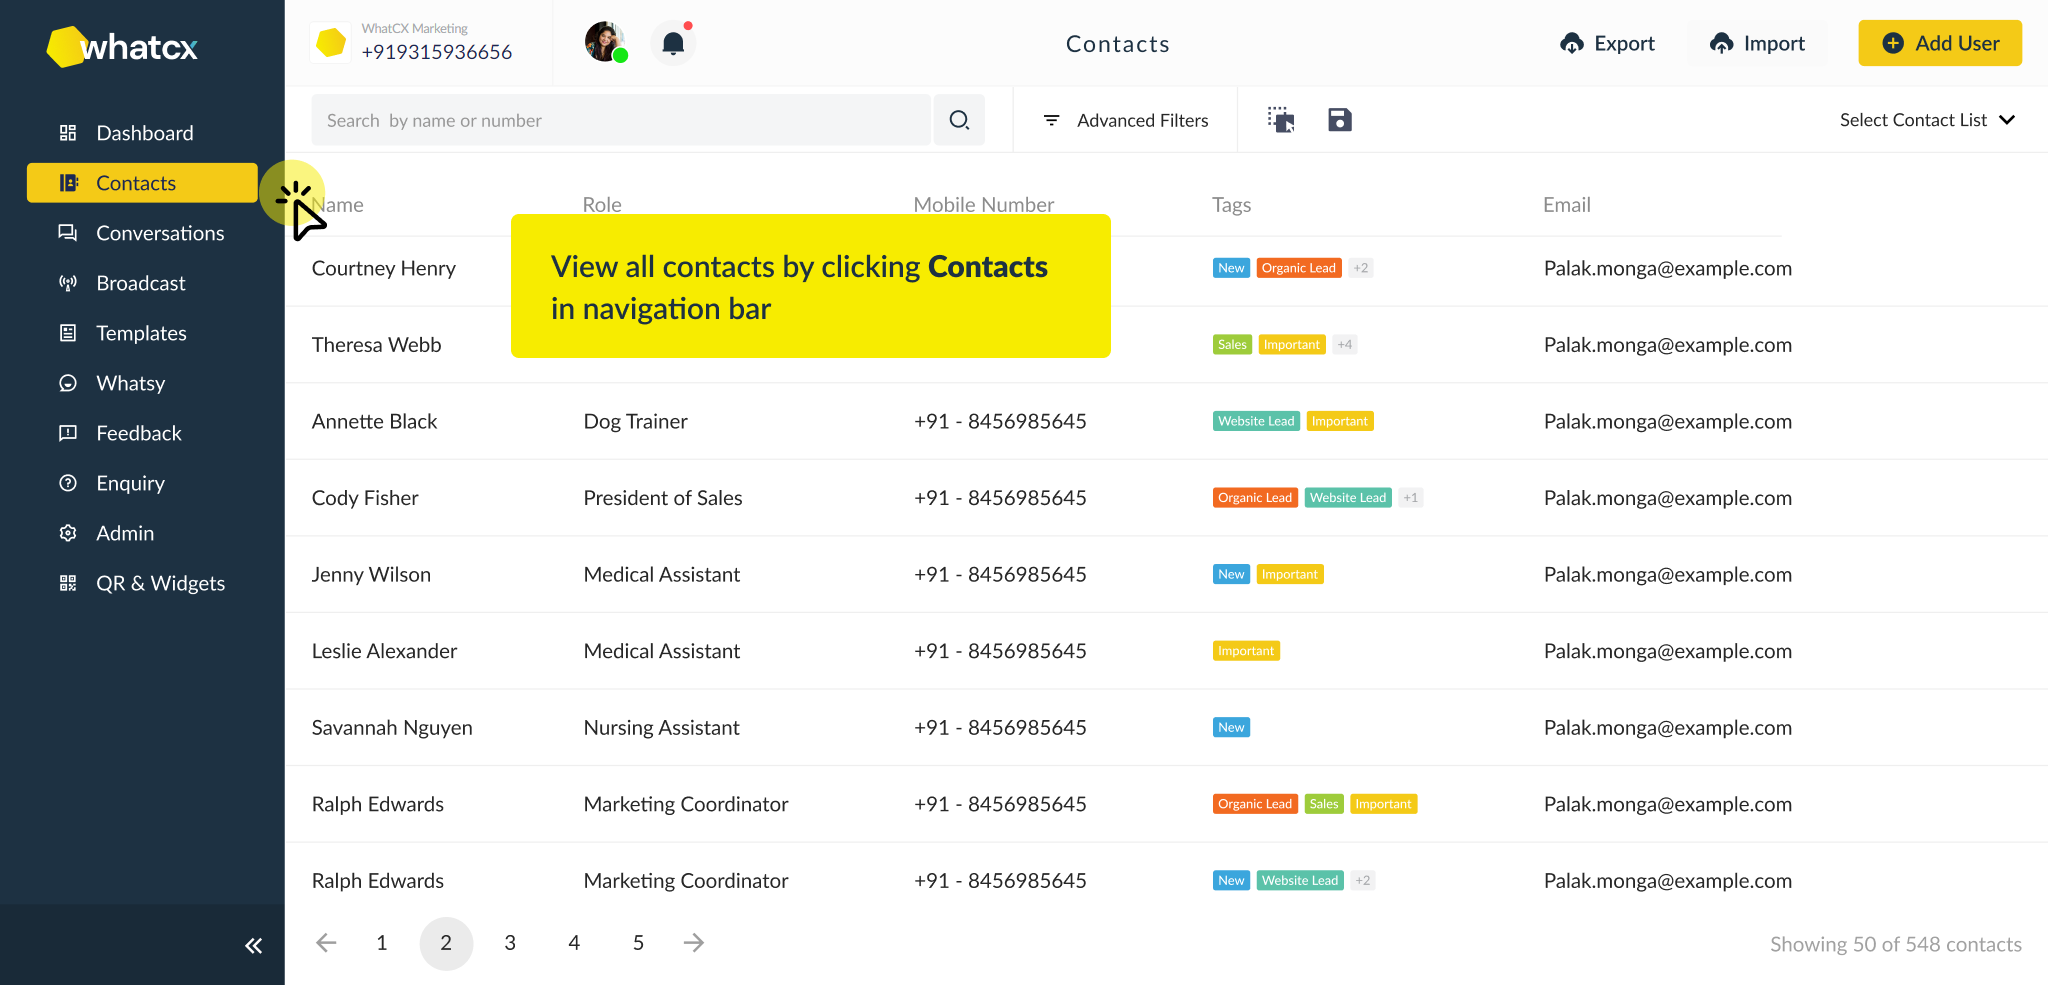
1. Login to WhatCX, and click on the contacts in the left navigation.
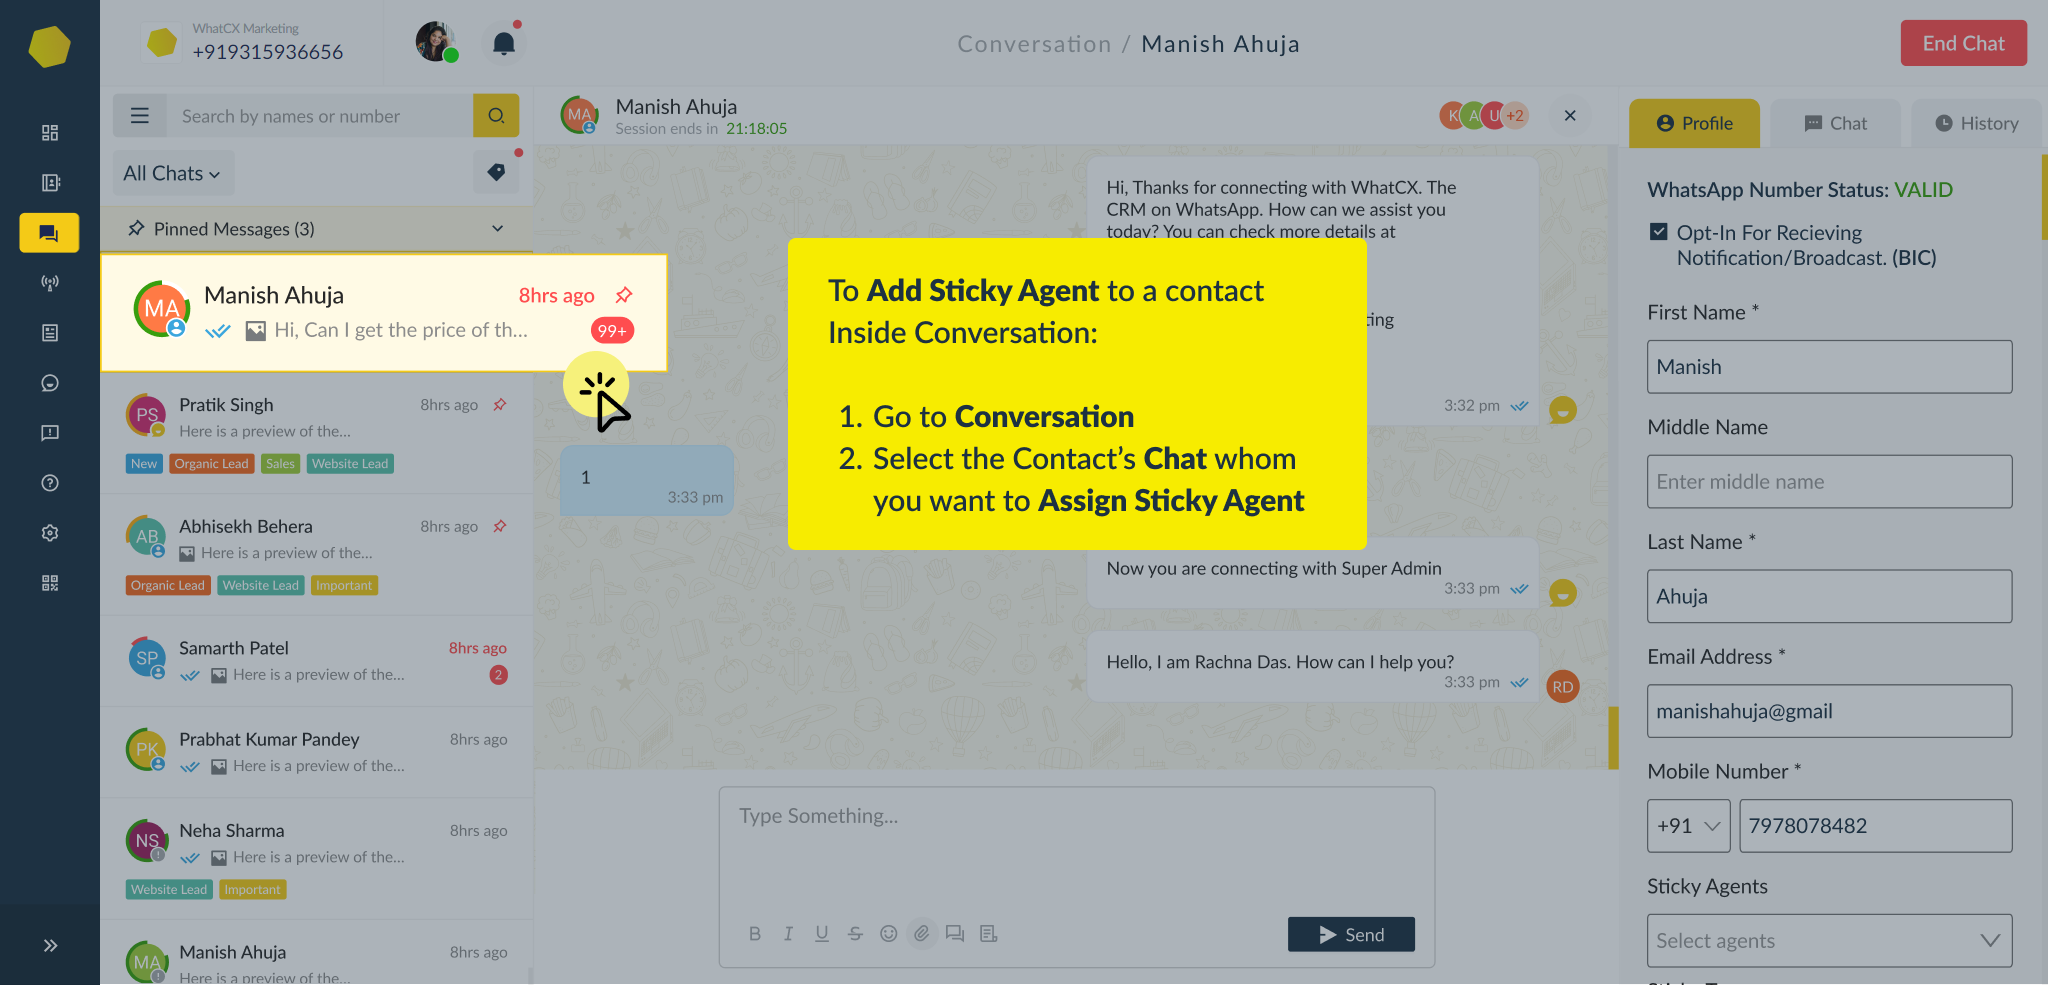
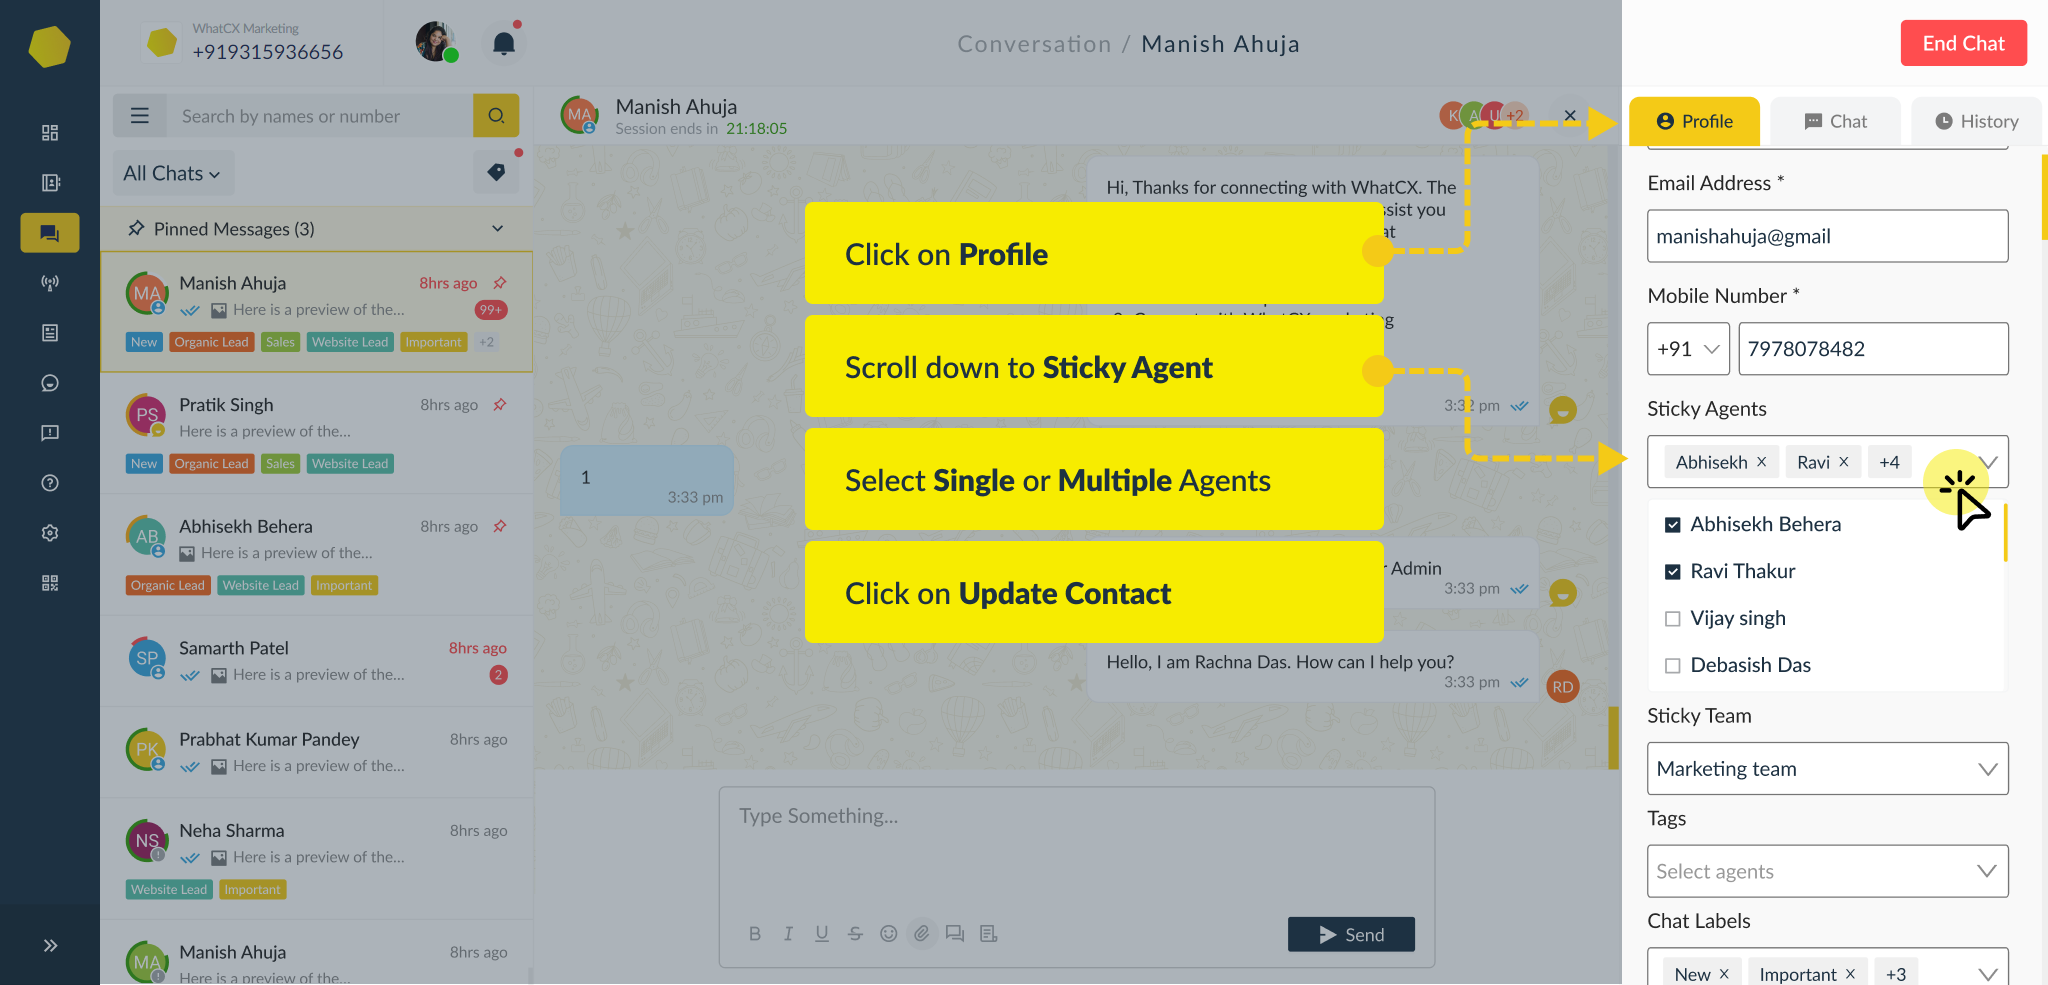
2. Click on Add Contacts and enter the contact’s details like in the screenshot below. Enter all the information you have for that particular contact like Name, Email, Country Code, Mobile Number. You can also assign Sticky agents for the contact.
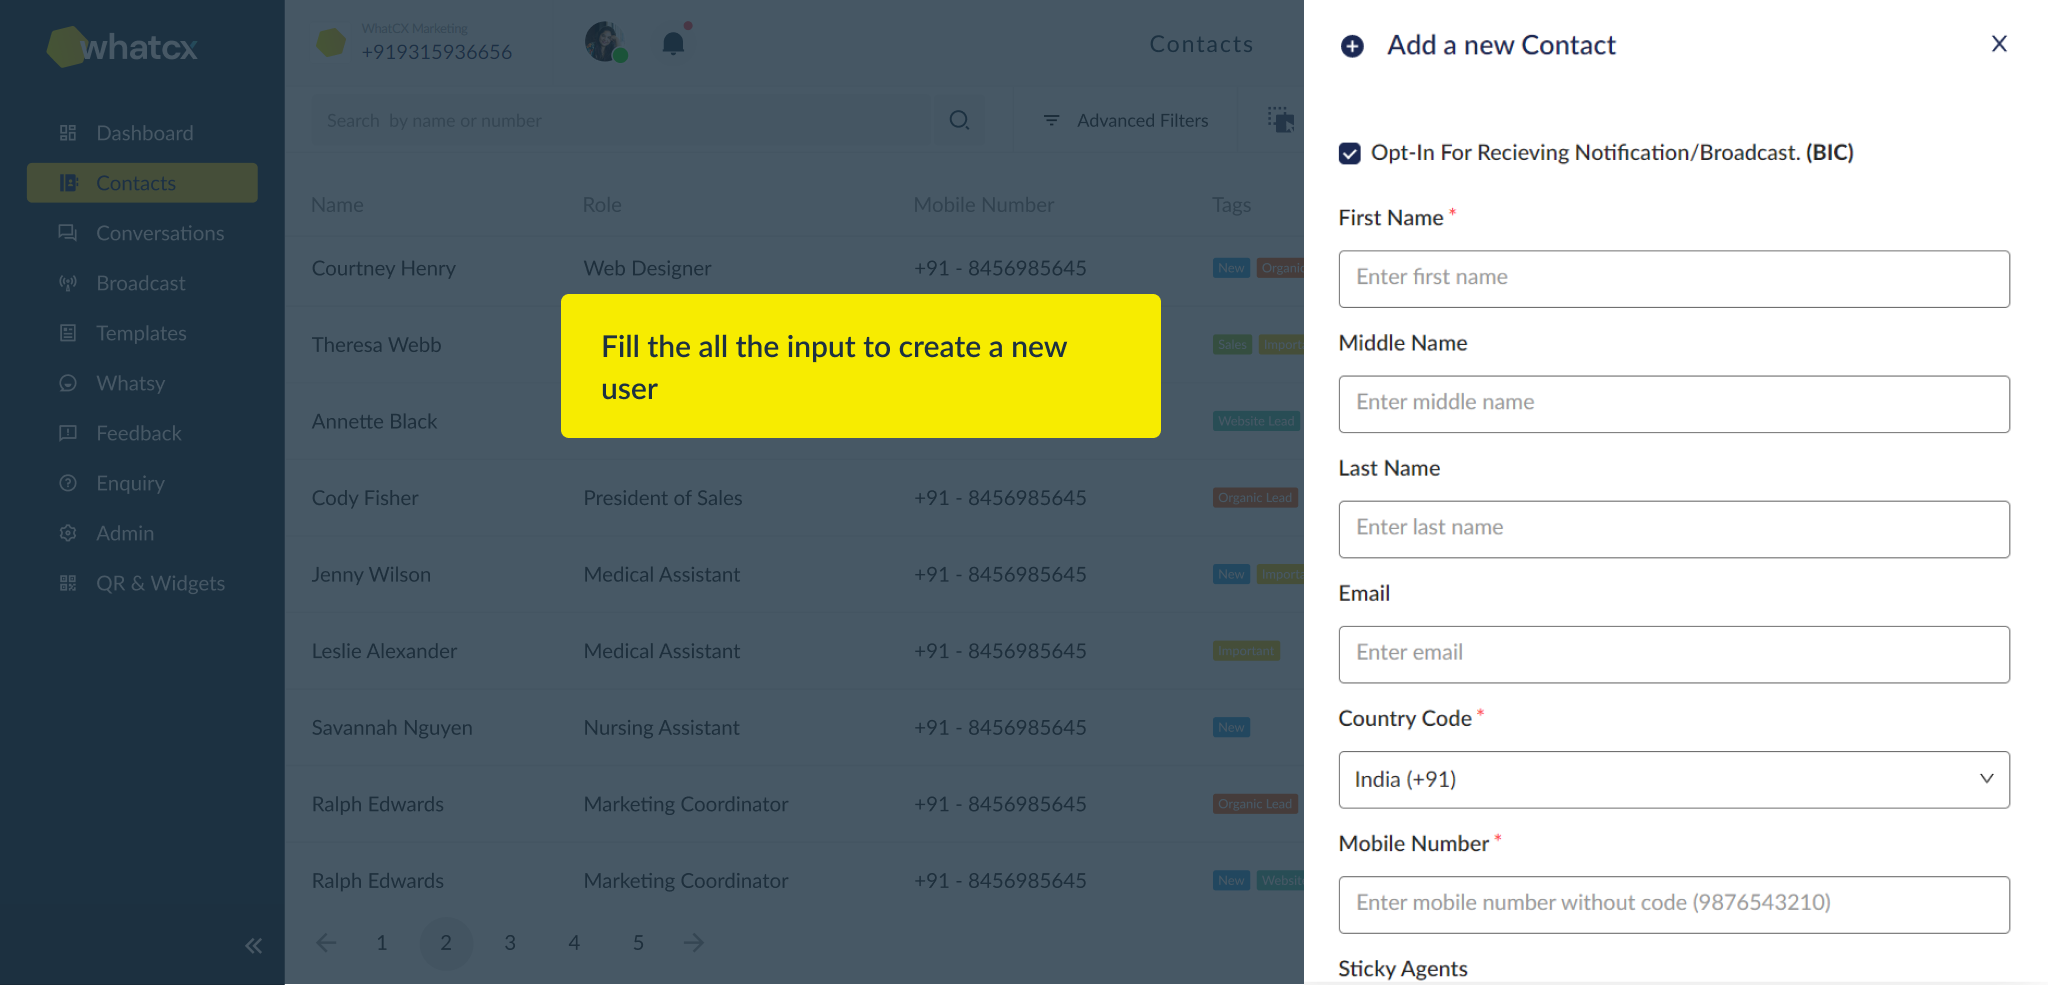
3. Post entering the details click on ‘Save Contact’ and the contact will be created.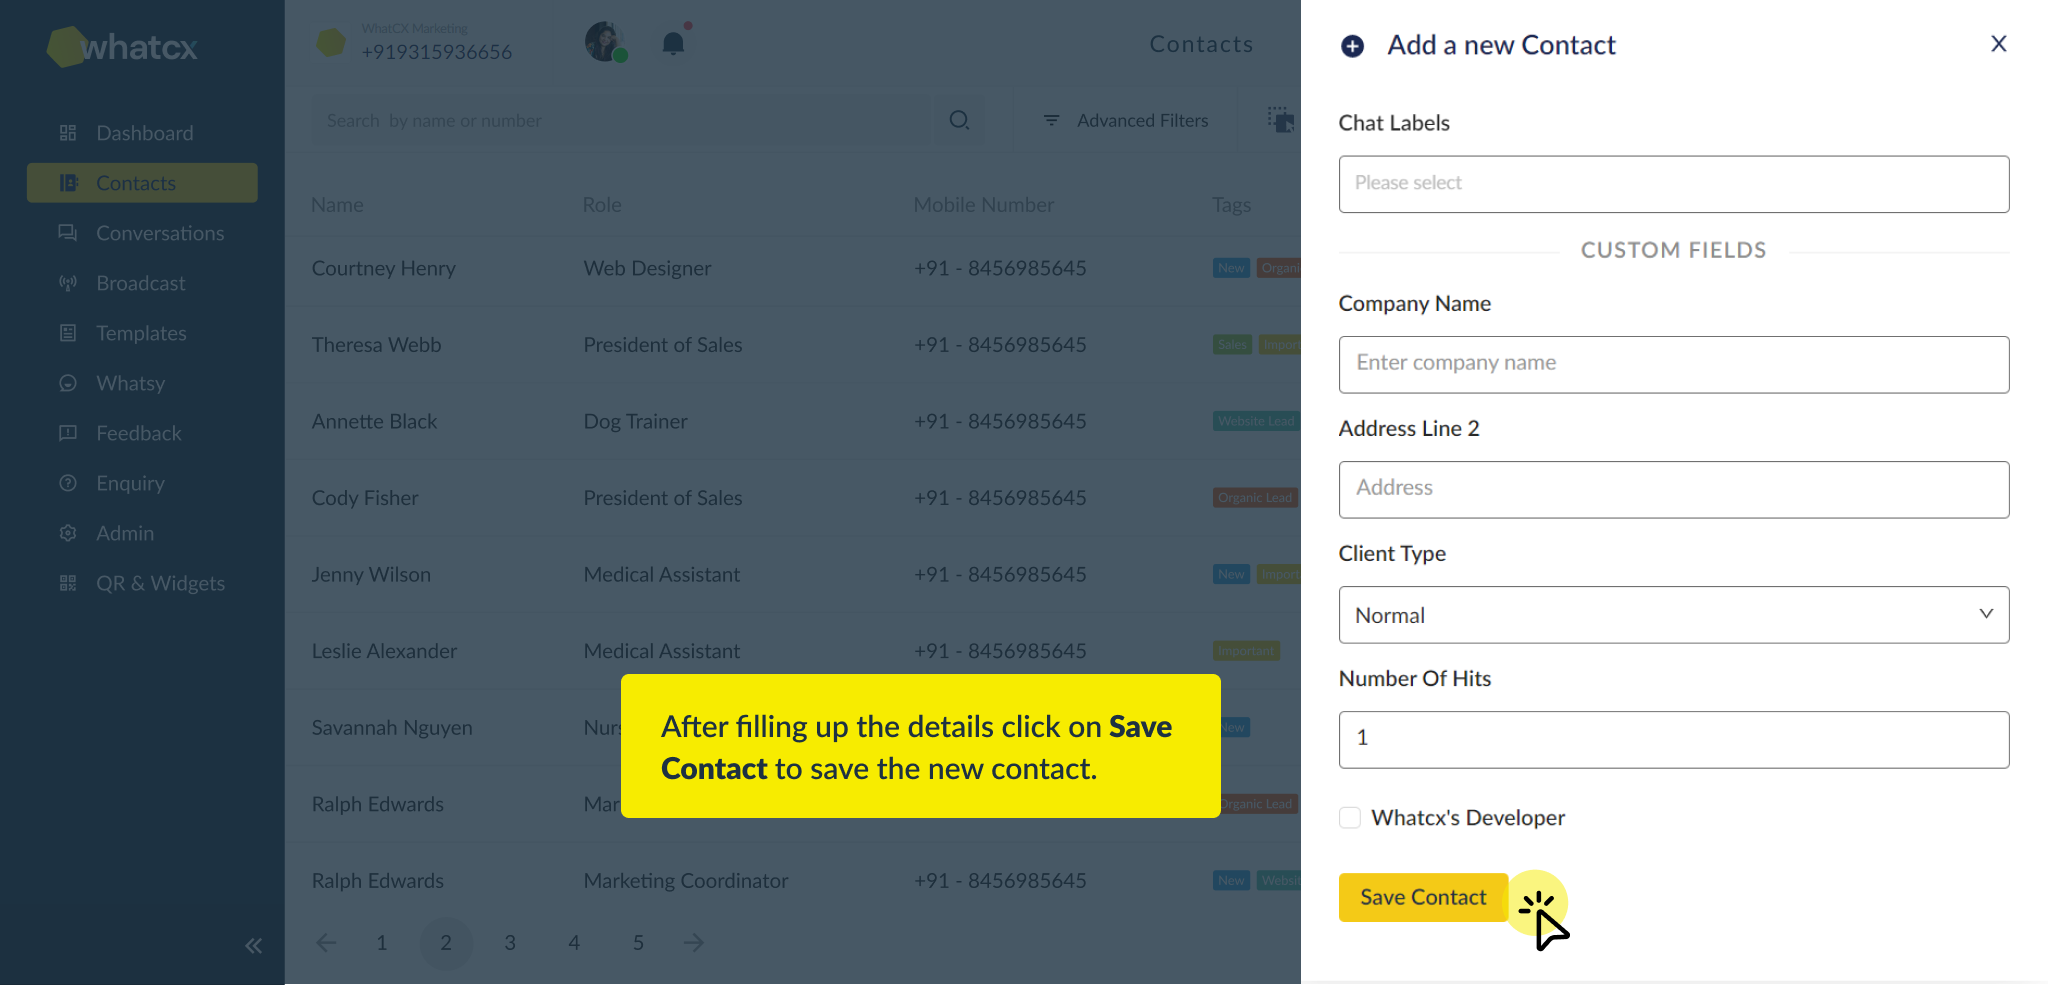
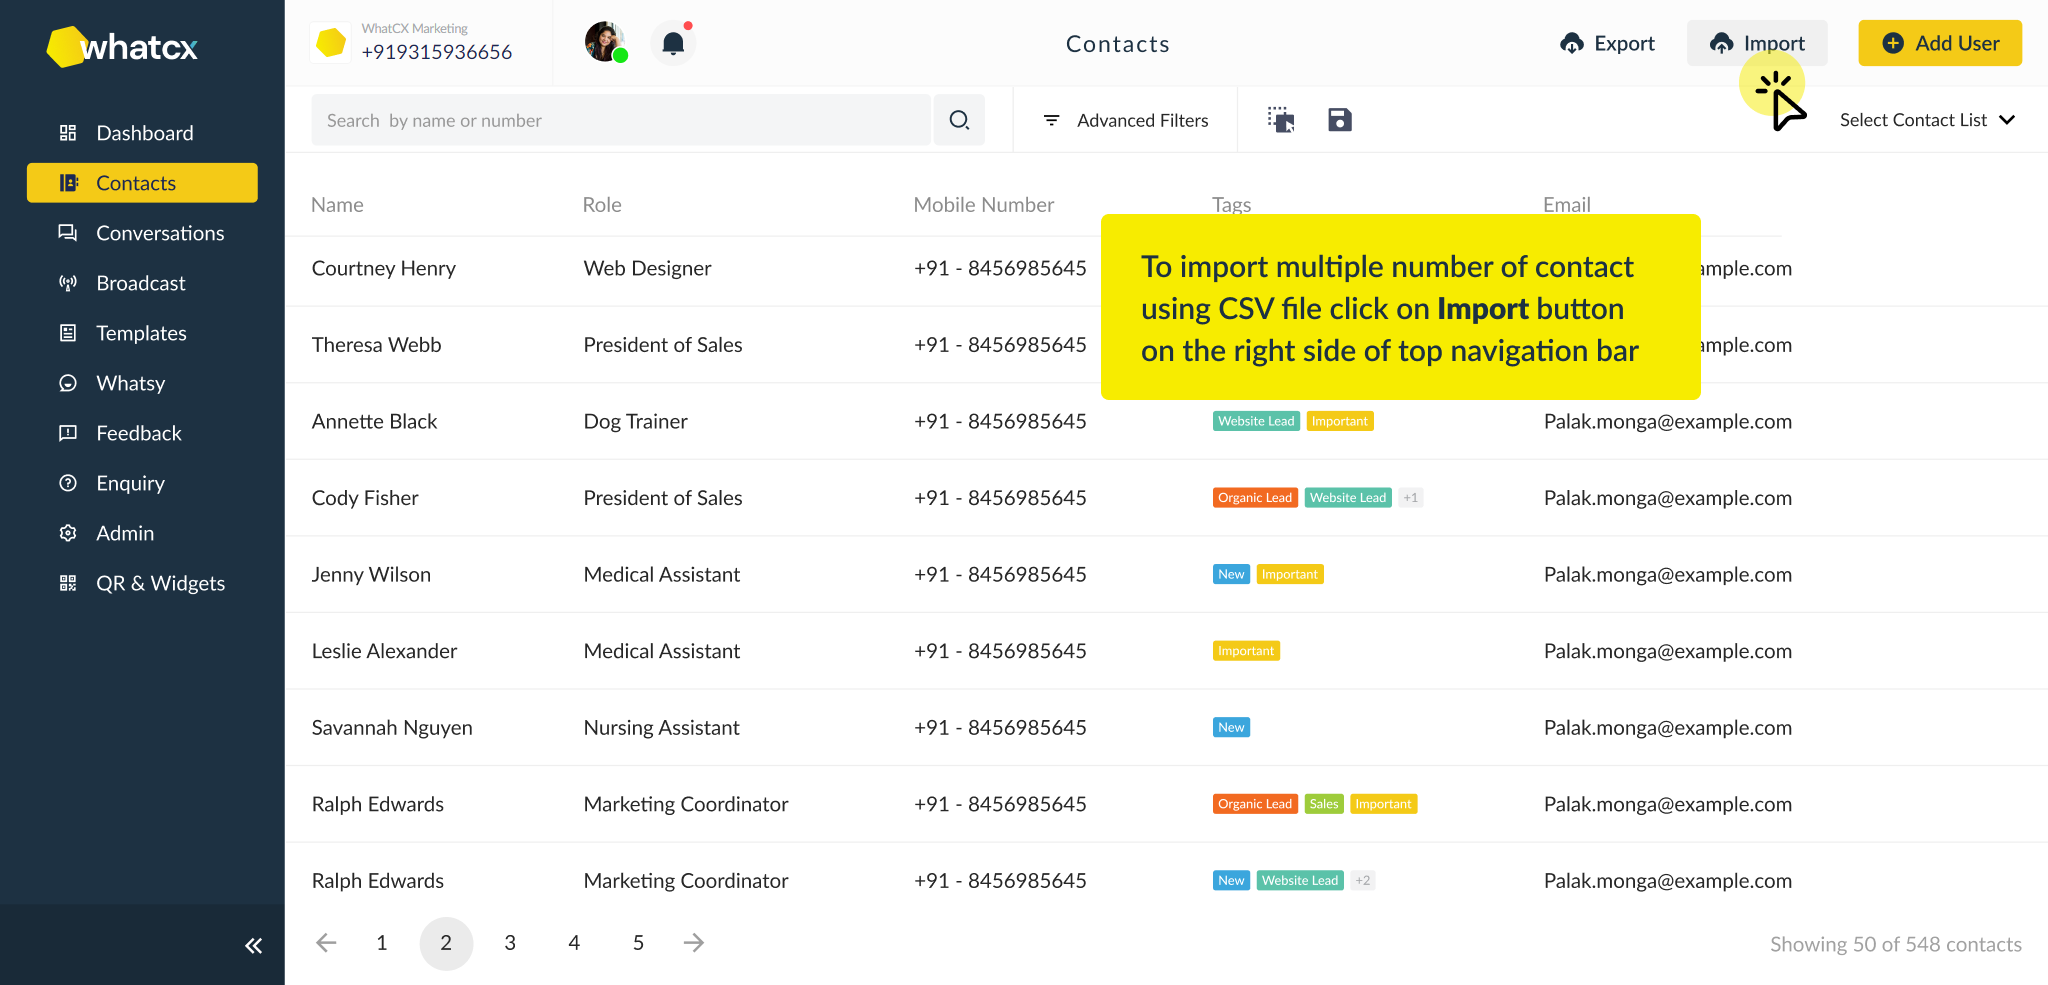
Here are the steps to Import a CSV file and map it –
1. Login to WhatCX and navigate to Contacts on the left panel and Click on Import
 2. Select the file you want to upload
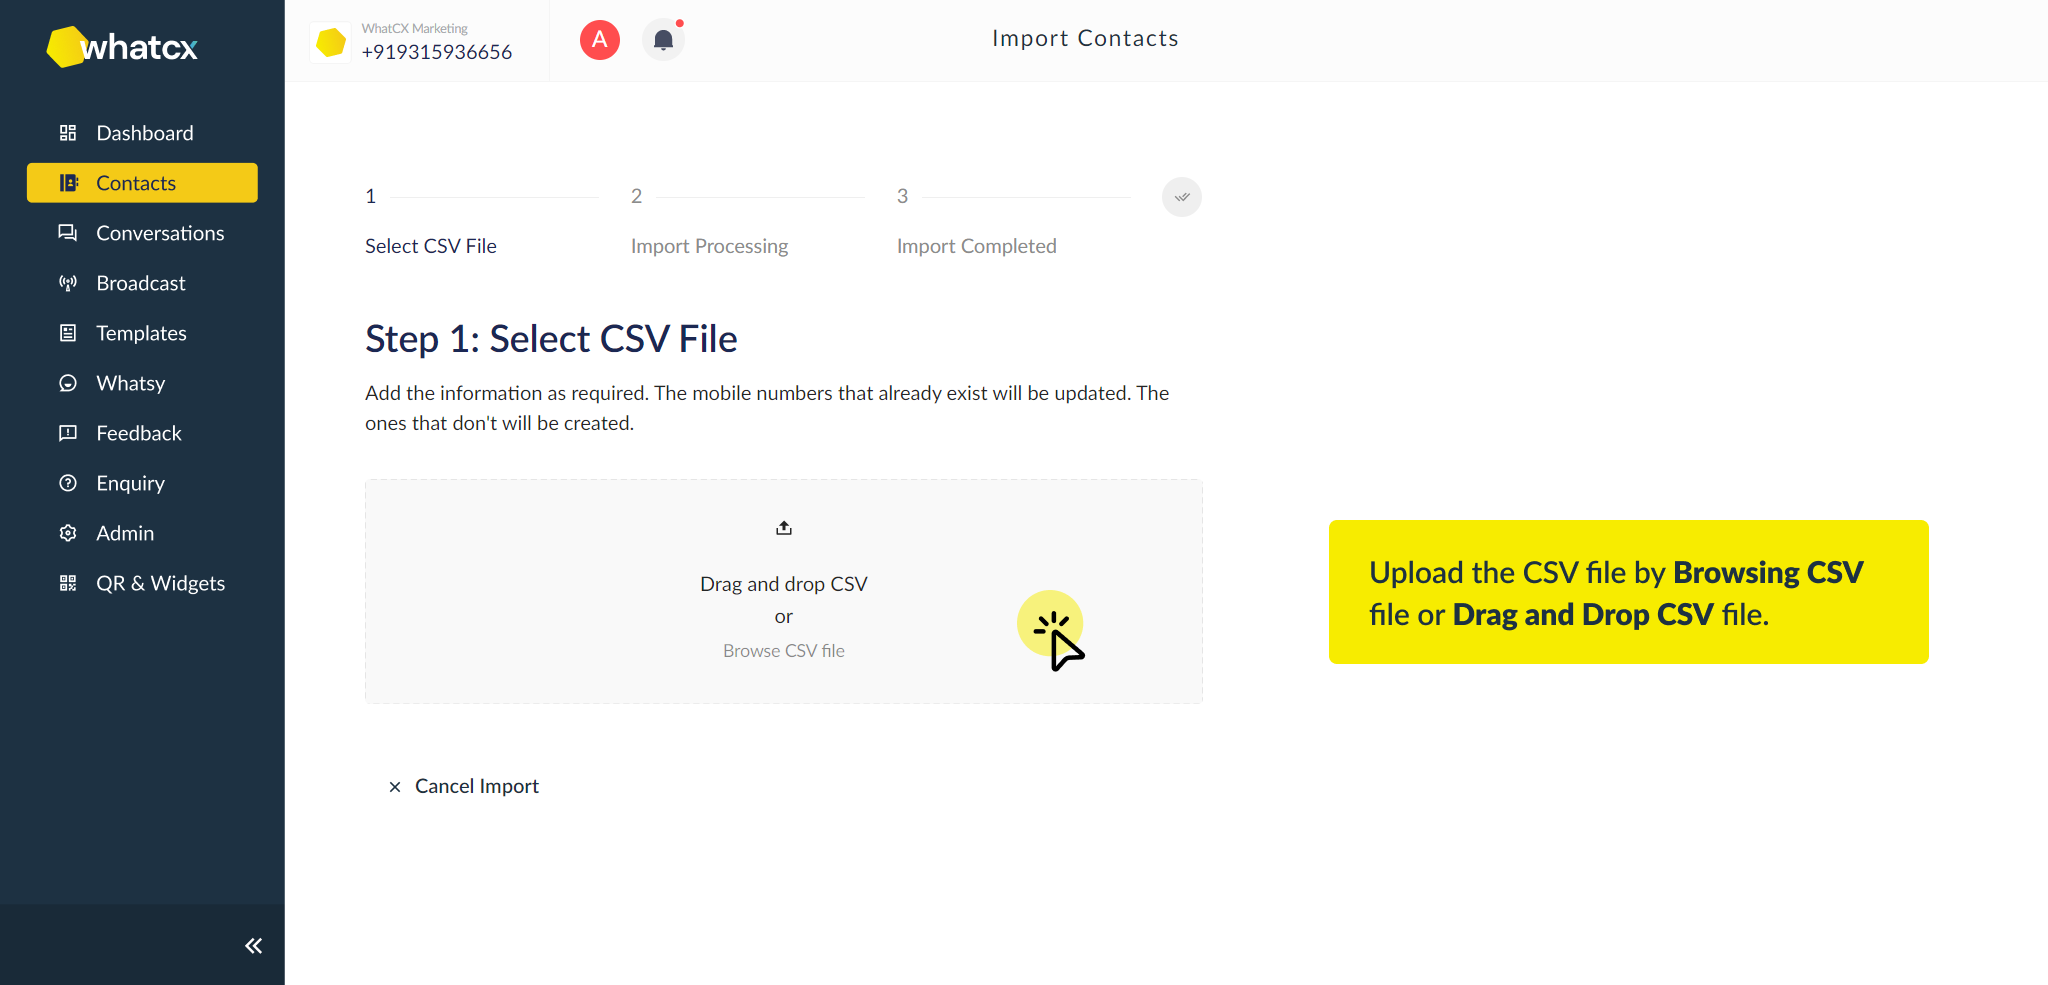
3. Click on Map CSV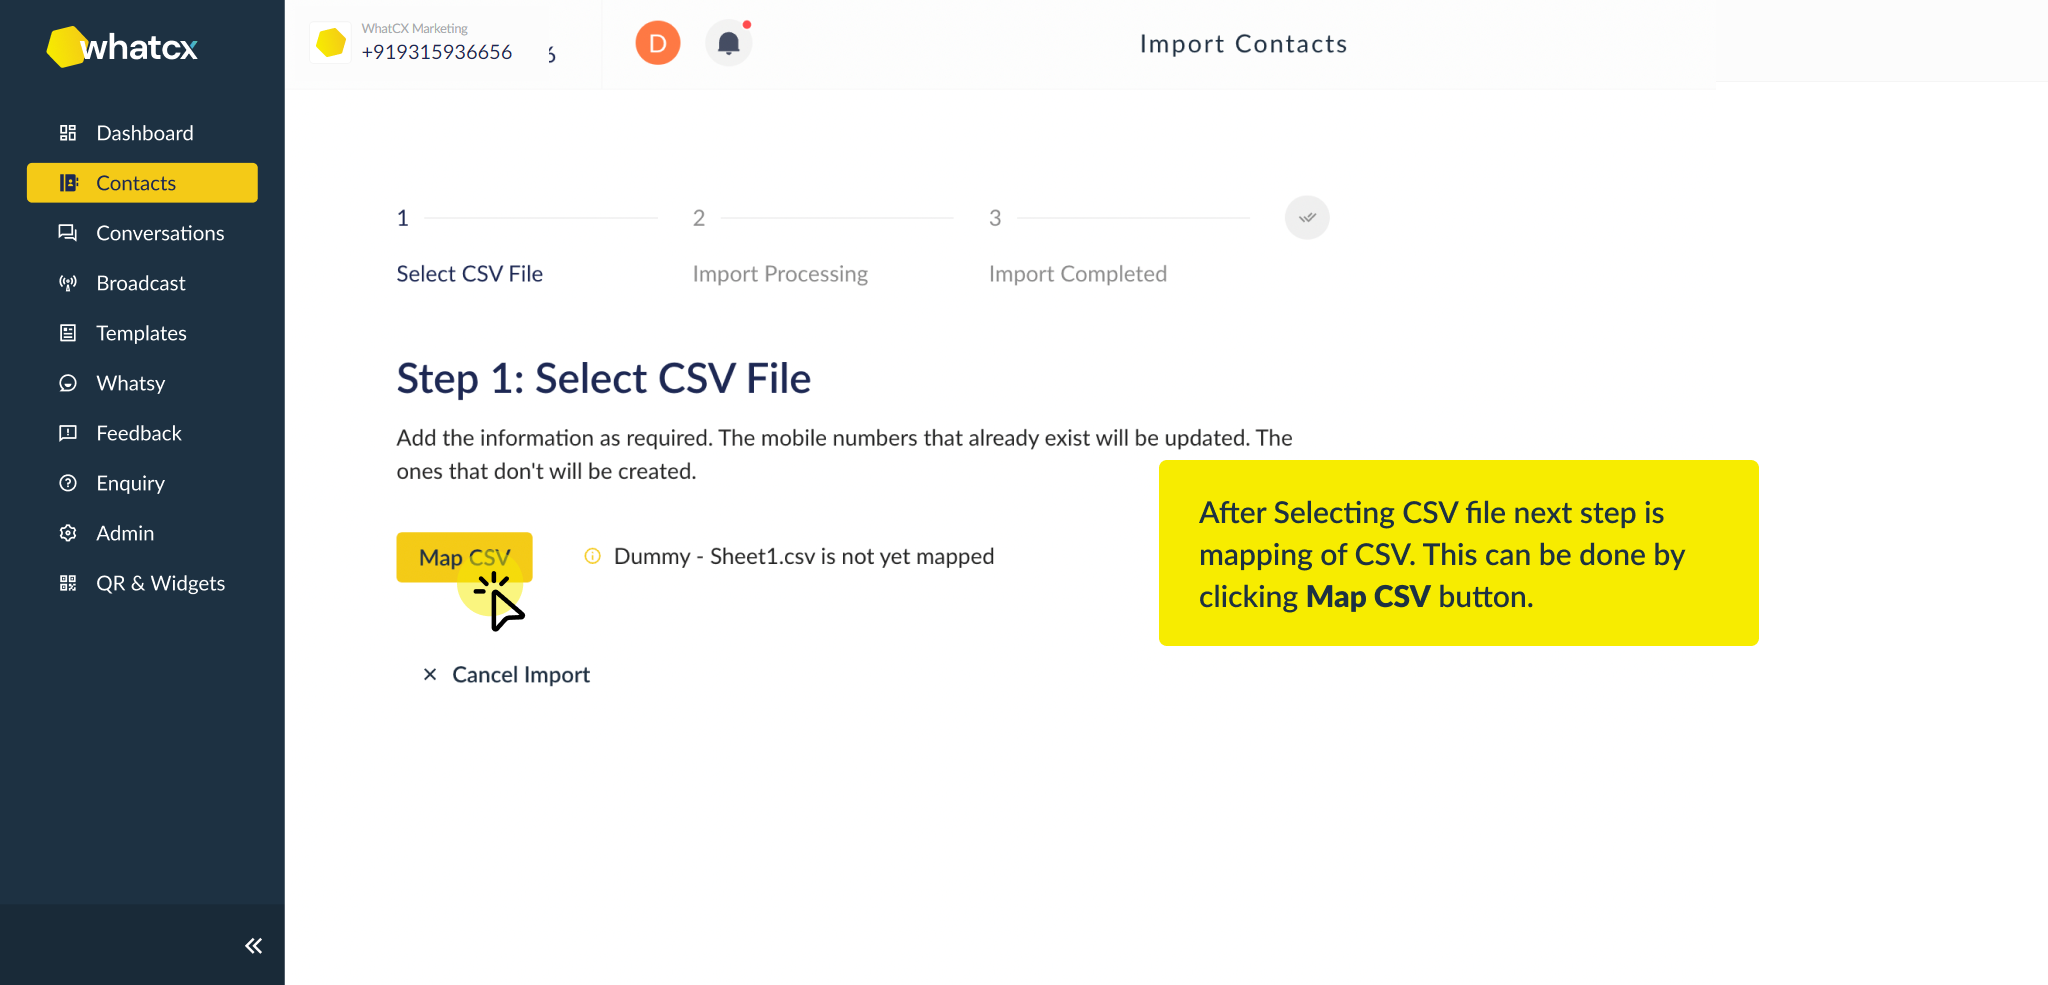
4. You now need to define the fields in the system as per the data in the sheet. In the below screenshot, I have mapped the name against the First name, Country code against the country code, and Mobile Number against the Mobile. This means that the input of which field has what data is given to the system.
Please note – Name, Phone number and country code are the mandatory field.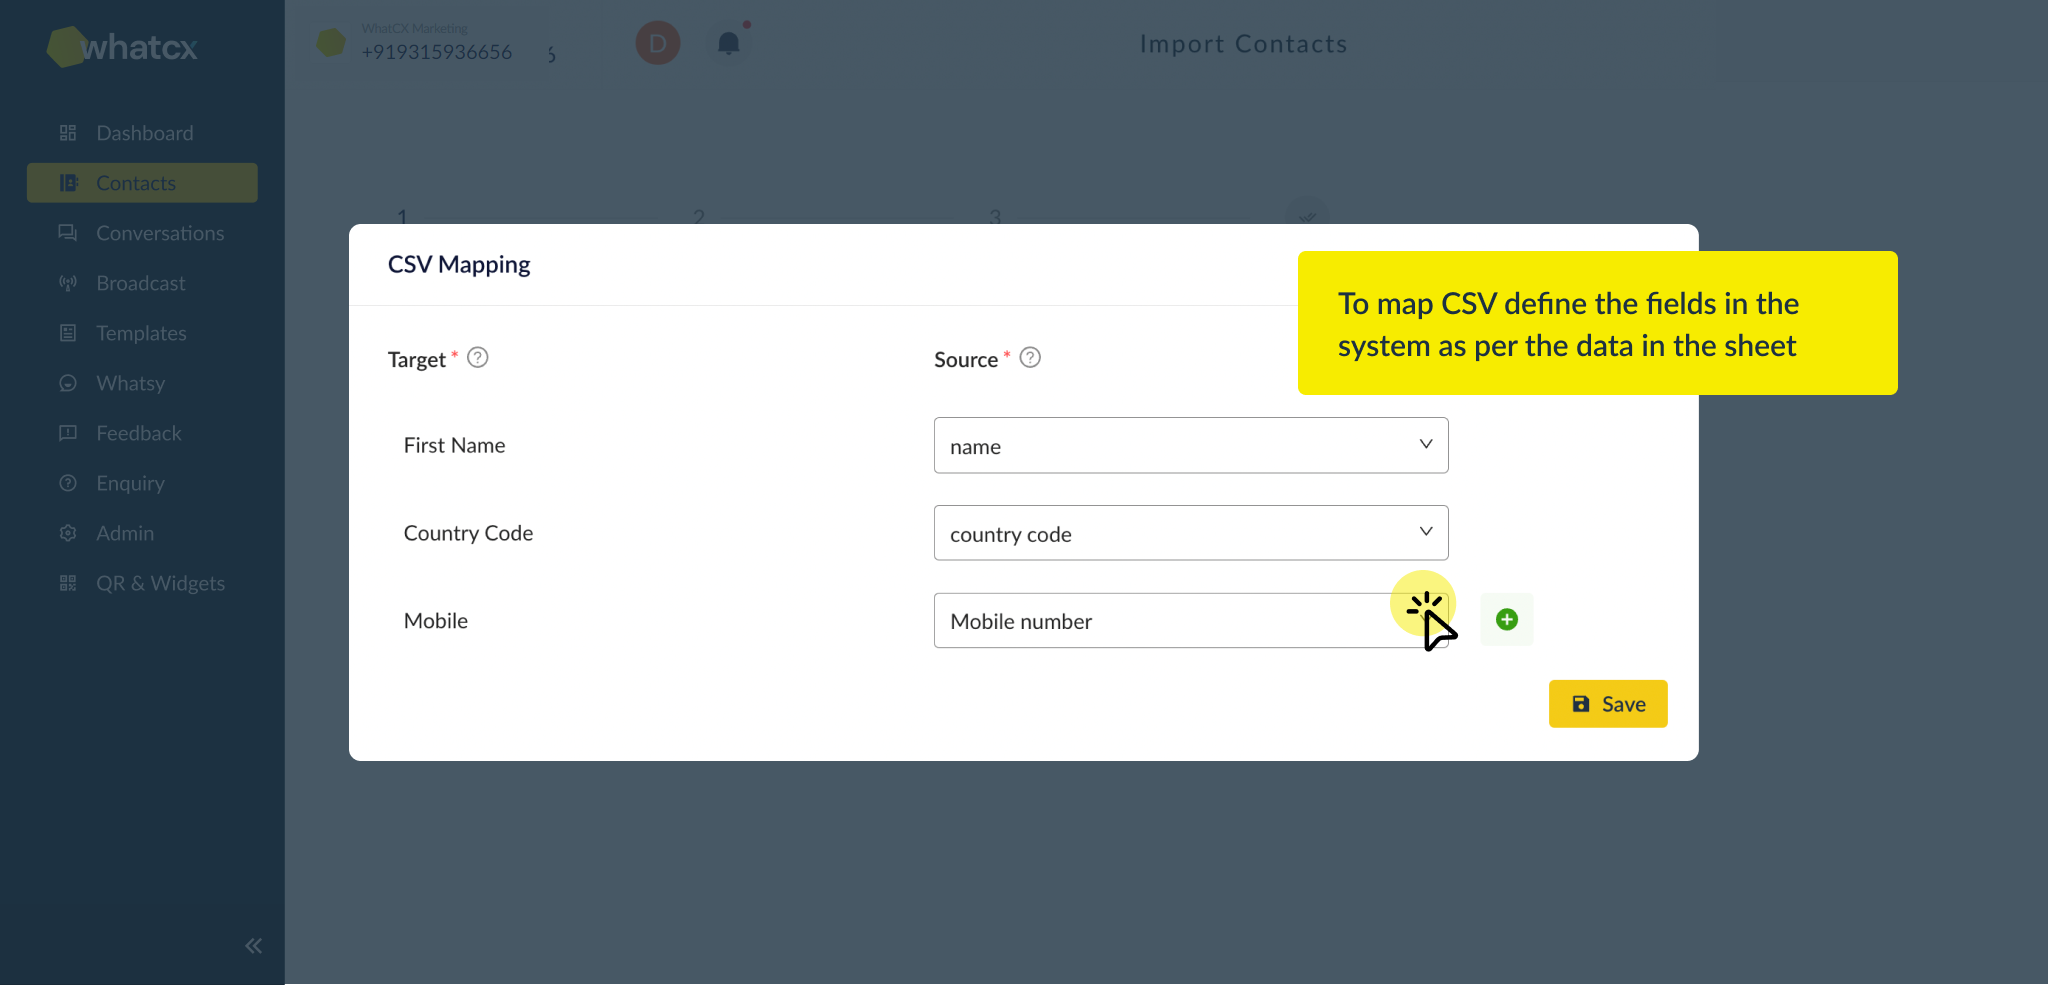
5. You can click on the + icon to add more fields in case you want to assign a Tag to these contacts, or want to have their company name etc.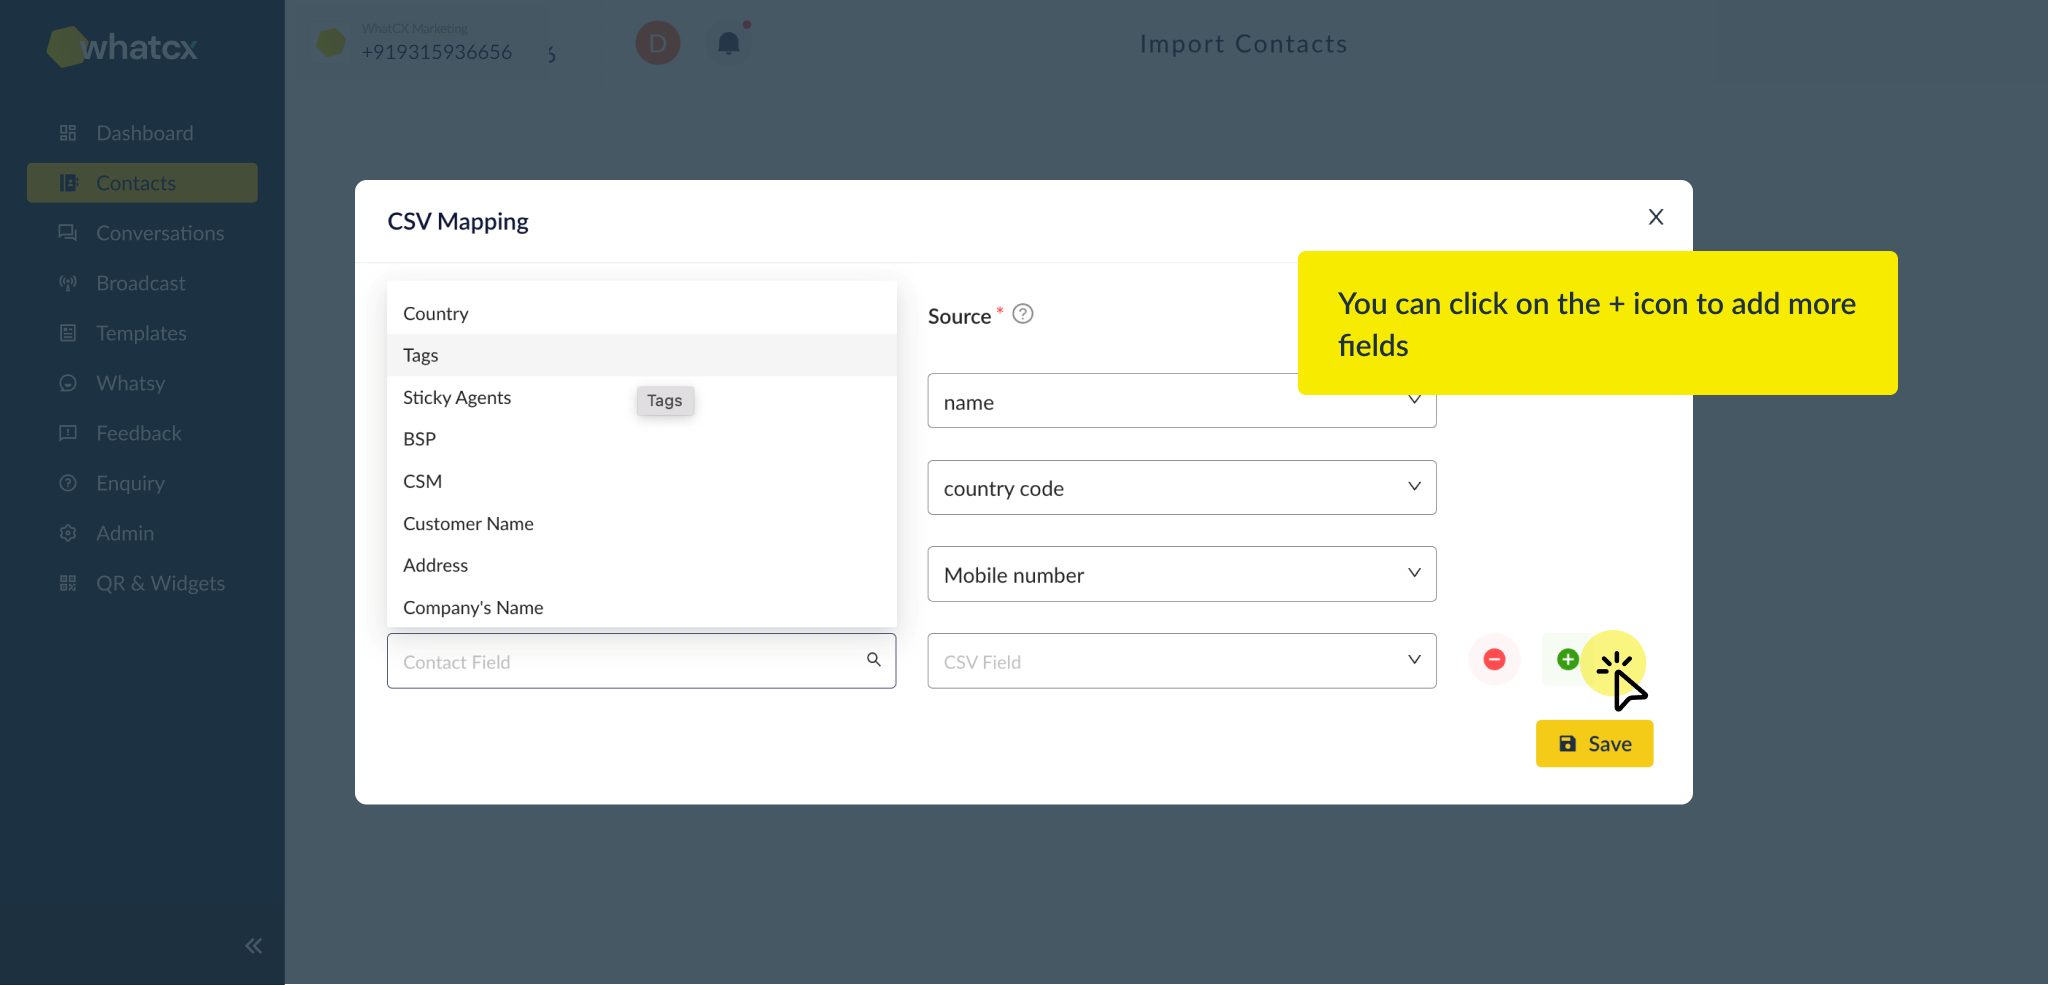 6. Once you are done with mapping your CSV file. Click on Save and Continue
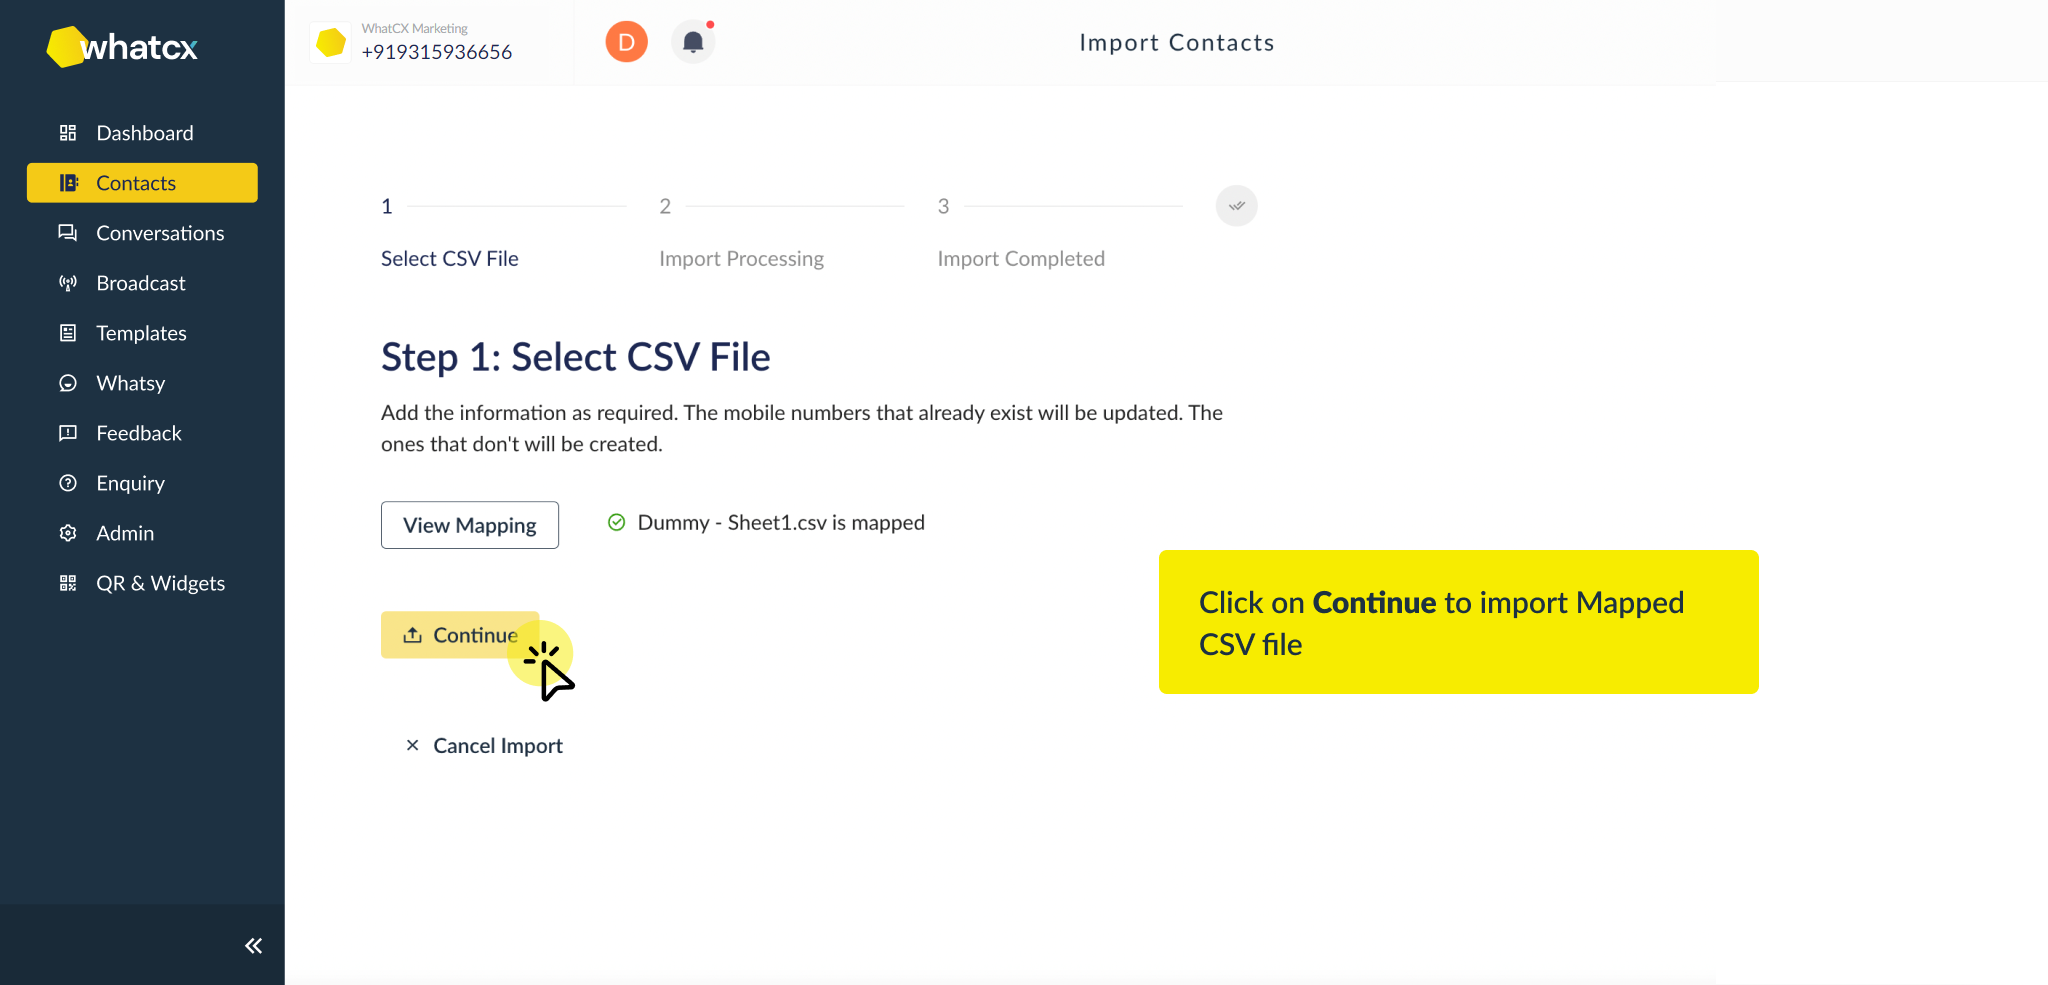
7. Your file will be imported and you can see your data
8. Click on Go back to Contacts and you will find all your contacts there.
Have your first Conversation on WhatCX
WhatsApp is a crucial engagement tool for users all around the world and is rapidly becoming the most popular conversational messaging service in the world. WhatCX Conversations already supports WhatsApp and can assist you in addressing the following patterns-
• You can check all the chats assigned to you by clicking on All Chats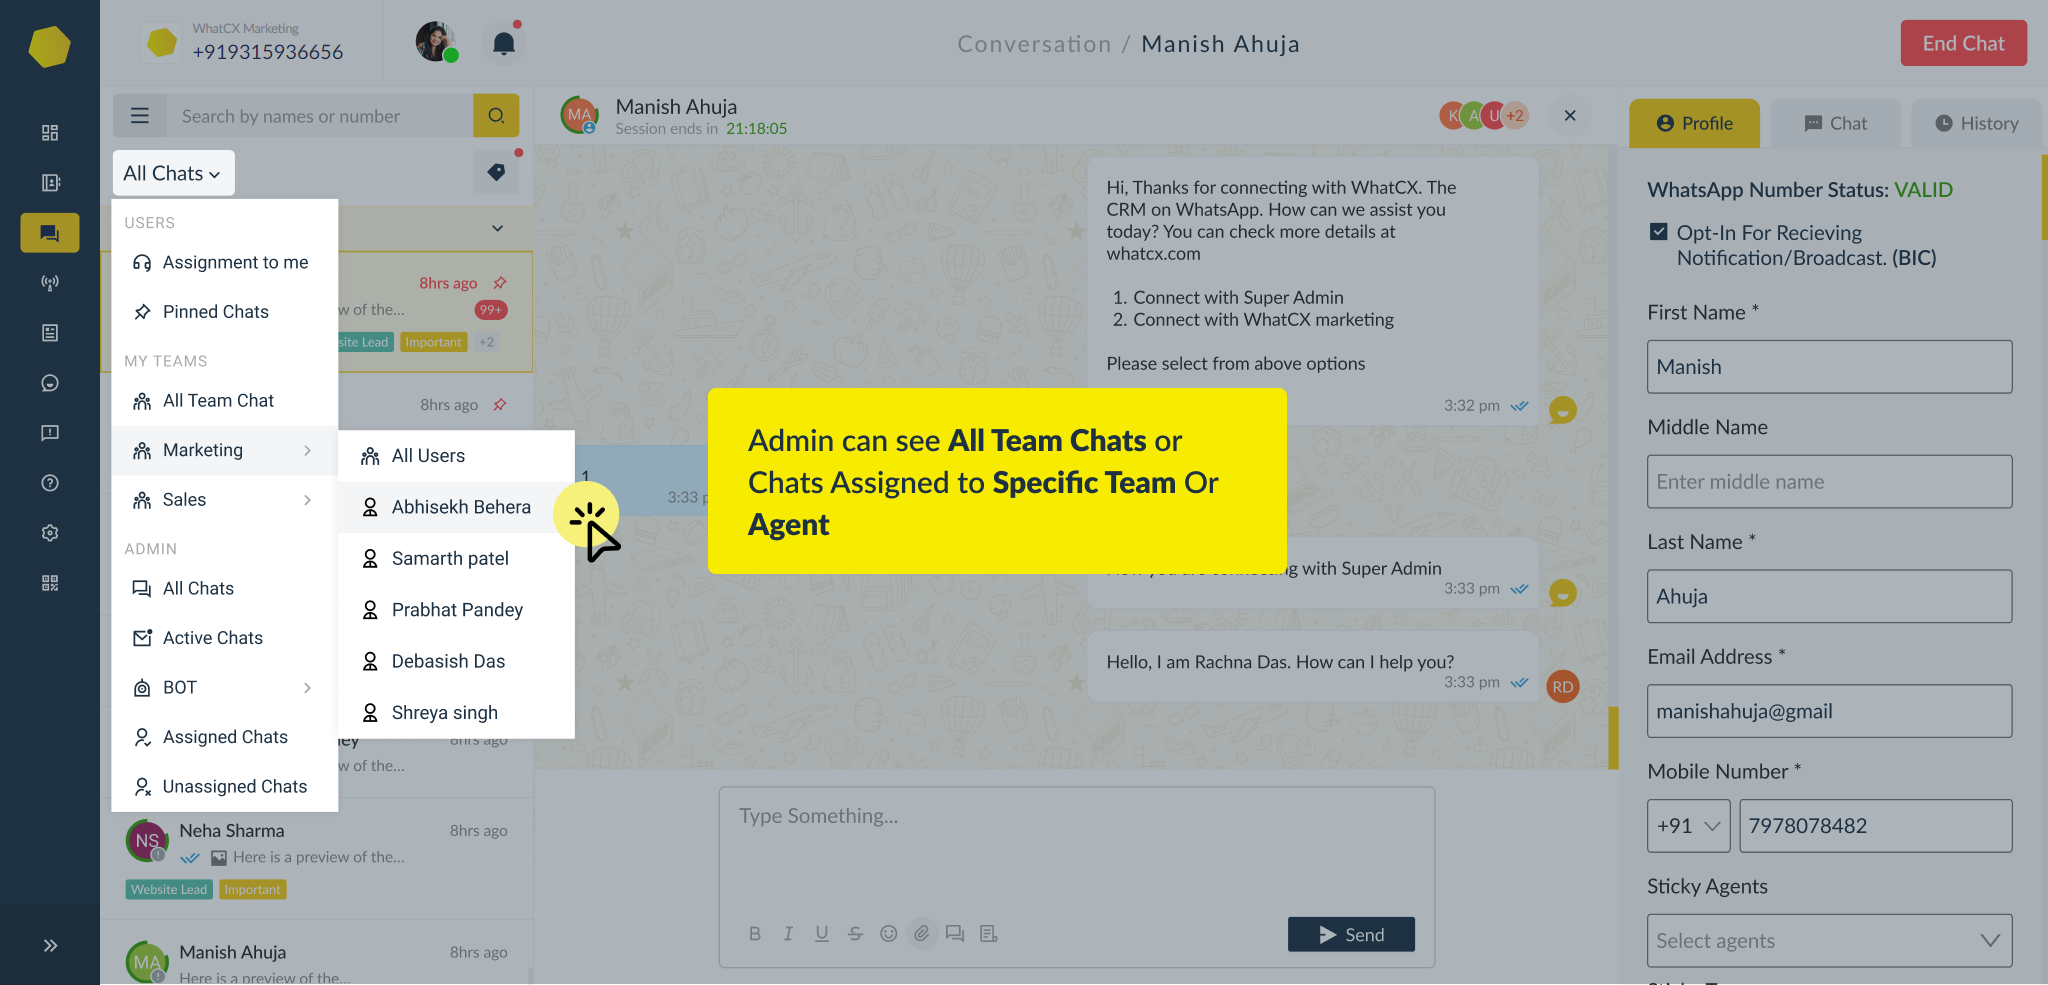
• Admins can check all Team chats and Agent Chats by clicking on ‘All Chats’
• You can use chat filters like the Active Chat sessions, Assigned chats, Unassigned chats
Schedule your first Broadcast
Using broadcast lists, which are maintained contact lists, you can send messages to a large number of your consumers at once. If any of your clients respond to your message, their response will show up in your CHATS panel as a regular massage.
To start with creating a Broadcast on WhatCX you need to follow the below steps-
1. Login to your WhatCX account, navigate to the broadcast section on the left side, select Add Broadcast, and then give your Broadcast a name. 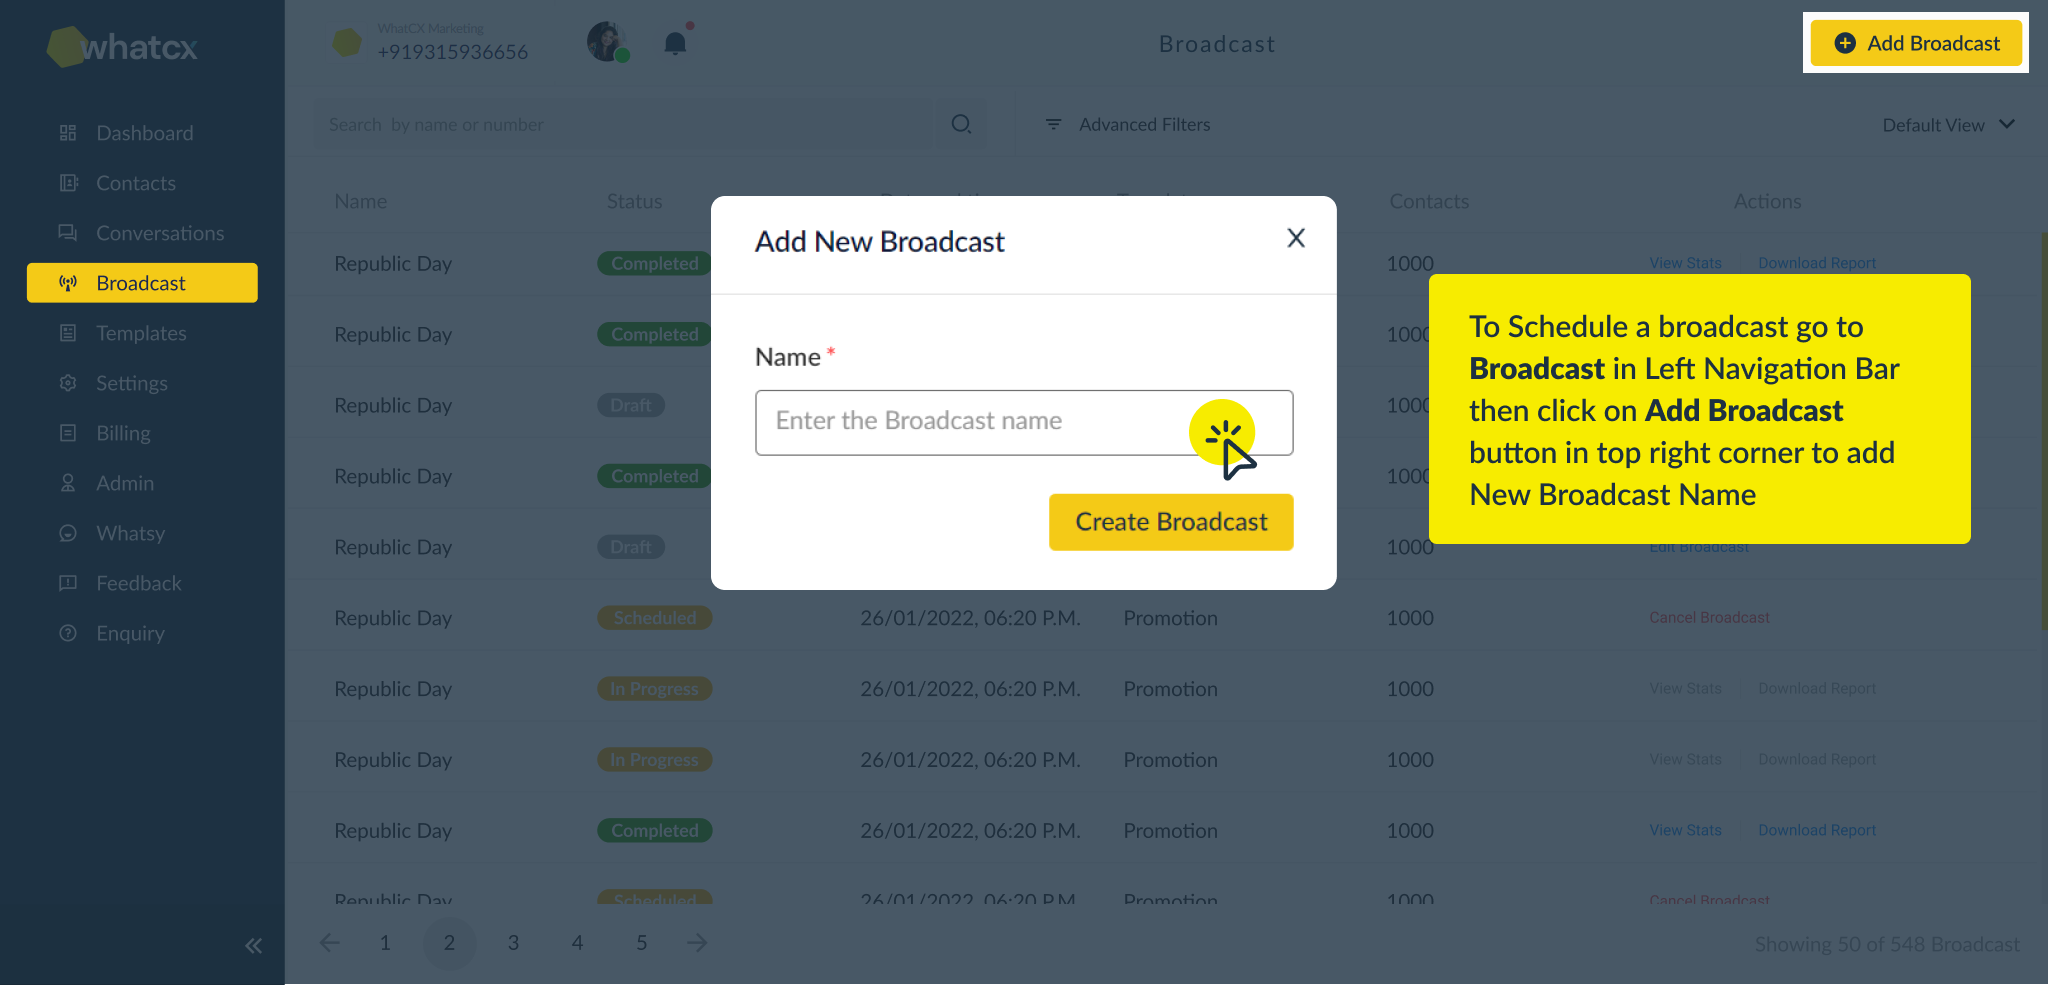
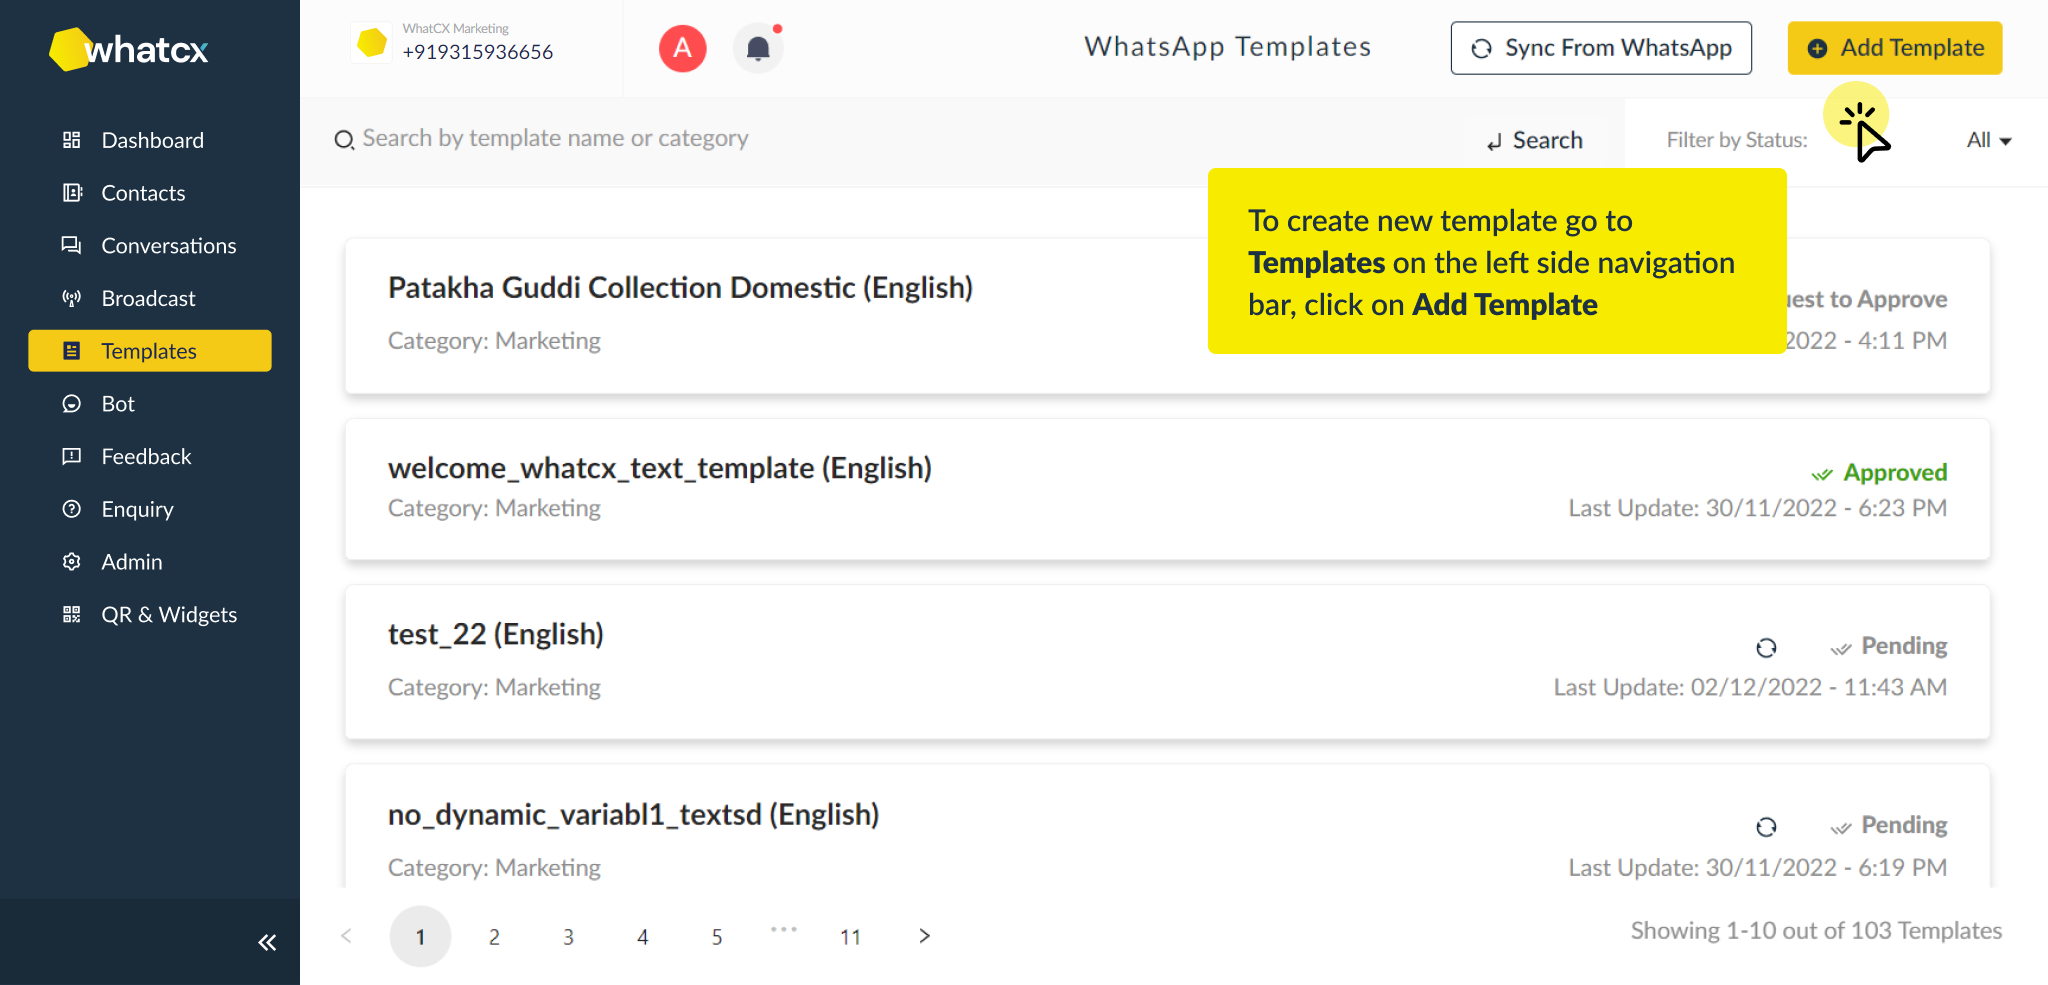
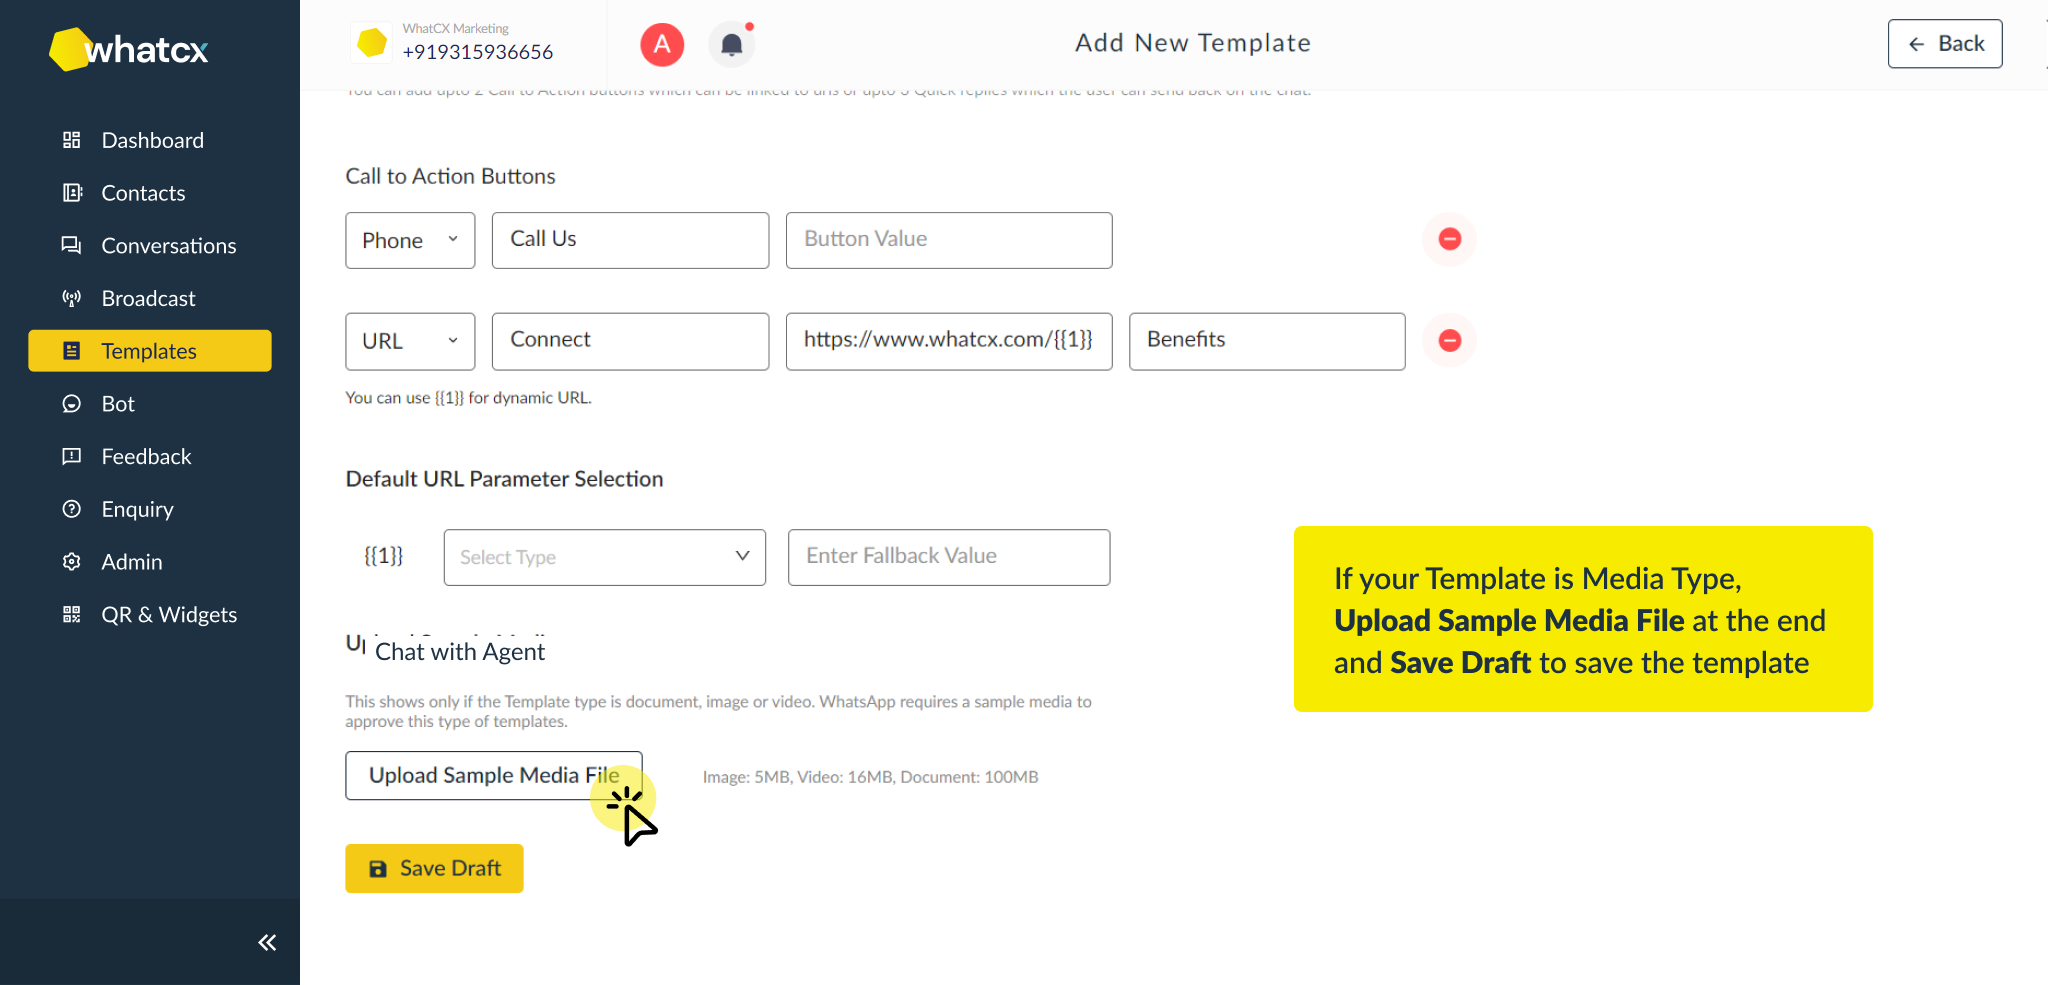
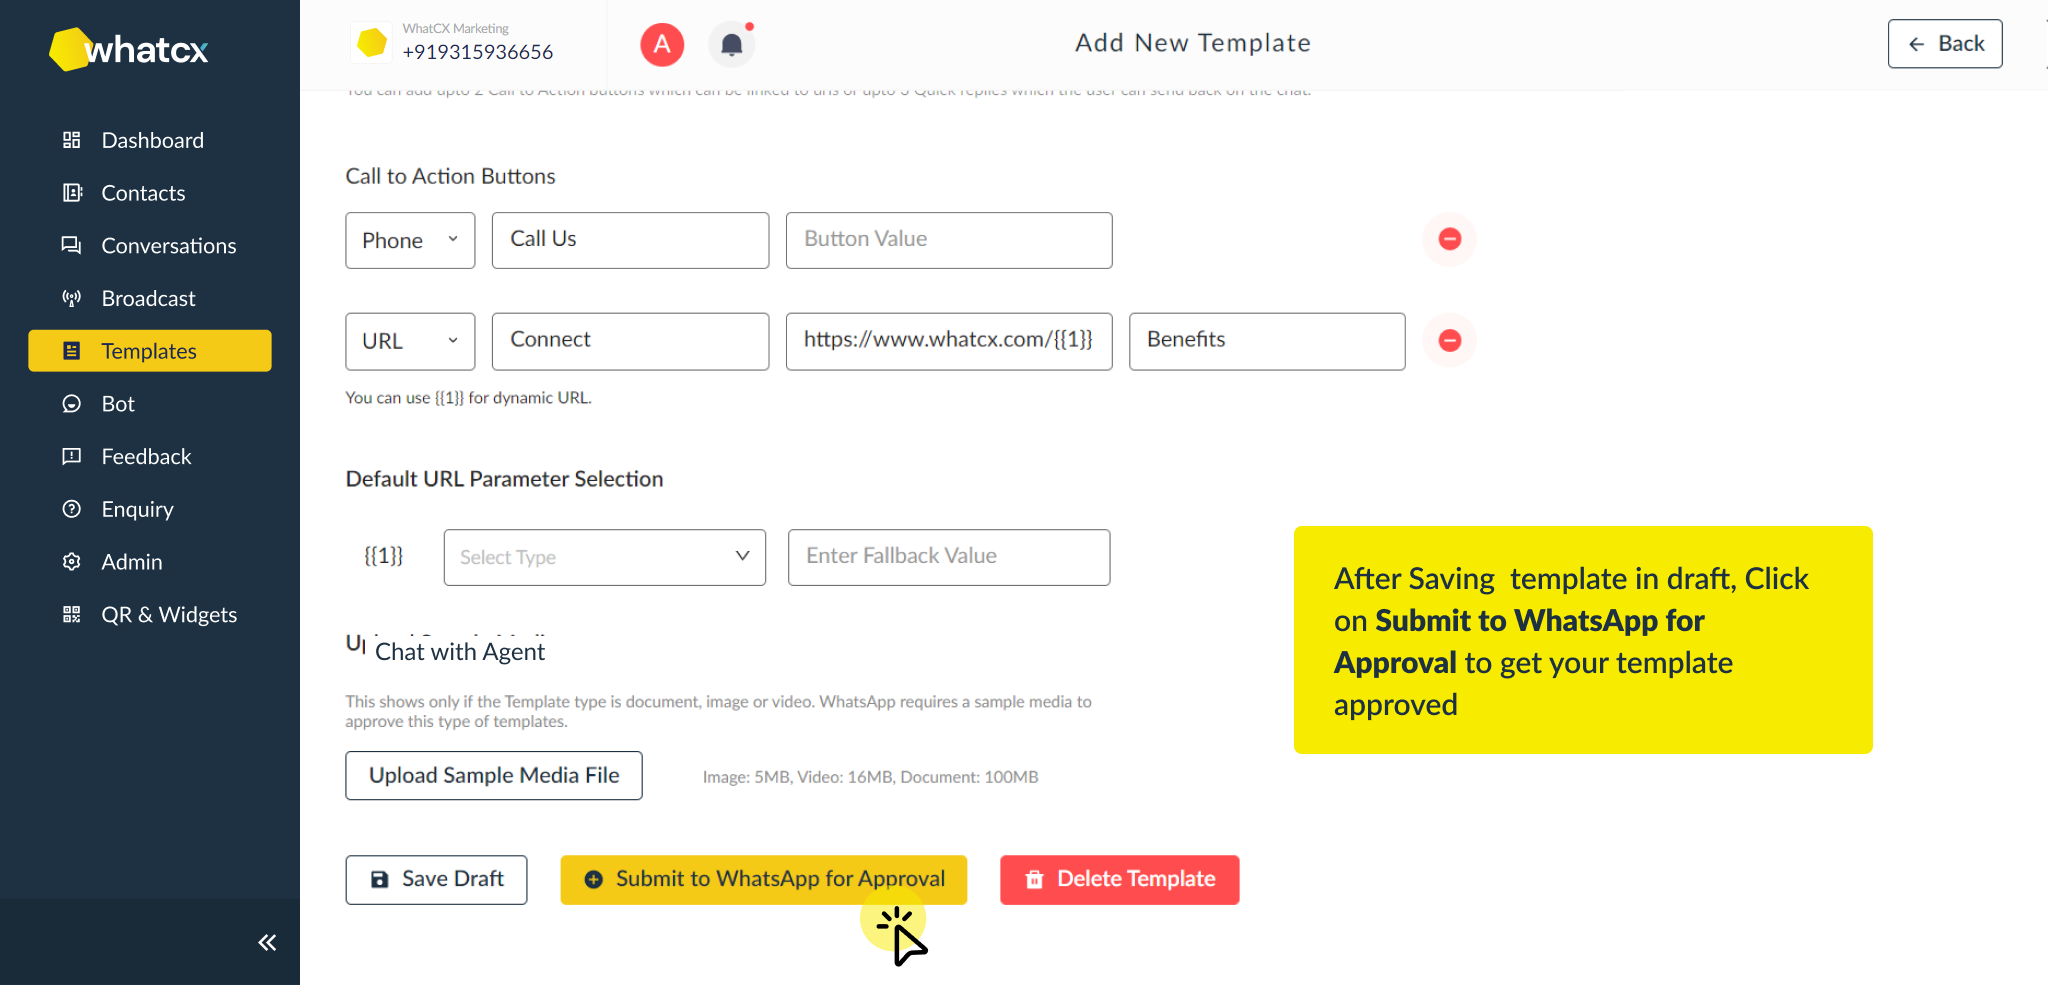
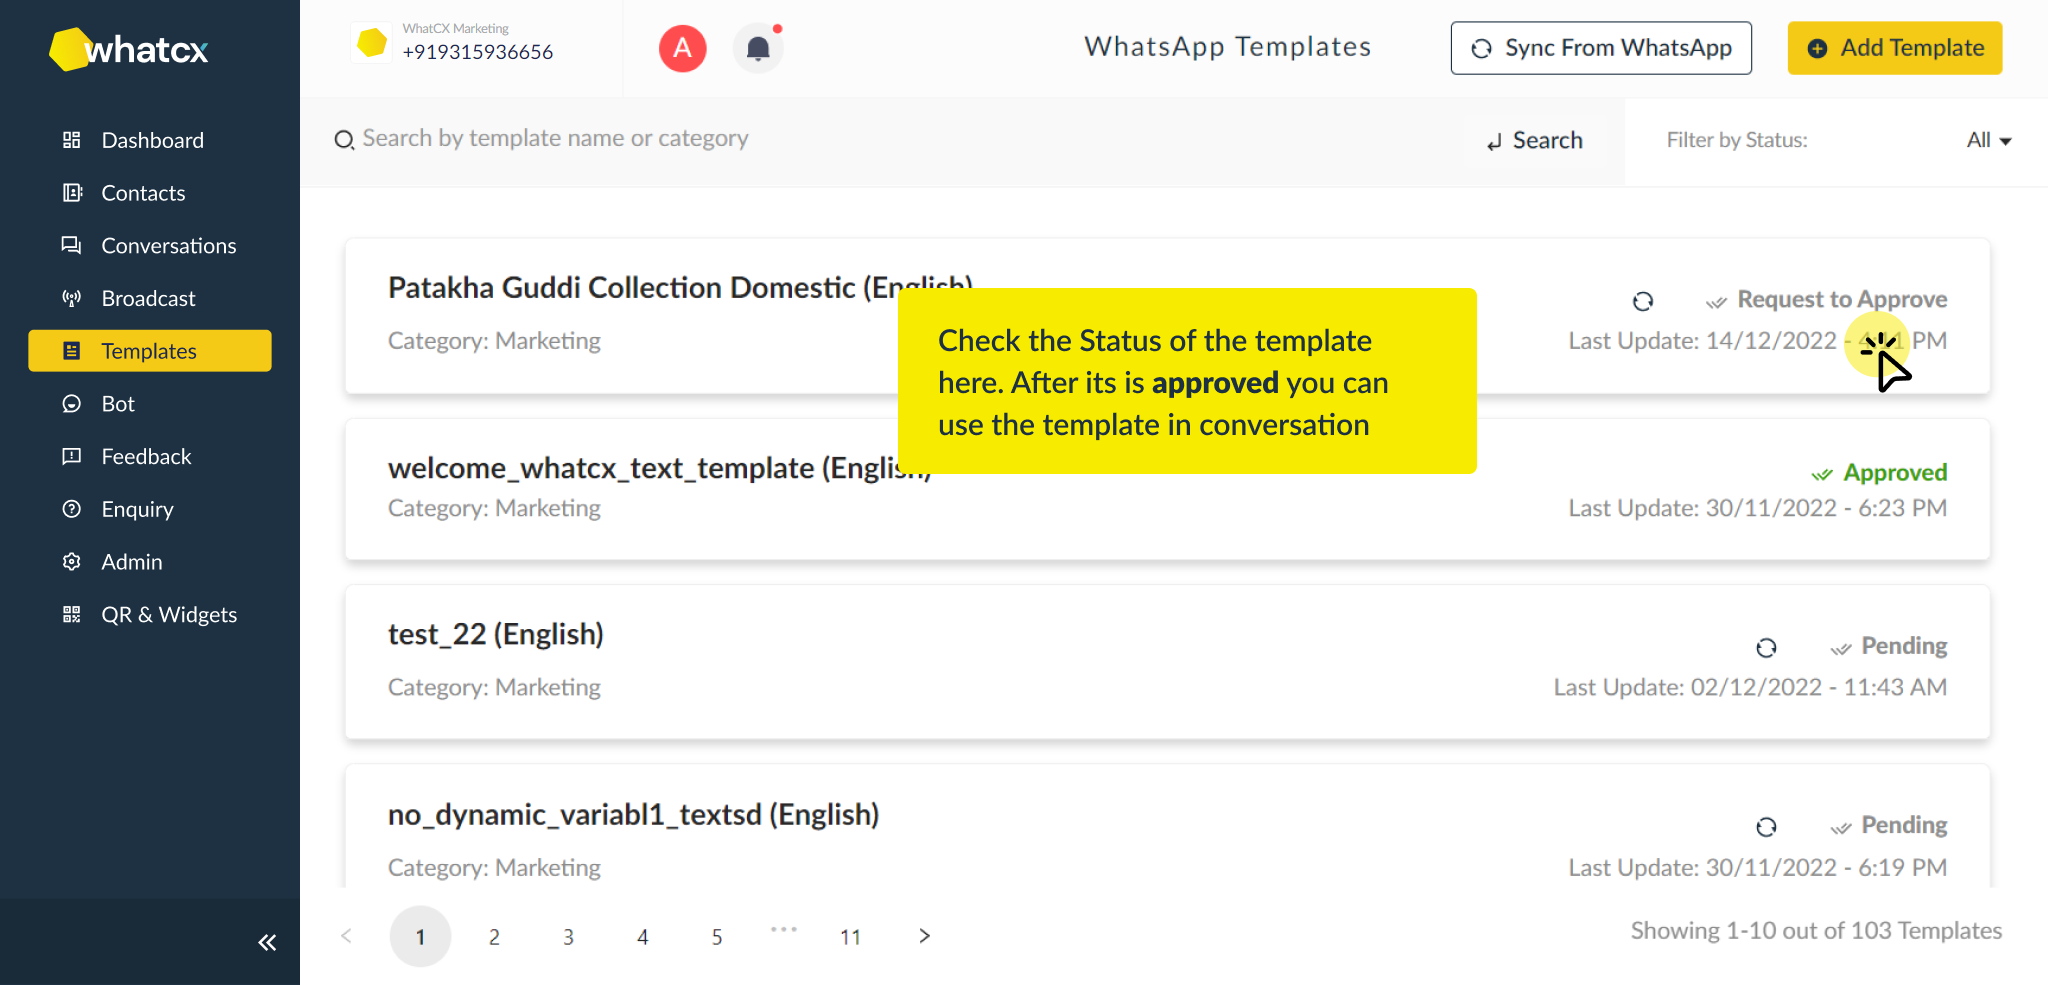
2. After clicking “Create Broadcast,” you will be sent to the Template Creation page. If you want to use an existing broadcast template, you can choose that option from the template menu, or you can create a new one. Enter the broadcast message here, then click Next.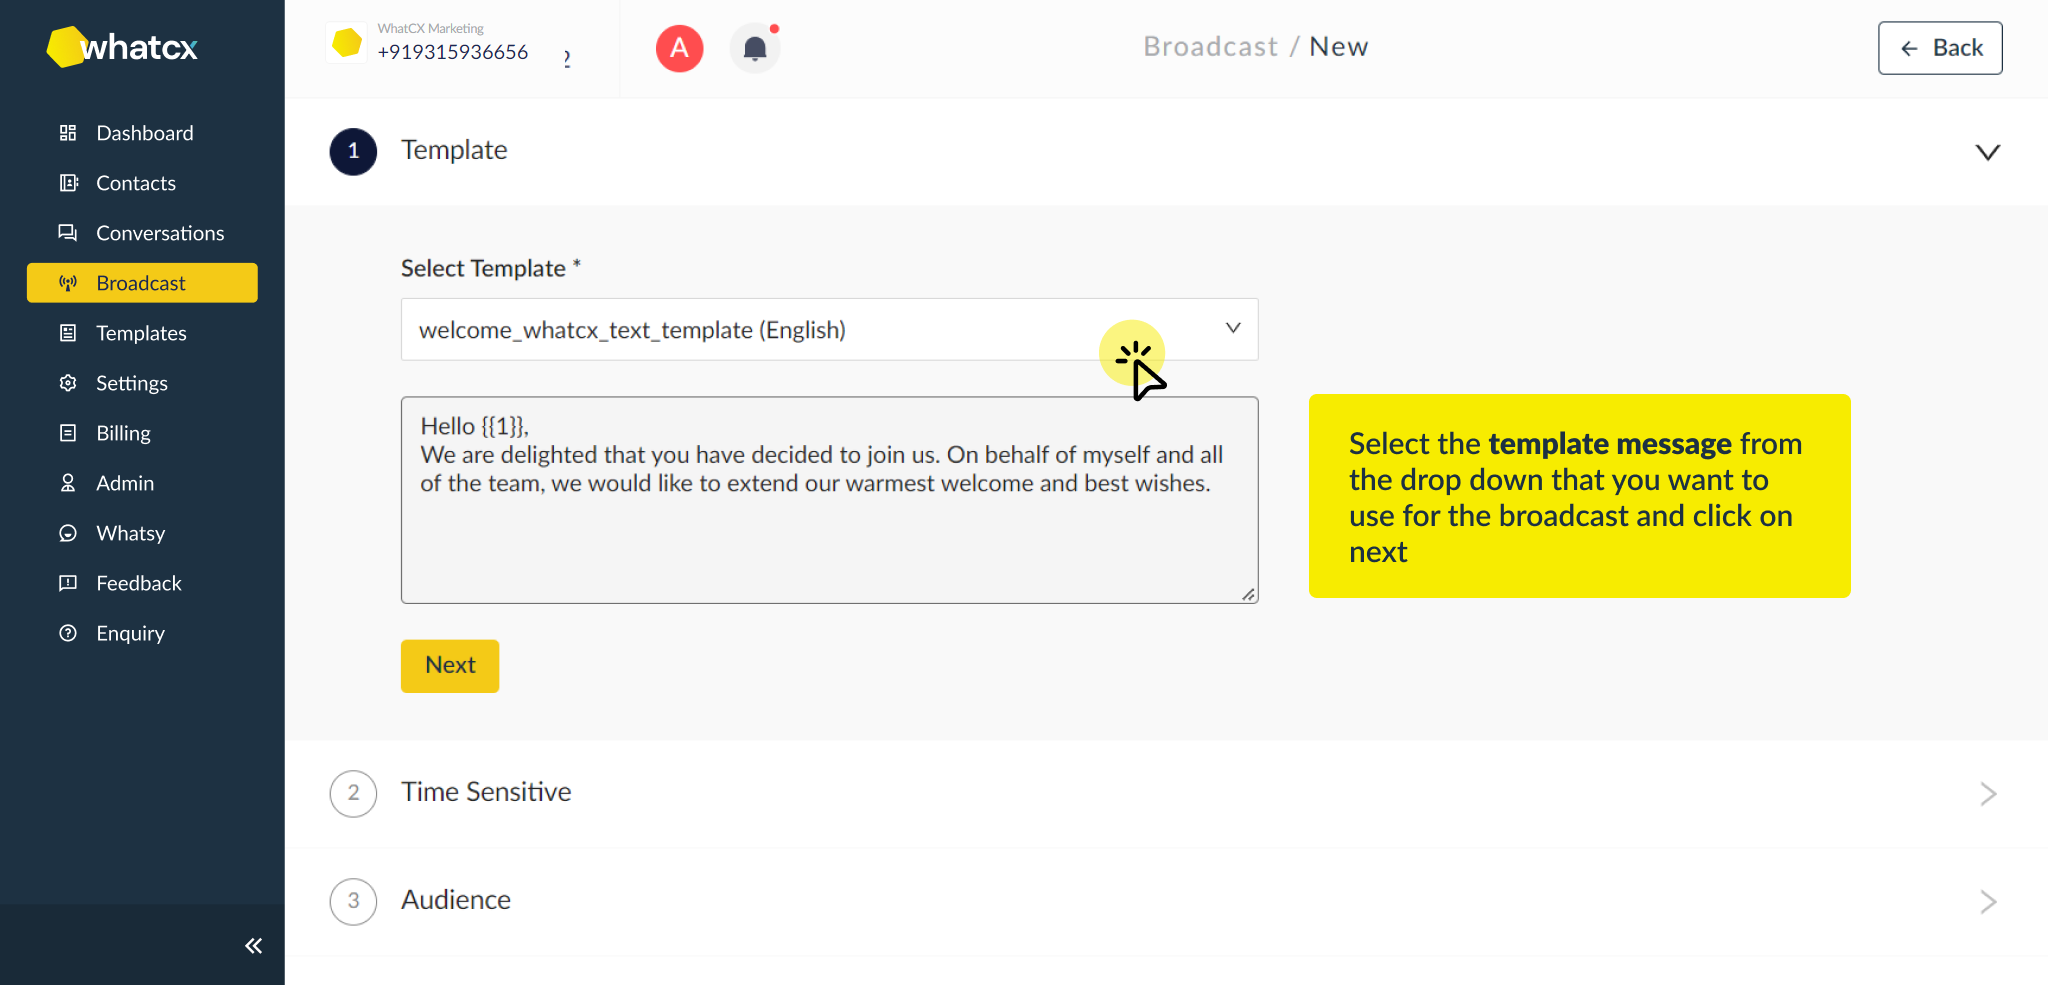
3.After clicking “Next,” you will land to Time Sensitive. You have 2 choices here –
- ‘Yes’ (Instant) – which implies the messages will be delivered within 15 minutes.
- ‘No’ (Batch Processing) – The message will be delivered to clients in batches and at a scheduled time.
After making the selection, click Next and move on.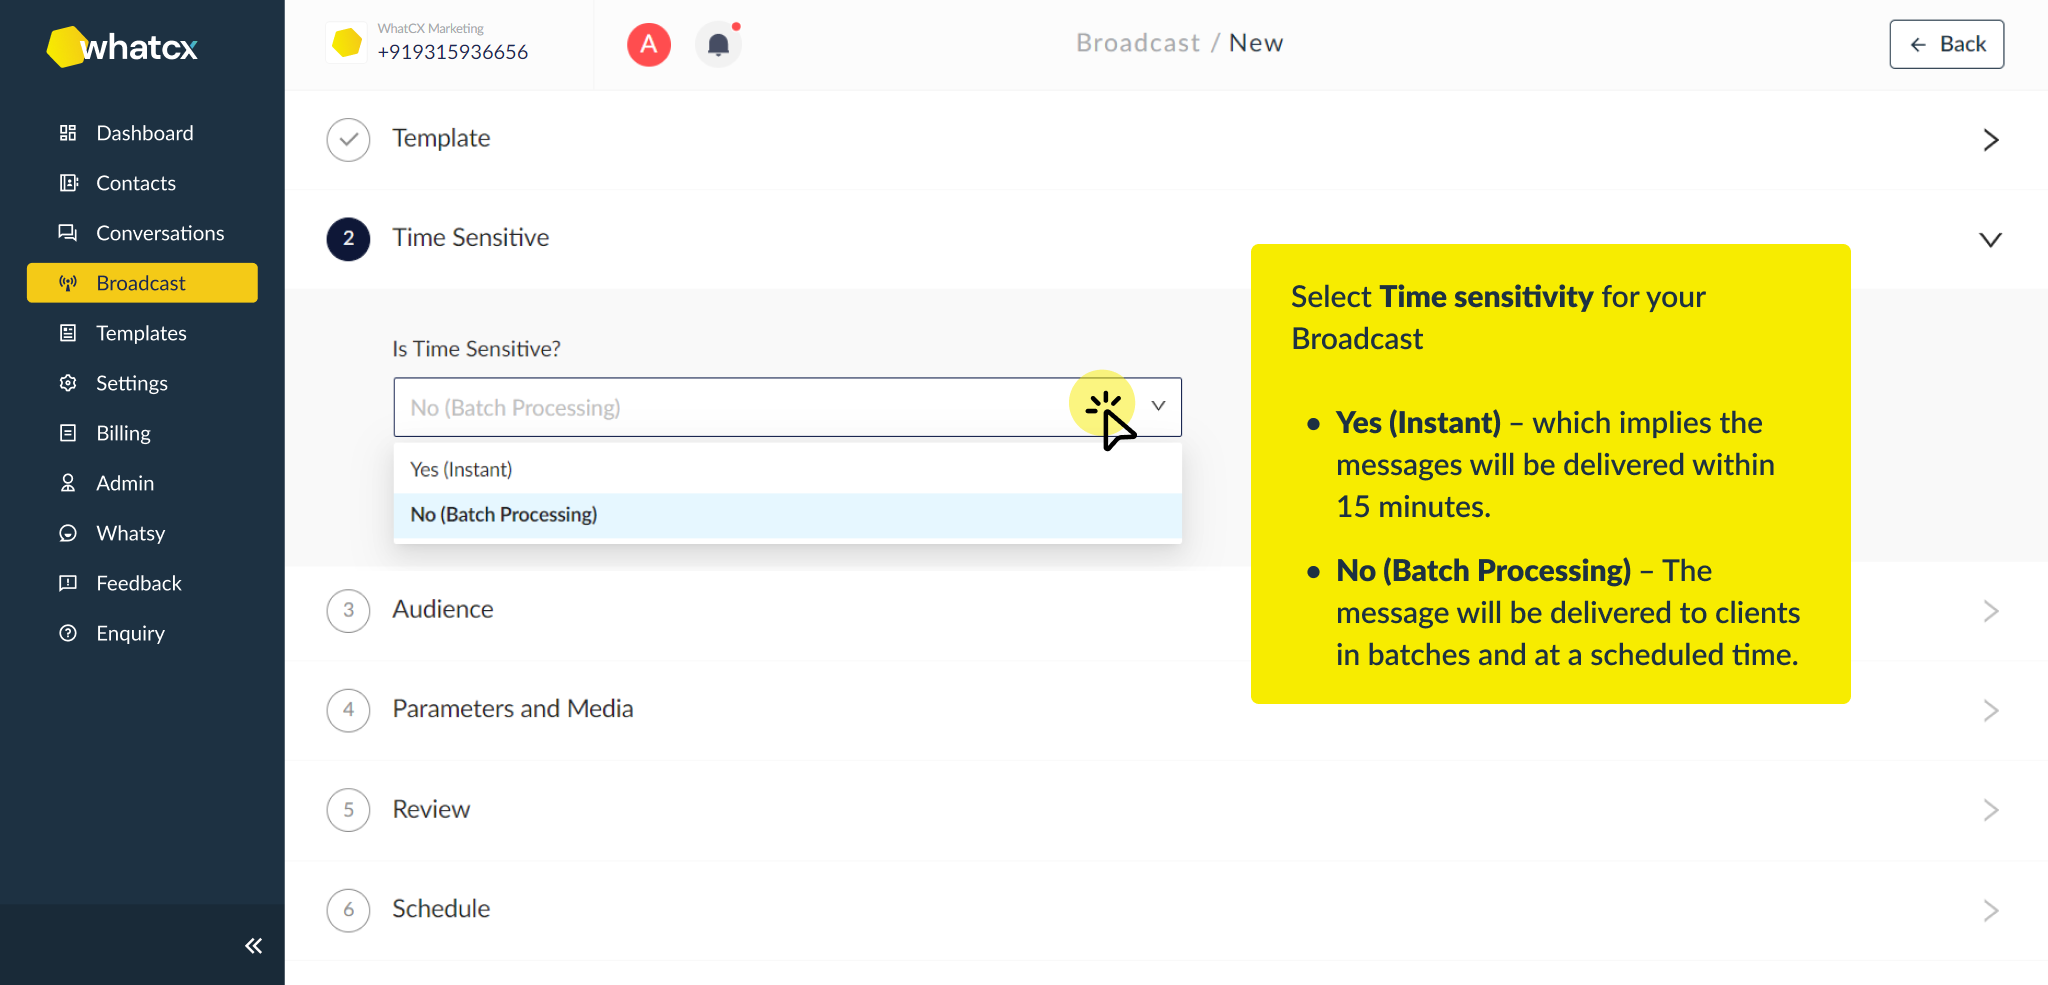
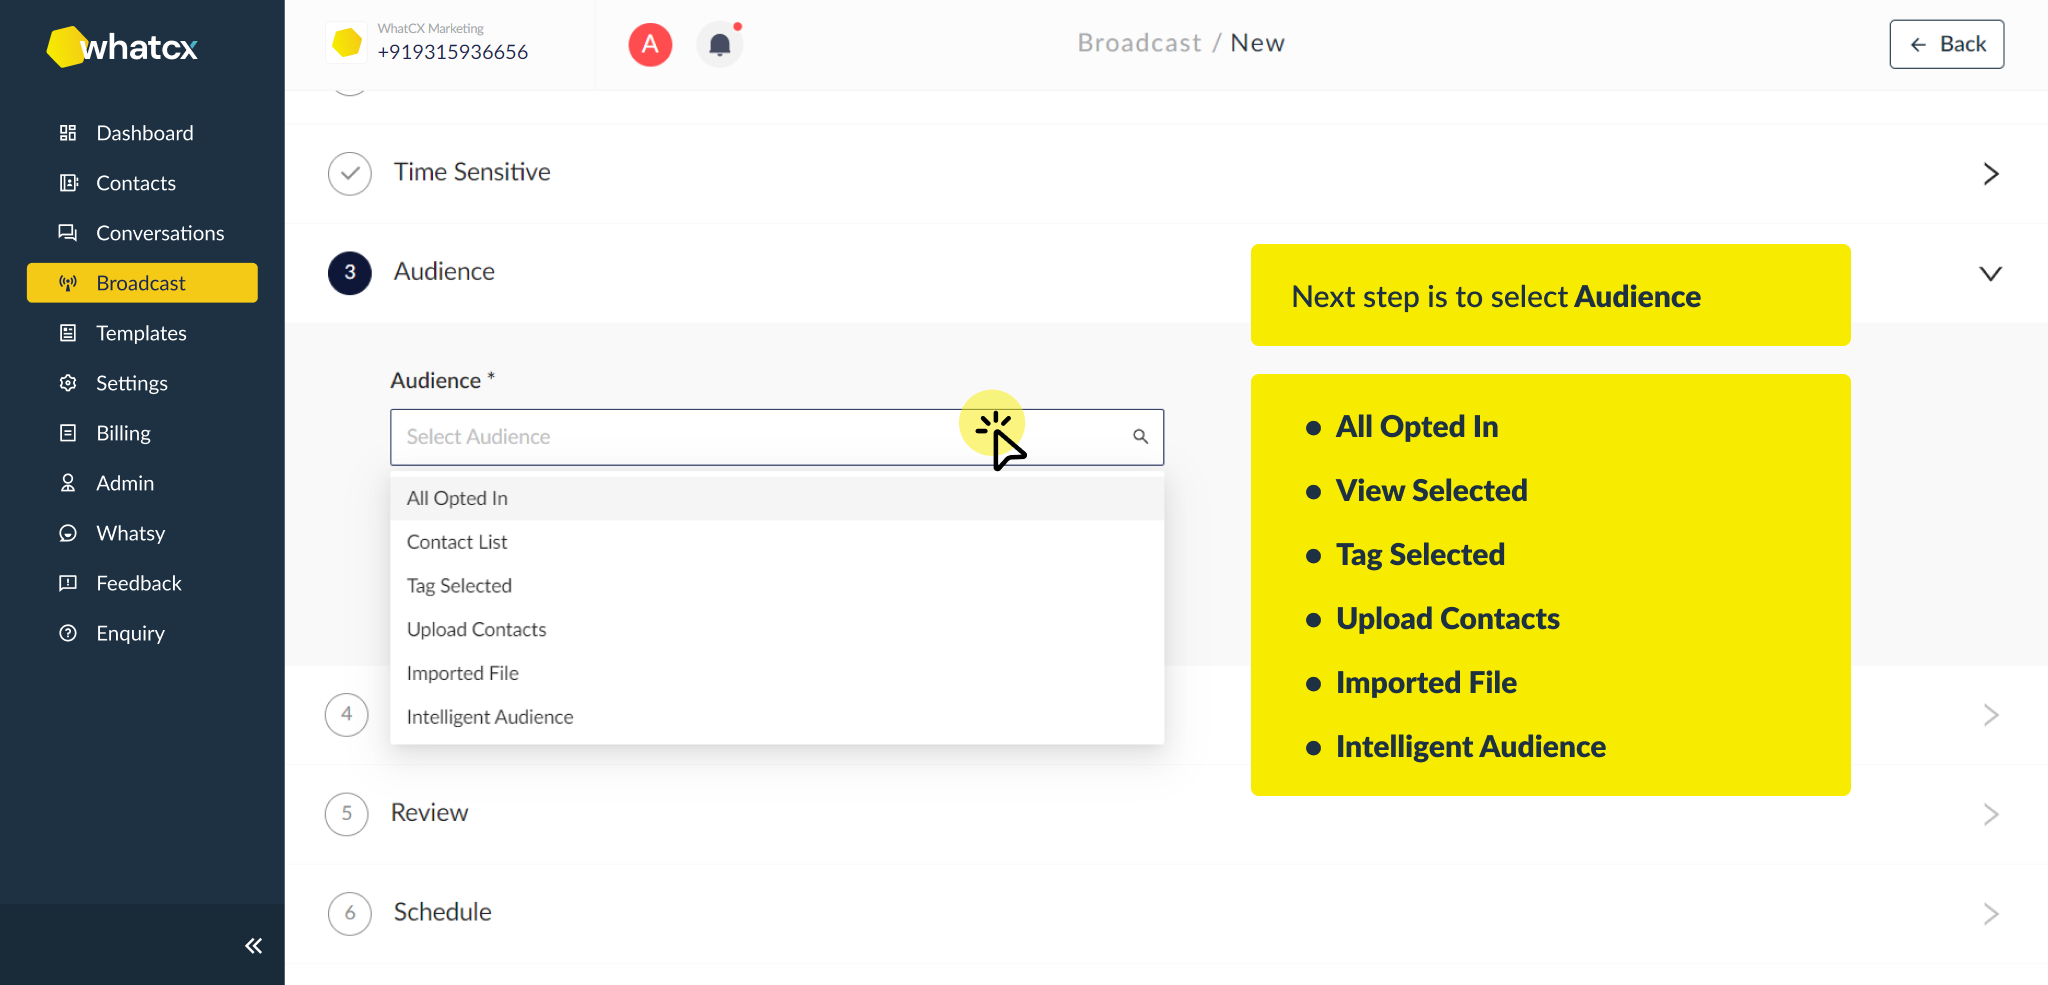
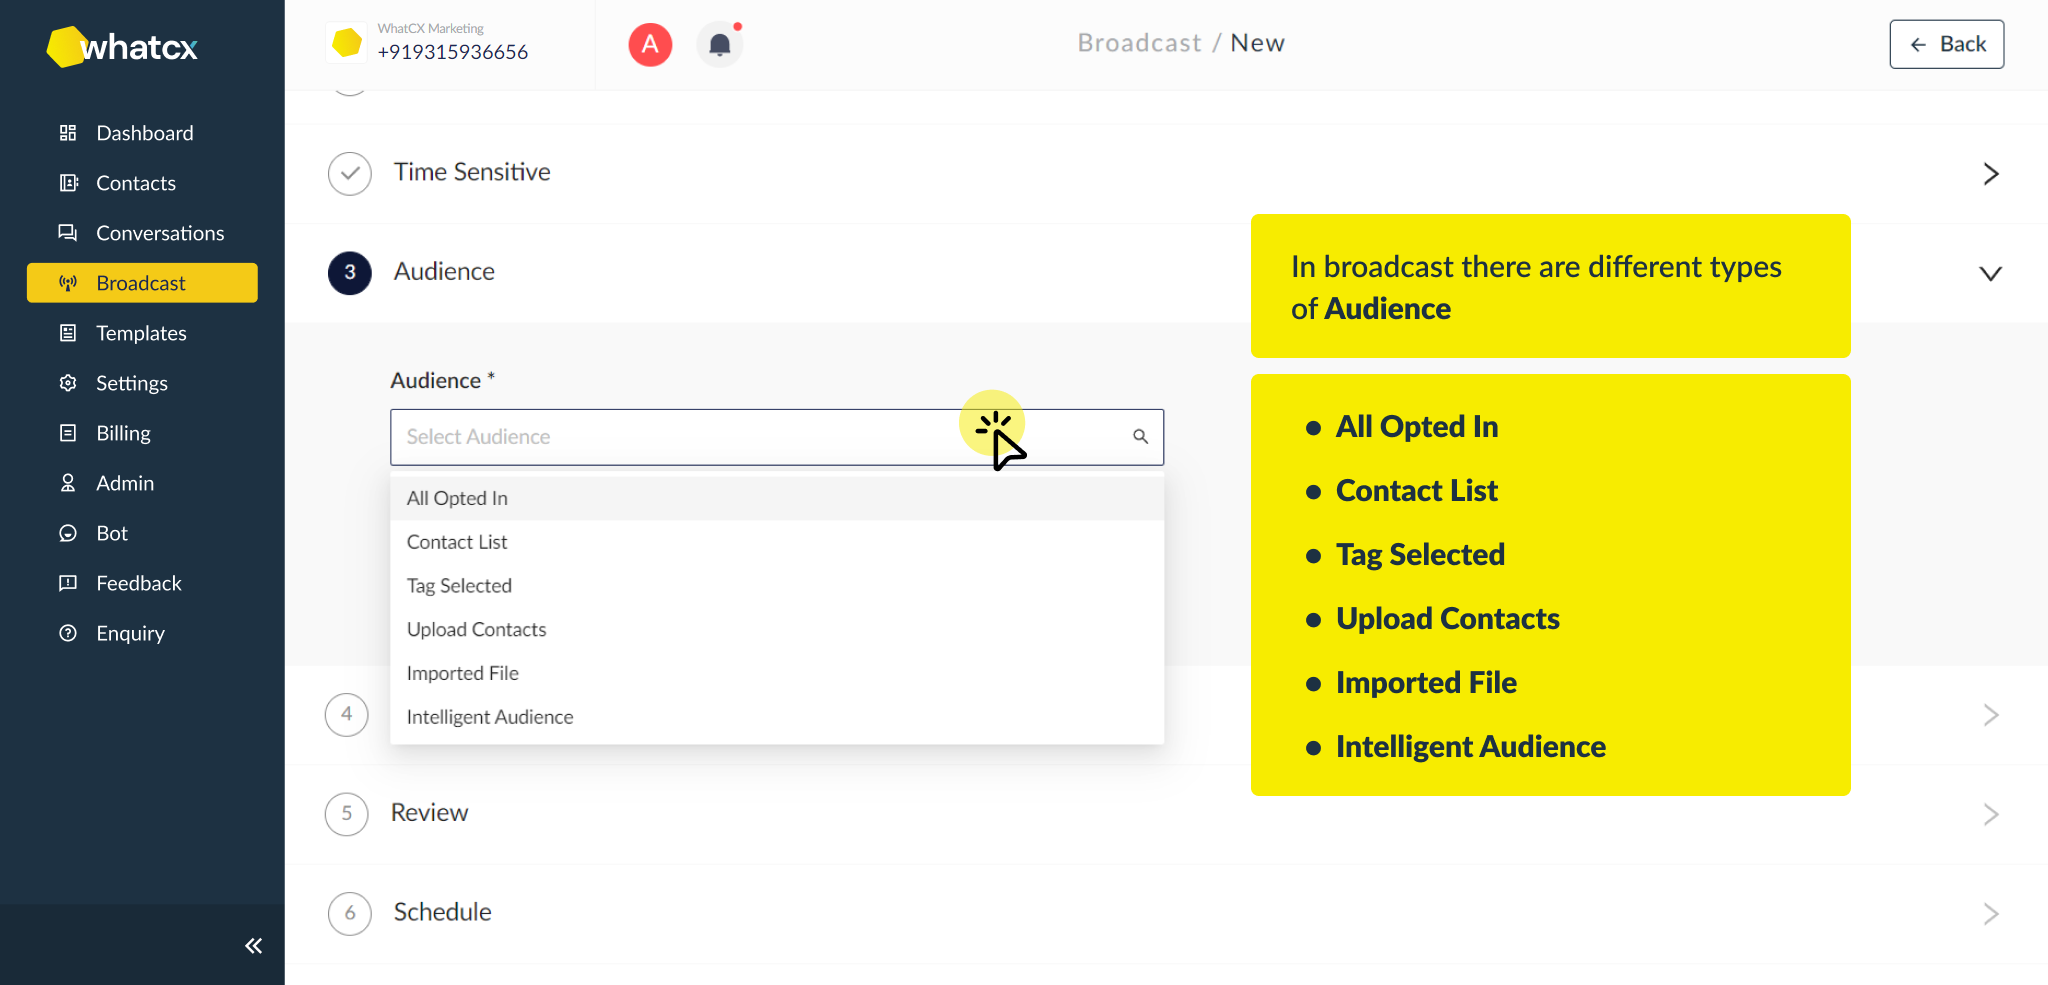
4. You will then be prompted to choose the audience for your broadcast message after selecting the Broadcast delivery. Included here is the list of recipients you want to send the broadcast to. It can be of the following types –
- All Opted In – Here, the contacts added to our contact list and approved by the business will be taken.
- Contact List – You can select “Contact List” and send the broadcast to the group you wish to deliver messages to if you have established a customized view for a particular customer.
- Tag Selected – If you have created a tag, such as “Hot Leads,” and you only want people who have the “Hot Lead” status to receive the broadcast message, you can select “Tag Selected” as the audience type and continue with the other stages.
- Upload Contacts – The list of contacts you want to send messages to can be uploaded here. Please Note –
- The file should be a CSV file
- Name, Mobile No. (with no prefix) and Country Code (No ‘+’ prefix to be used)
- Imported File – These are the documents that the contacts section imported.
- Intelligent Audience – Basically, it is a combination of New, Recently Active, and Inactive connections. You can choose “New” if you only want to send messages to newly added members. You can also choose “Recently Active Contacts” or “Inactive Contacts” if you only want to send messages to recently active or inactive contacts. Then click “Send” to continue.
 5. After choosing the audience, enter the message in the “Parameters and Media” box.
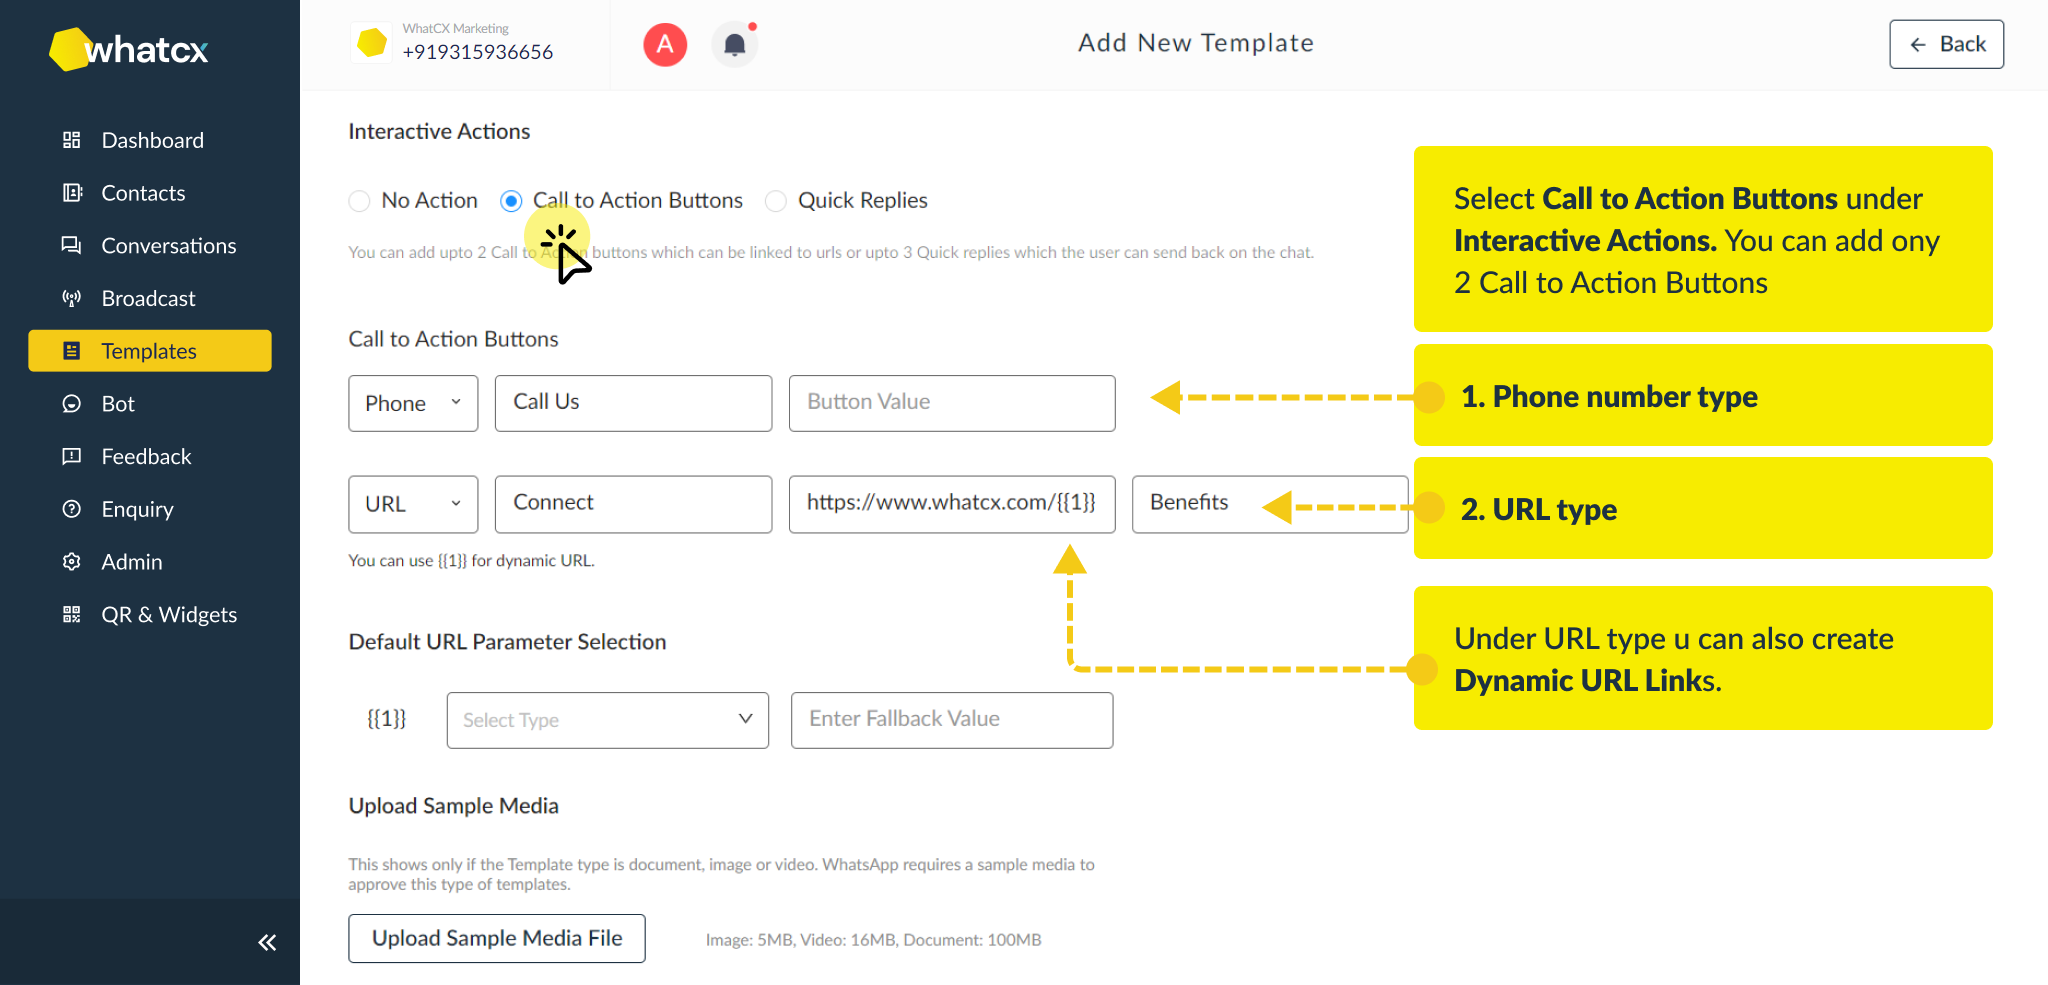
 - The curly {{1}} braces are essentially used to specify the field value, and the definition of the value “1” must be explained in the Parameters section.
- Fallback value simply refers to the message that should be displayed to customers if there is no first name in the contact list.
- Now you need to define the {{1}} to the system in the Parameters section.
- In the screenshot, we want {{1}} to be the first name of the customer.
- In {{2}}, we have selected the Fixed Value as our ‘type’ and we want the customer to have the link to the website at the bottom of the message.
- You can choose any image, video, or other types of media to send as an attachment to your customers.
When you’re done, click the next button to move on.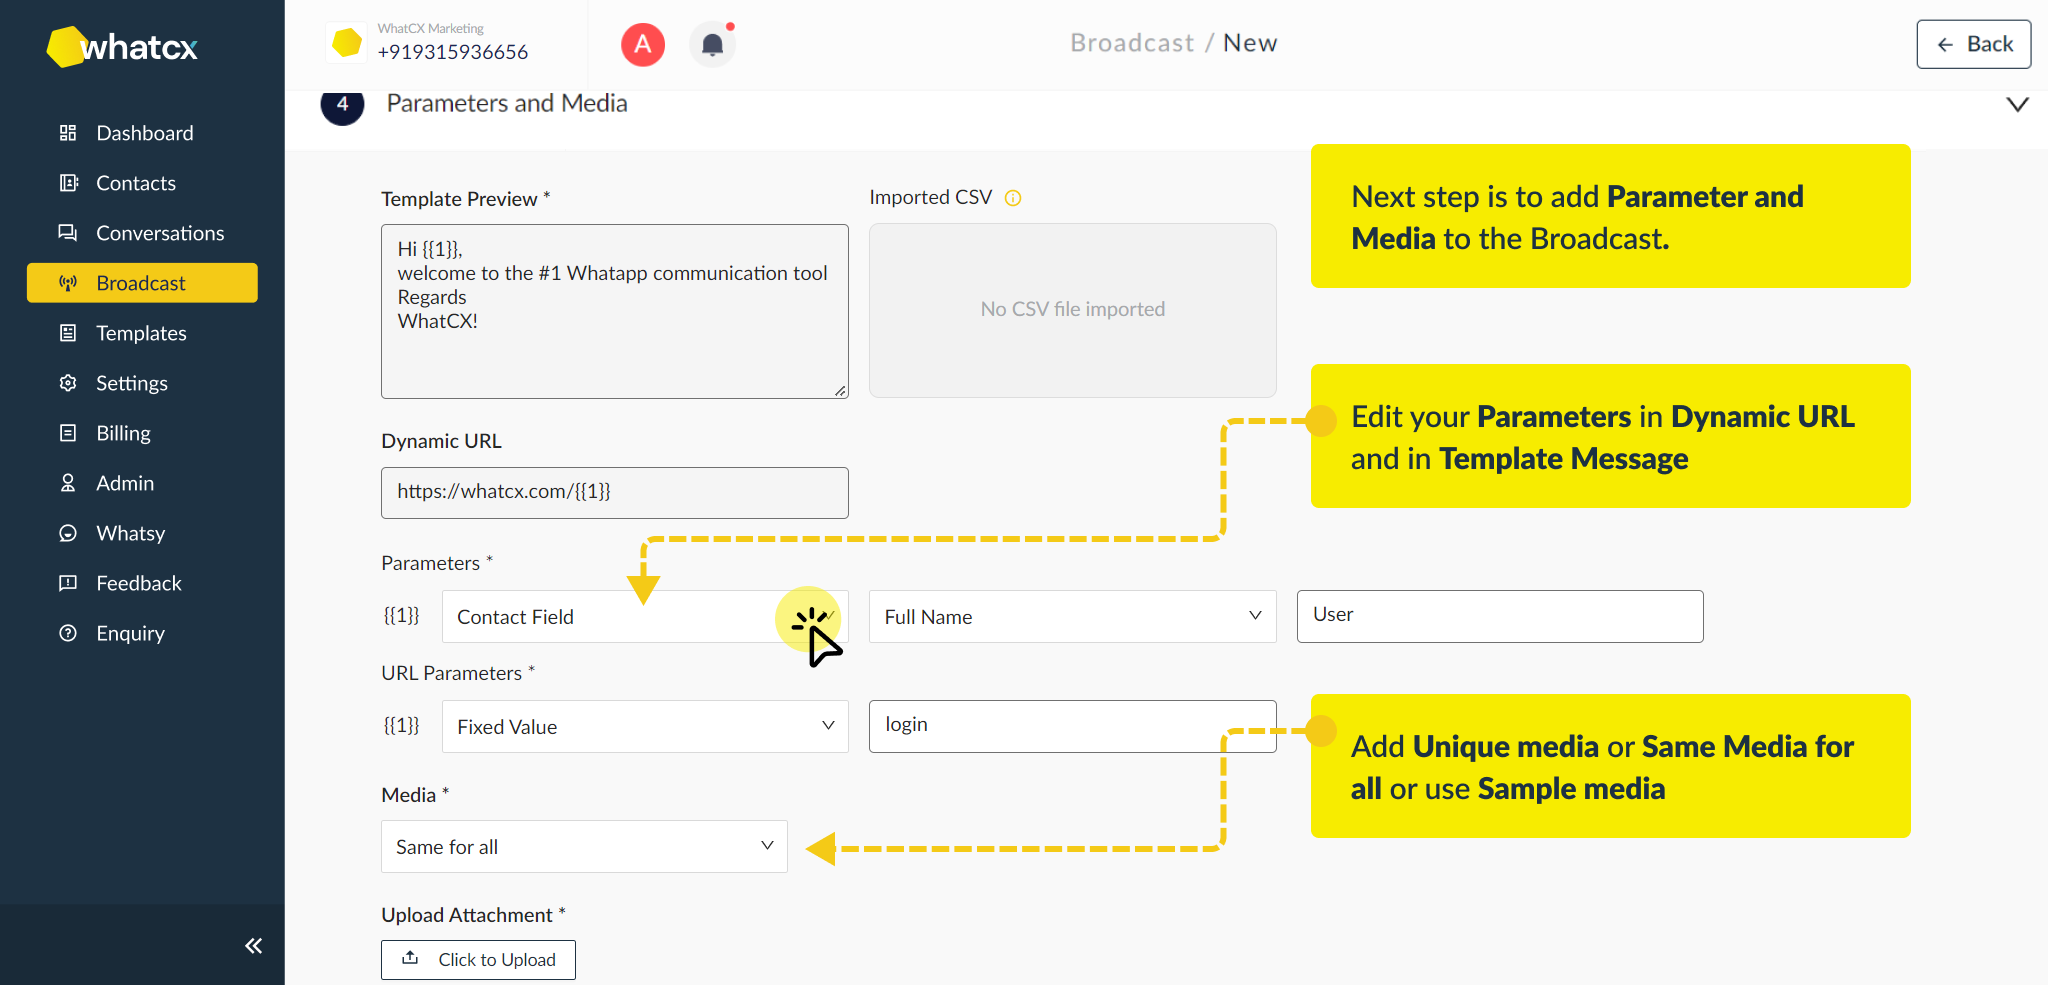 6. Post creating your template message and fixing the parameters and media, you now have to review the contacts. In the ‘Review’ section, you can edit the contact details if you want or can delete a contact from the list.
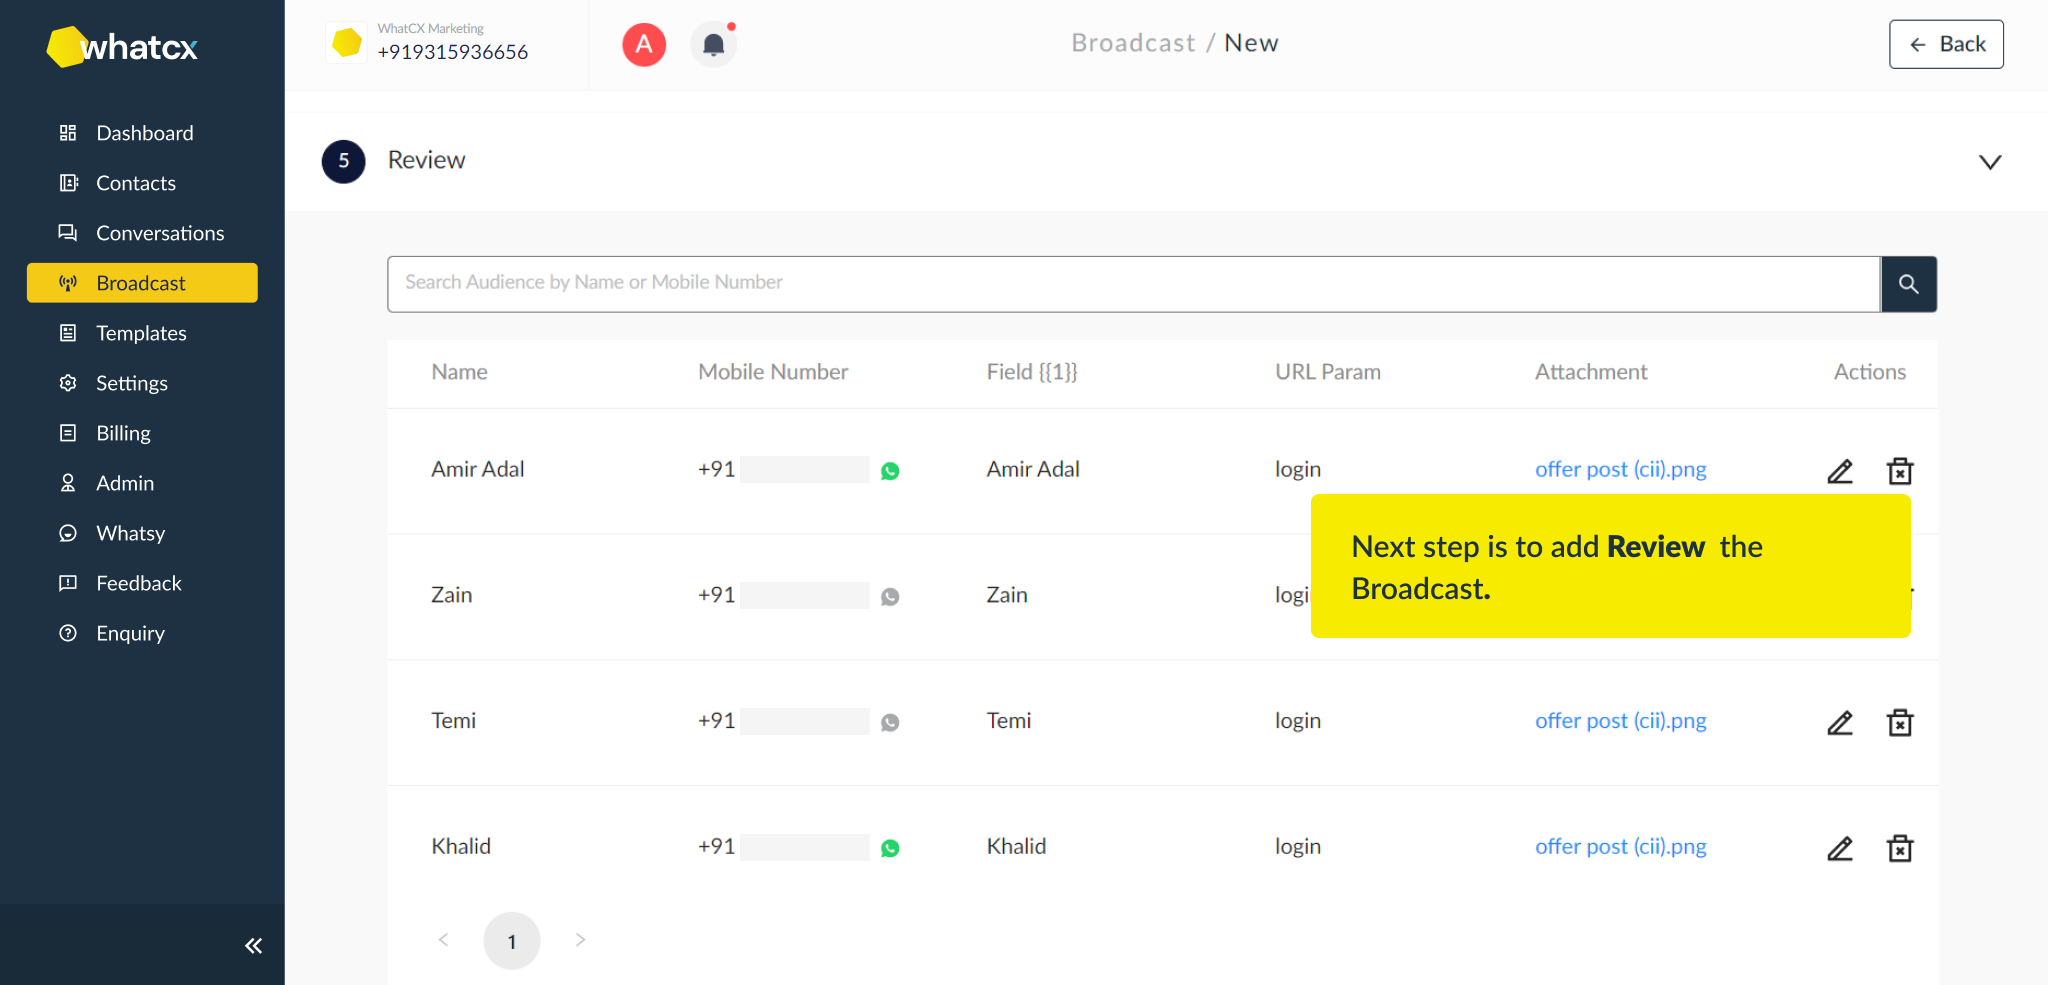
7. After you have done the review of the message you reach to the 7th step which is to schedule the date and time for the broadcast message.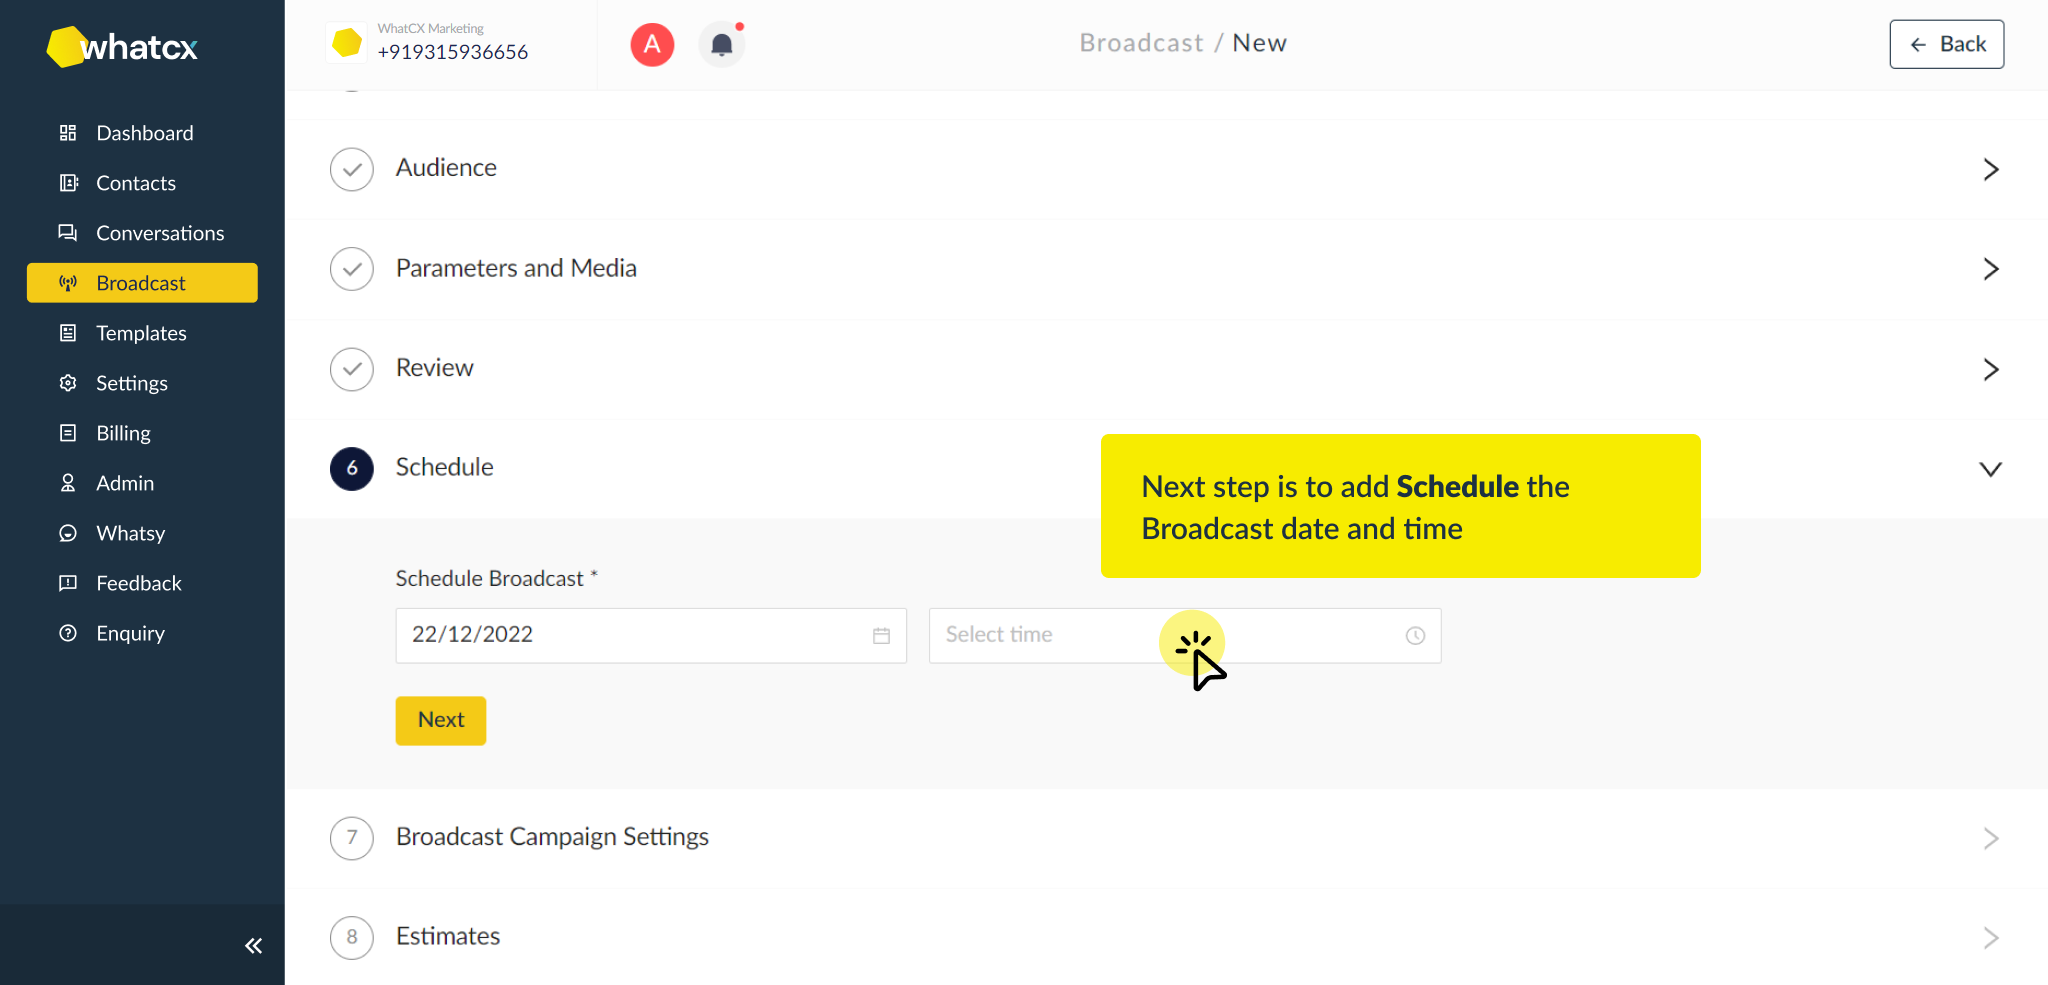
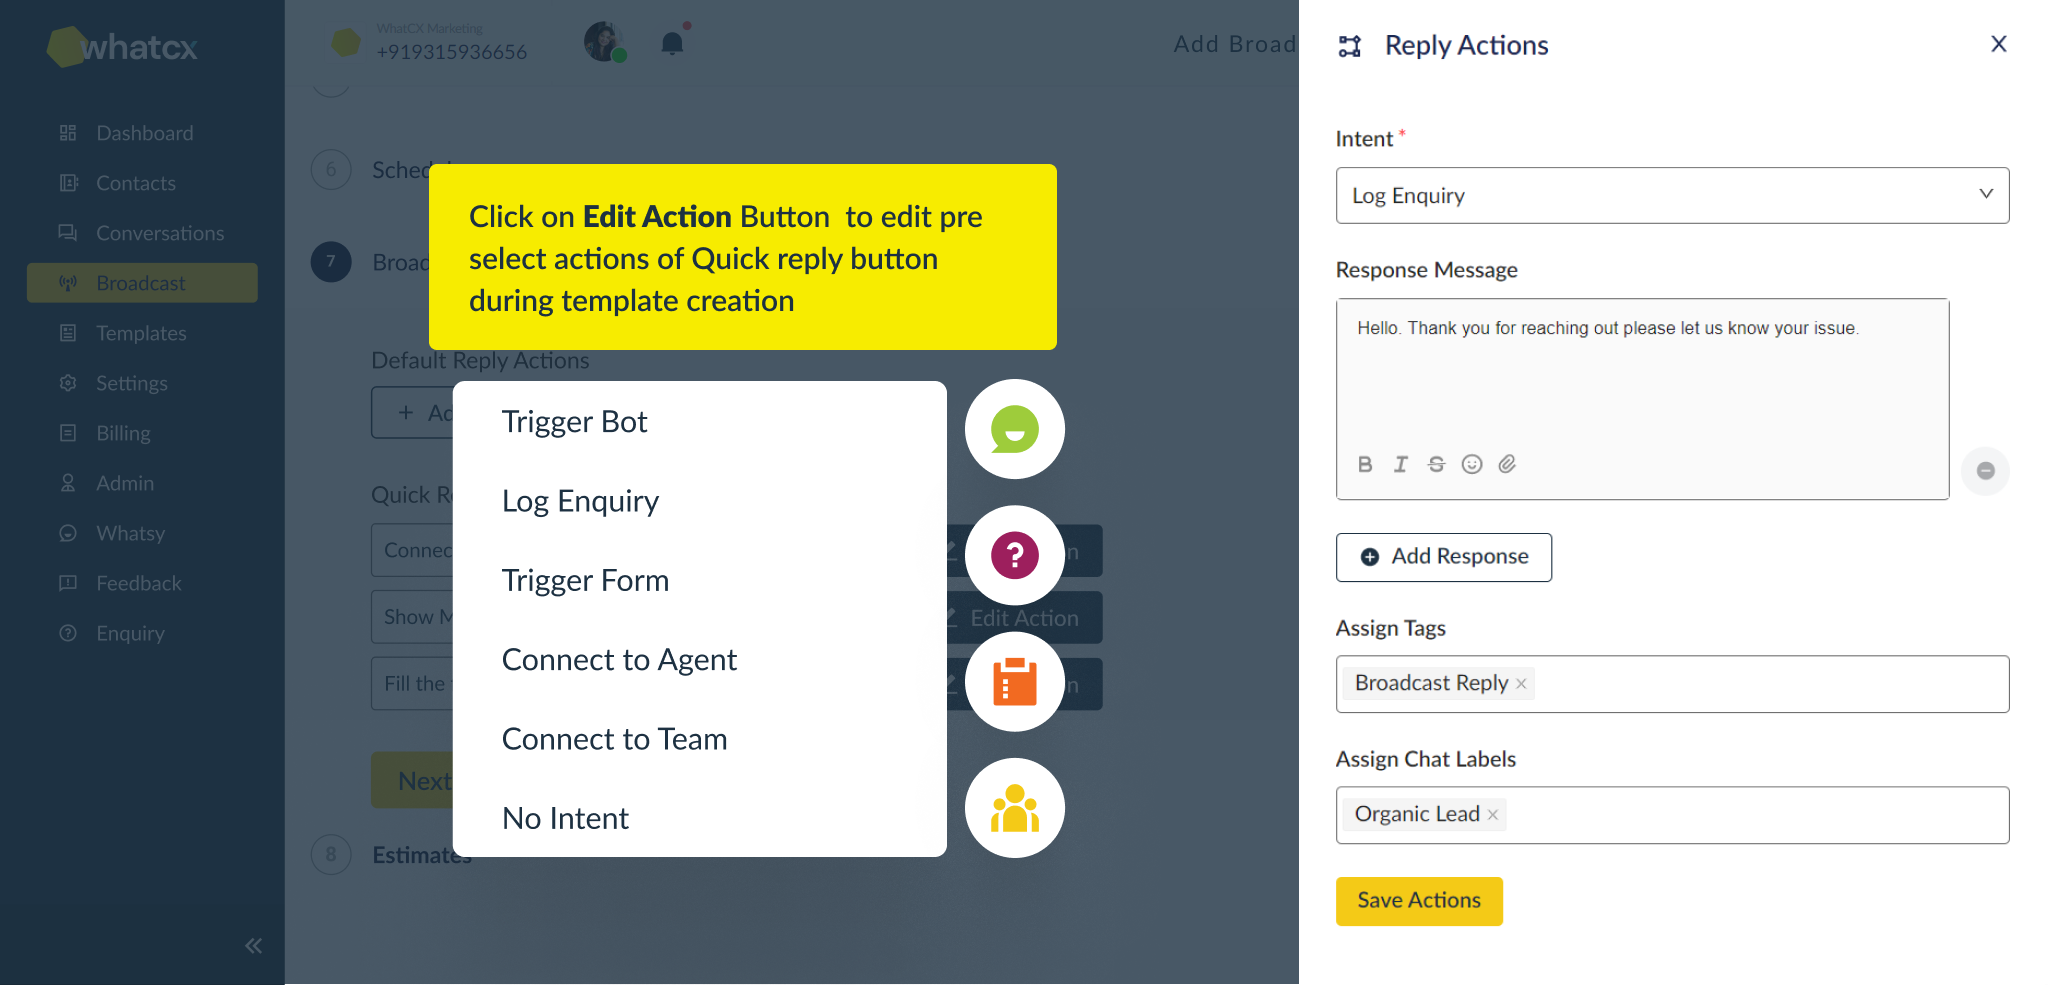
8. Post scheduling the broadcast date and time, you have to set the Broadcast Campaign setting where you need to take the following actions –
- Assign an Agent or team to reply to the response received after Broadcast.
If in case you click on Register and Enquiry on response, you need to create a default response message for the broadcast message.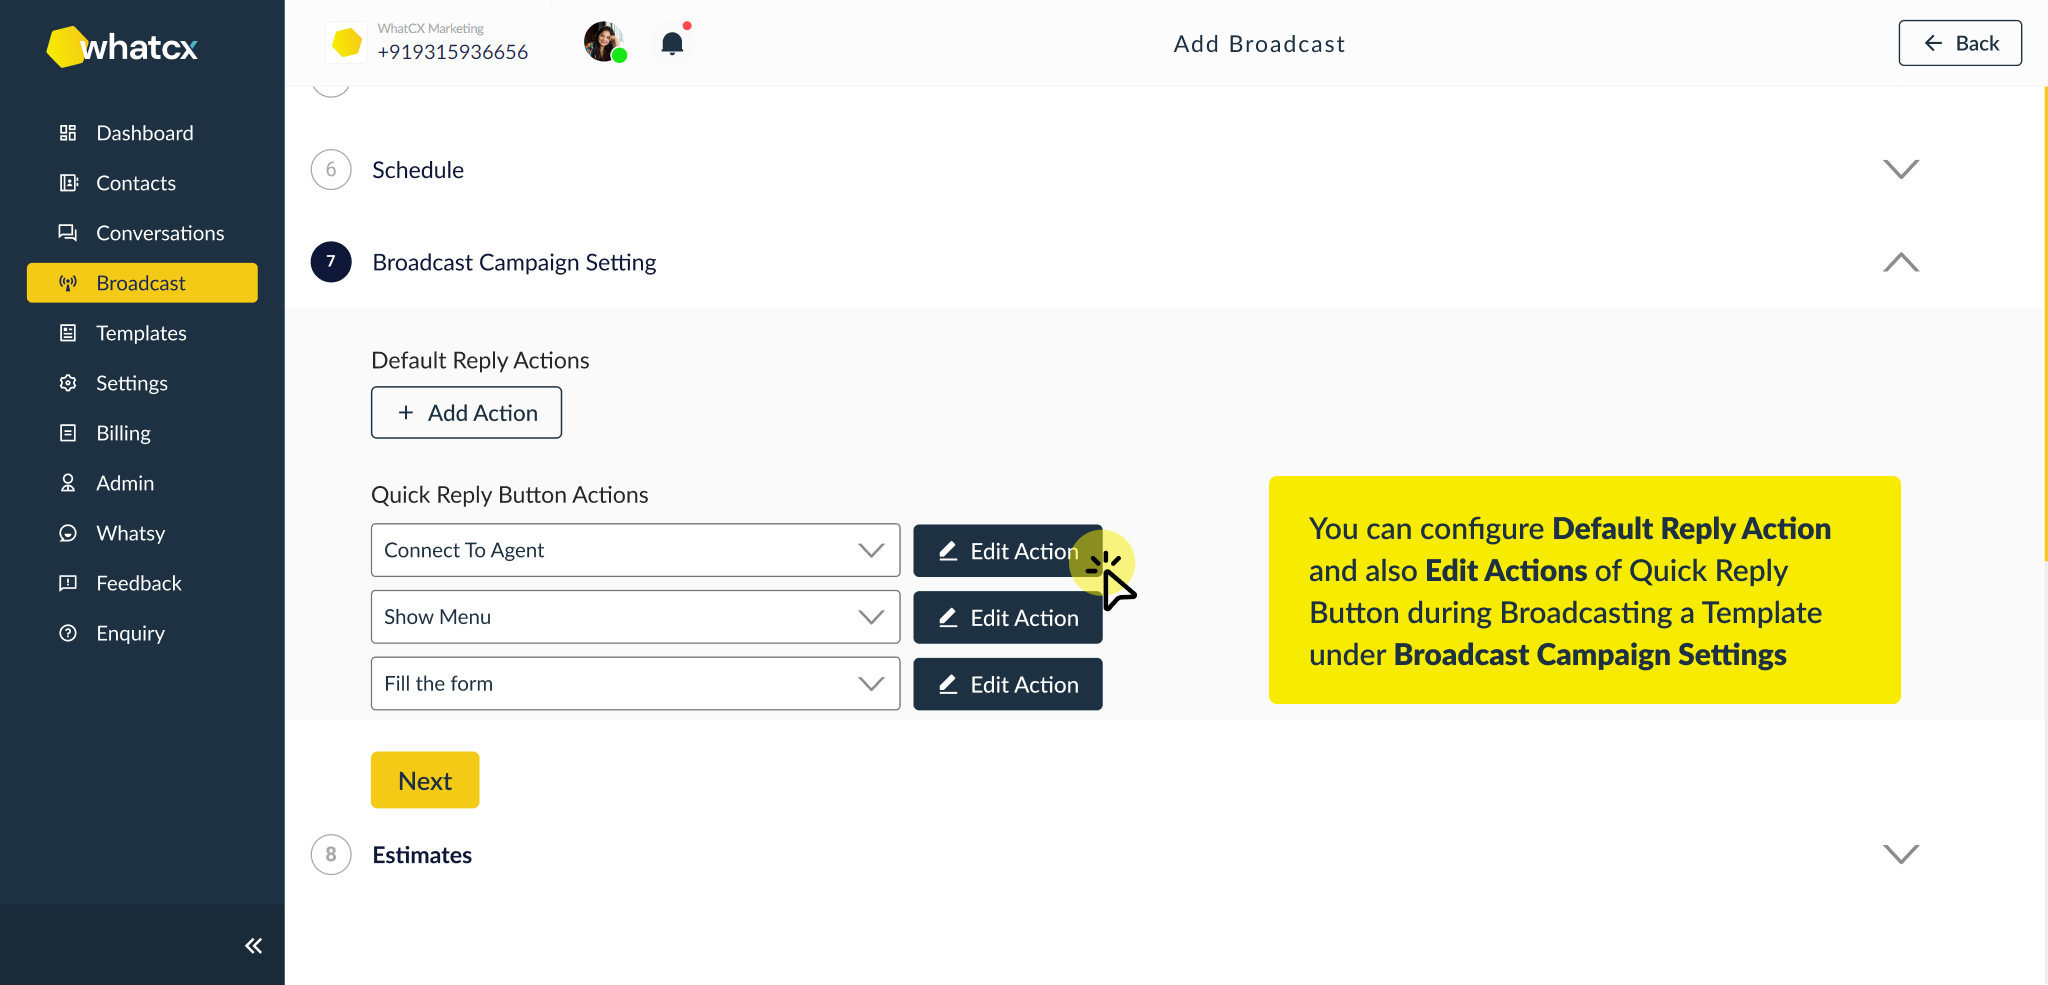
 9. Once you have set the Broadcast Campaign settings you will reach the final step which shows you the campaign estimate.
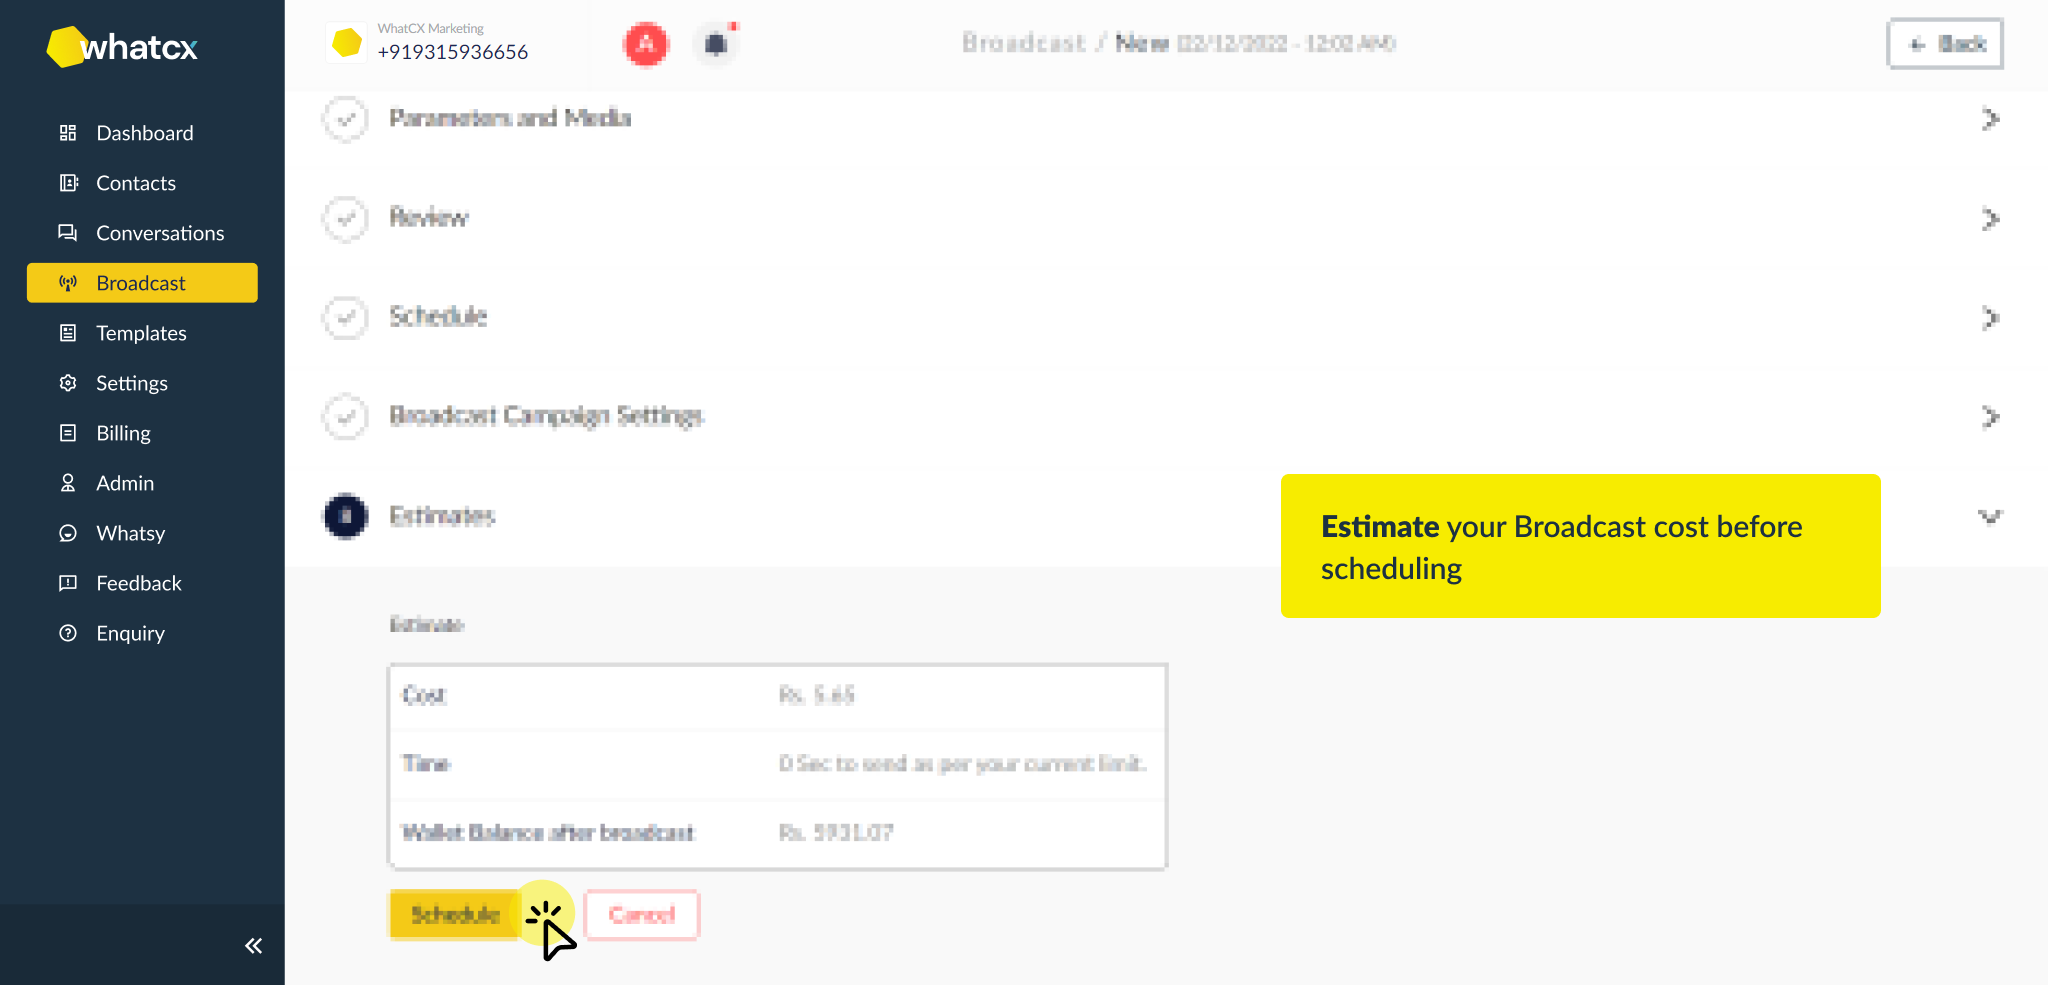
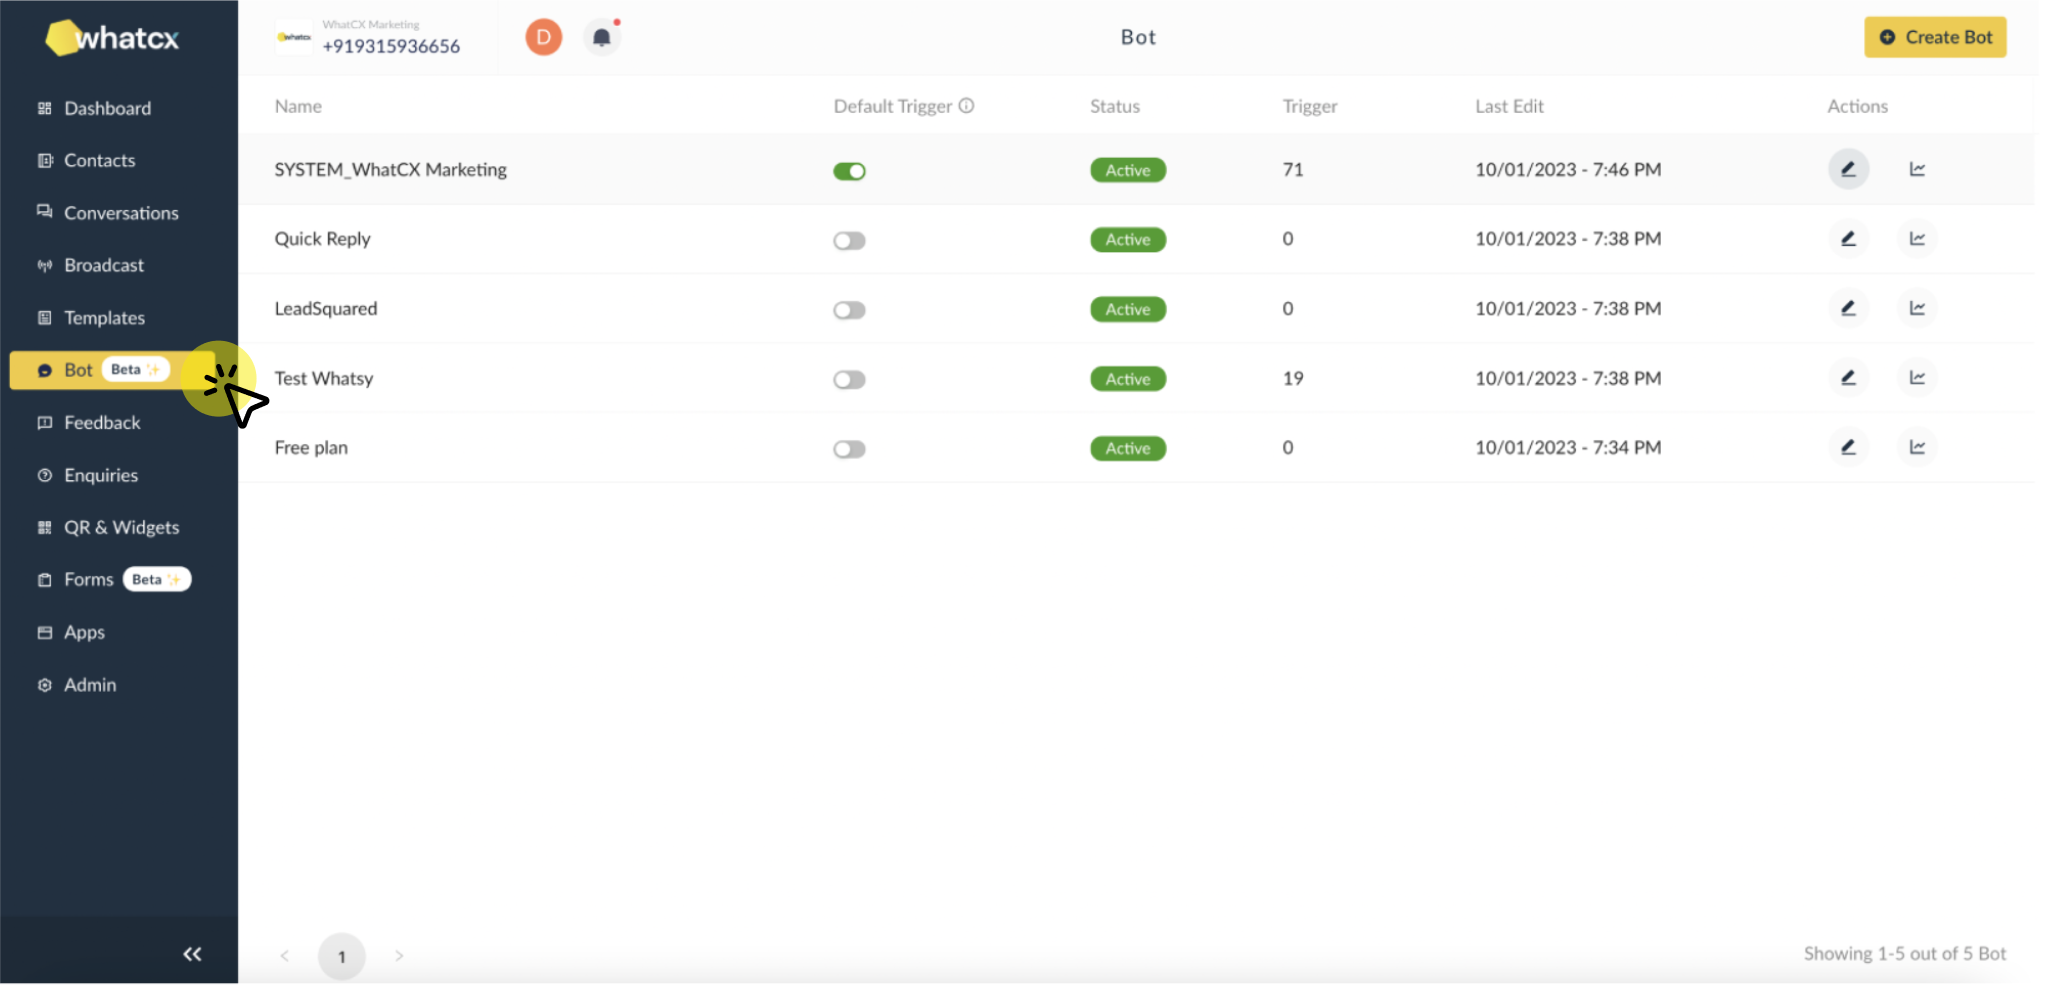
Setup your first bot
For creating a bot, follow the steps below:
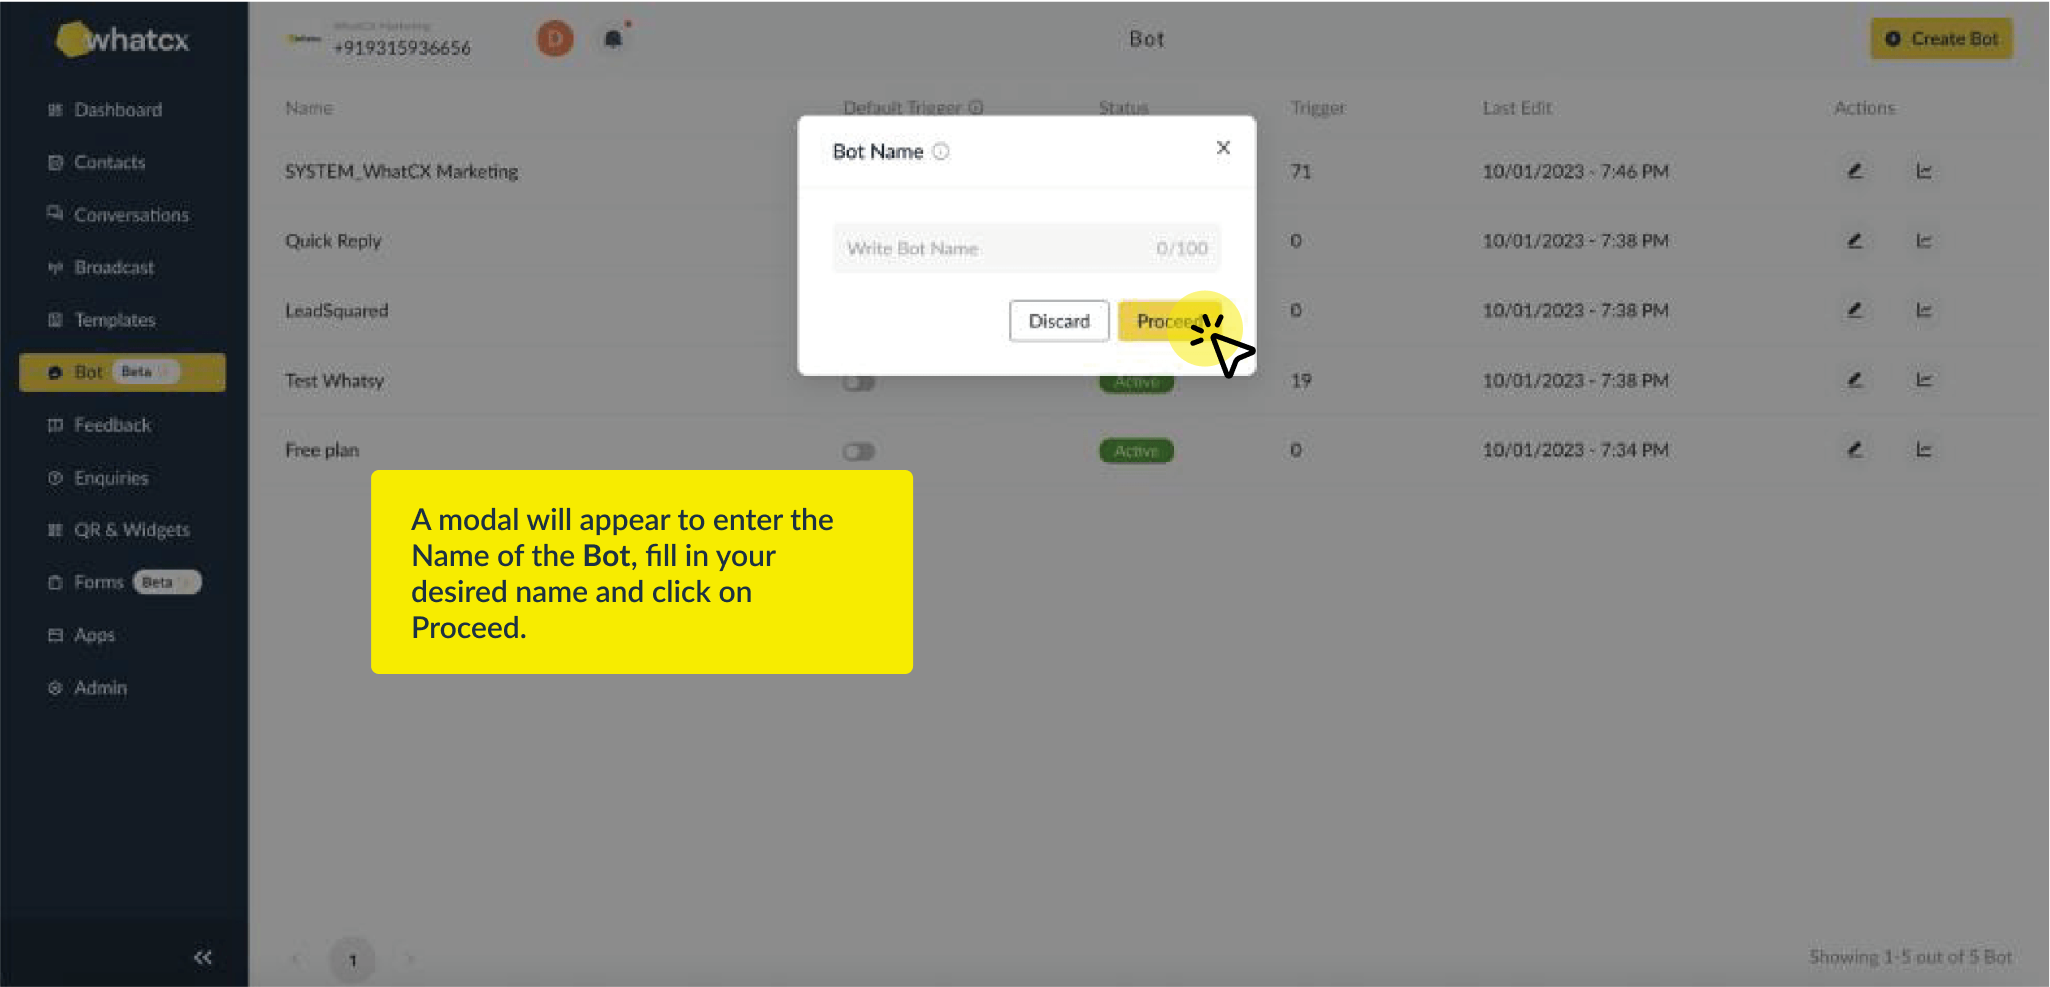
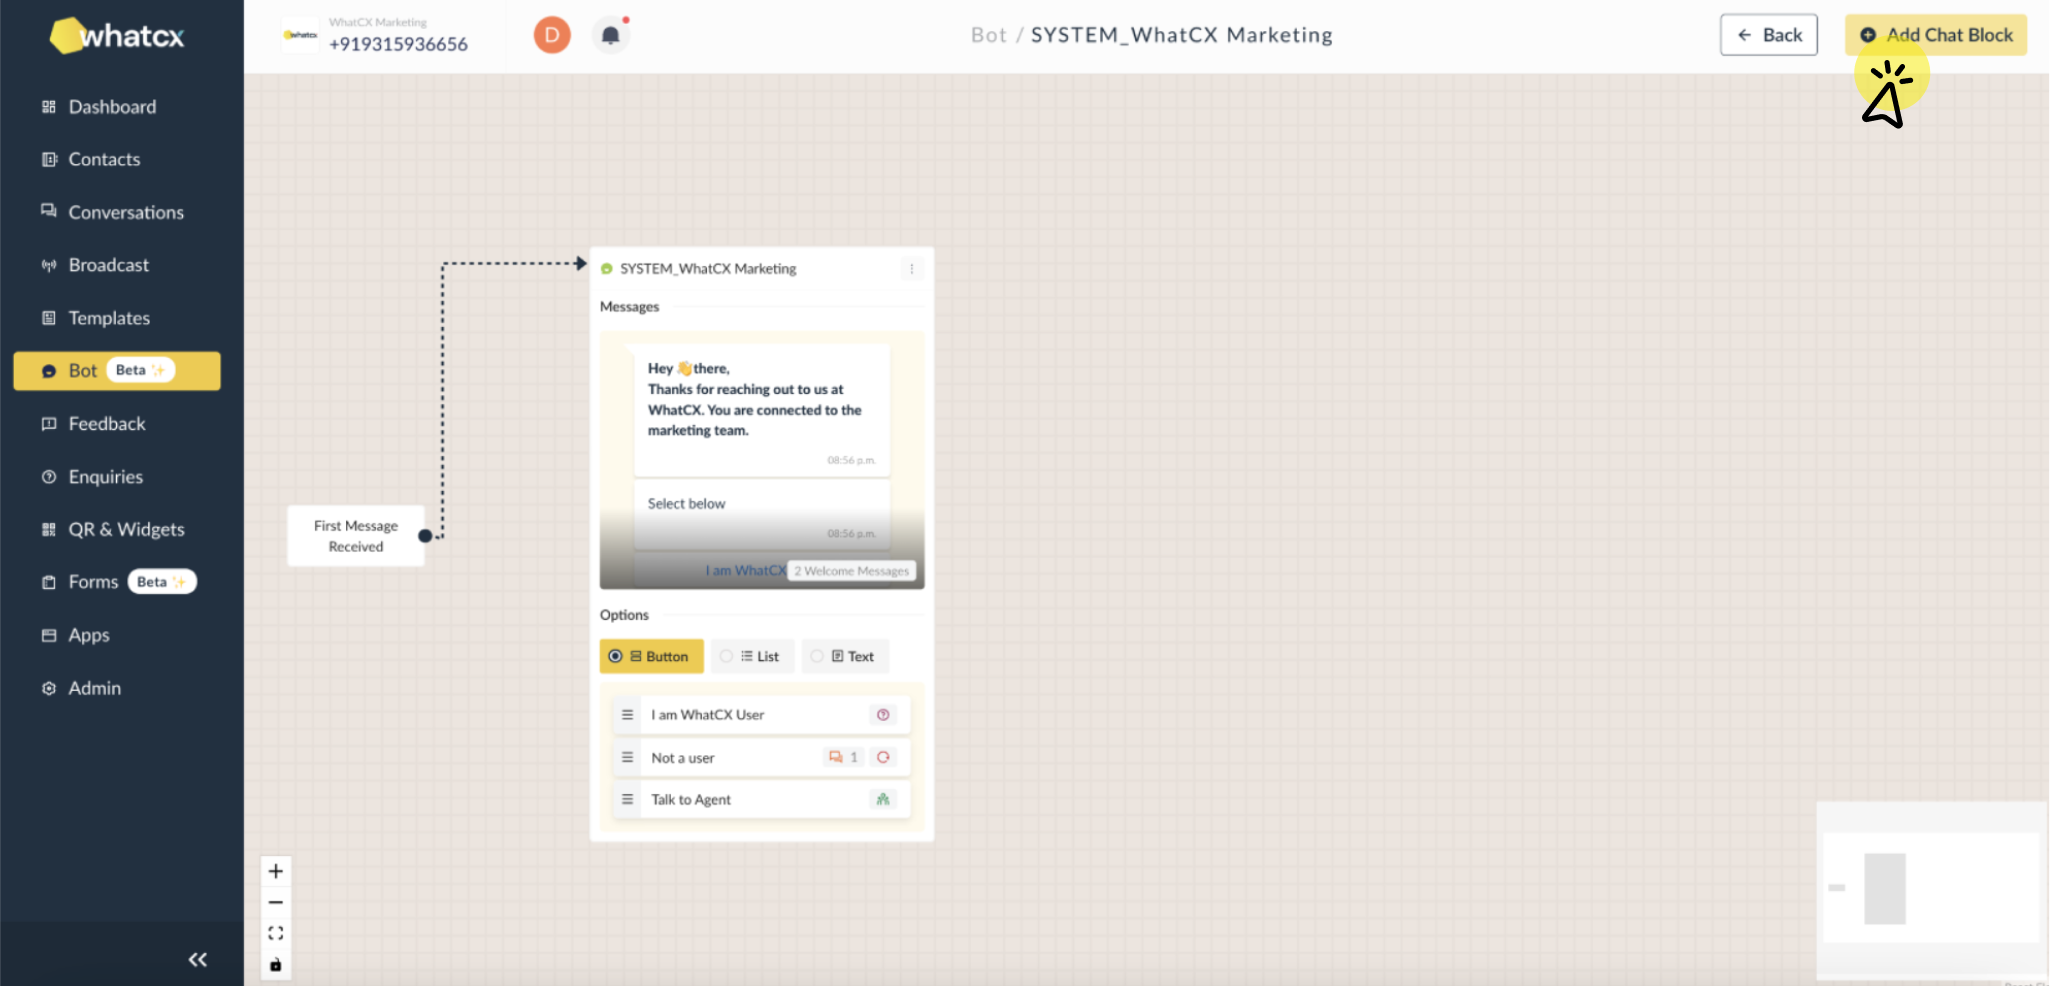
1. Login to your WhatCX Account, go to the Bots Module and click on the Create Bot button on the top-right.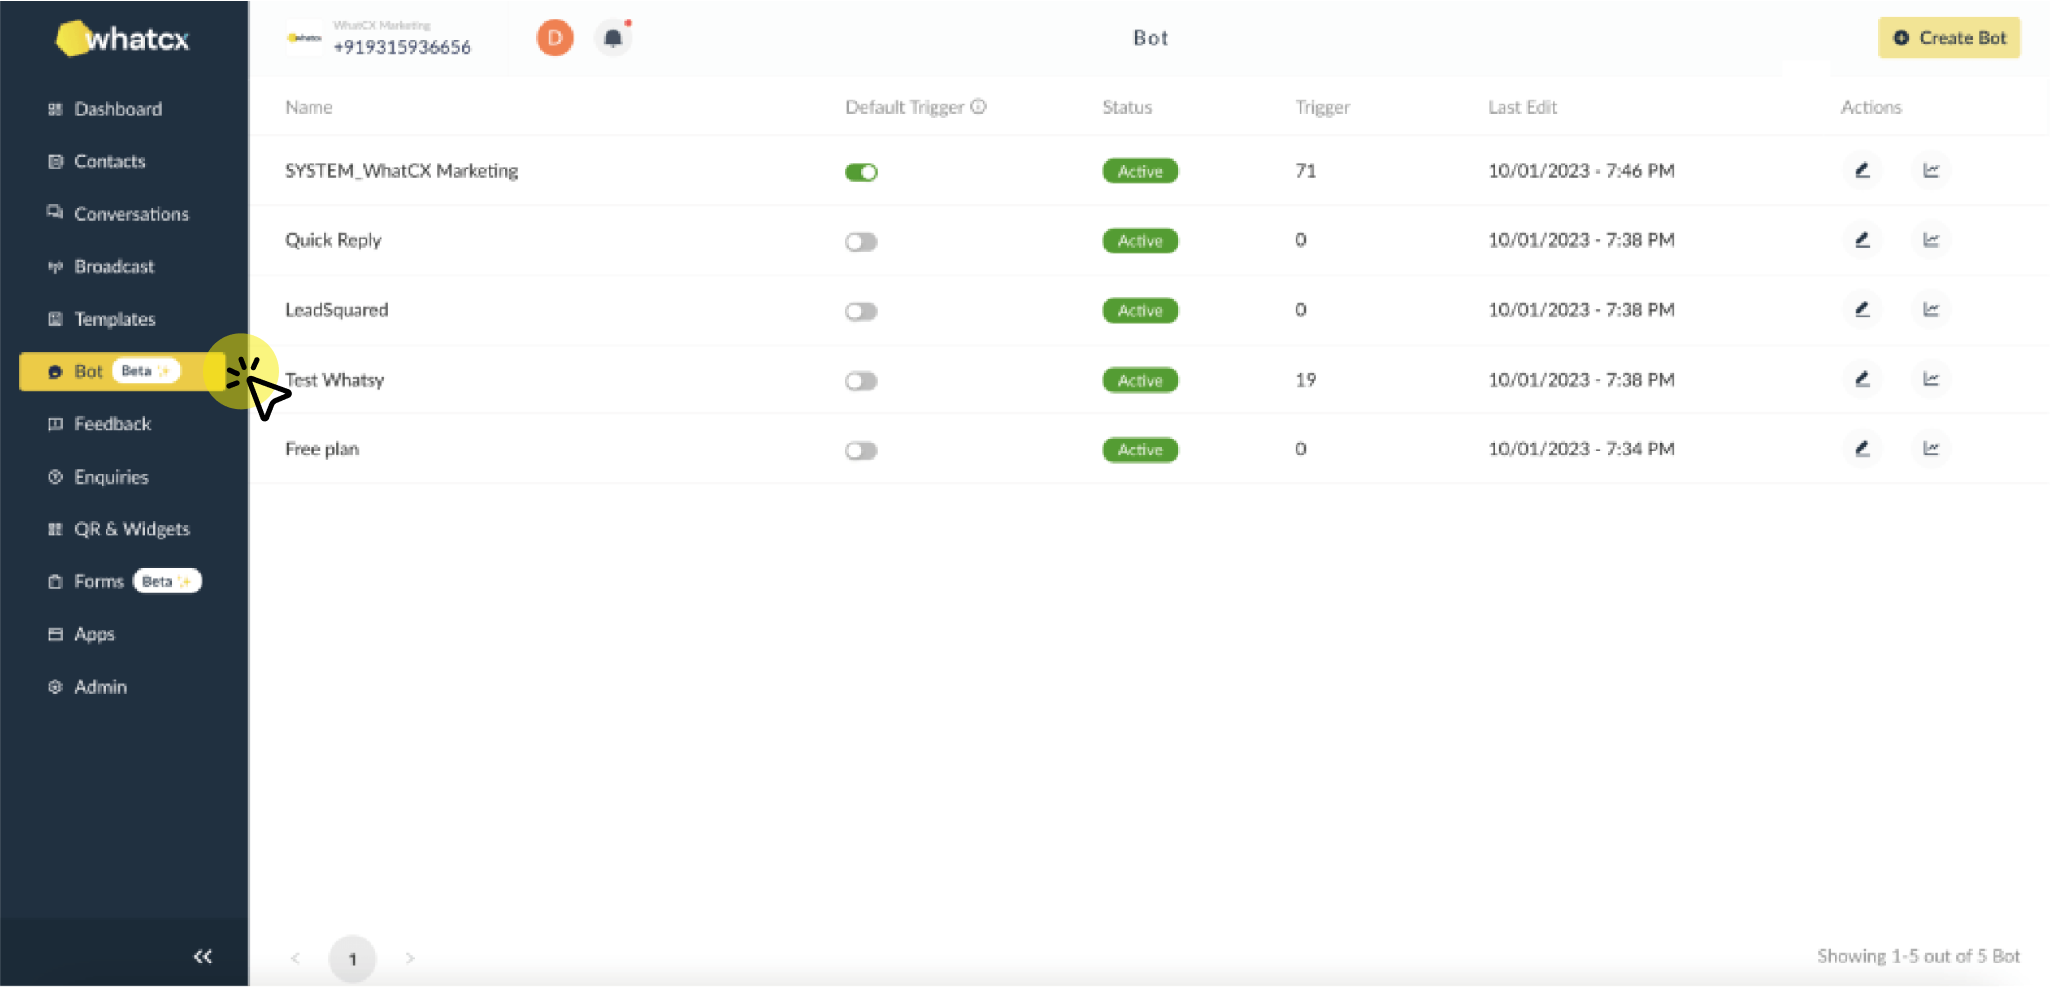
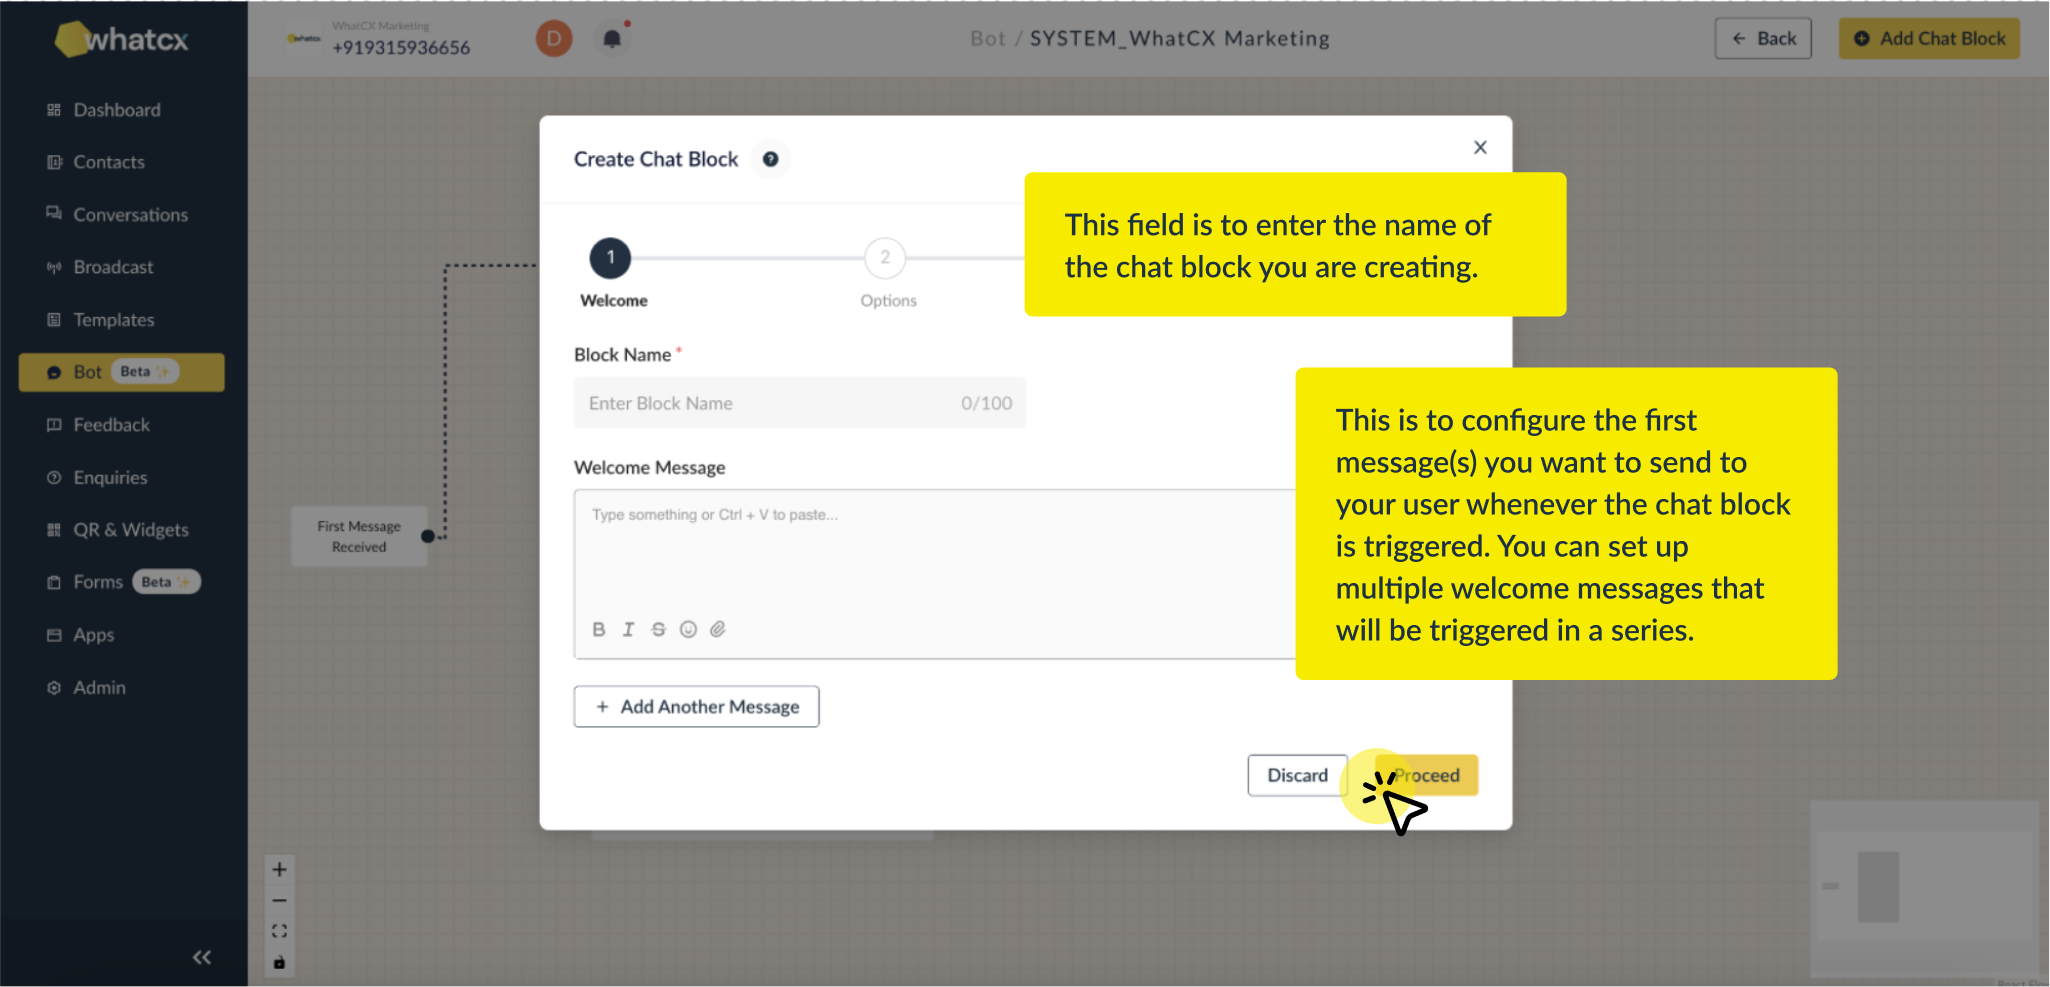
2. A modal will appear to enter the Name of the Bot, fill in your desired name and click on Proceed.
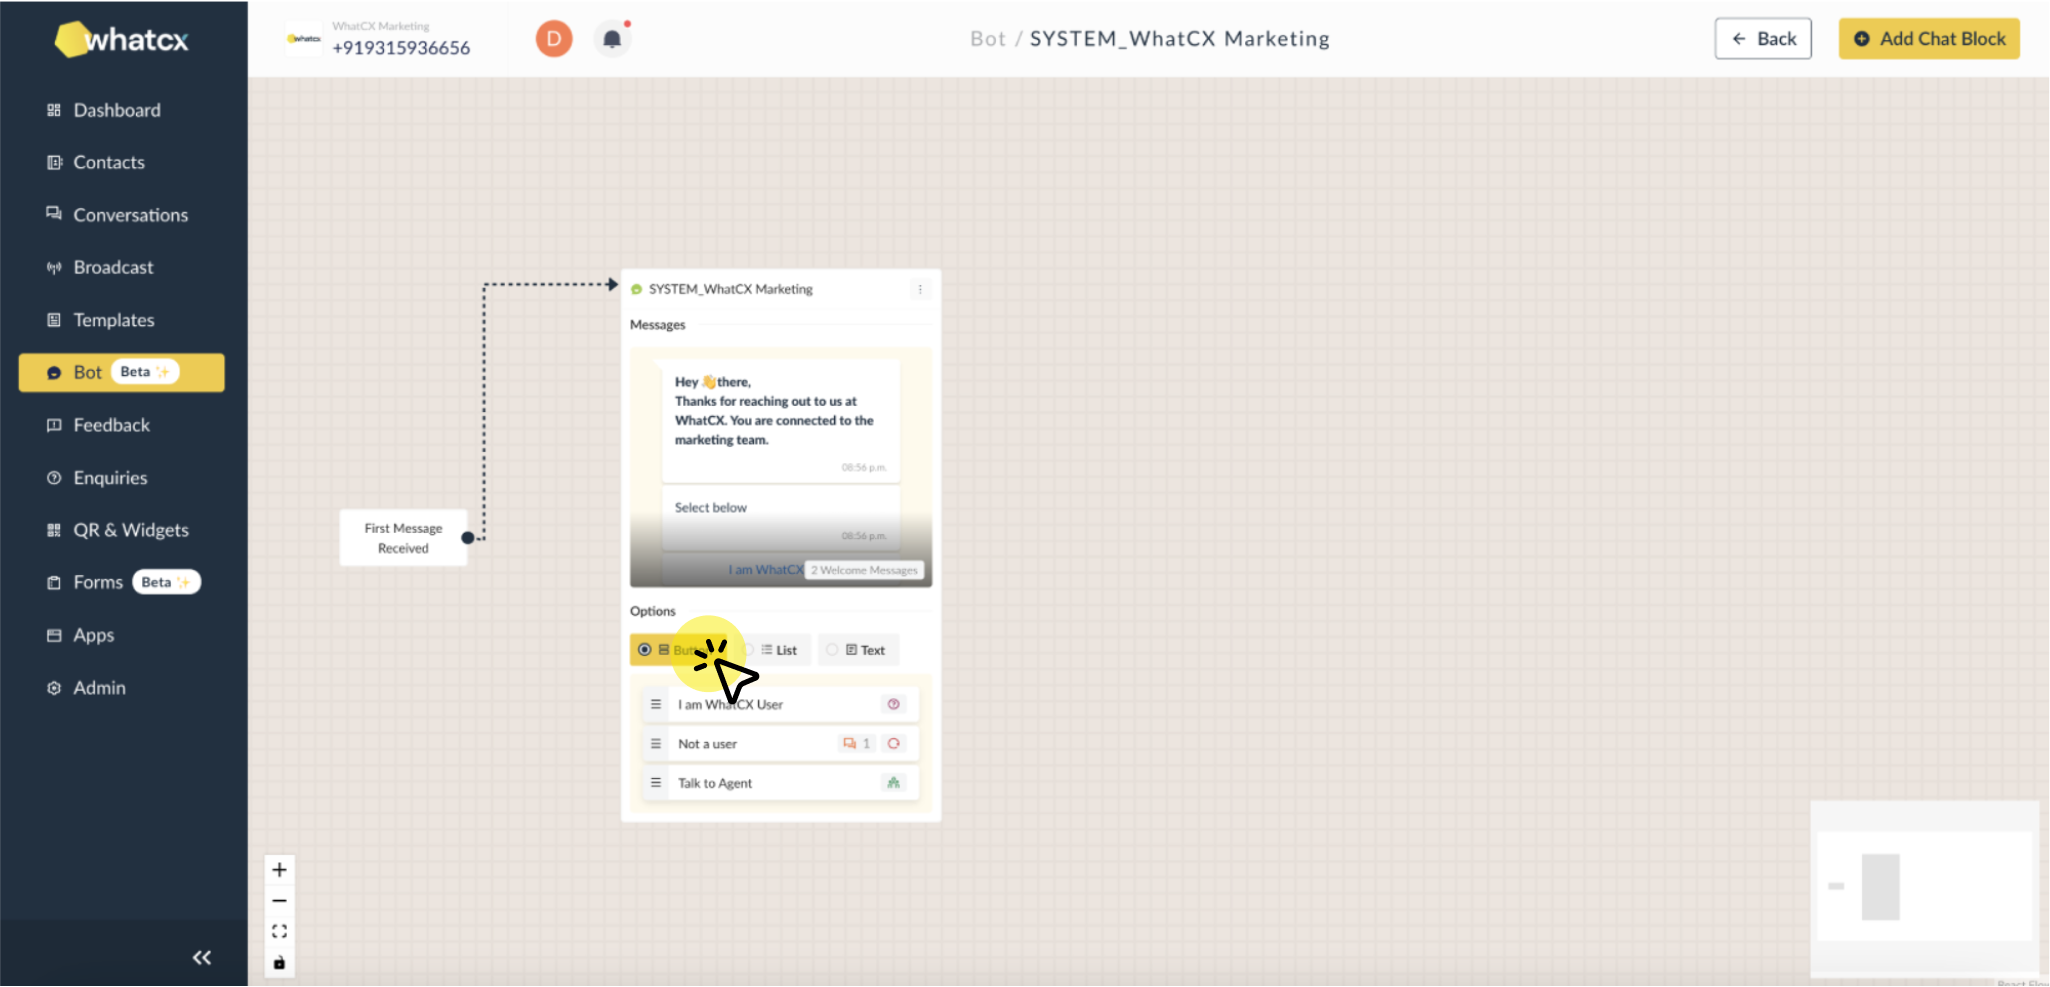
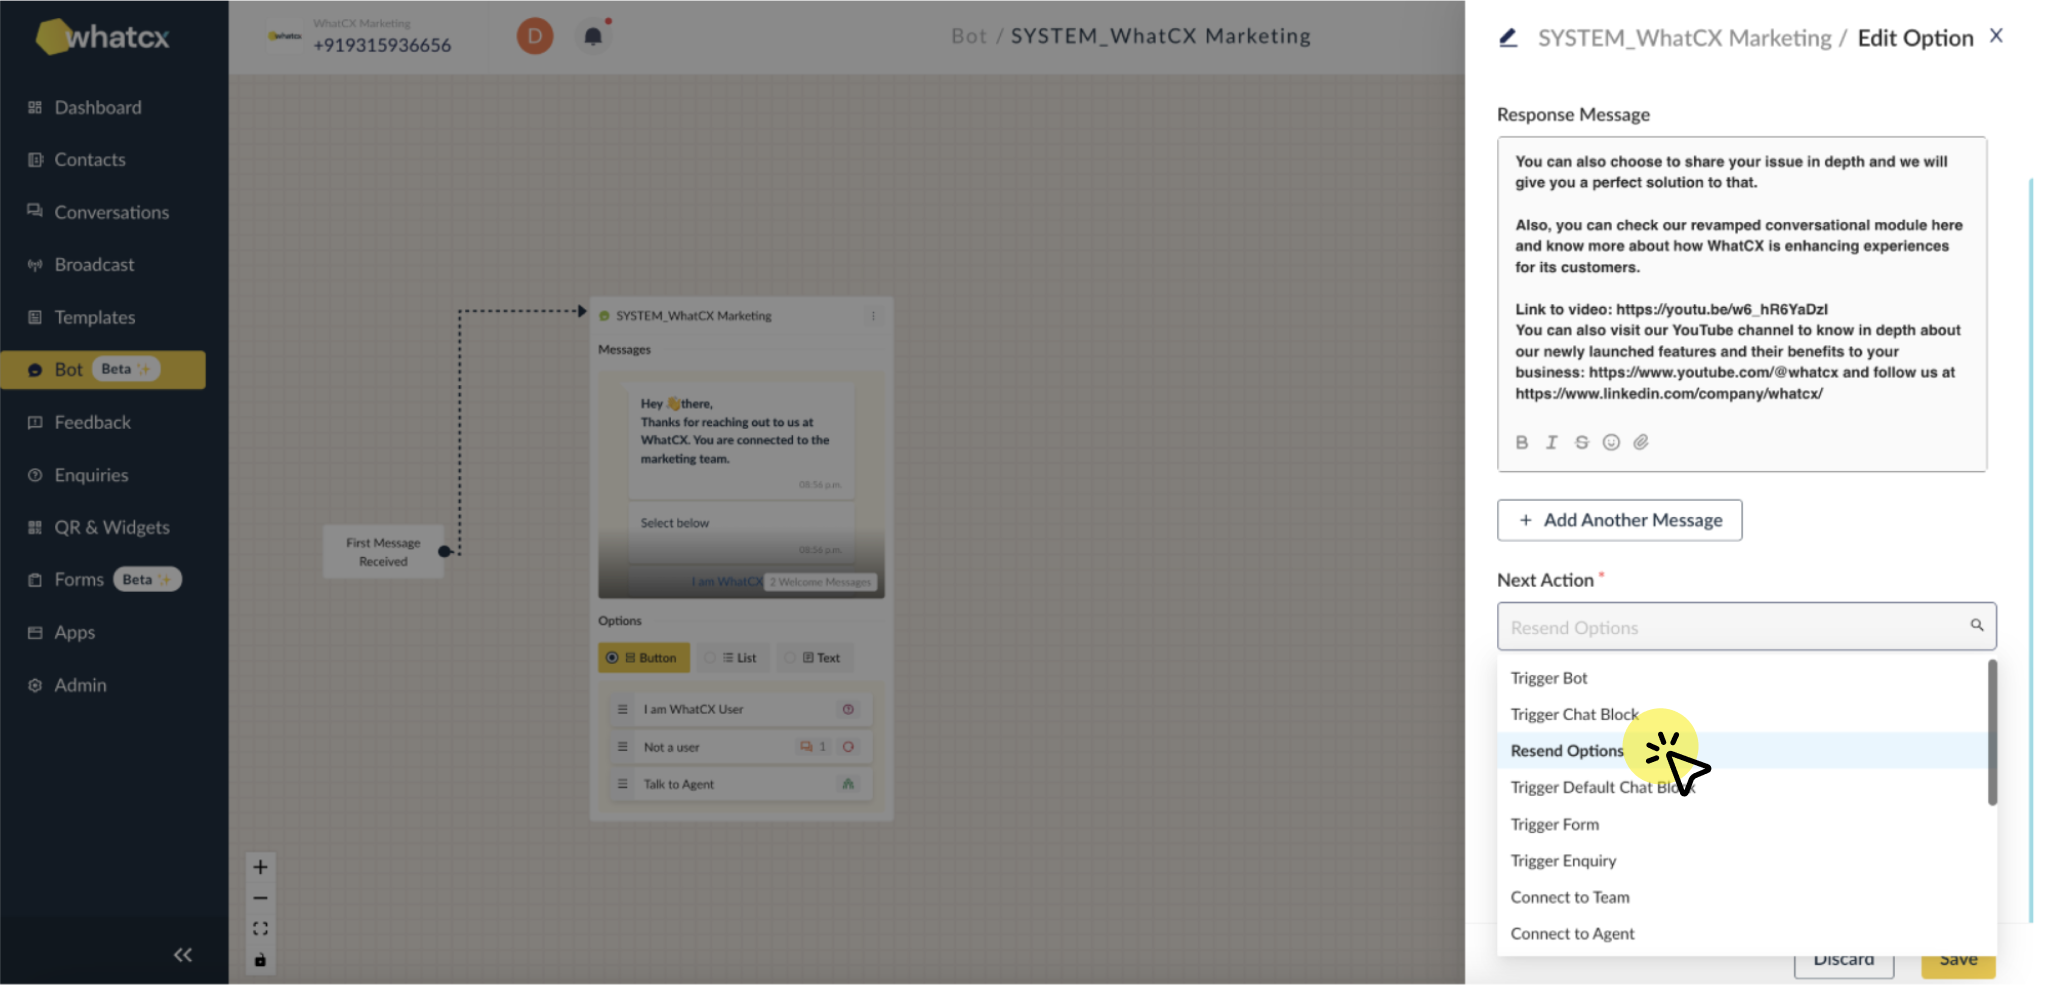
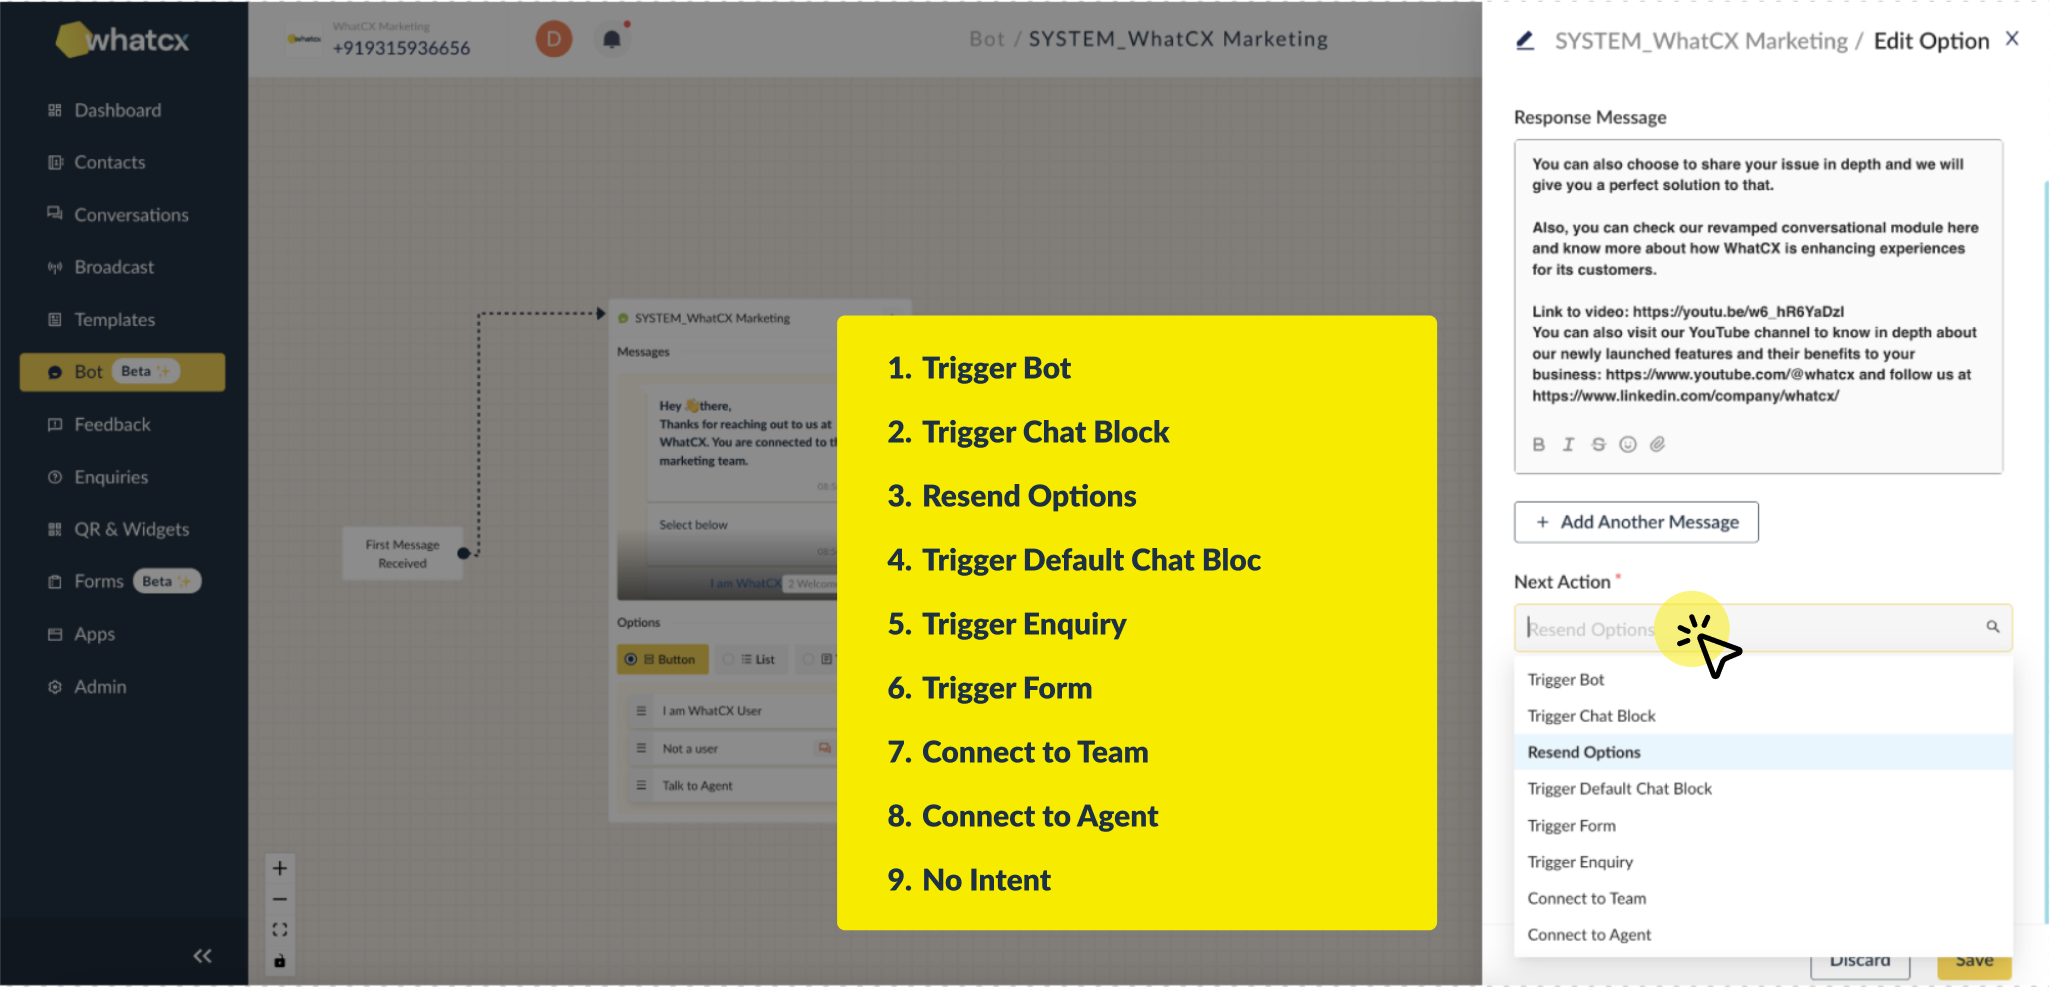
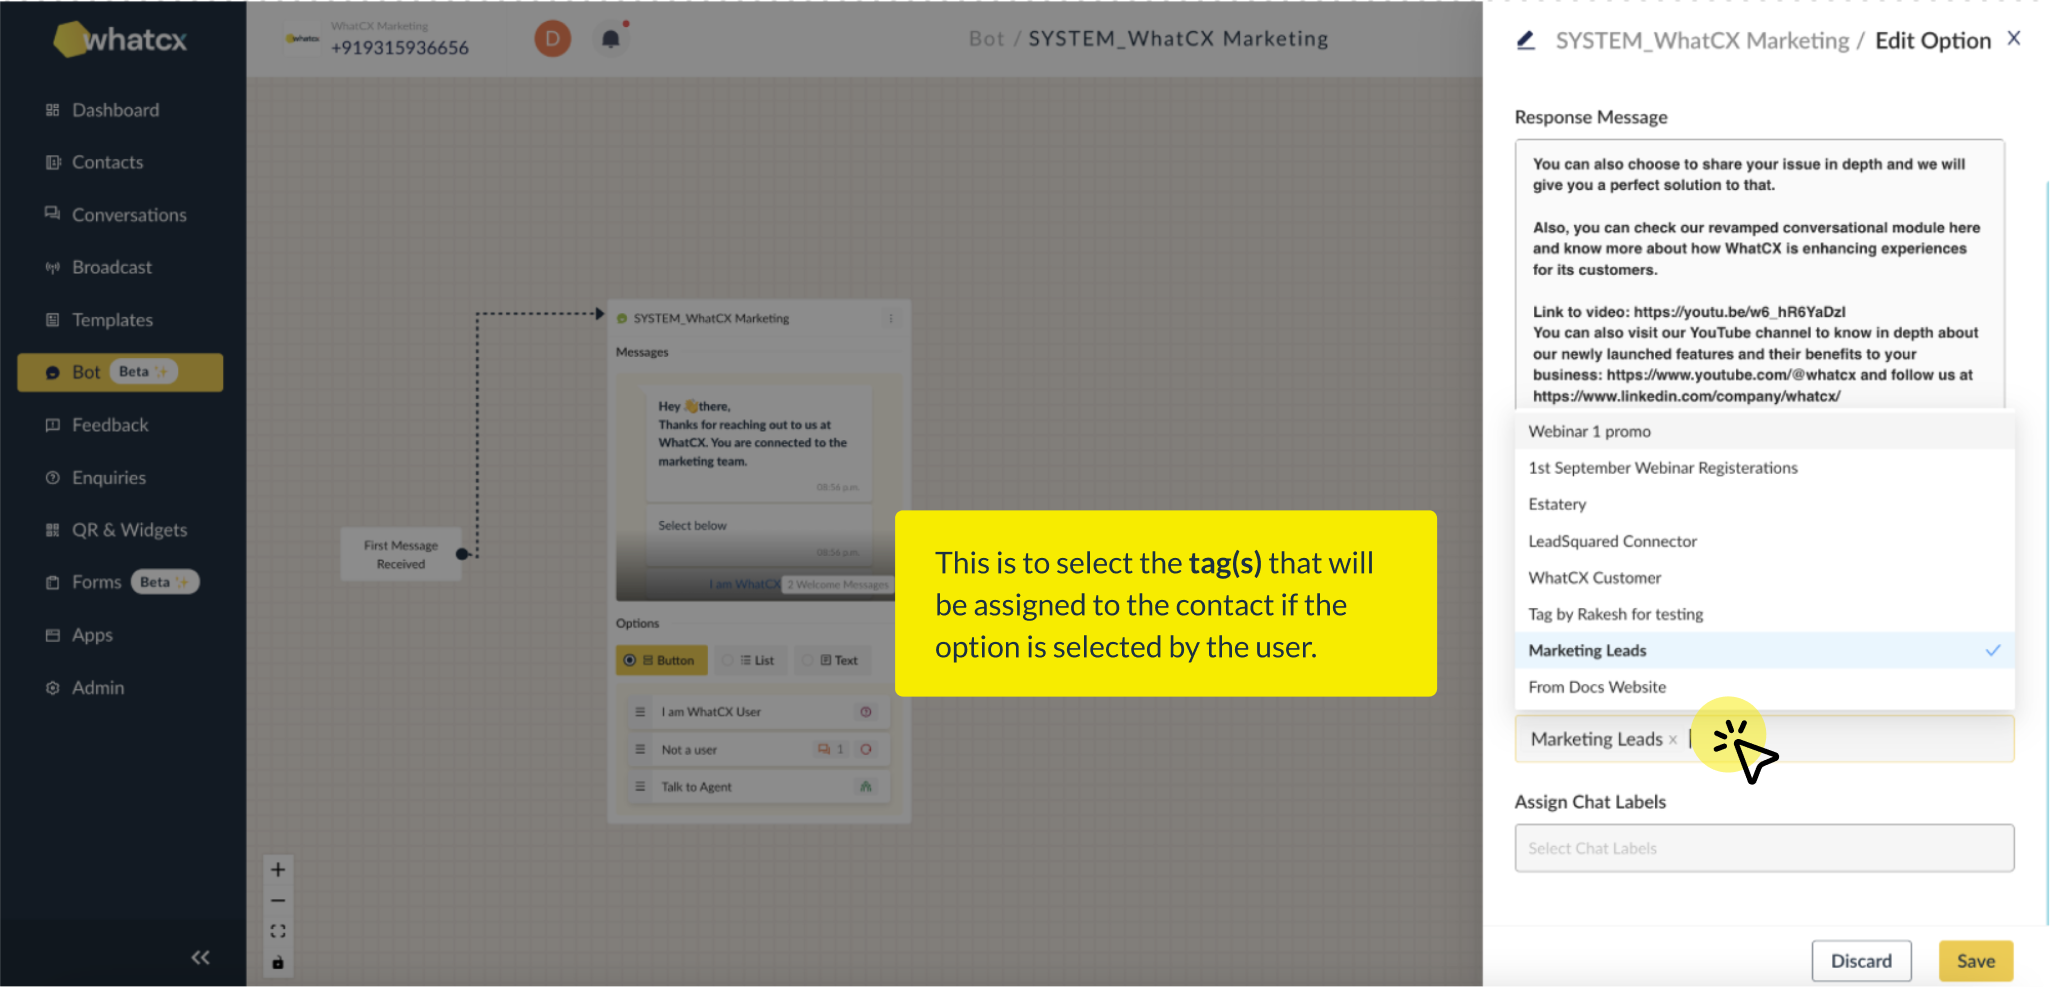
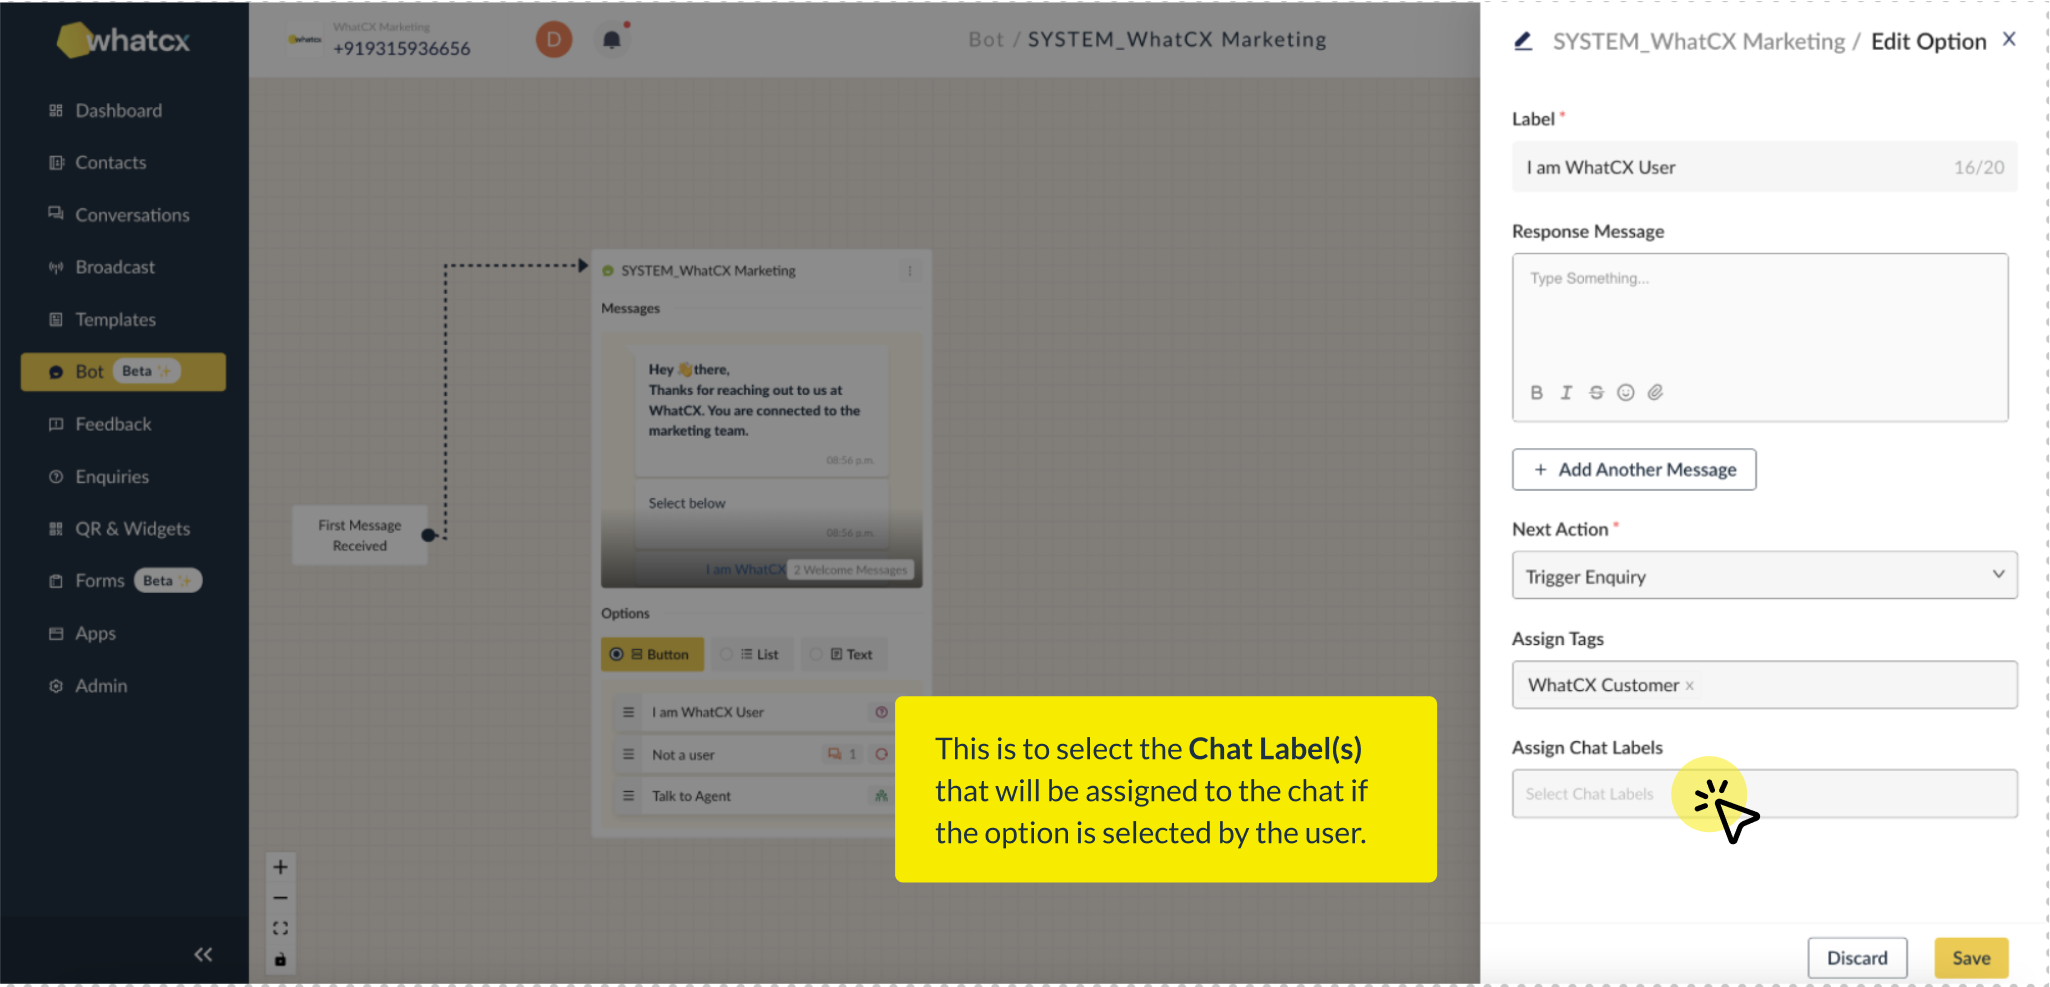
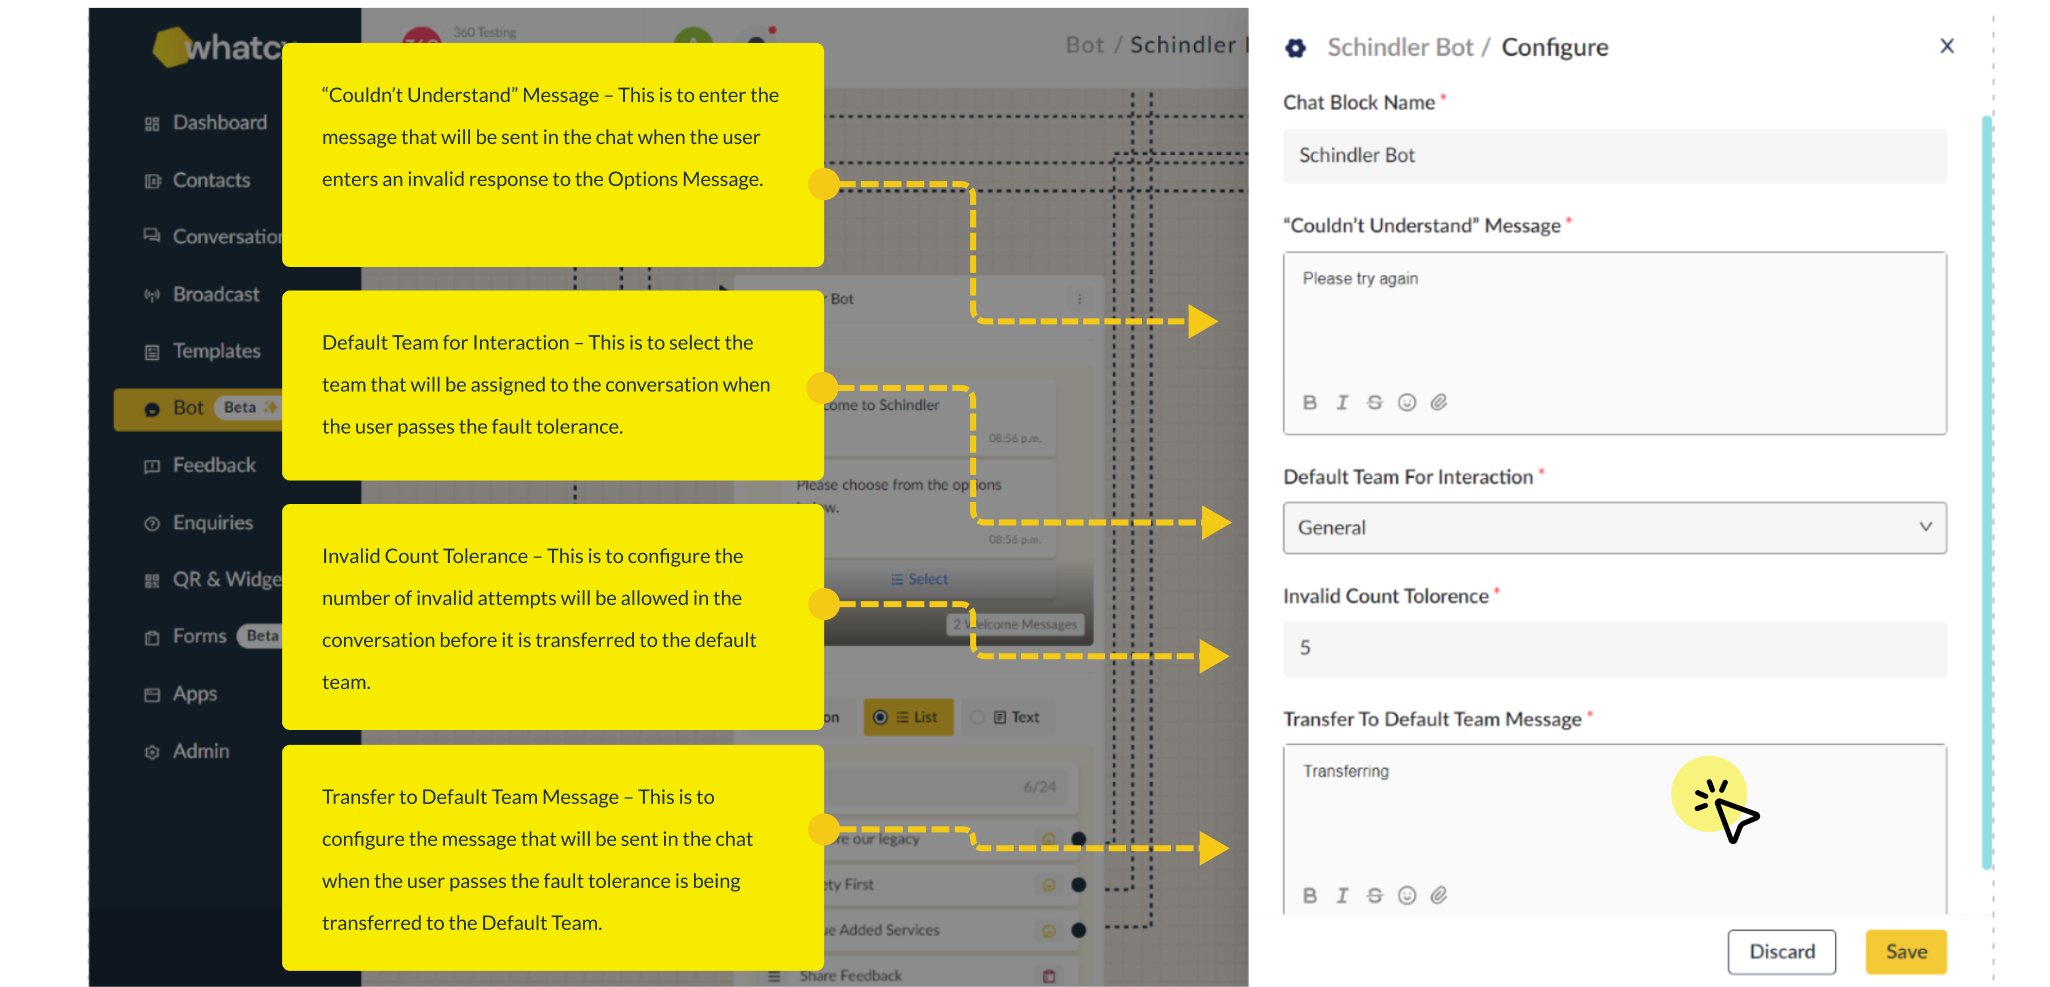
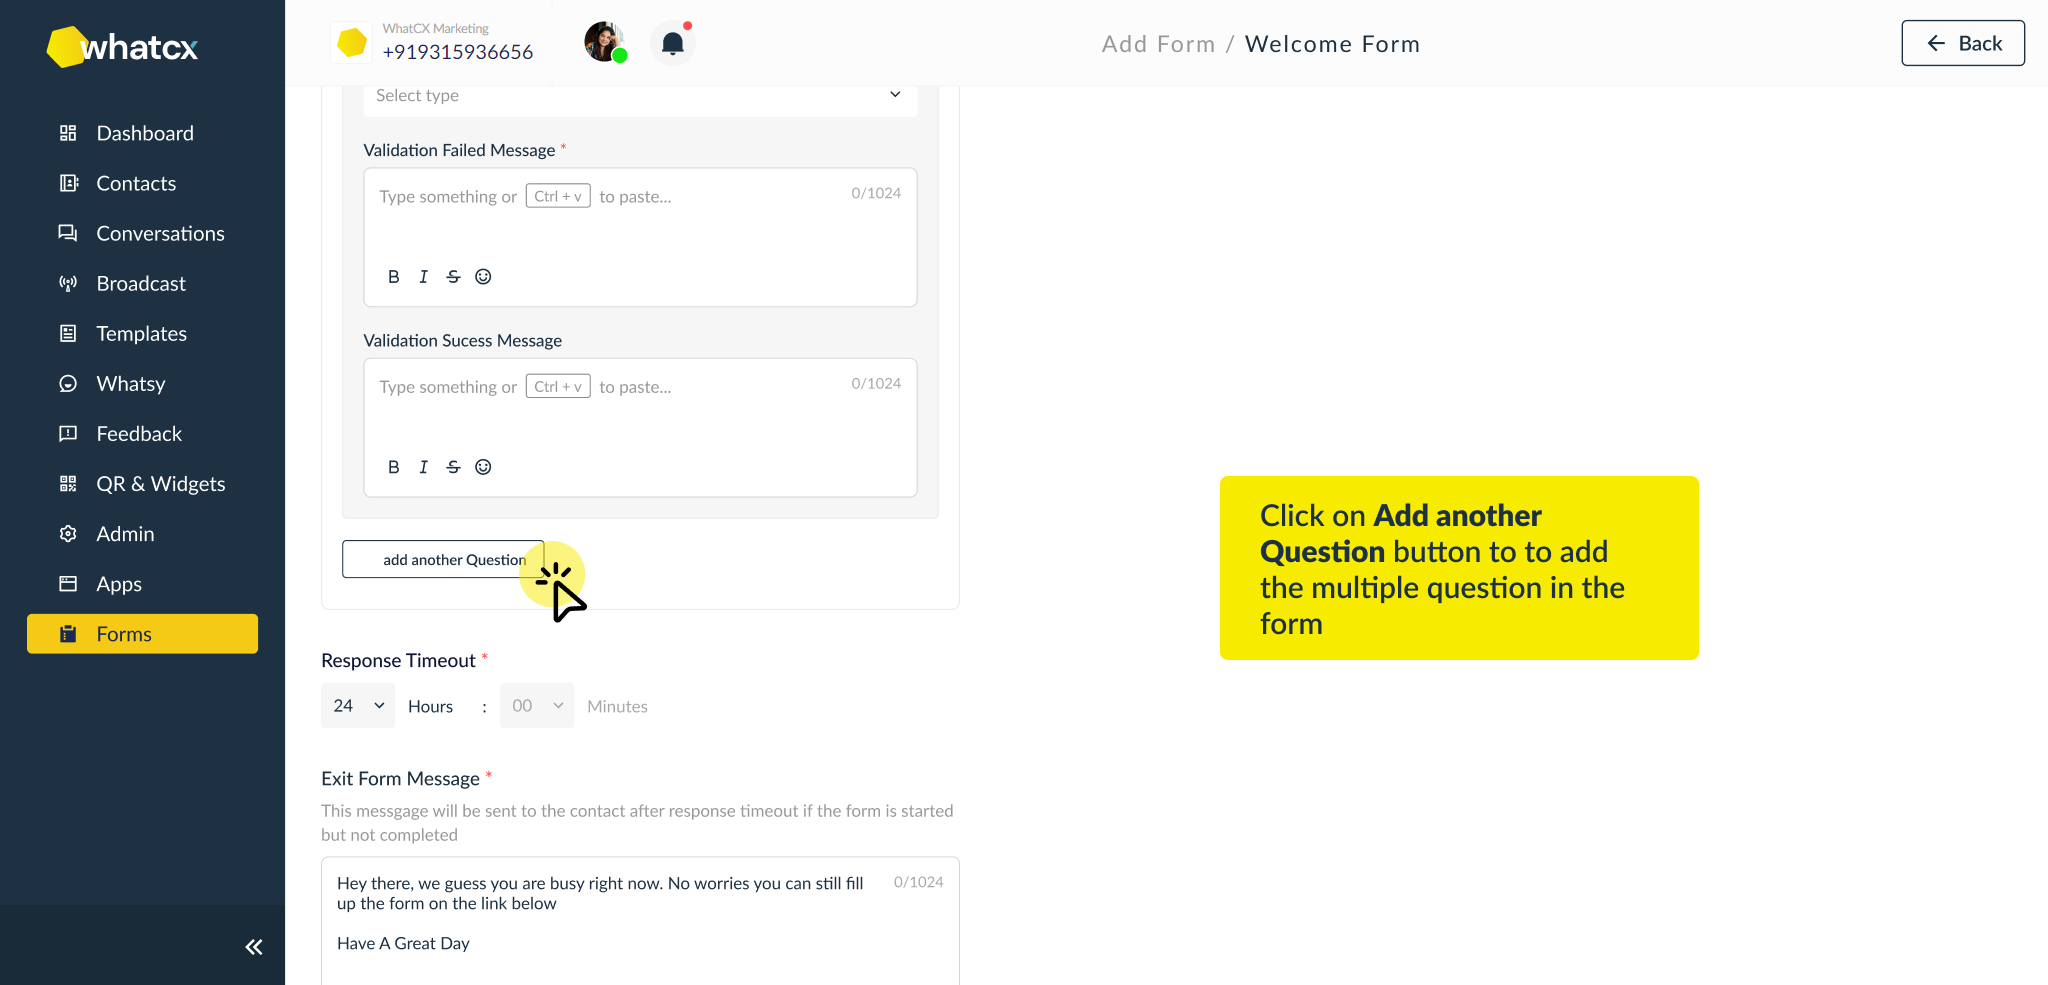
3. The bot is created. You can now add and configure chat blocks in the created bot.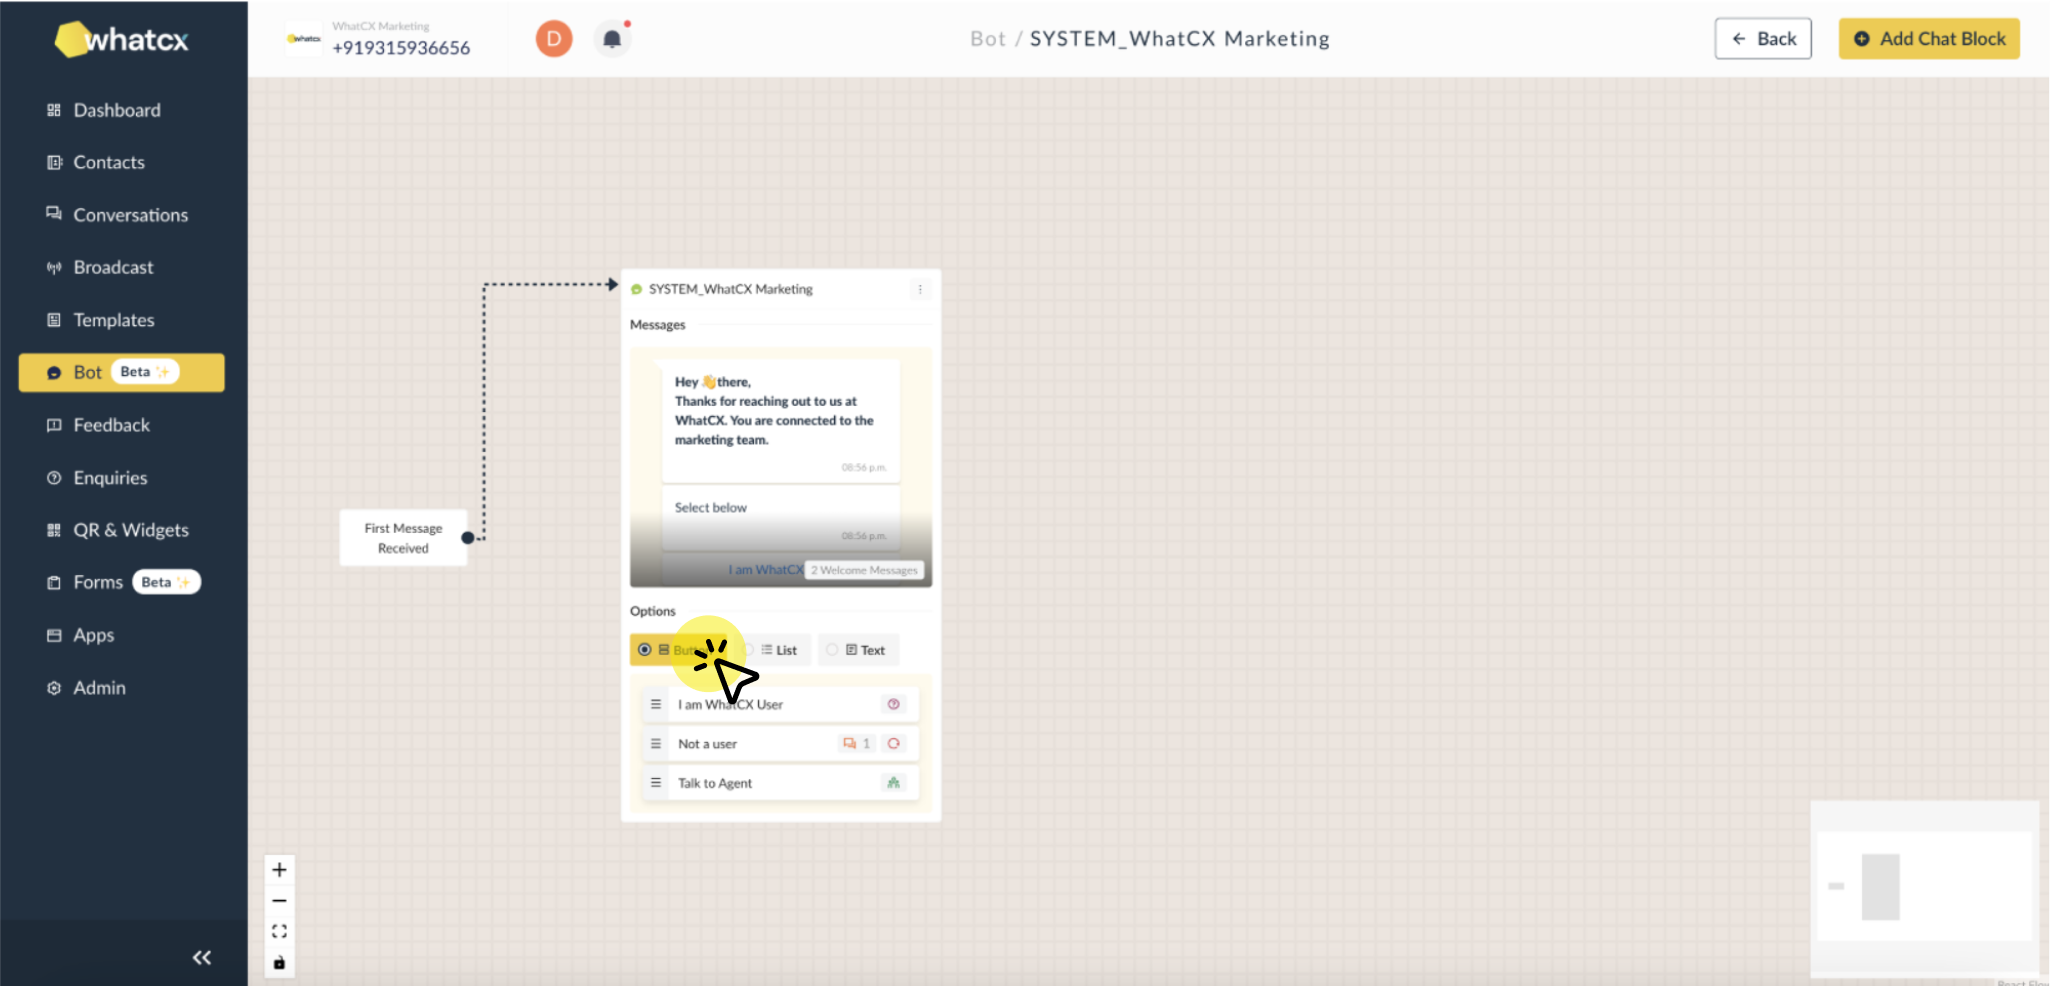
 2. Click on Add Contacts and enter the contact’s details like in the screenshot below. Enter all the information you have for that particular contact like Name, Email, Country Code, Mobile Number. You can also assign Sticky agents for the contact.
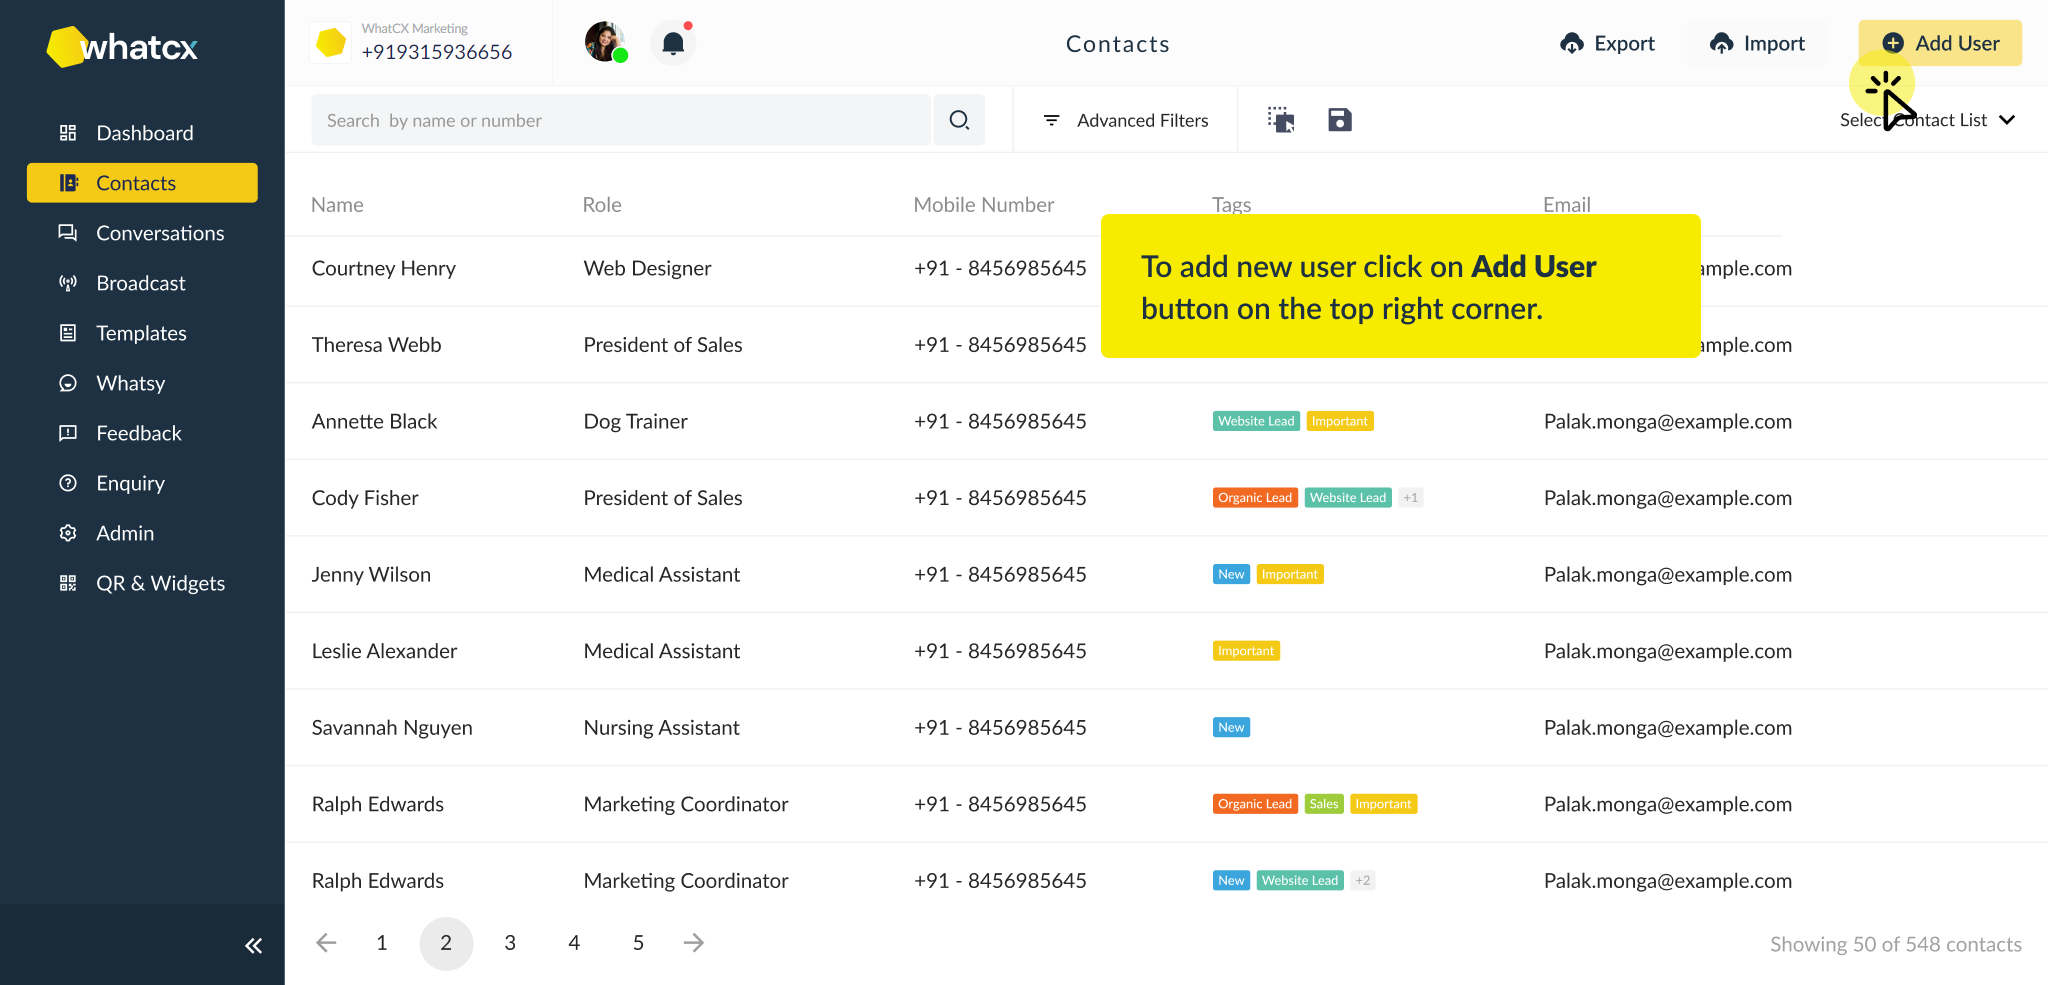
 3. Post entering the details click on ‘Save Contact’ and the contact will be created.


 2. Admins can check all Team chats and Agent Chats by clicking on ‘All Chats’
 3. You can use chat filters like Active Chat sessions, Assigned chats, Unassigned chats
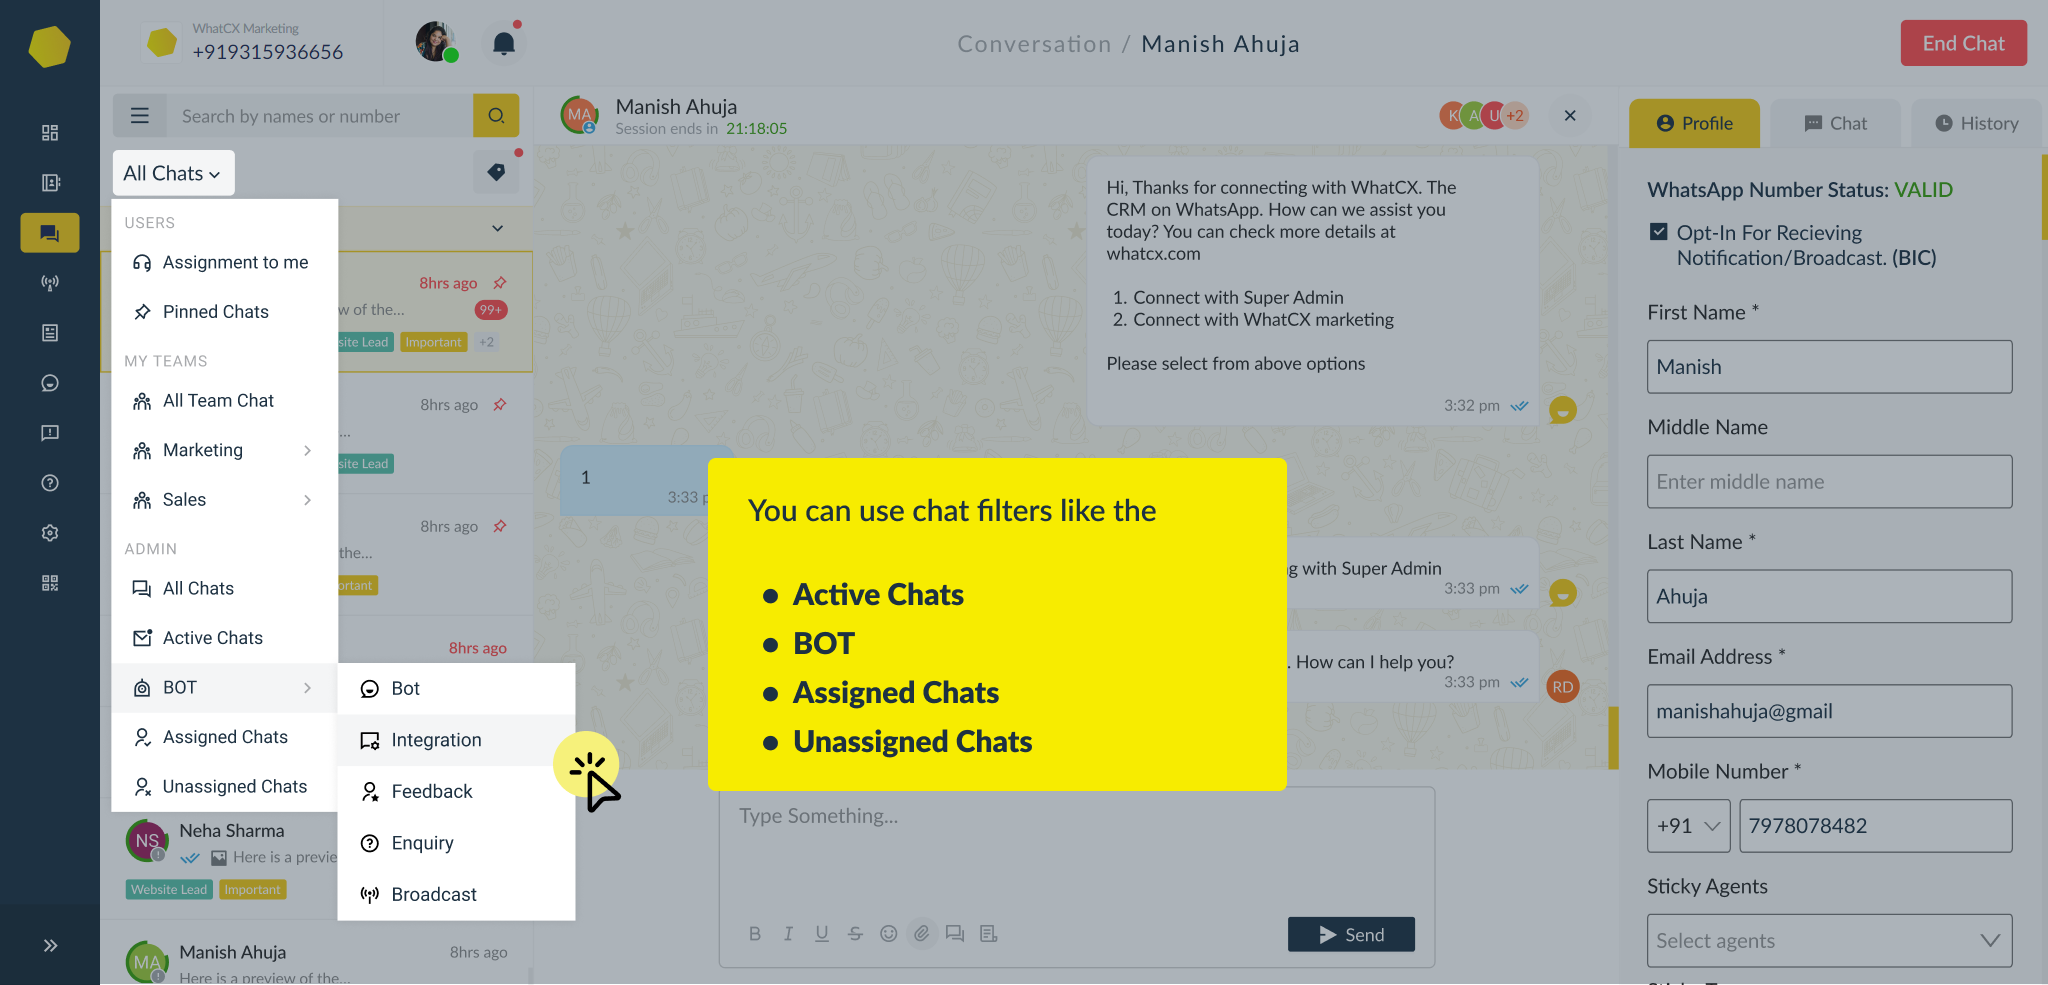

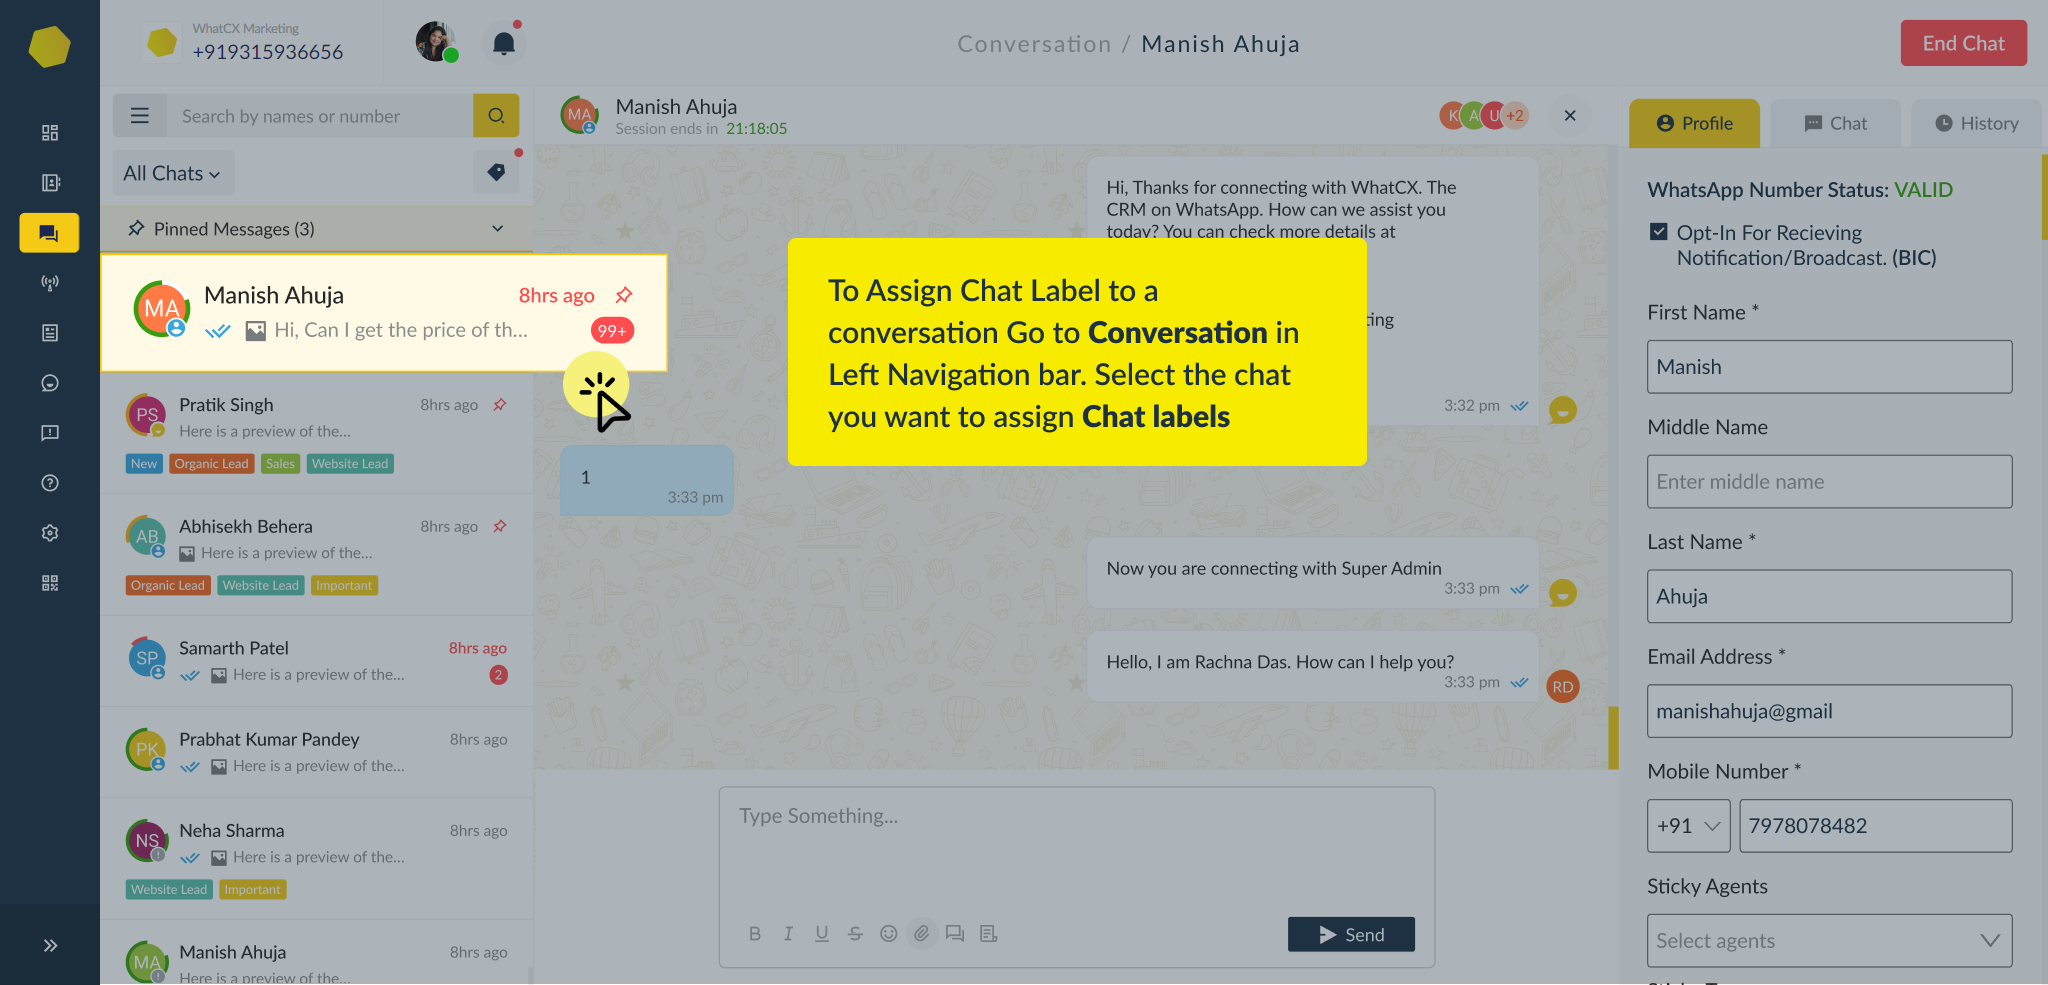
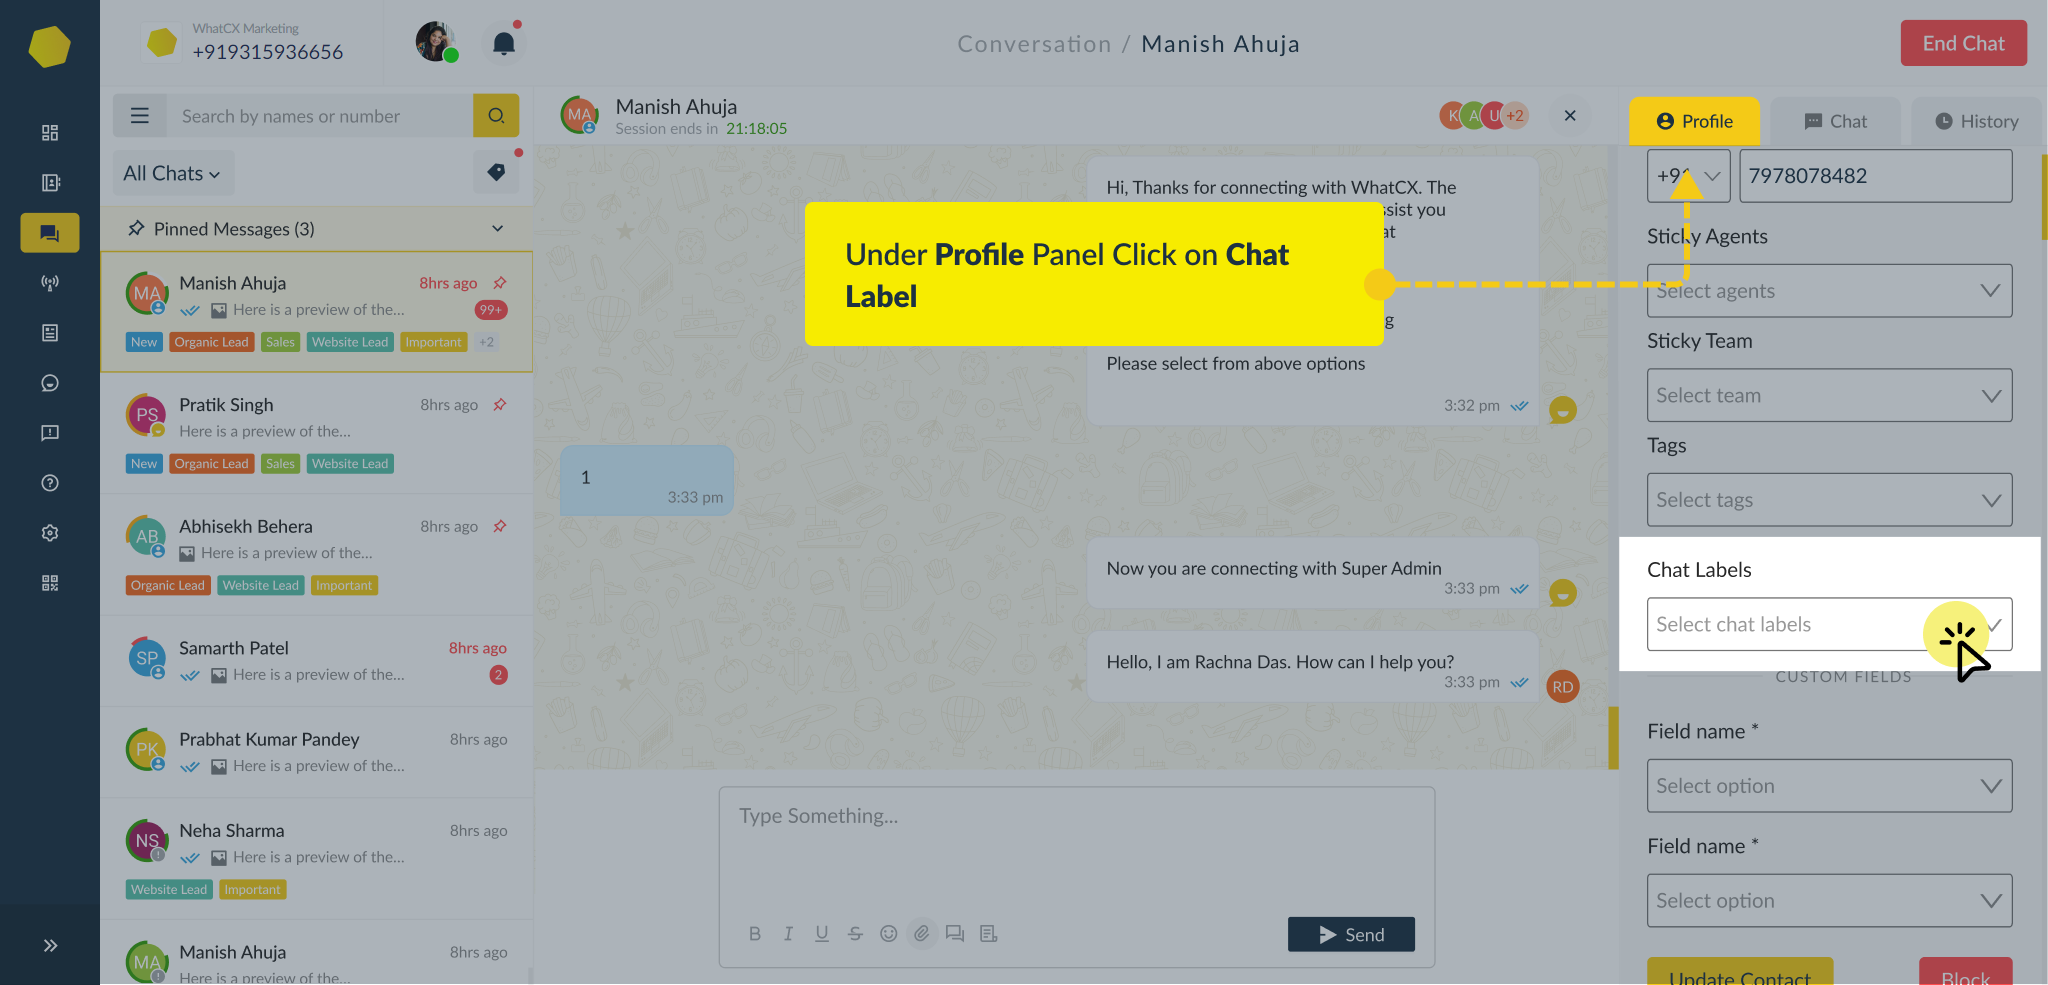
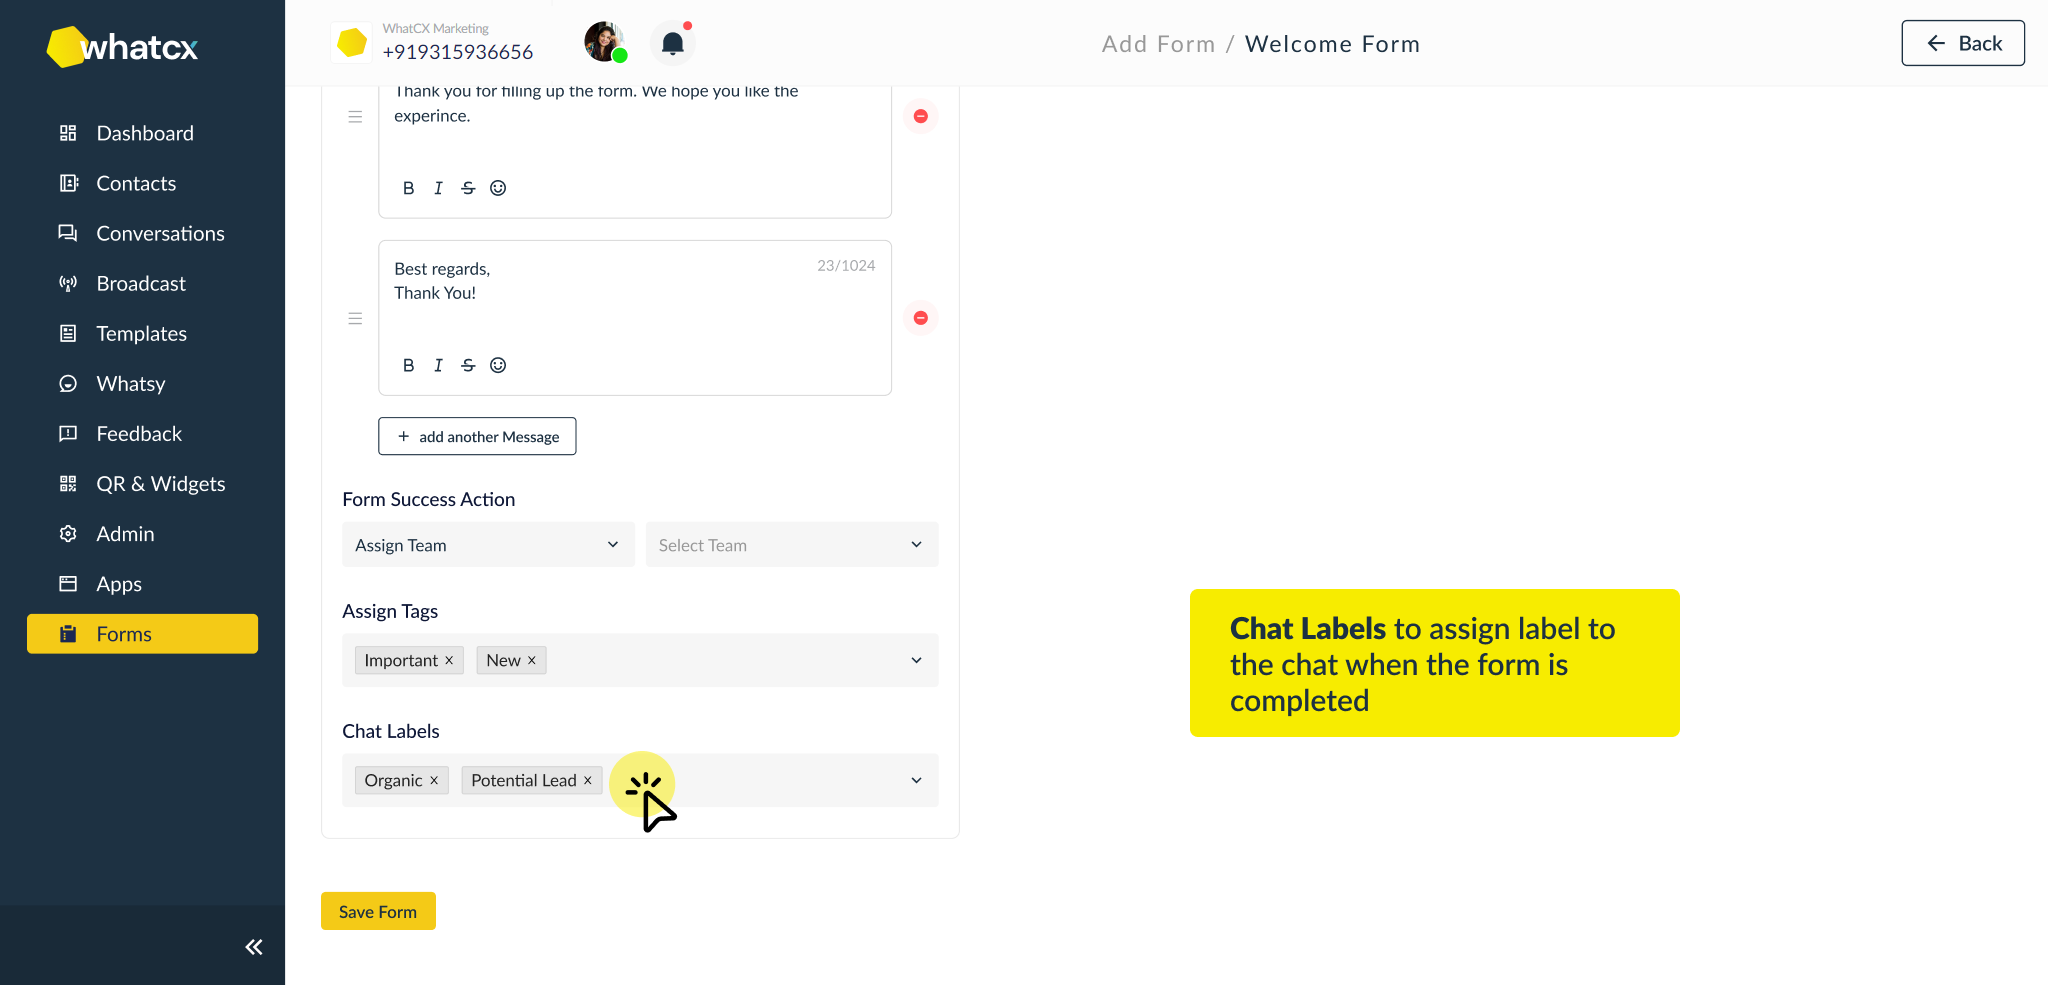
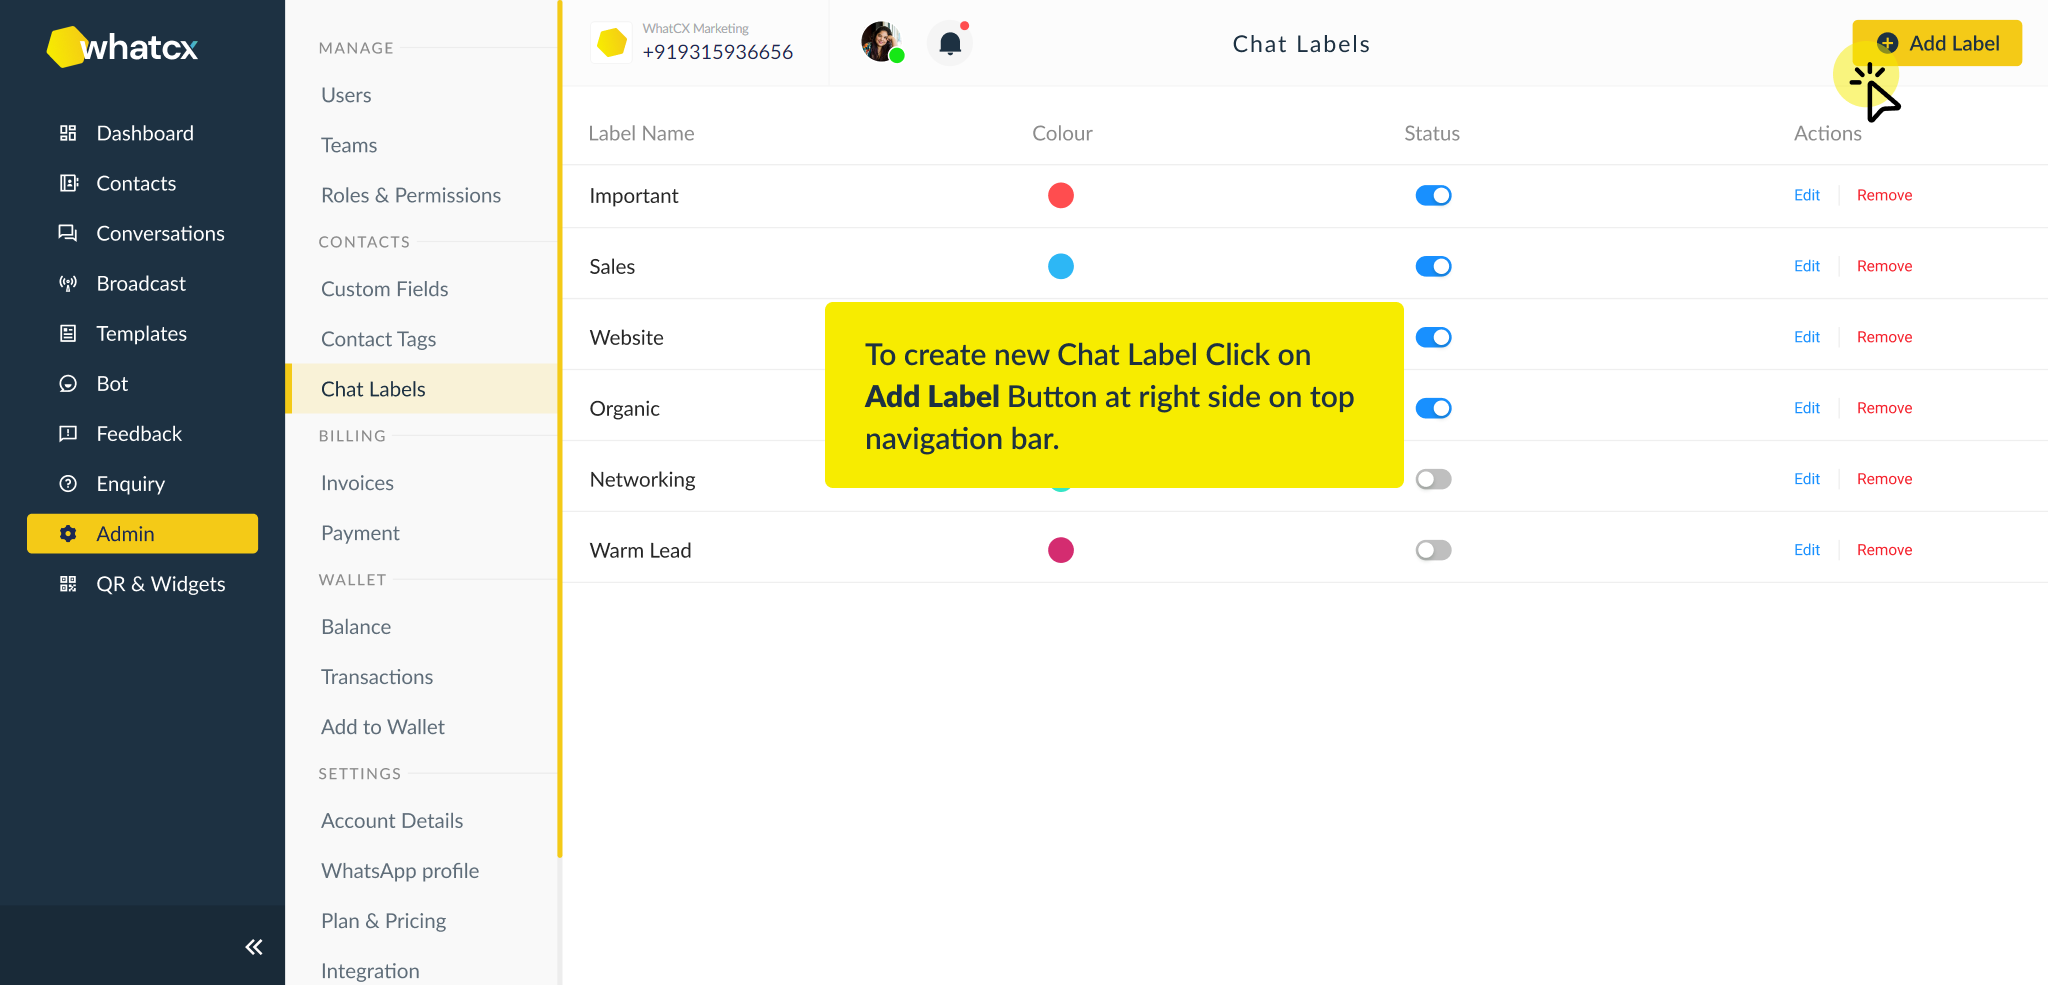 3. Click on Add Label, Give your Chat Label a Title. It could be anything depending on your business needs. You can choose the Label colour by clicking on ‘Color’ and then Click ‘Create Label’
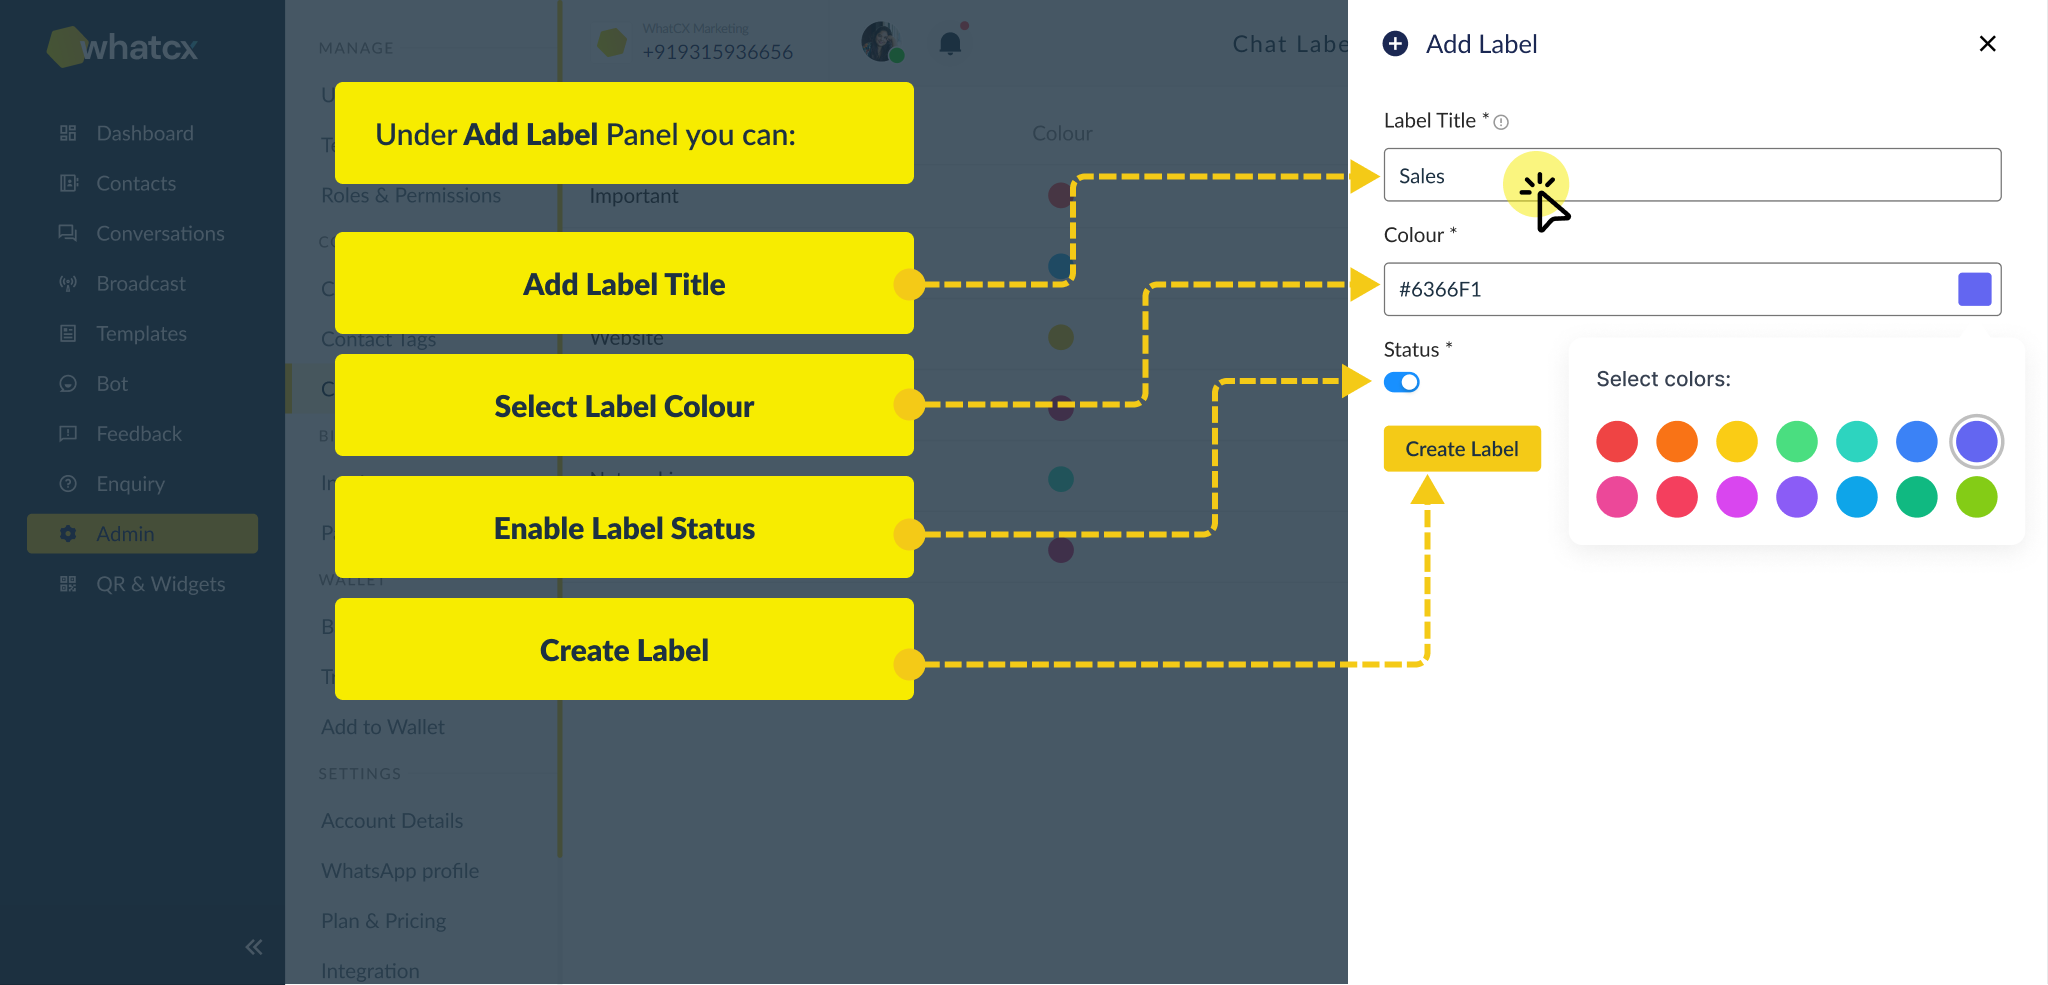
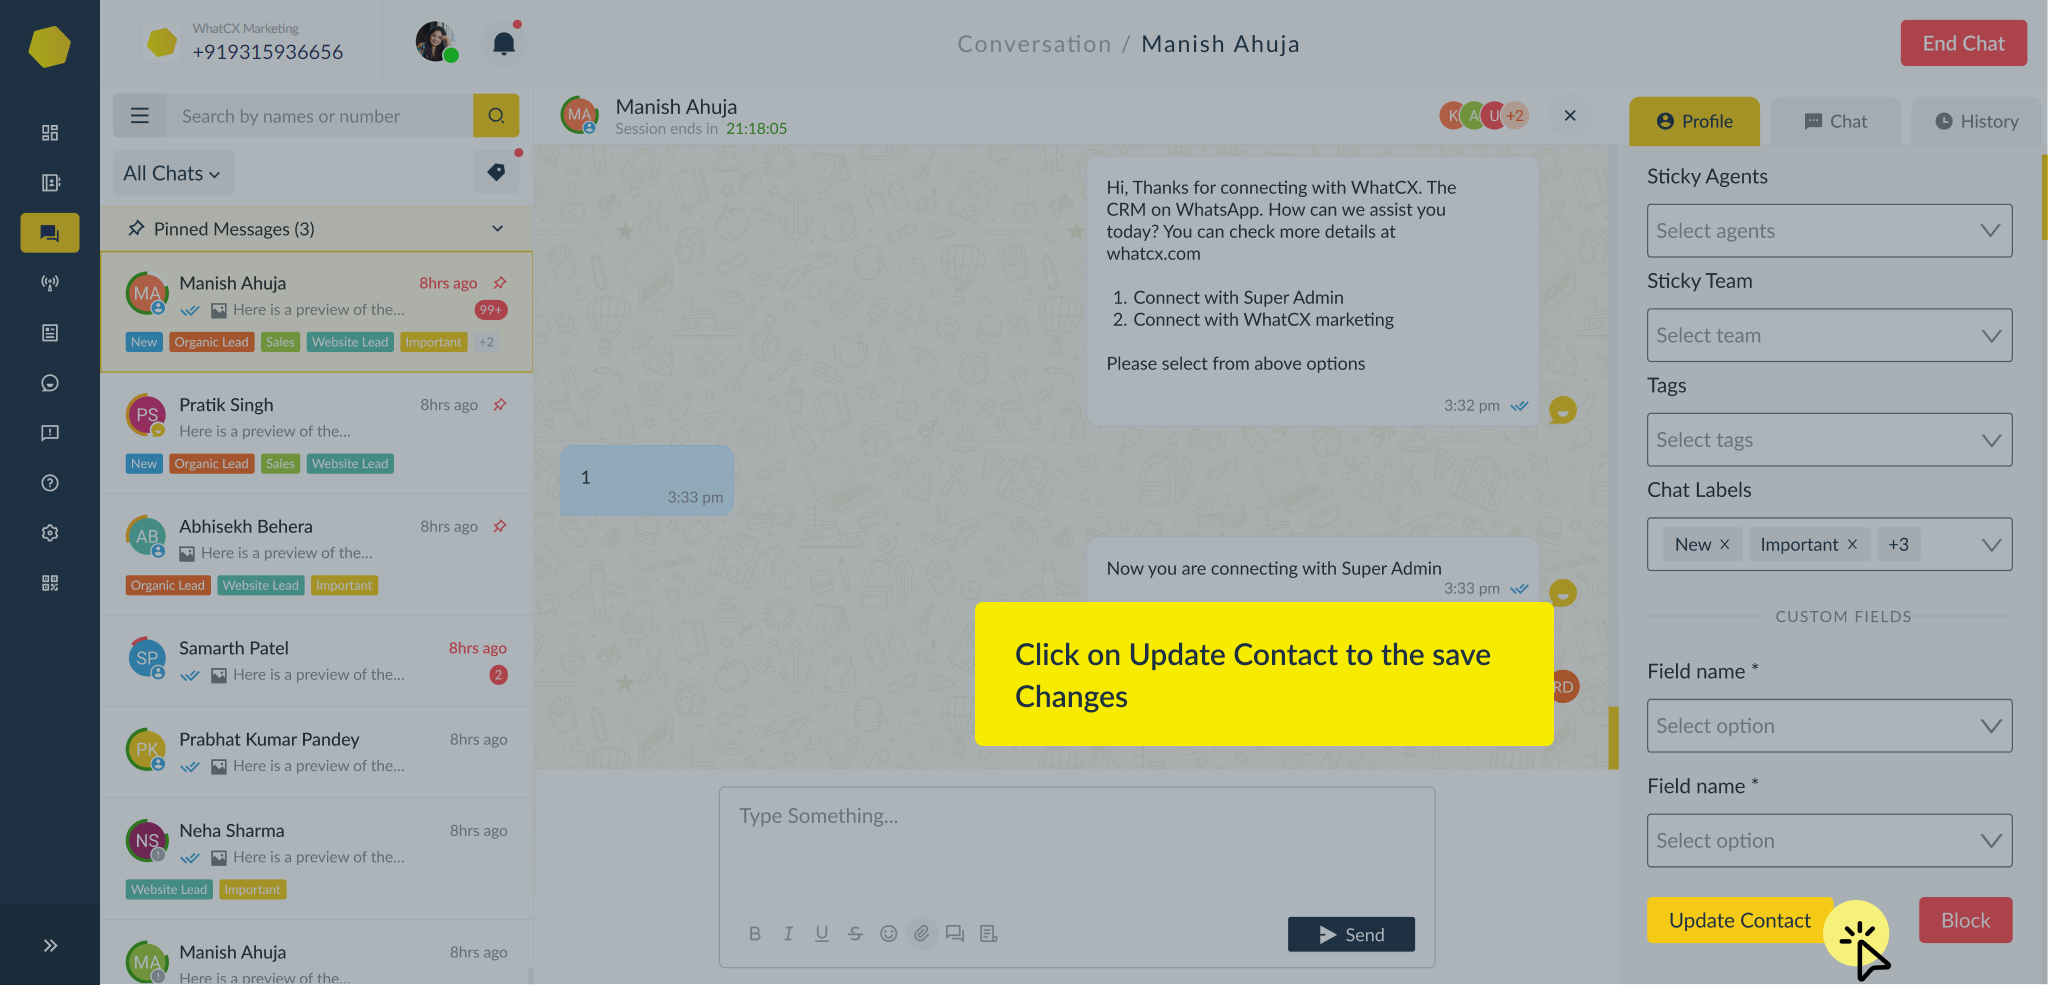
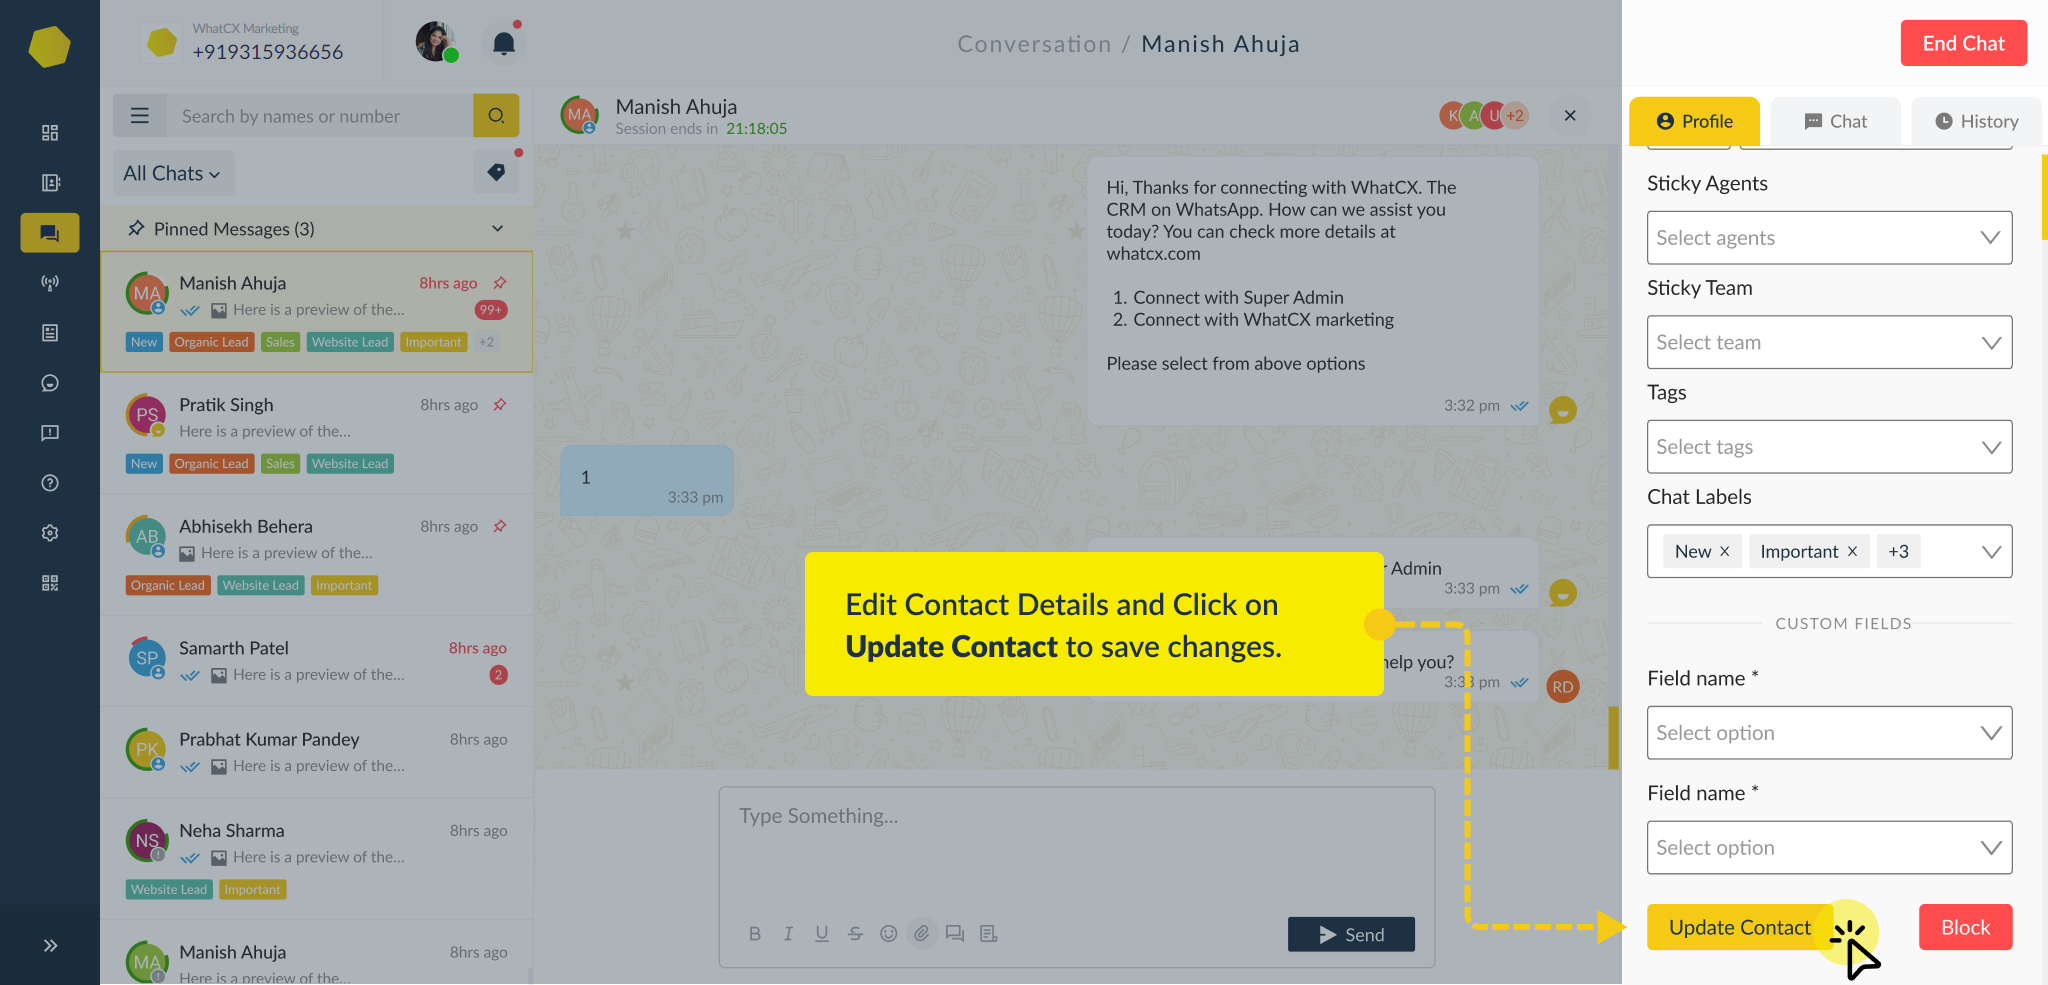
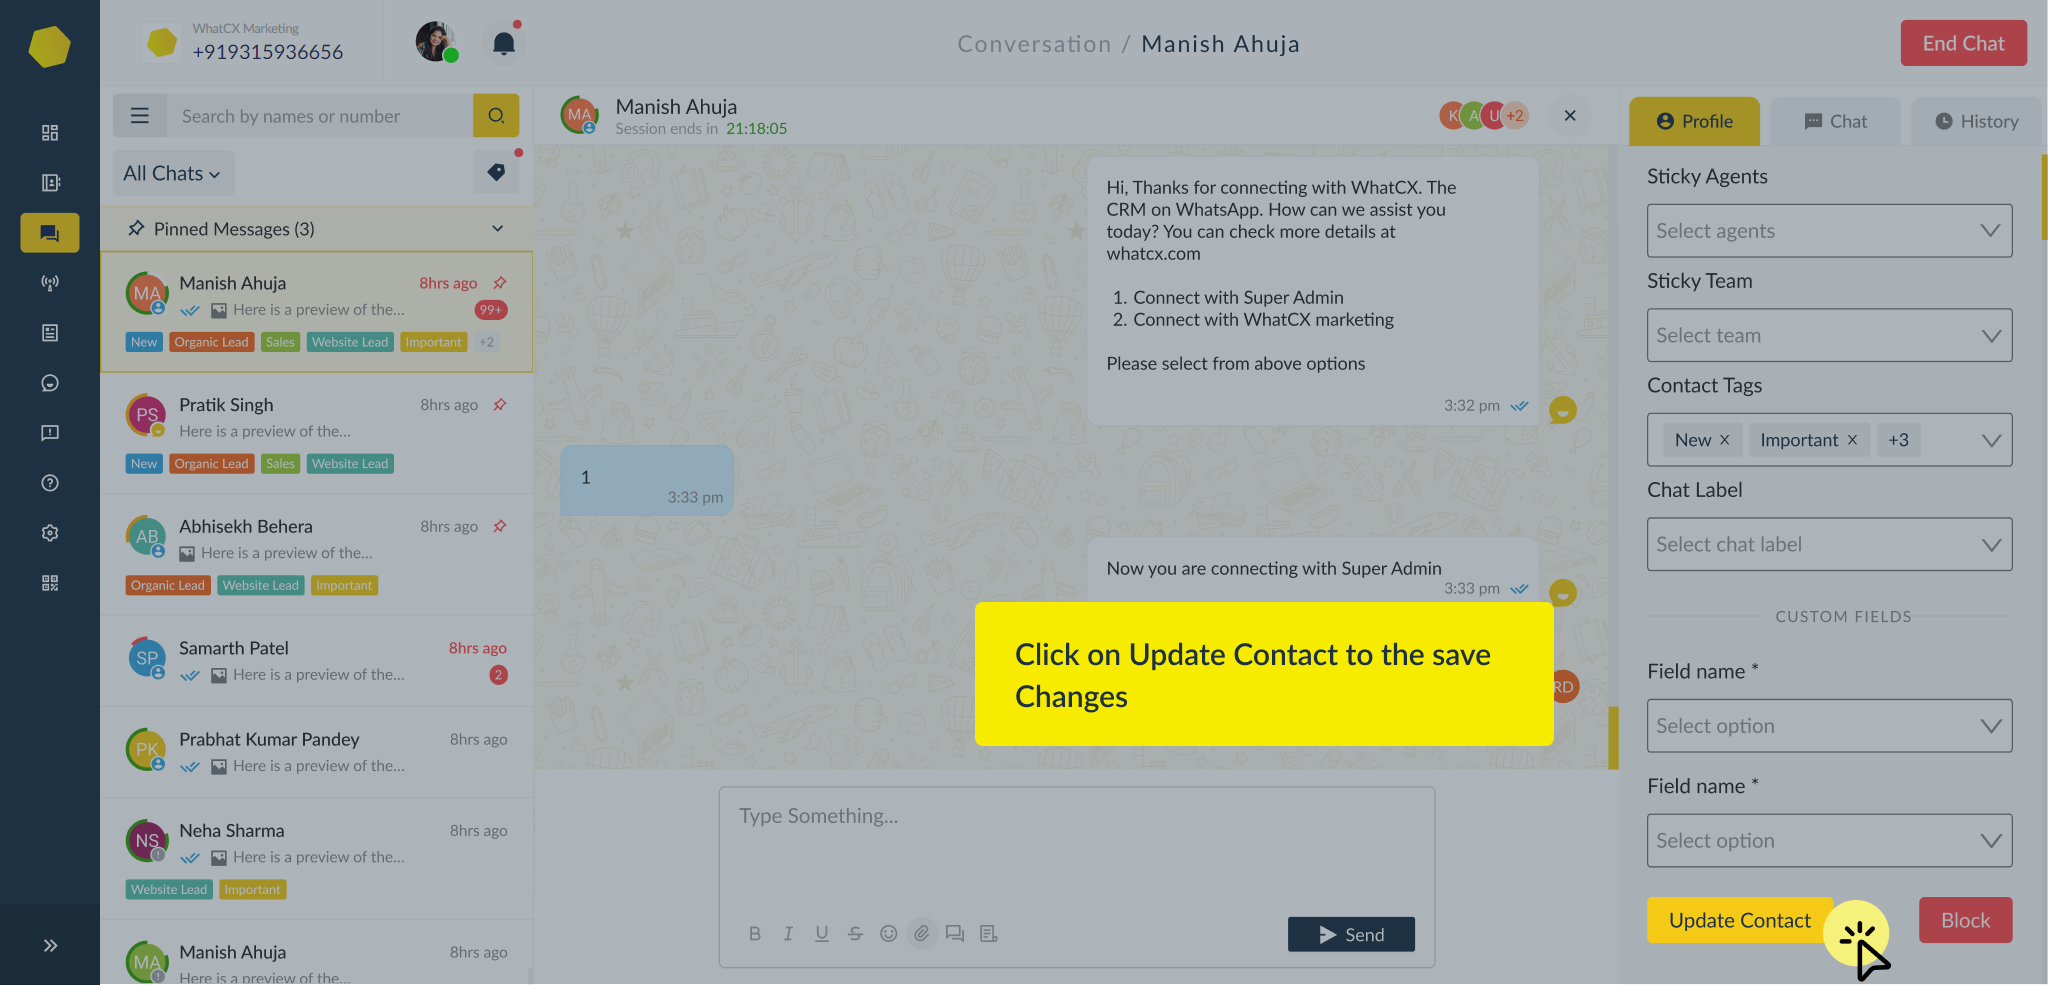
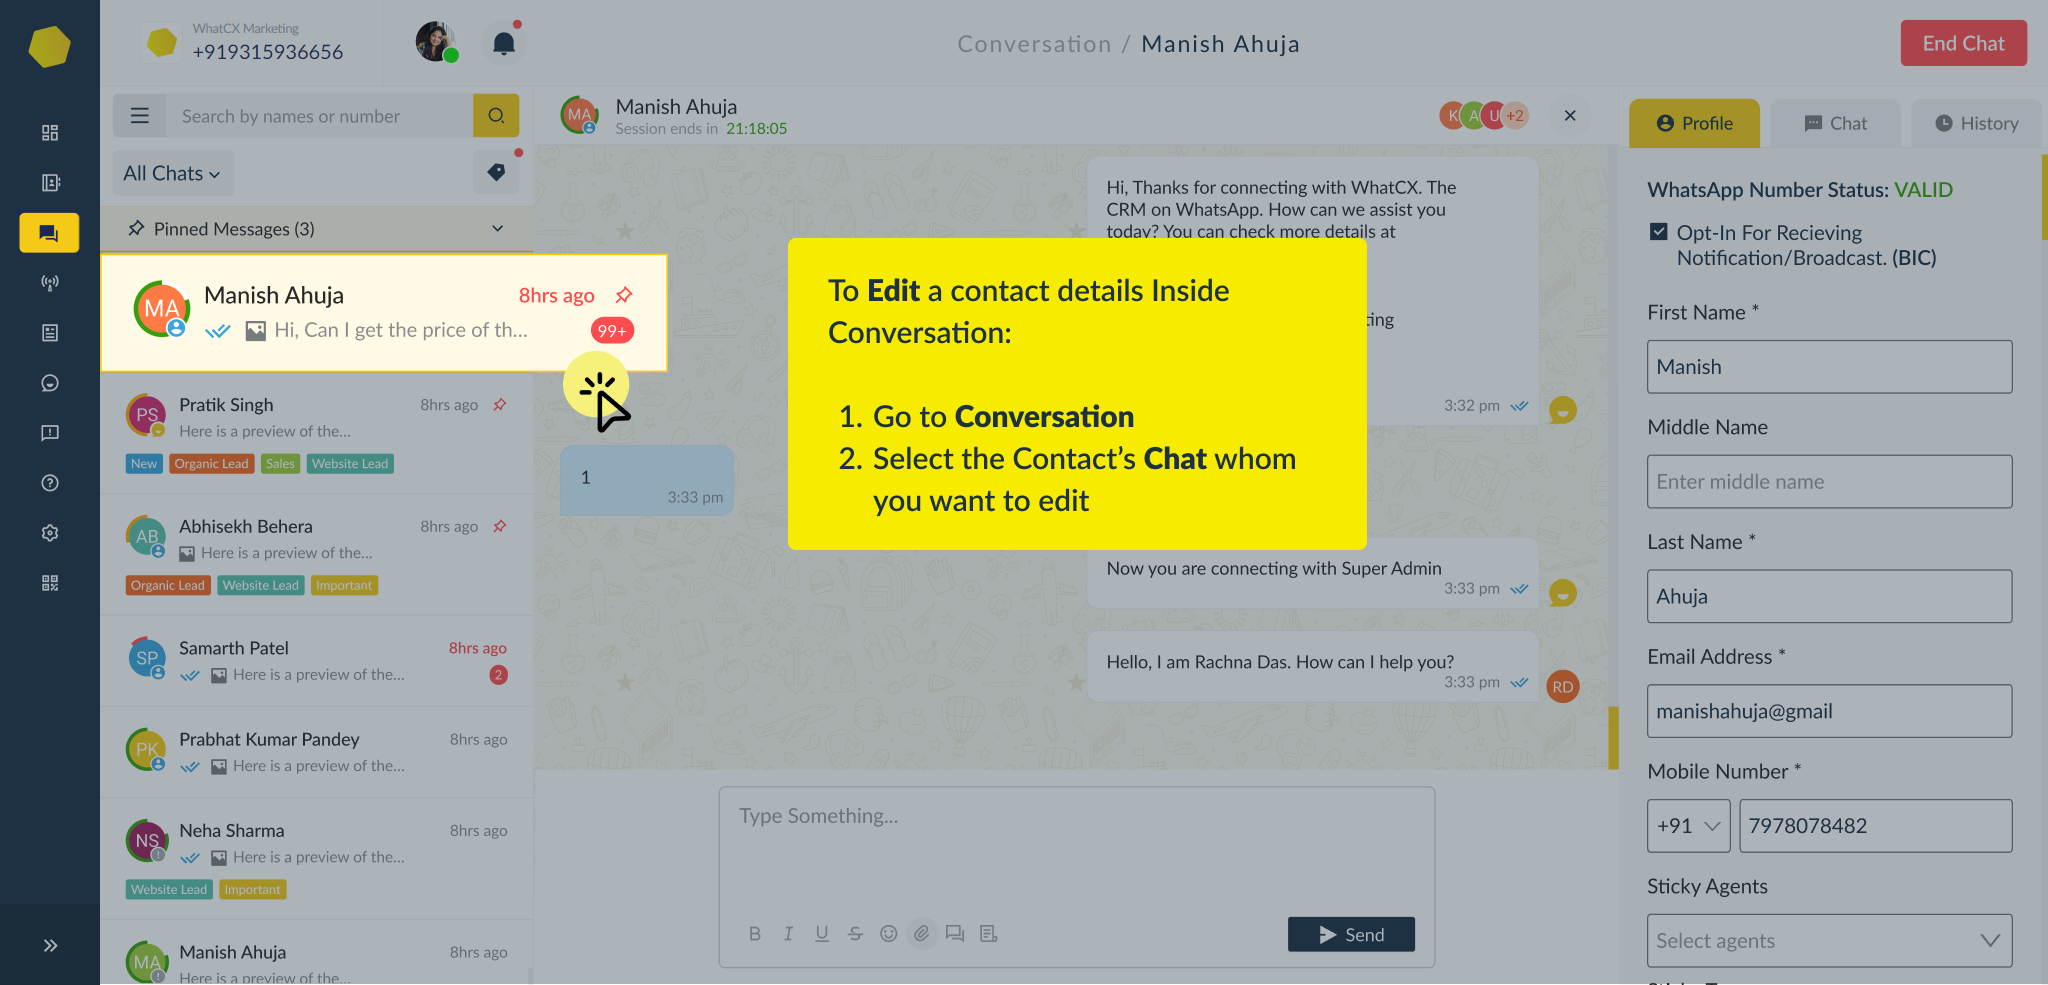 3. Fill in the customer details and click on Update Contact
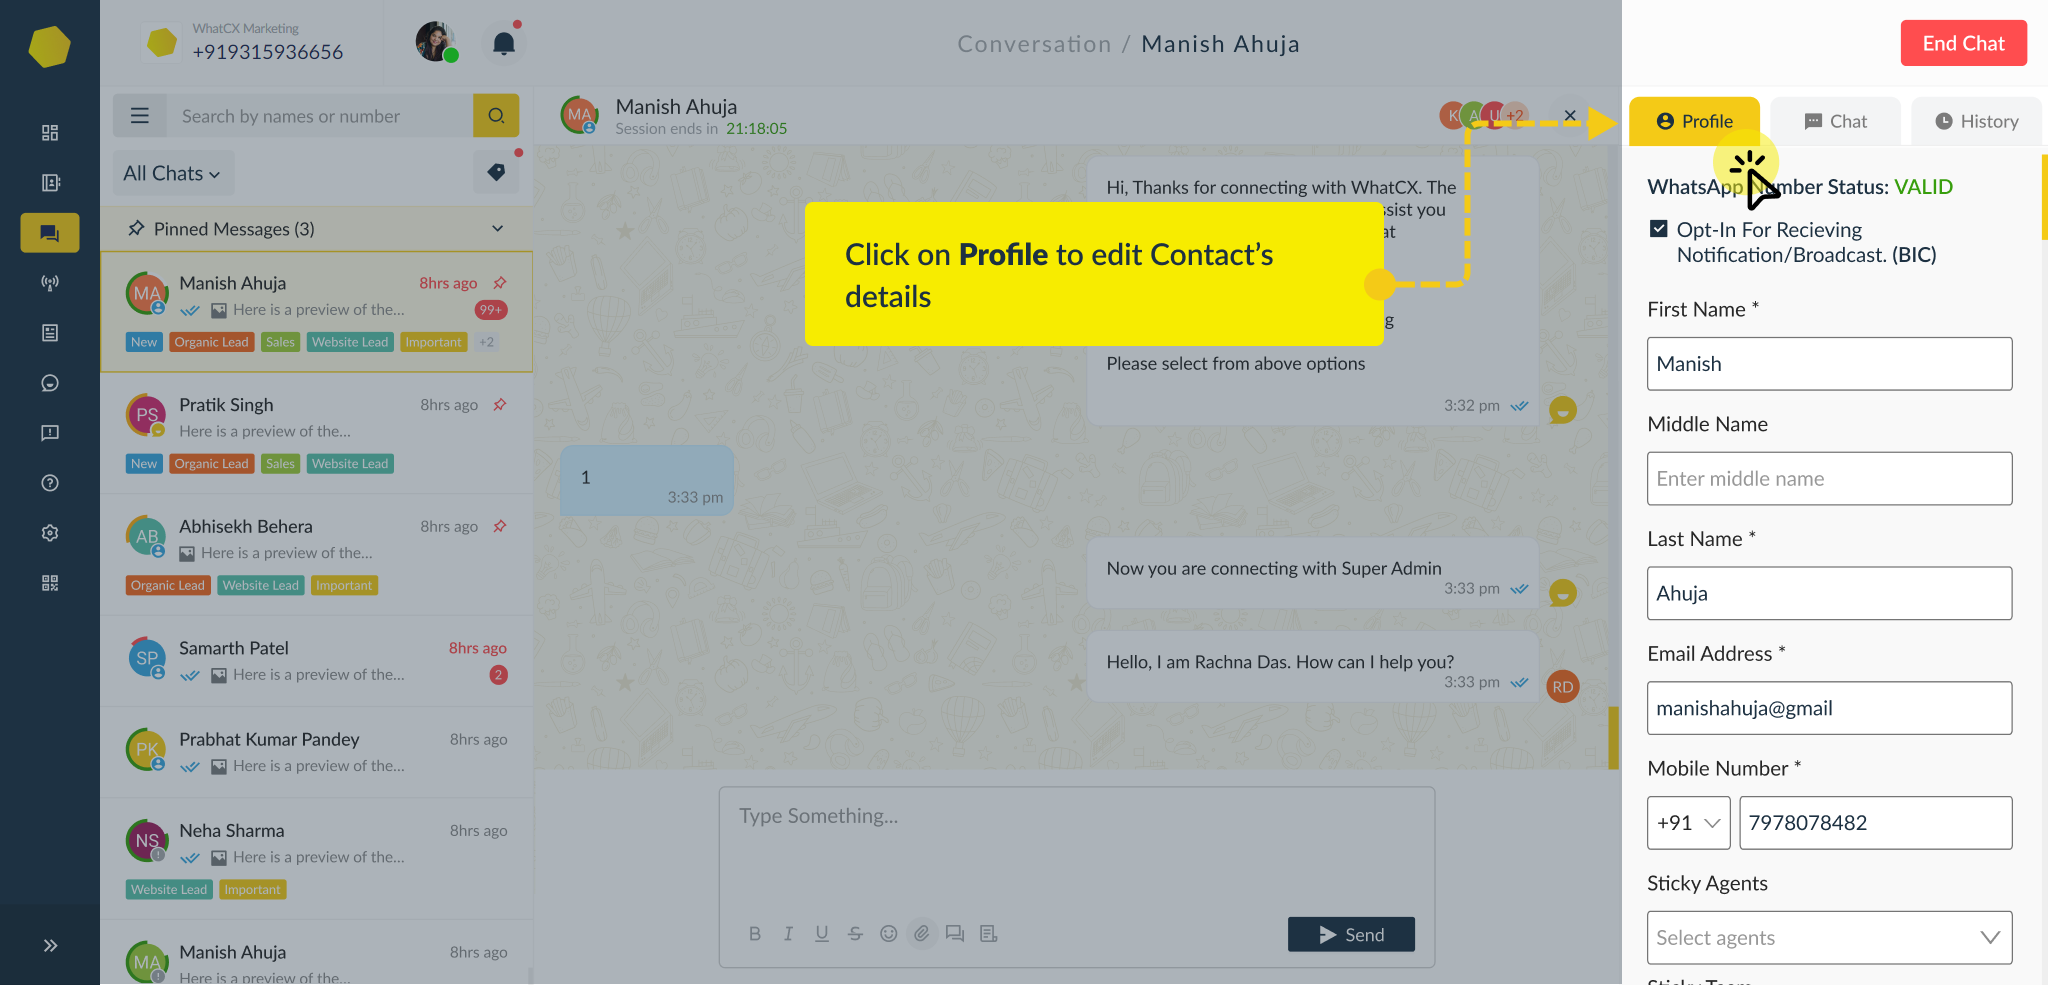
 Once you click on Create Chat labels and proceed to conversations. You can use the Chat Labels to distinguish between your conversations by priority, lead quality etc.
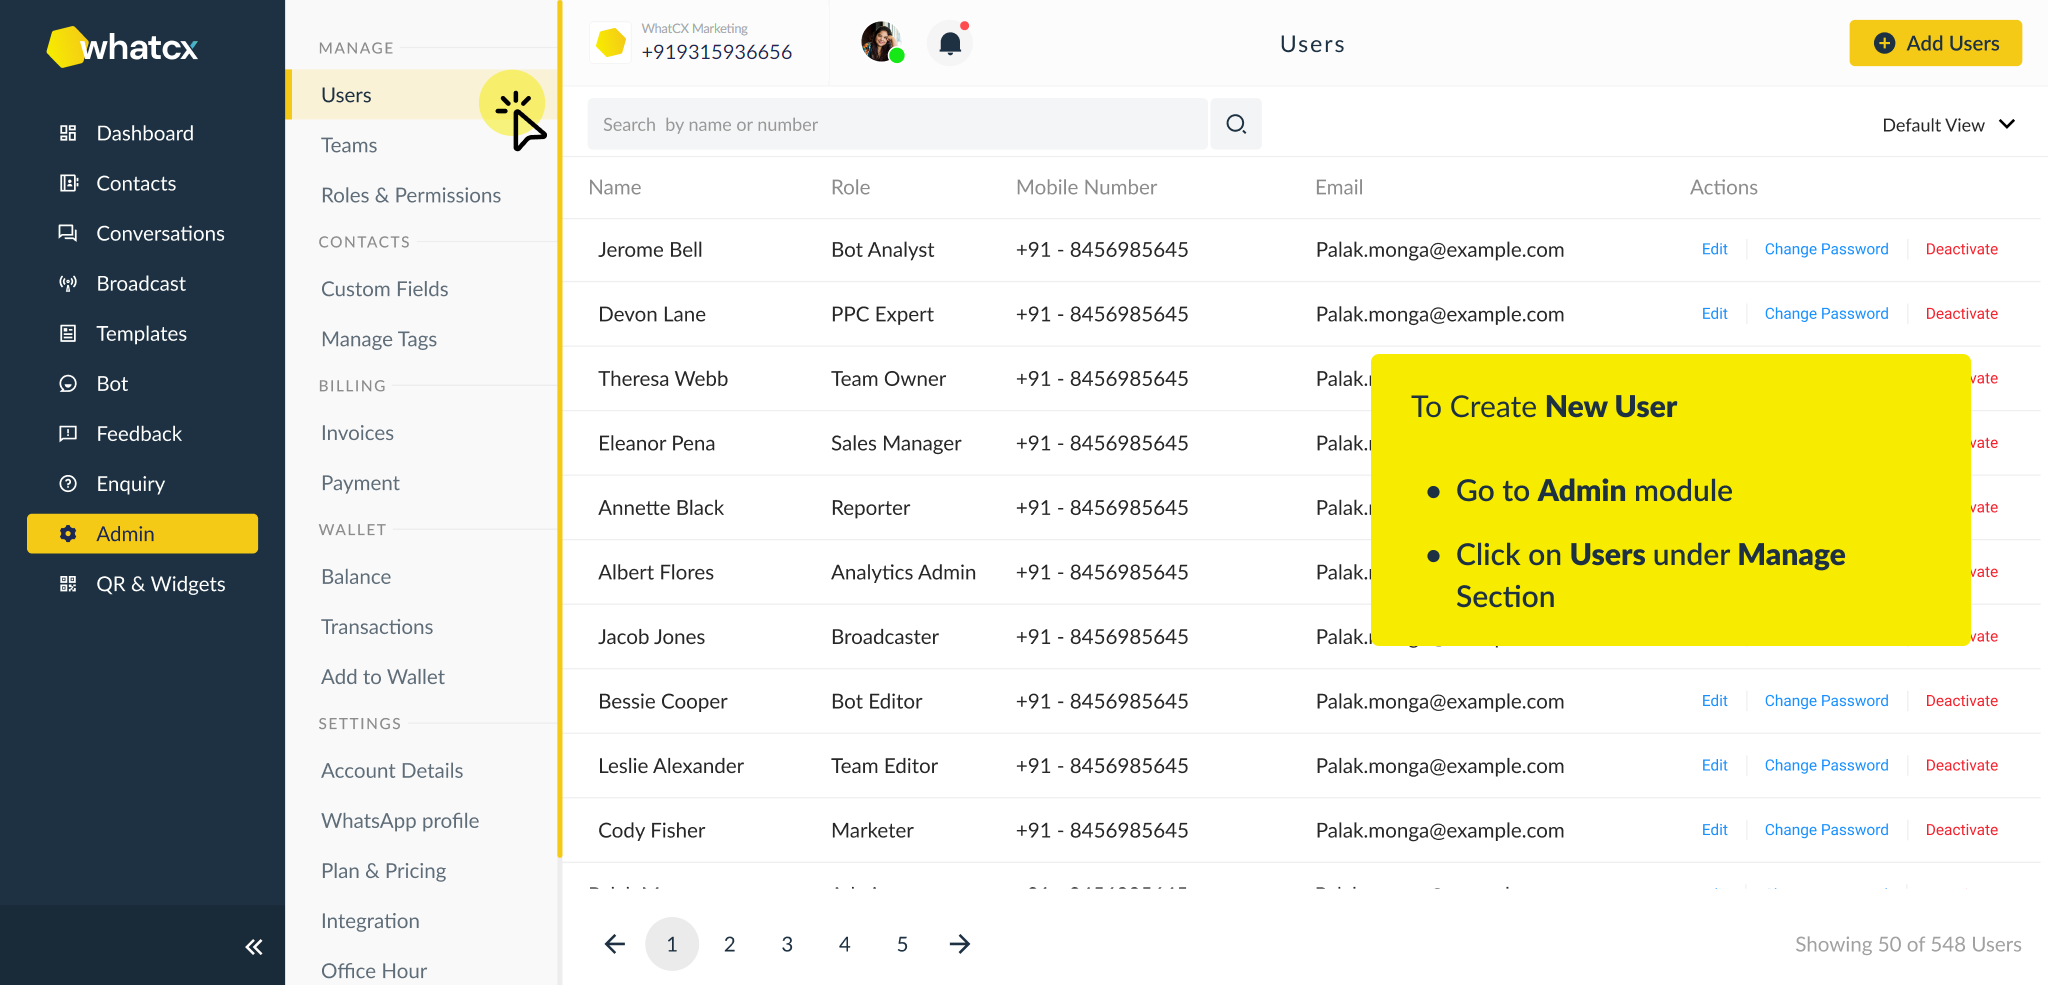 3. Click on Add User
 4. Enter the details and click on Add User, a new user will be created.
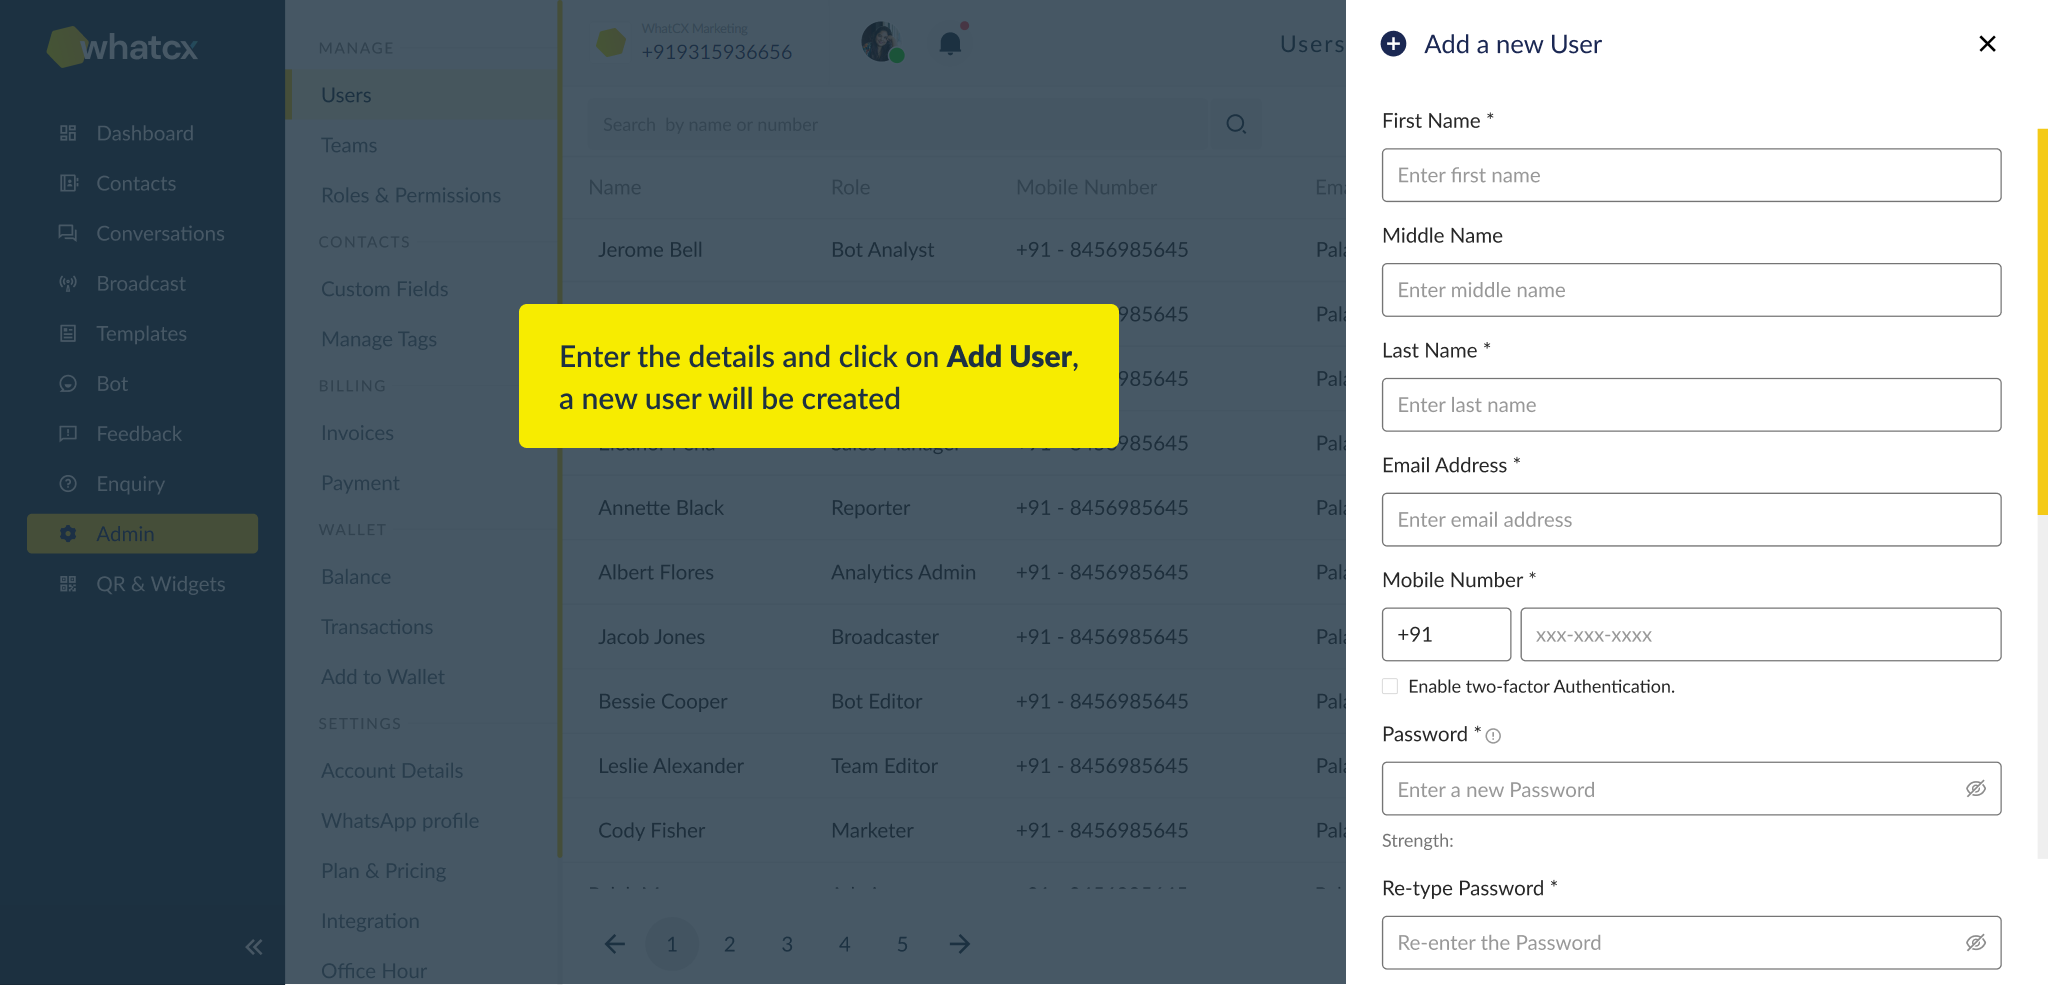
 2. Under Admin, you will find the option Contacts Tags
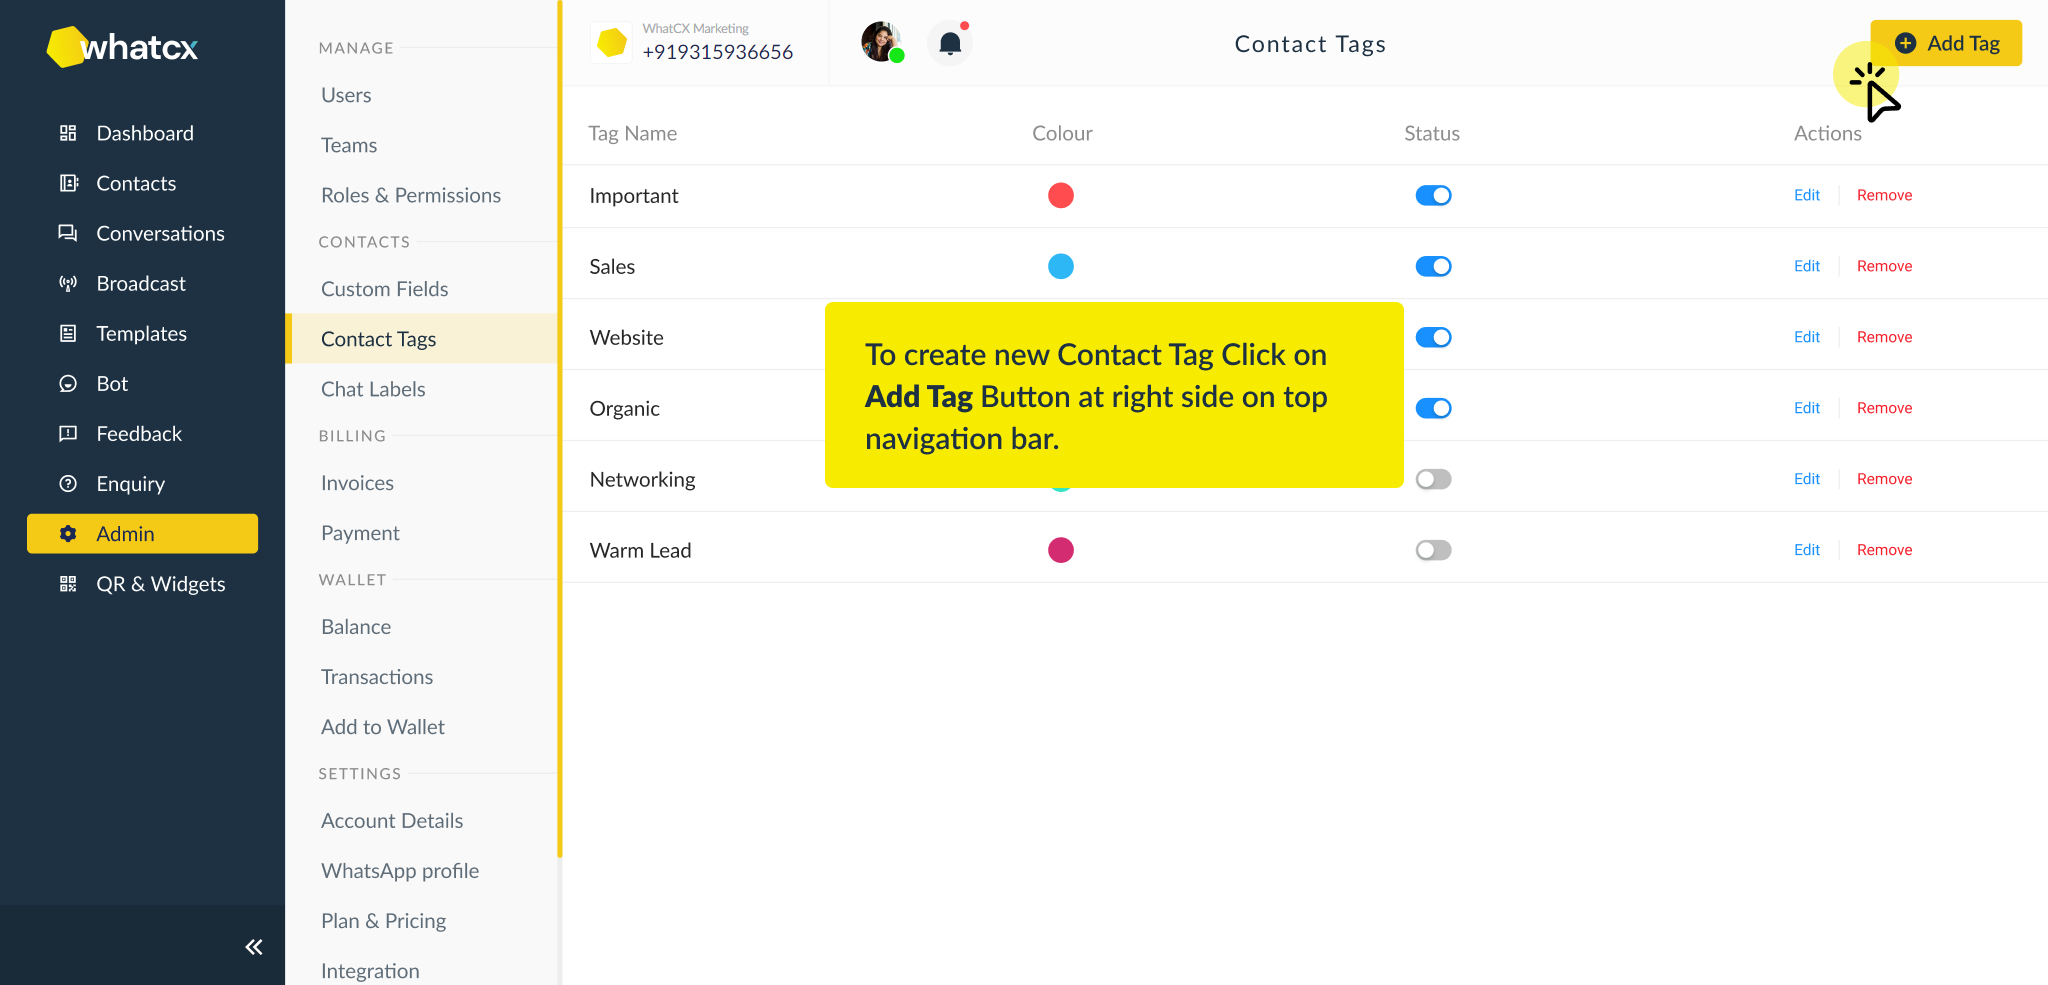 3. Click on Add Tags, and Give your Tag a Title. It could be anything depending on your business needs. You can choose the Tag color by clicking on ‘Color’ and then Clicking ‘Create Tag’
 Once you click on Create Tag and proceed to conversations. You can use the Chat Labels to distinguish between your conversations by priority, lead quality etc.
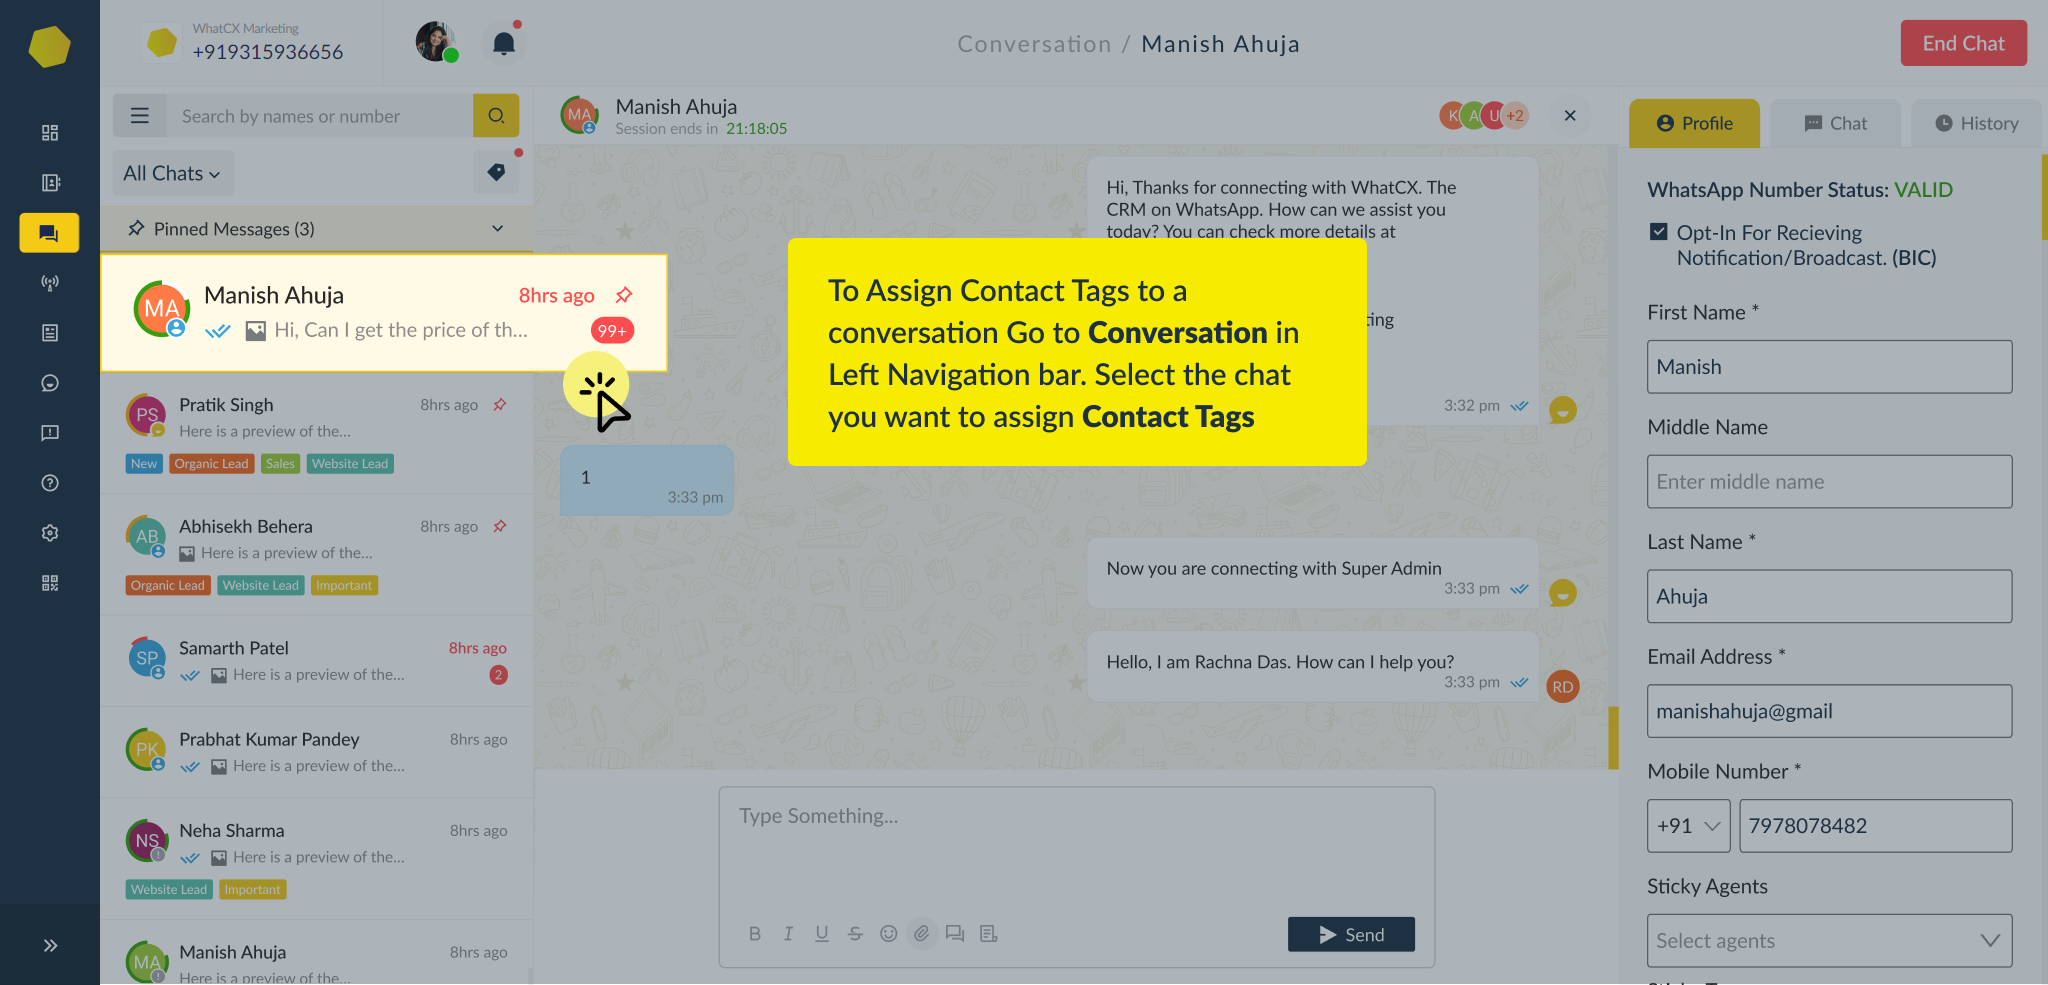


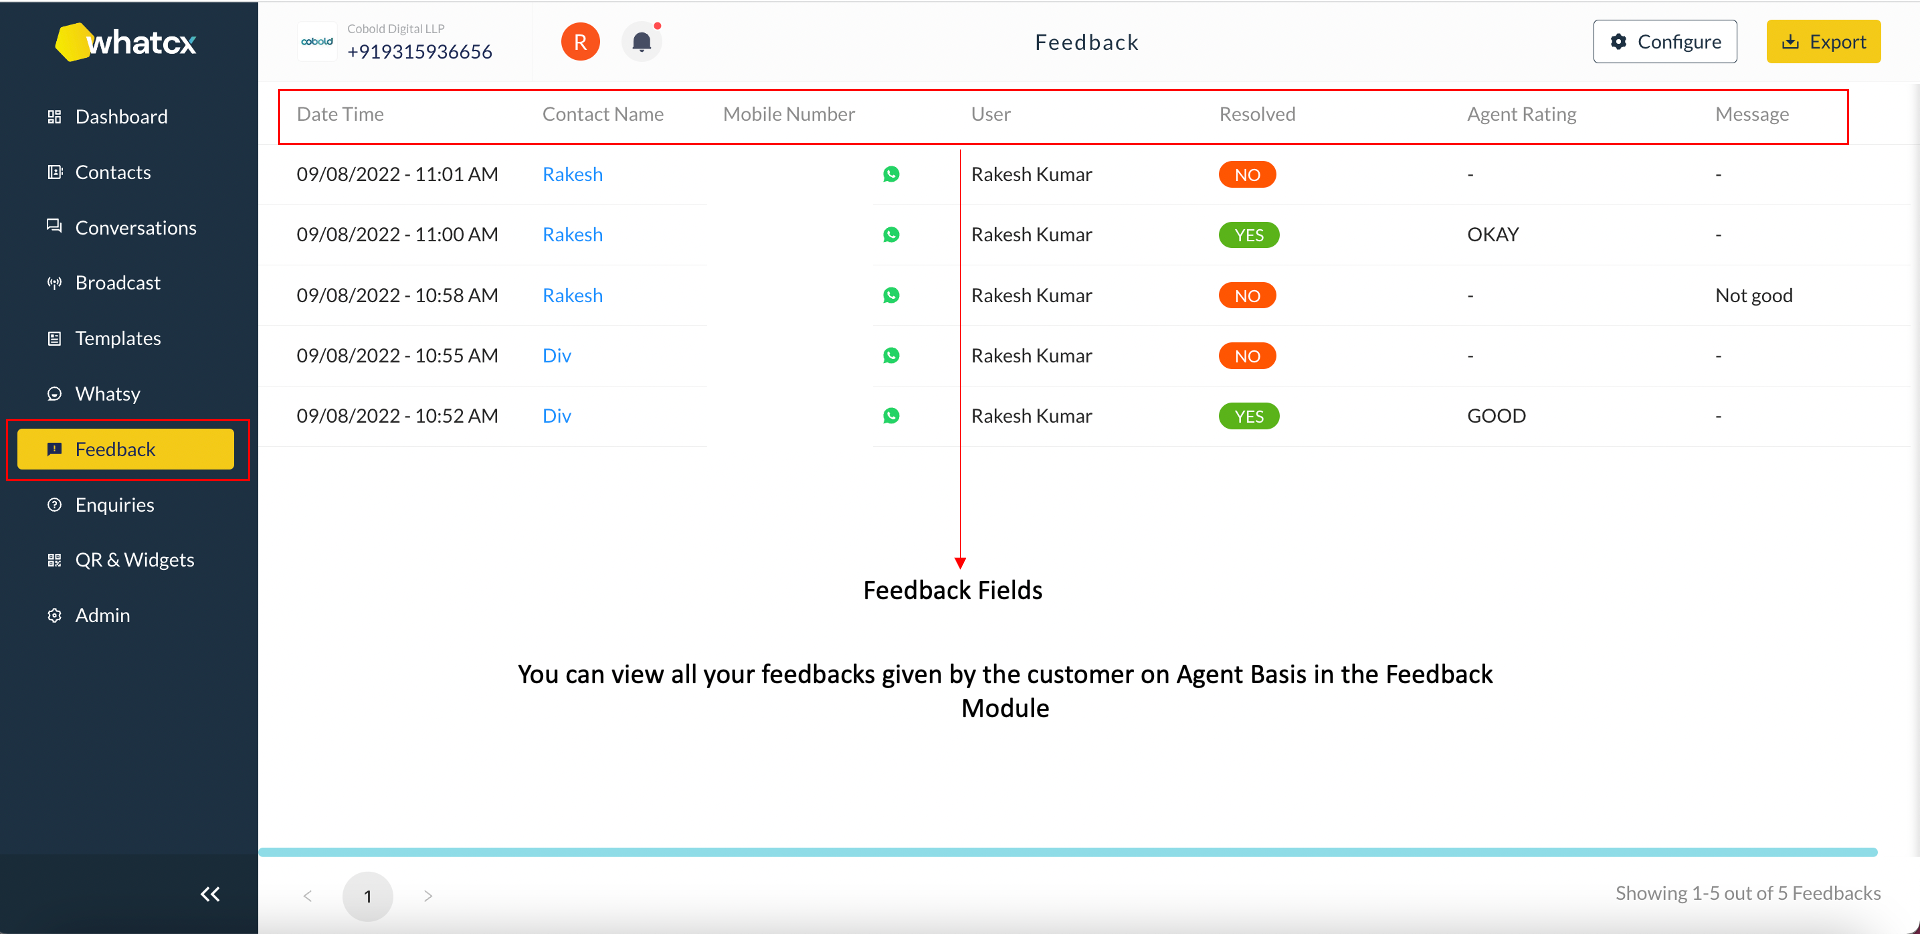 3. You now click on Configure. Please note that you need to Configure your Feedback templates only in case you want the bots to reply automatically in the Feedback Module
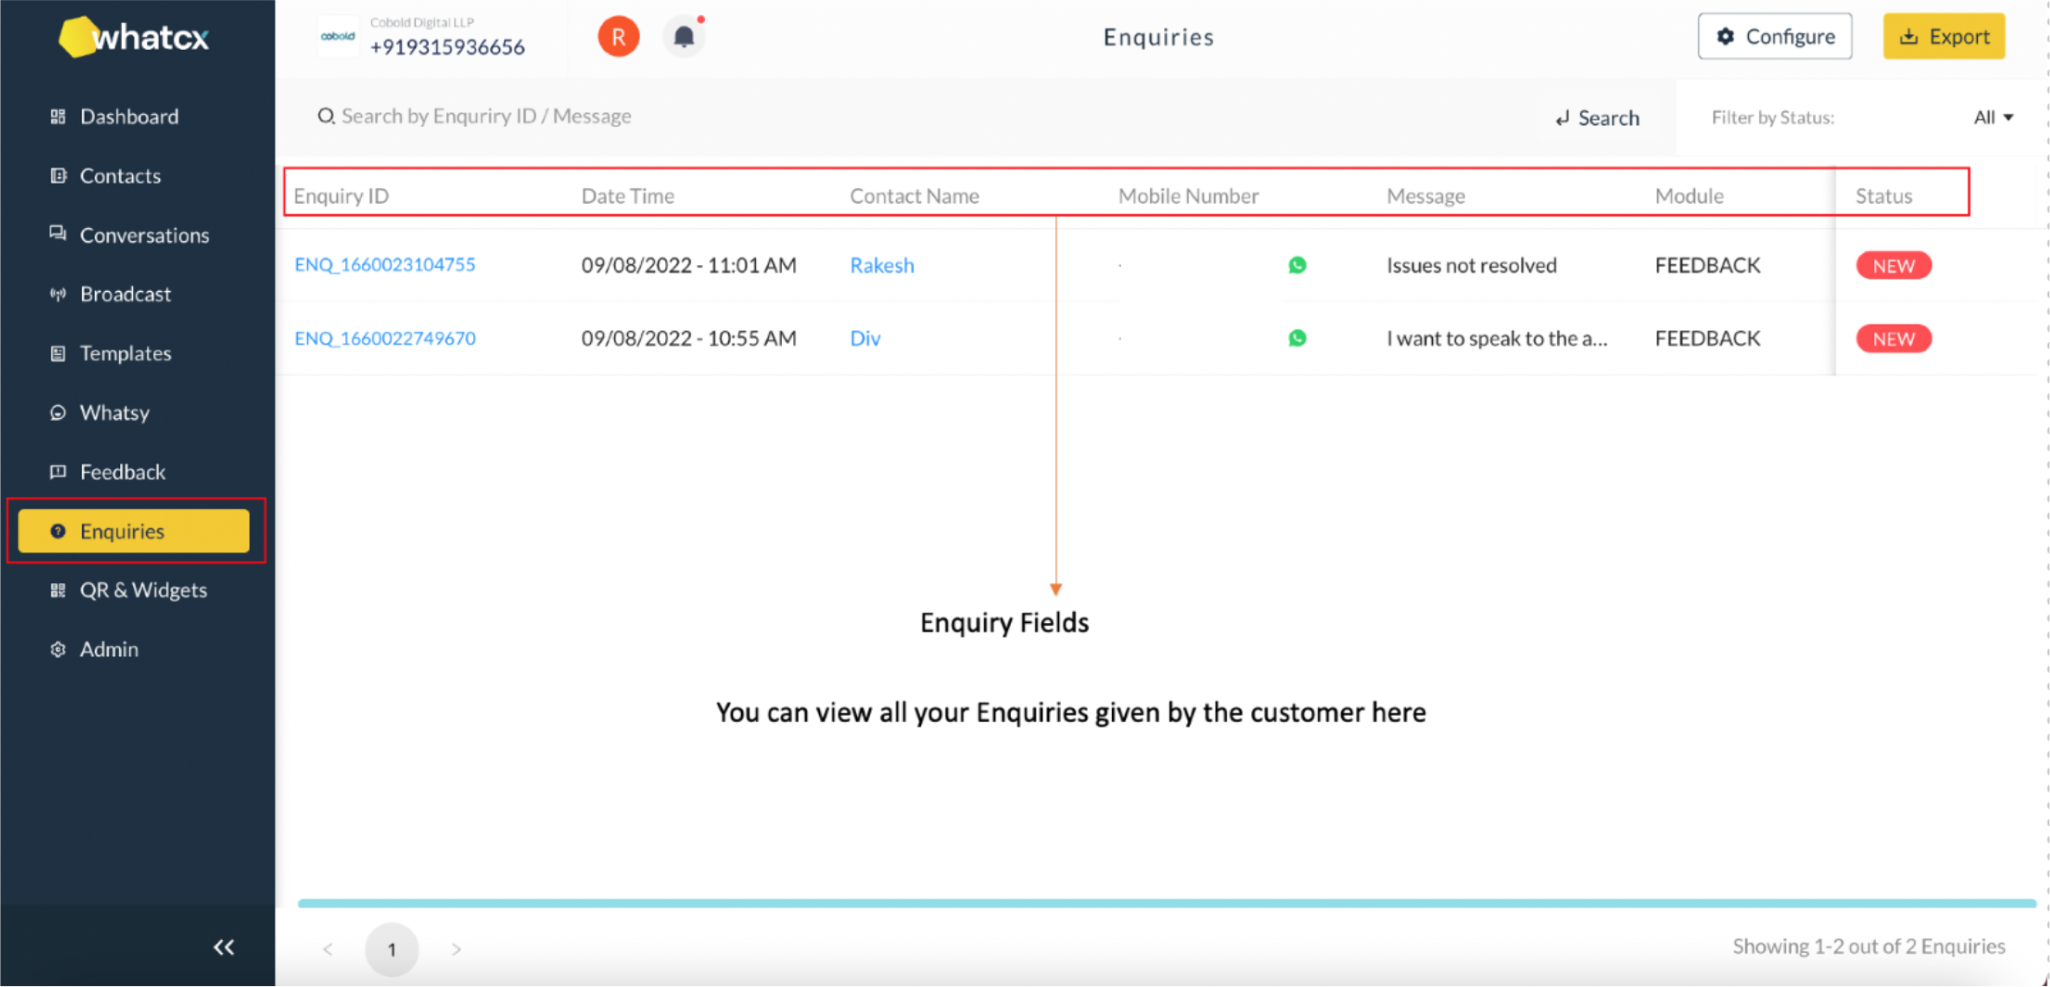 3. You now click on Configure.
 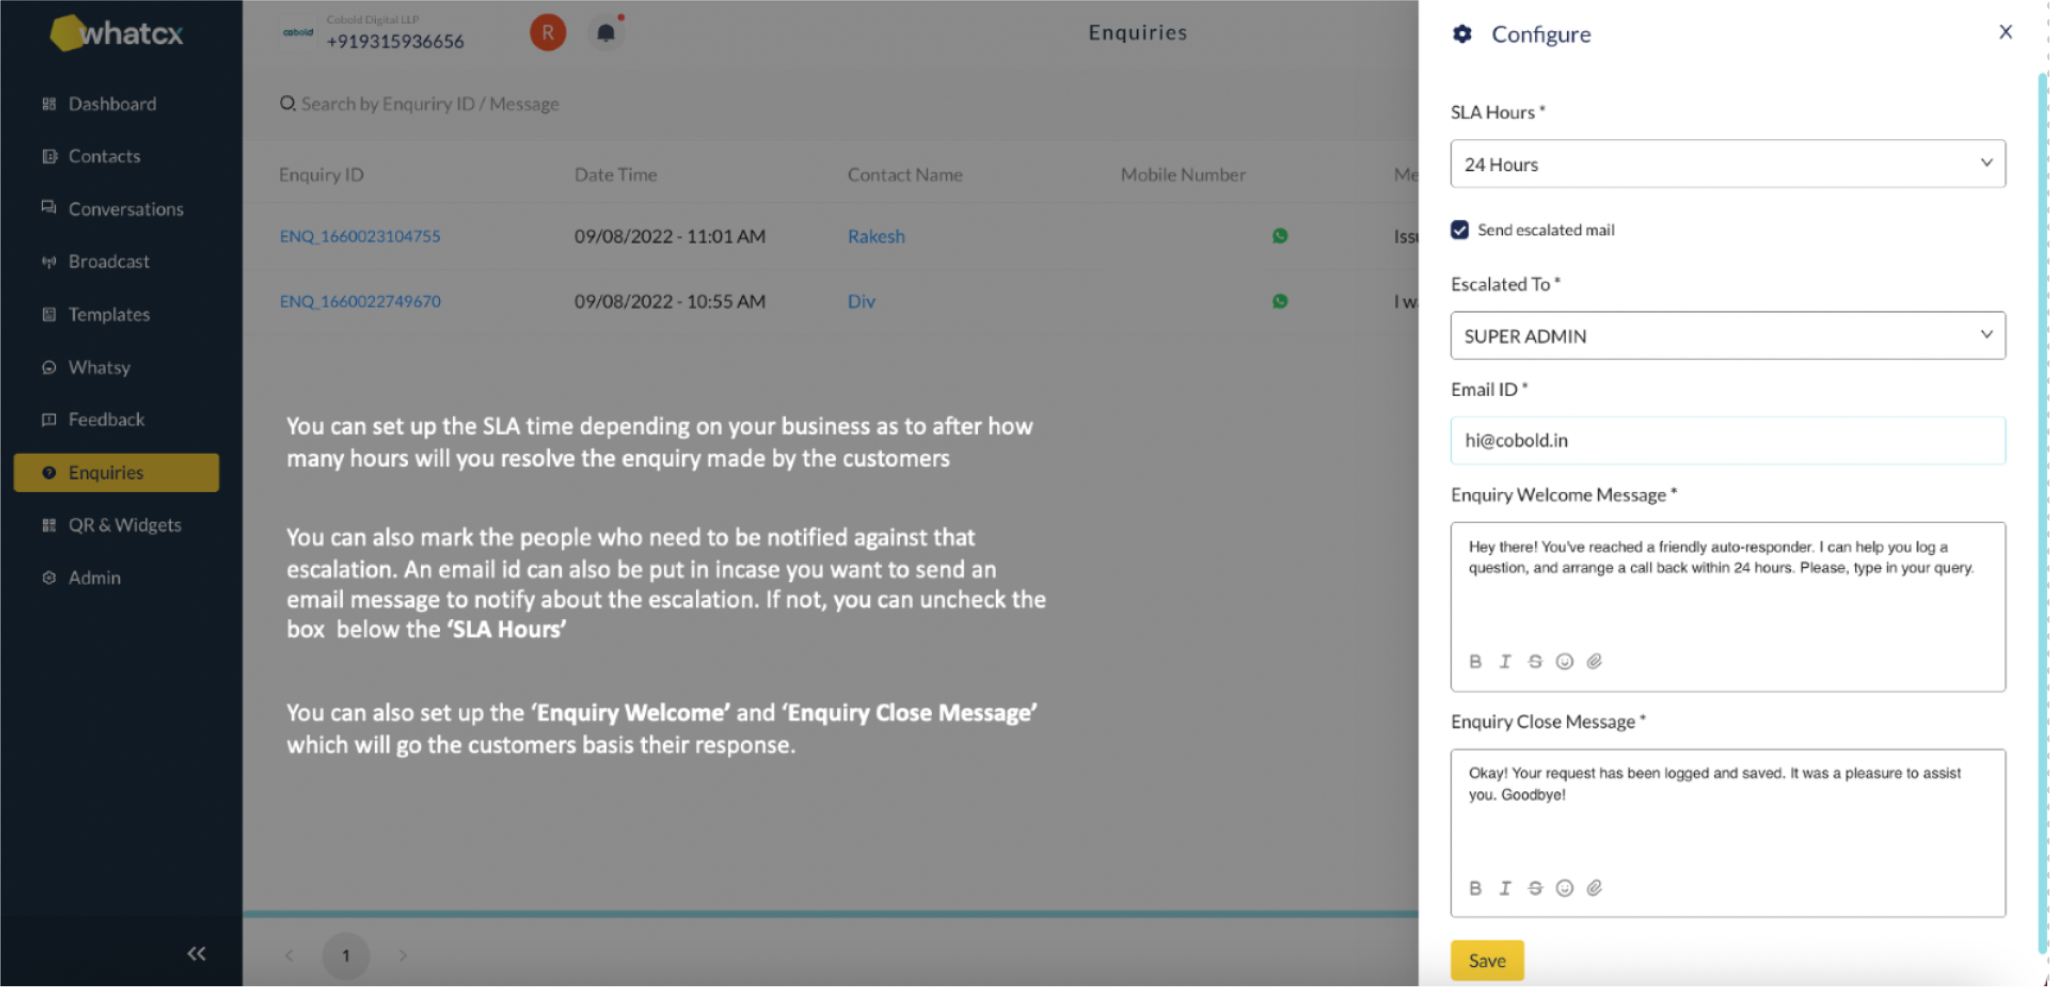 4. Click save. Now all the triggers which will be registered as Enquiry will receive the configured messages.