Introduction
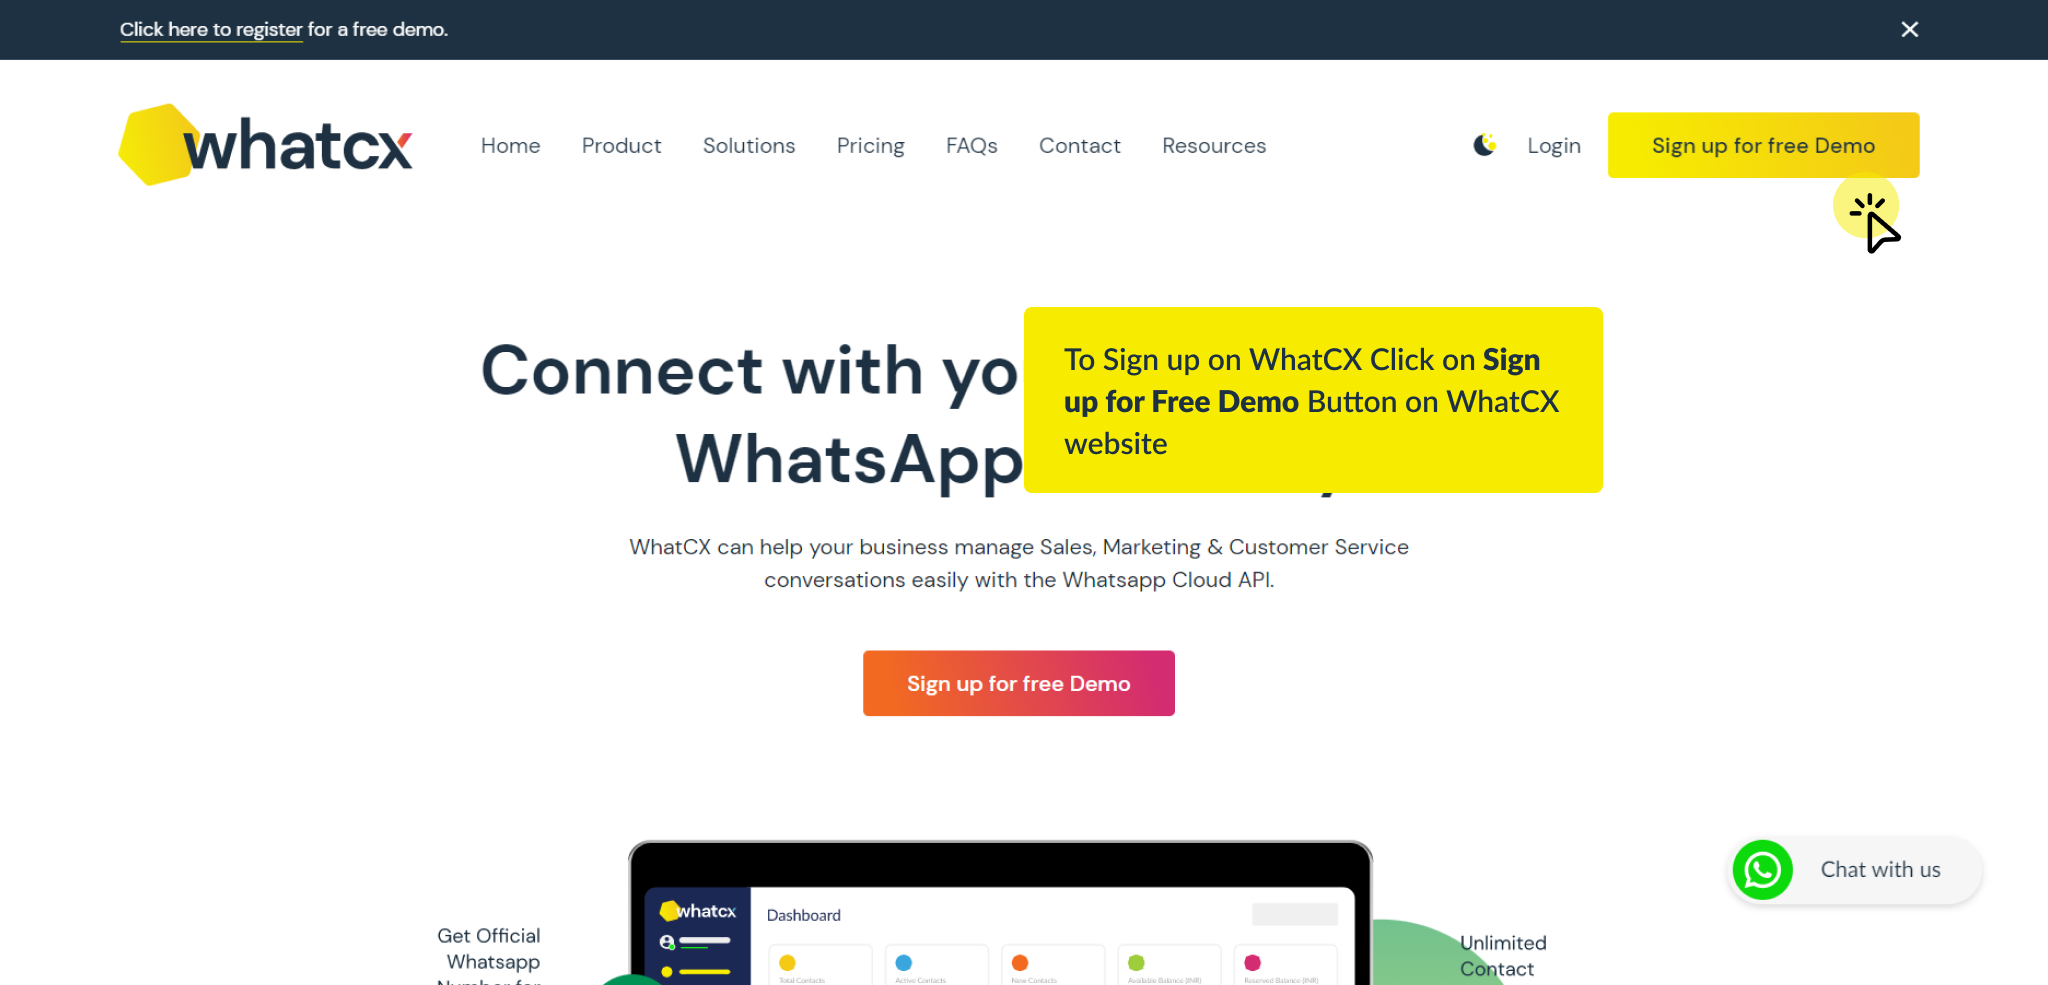
How to Sign-up on WhatCX?
How to reset your WhatCX account password?
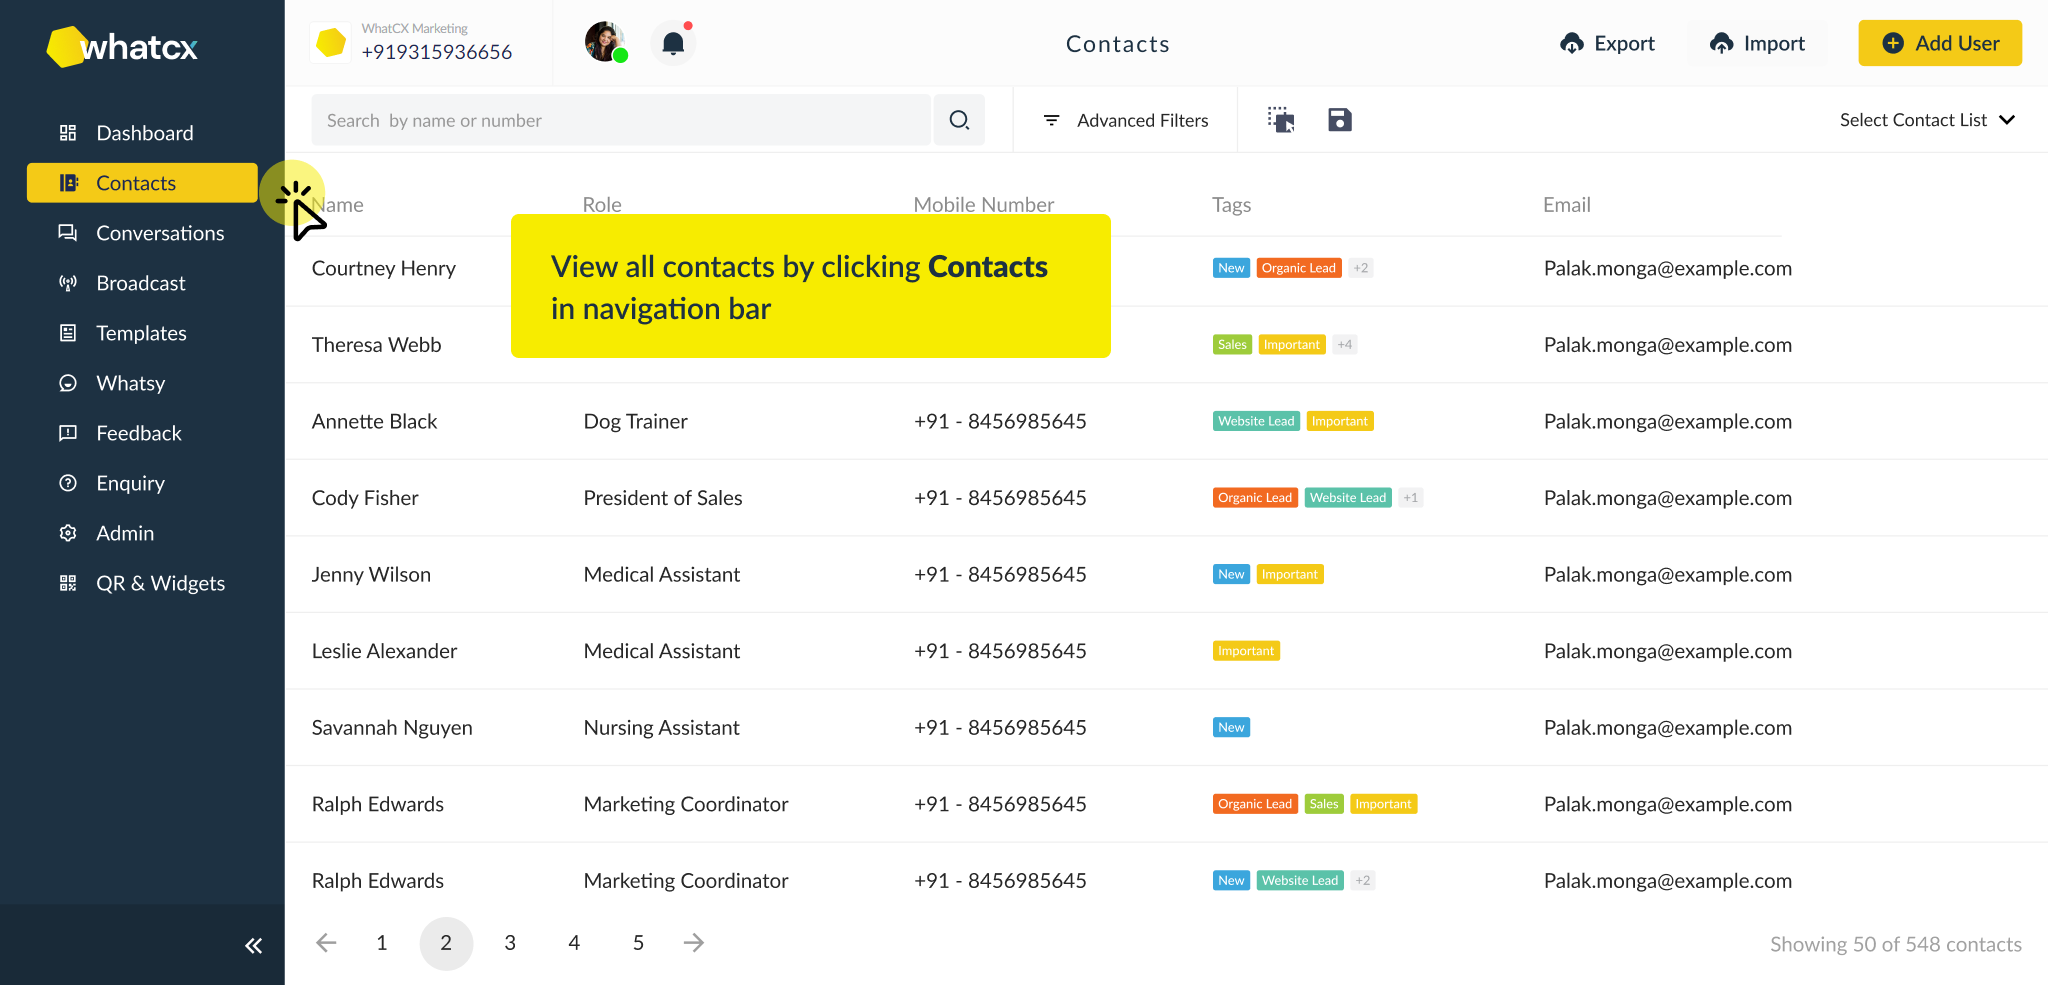
How to add Contacts manually?
Plan Overview
First Steps
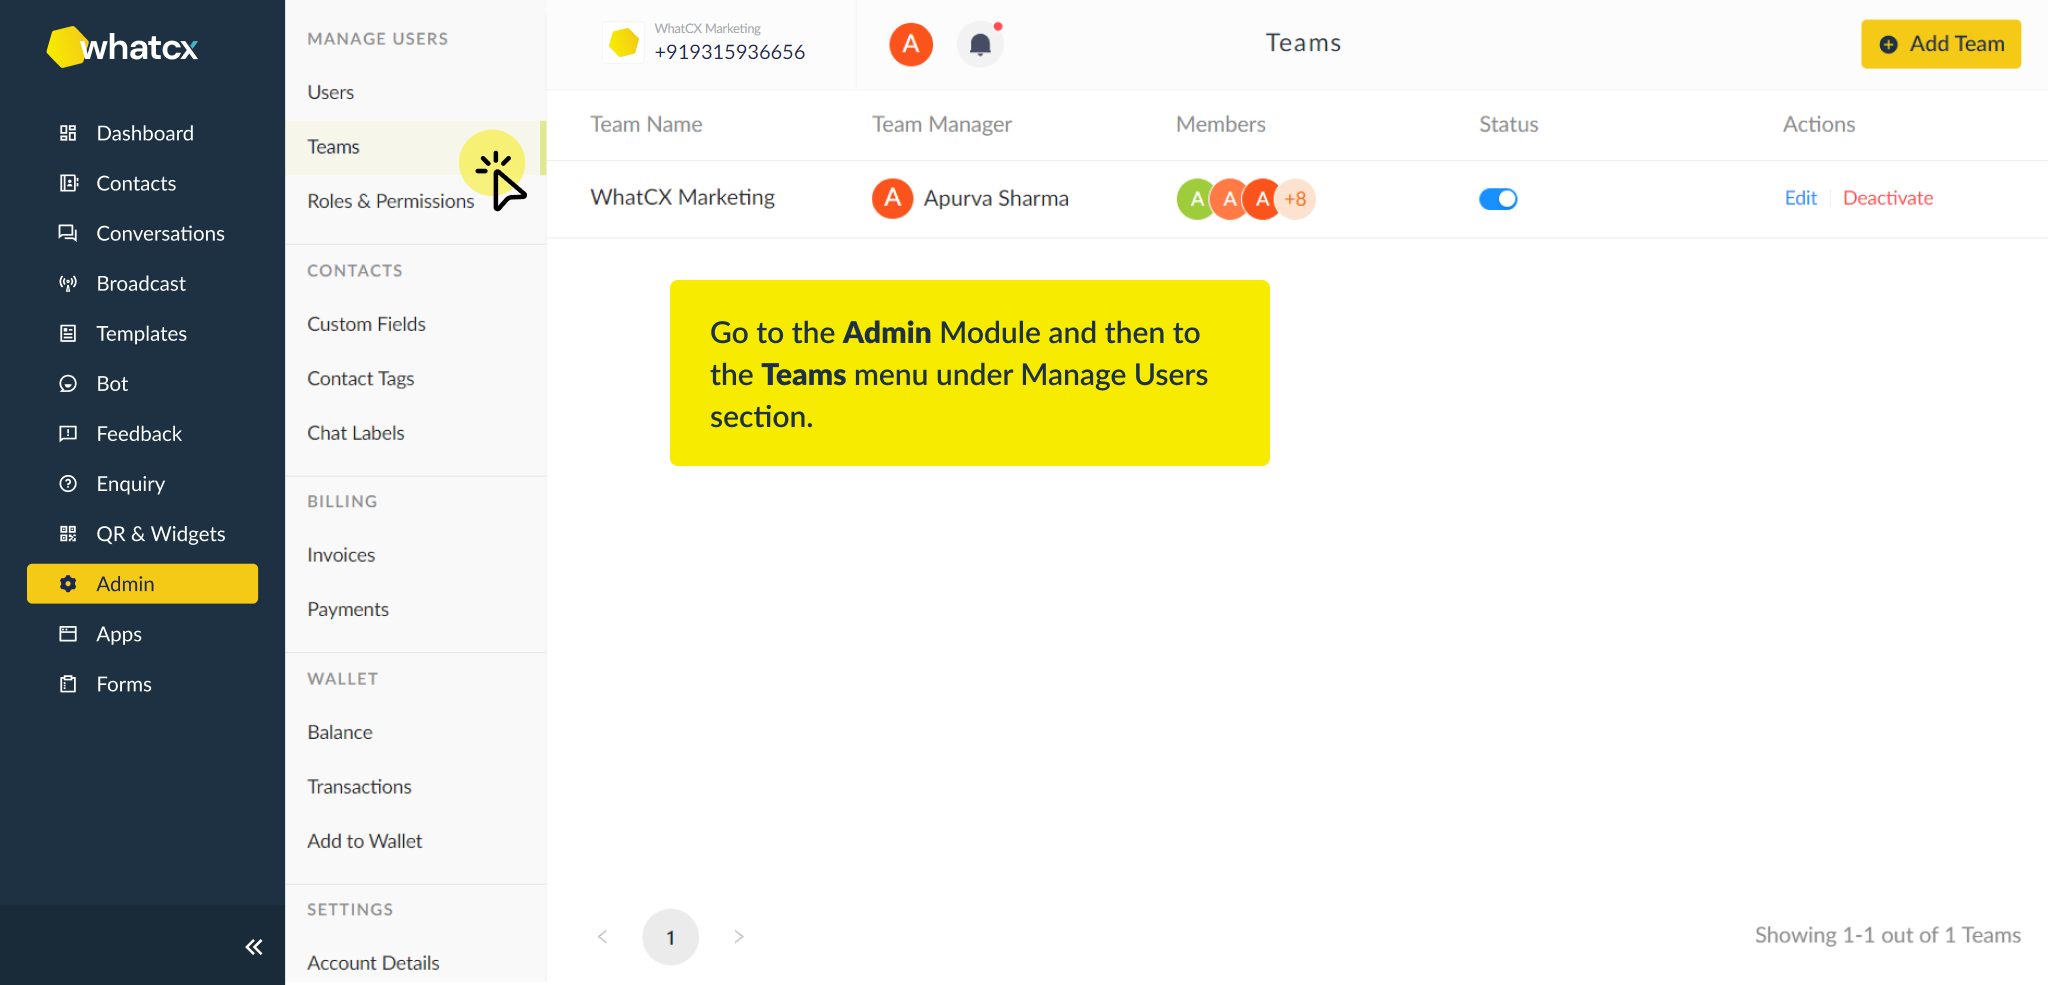
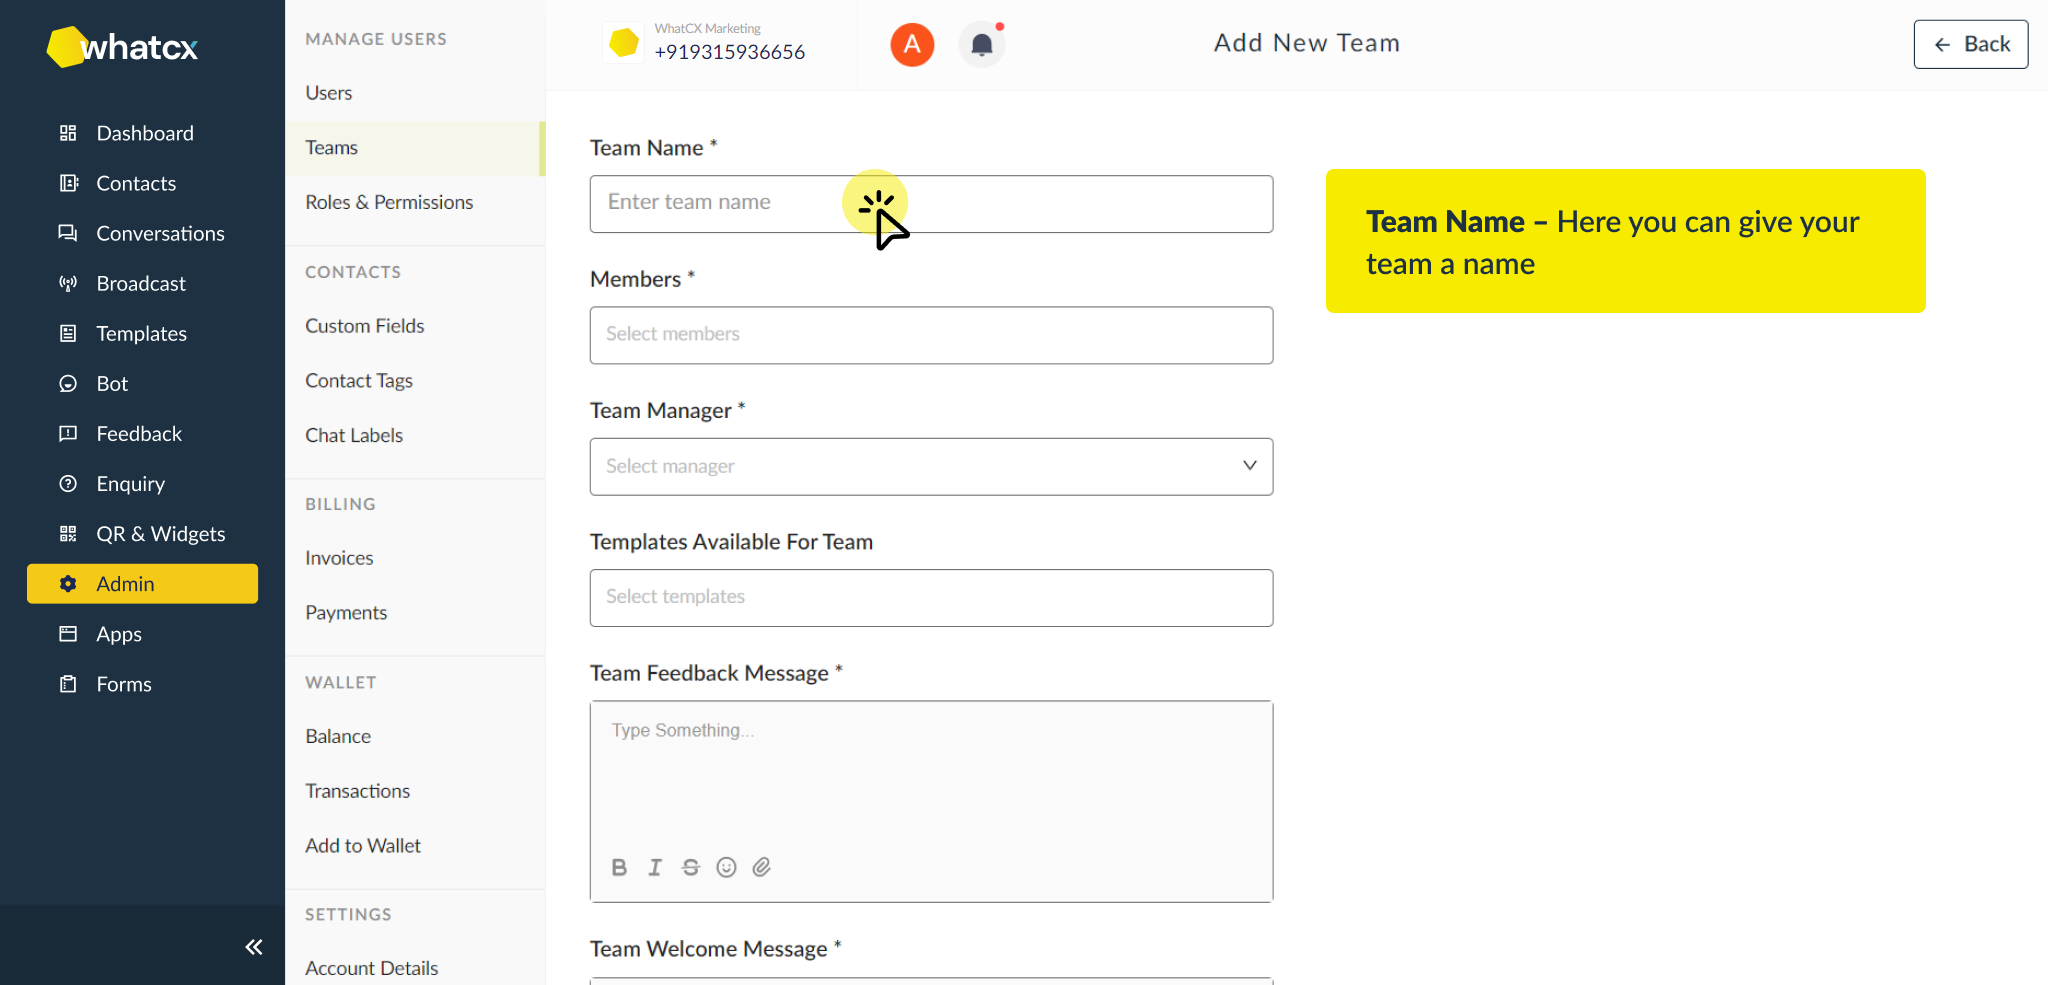
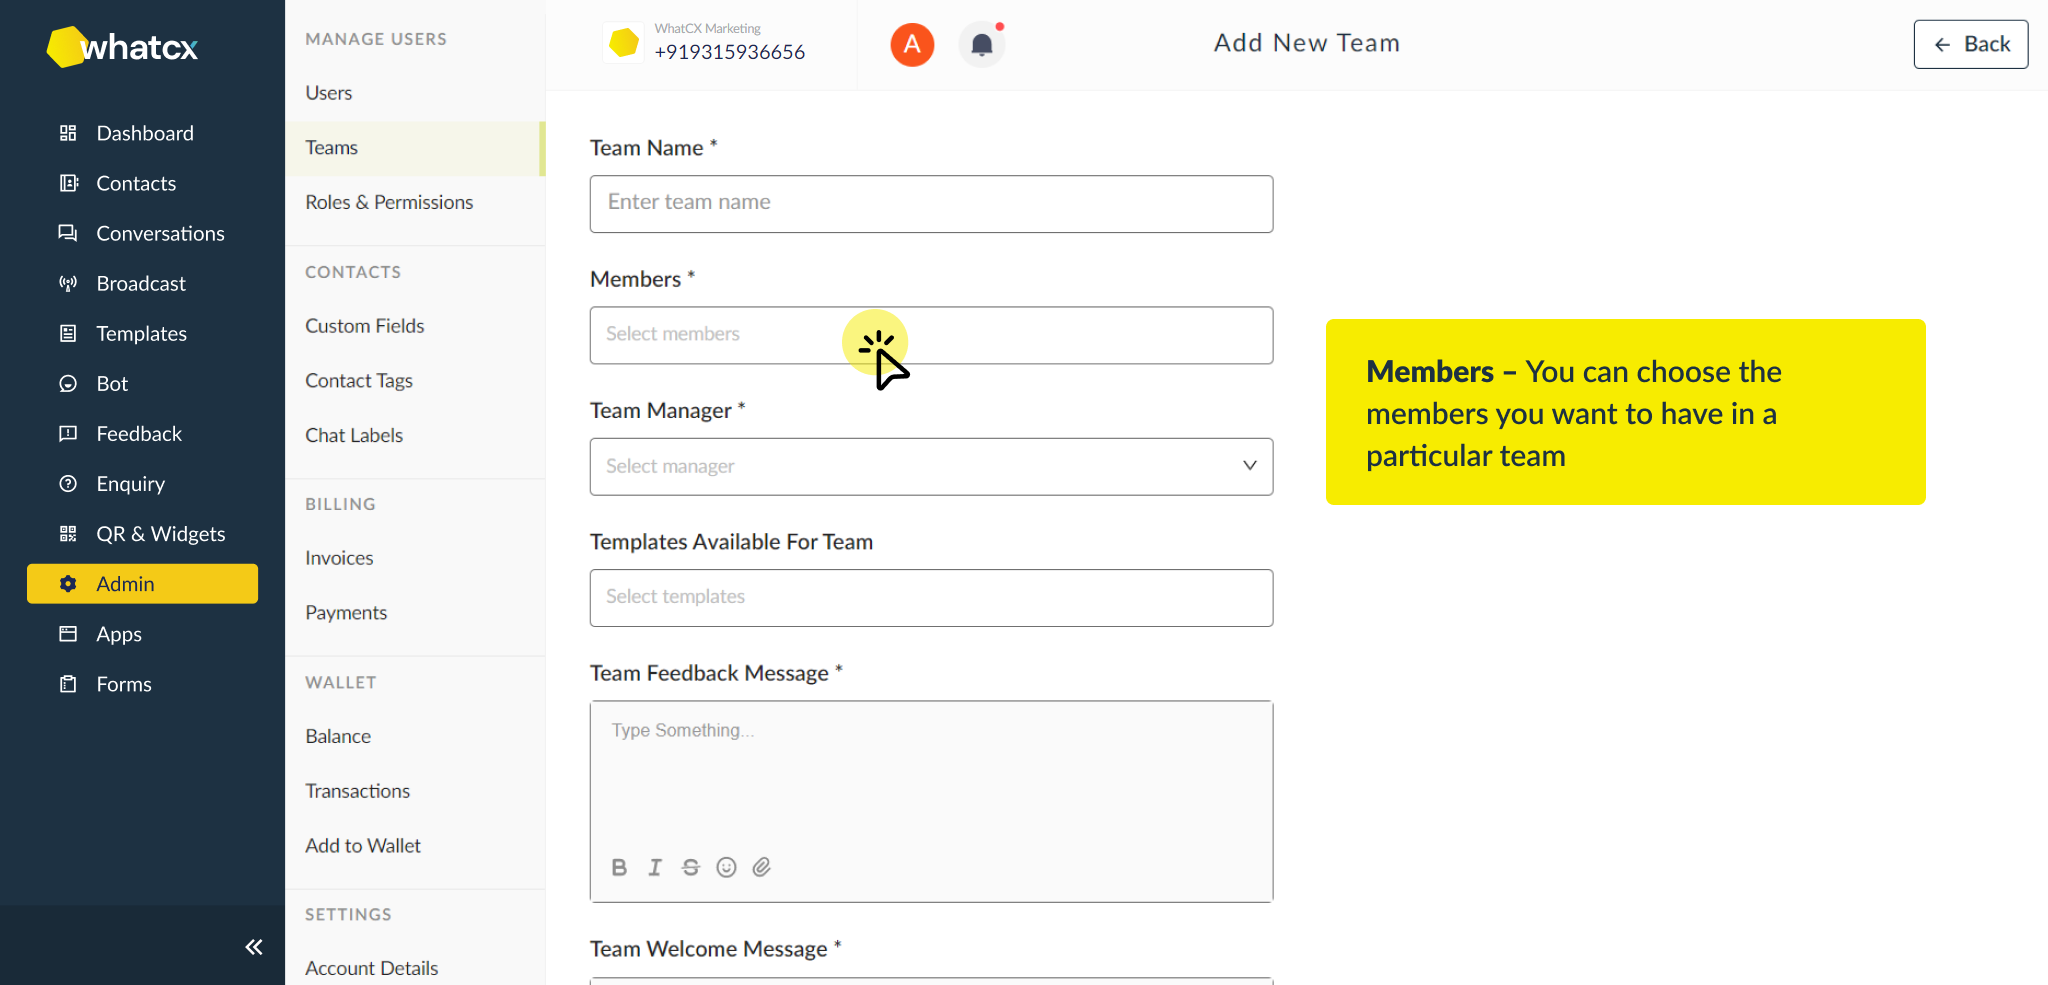
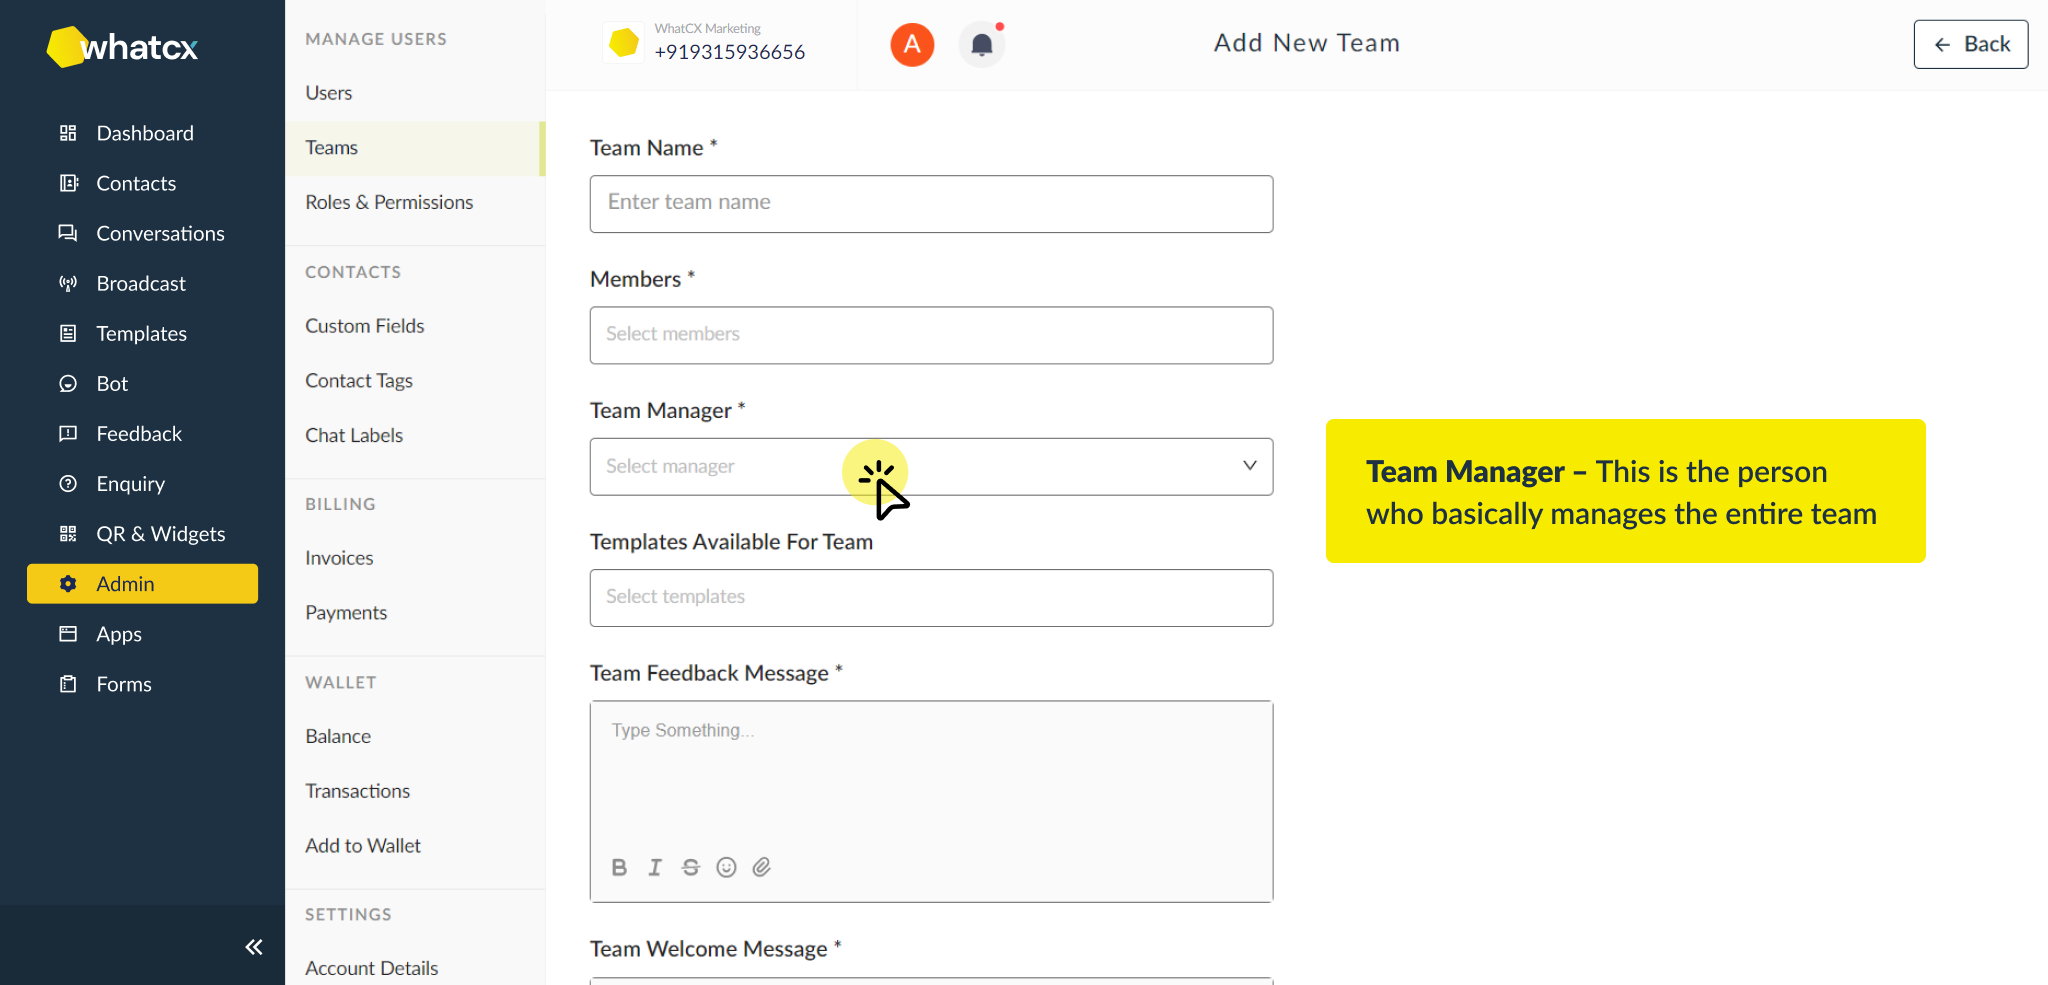
Invite Users & Setup Teams
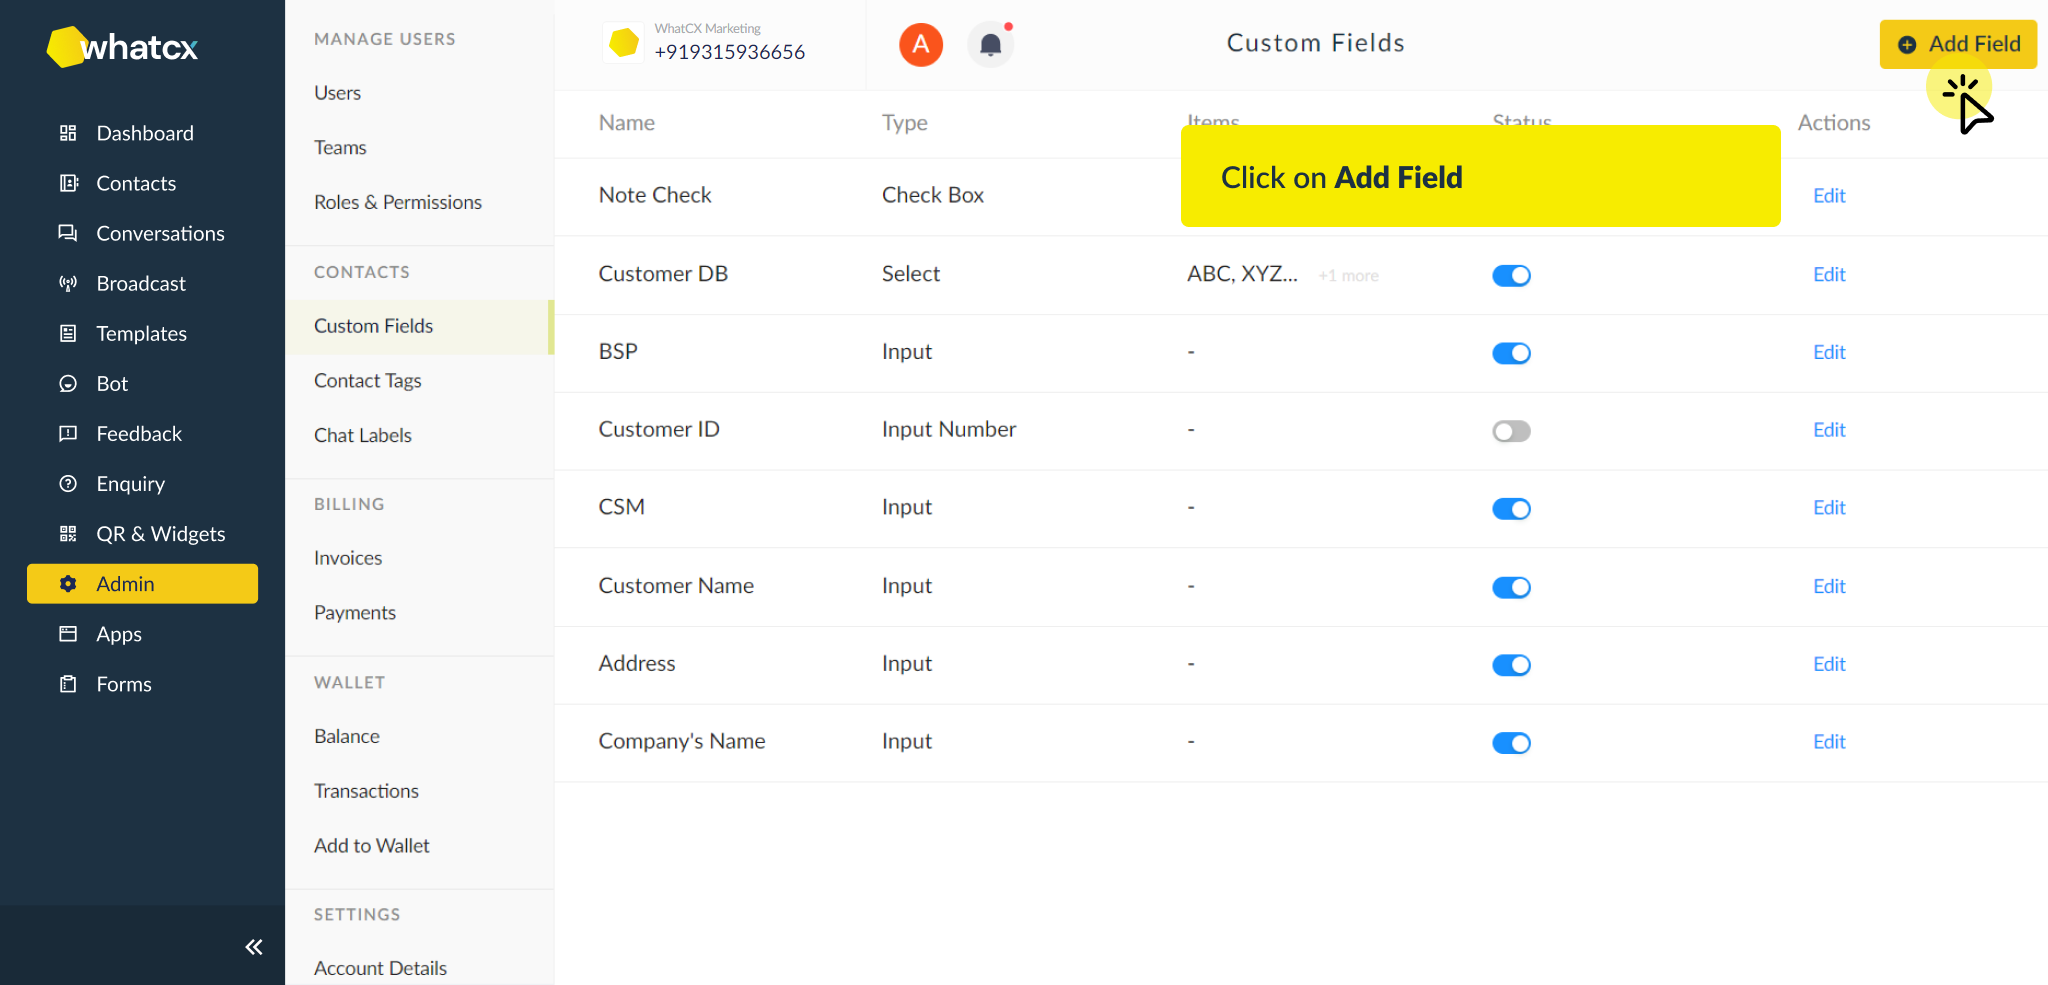
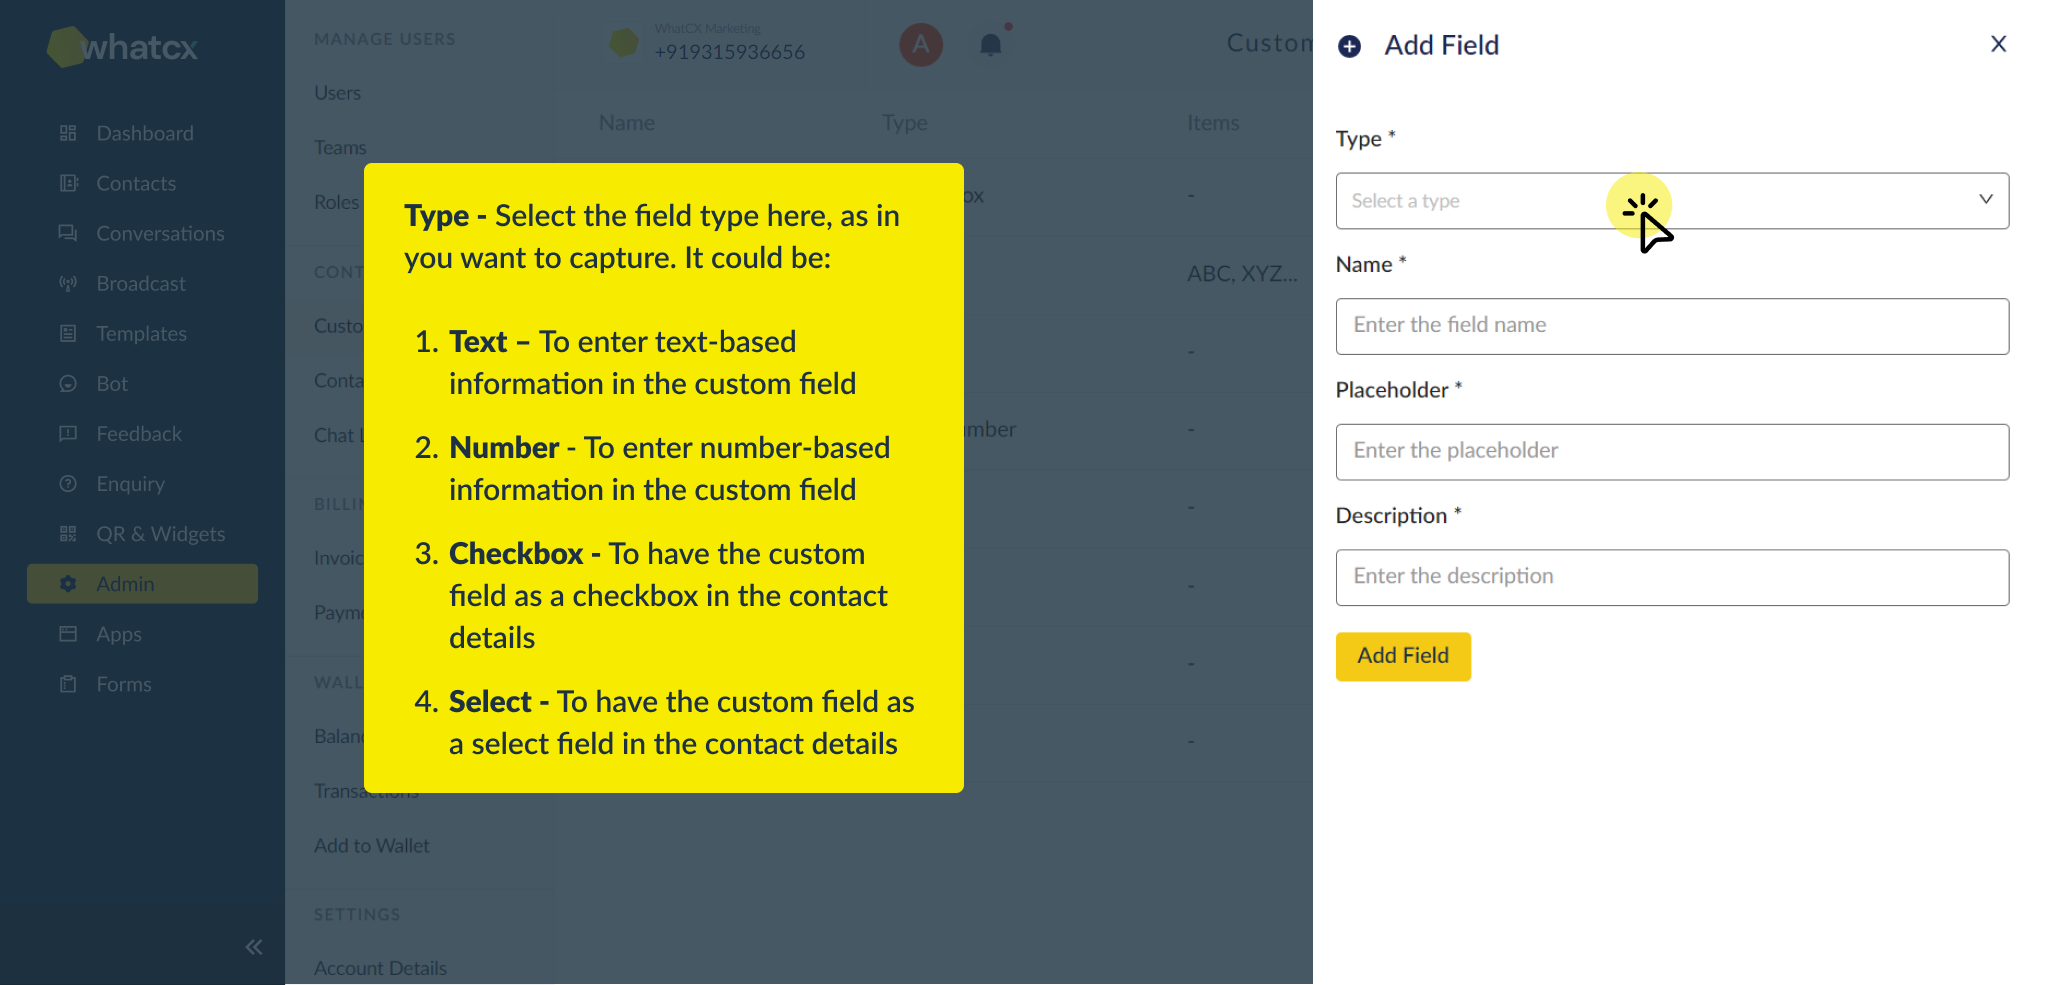
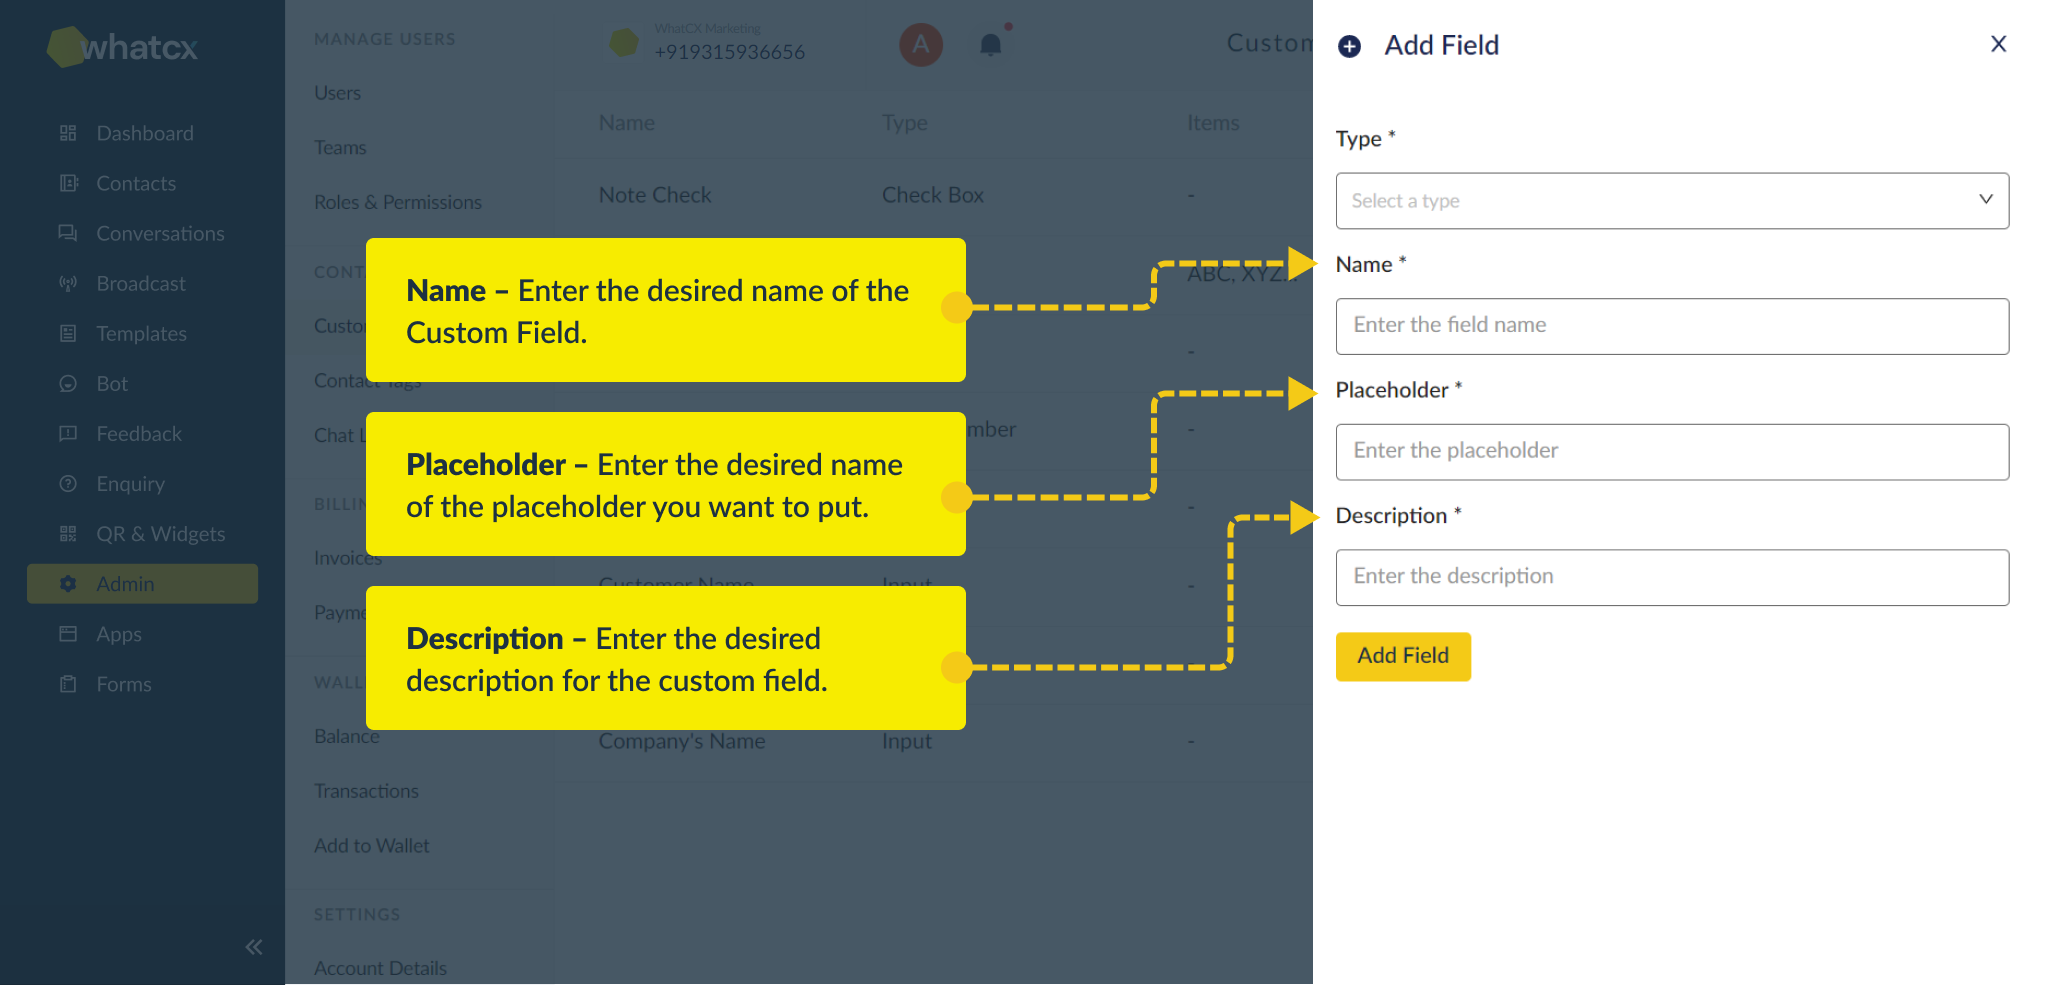
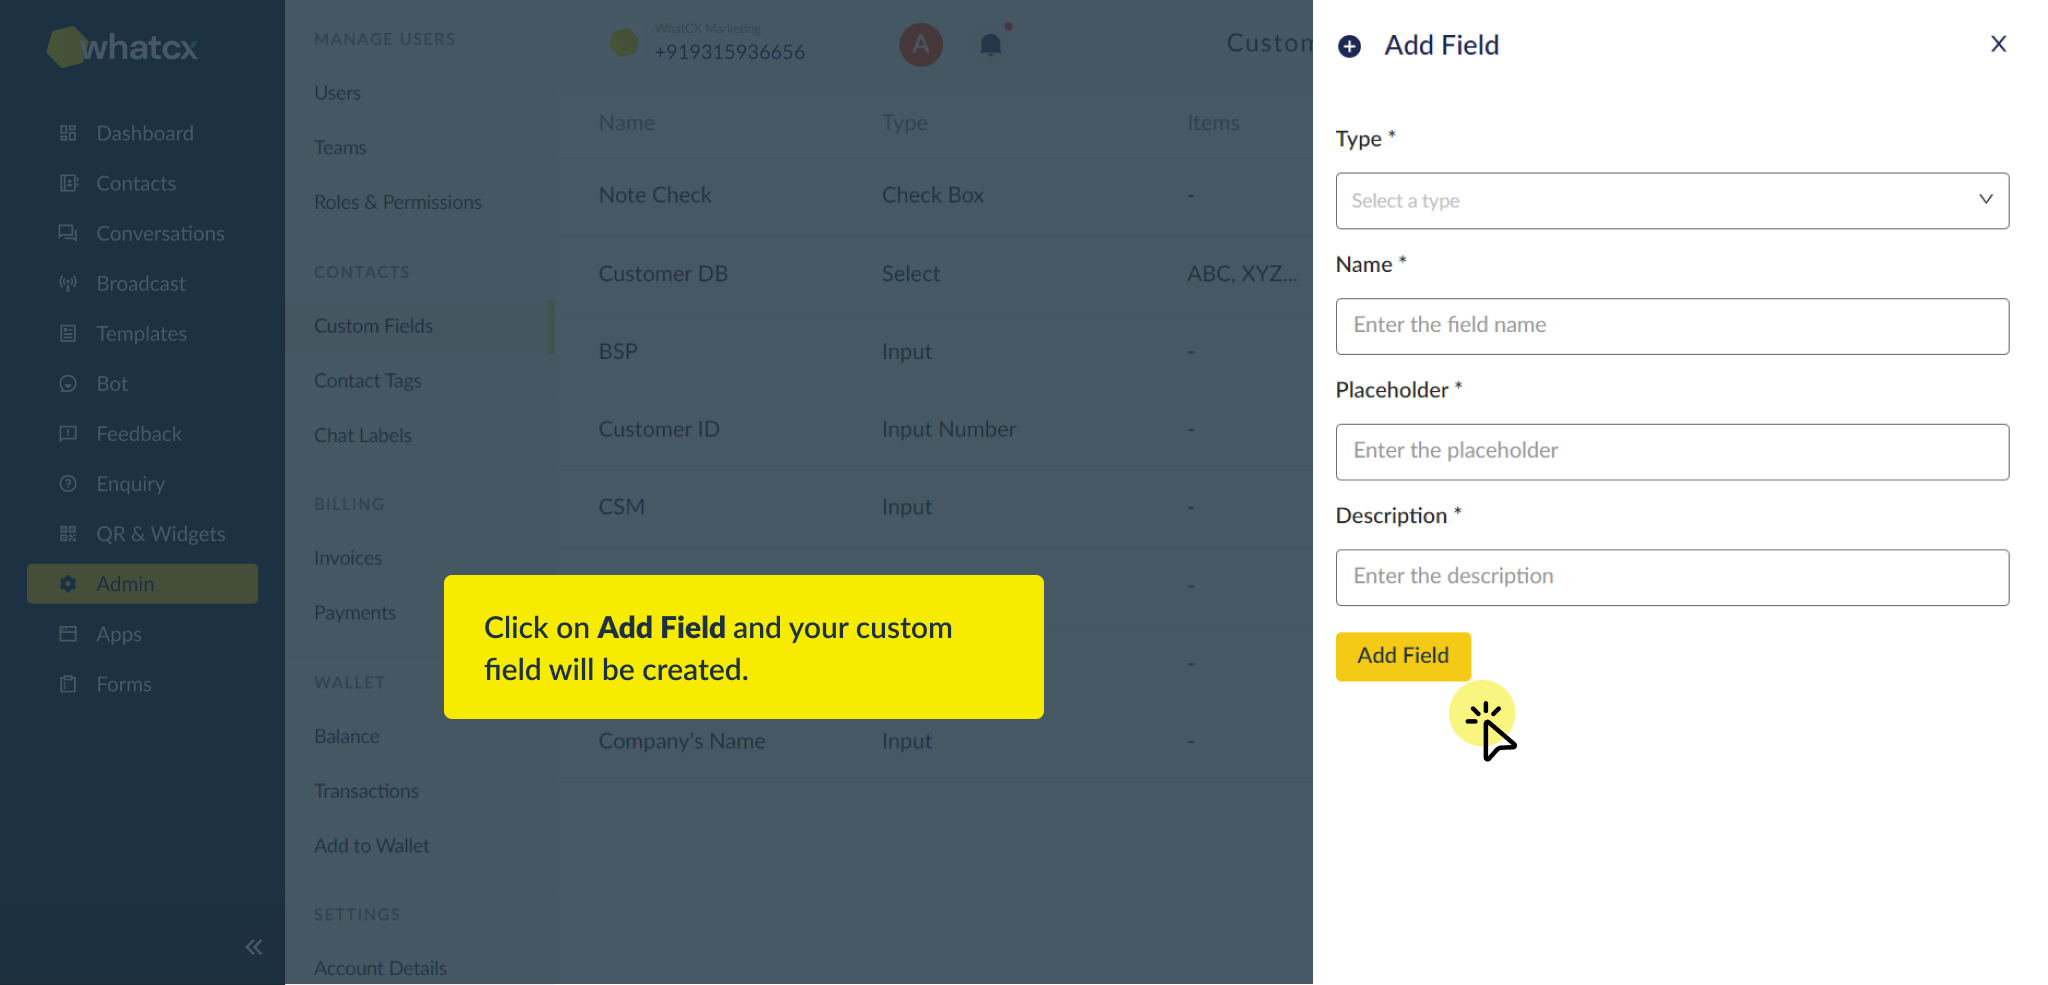
Setup Contact Tags & Custom Fields
Have your first Conversation on WhatCX
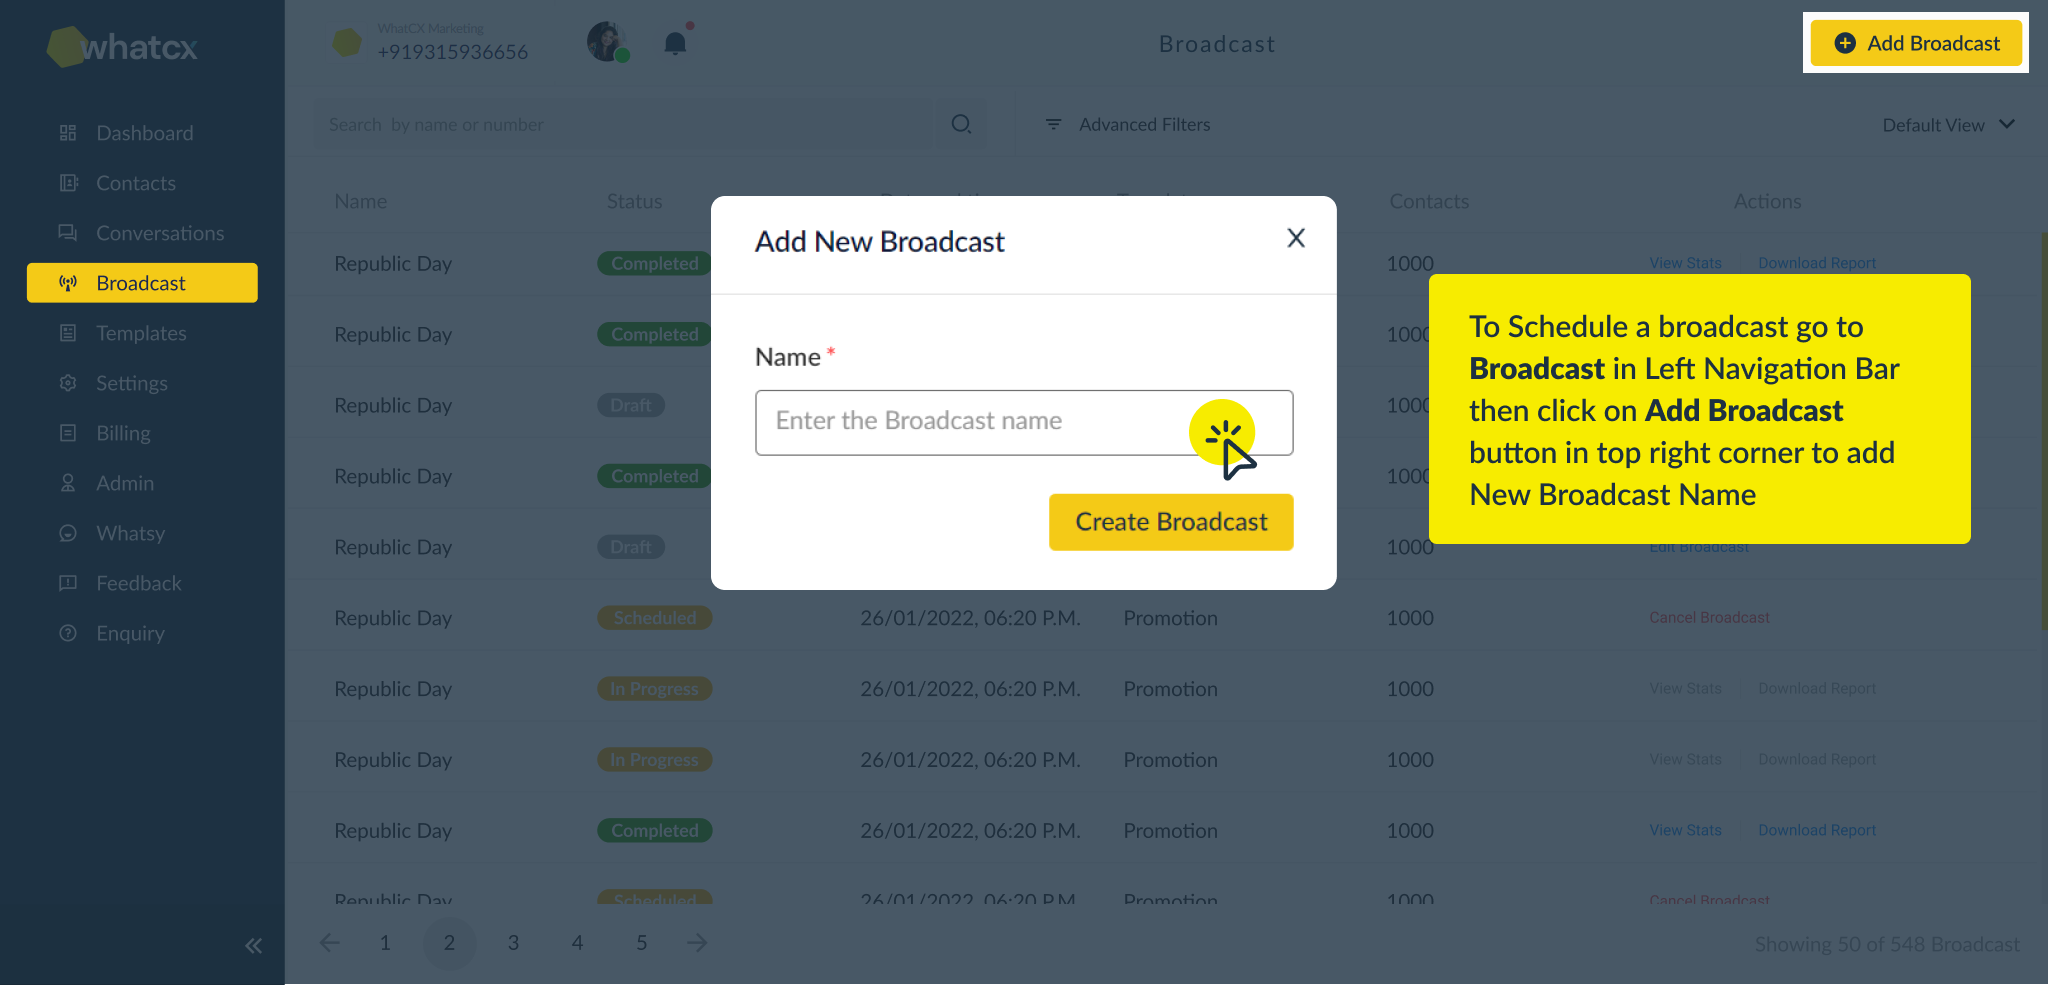
Schedule your first Broadcast
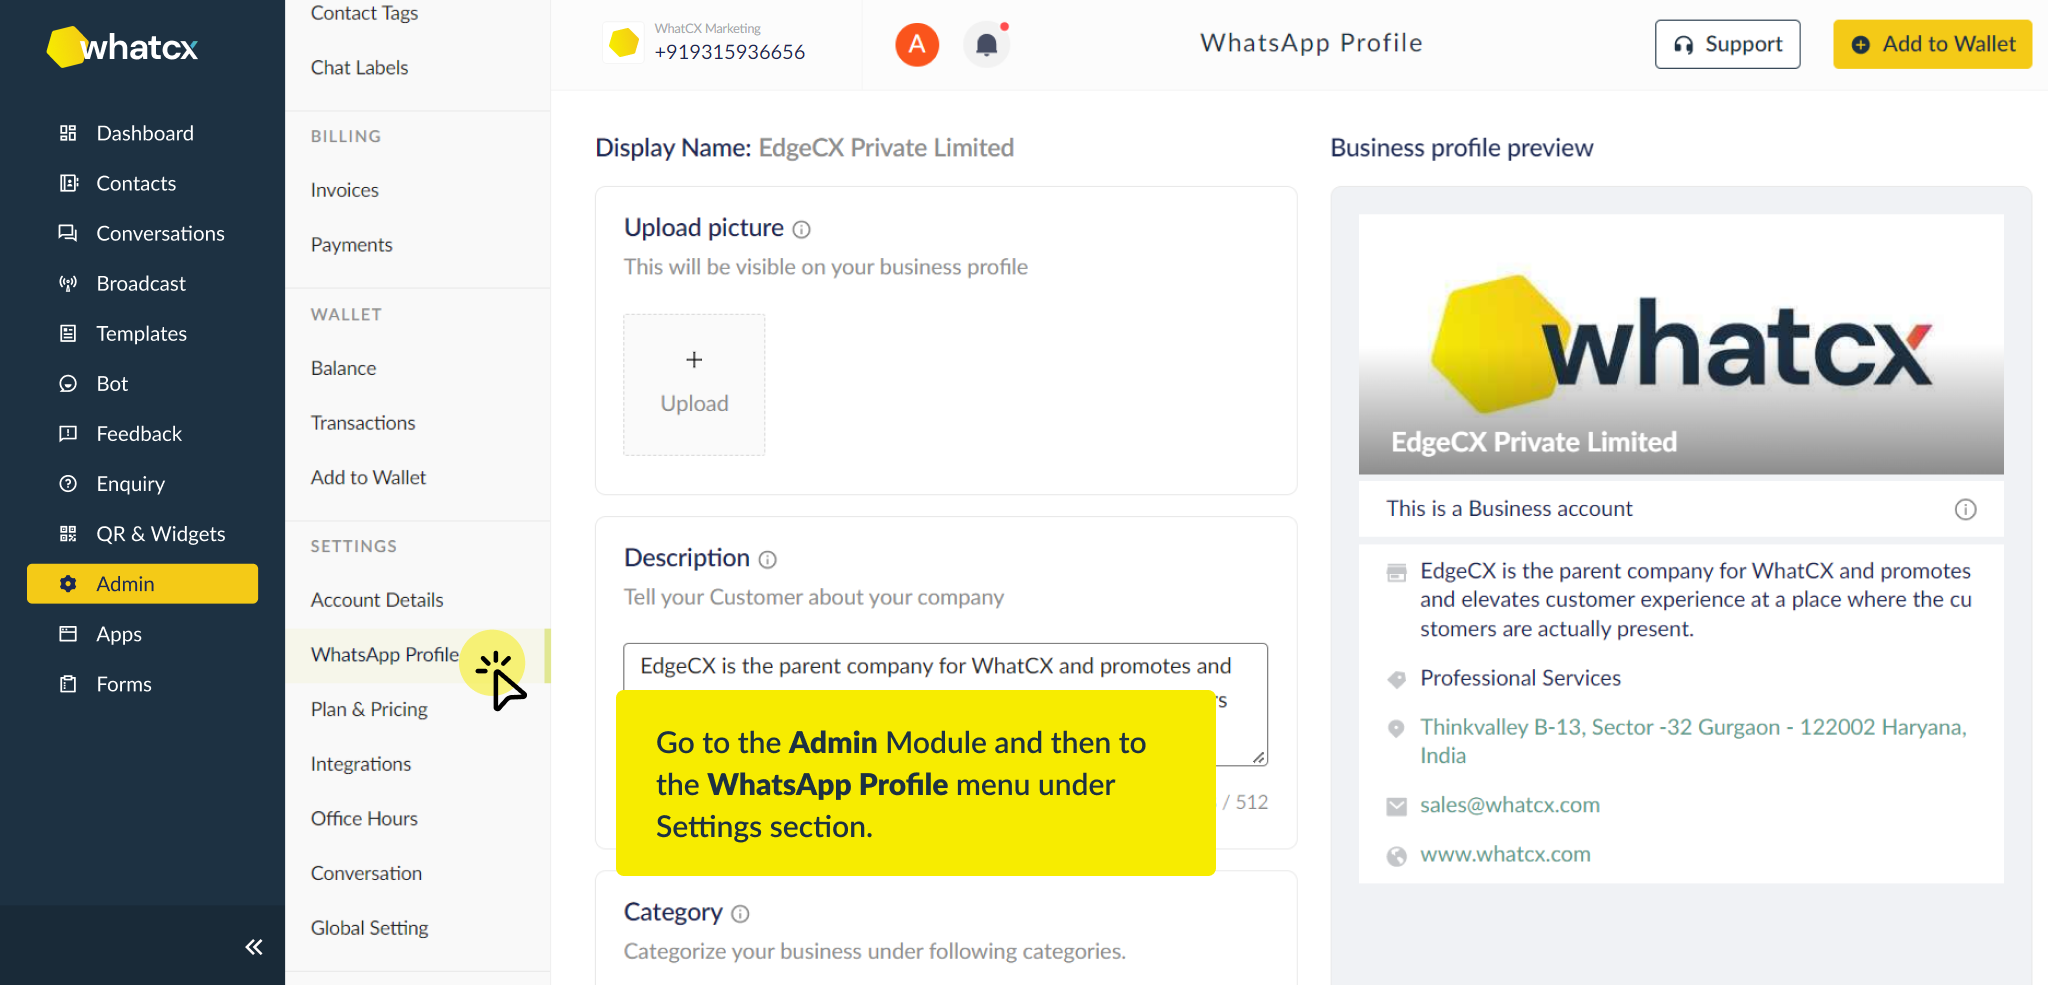
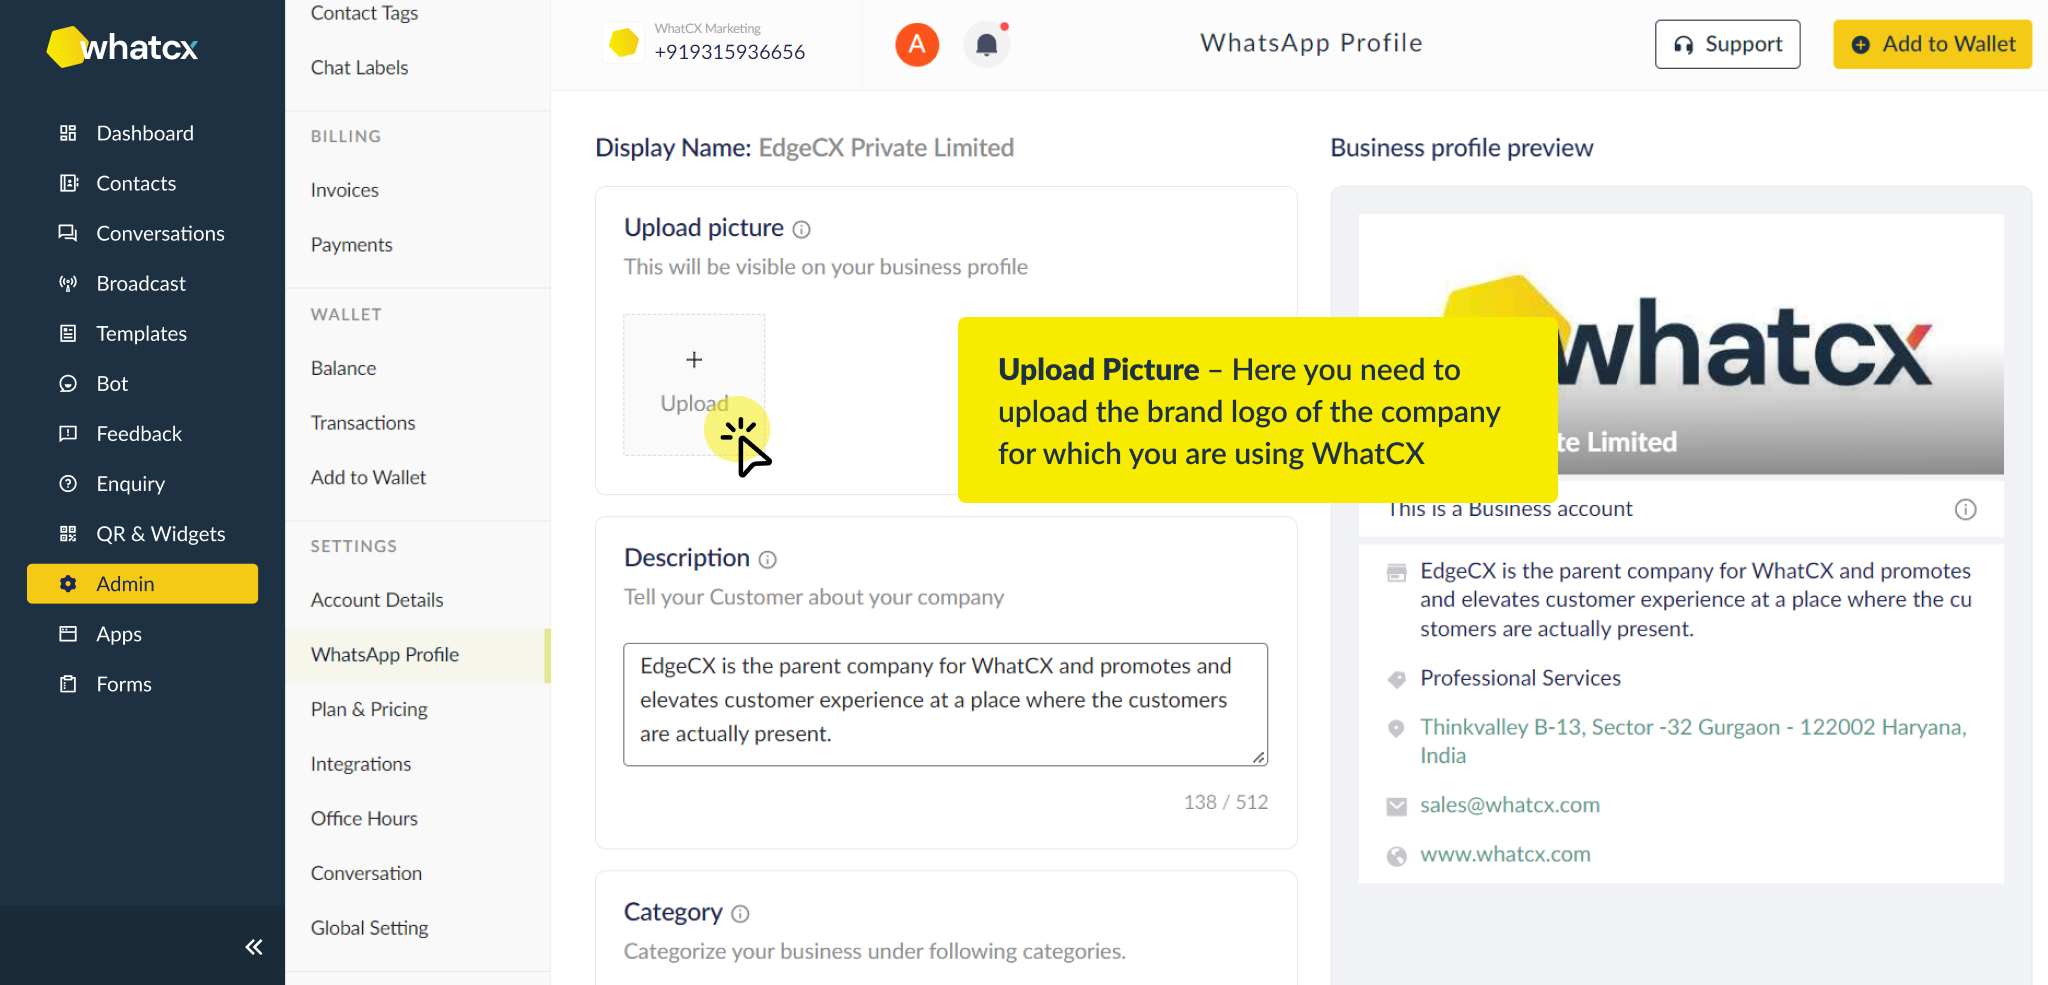
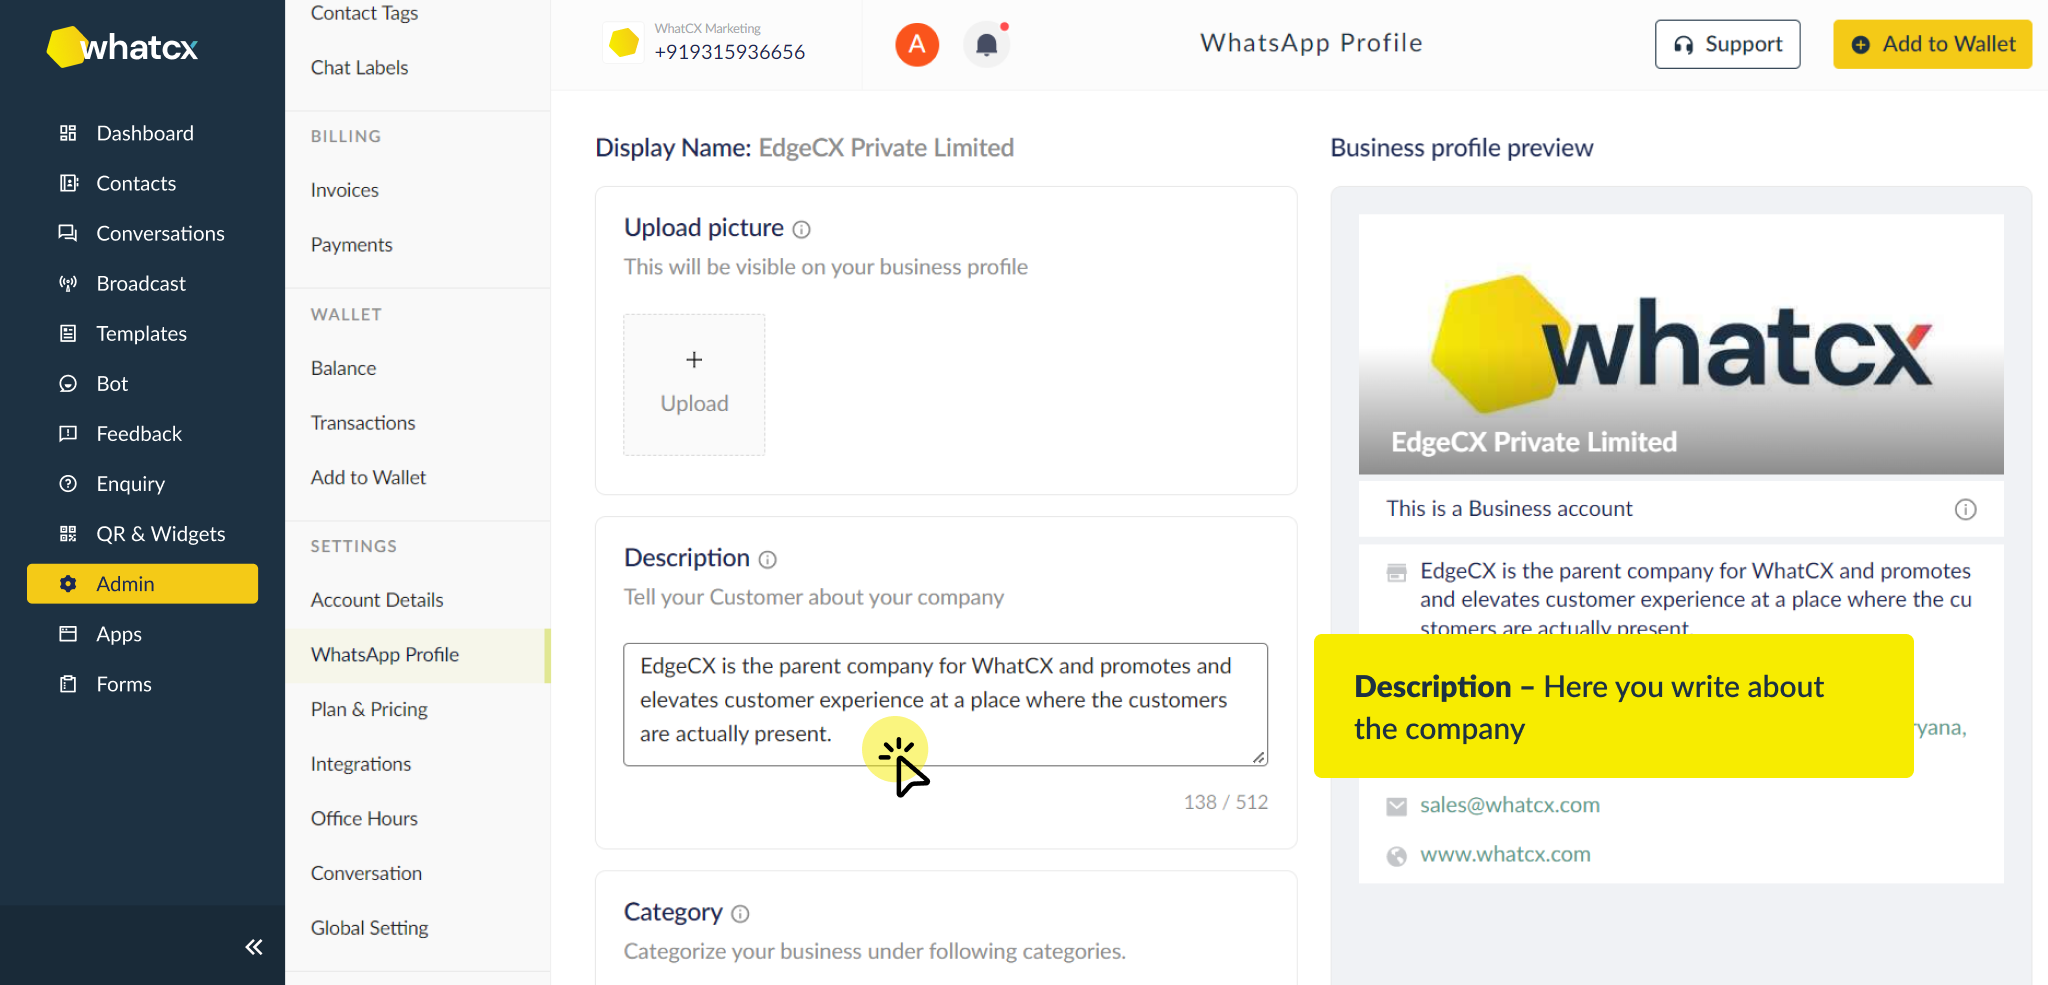
Setup WhatsApp Profile
How to Sign-up on WhatCX?
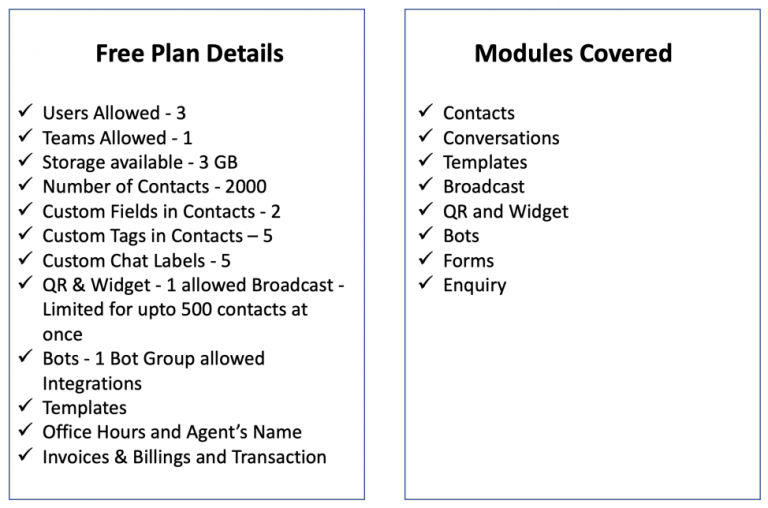
What are the pre-requisites to start using the Free Plan?
WhatsApp Cloud API
Daily Broadcasting Limits
List Items Style
How to import contacts and map the CSV?
Modules in Depth
How to add Contacts manually?
How to import contacts and map the CSV?
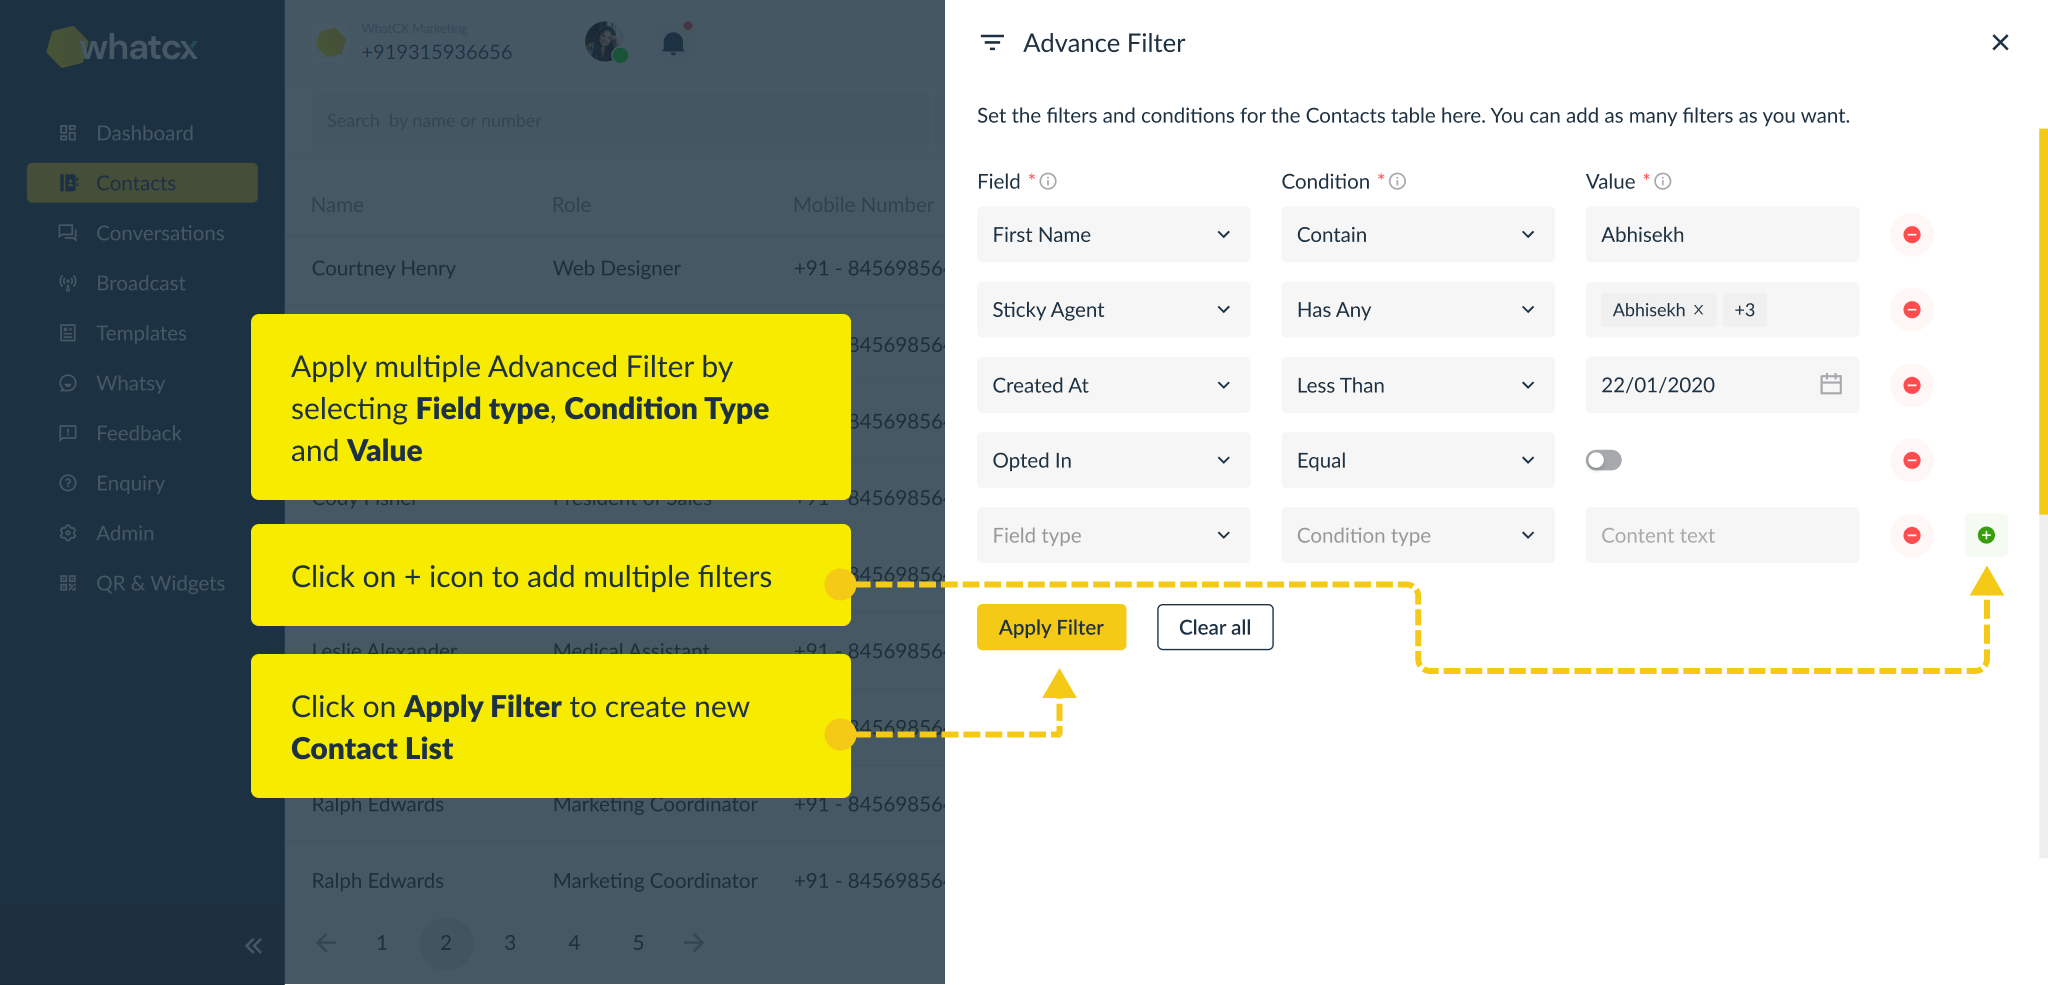
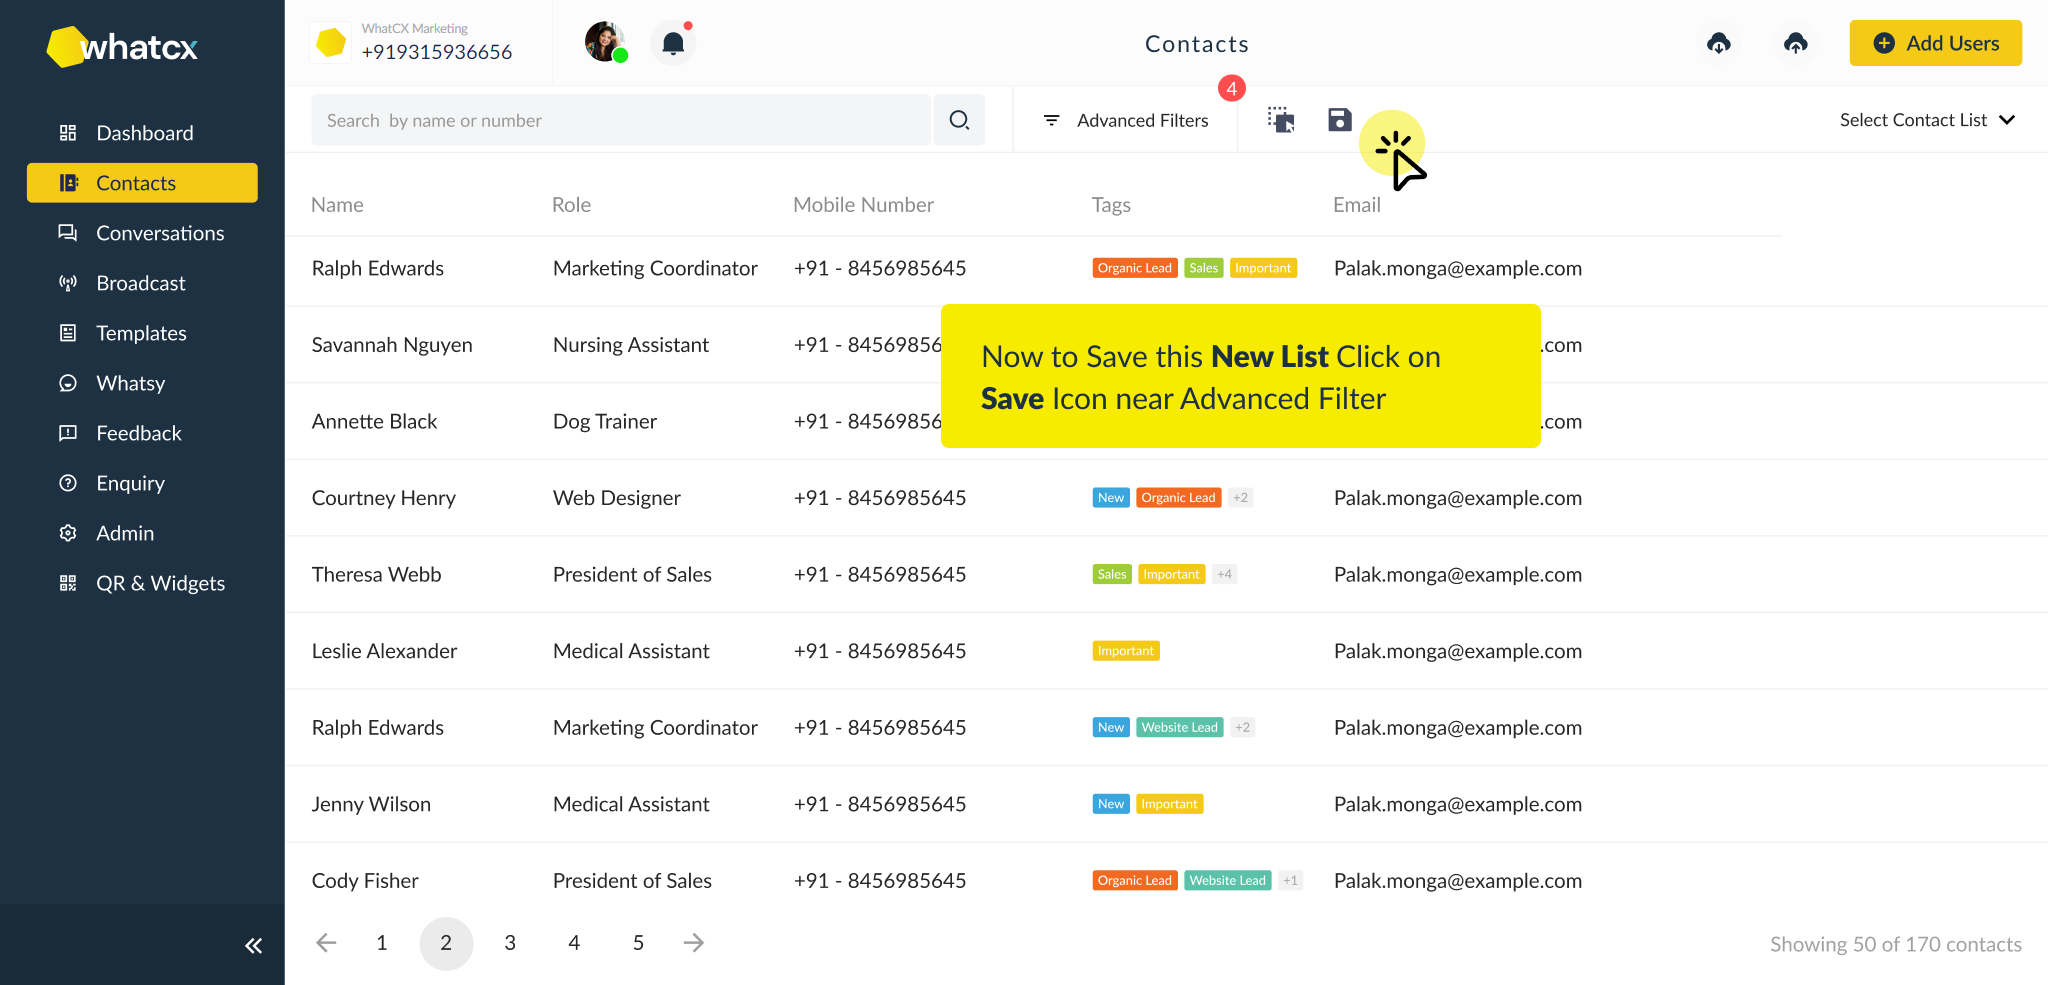
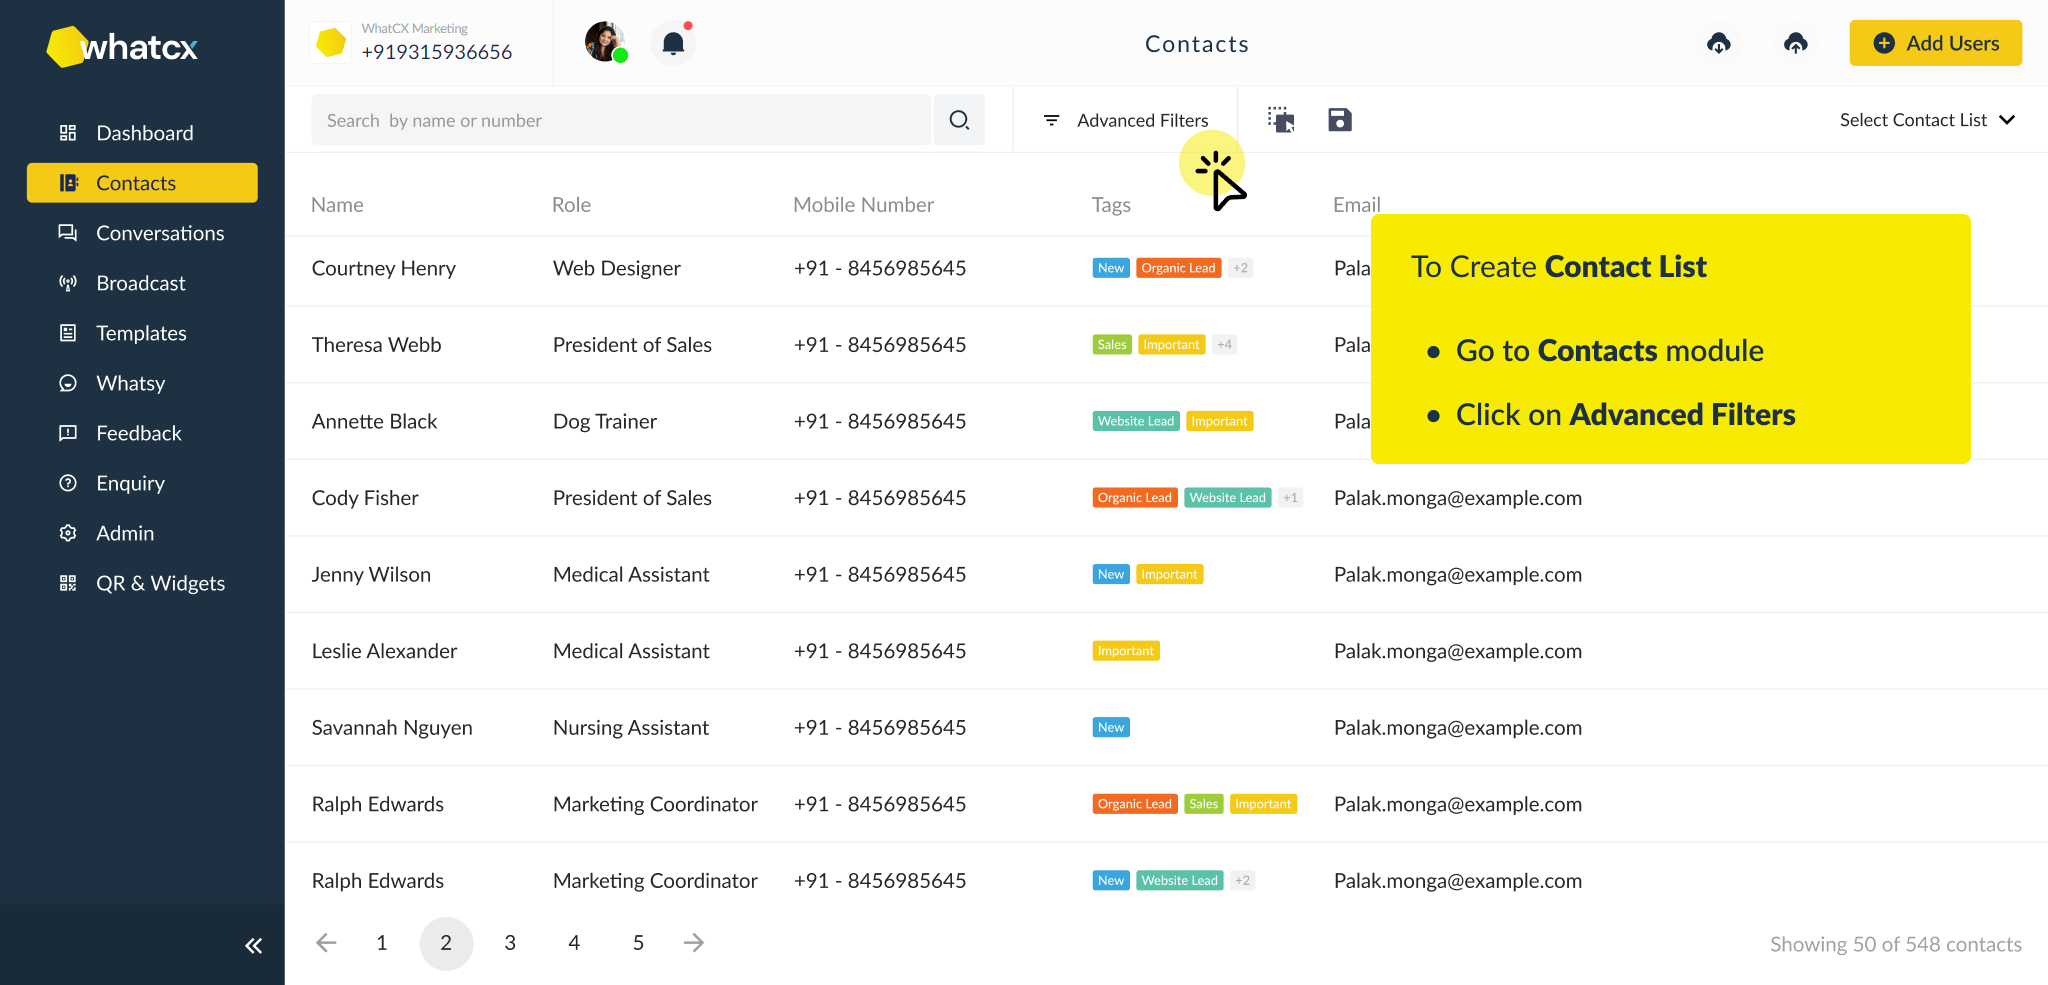
How to apply Advance Filters and create a Contact List?
How to manage chat in conversation module?
How to update Contacts Profile, add Sticky Agents & Tags?
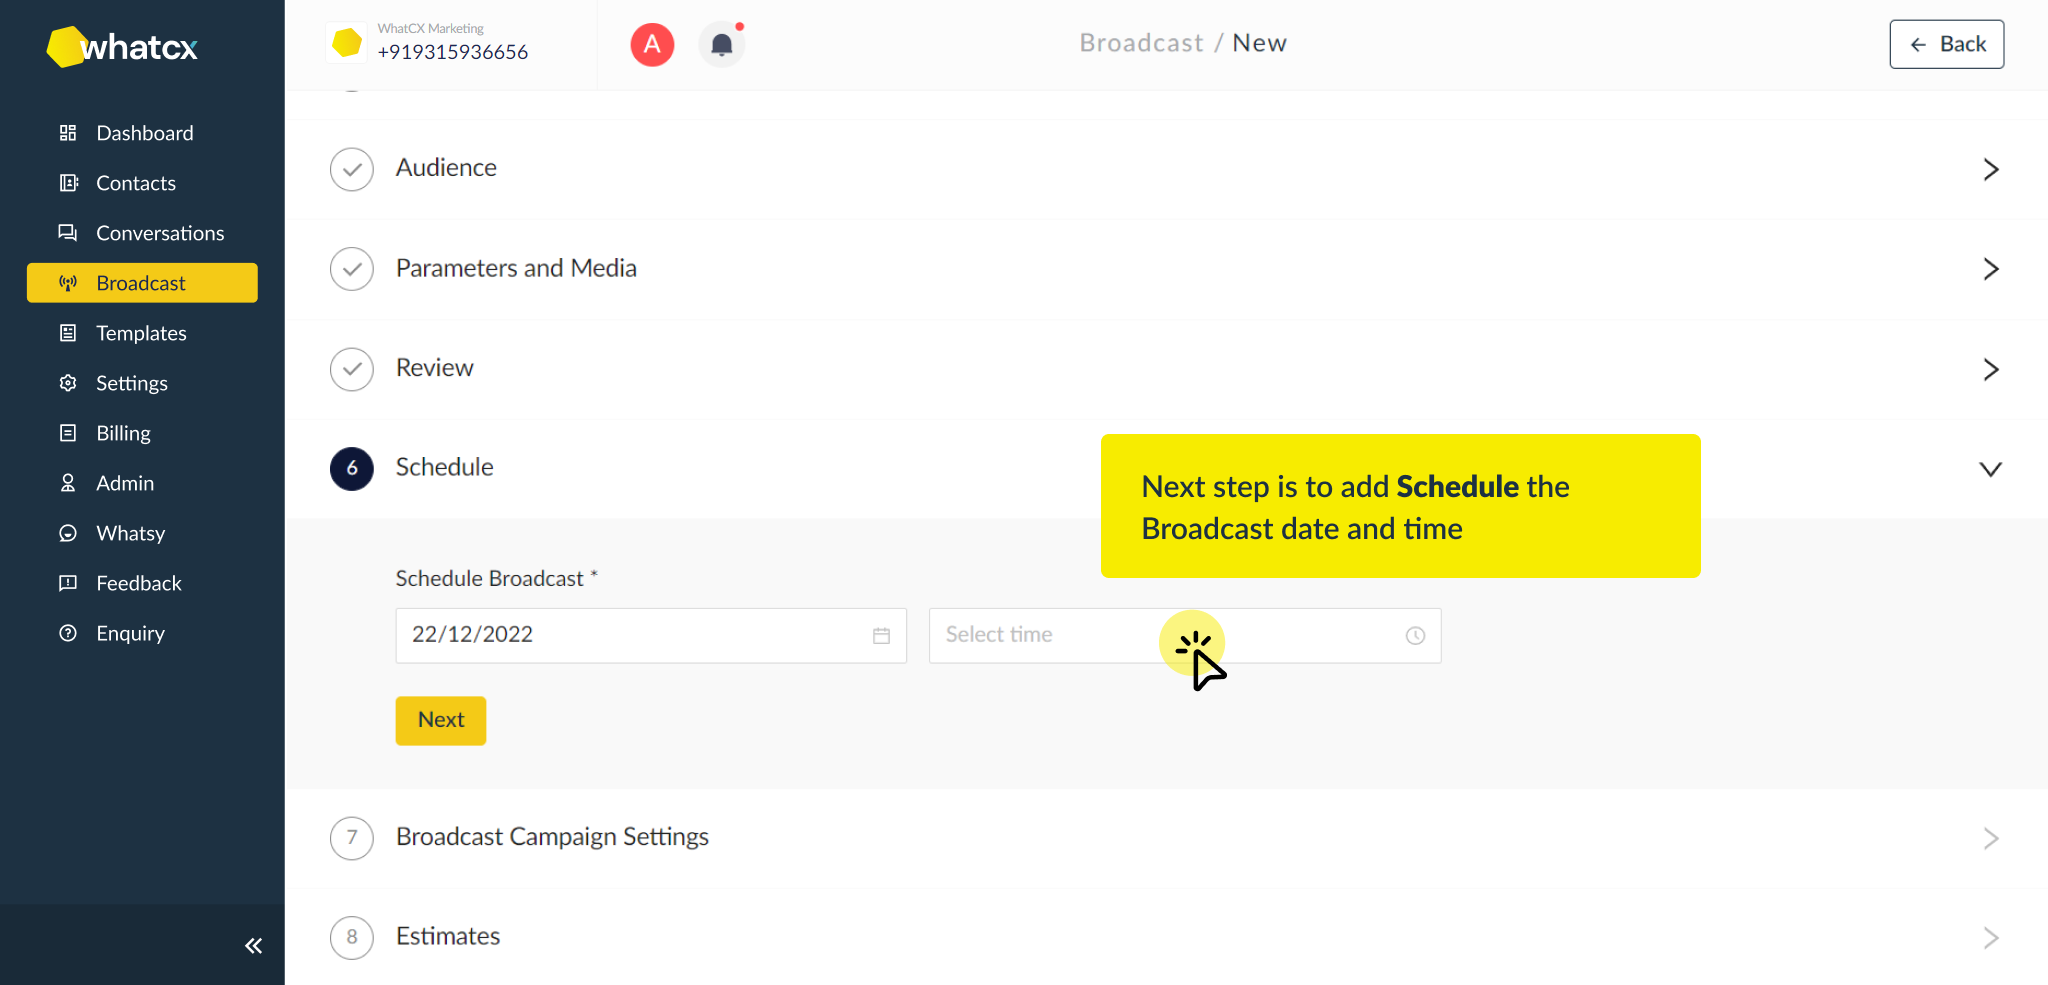
How to schedule a Broadcast?
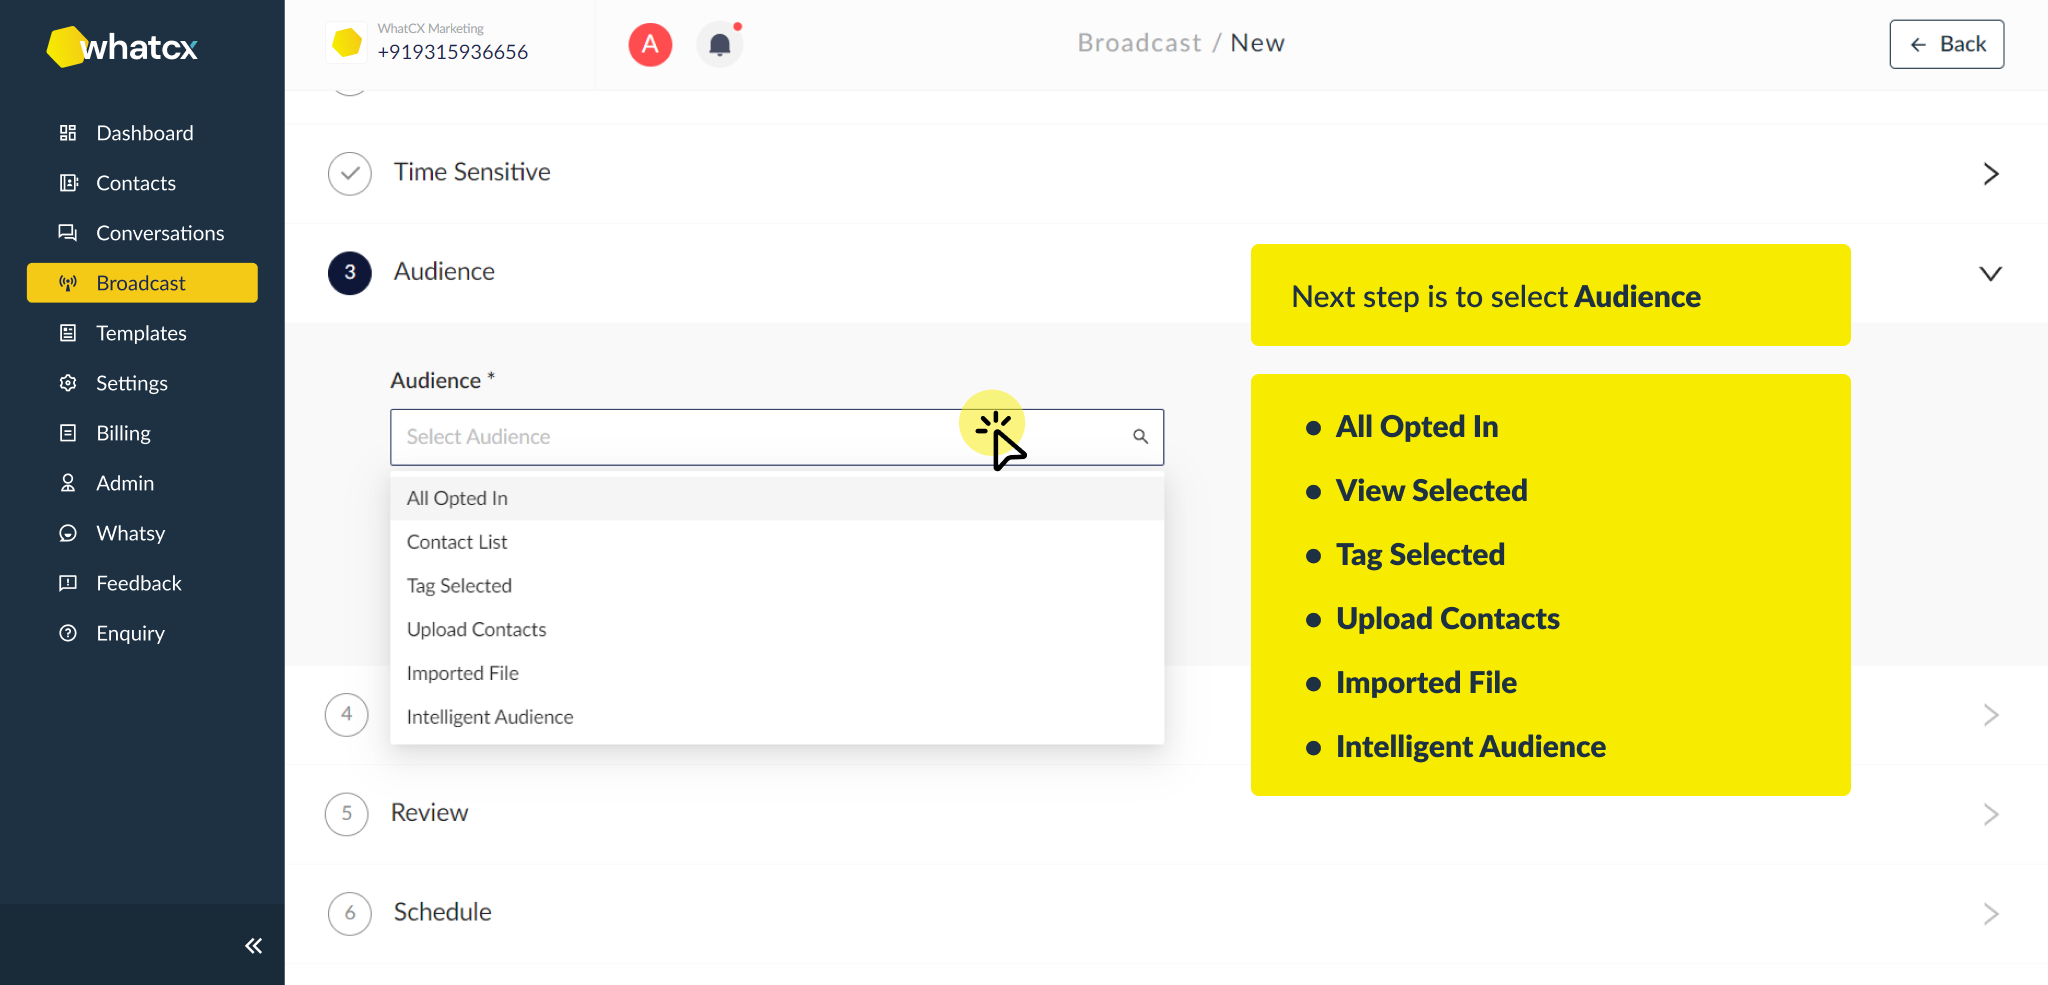
What are the different audience types in Broadcast?
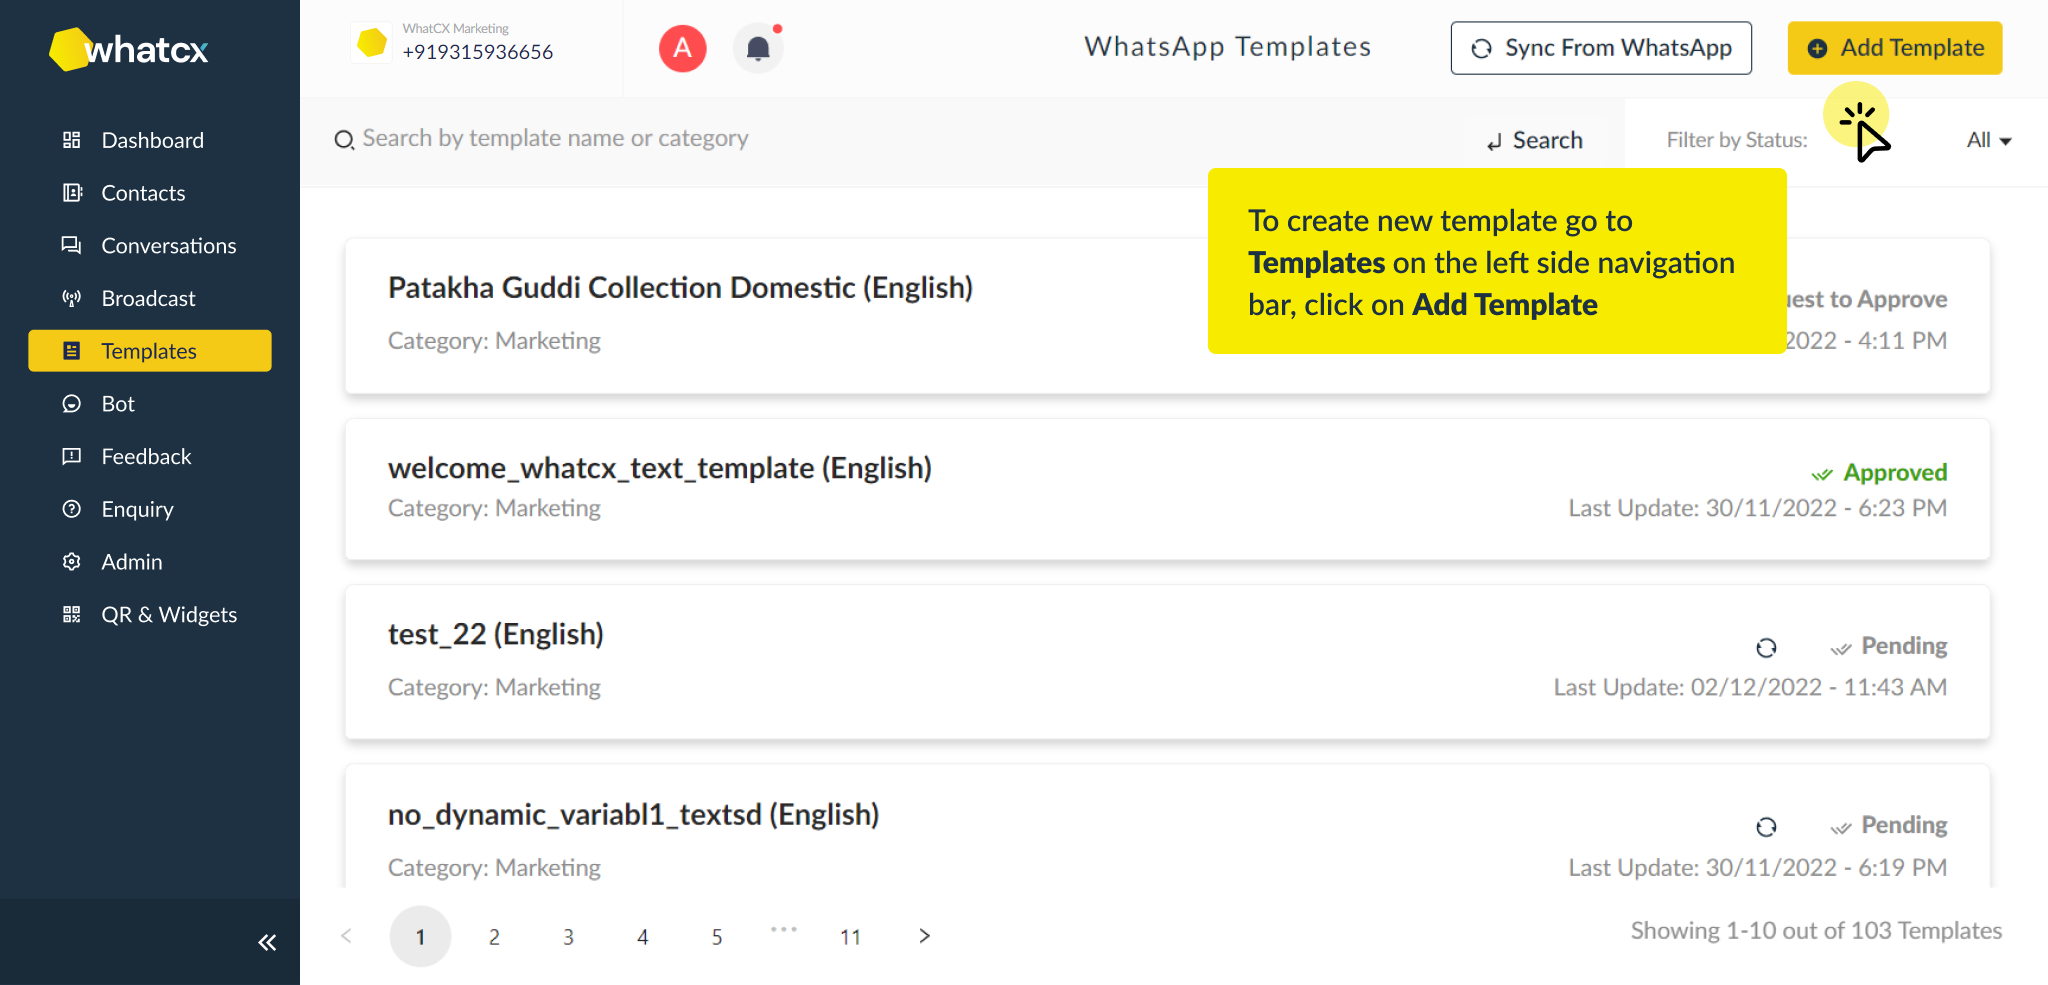
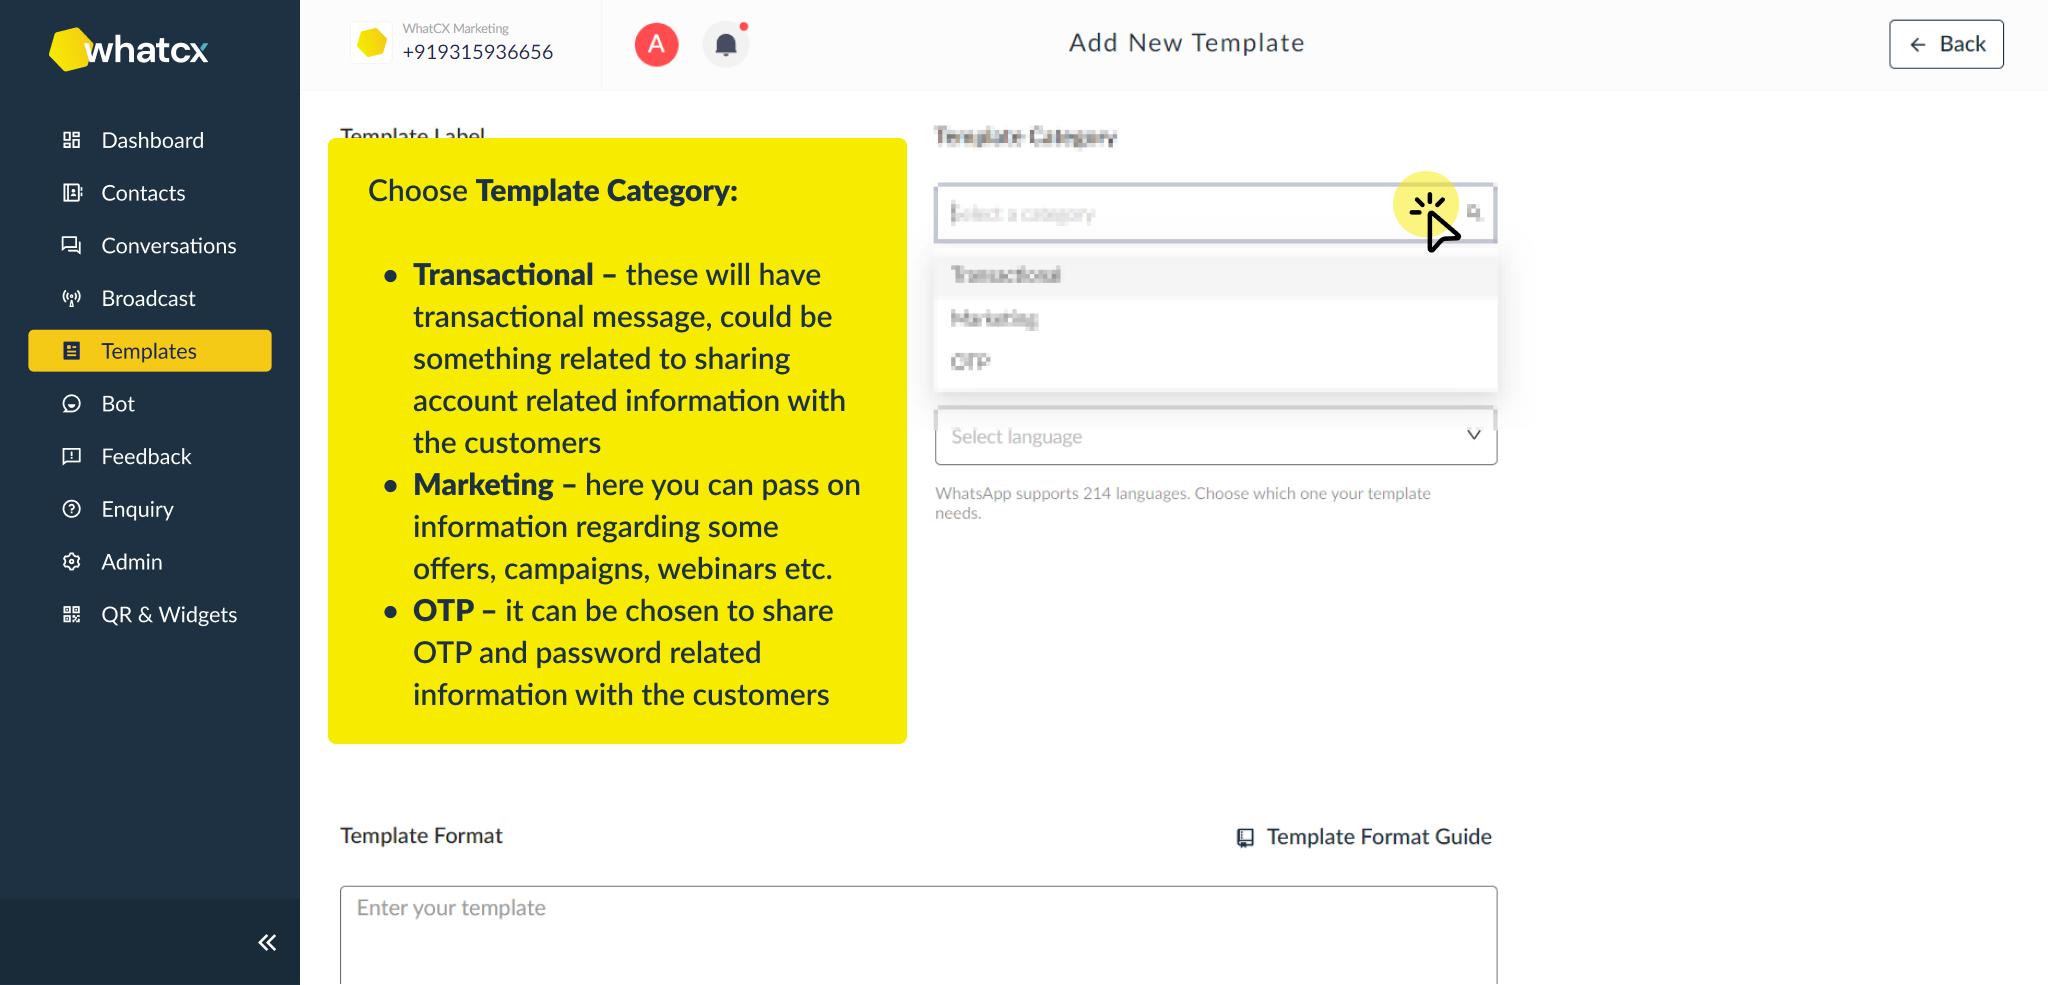
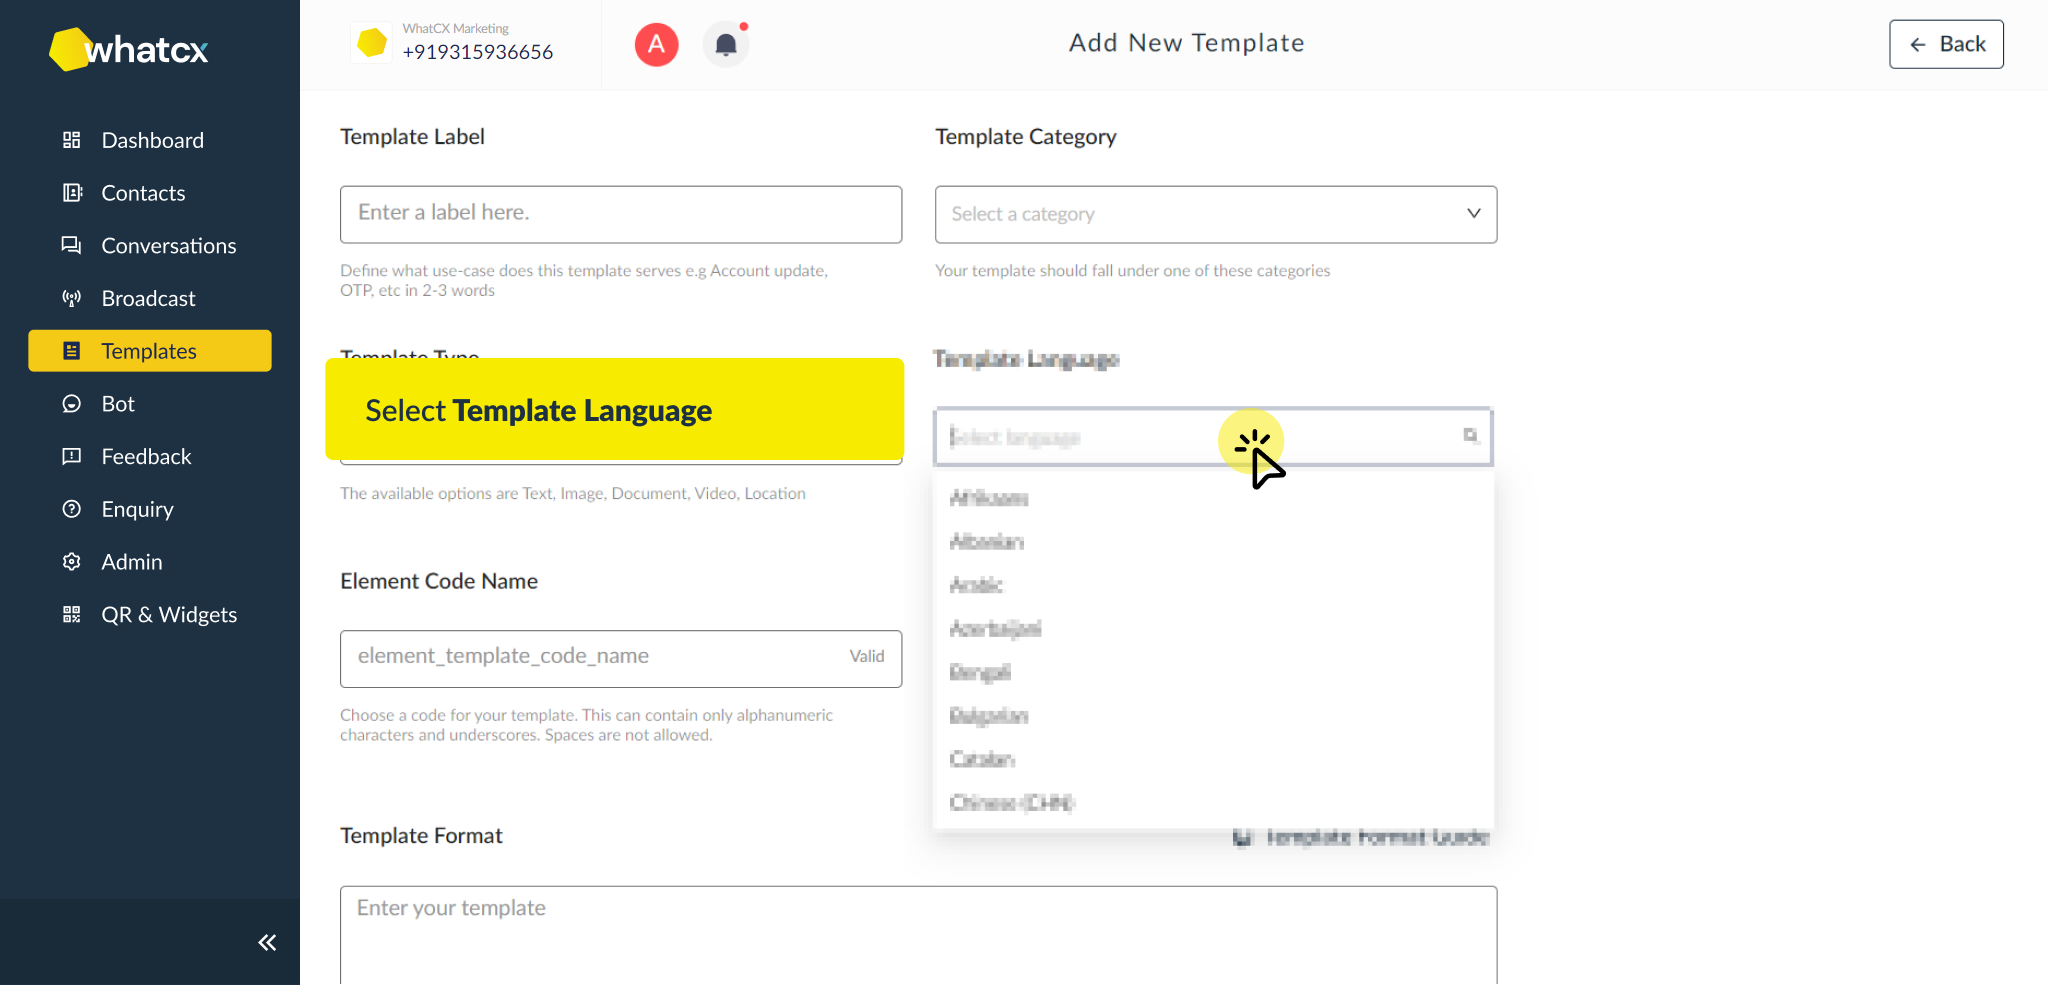
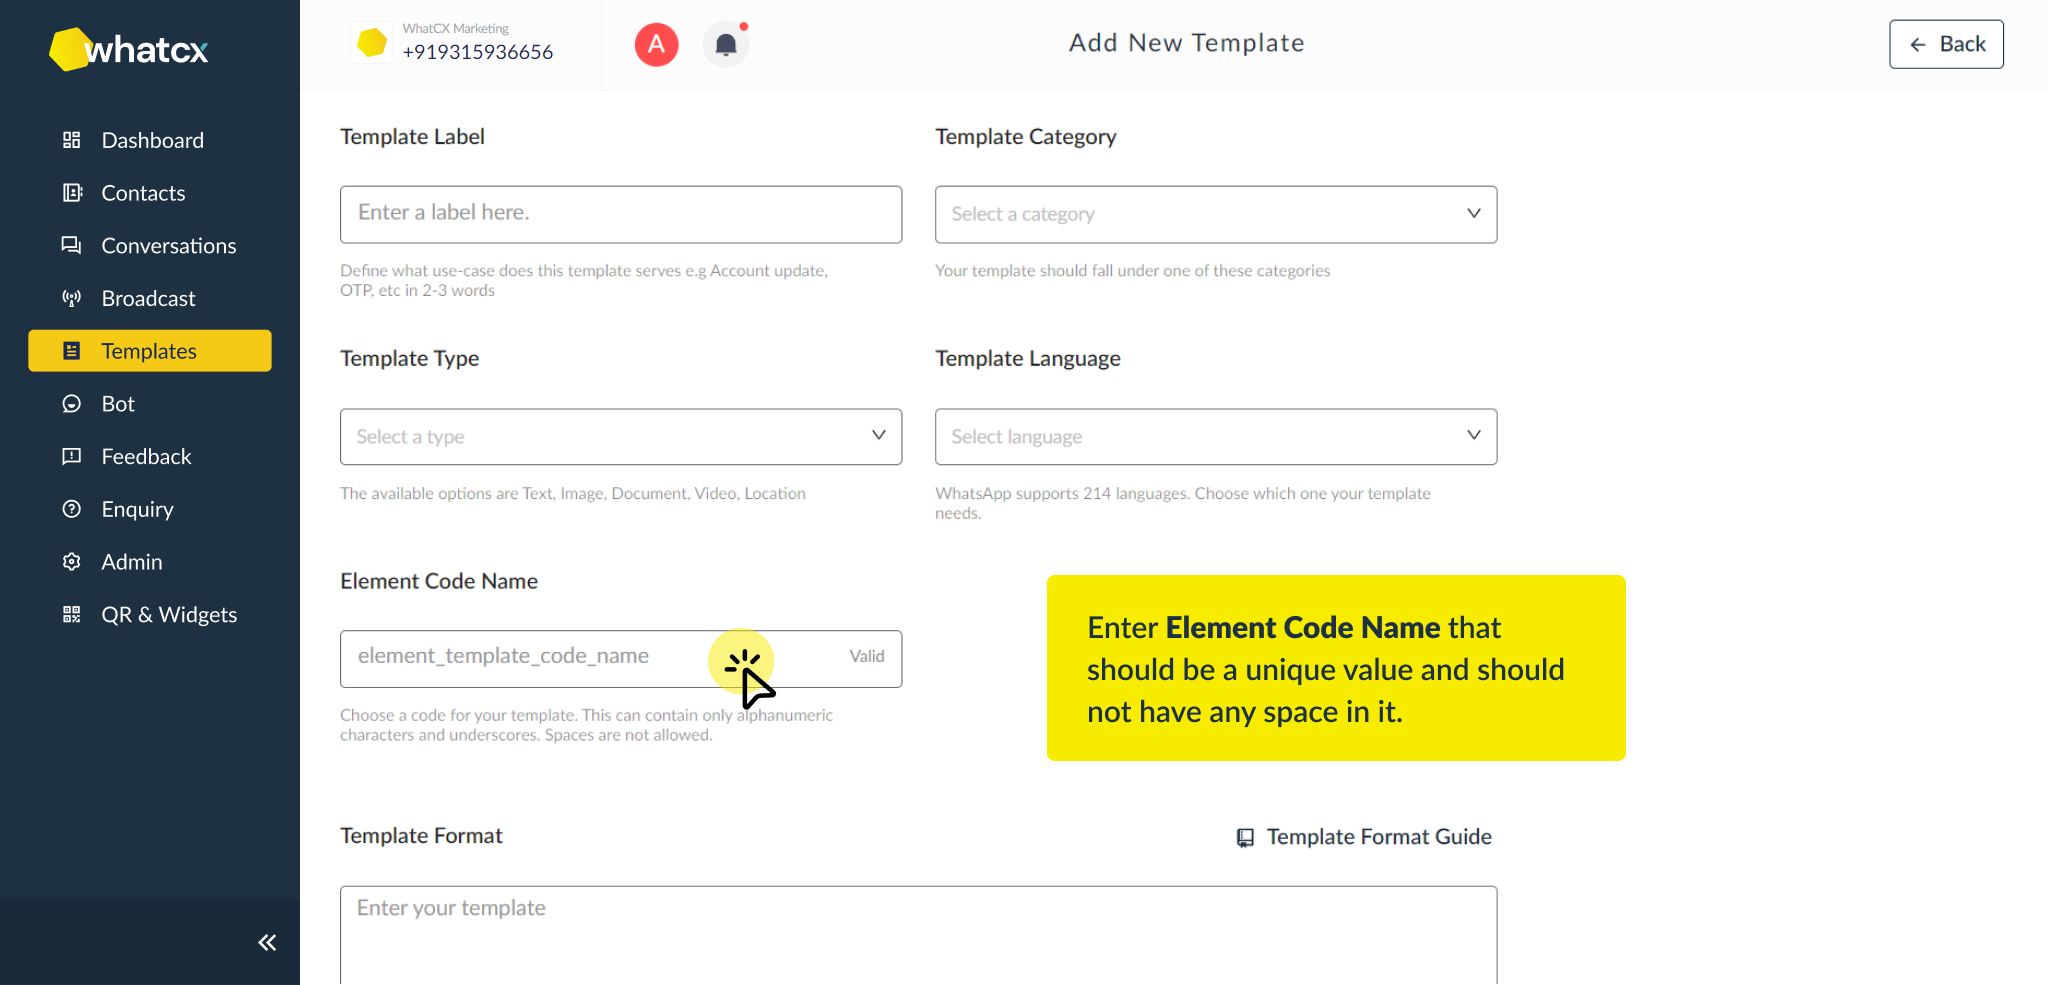
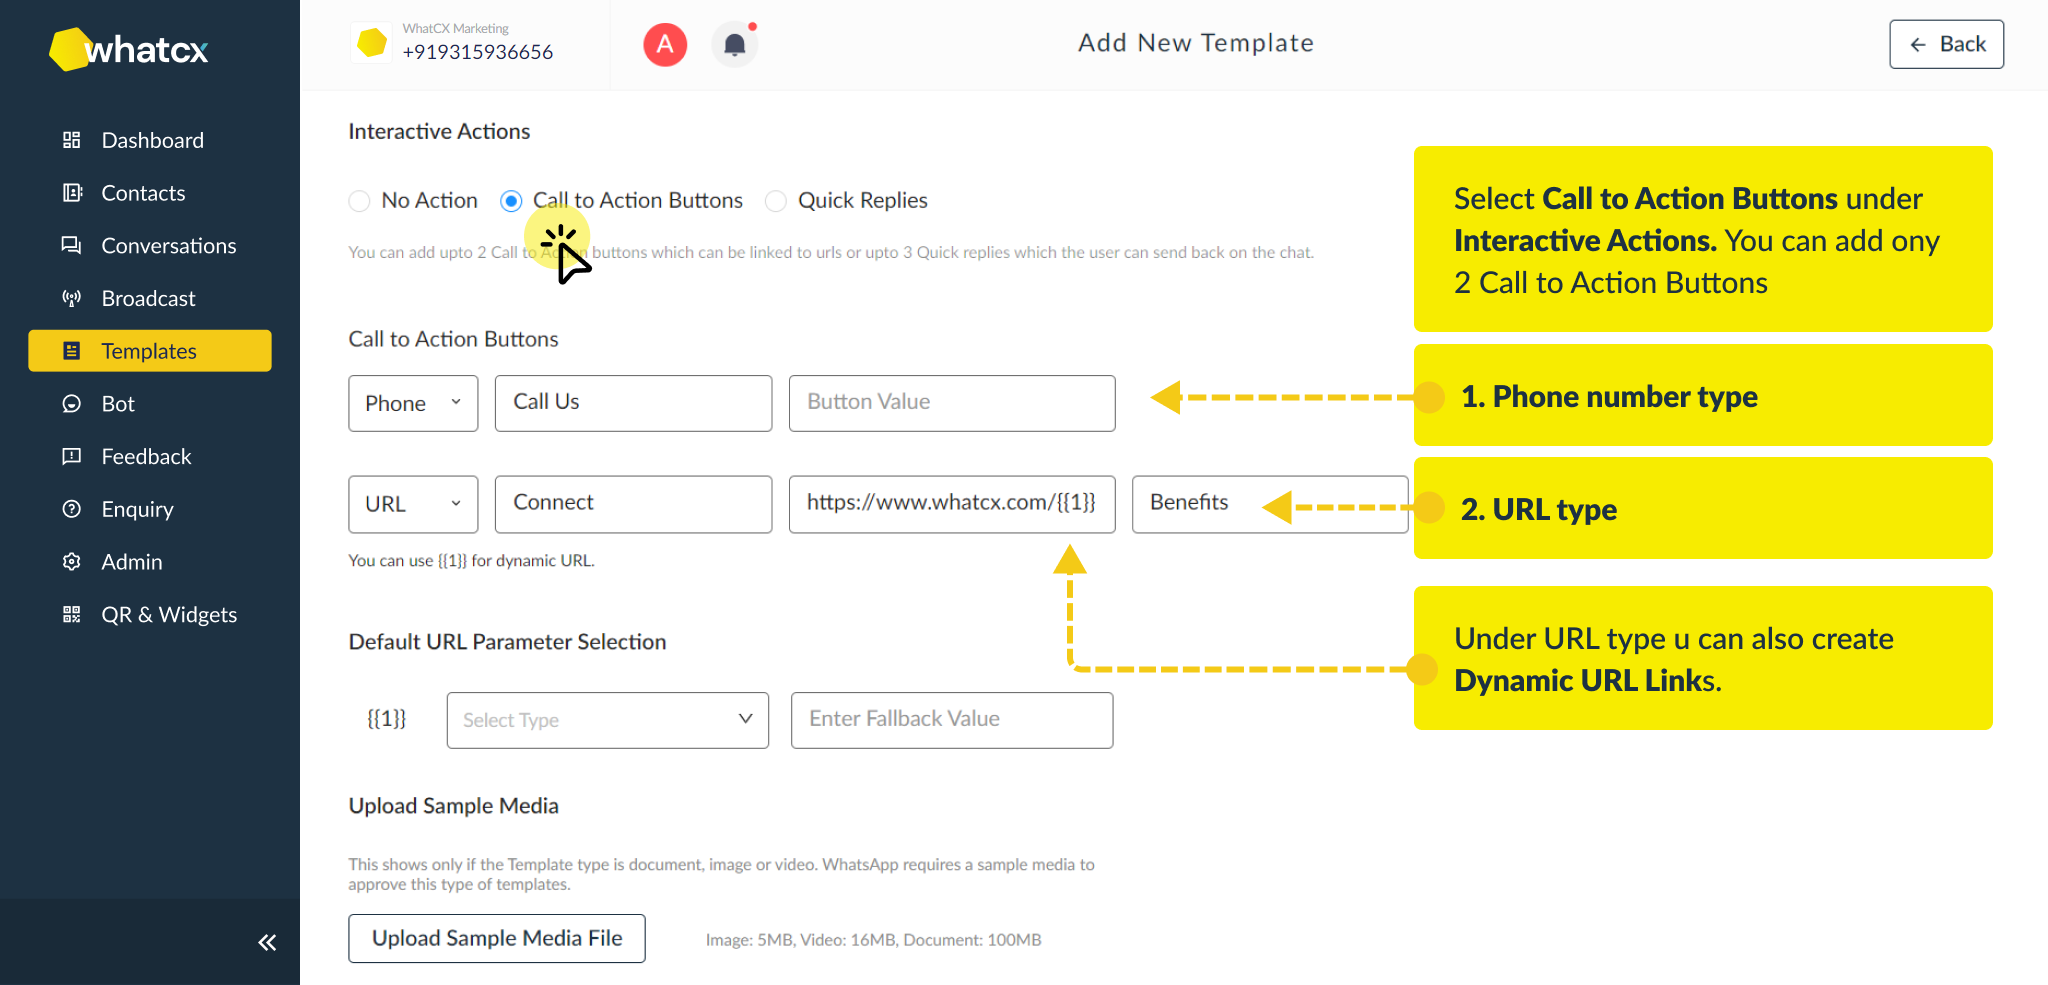
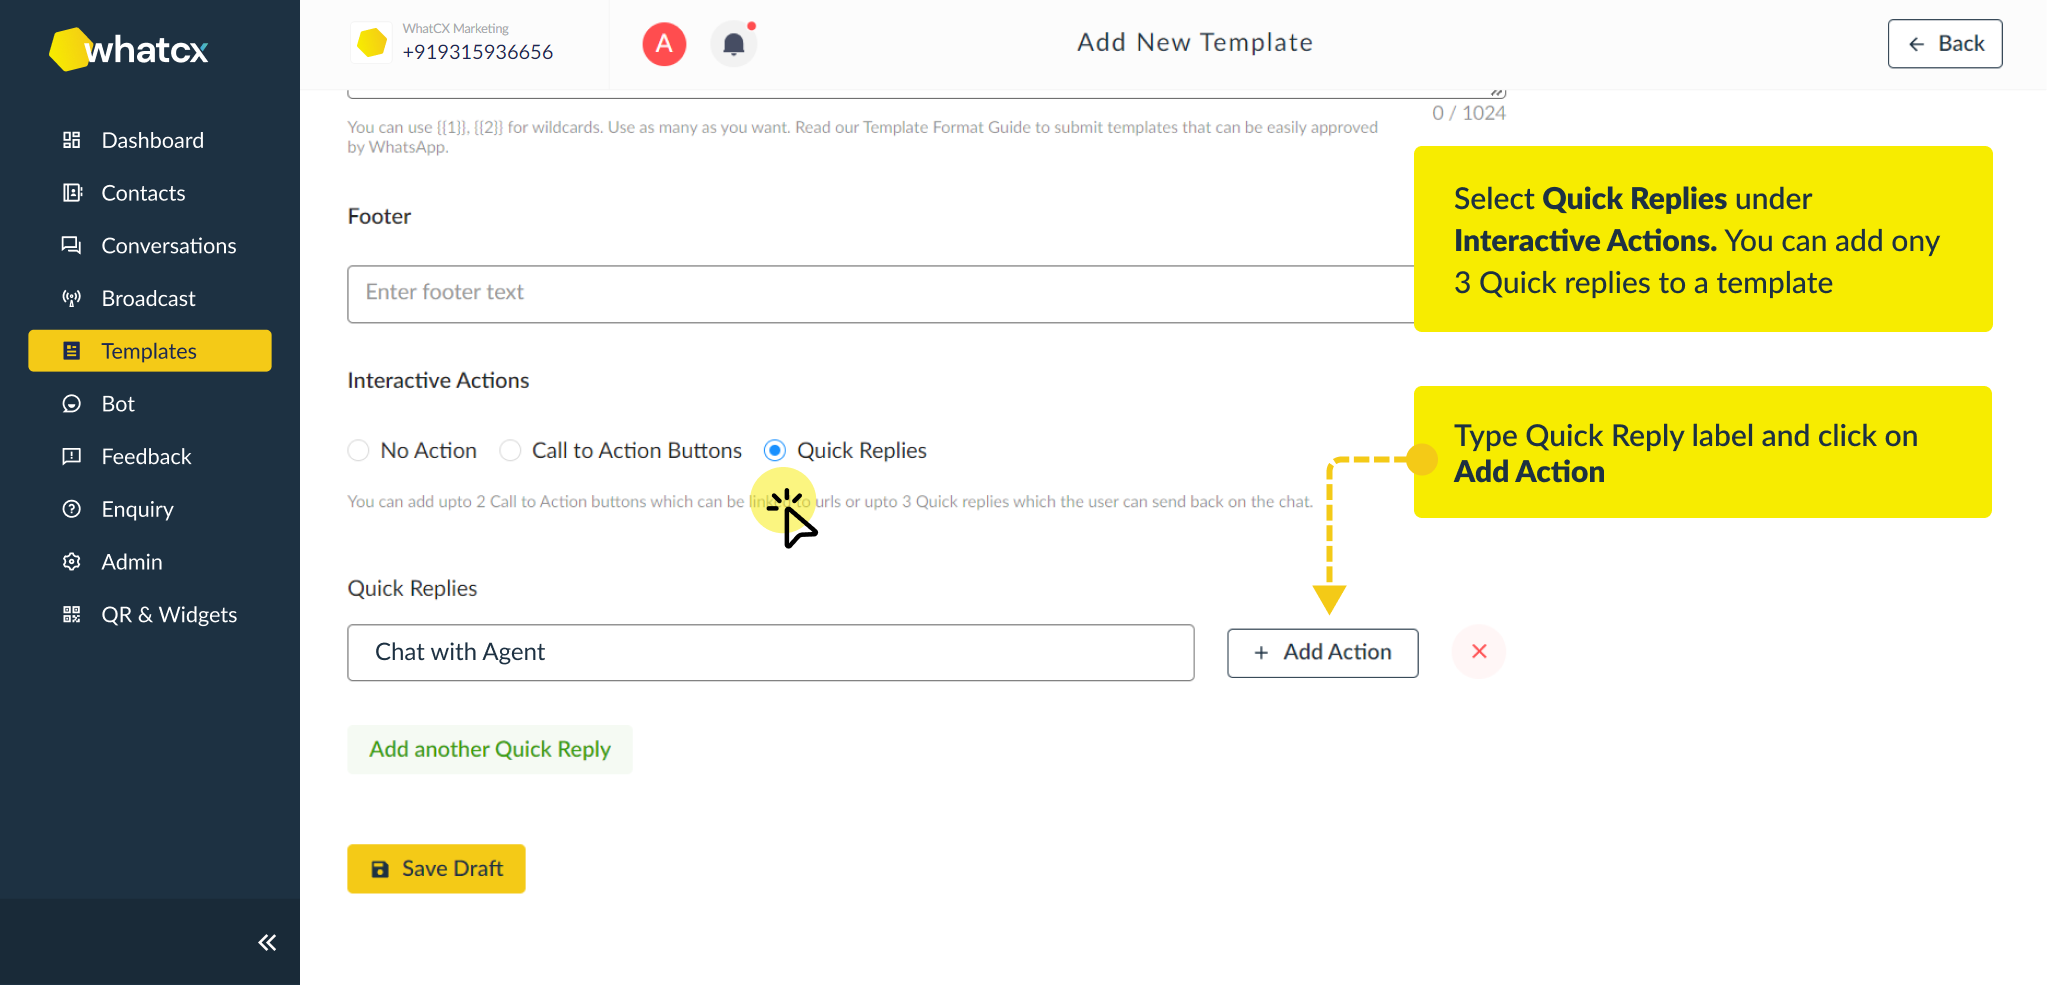
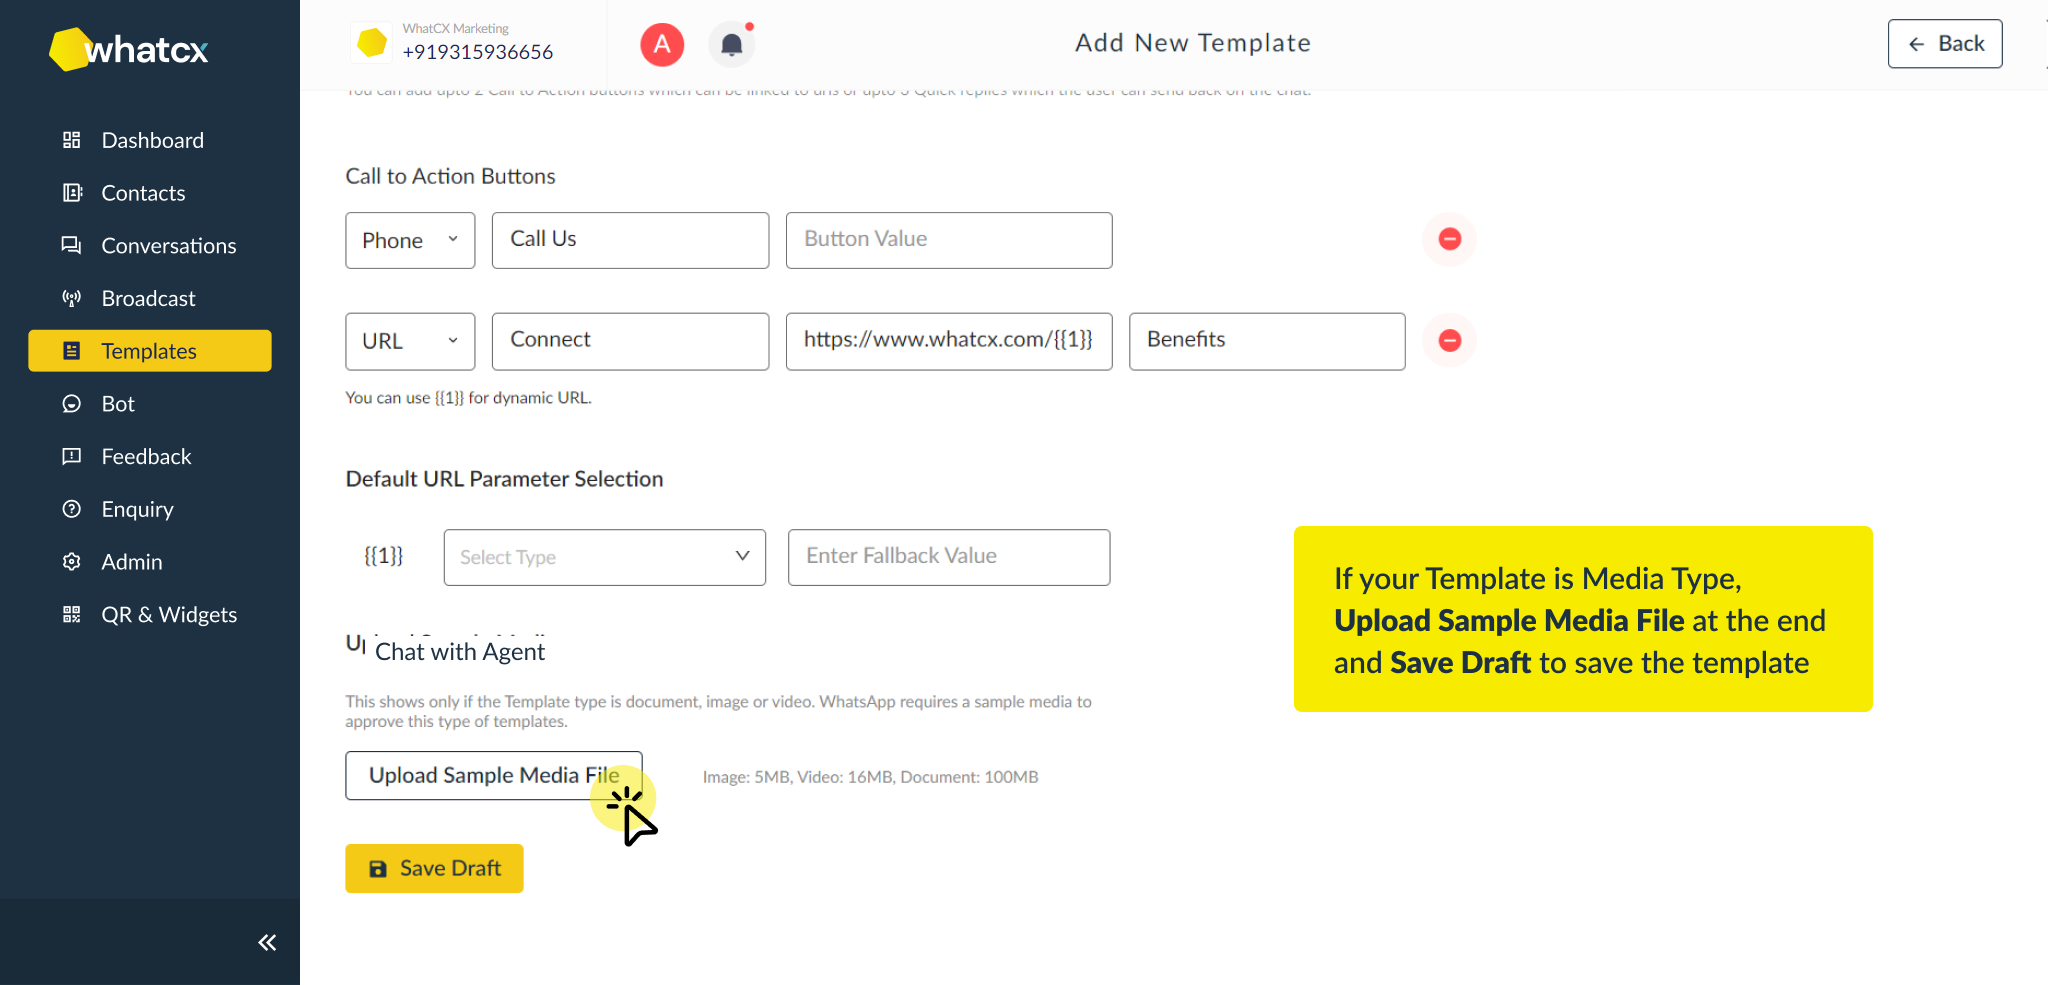
How to Create Templates on WhatCX?
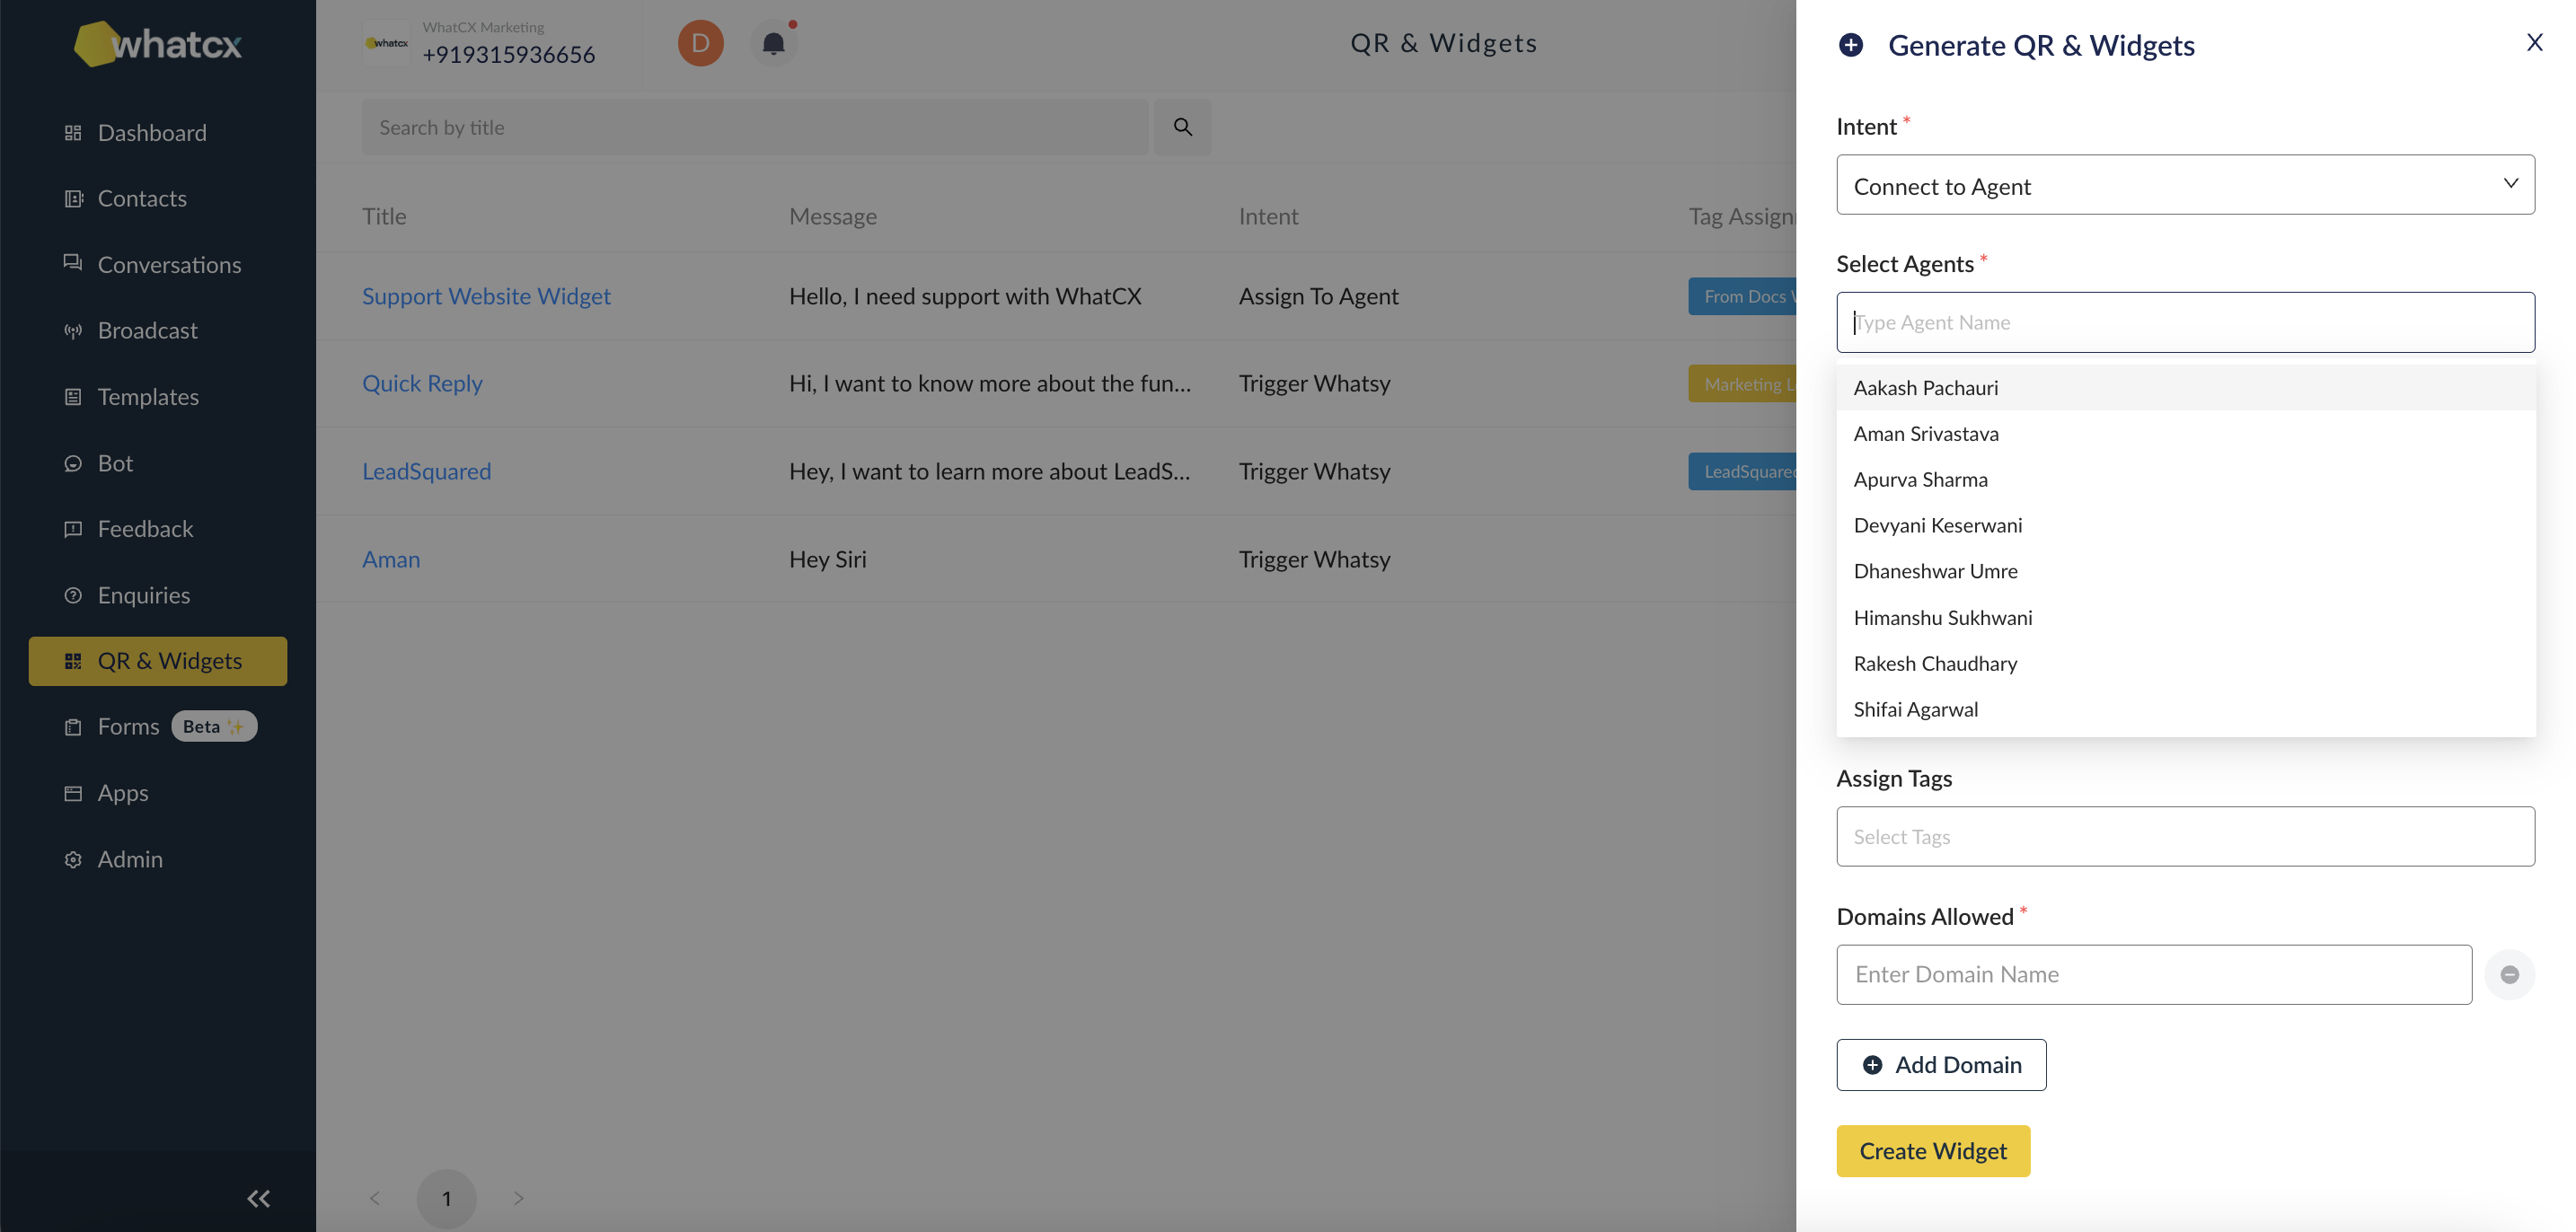
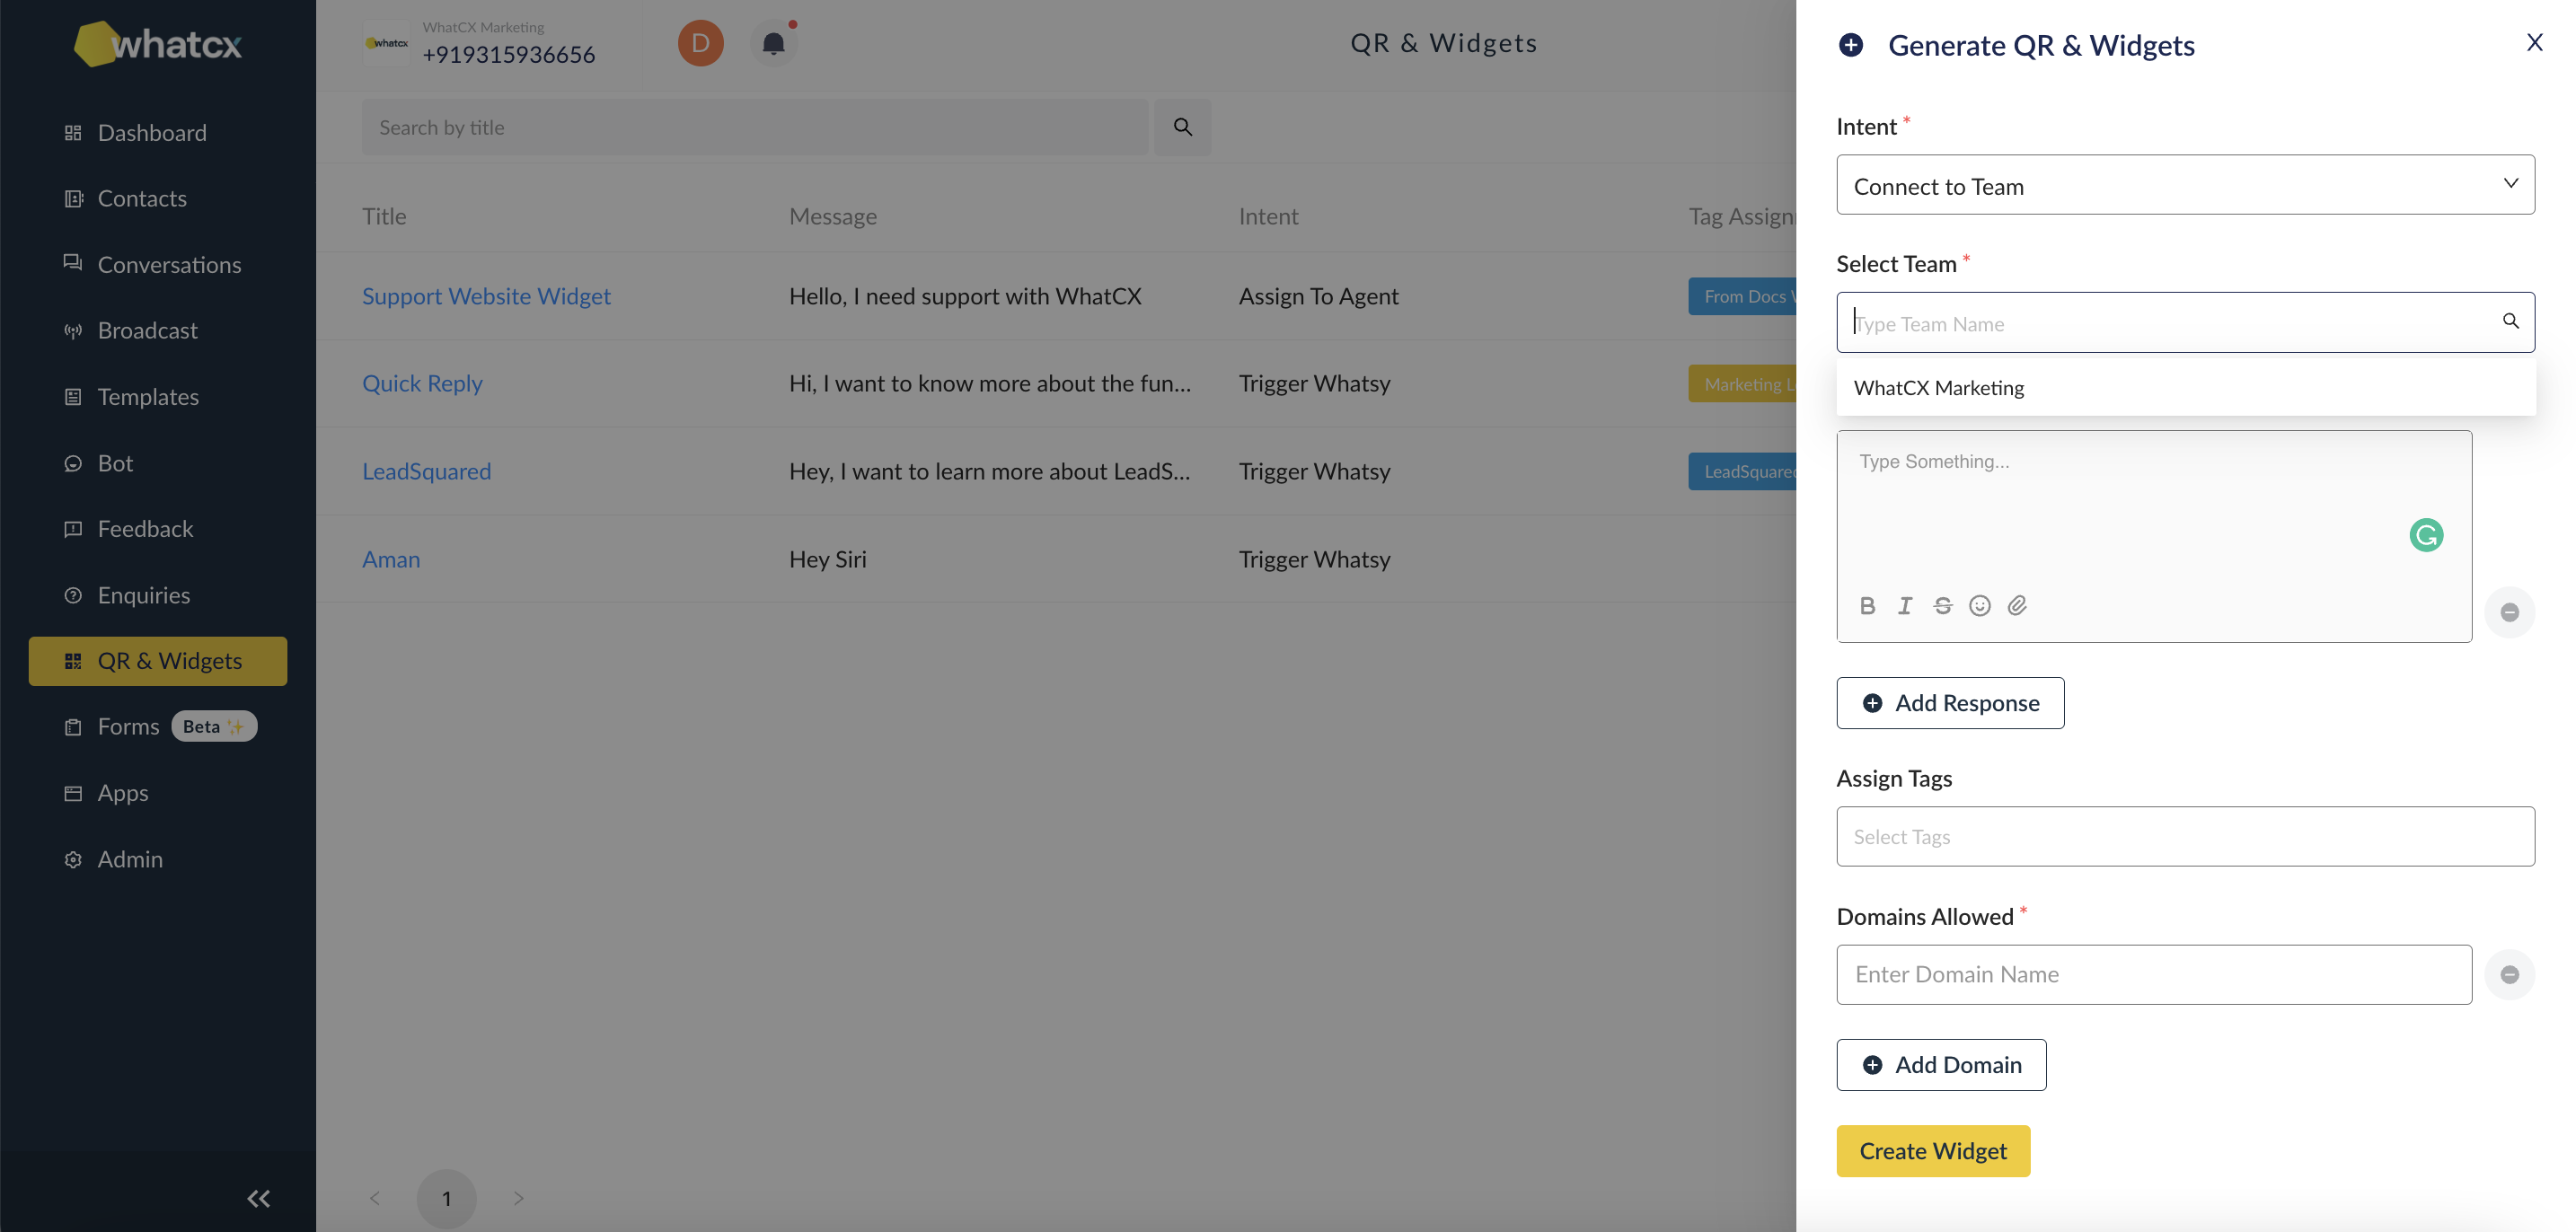
How to create QR & Widgets?
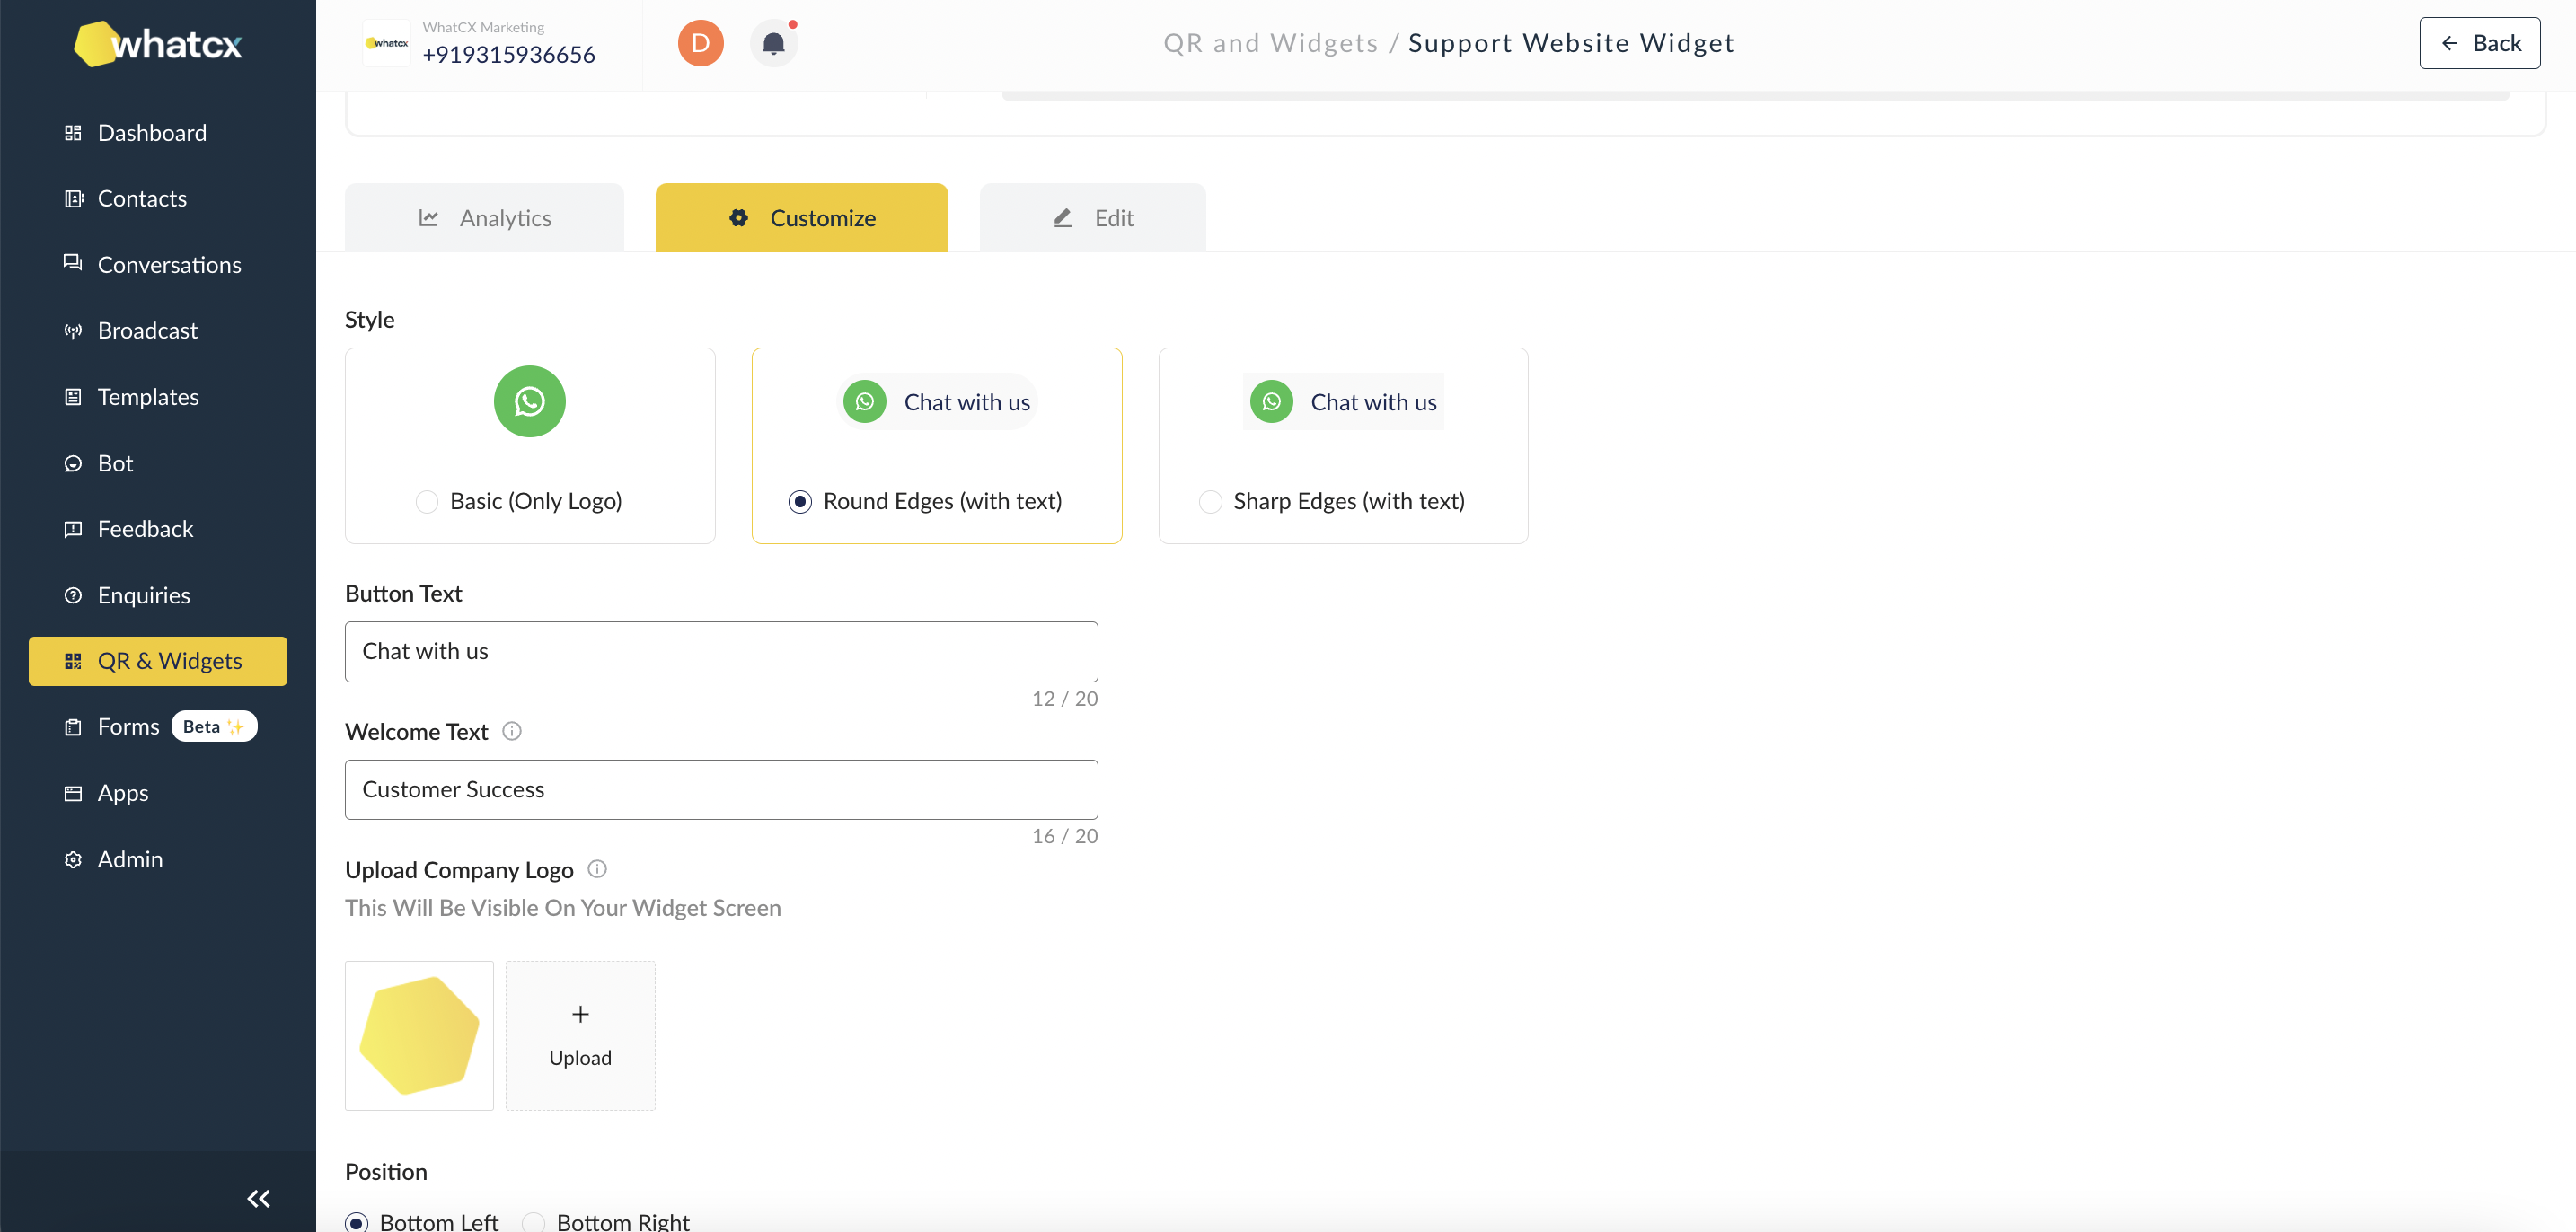
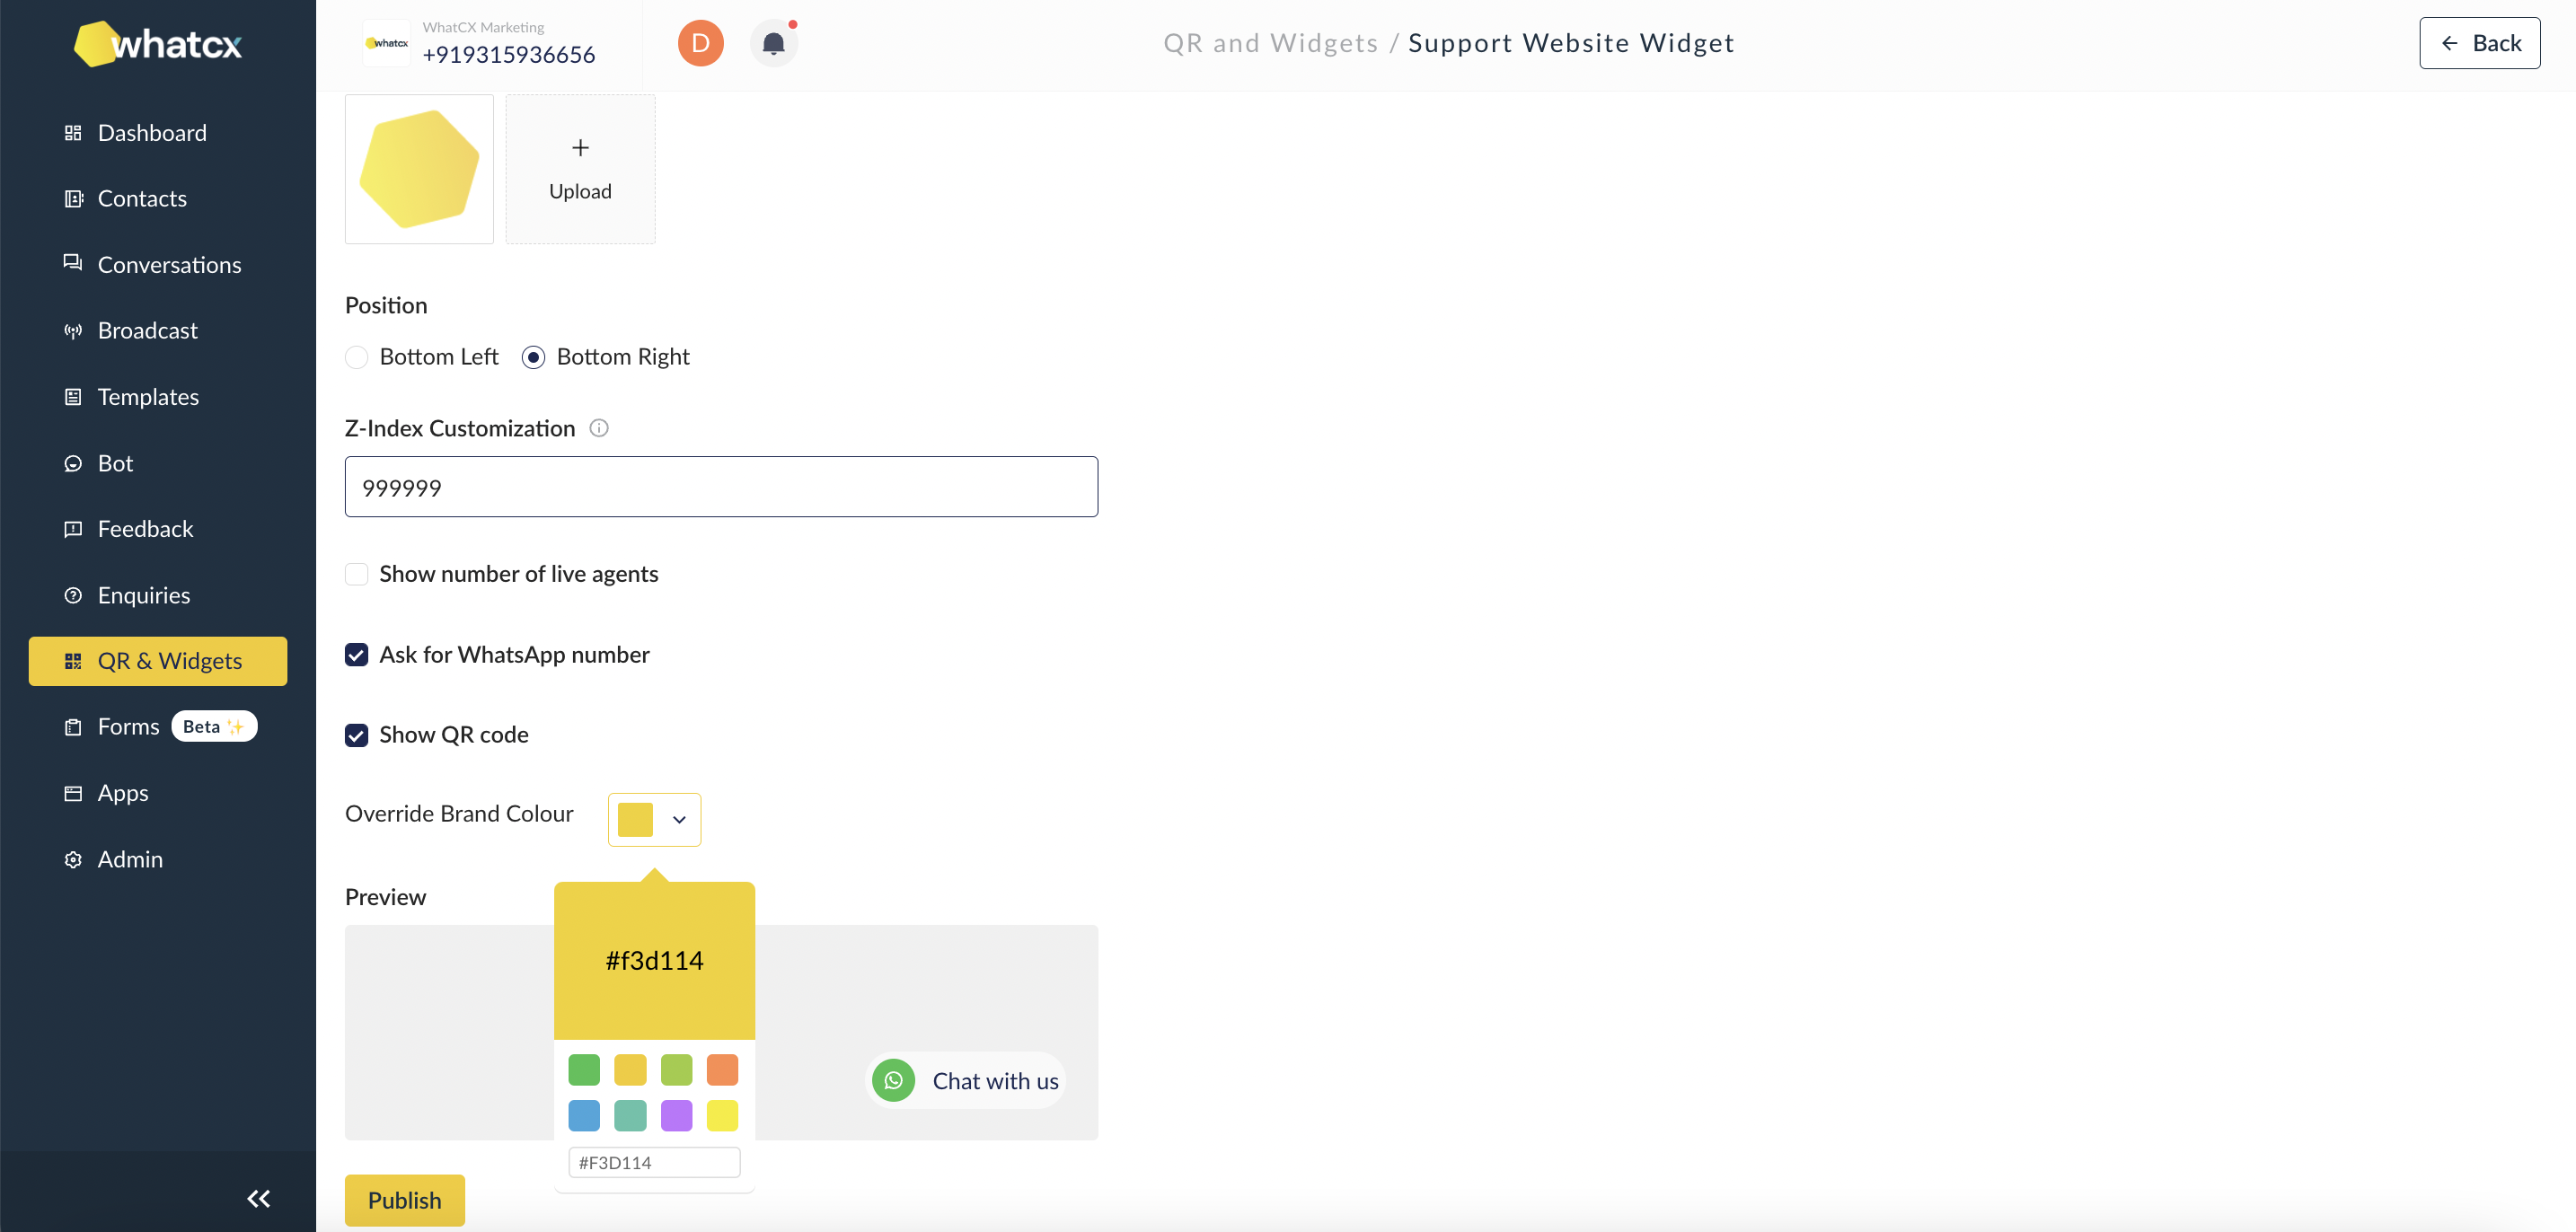
How to customize your QR & Widget?
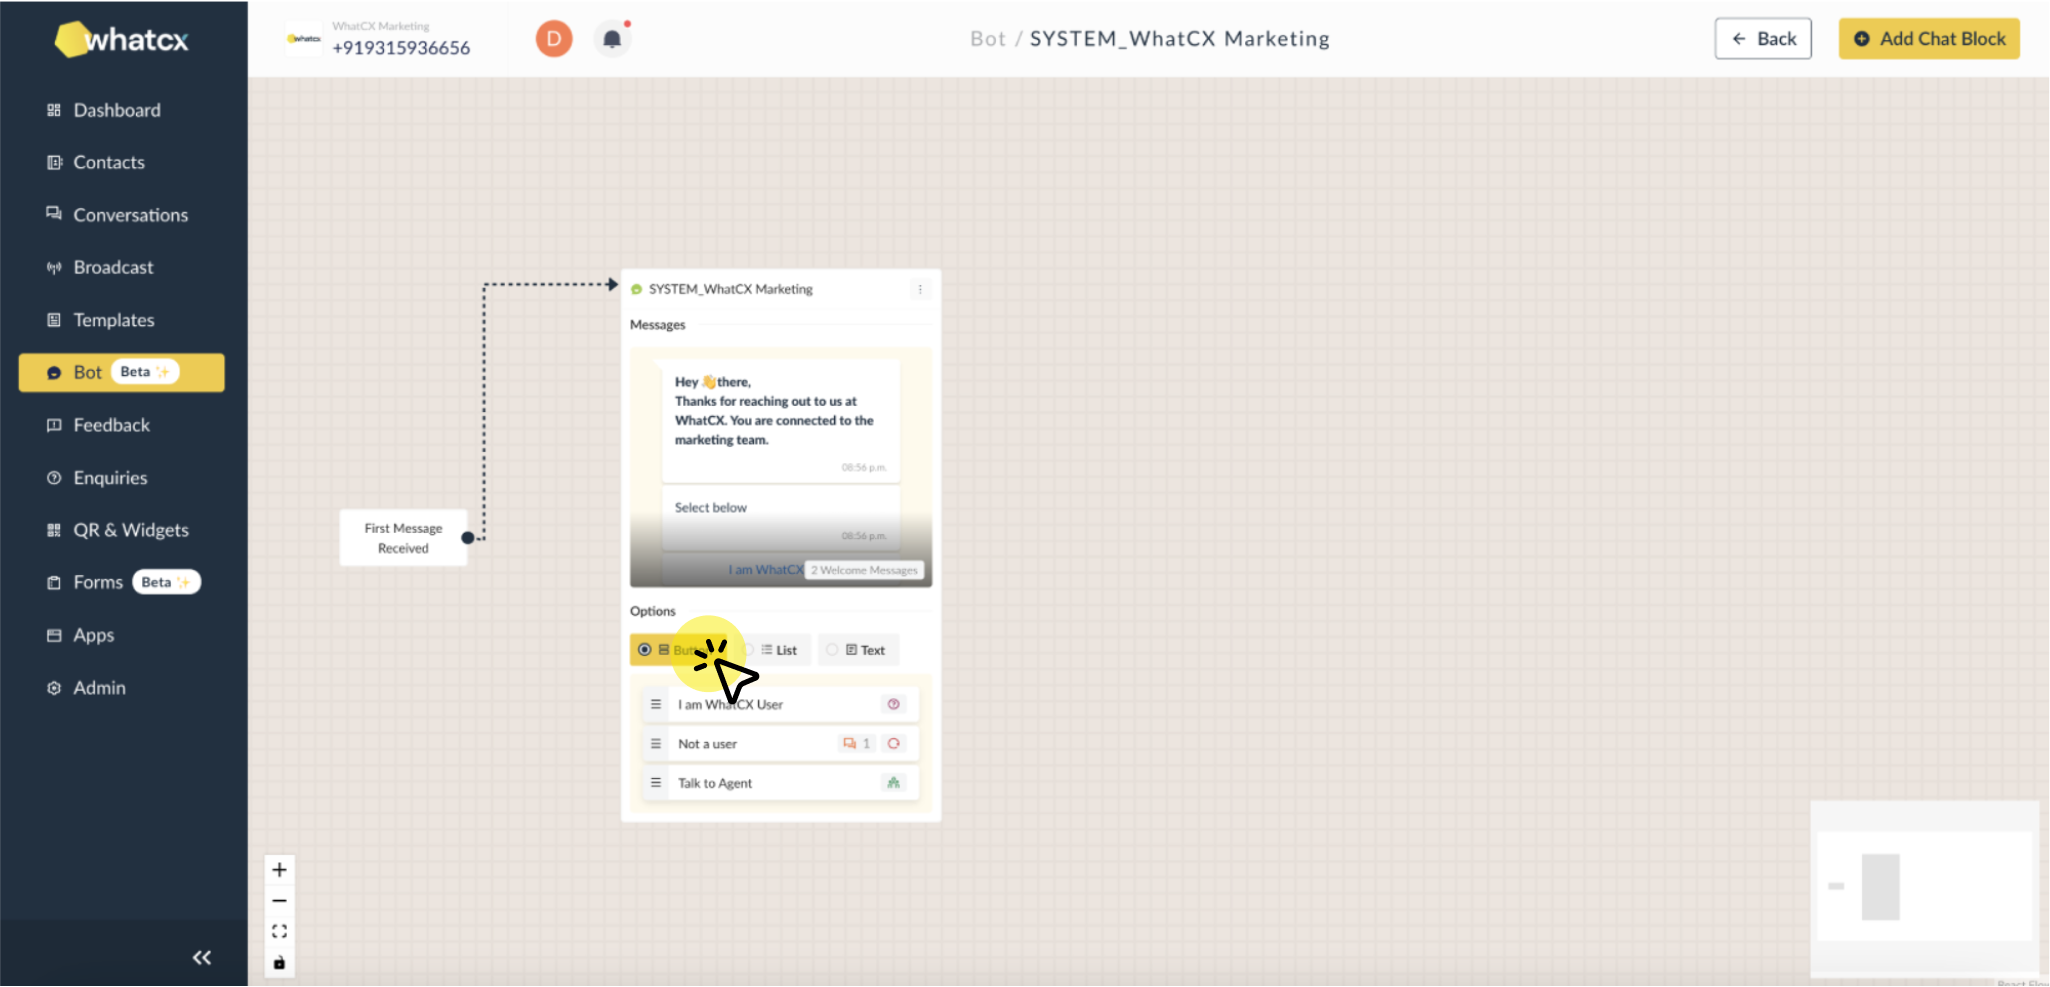
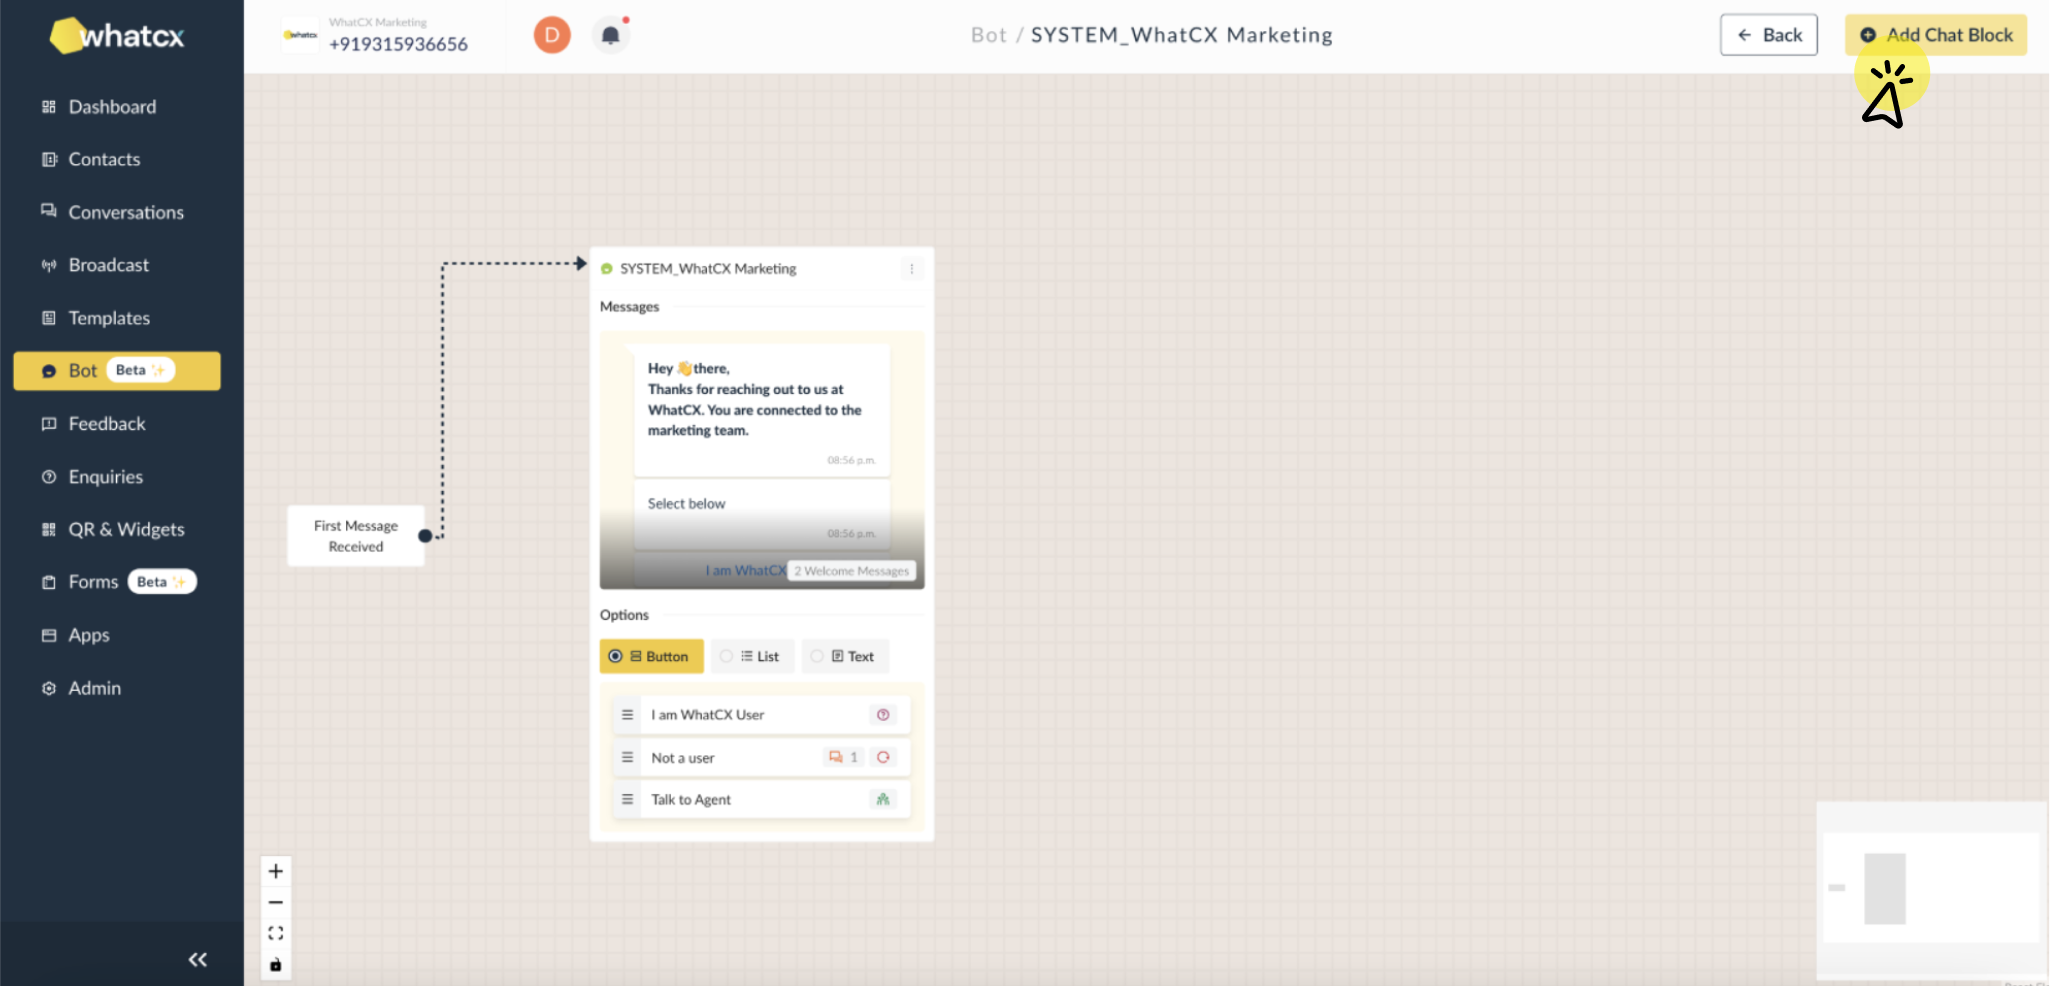
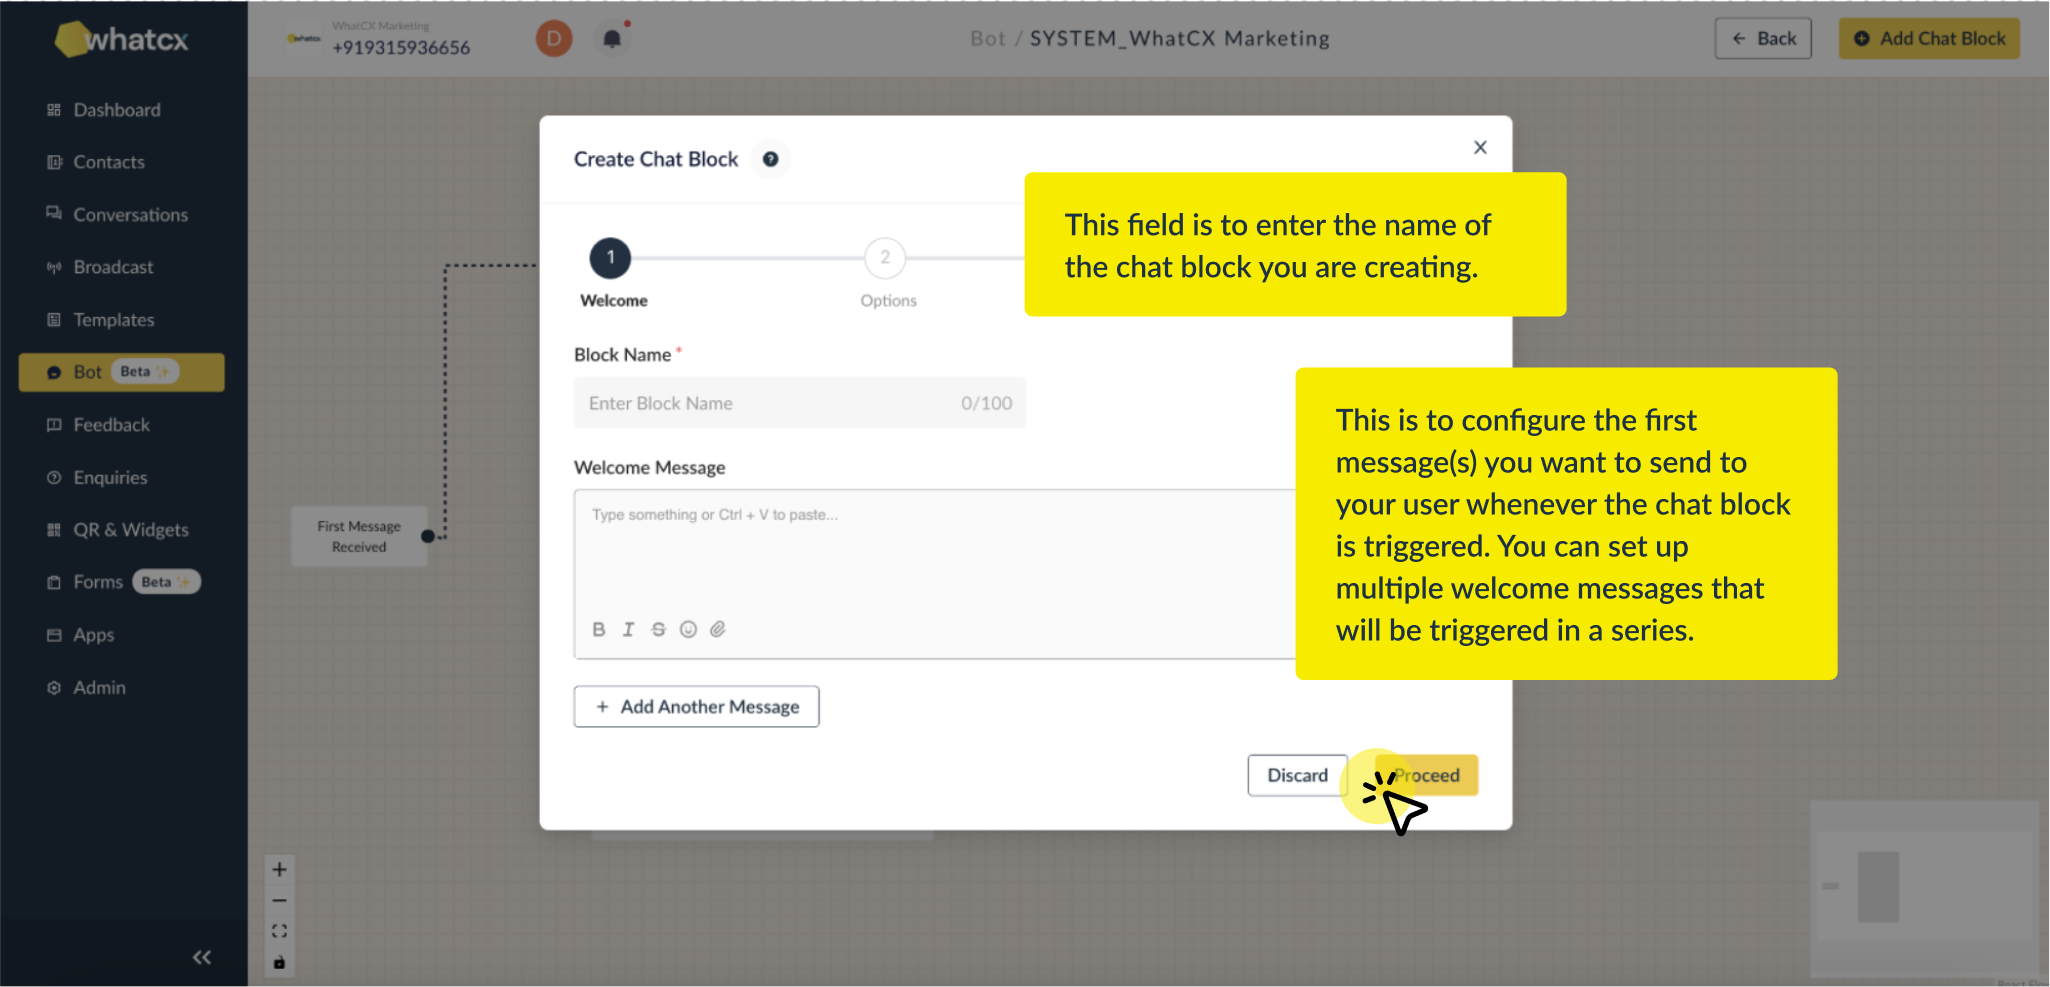
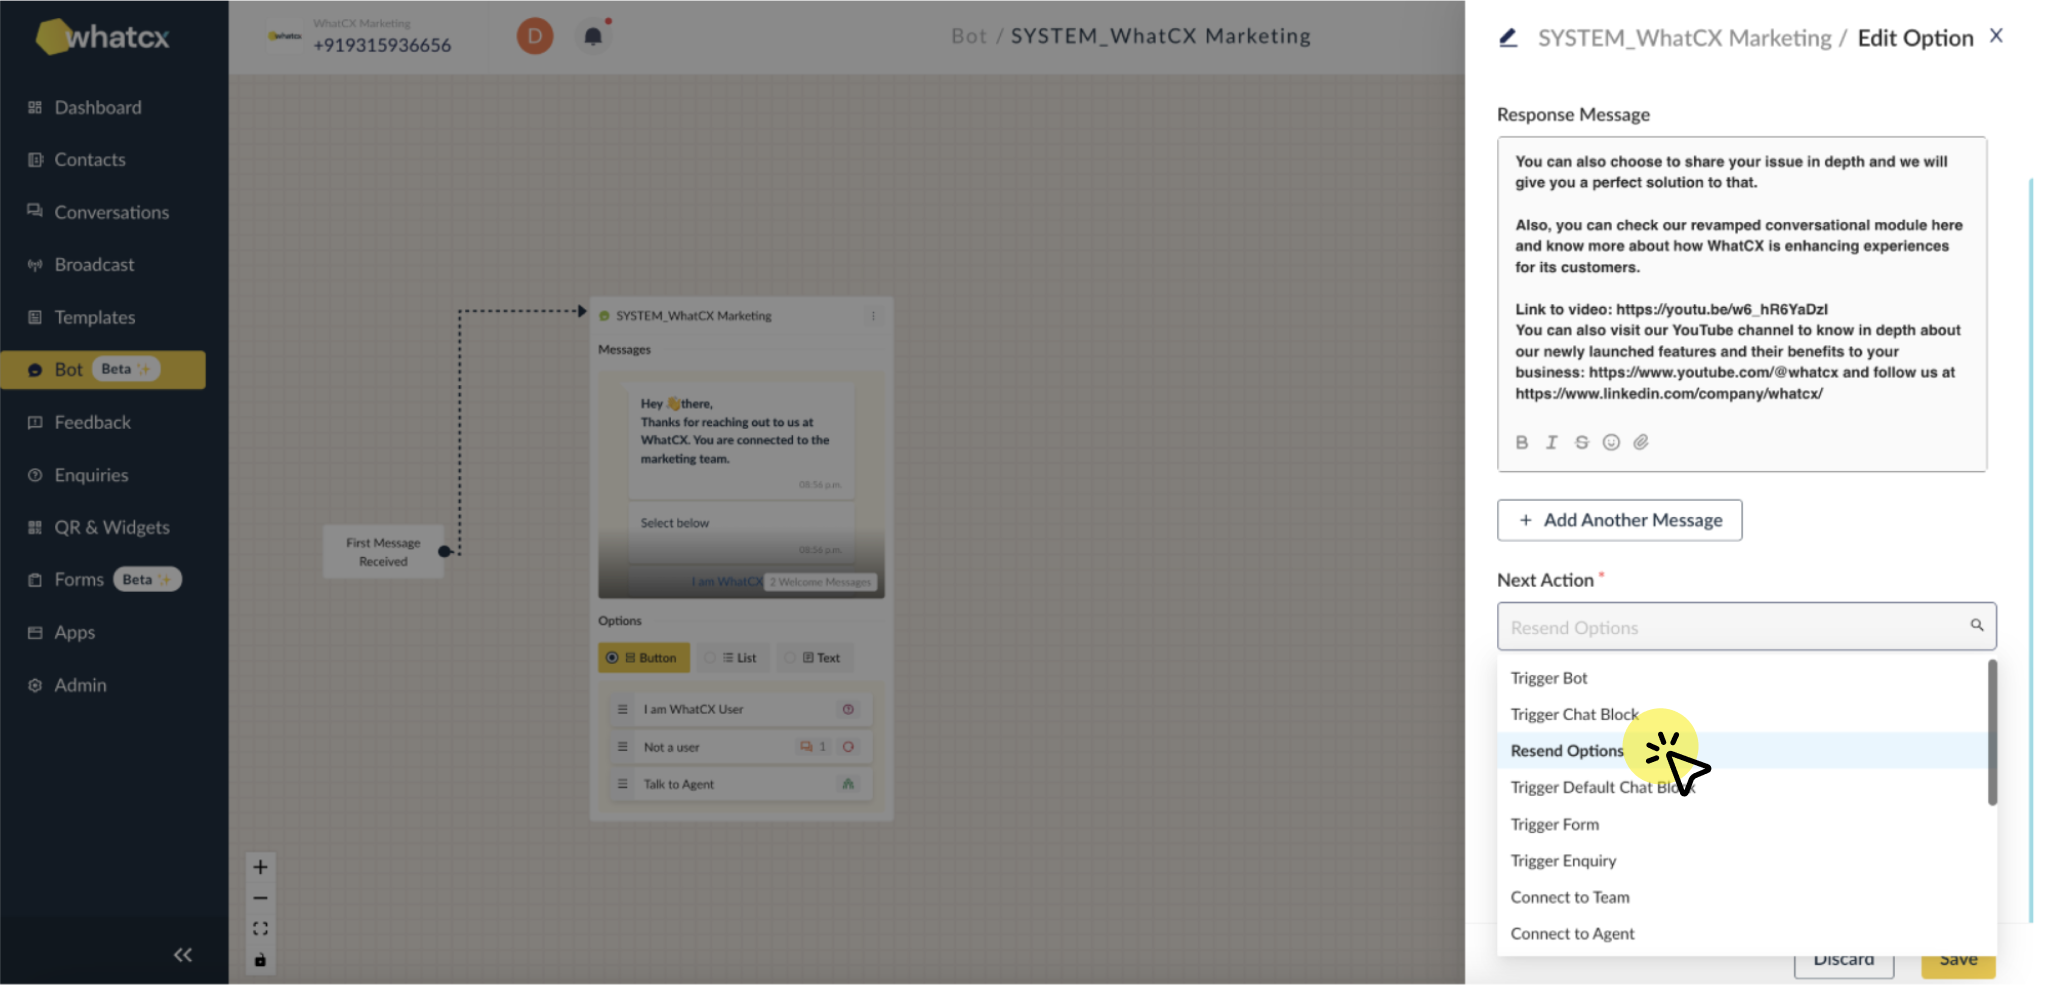
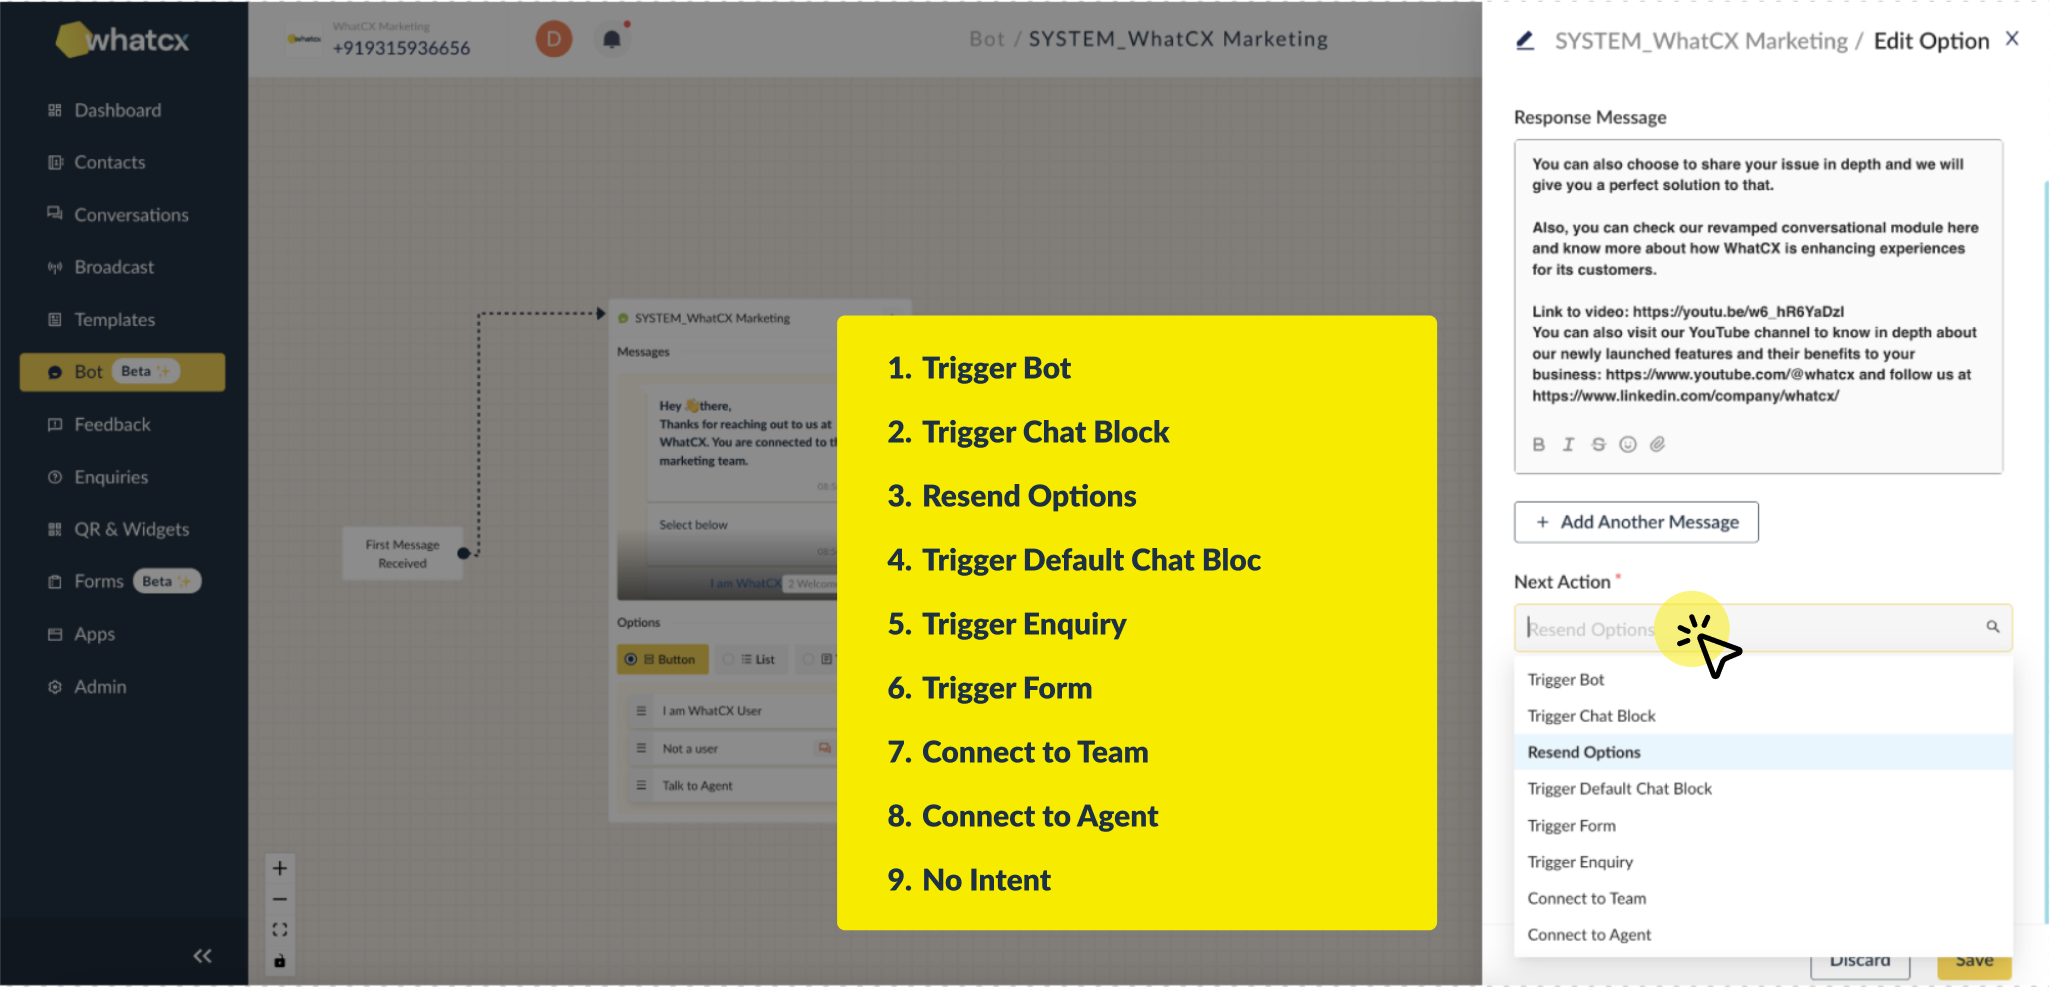
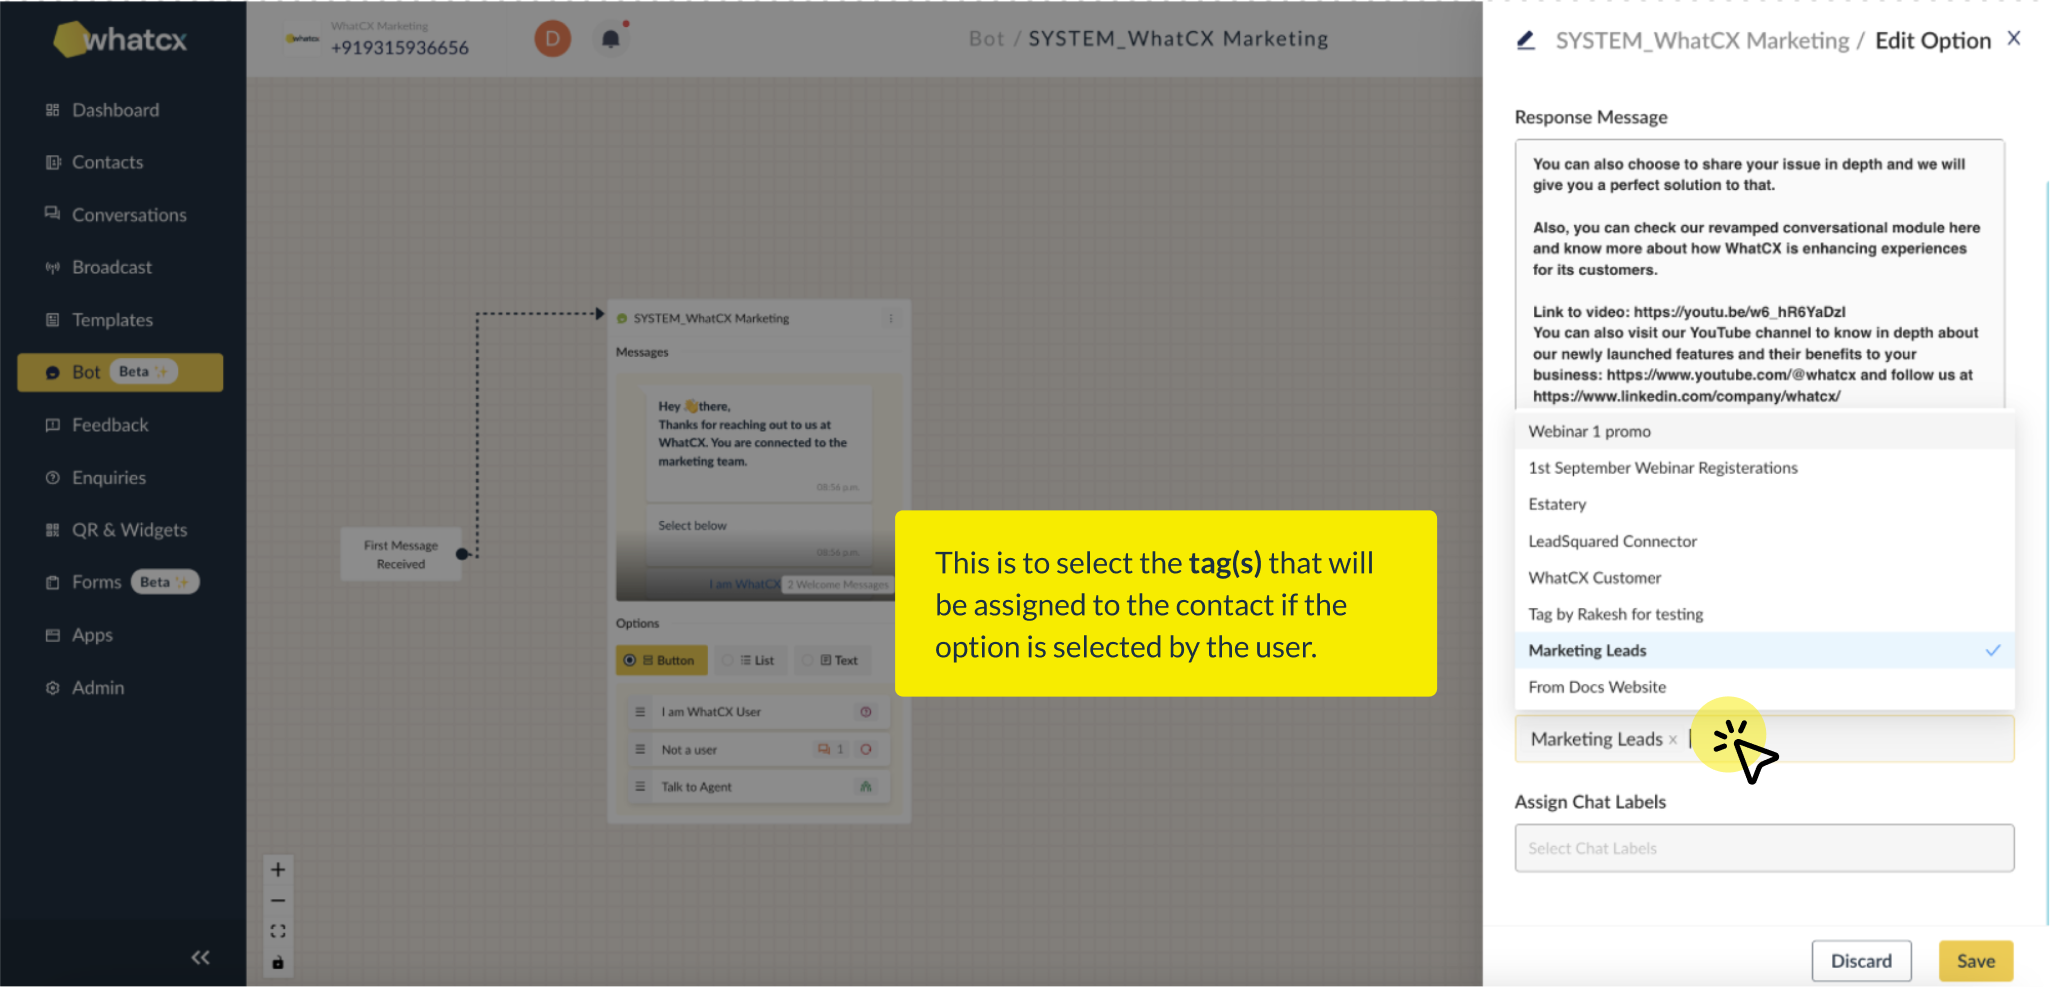
How to create a Chat Block?
Benefits and Use Cases of Integrating Forms
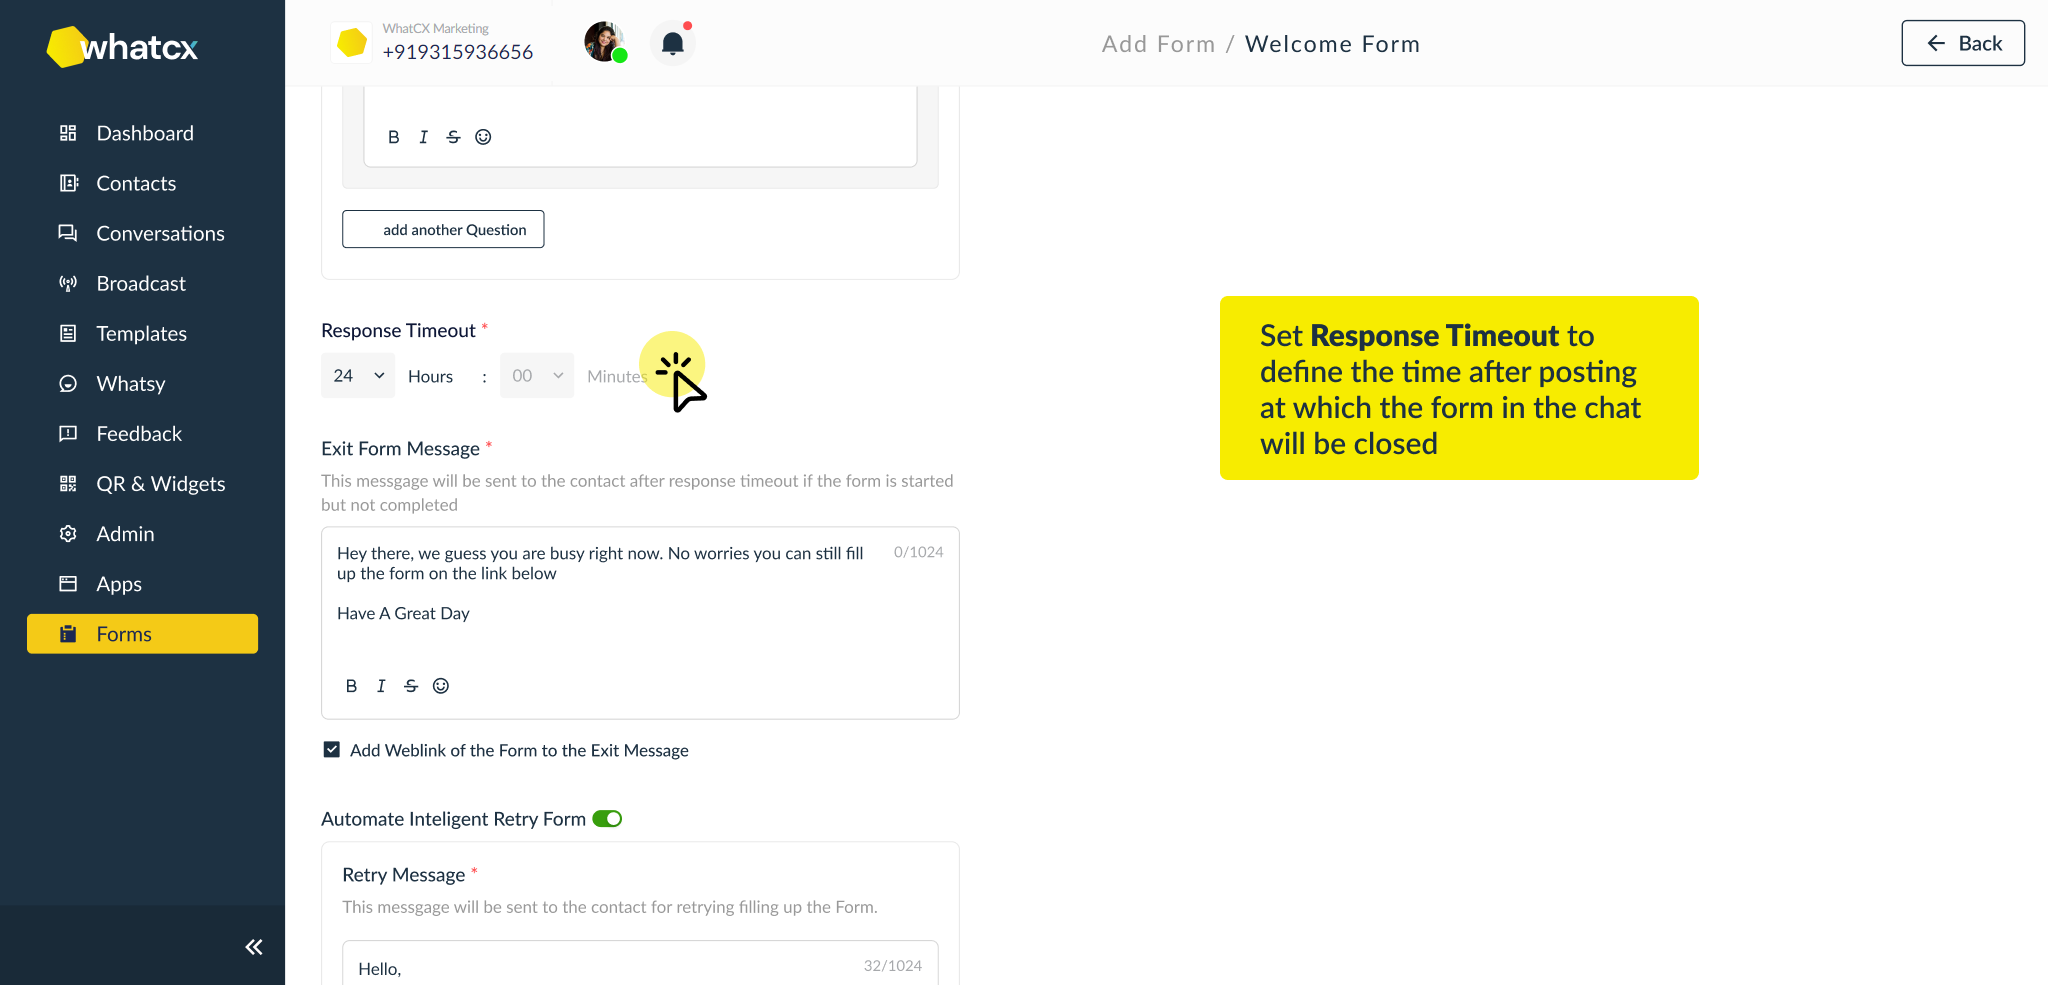
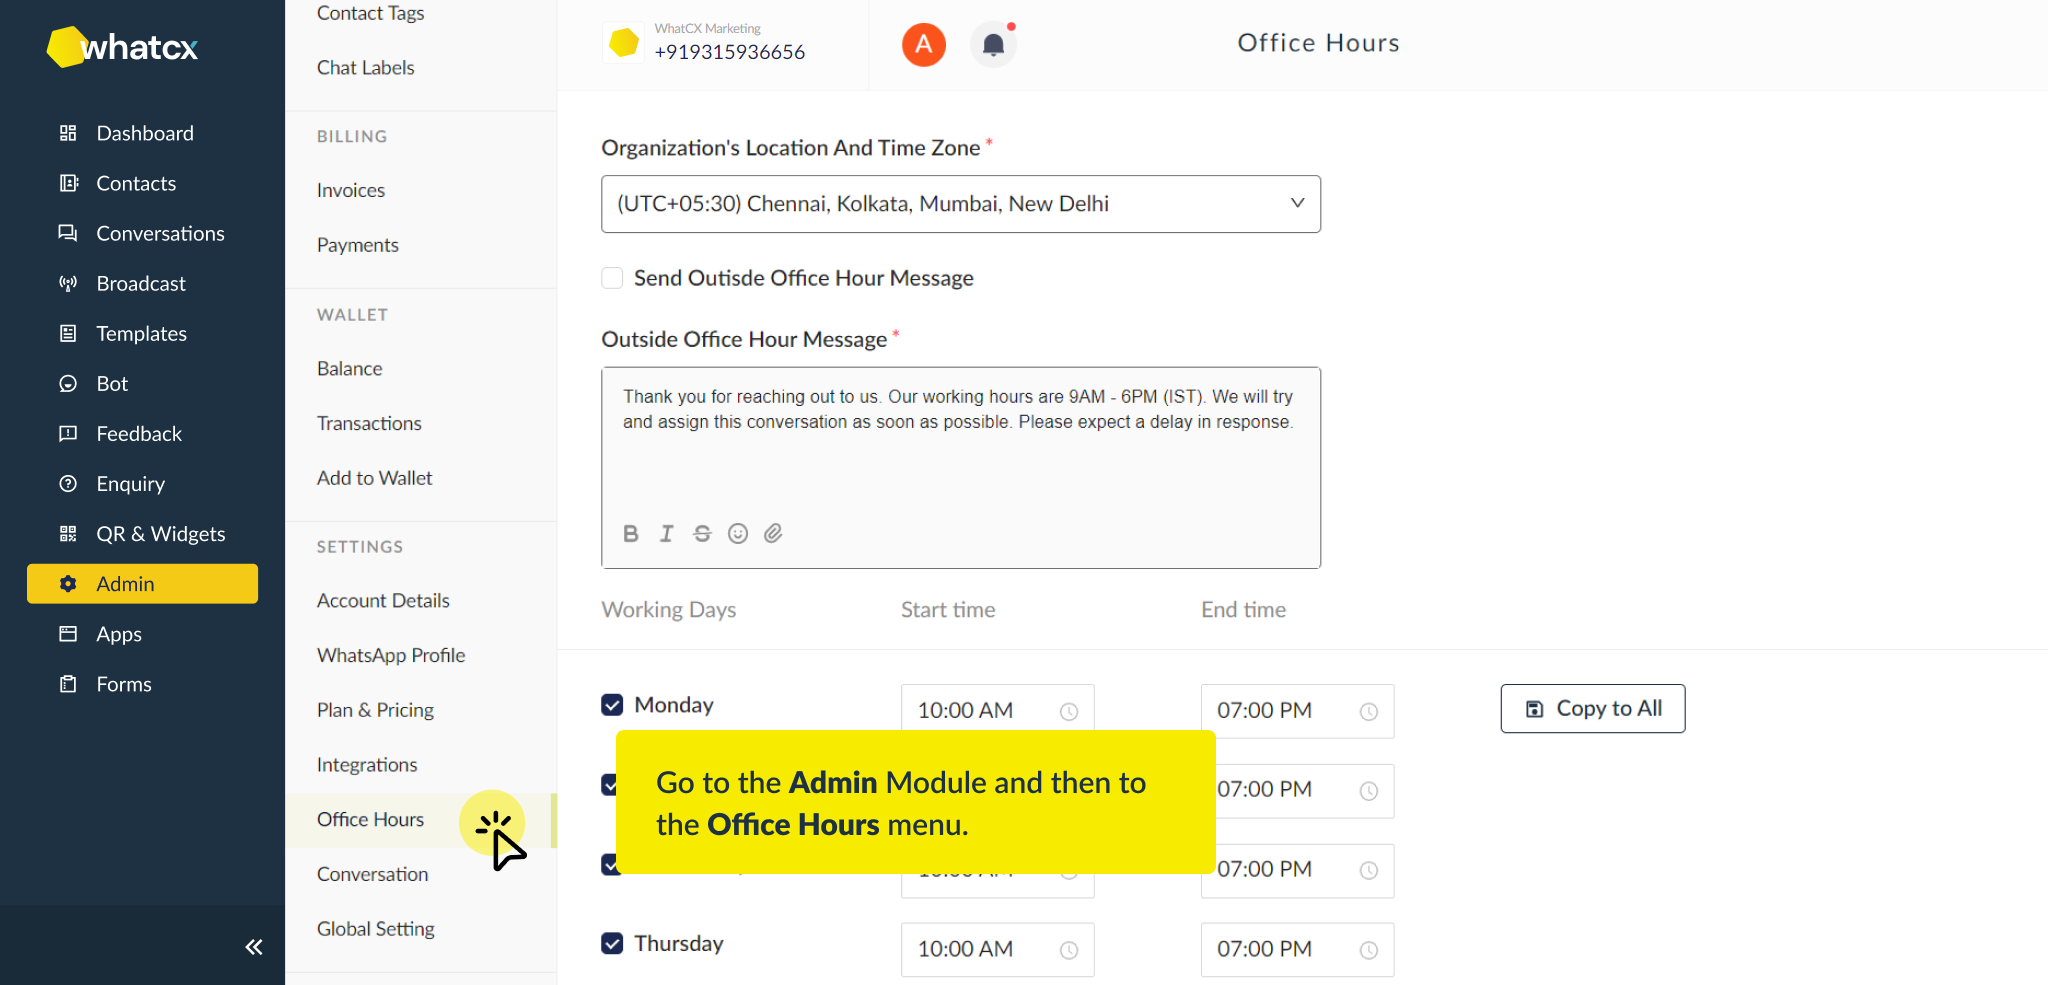
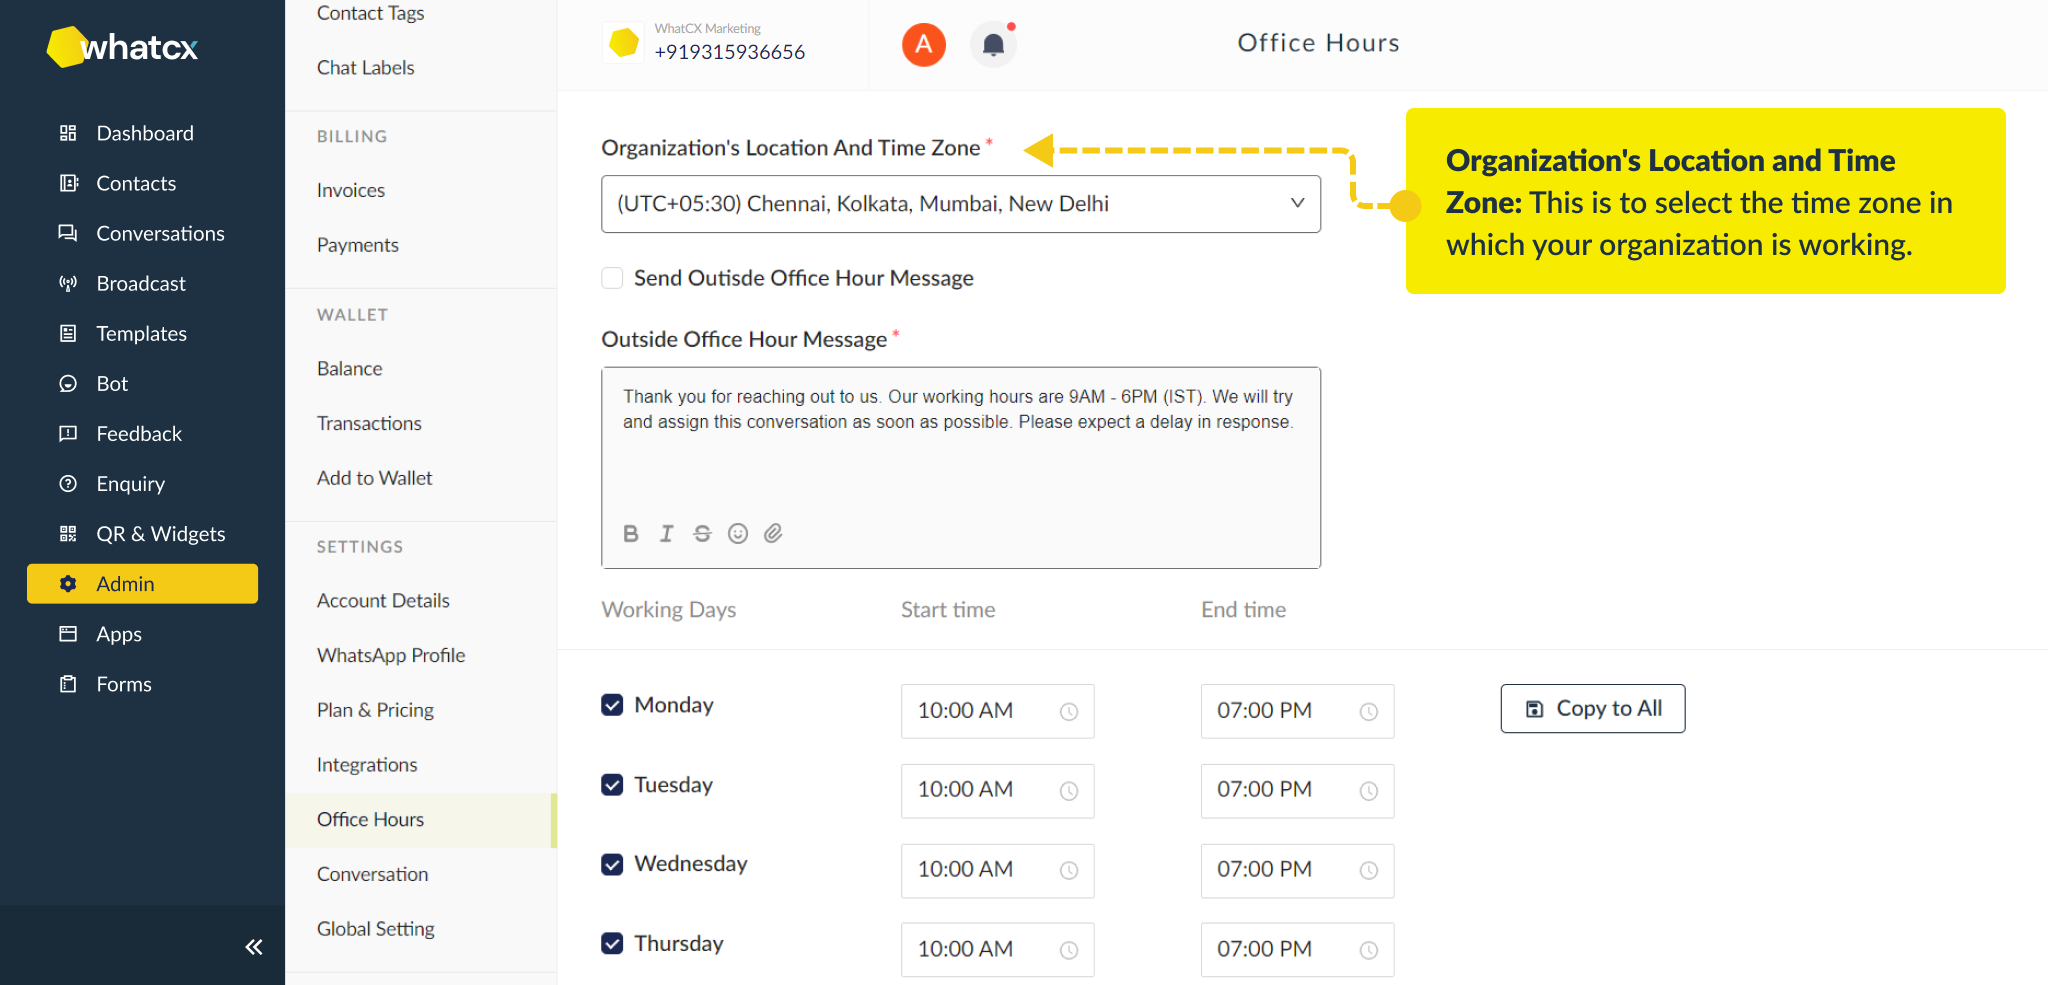
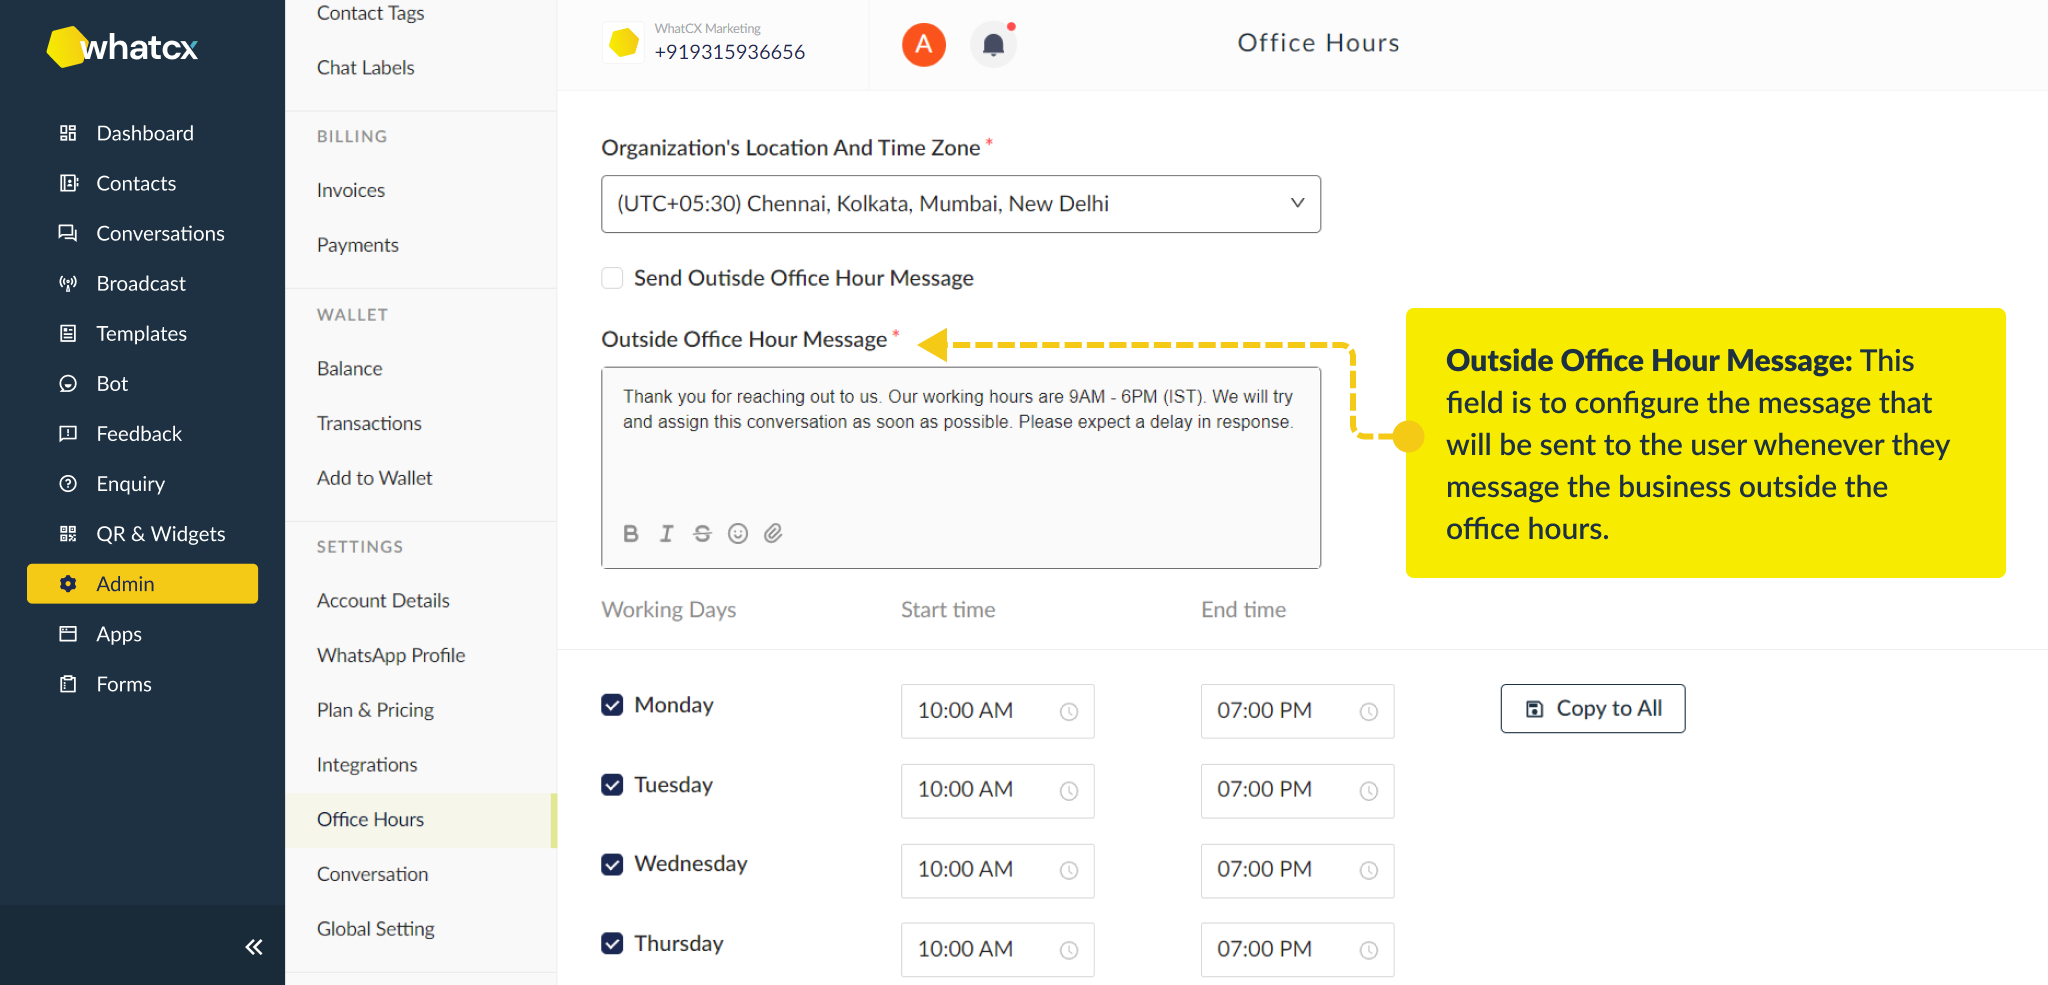
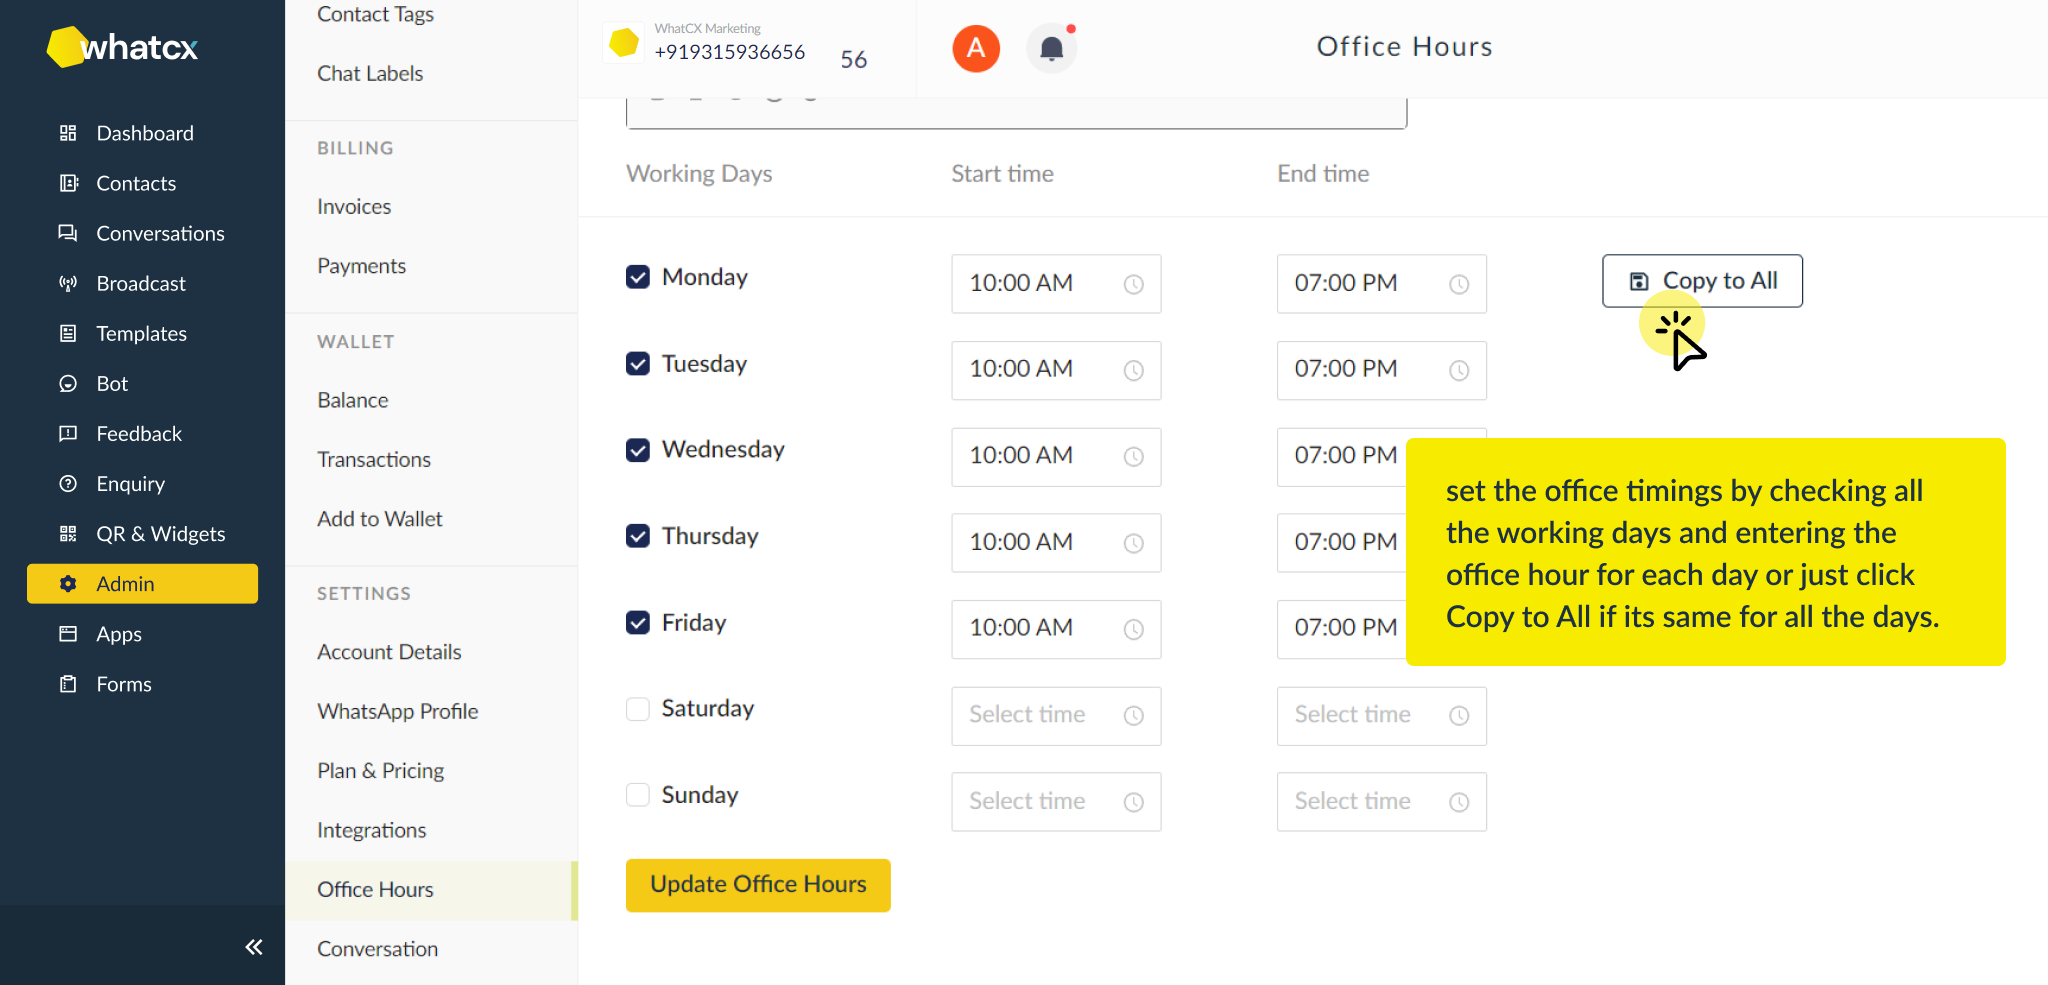
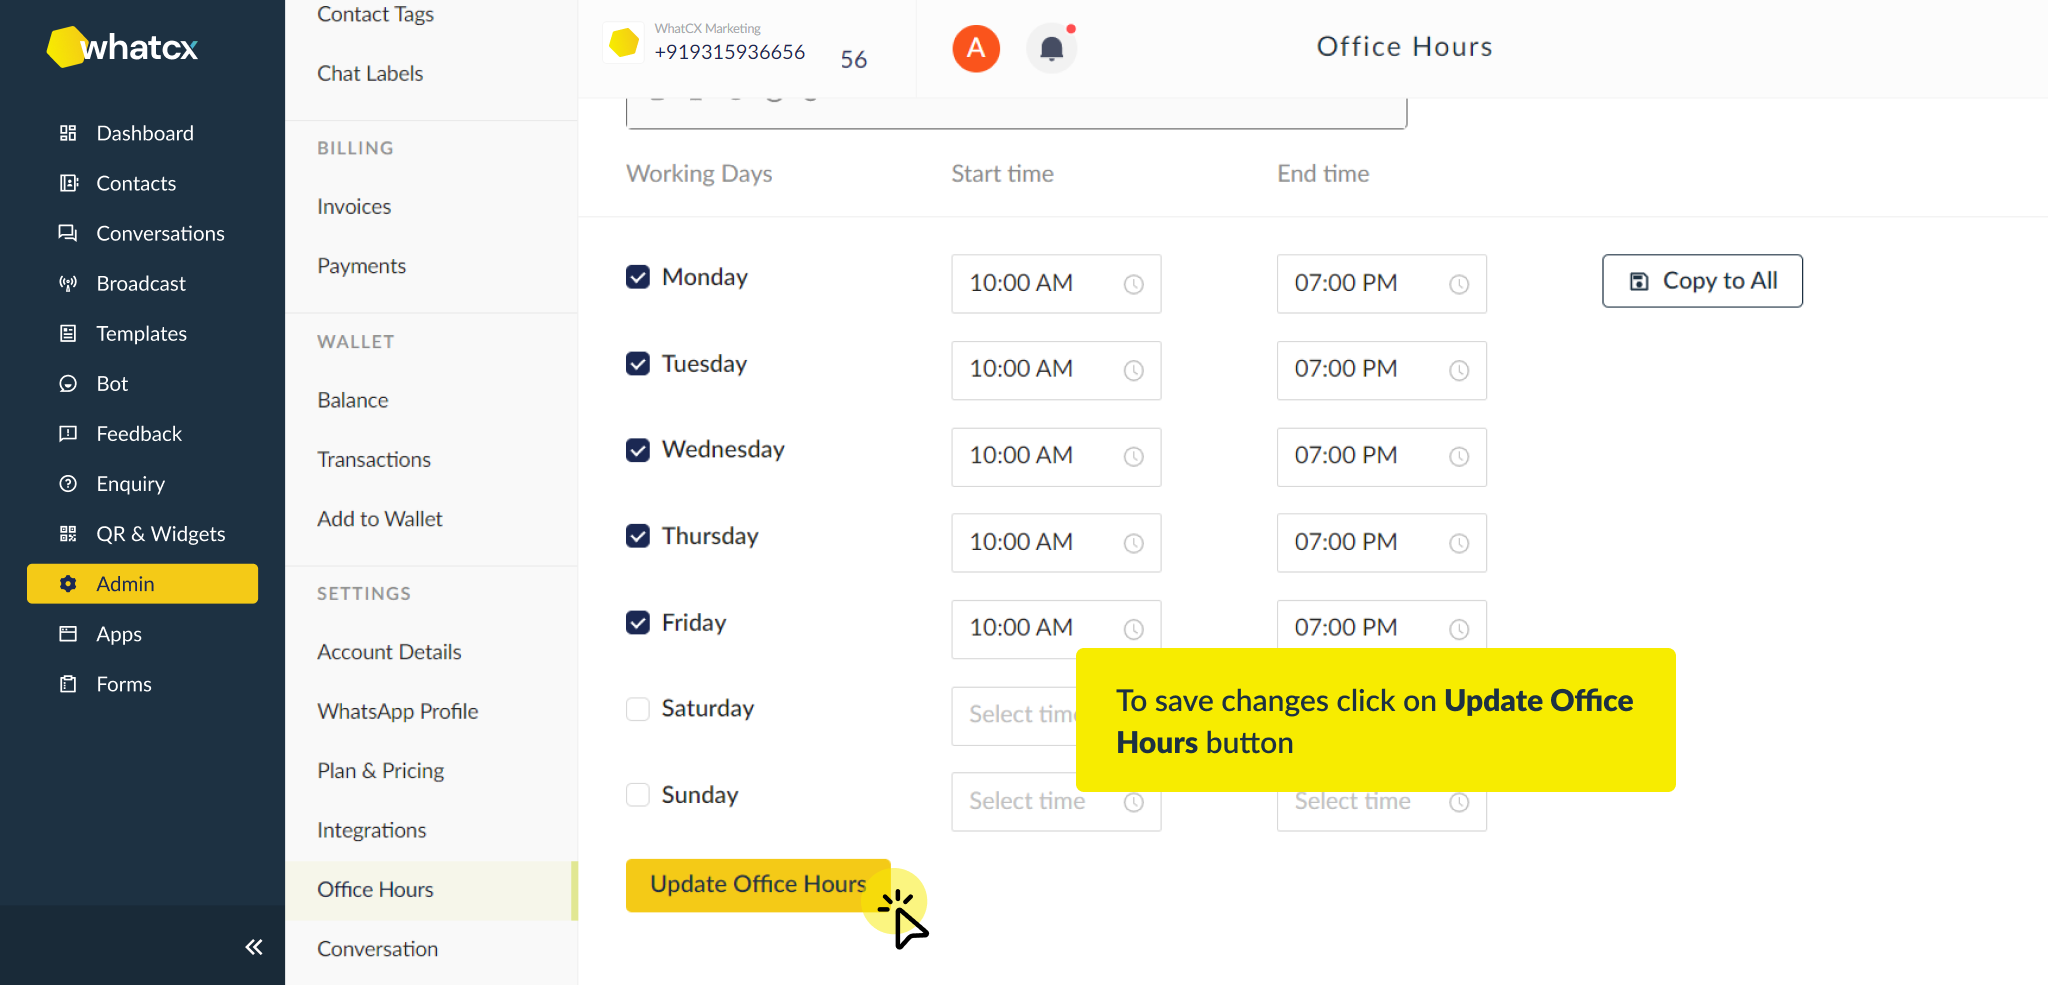
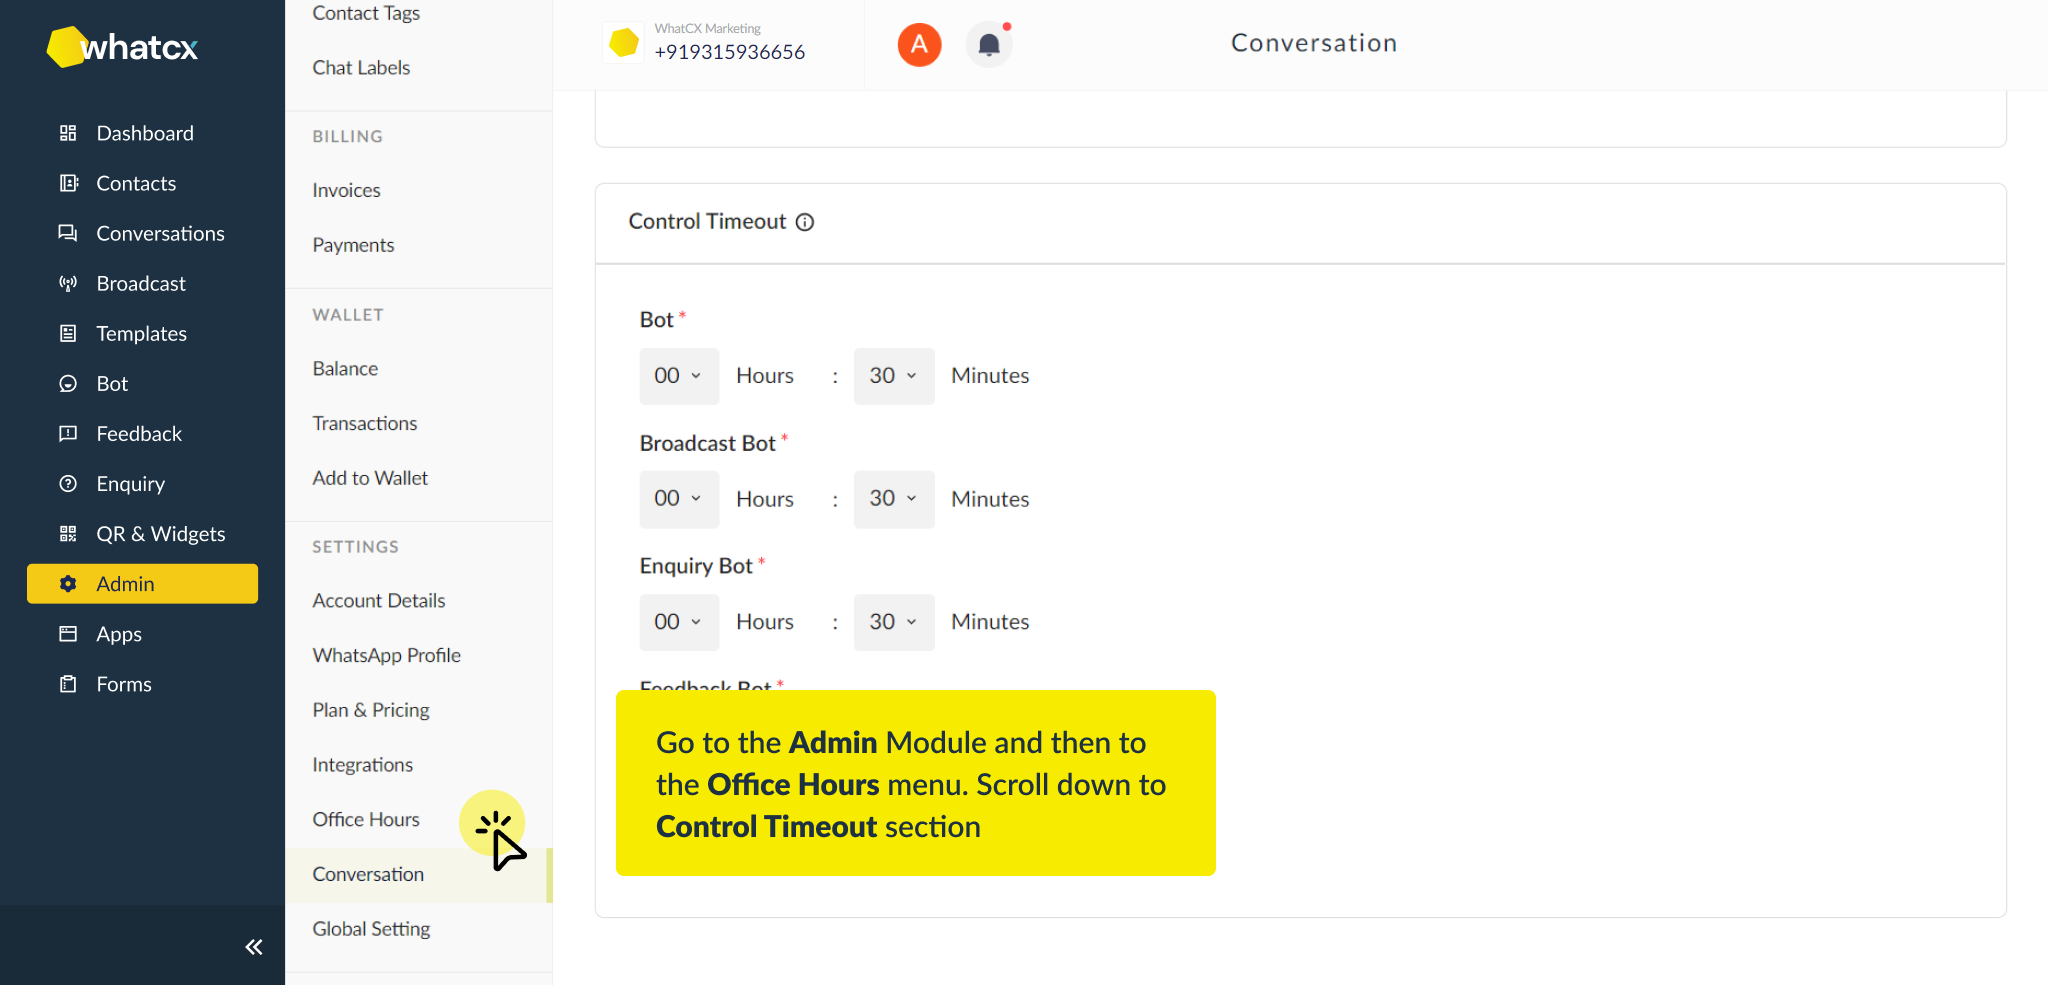
How to setup Office Hours?
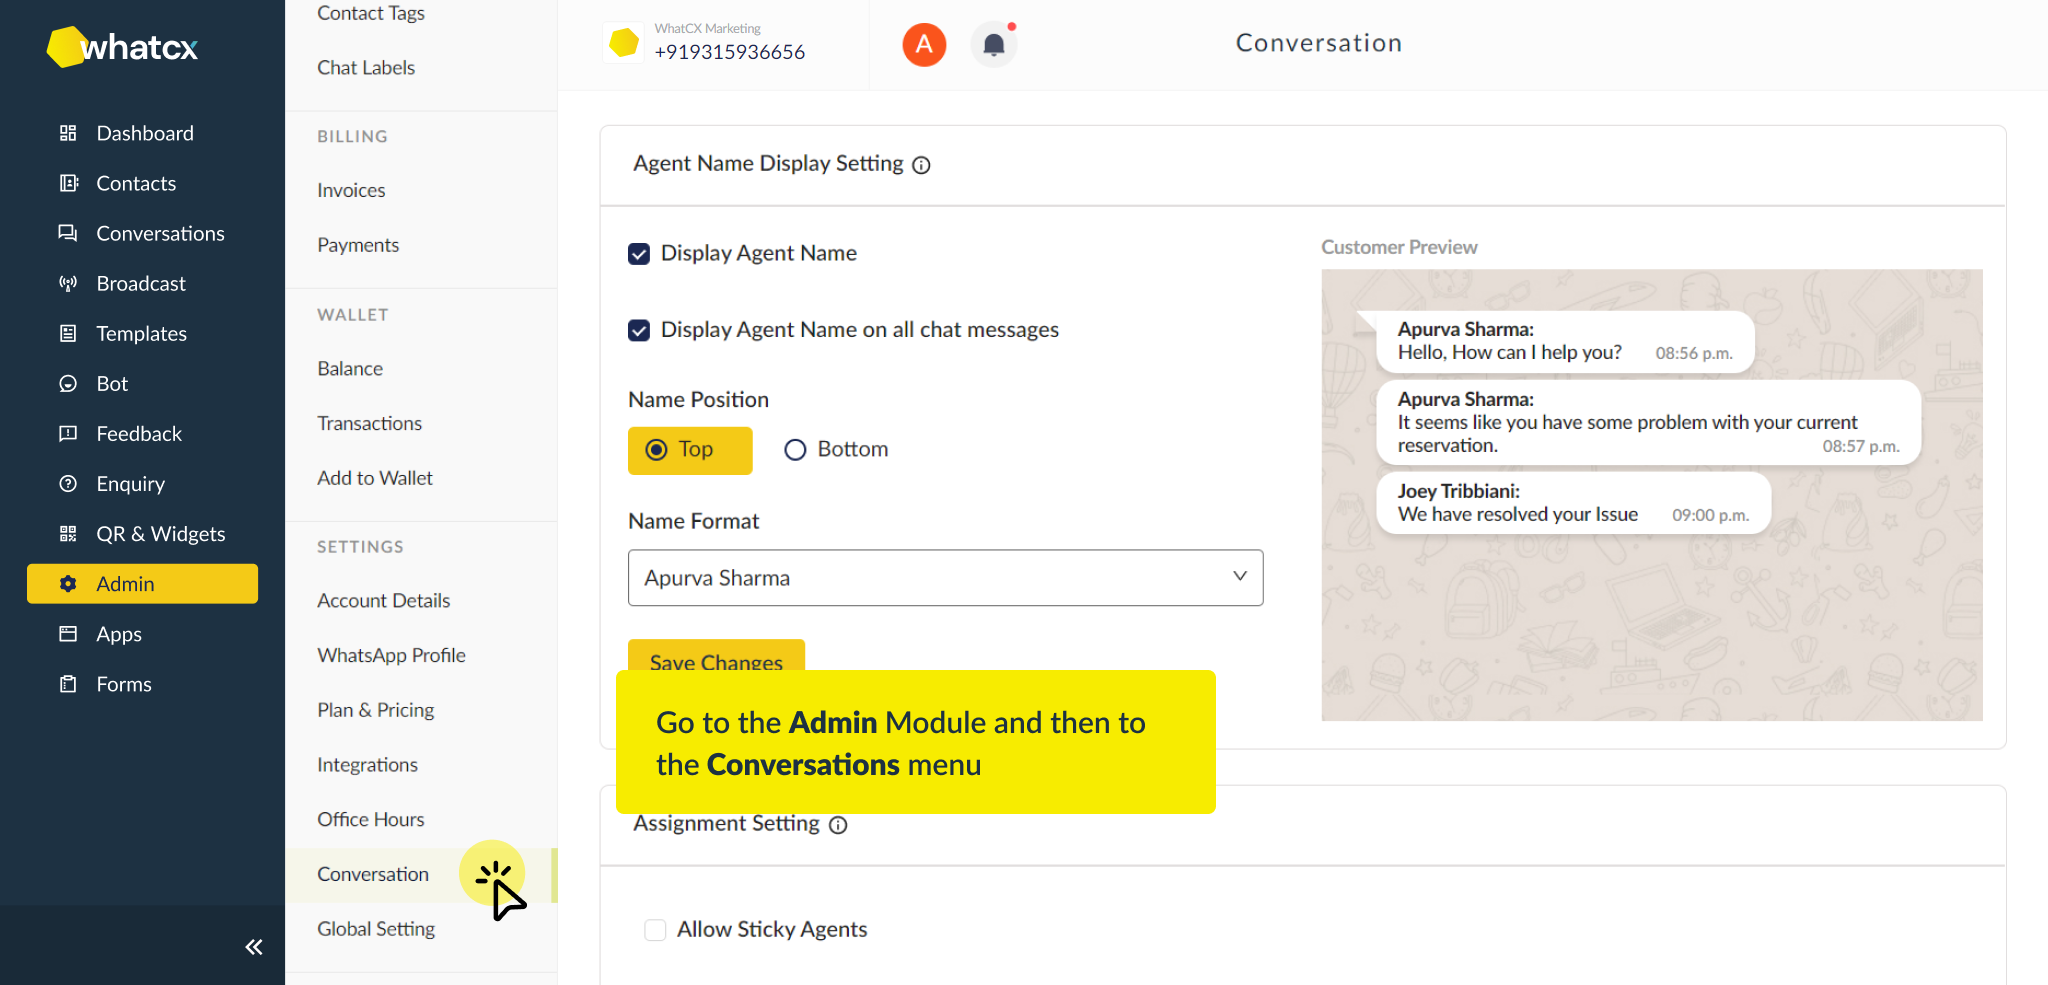
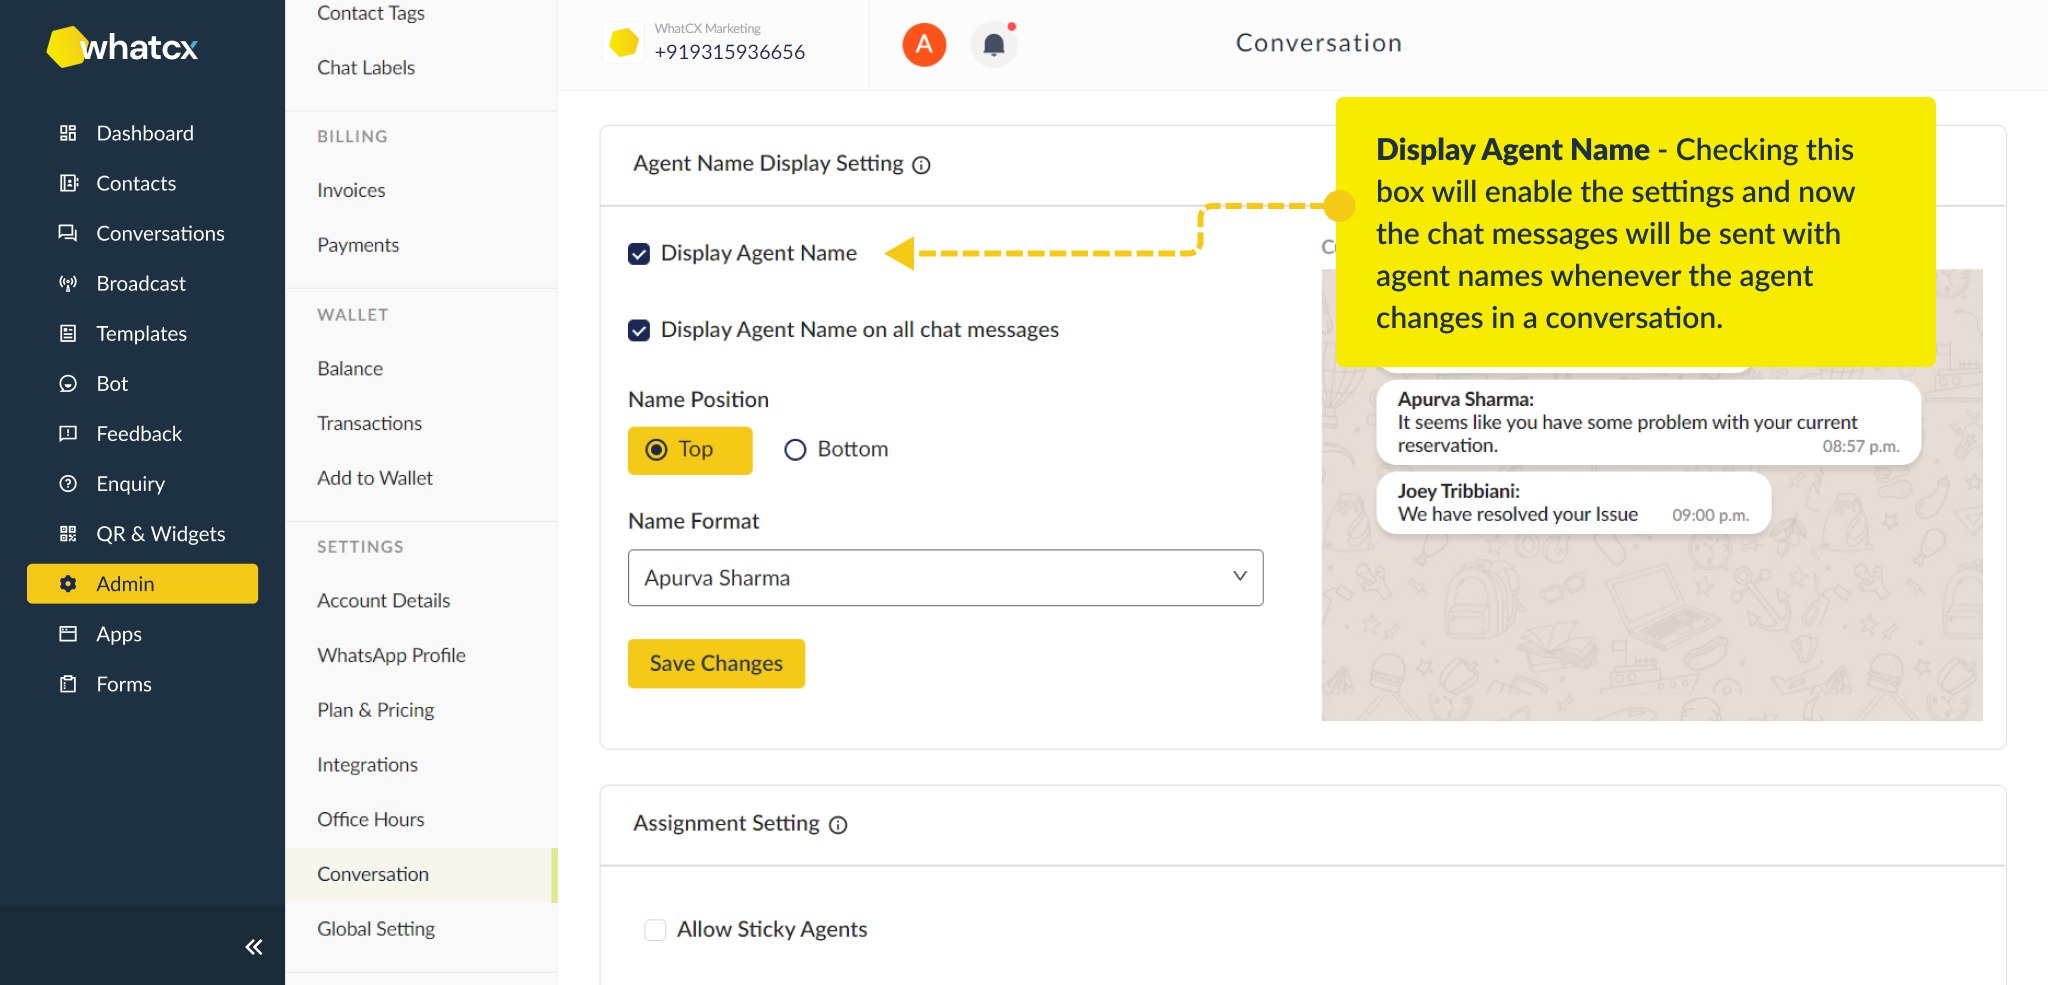
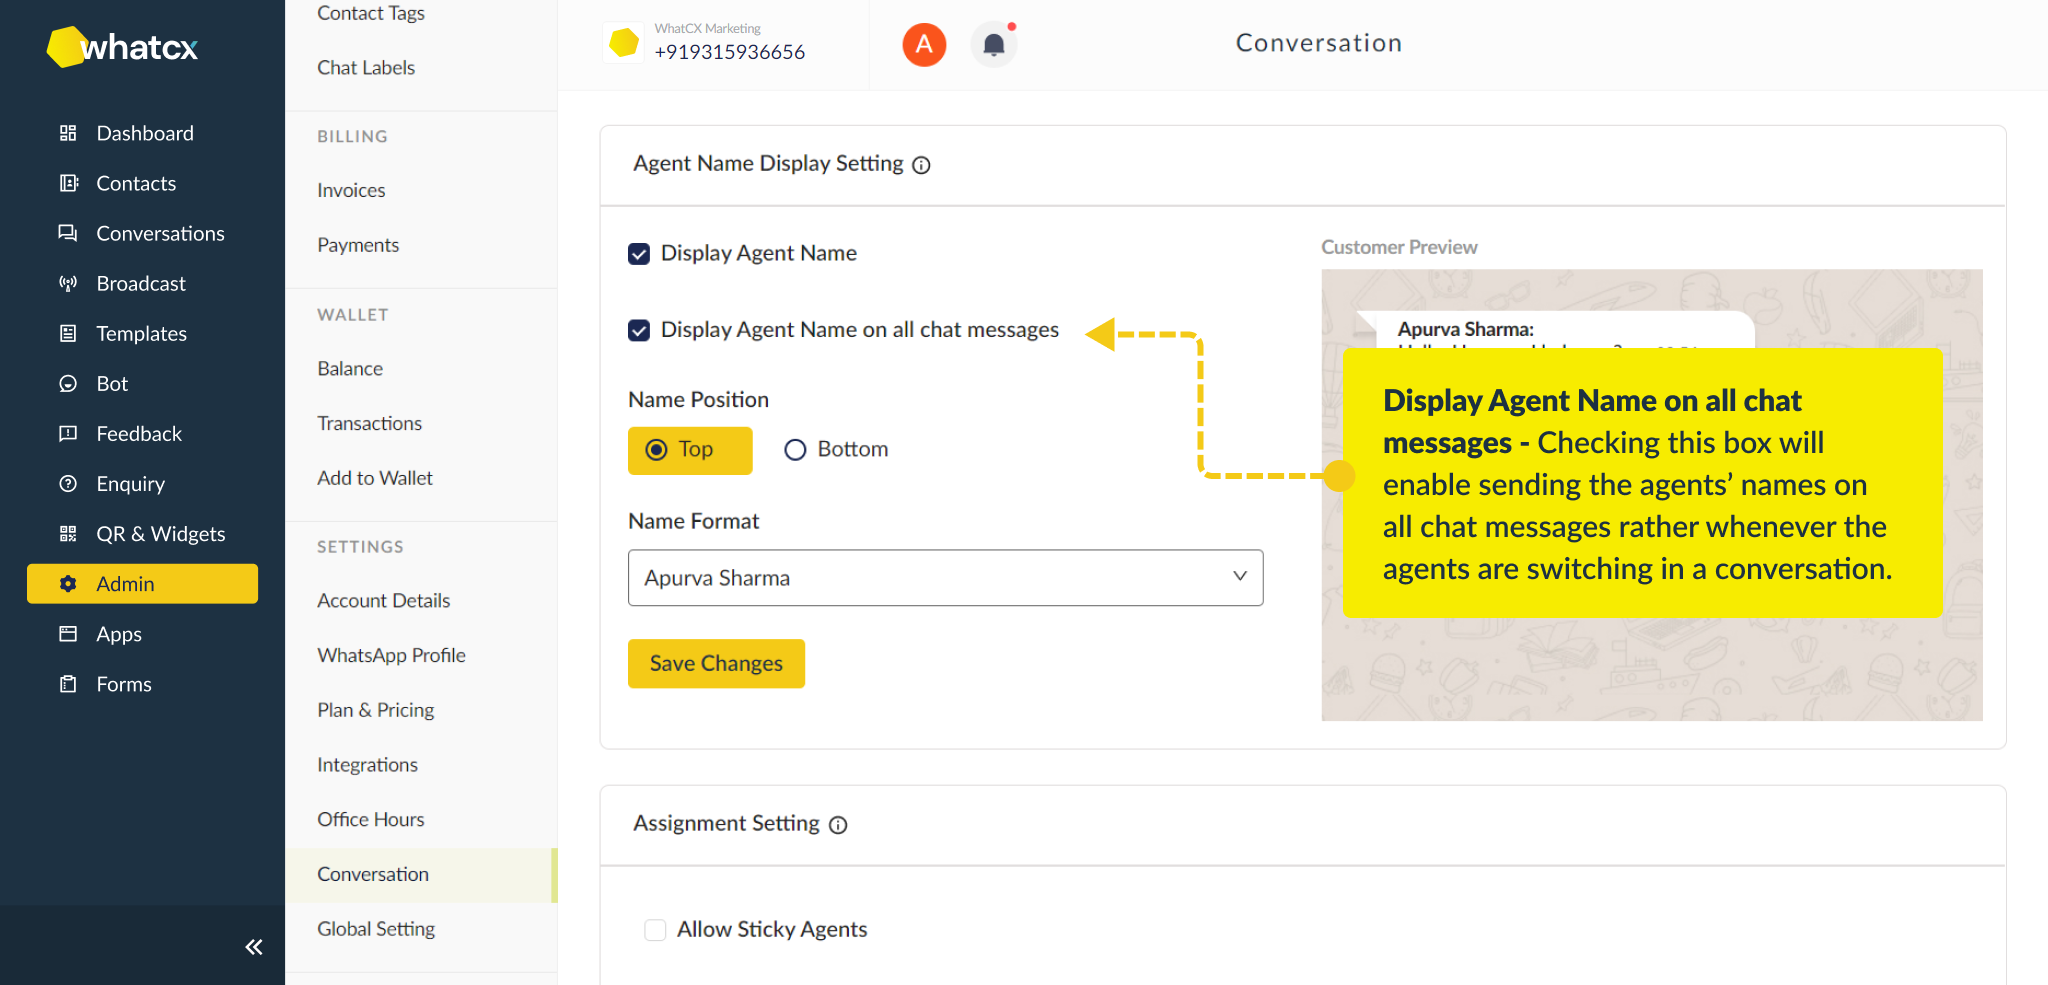
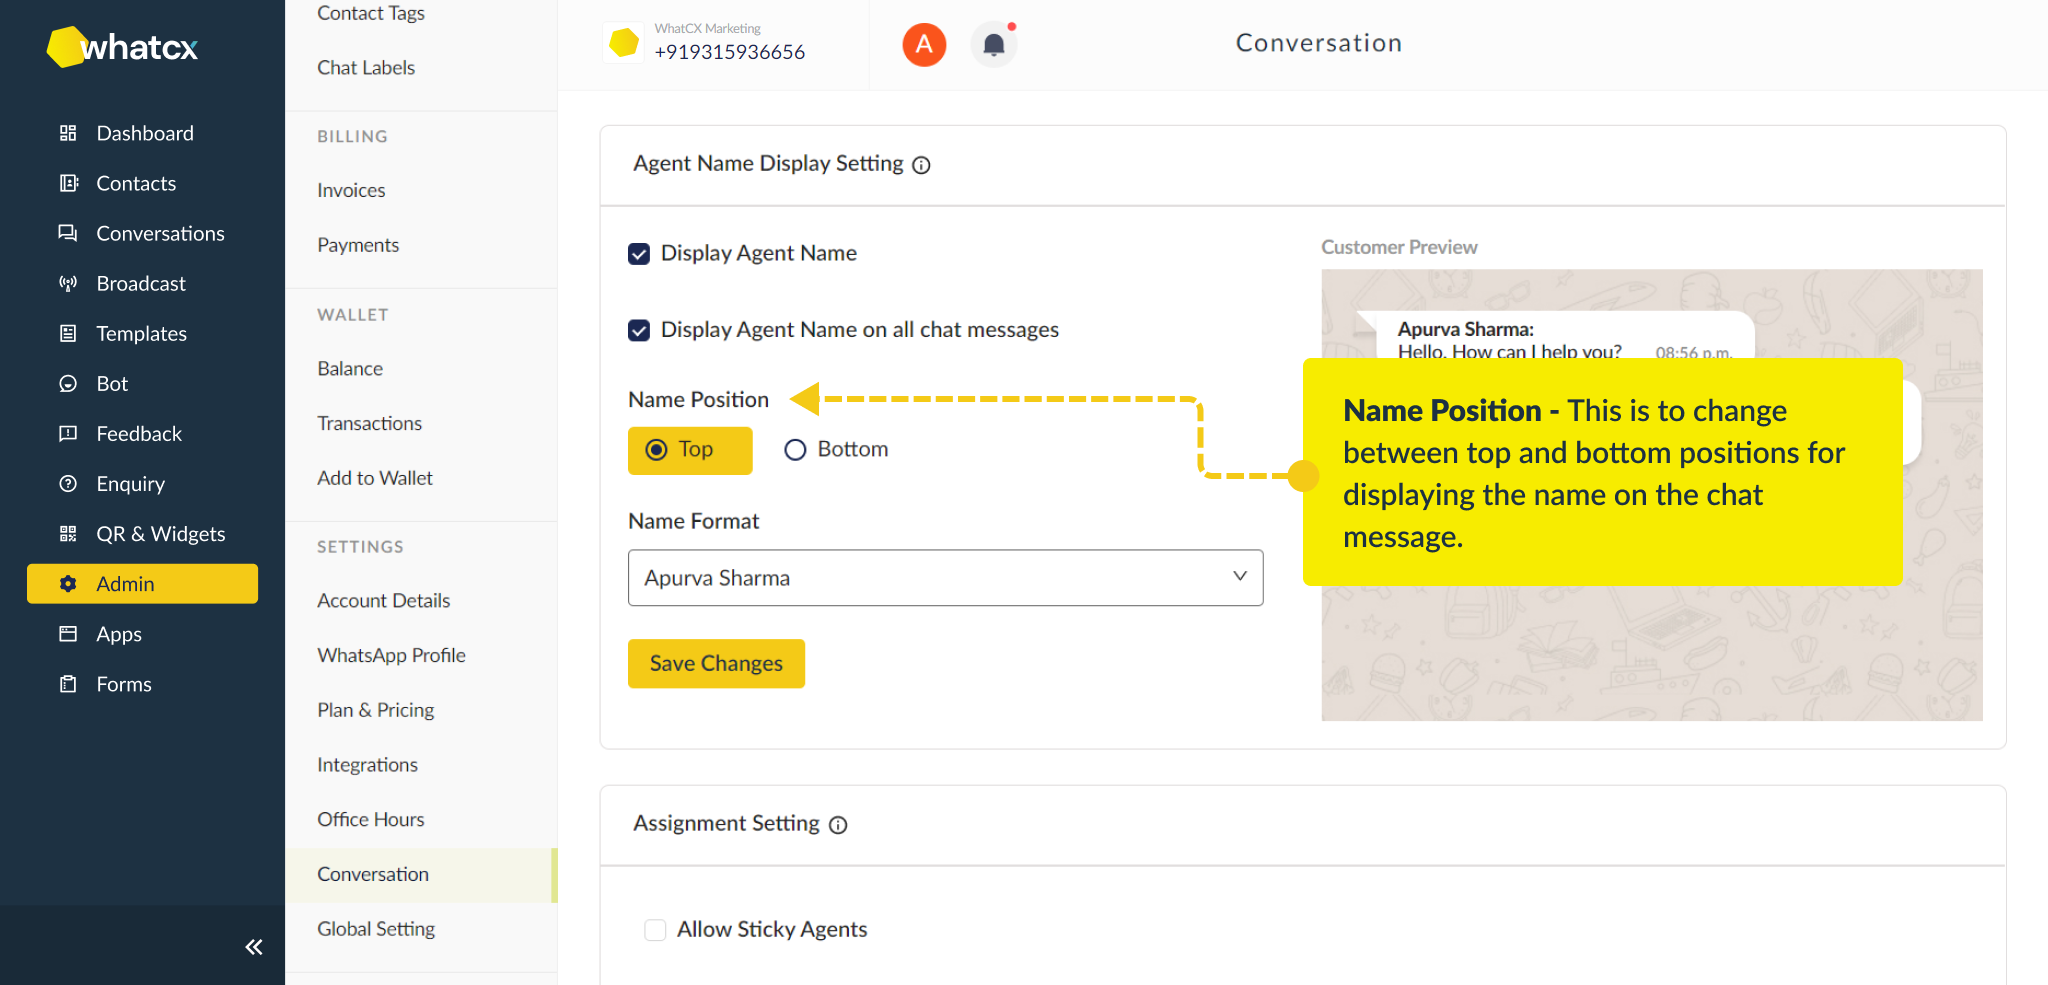
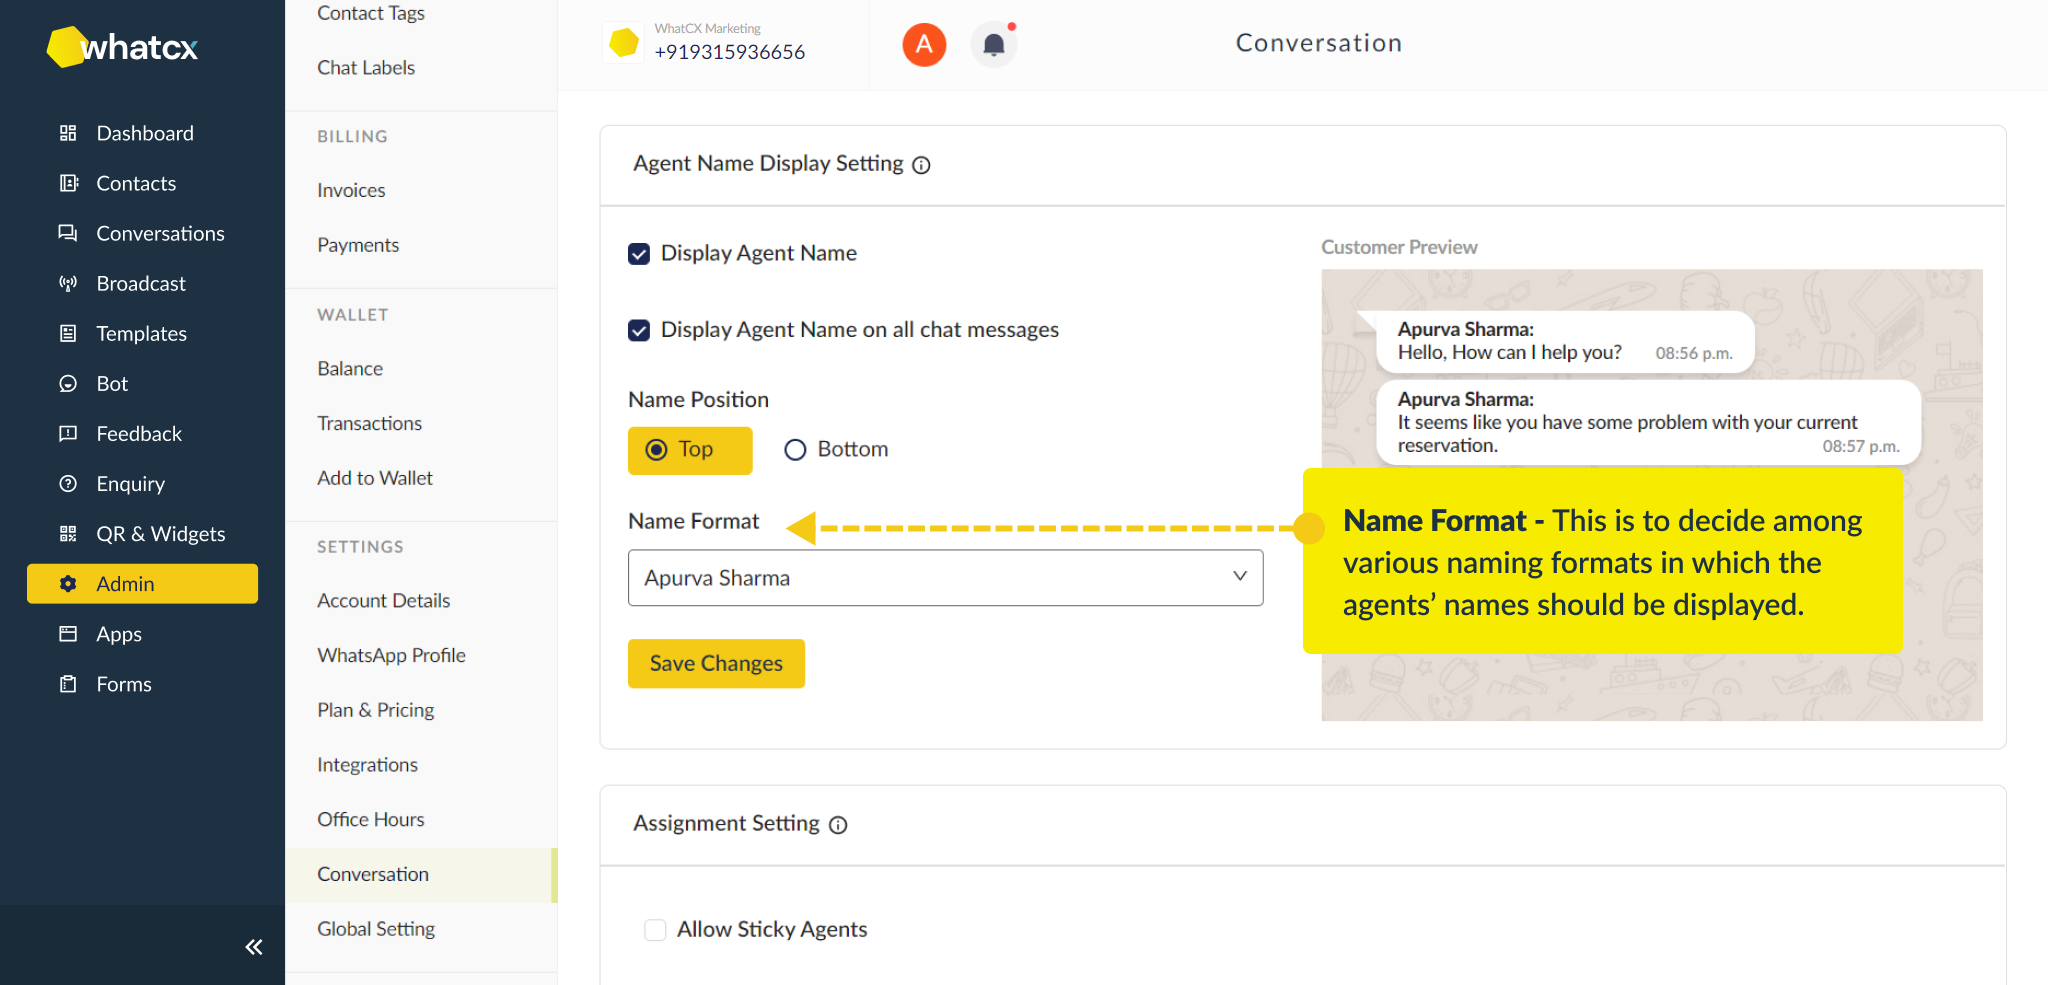
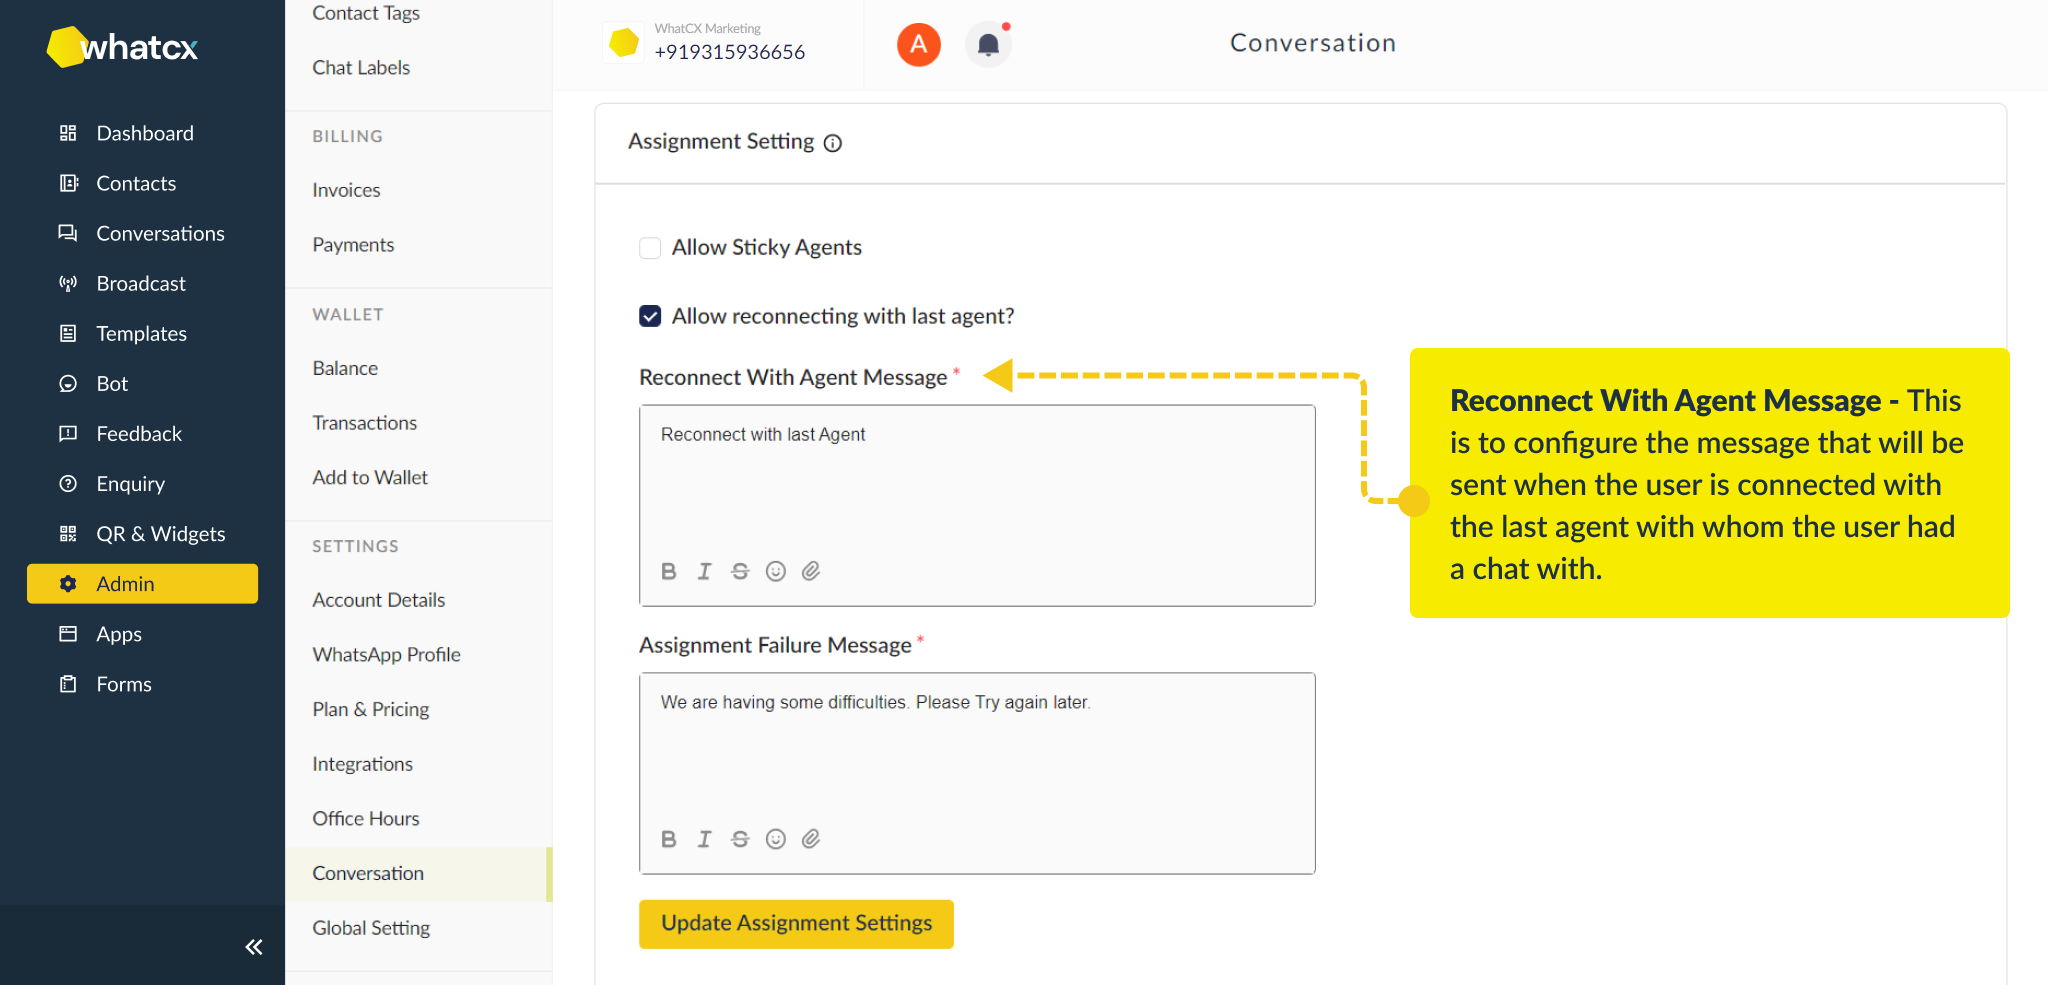
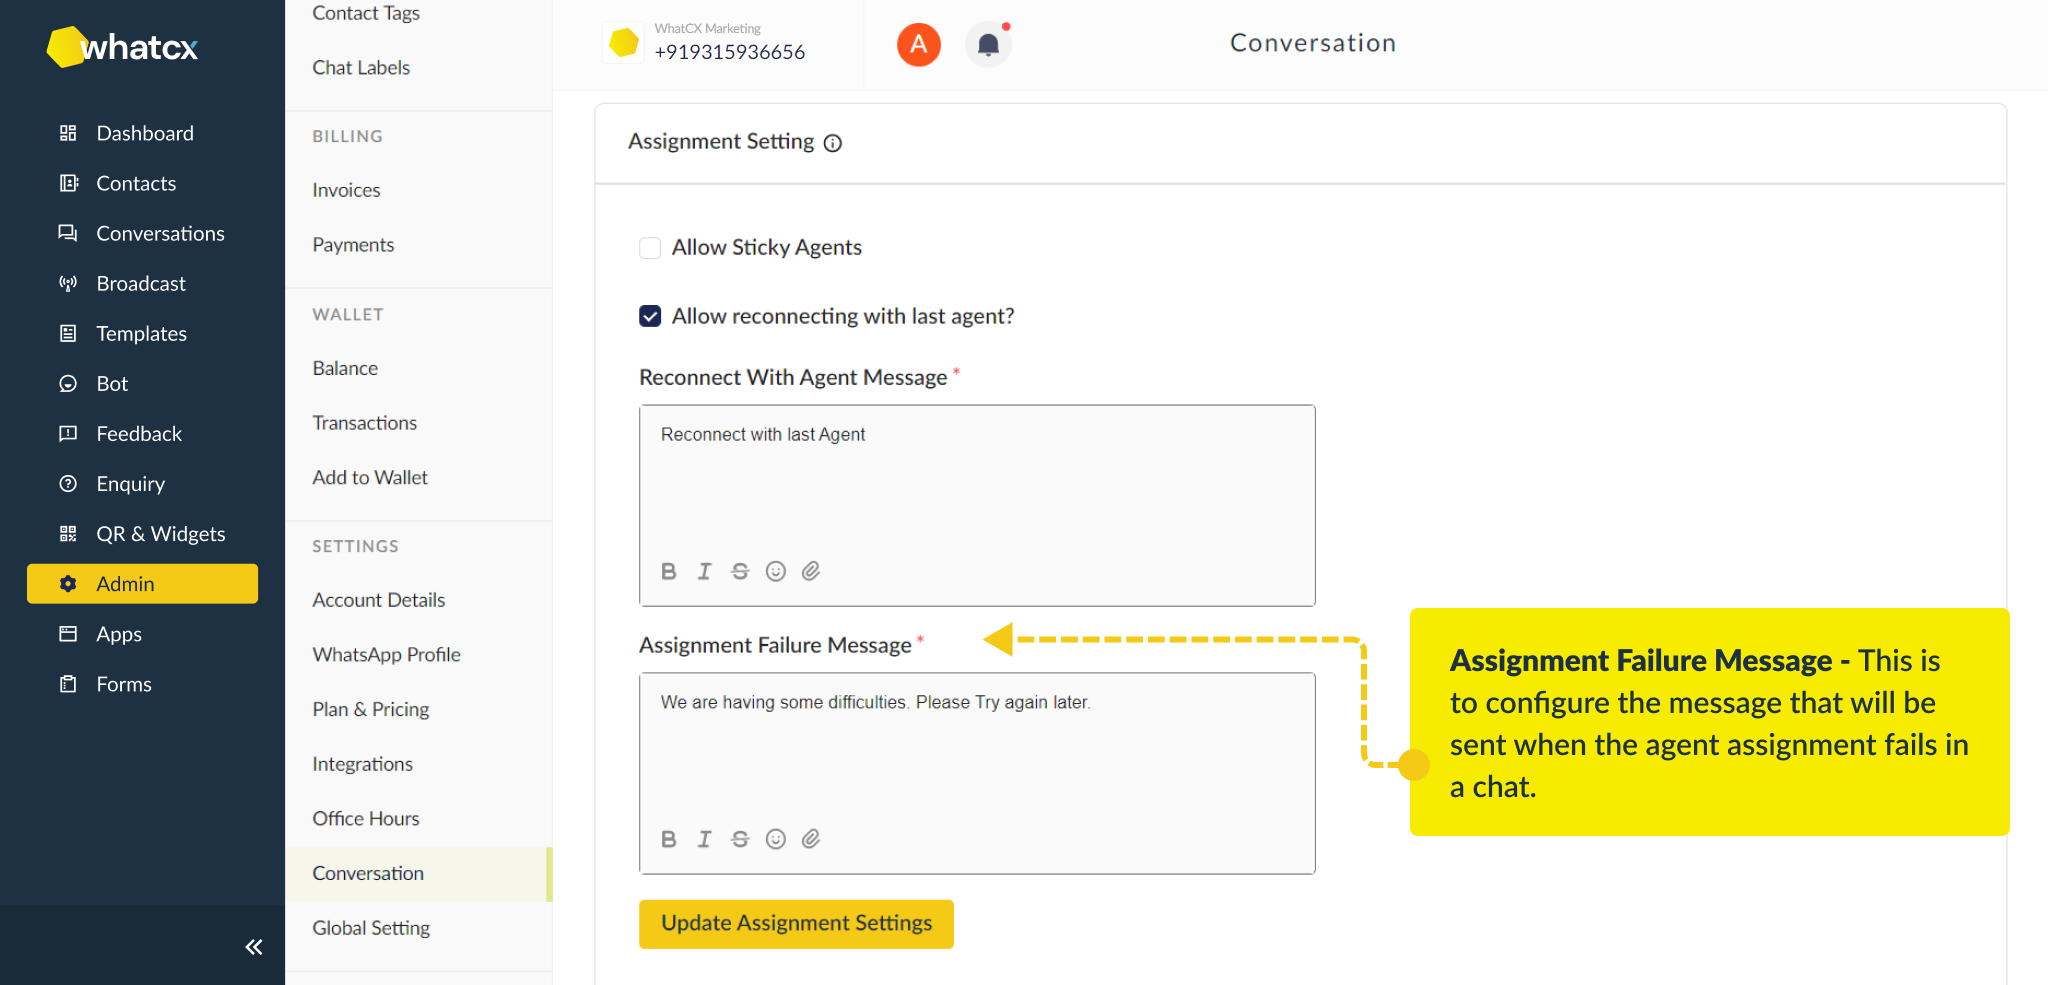
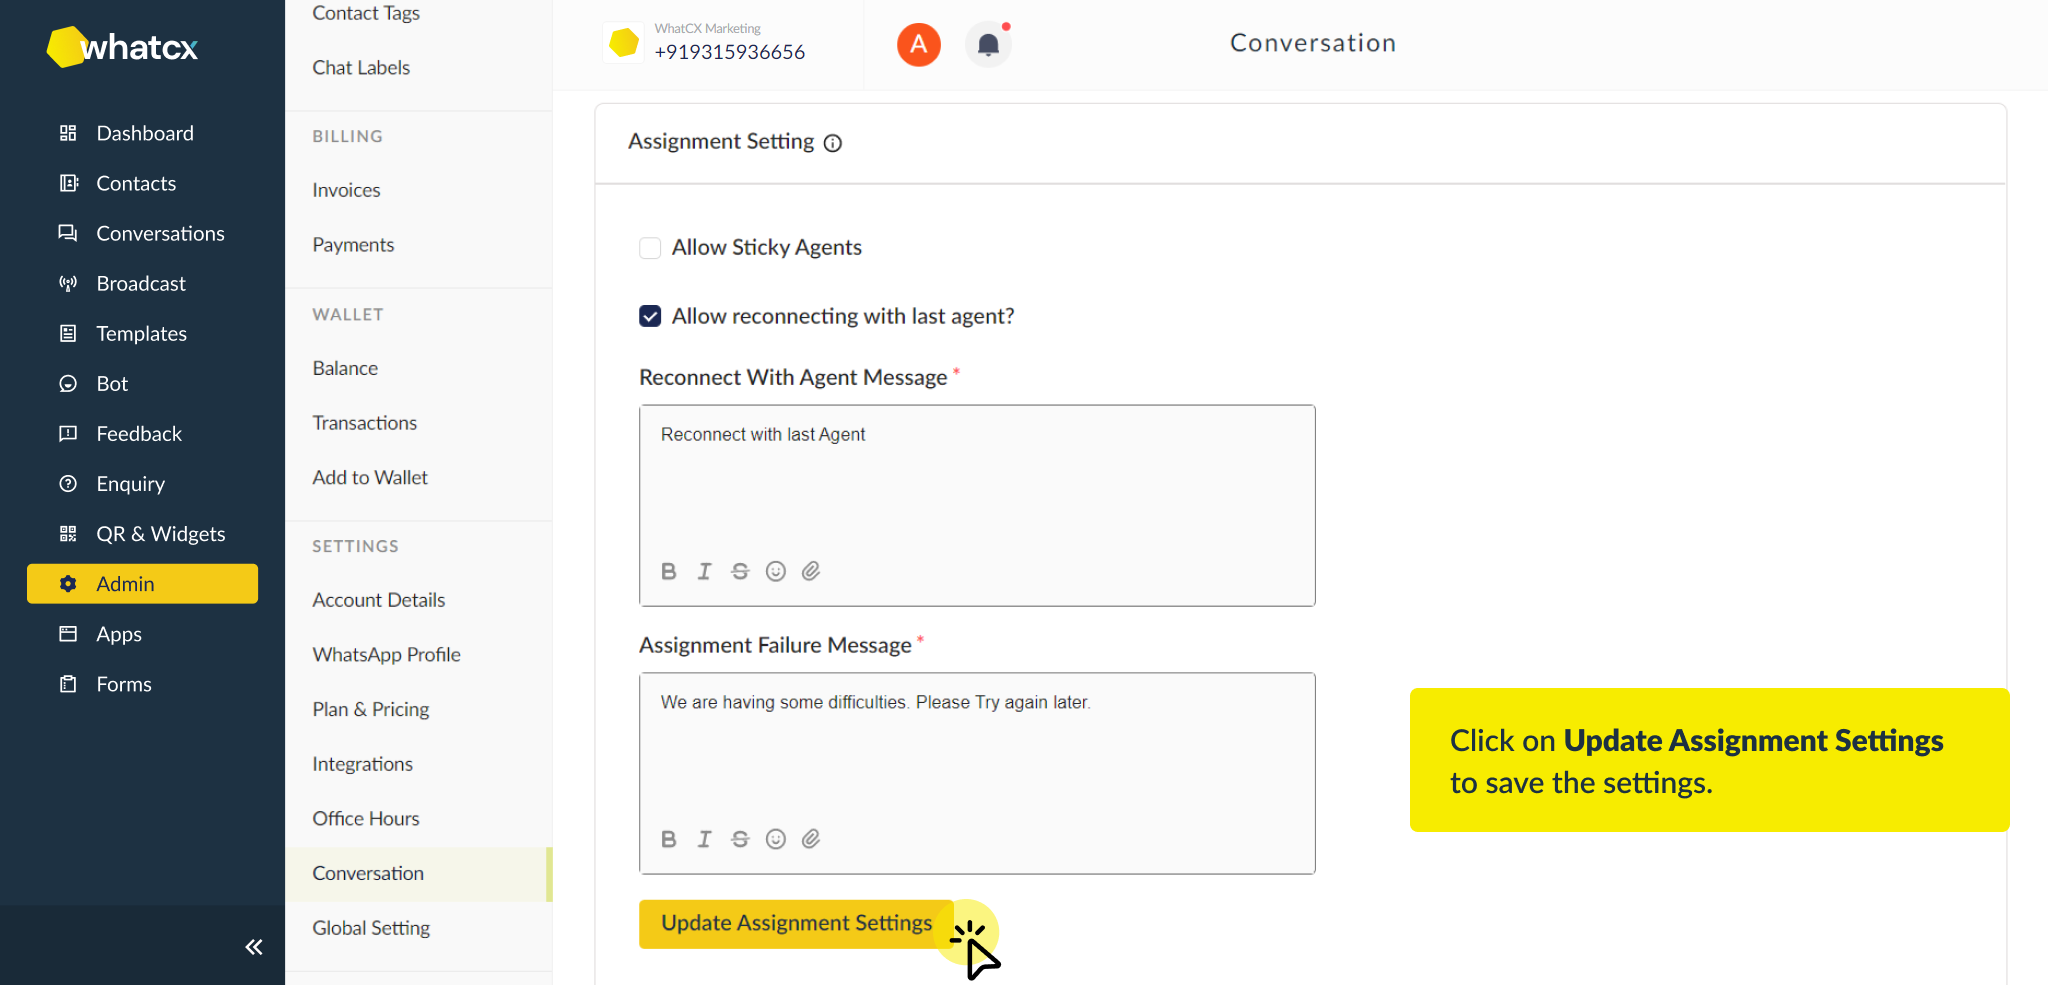
How to configure Conversations settings in Admin?
How to configure Global Settings?
How to configure Integrations?
How to Login to WhatCX?
Pre-requisites
What are the pre-requisites to start using the Free Plan?
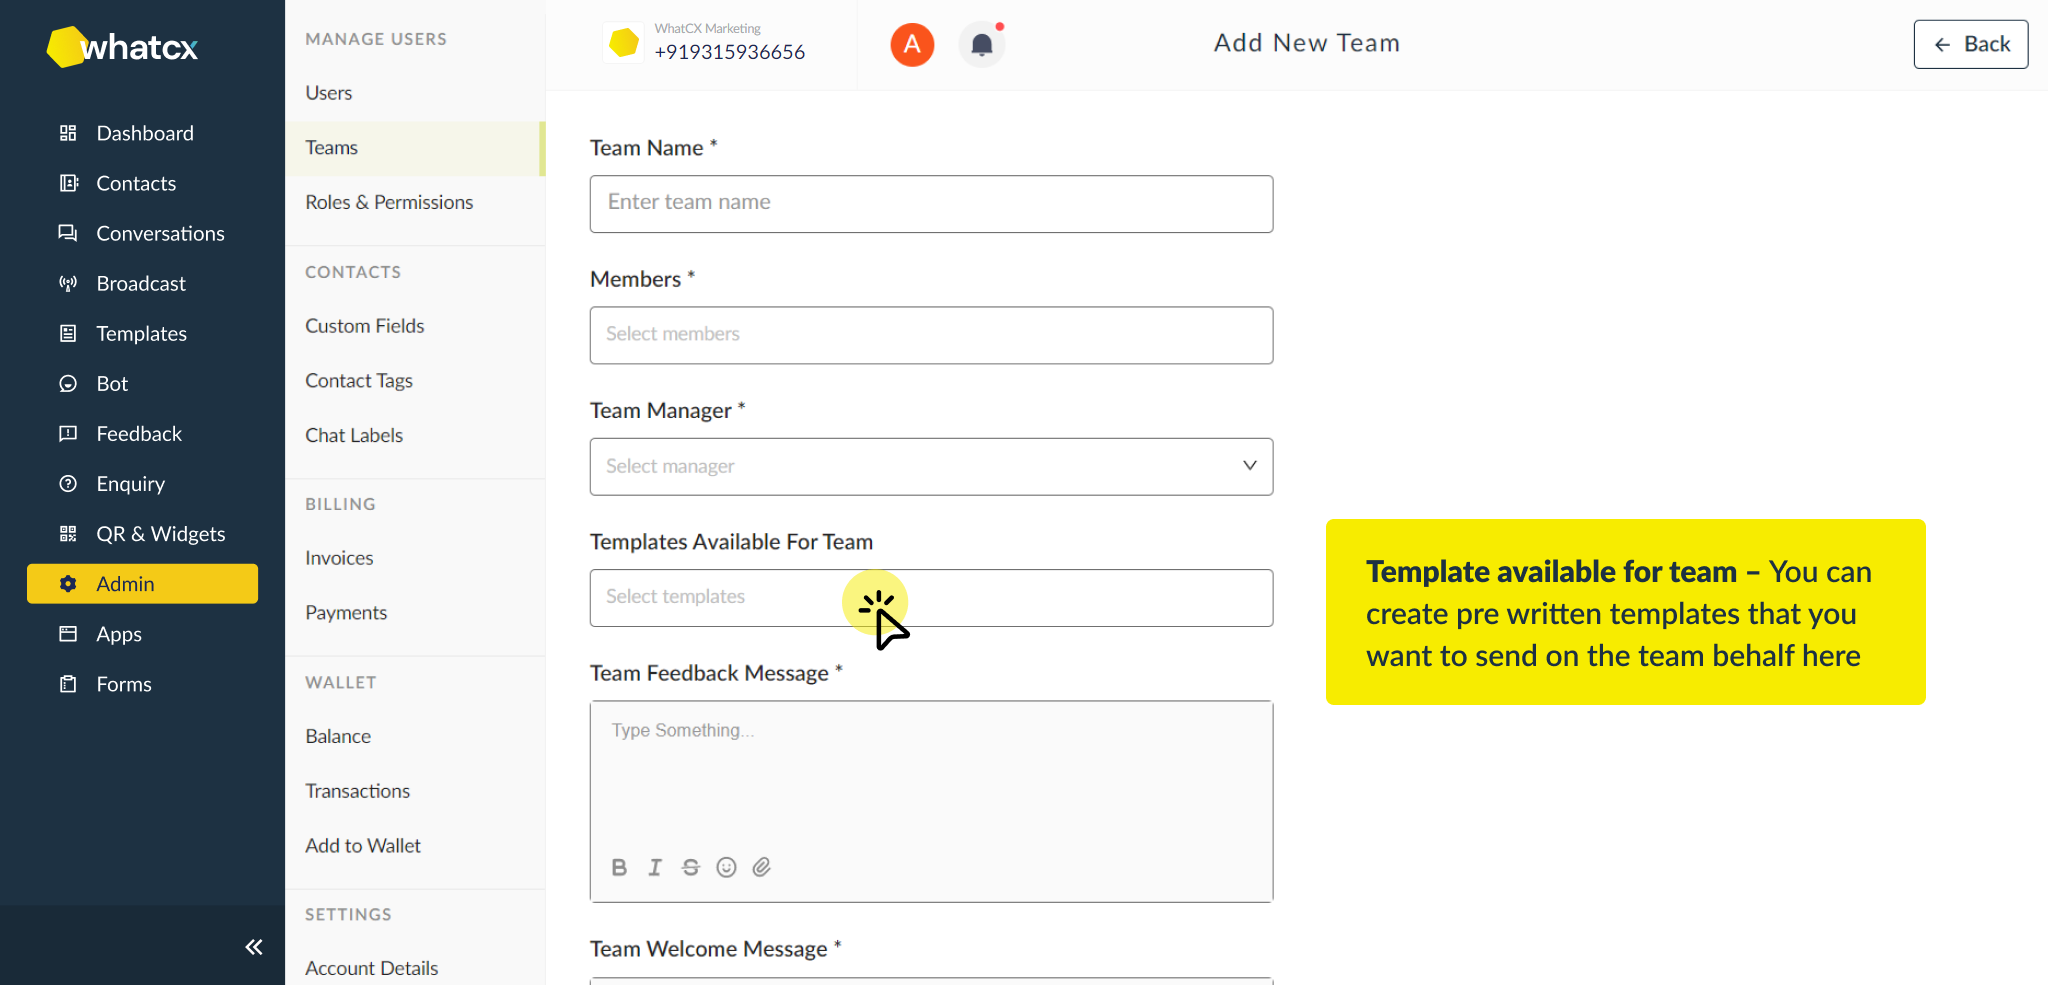
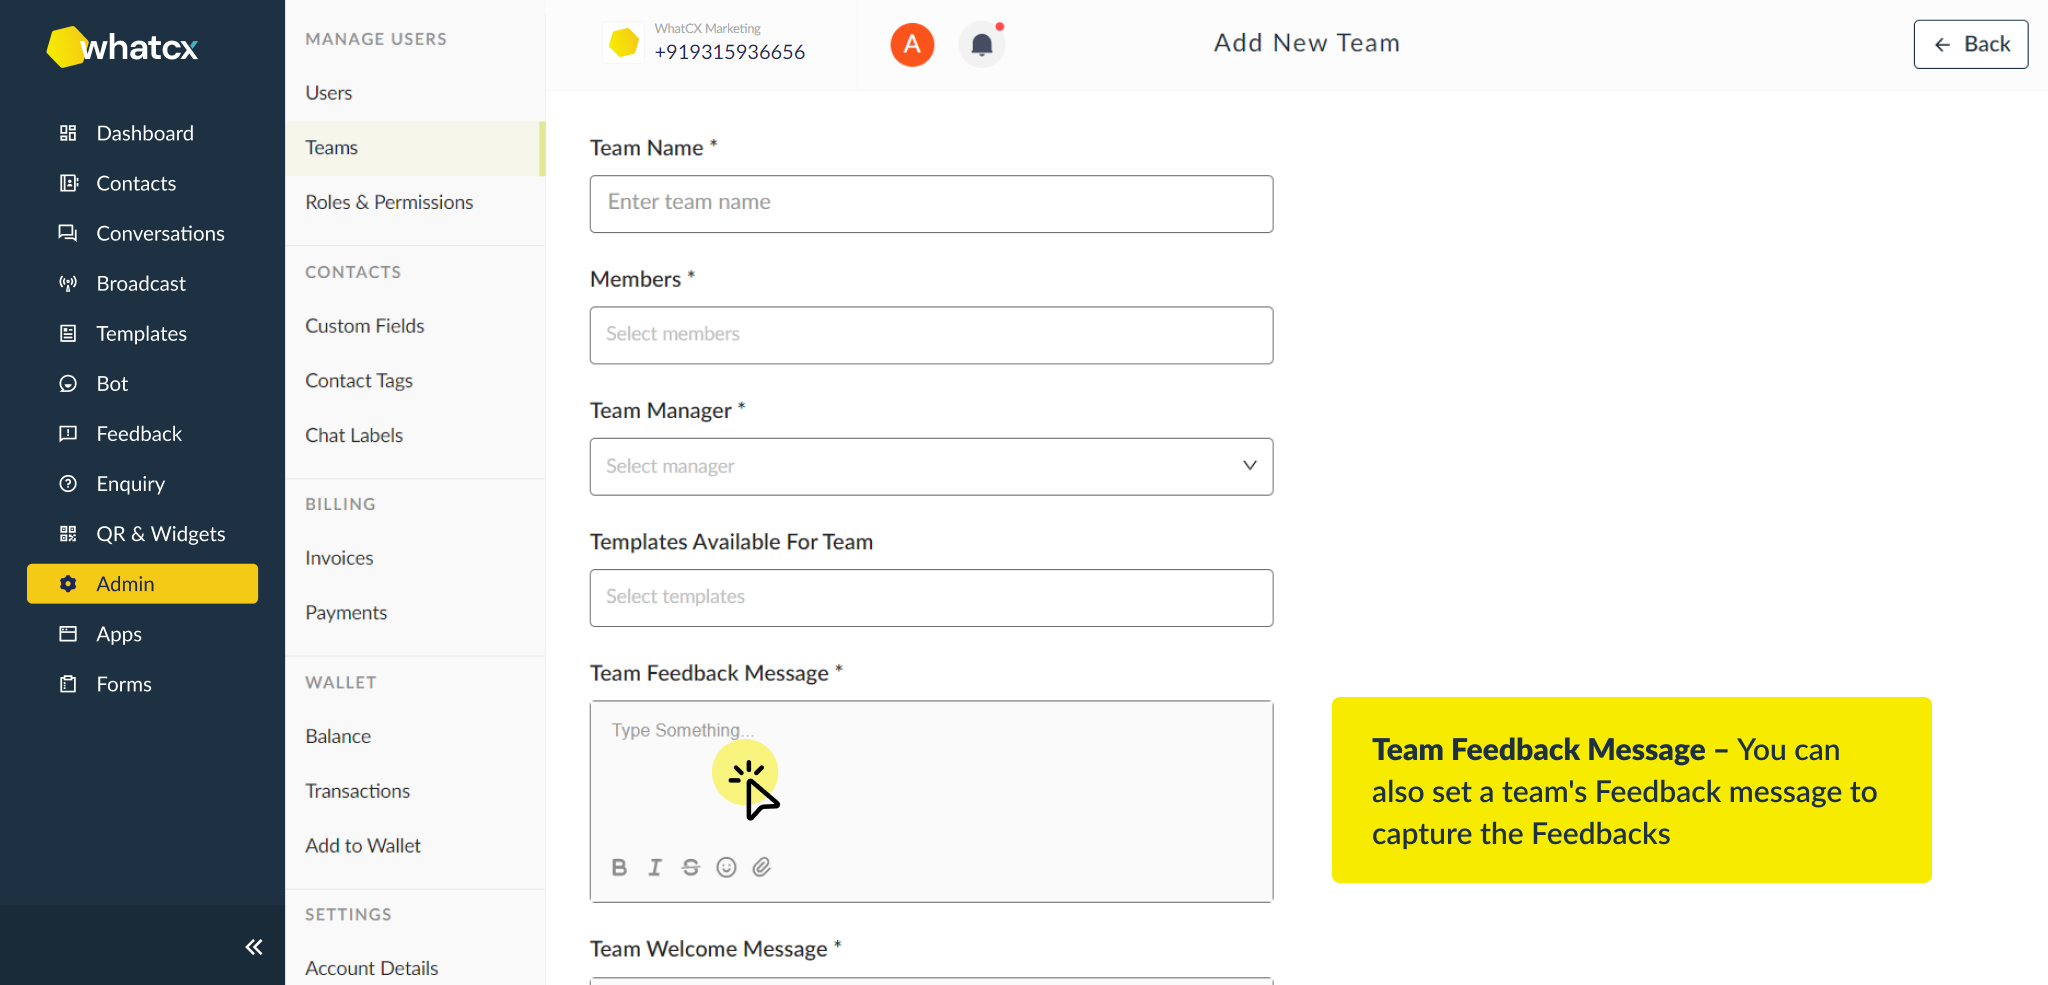
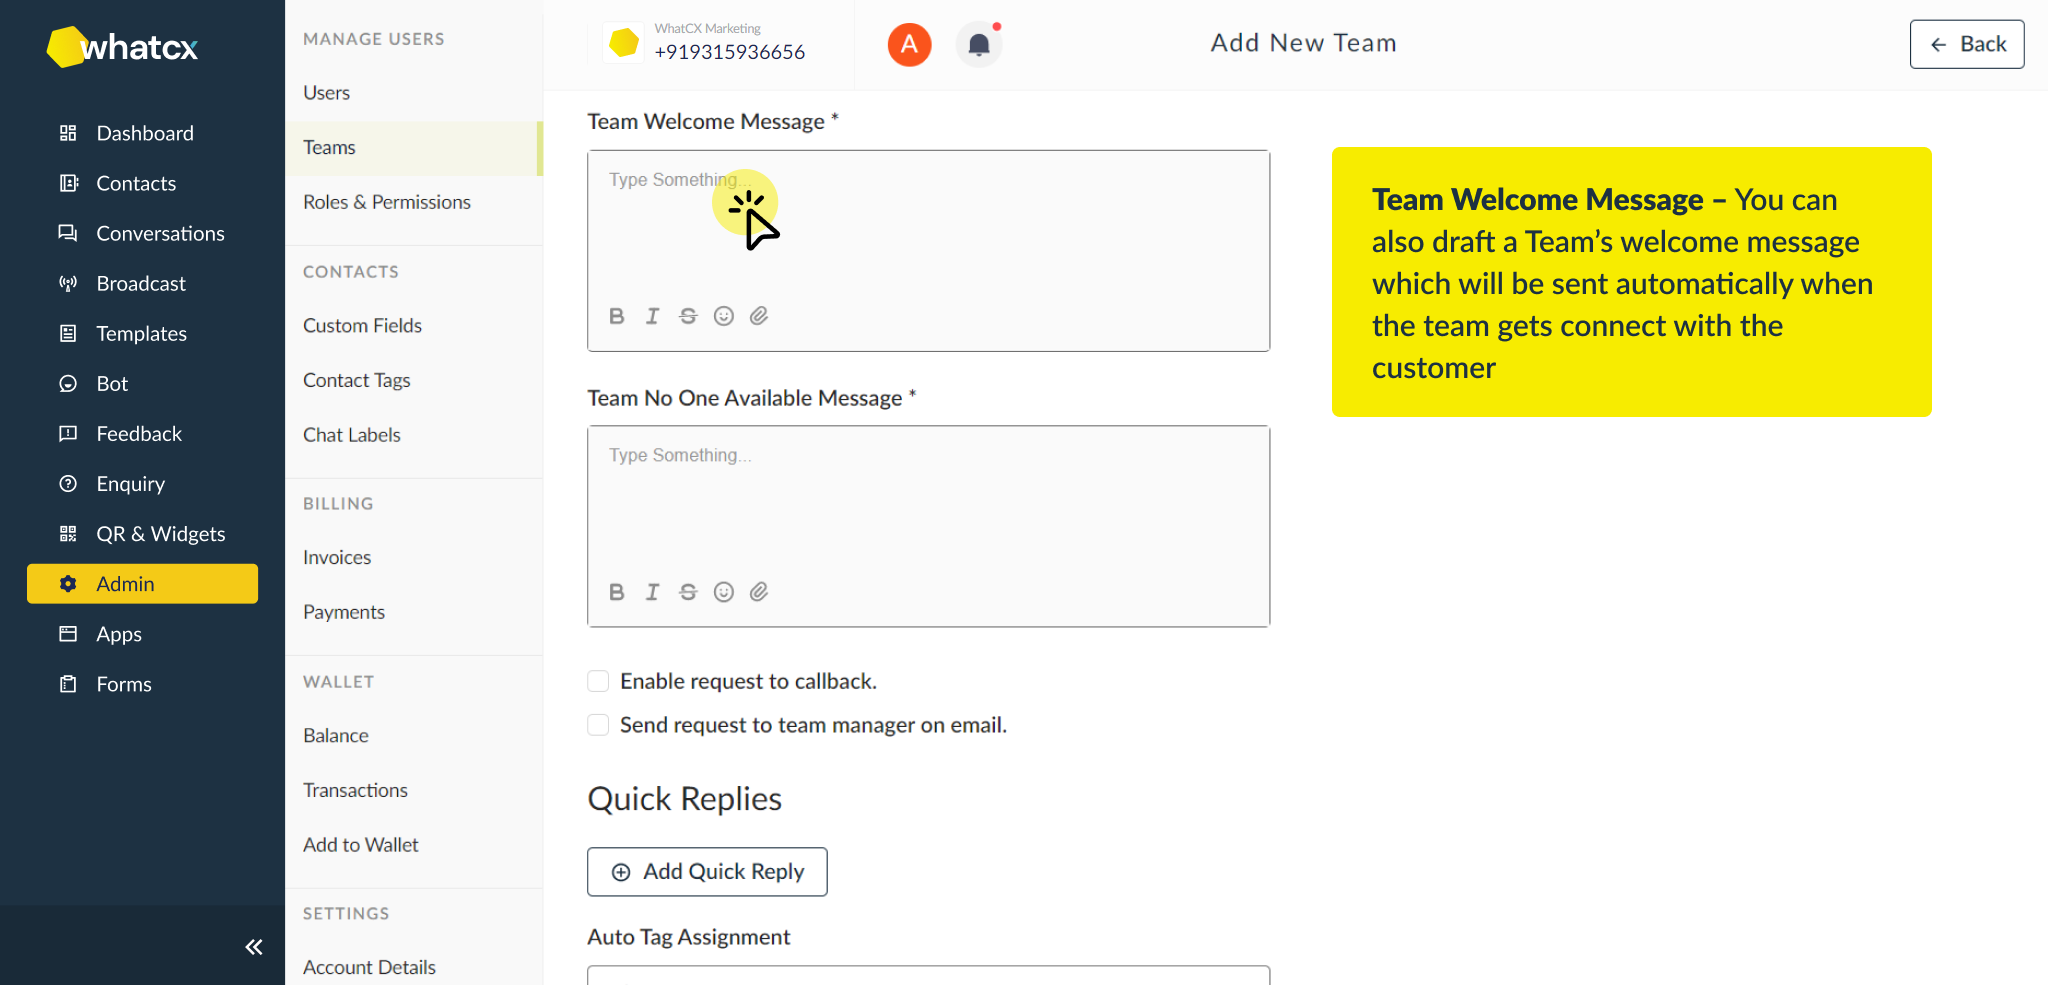
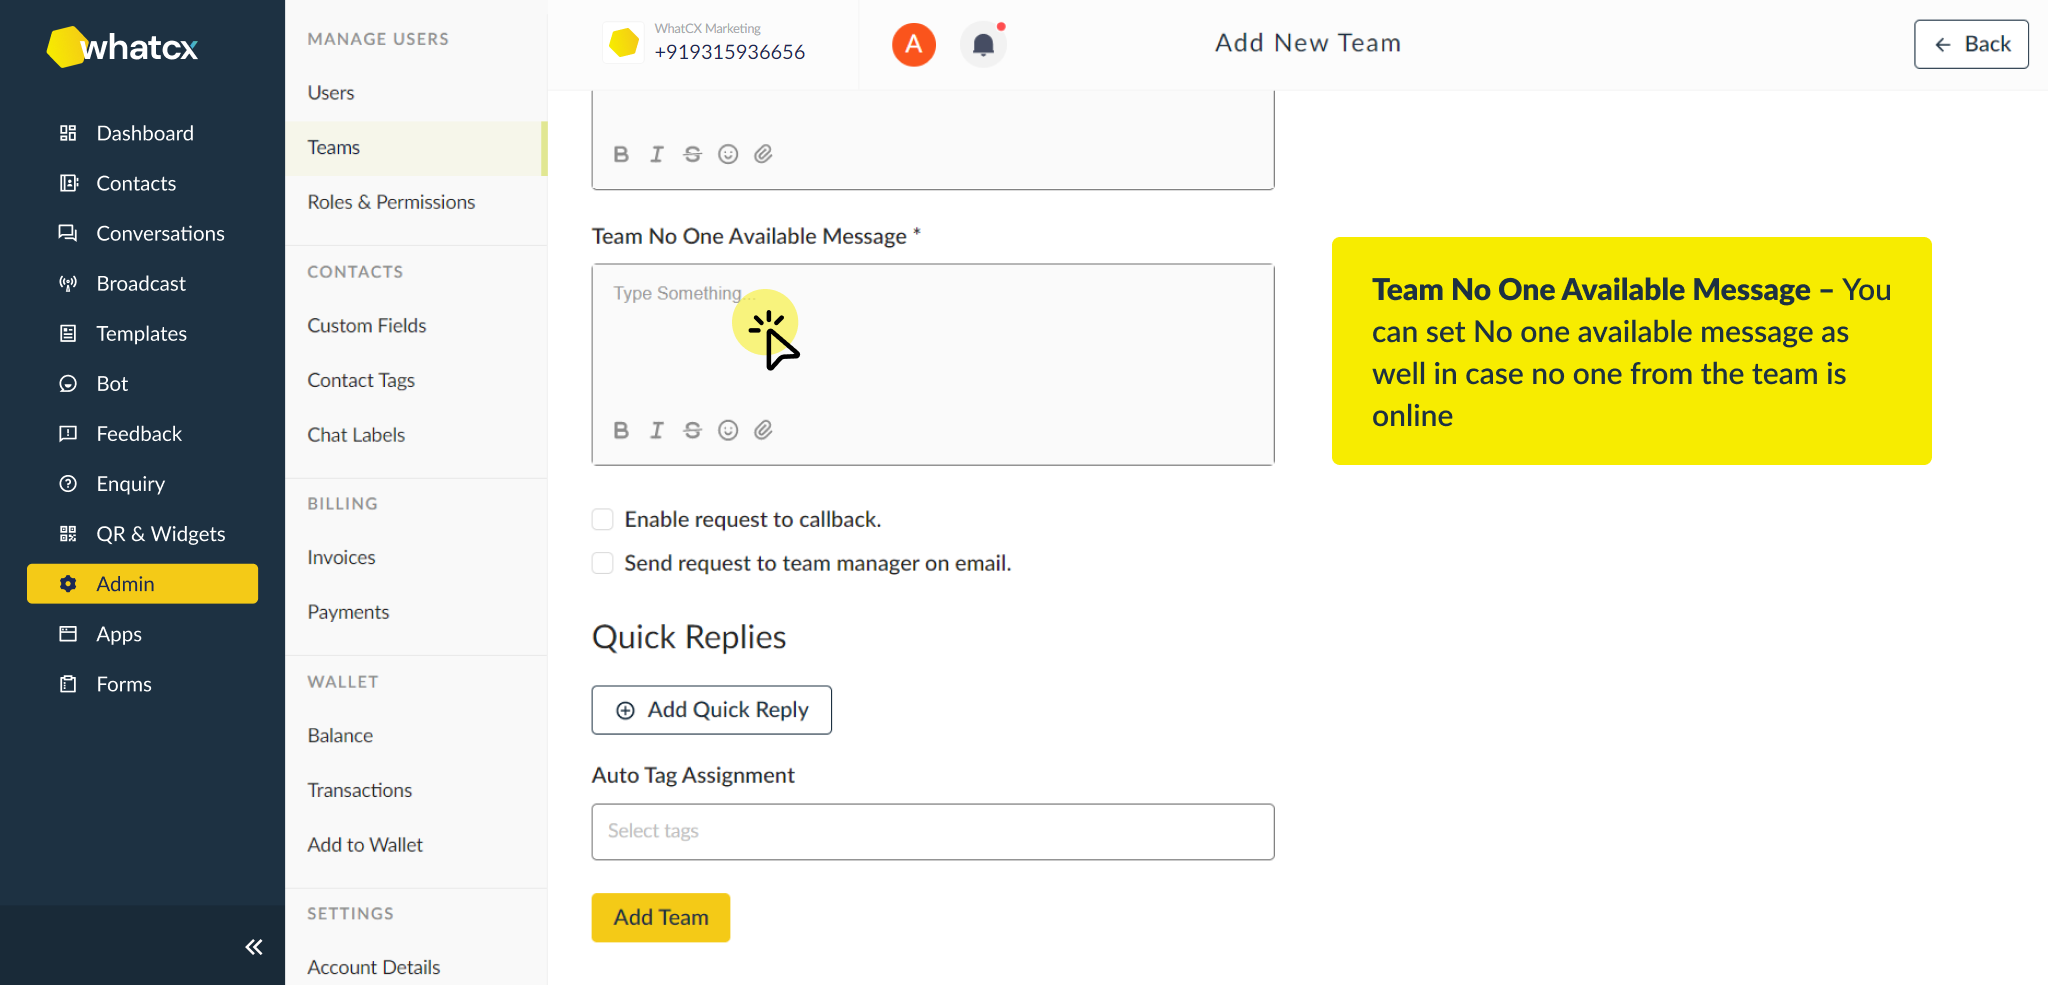
Invite Users & Setup Teams
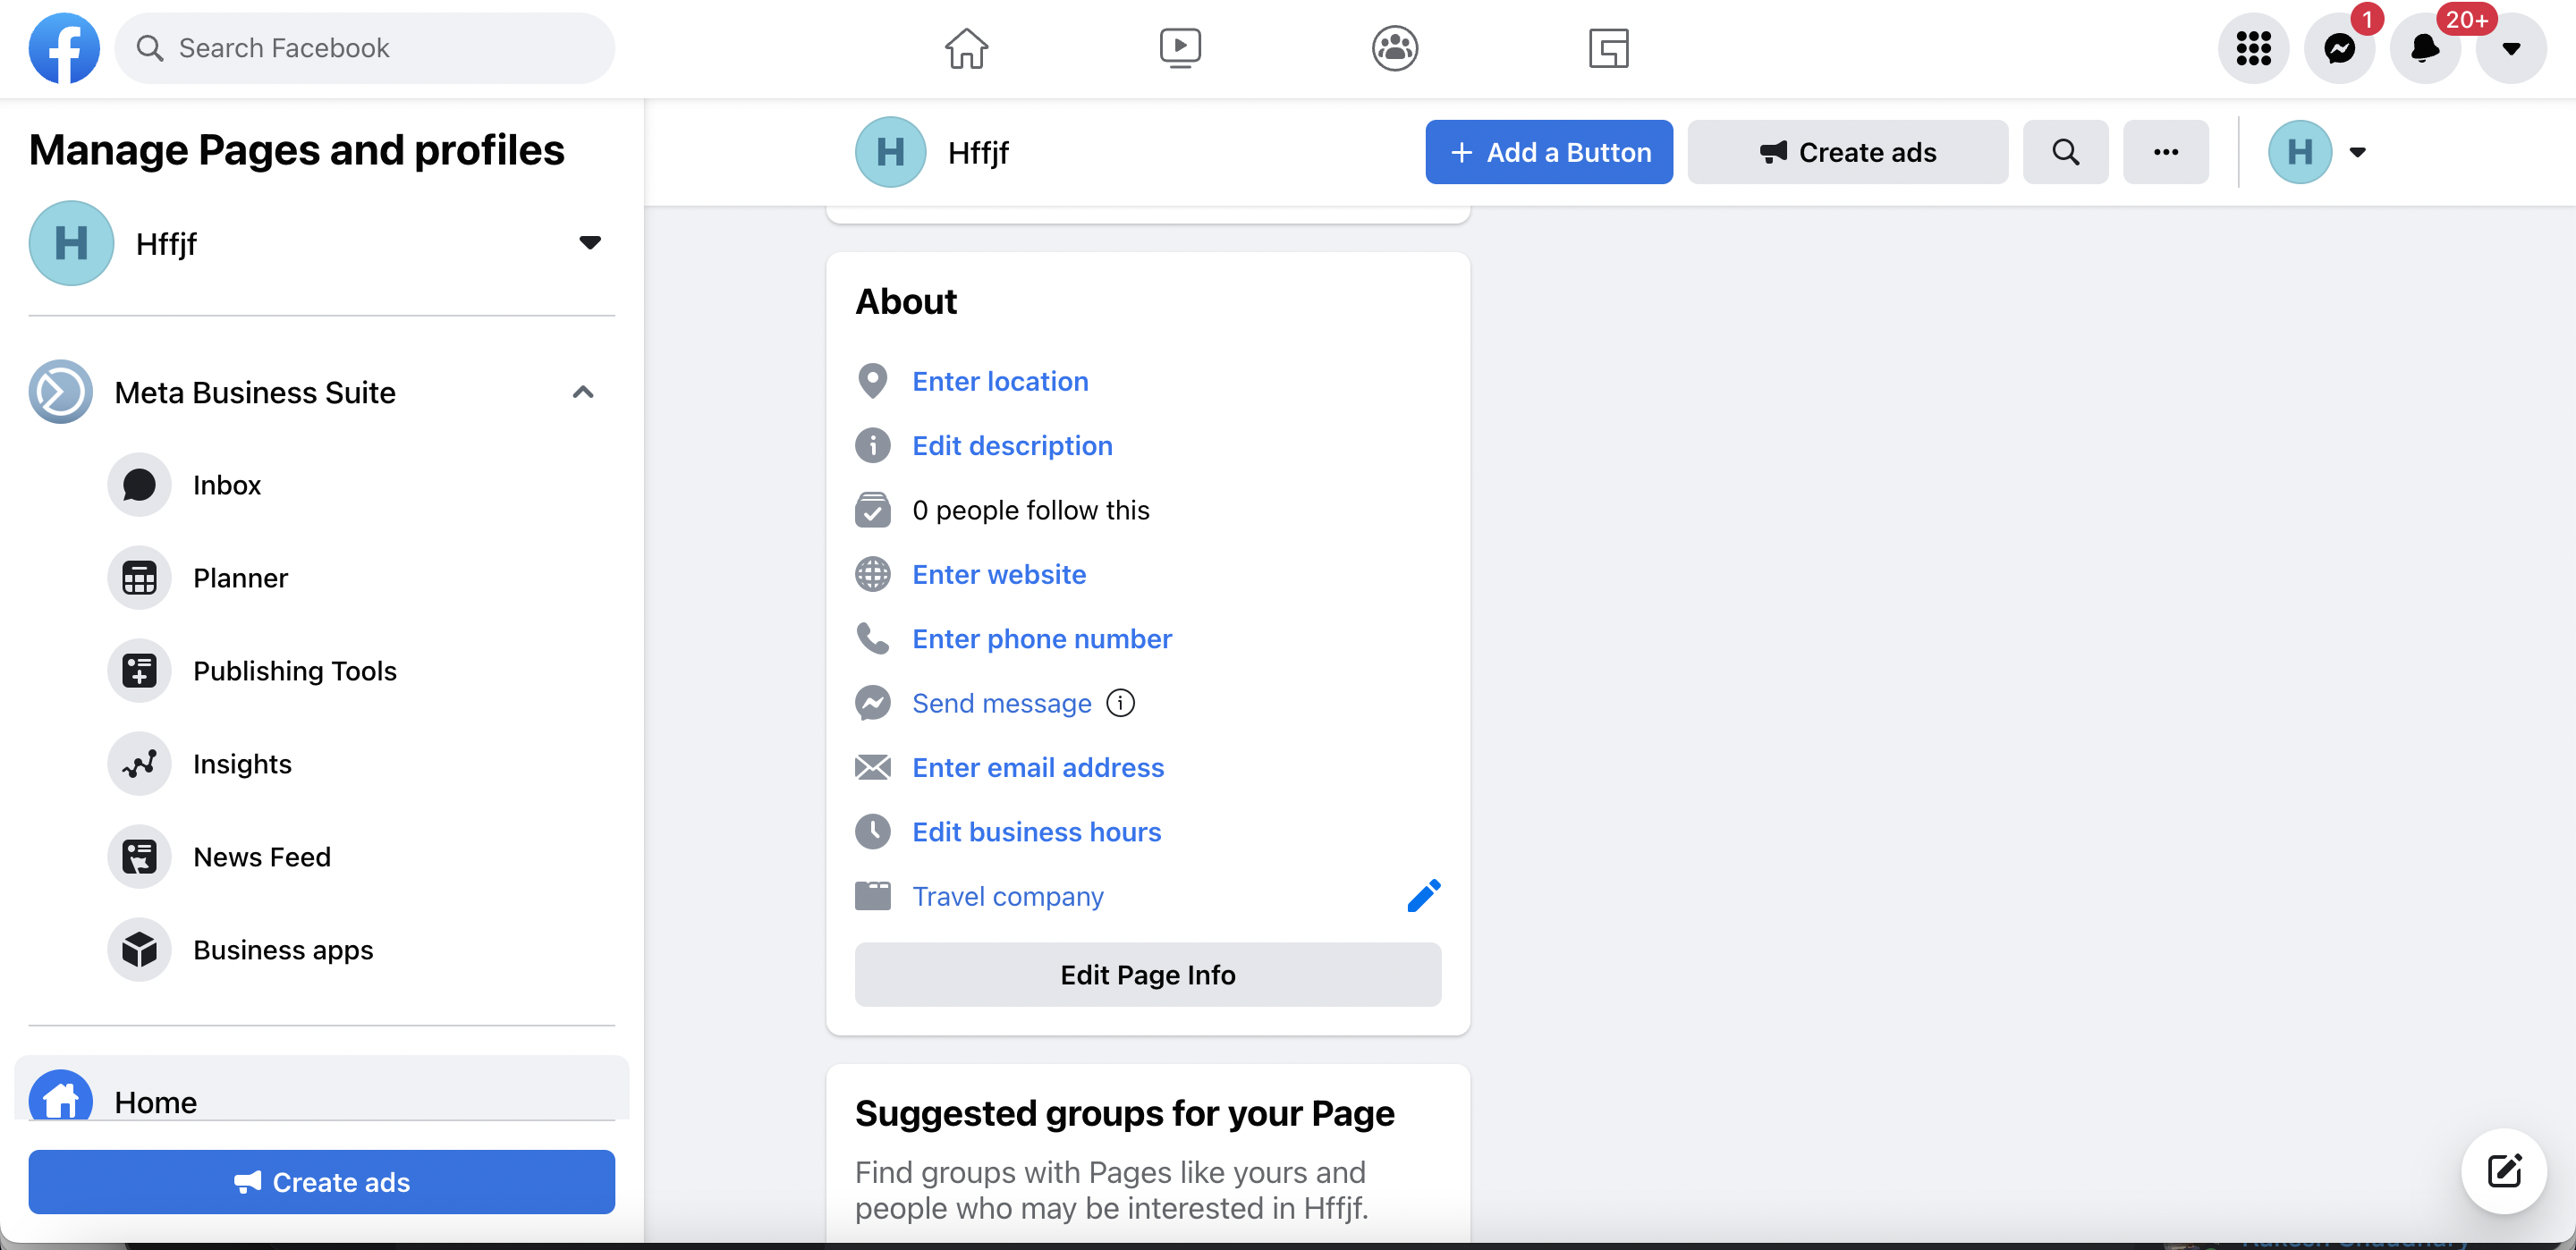
How to create FB Business Page?
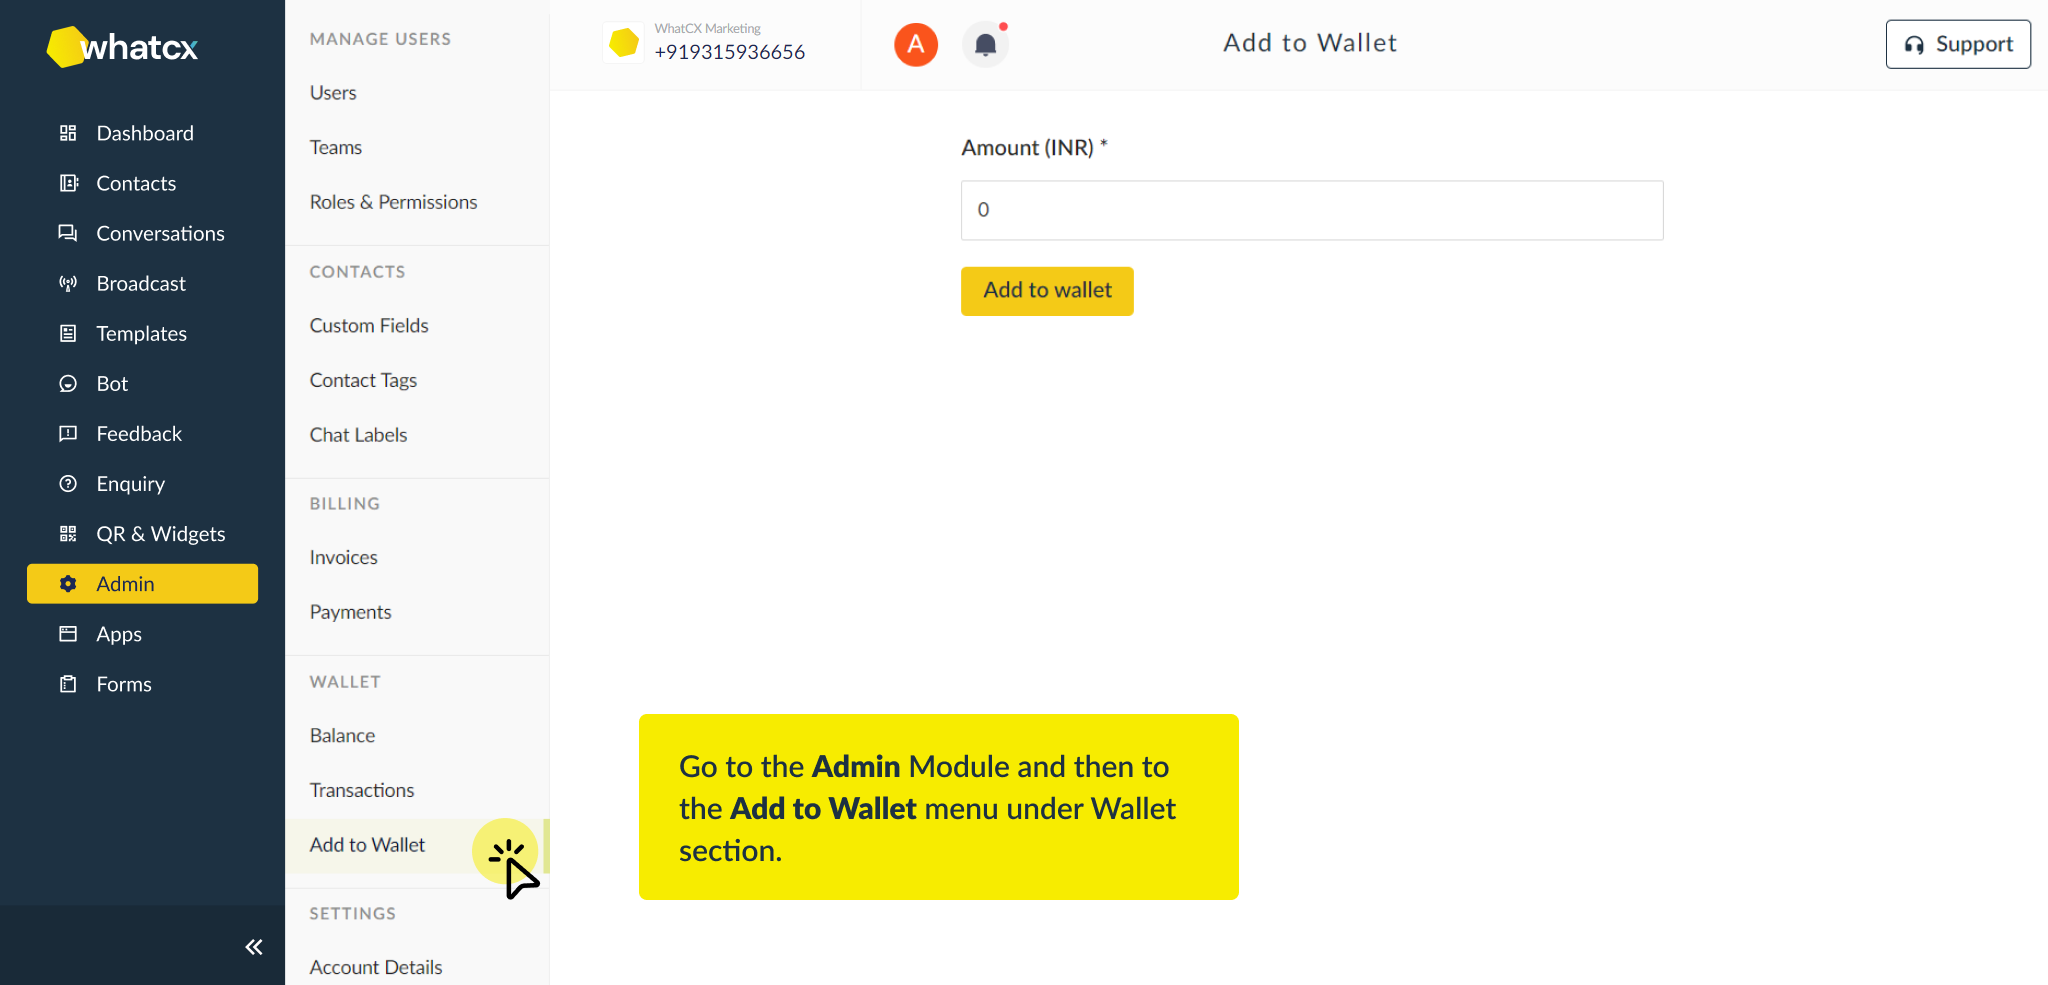
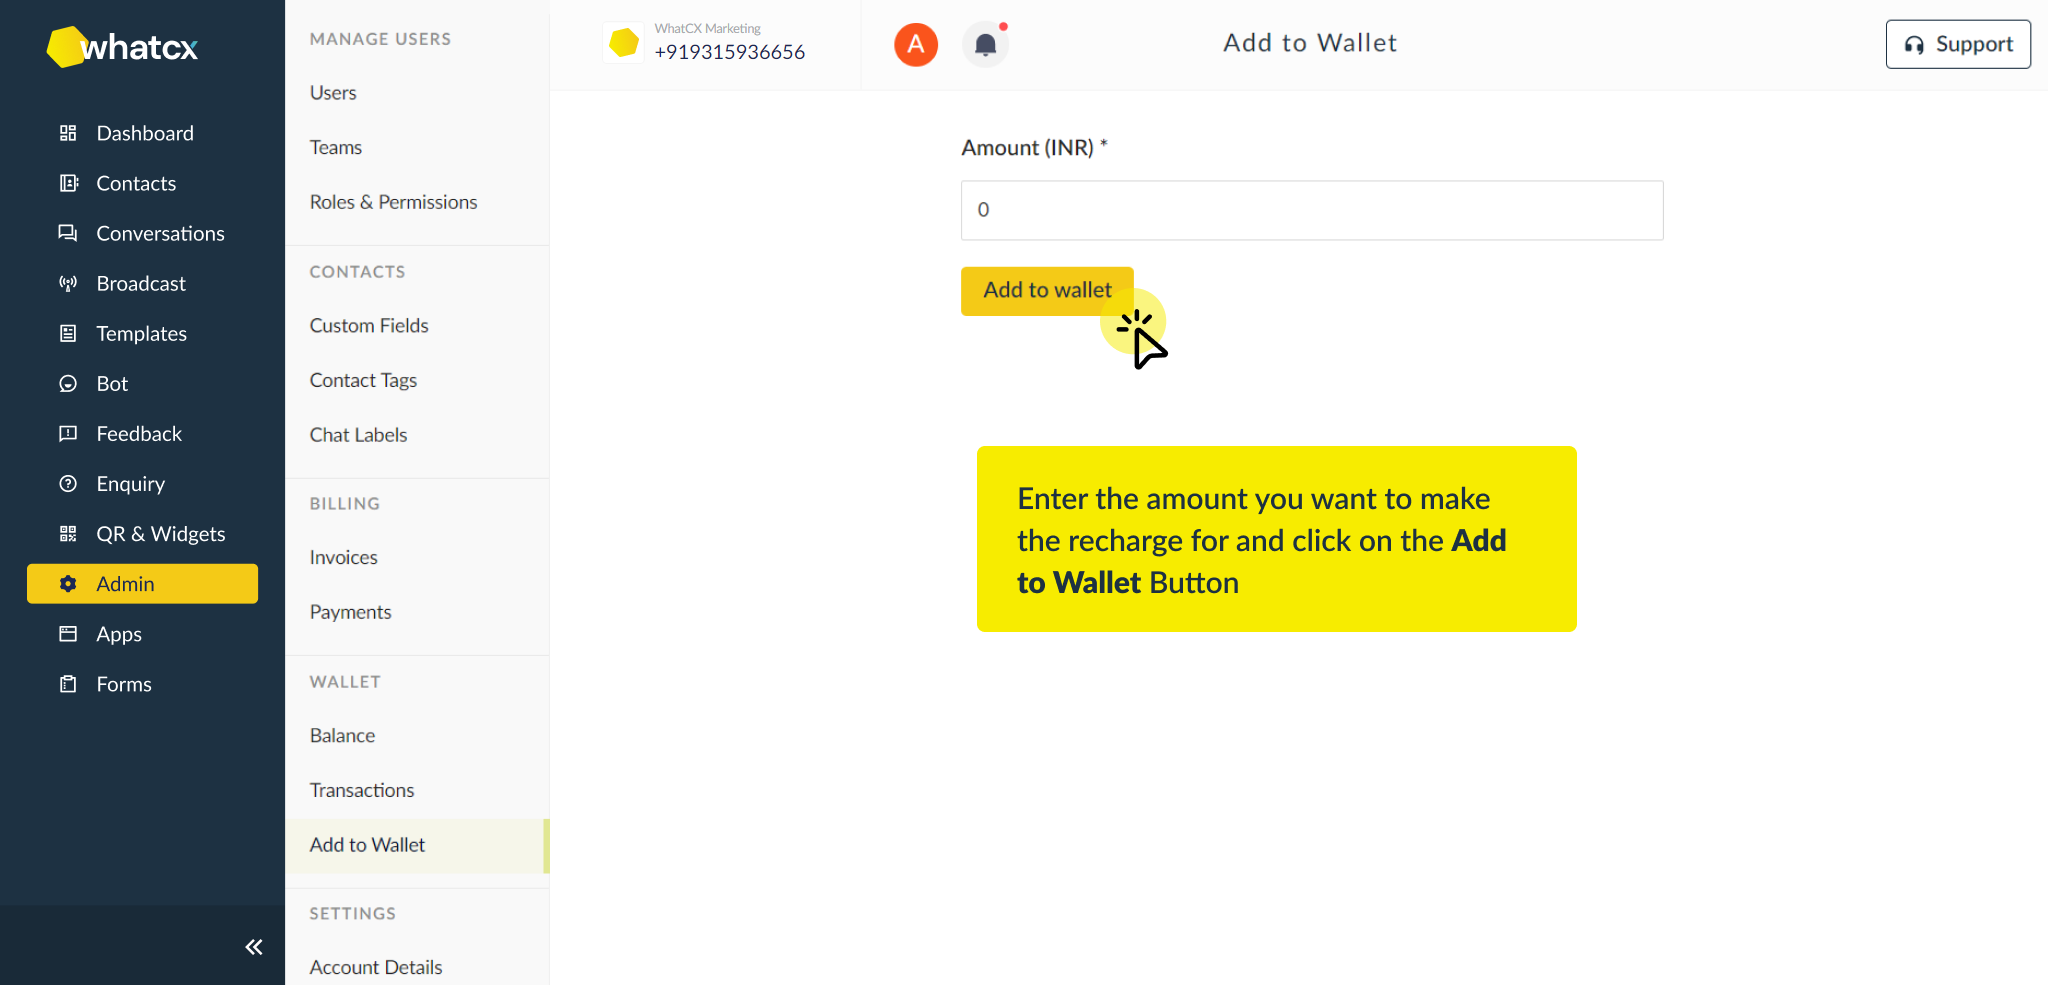
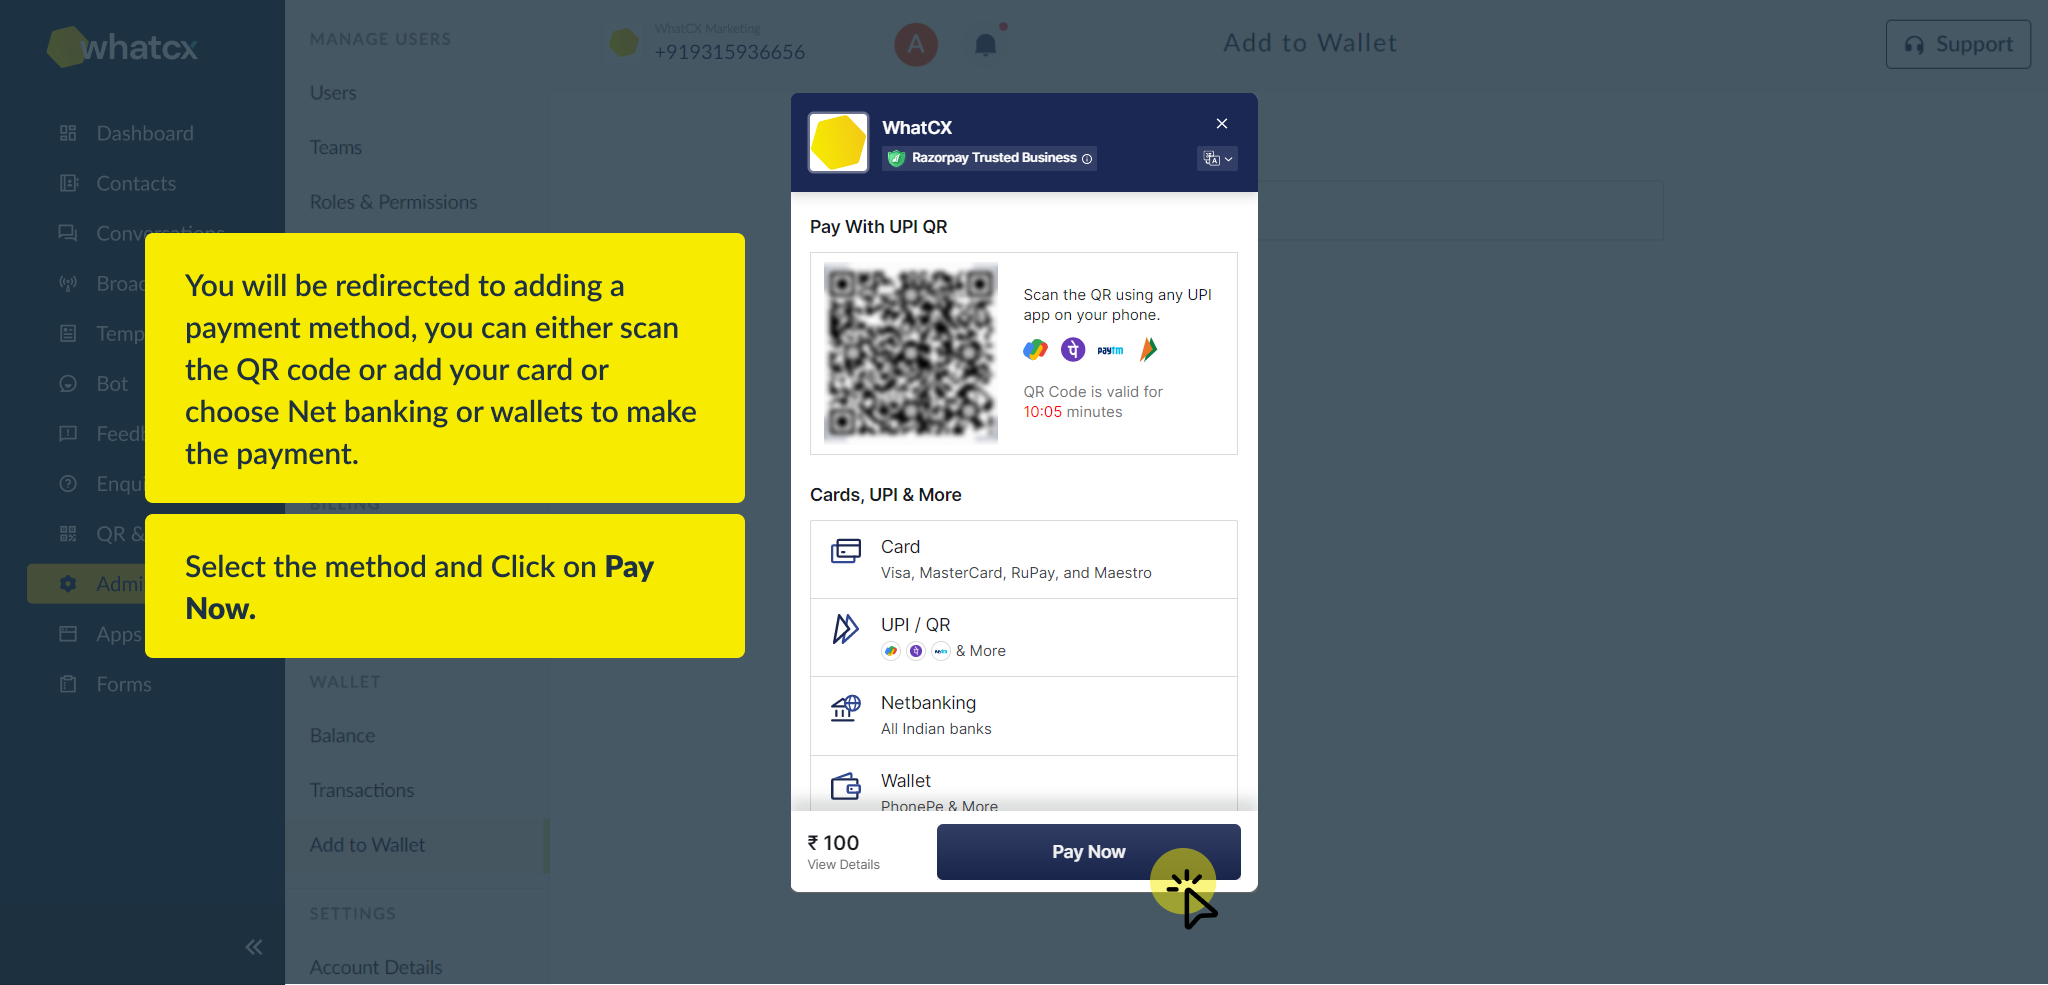
Add money to your Wallet
How to register?
How to reset your WhatCX account password?
How to apply Advance Filters and create a Contact List?
How to connect a FB Business Page to FB Business Manager?
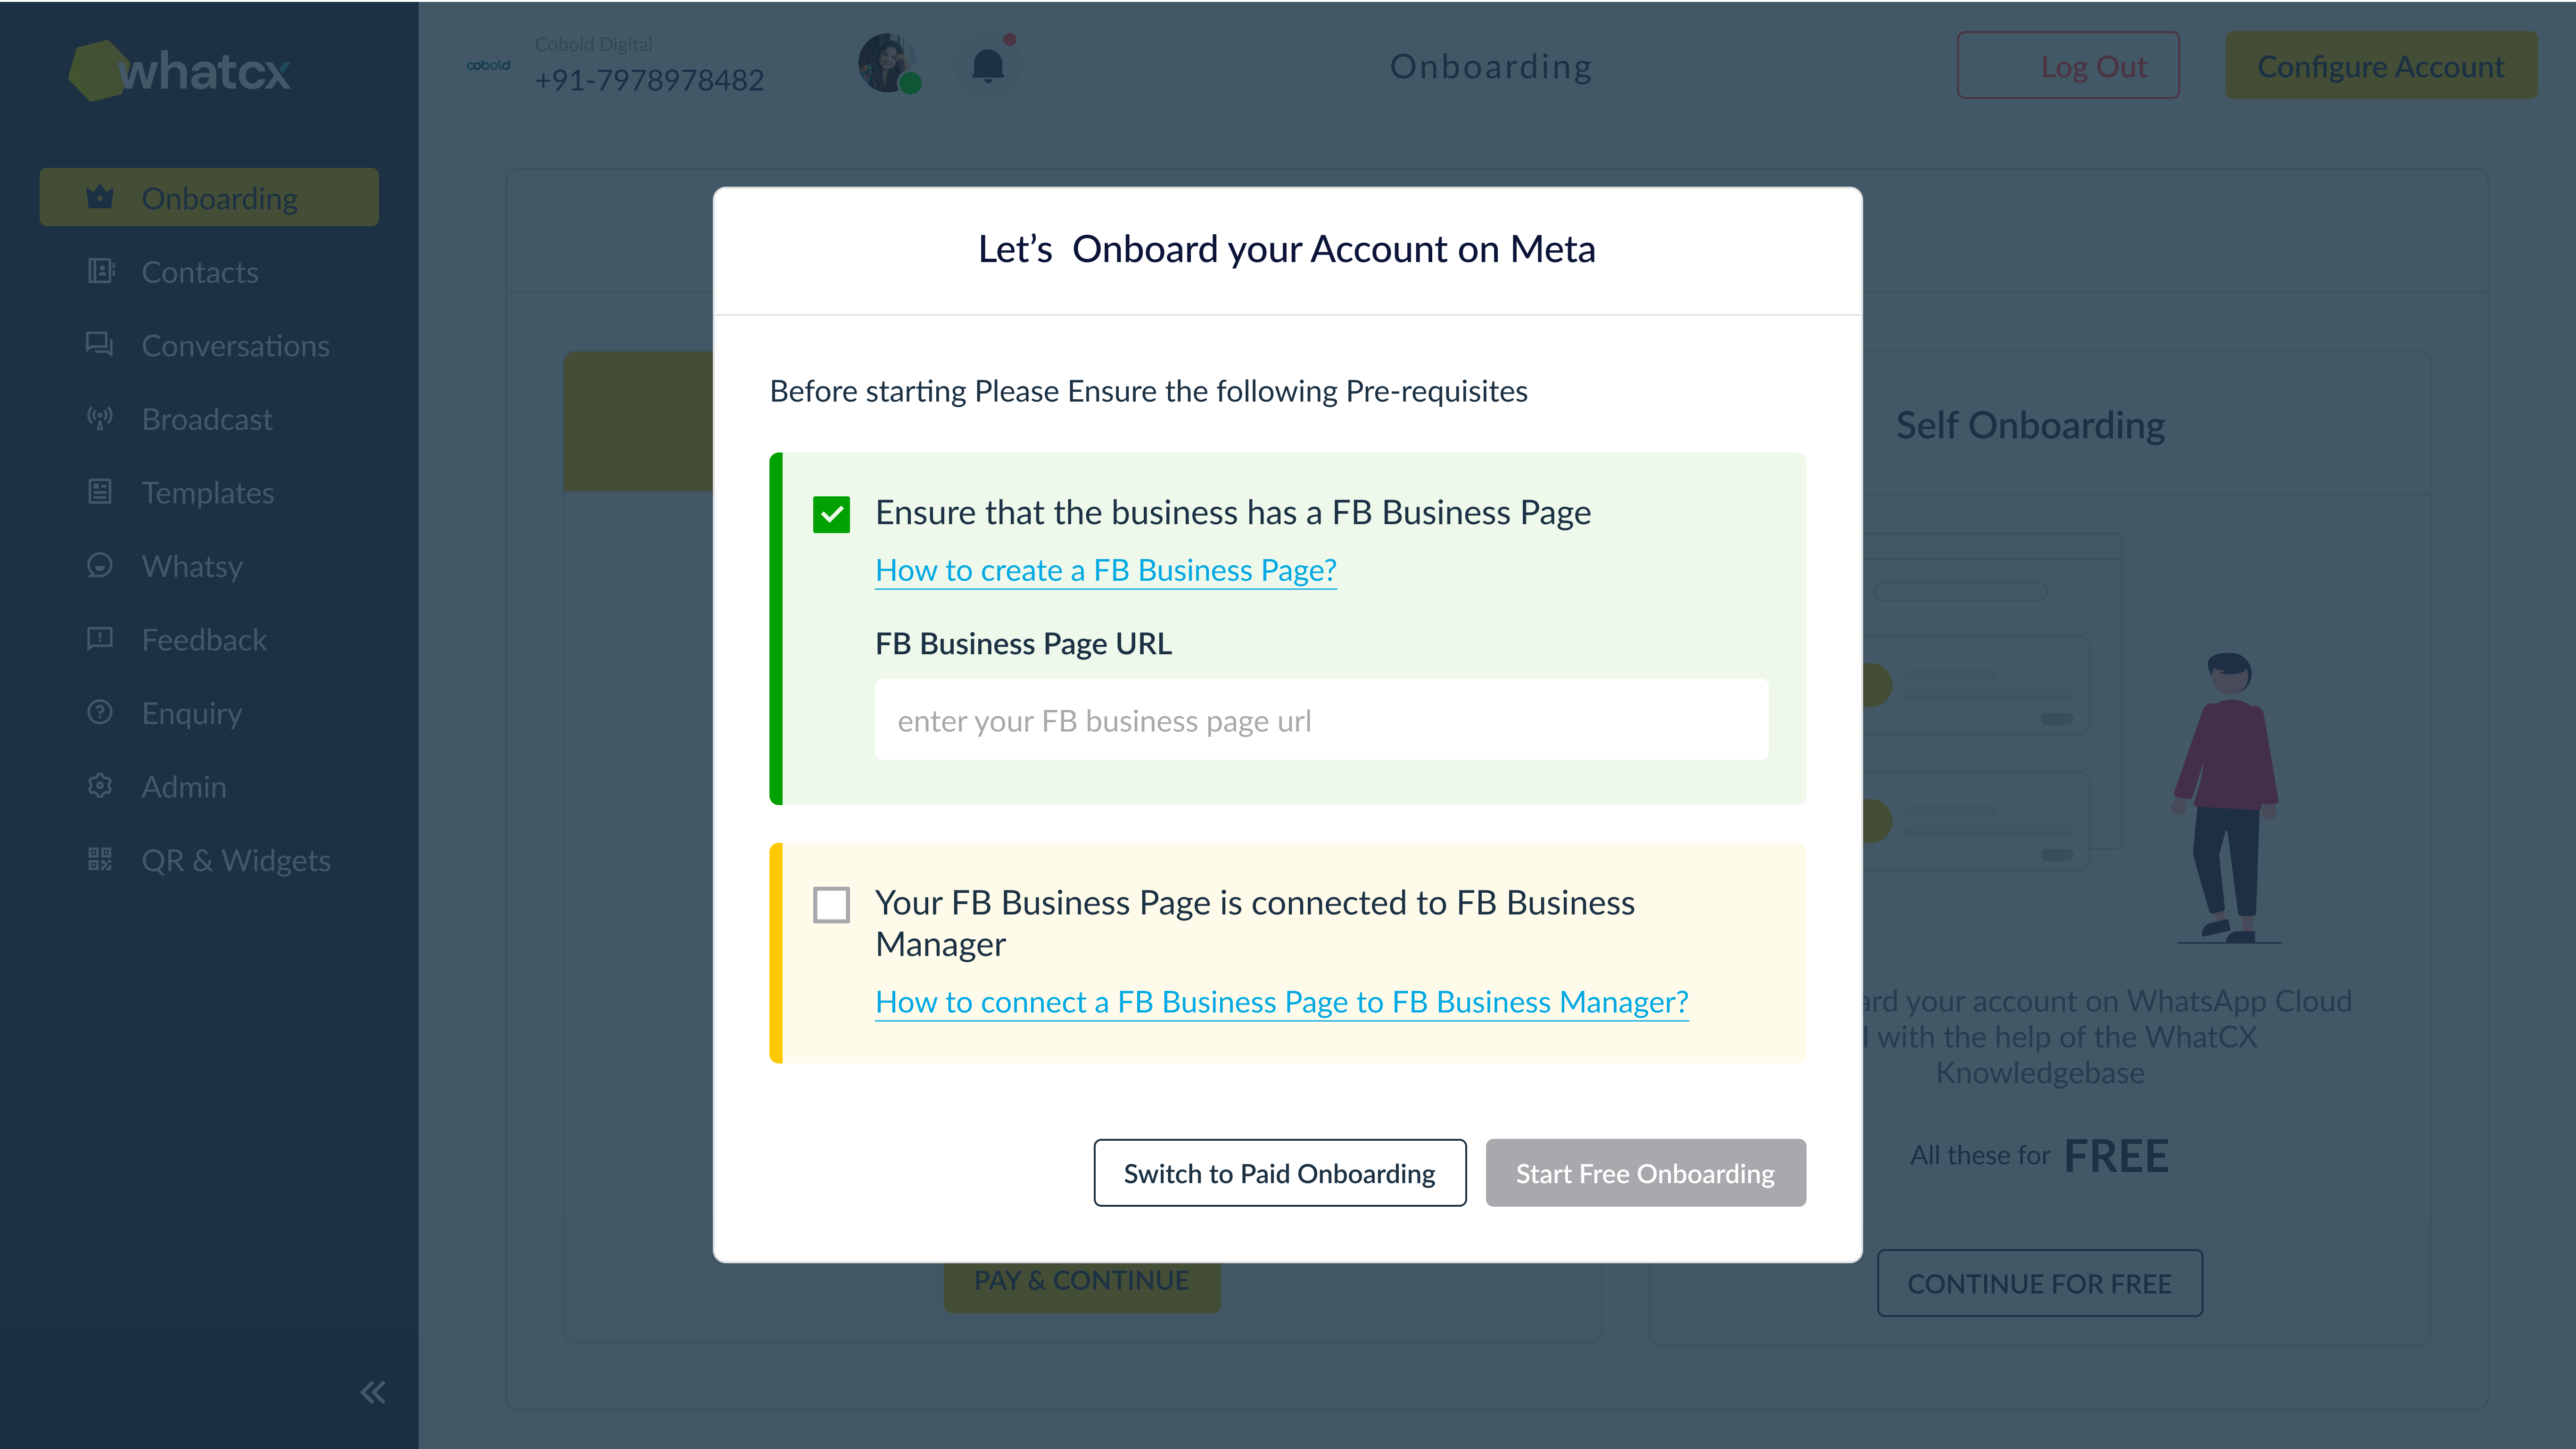
Onboarding Requirements
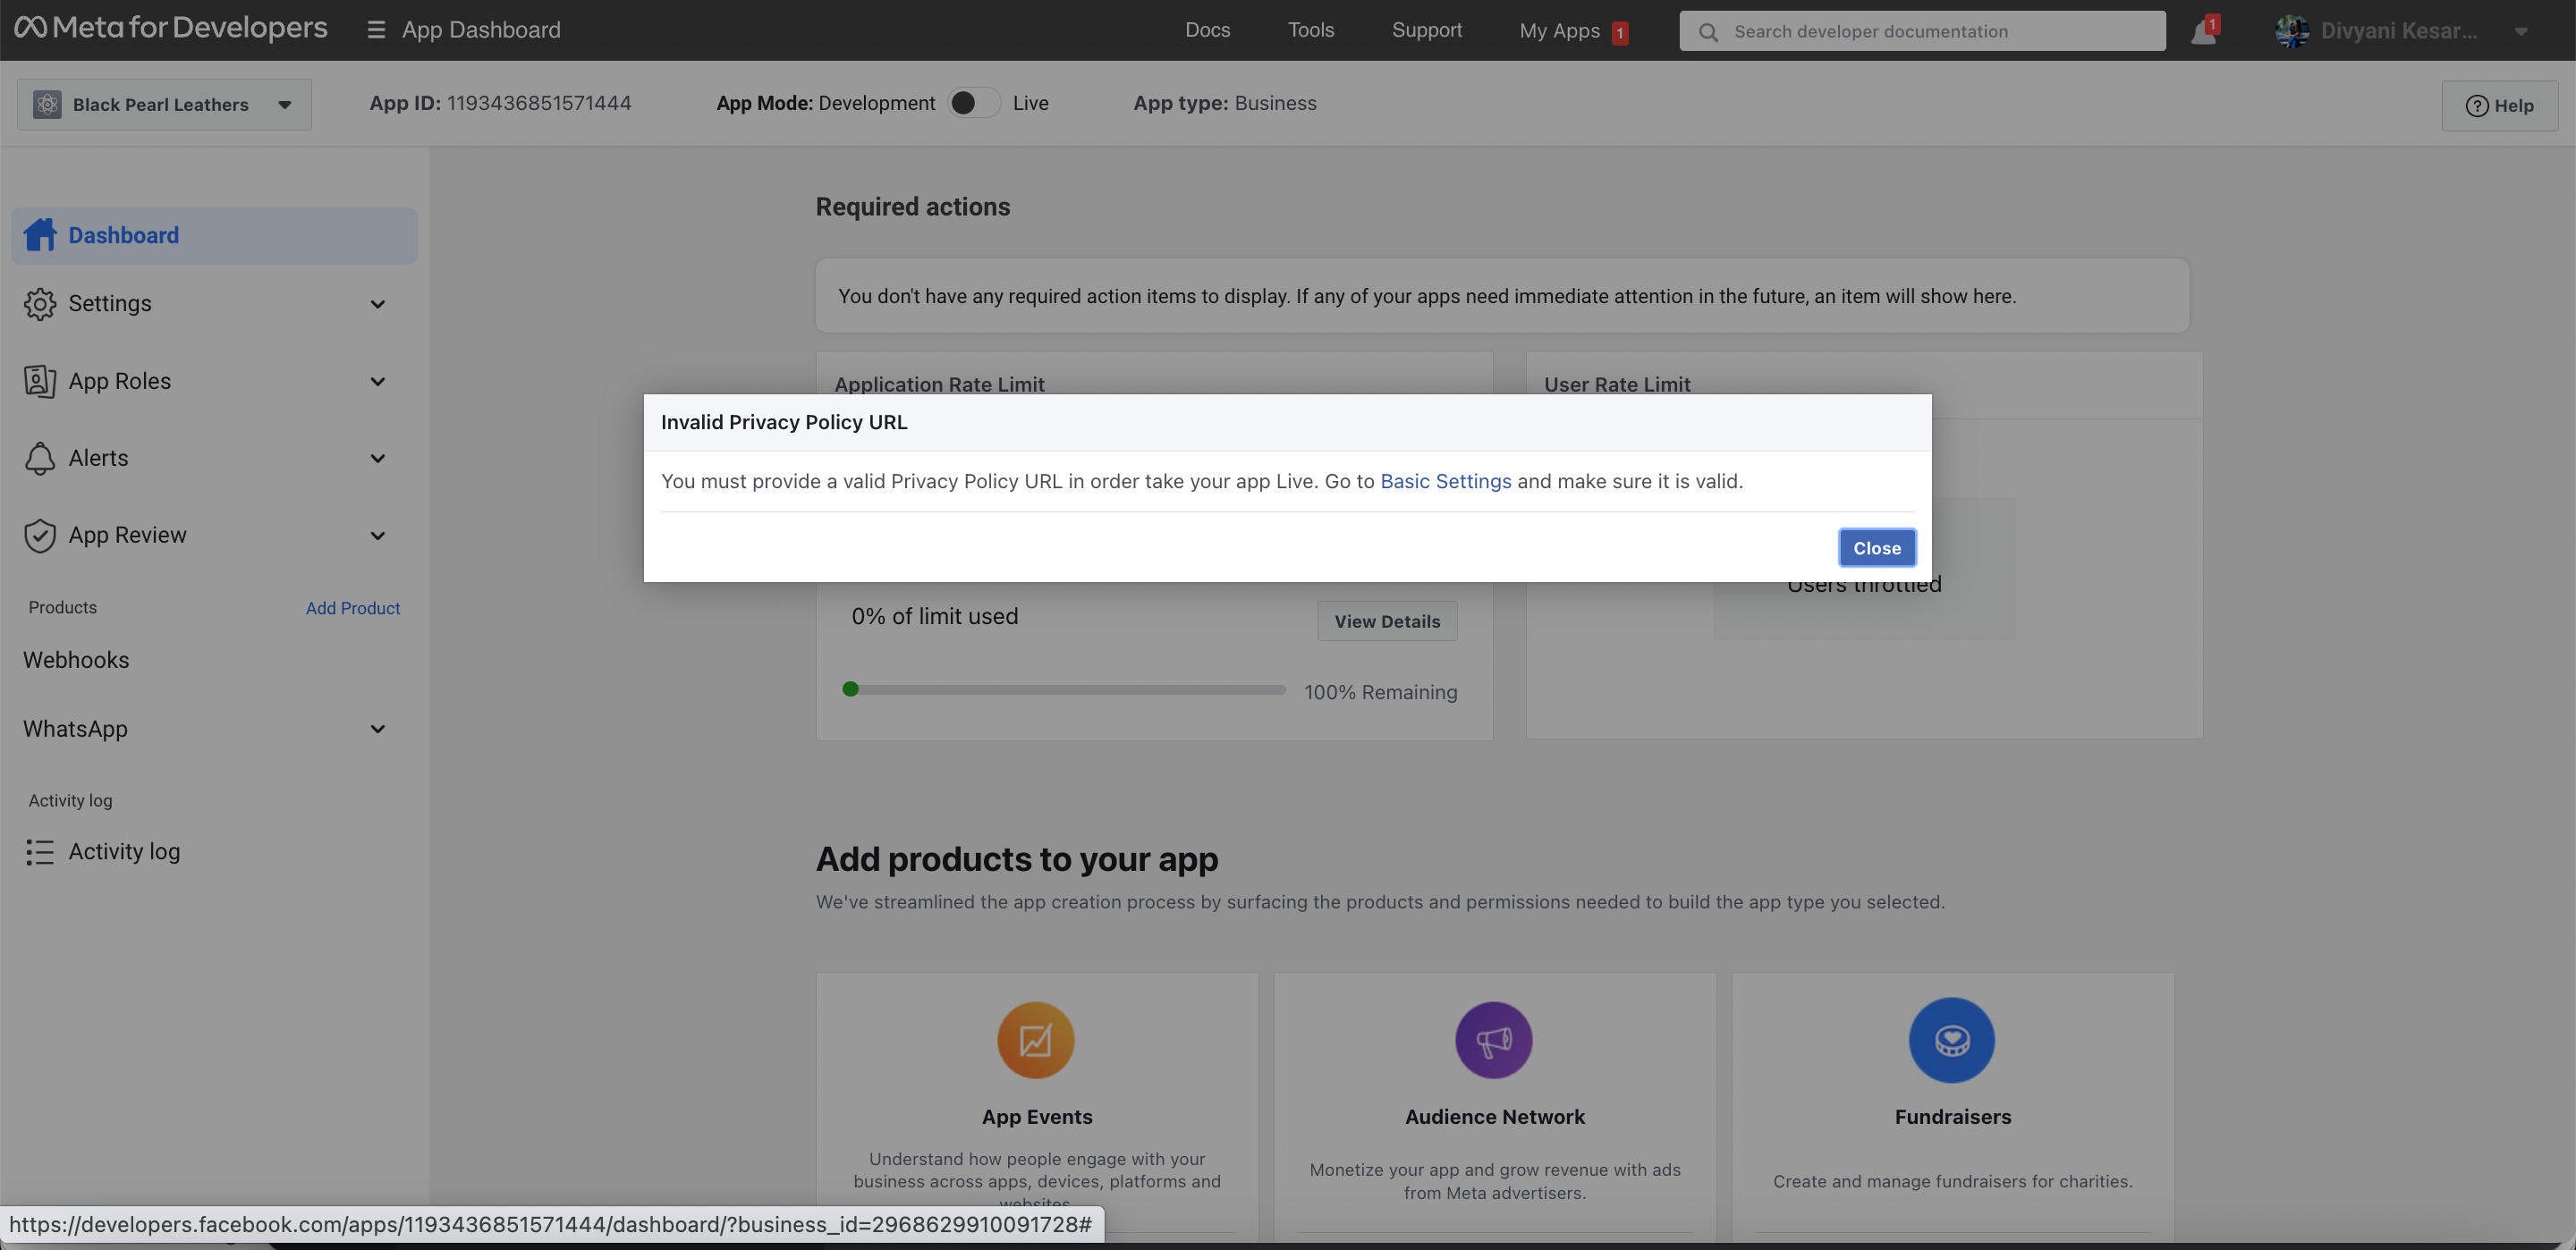
How to apply for Facebook Business Manager Verification?
What are the eligibility requirements for a WhatsApp Business API?
What to do if the verification button is not visible when applying for Facebook Business manager Verification?
Getting Started
How to Sign-up on WhatCX?
How to reset your WhatCX account password?
Daily Broadcasting Limits
How to apply for Facebook Business Manager Verification?
What are the eligibility requirements for a WhatsApp Business API?
What to do if the verification button is not visible when applying for Facebook Business manager Verification?
Overview
Connect your WhatsApp Cloud API
How to create FB Business Page?
How to connect a FB Business Page to FB Business Manager?
How to apply for Facebook Business Manager Verification?
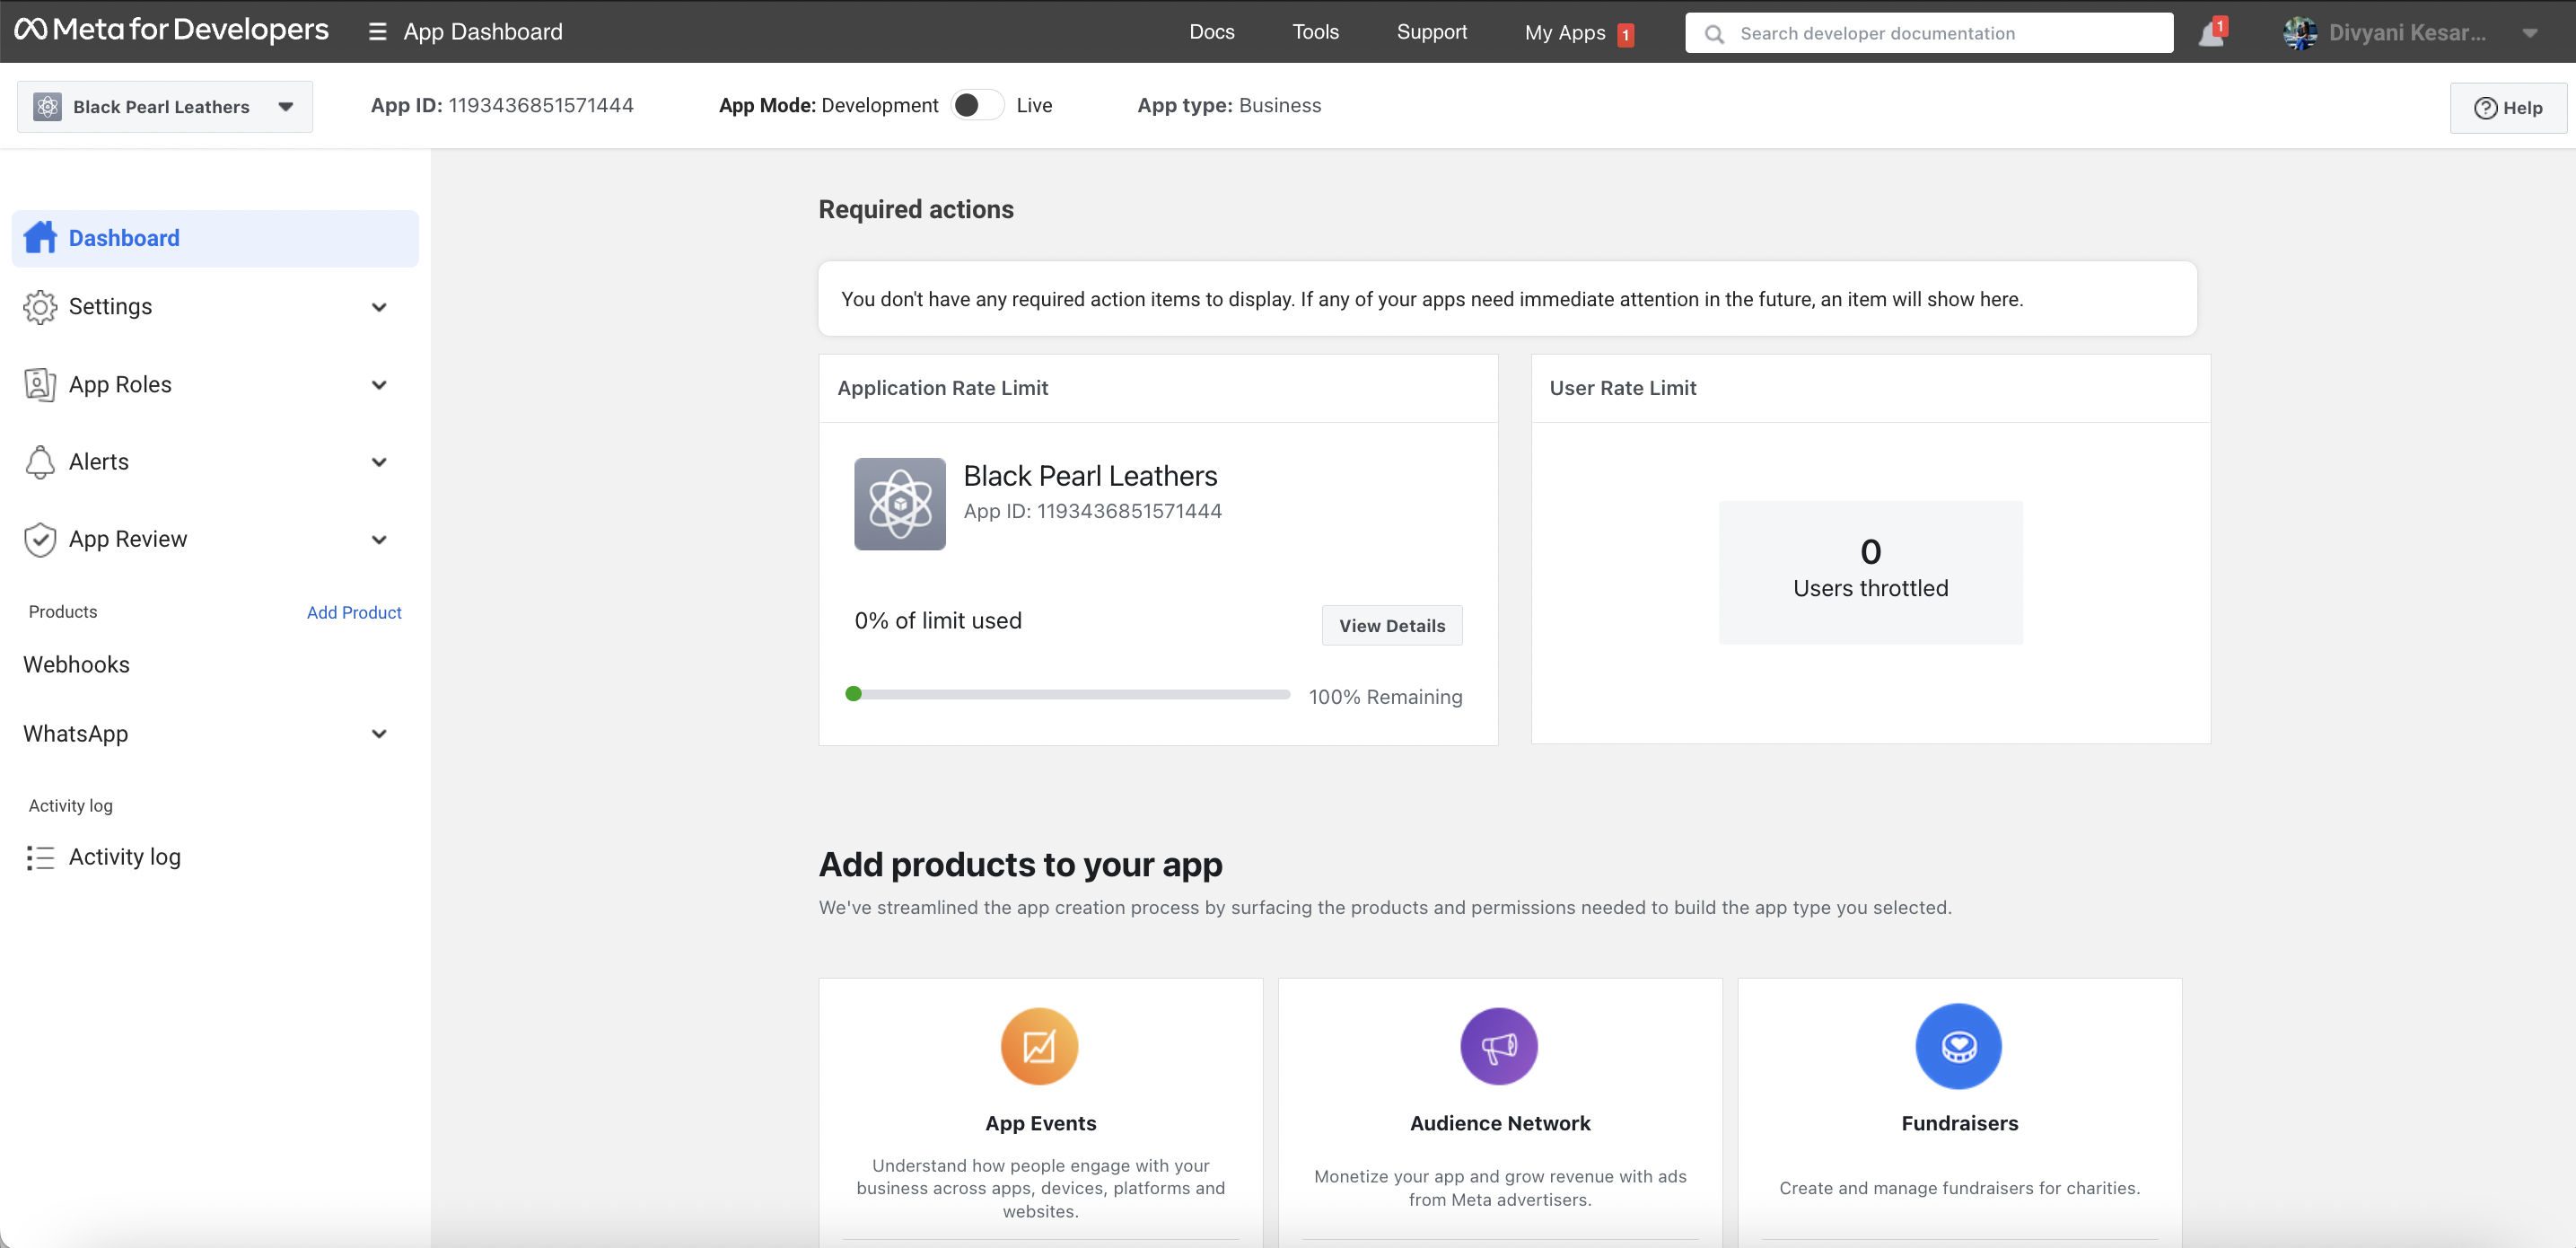
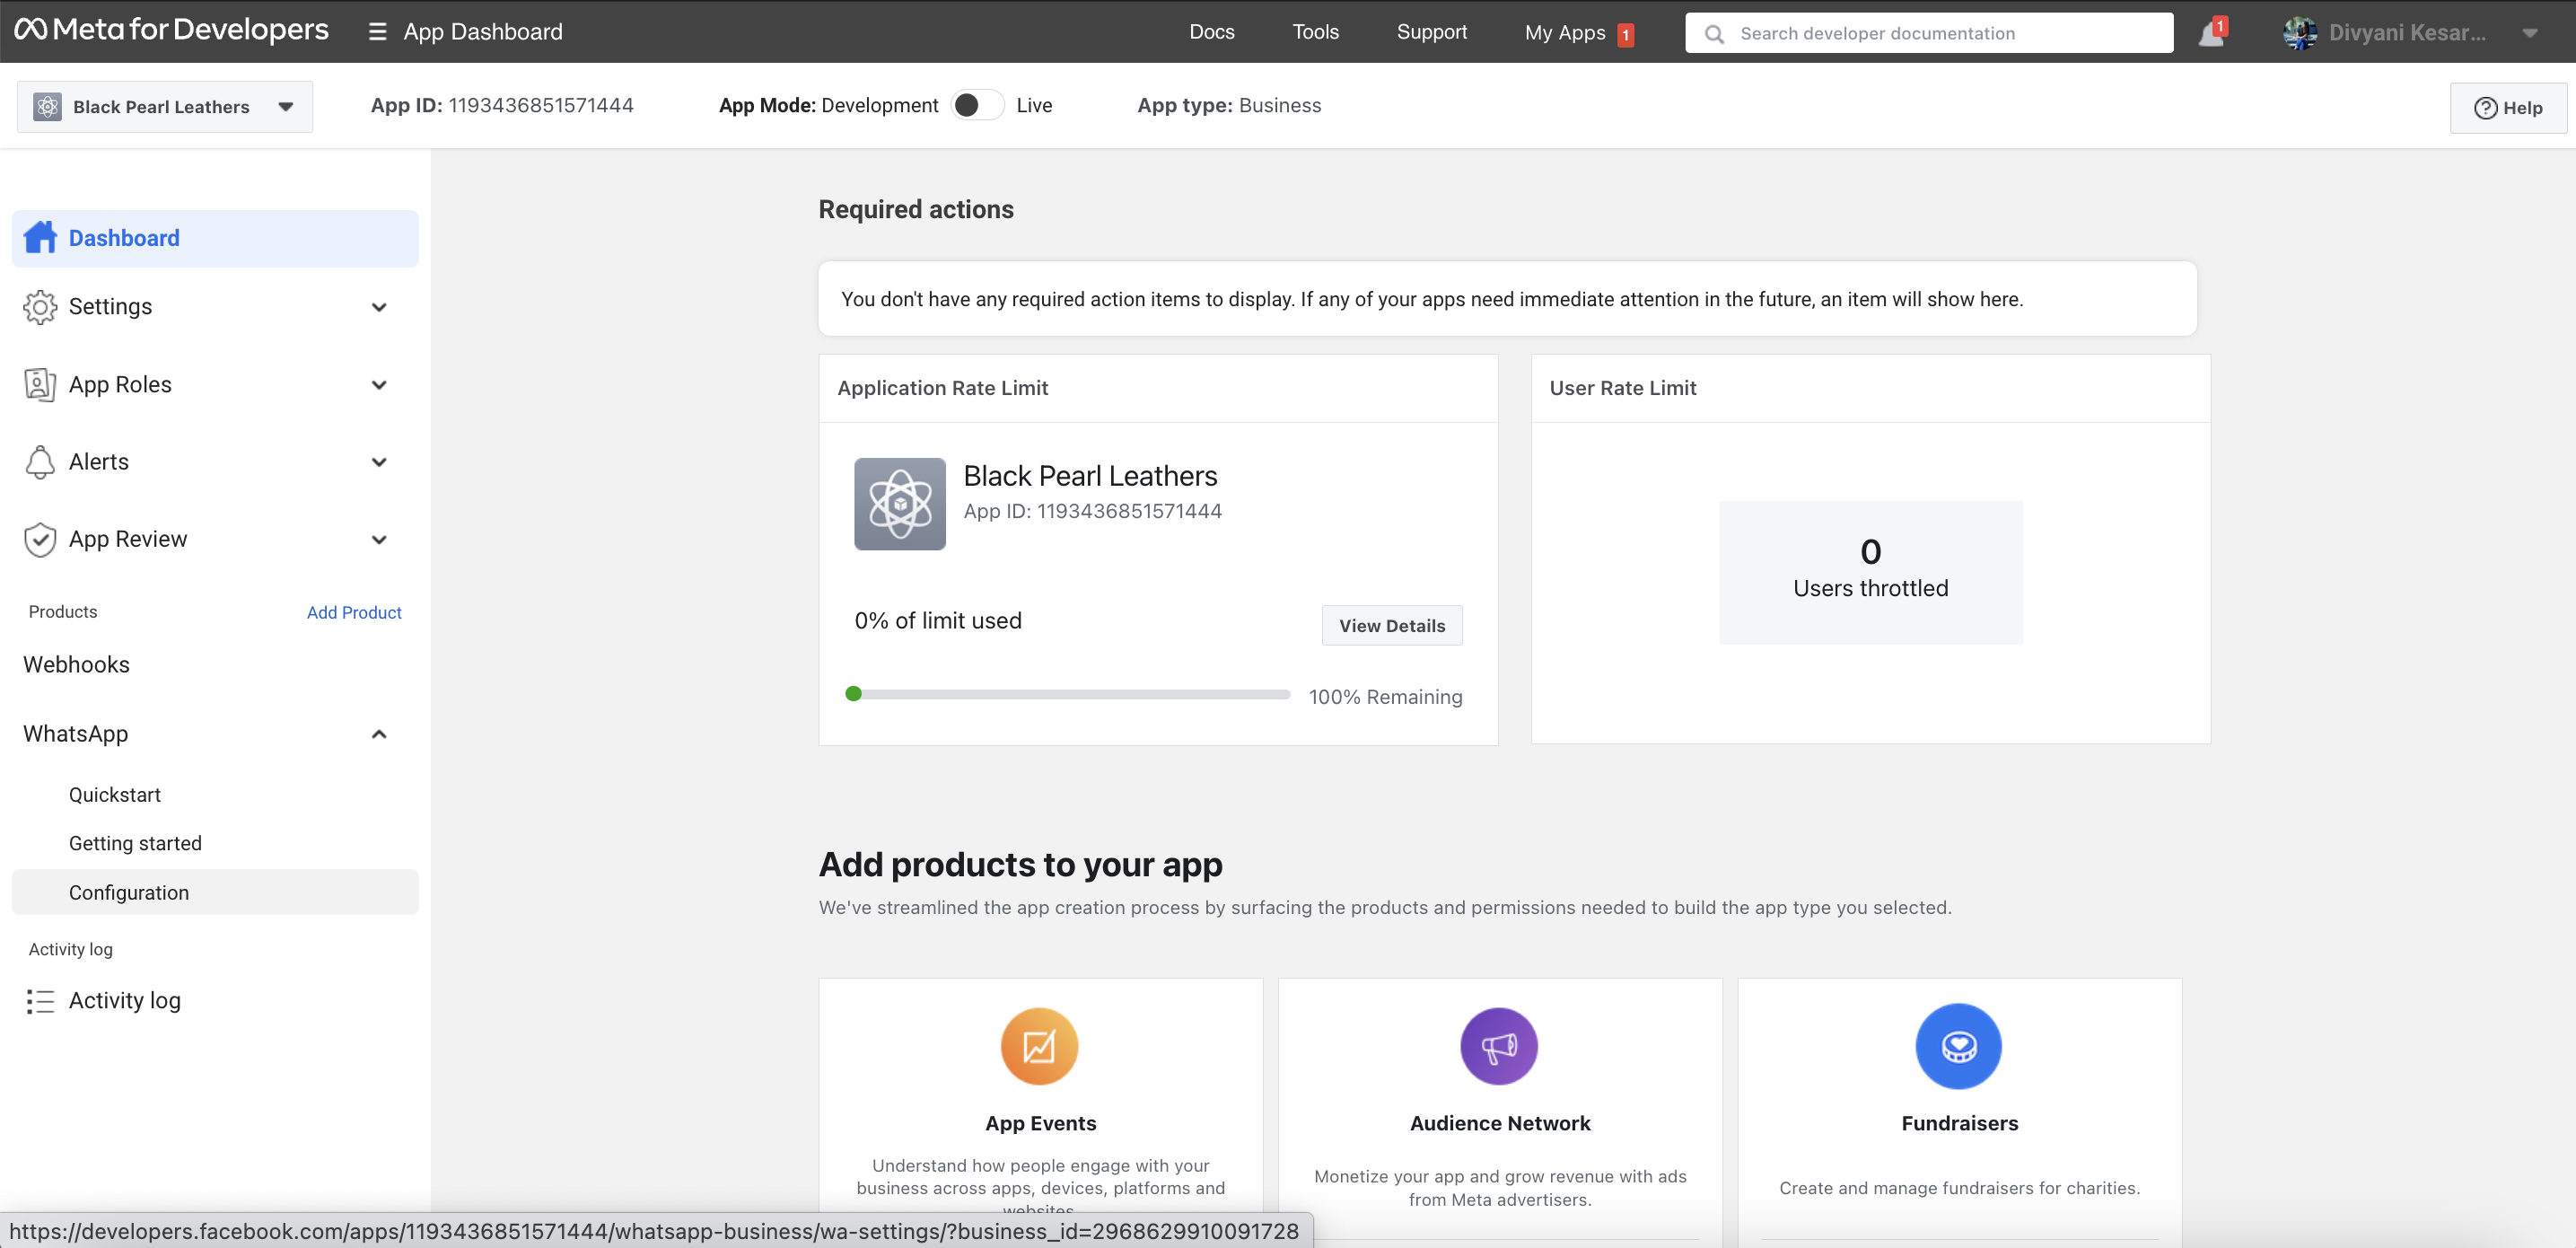
How to enable WhatsApp in Developer App?
How to create a Developer App?
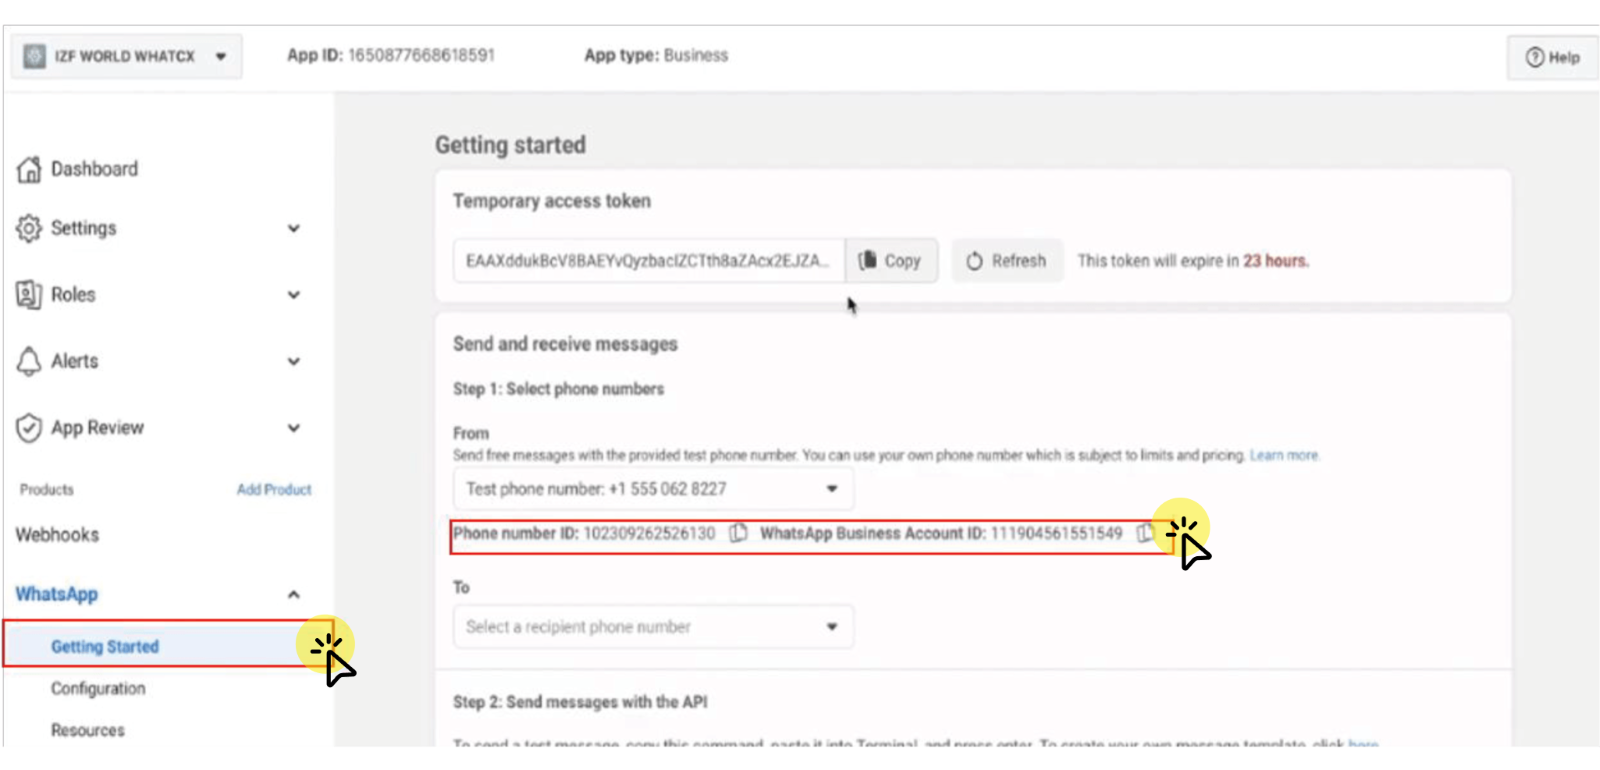
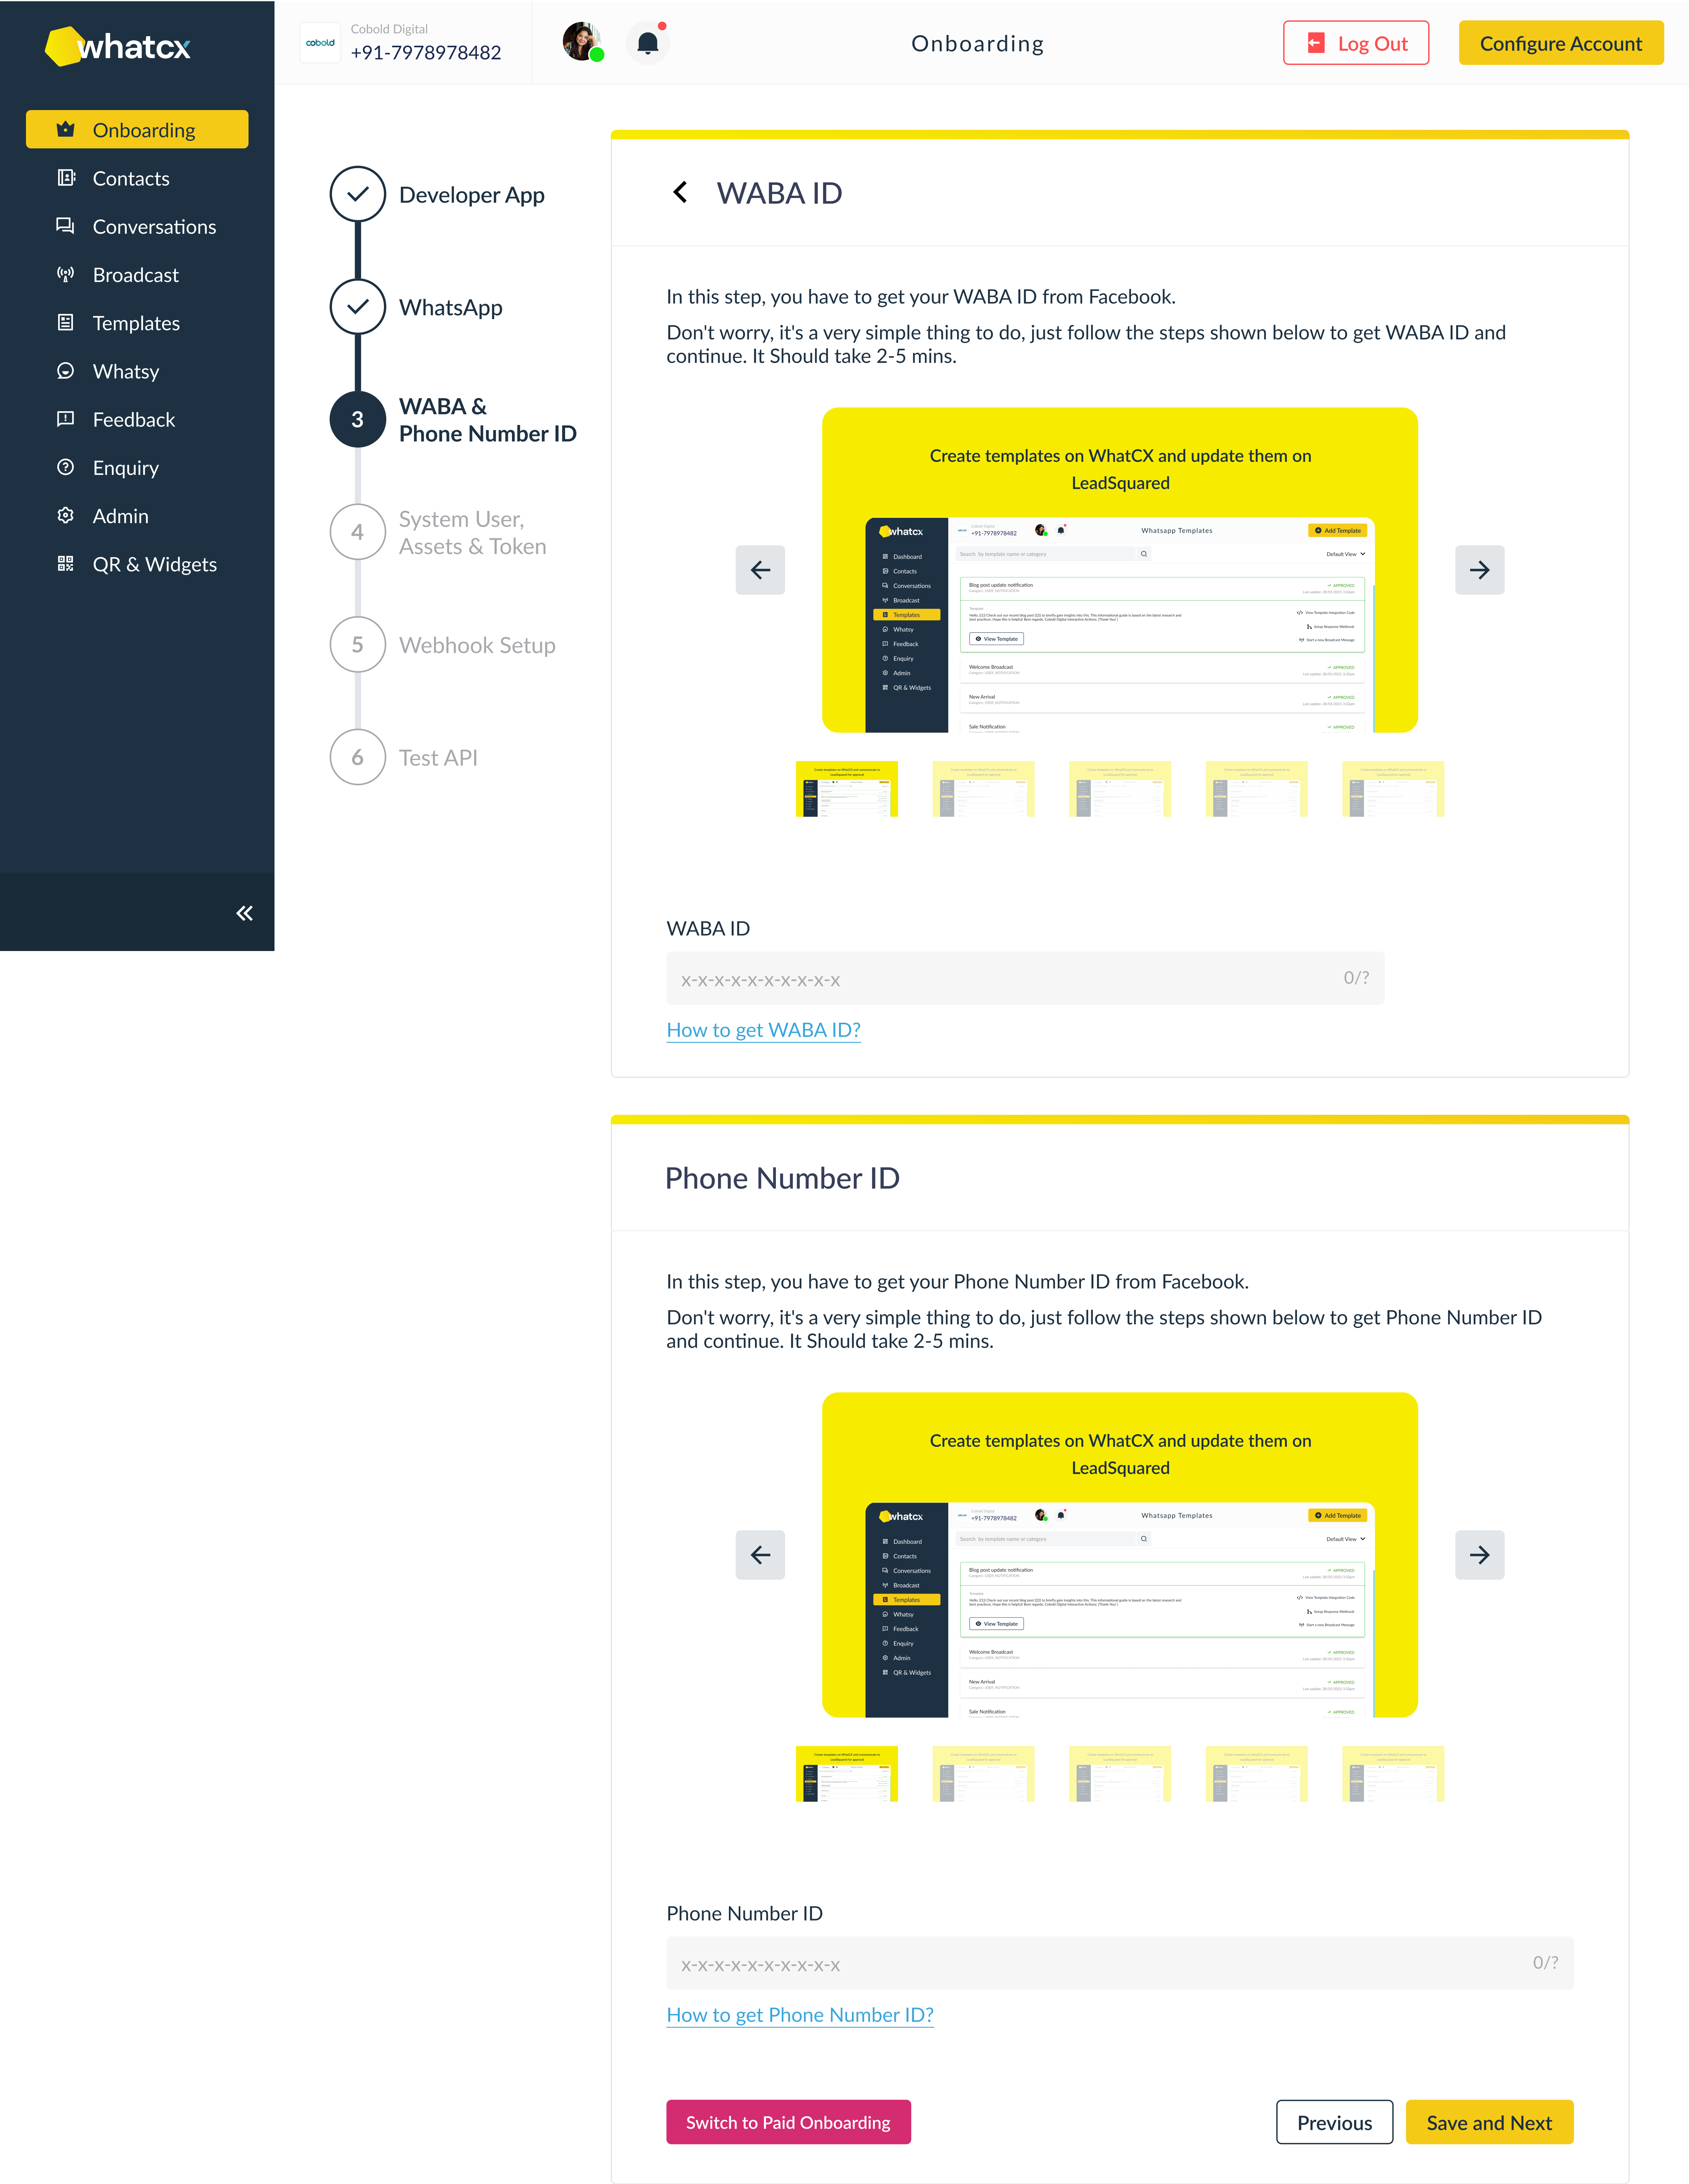
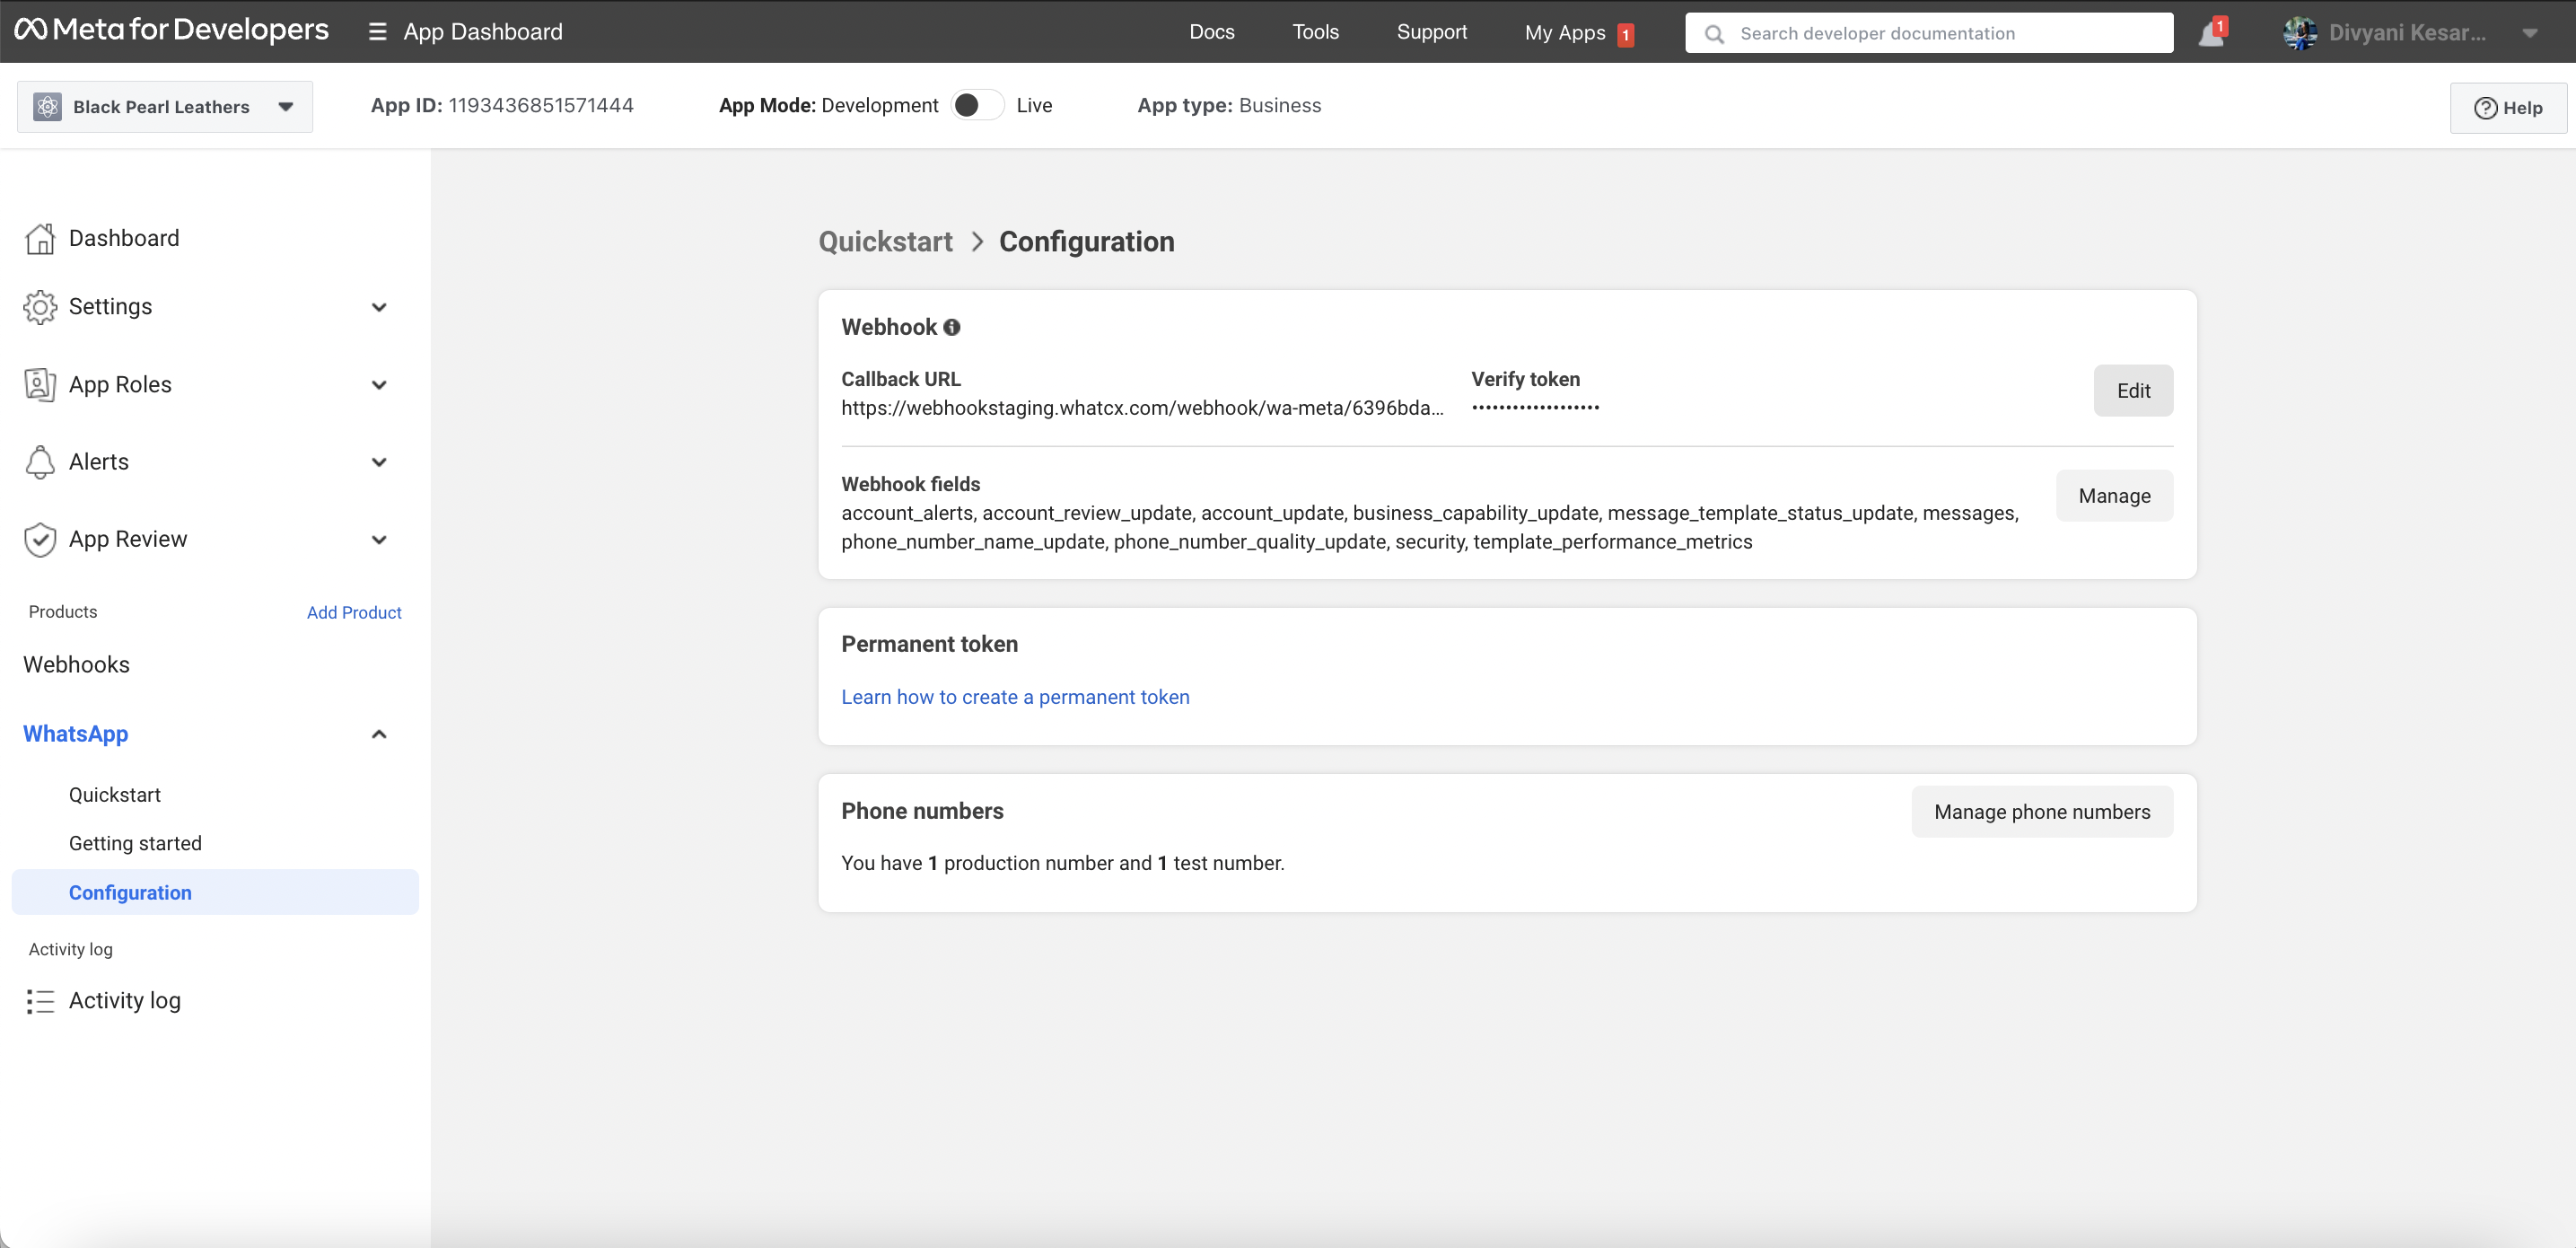
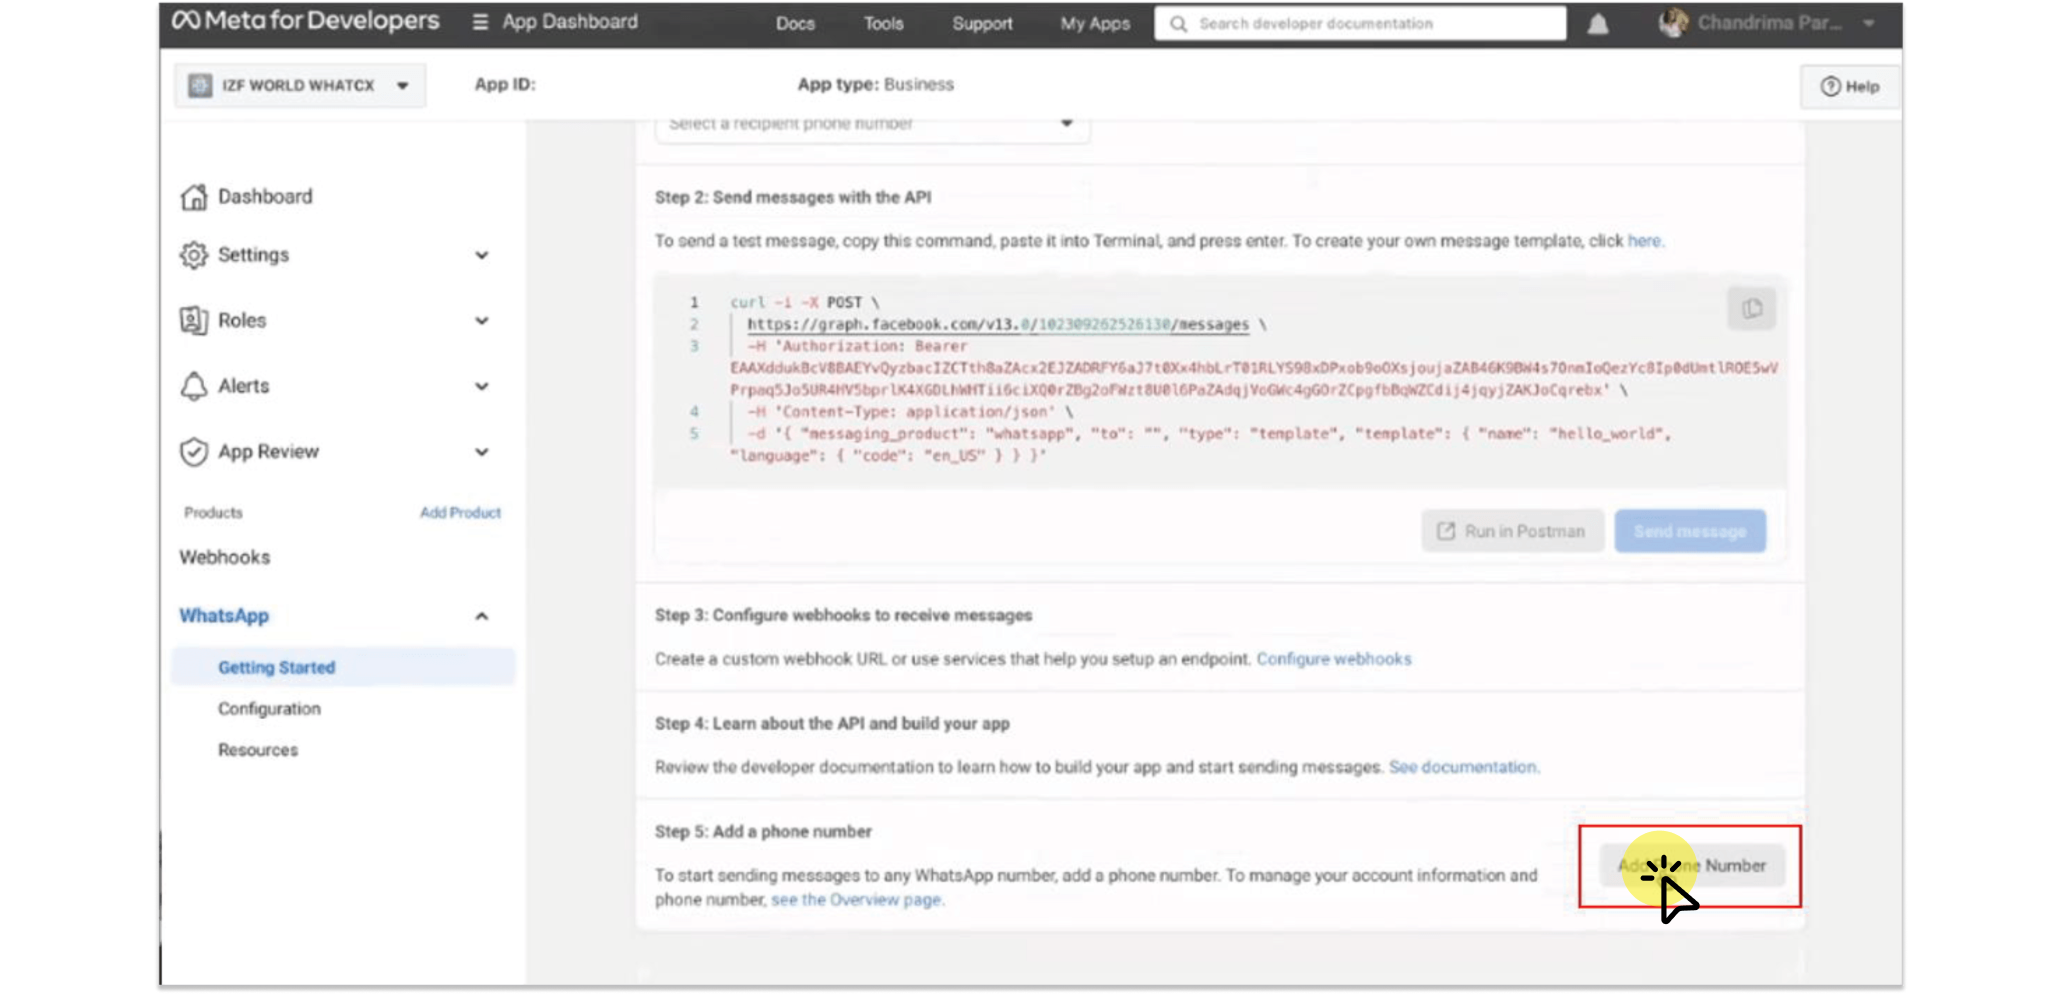
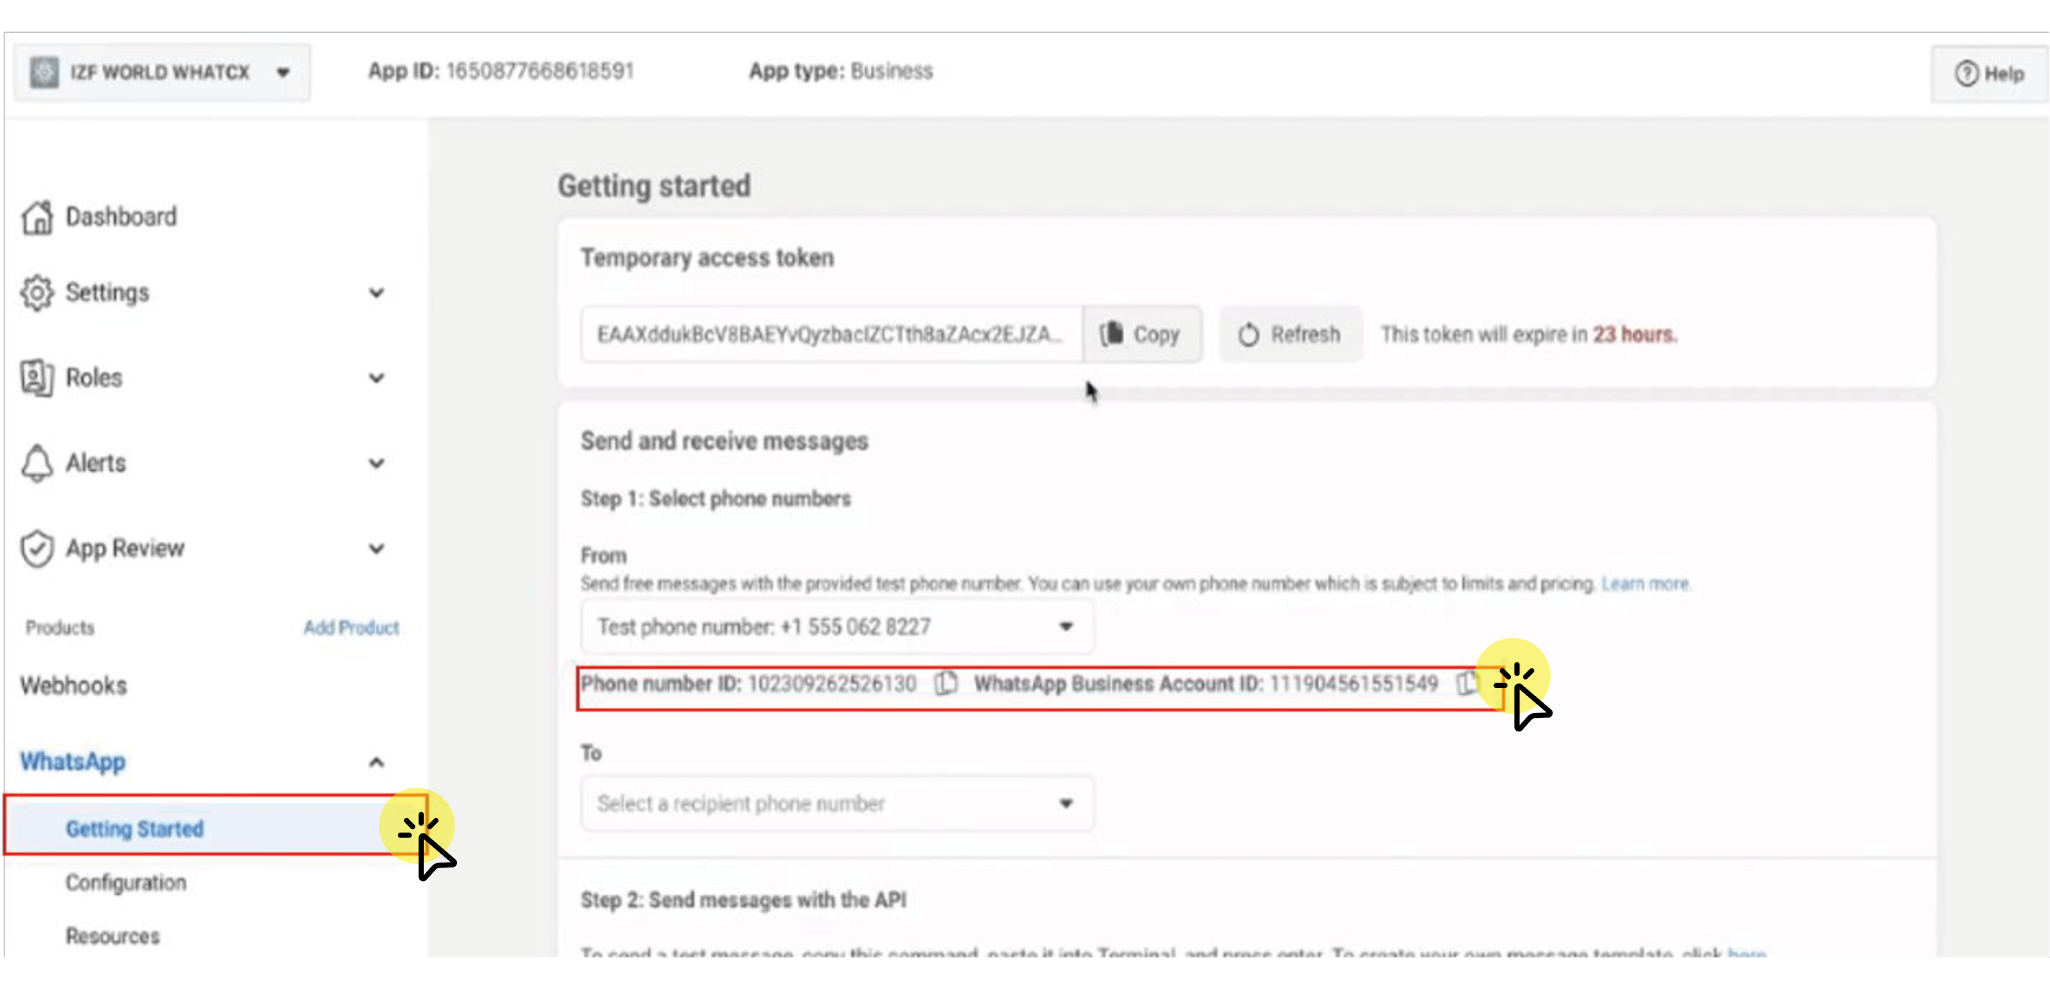
How to get Phone Number ID?
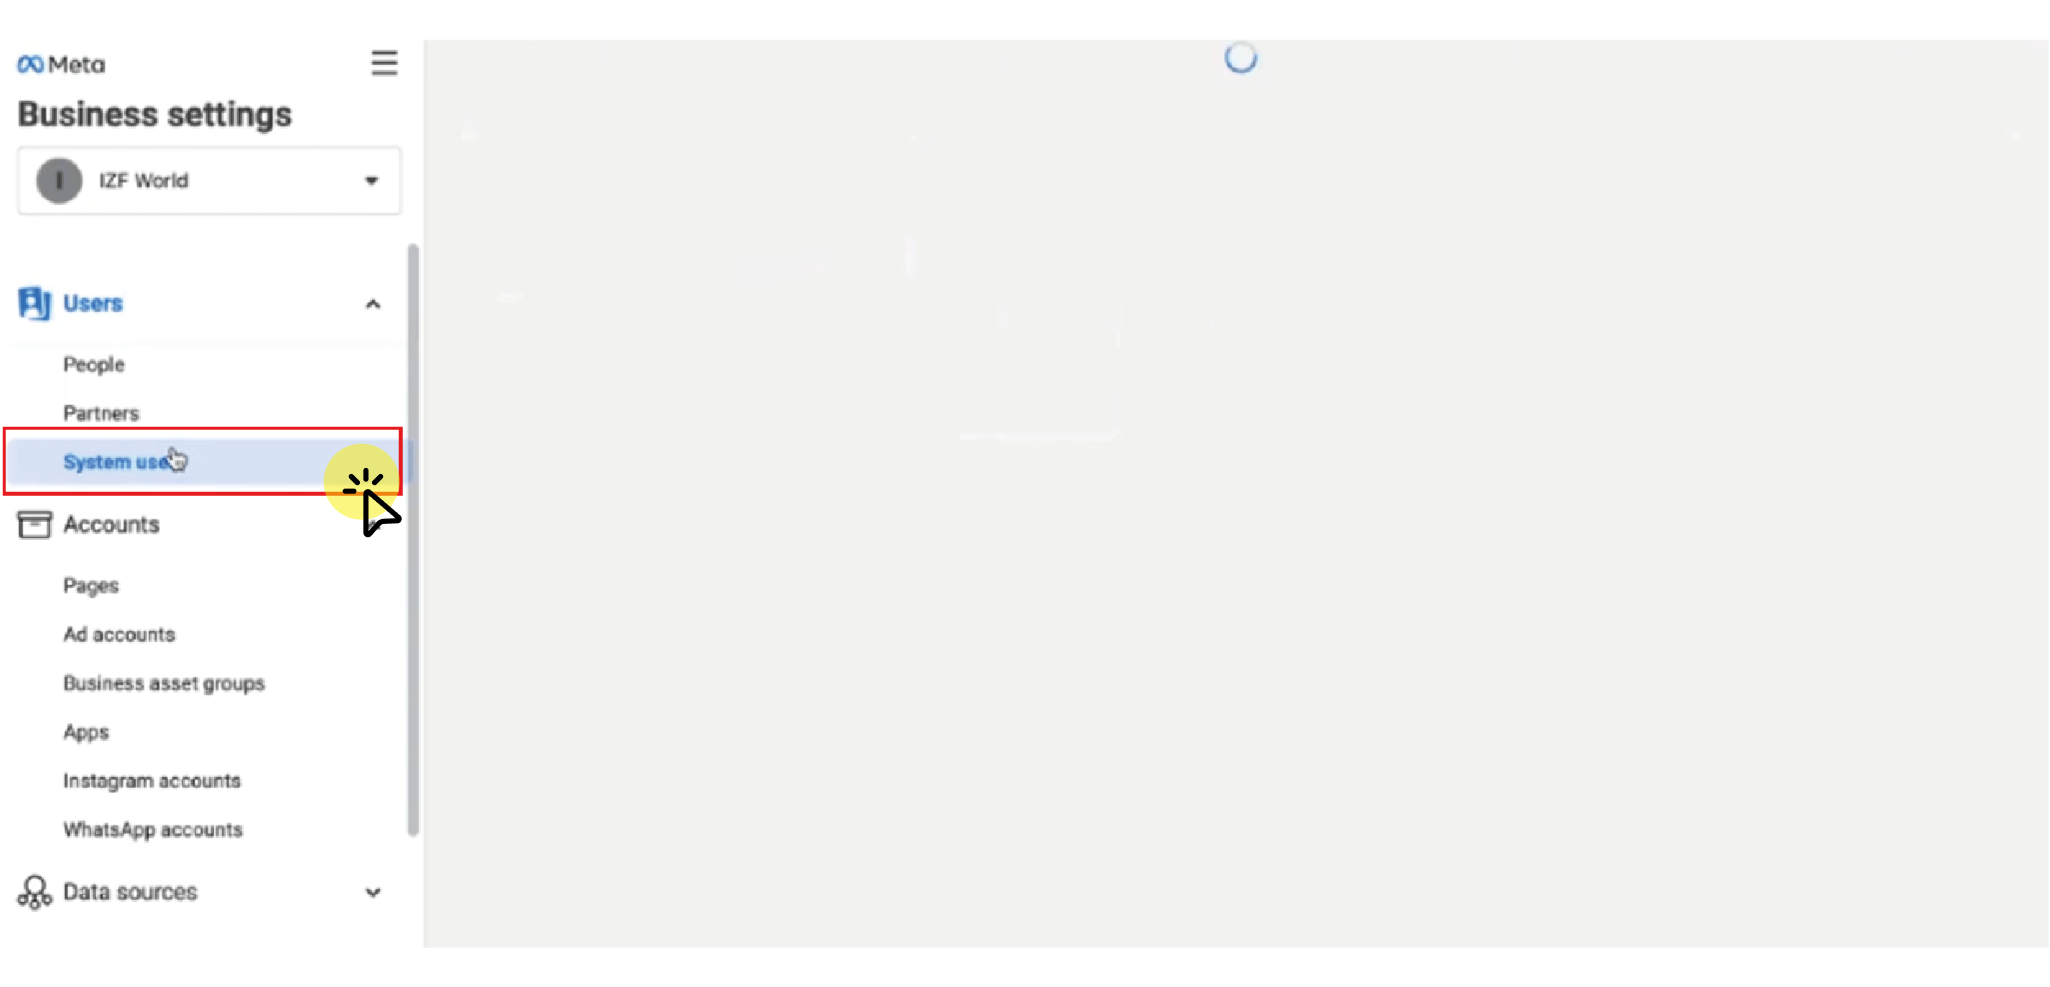
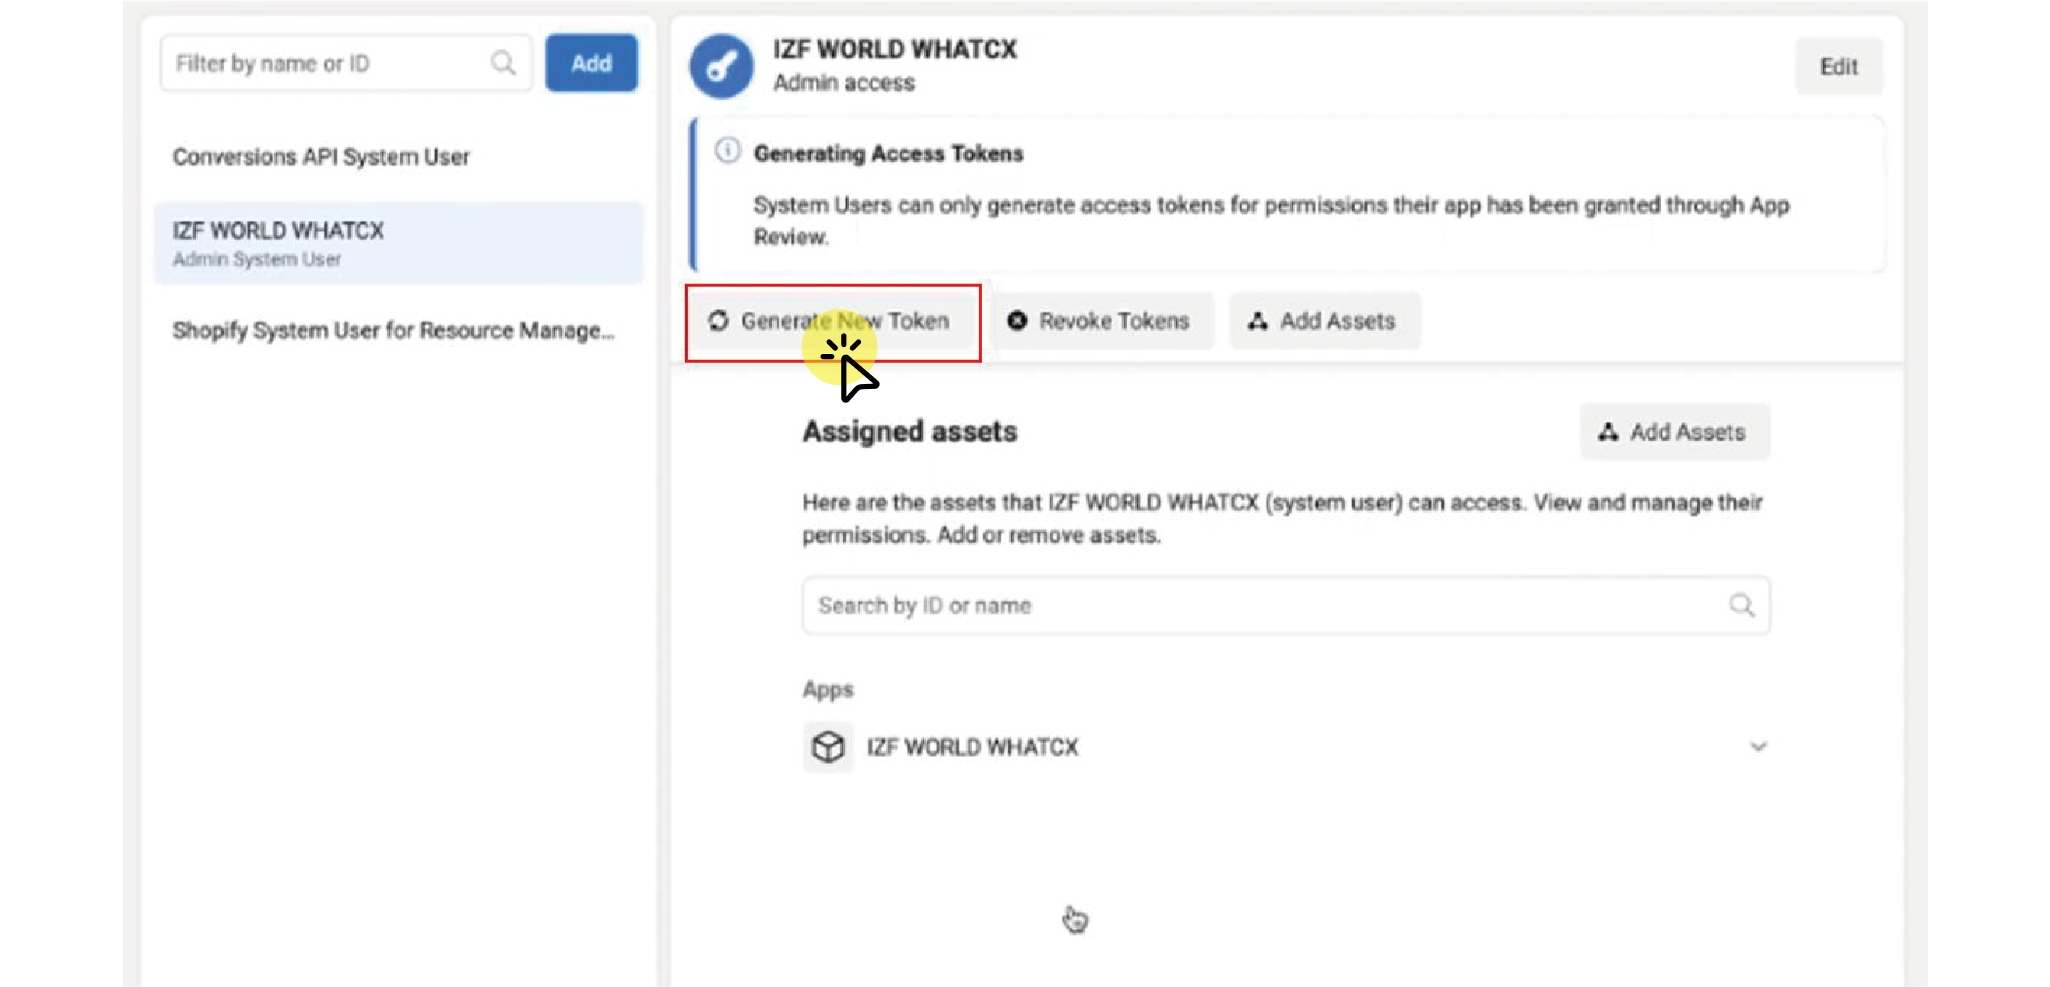
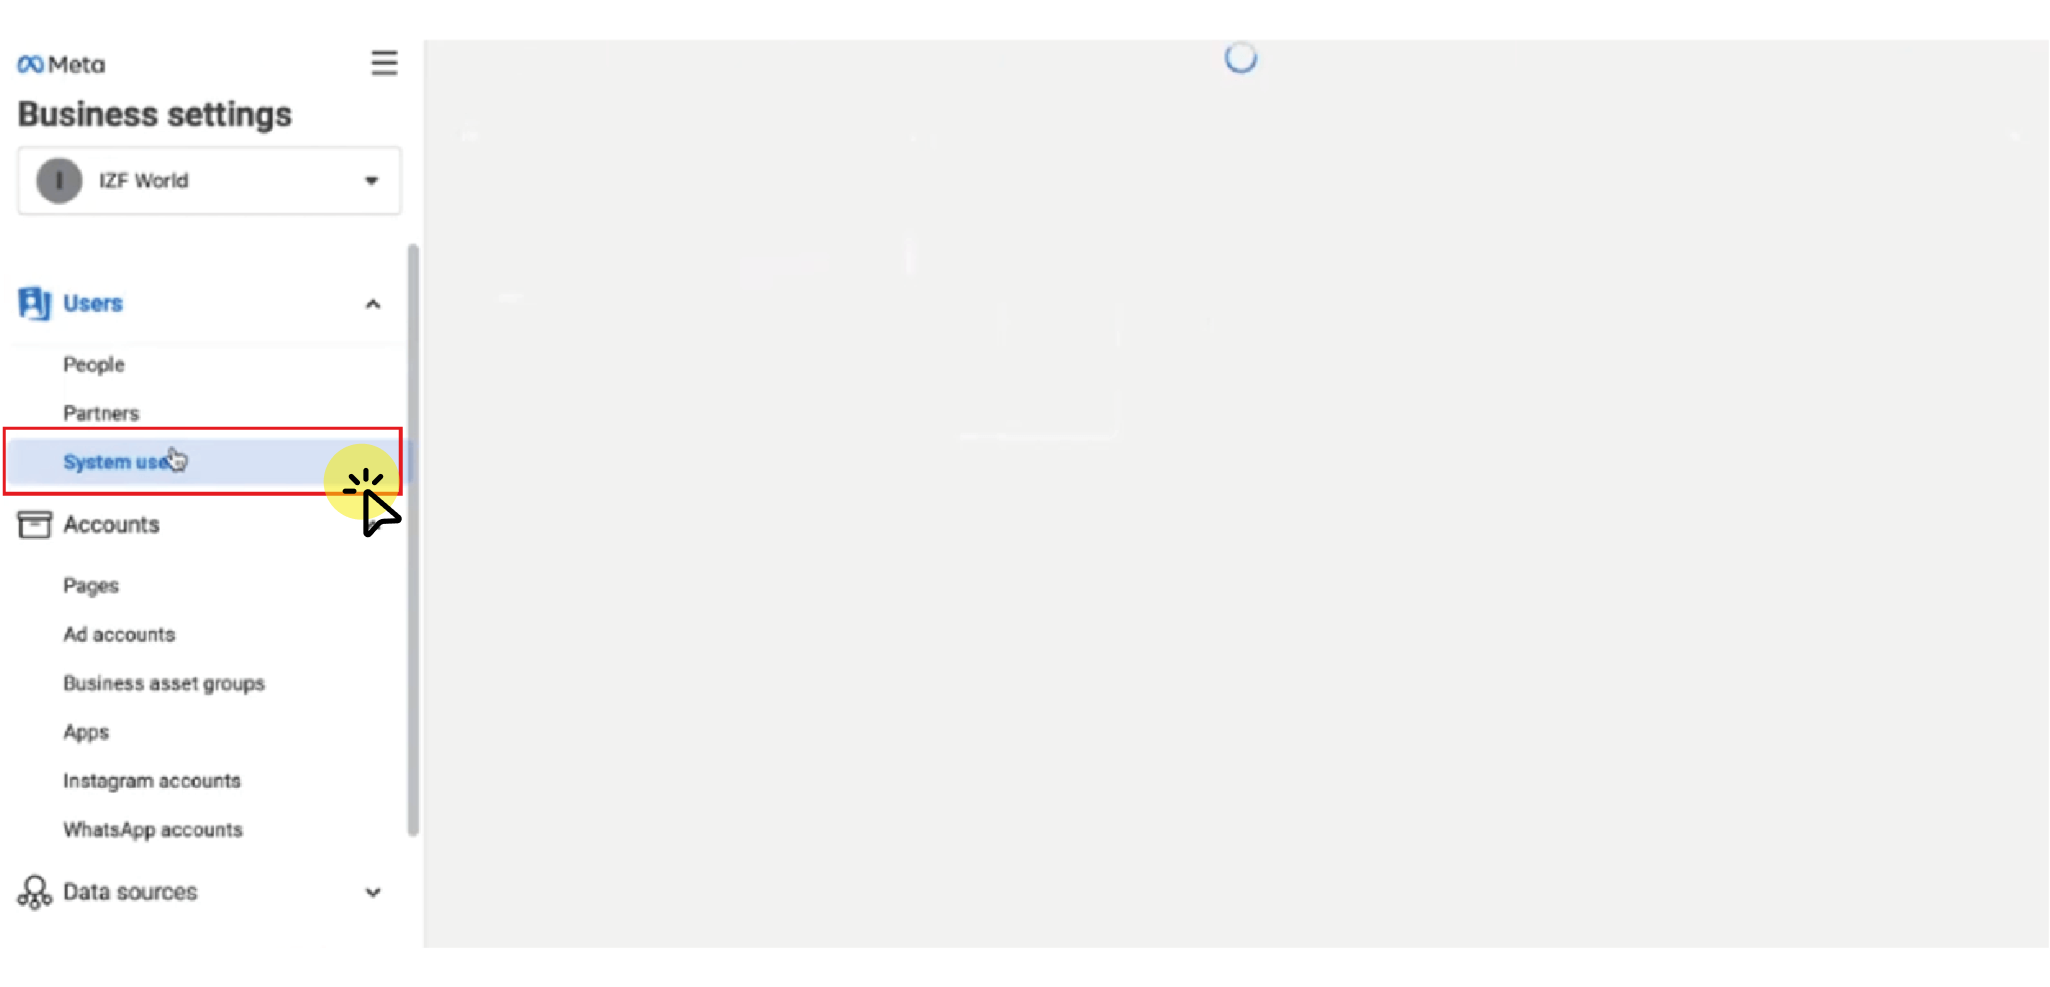
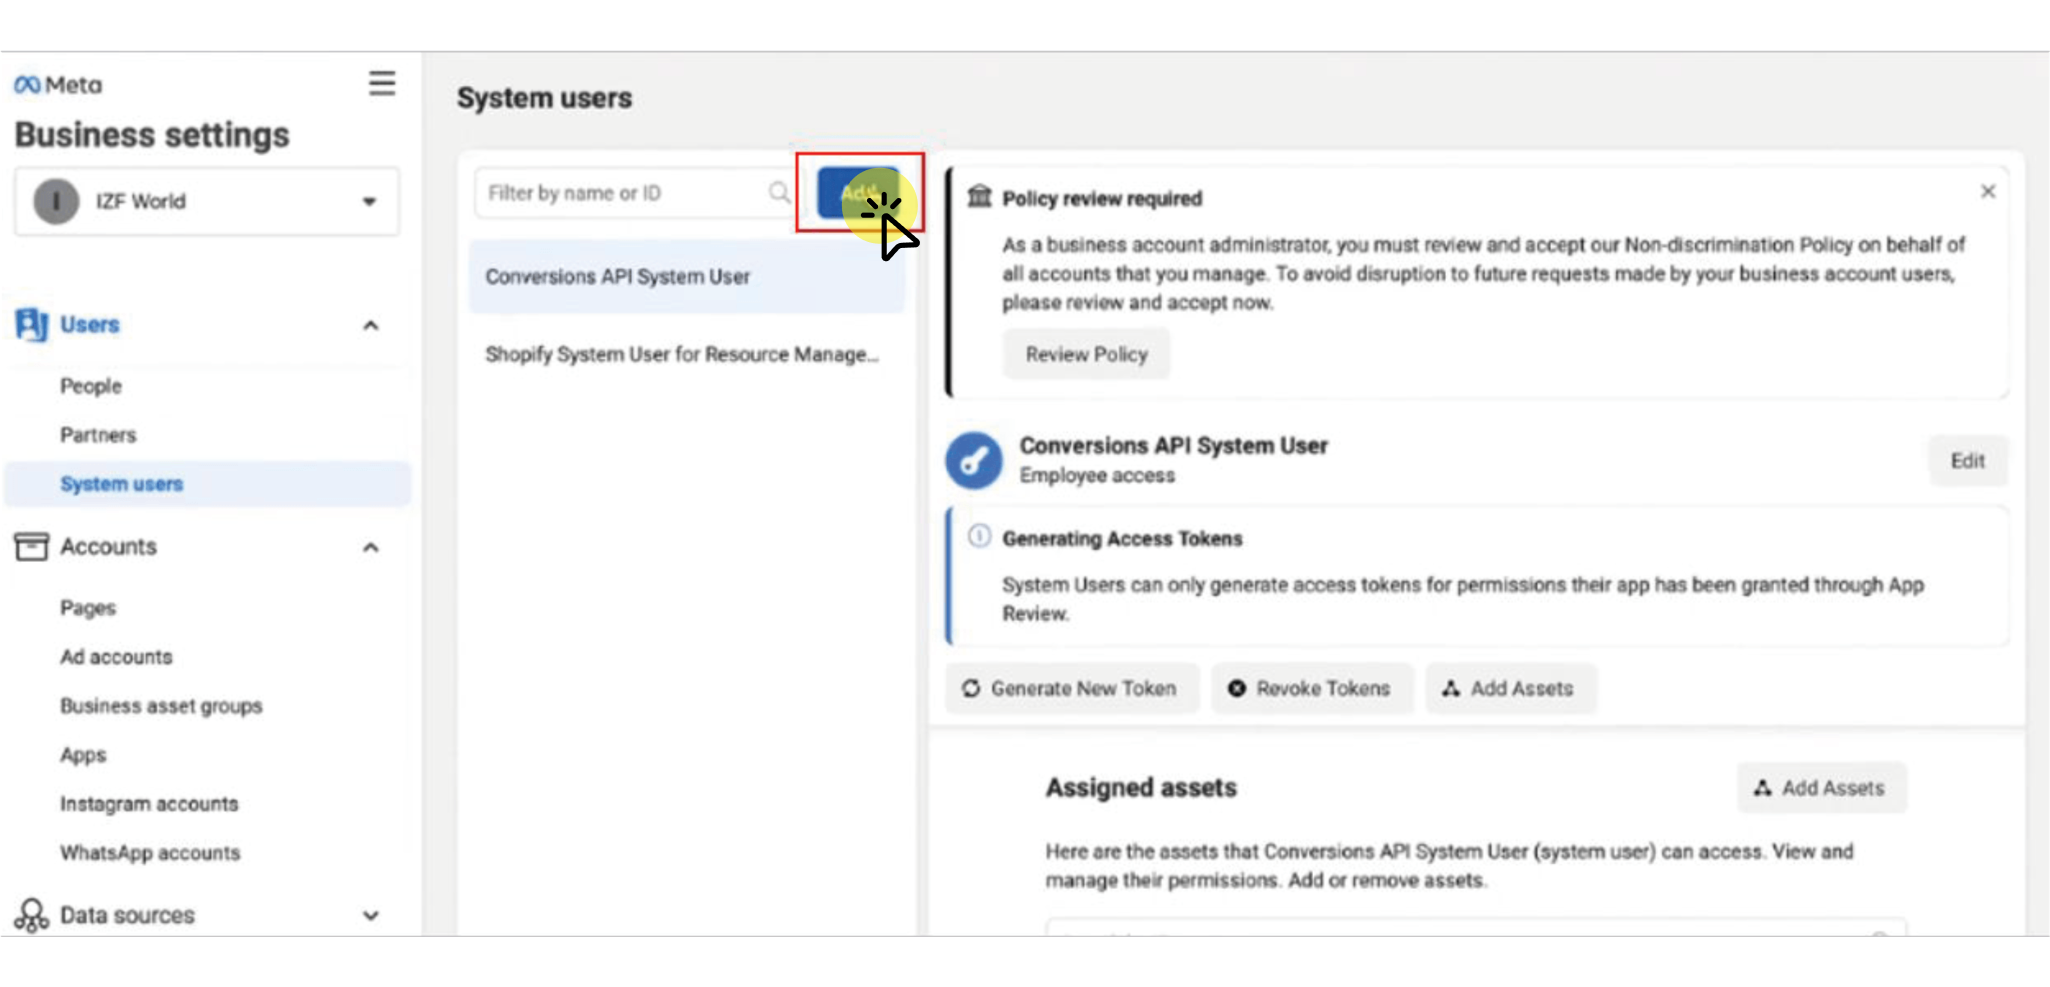
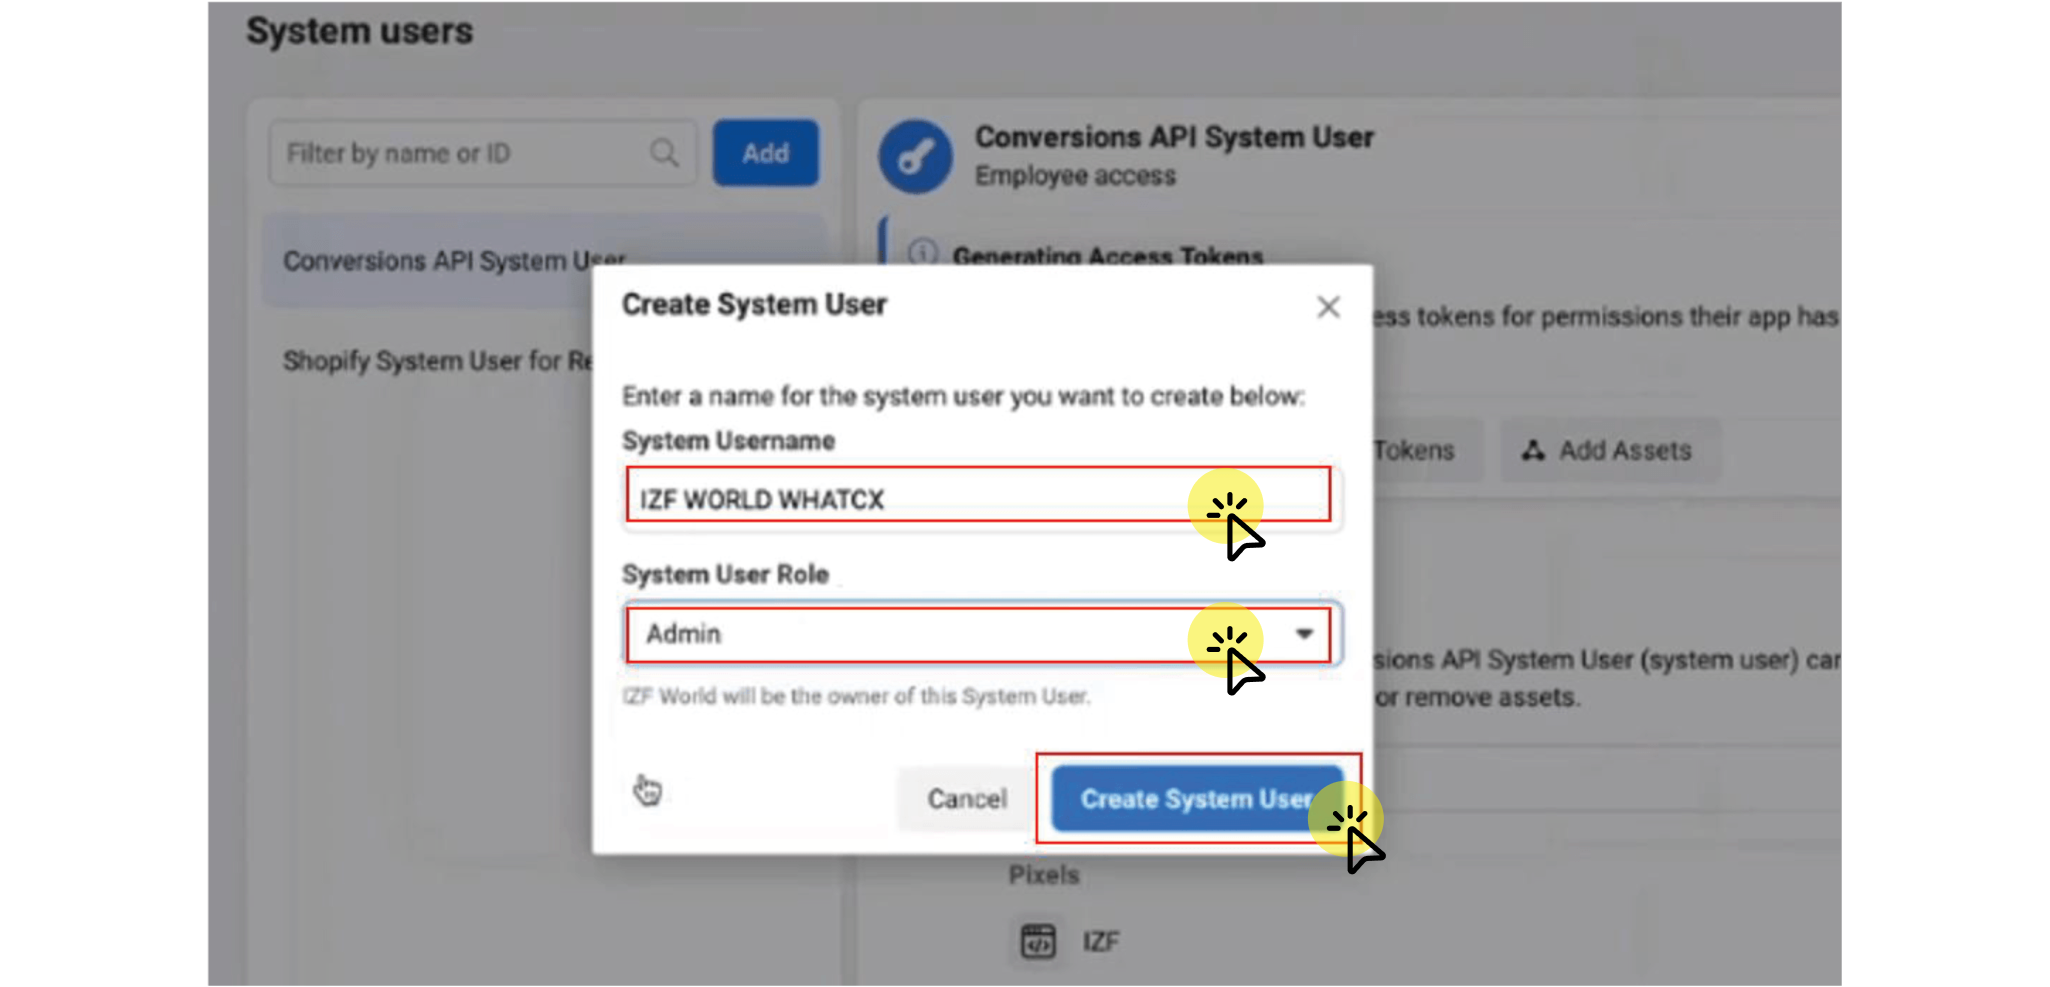
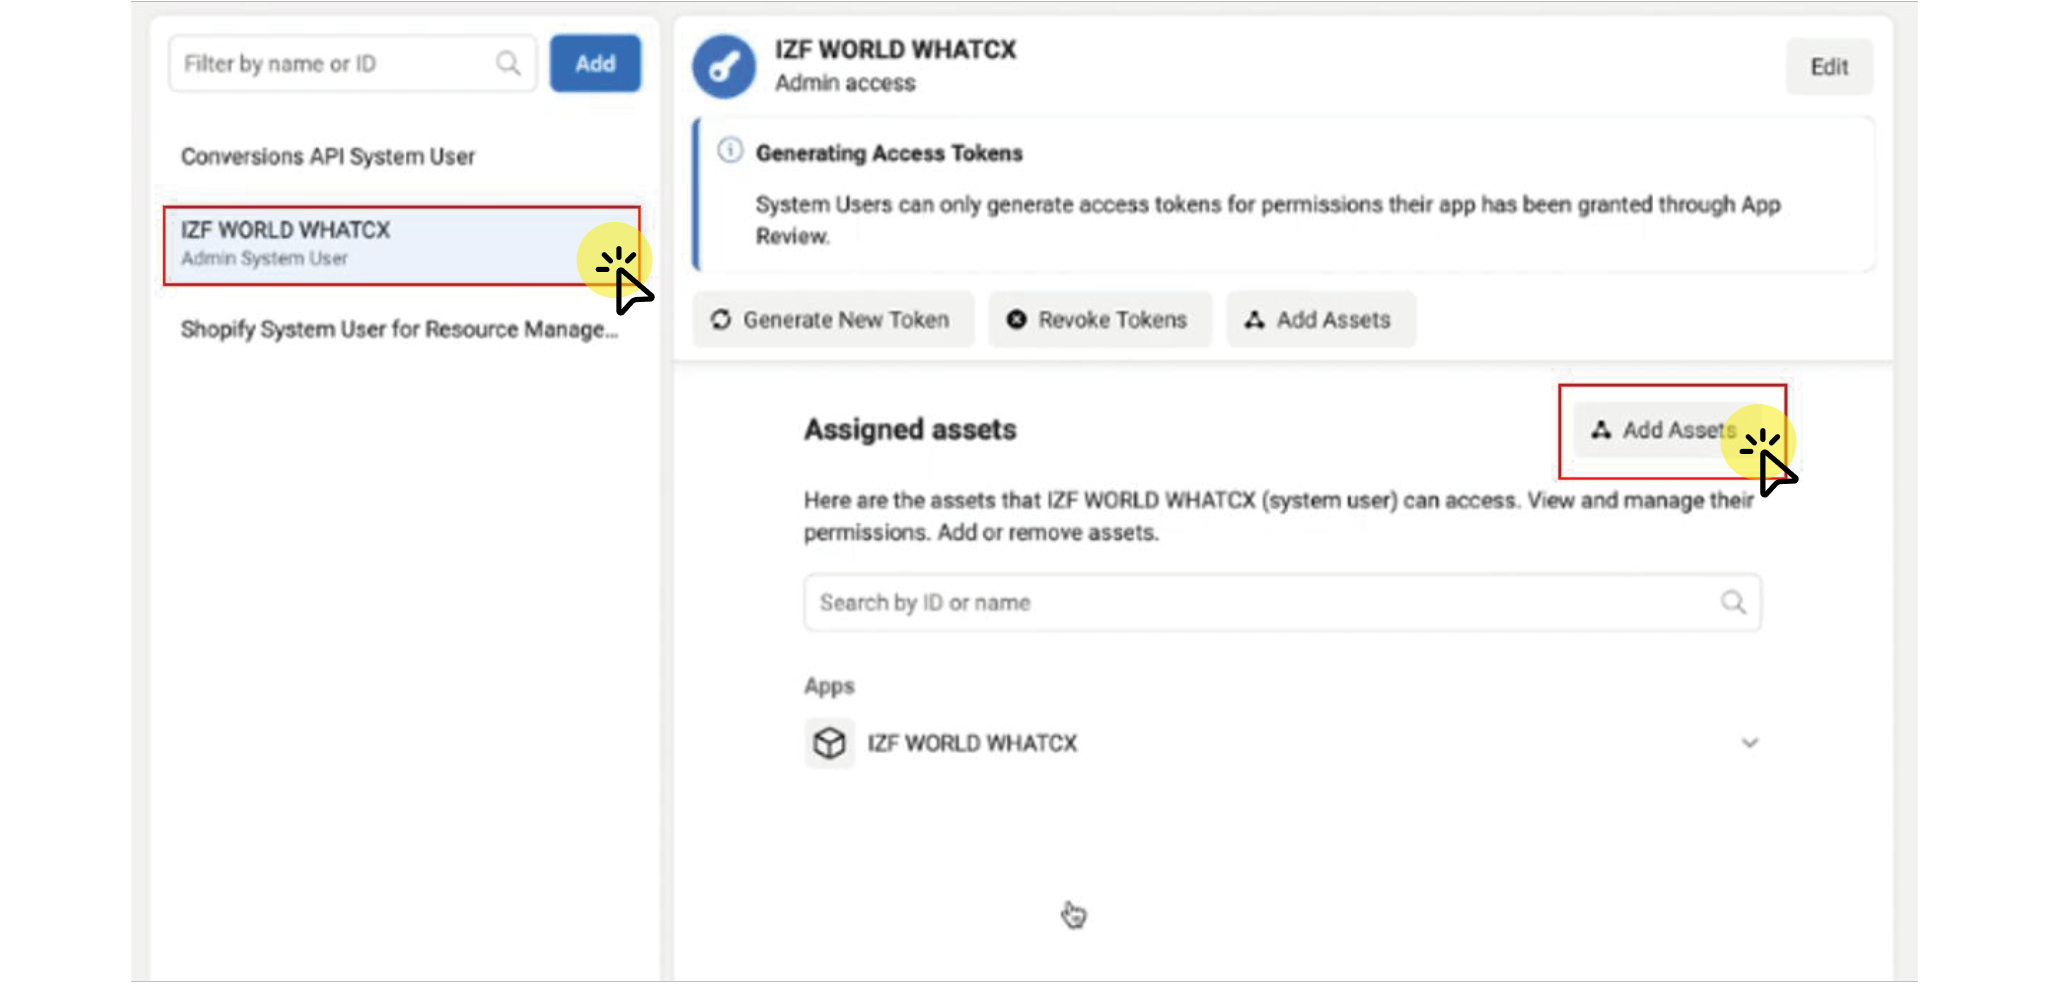
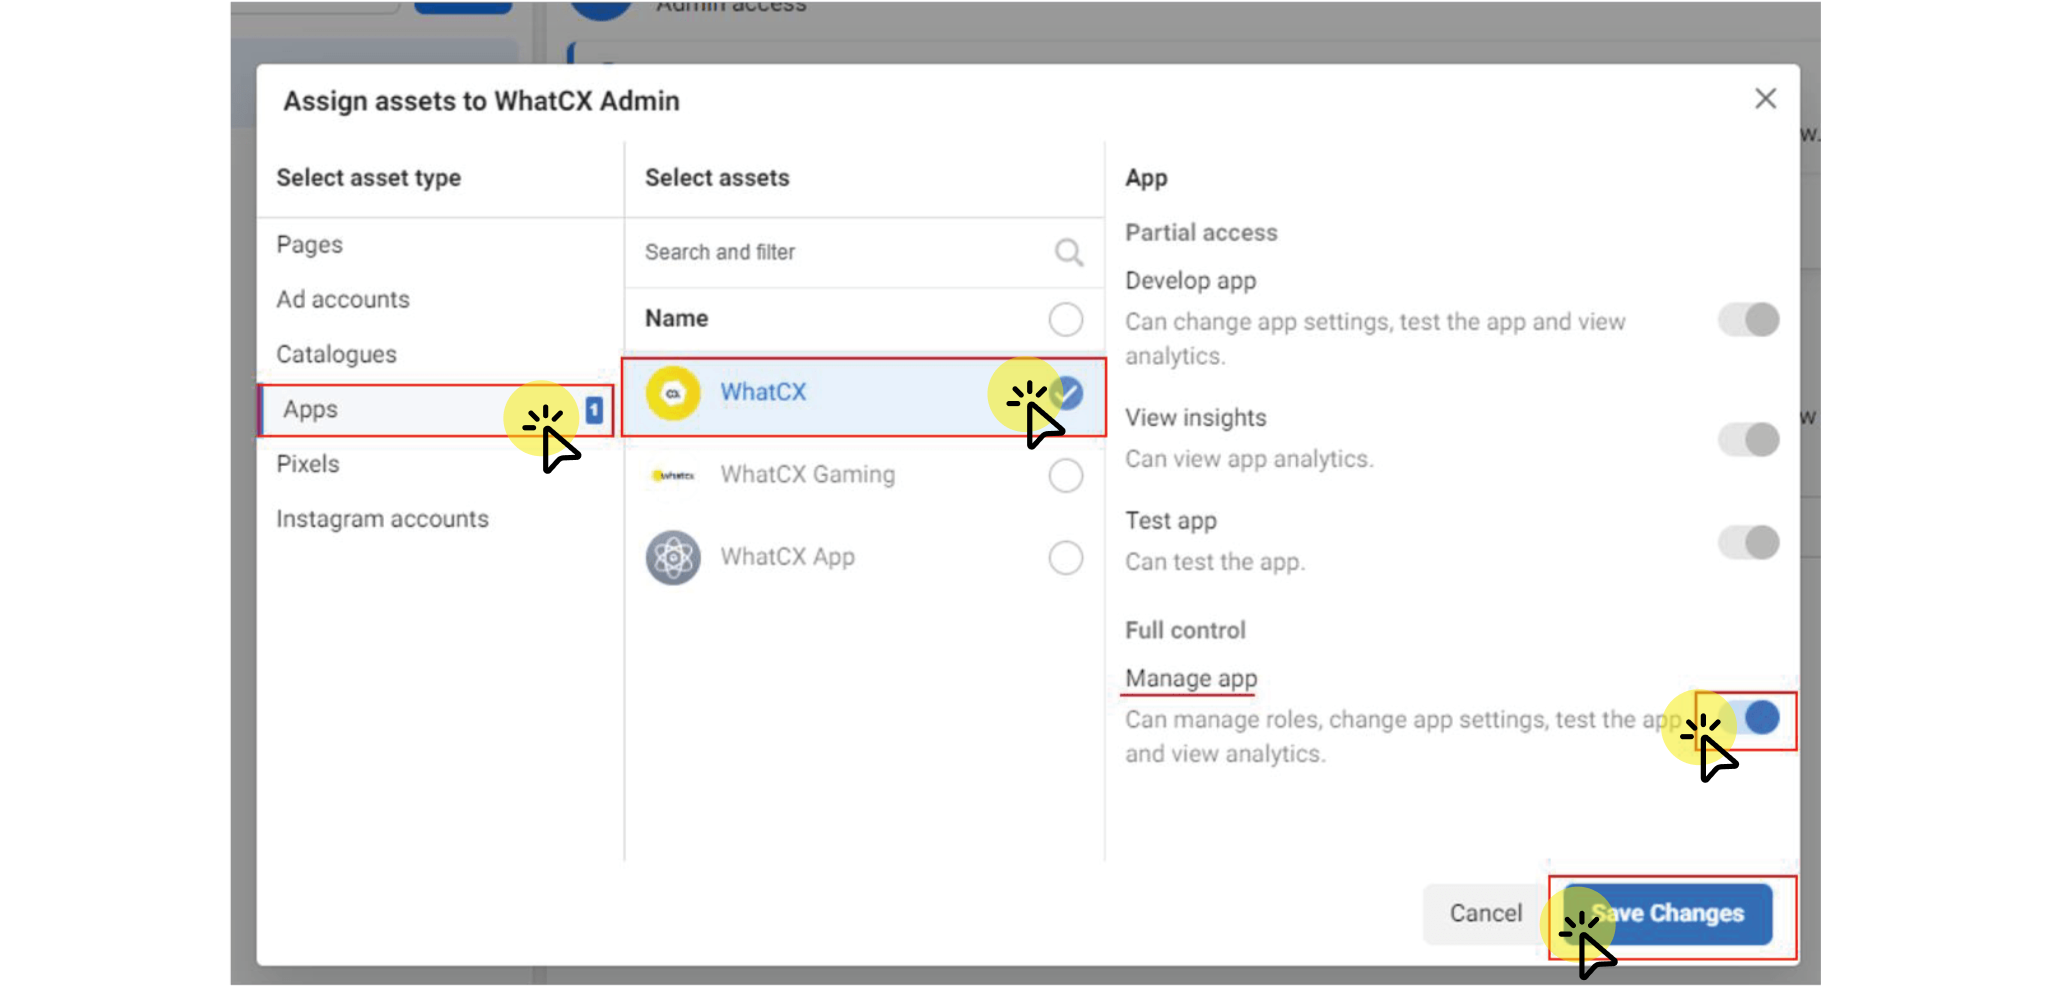
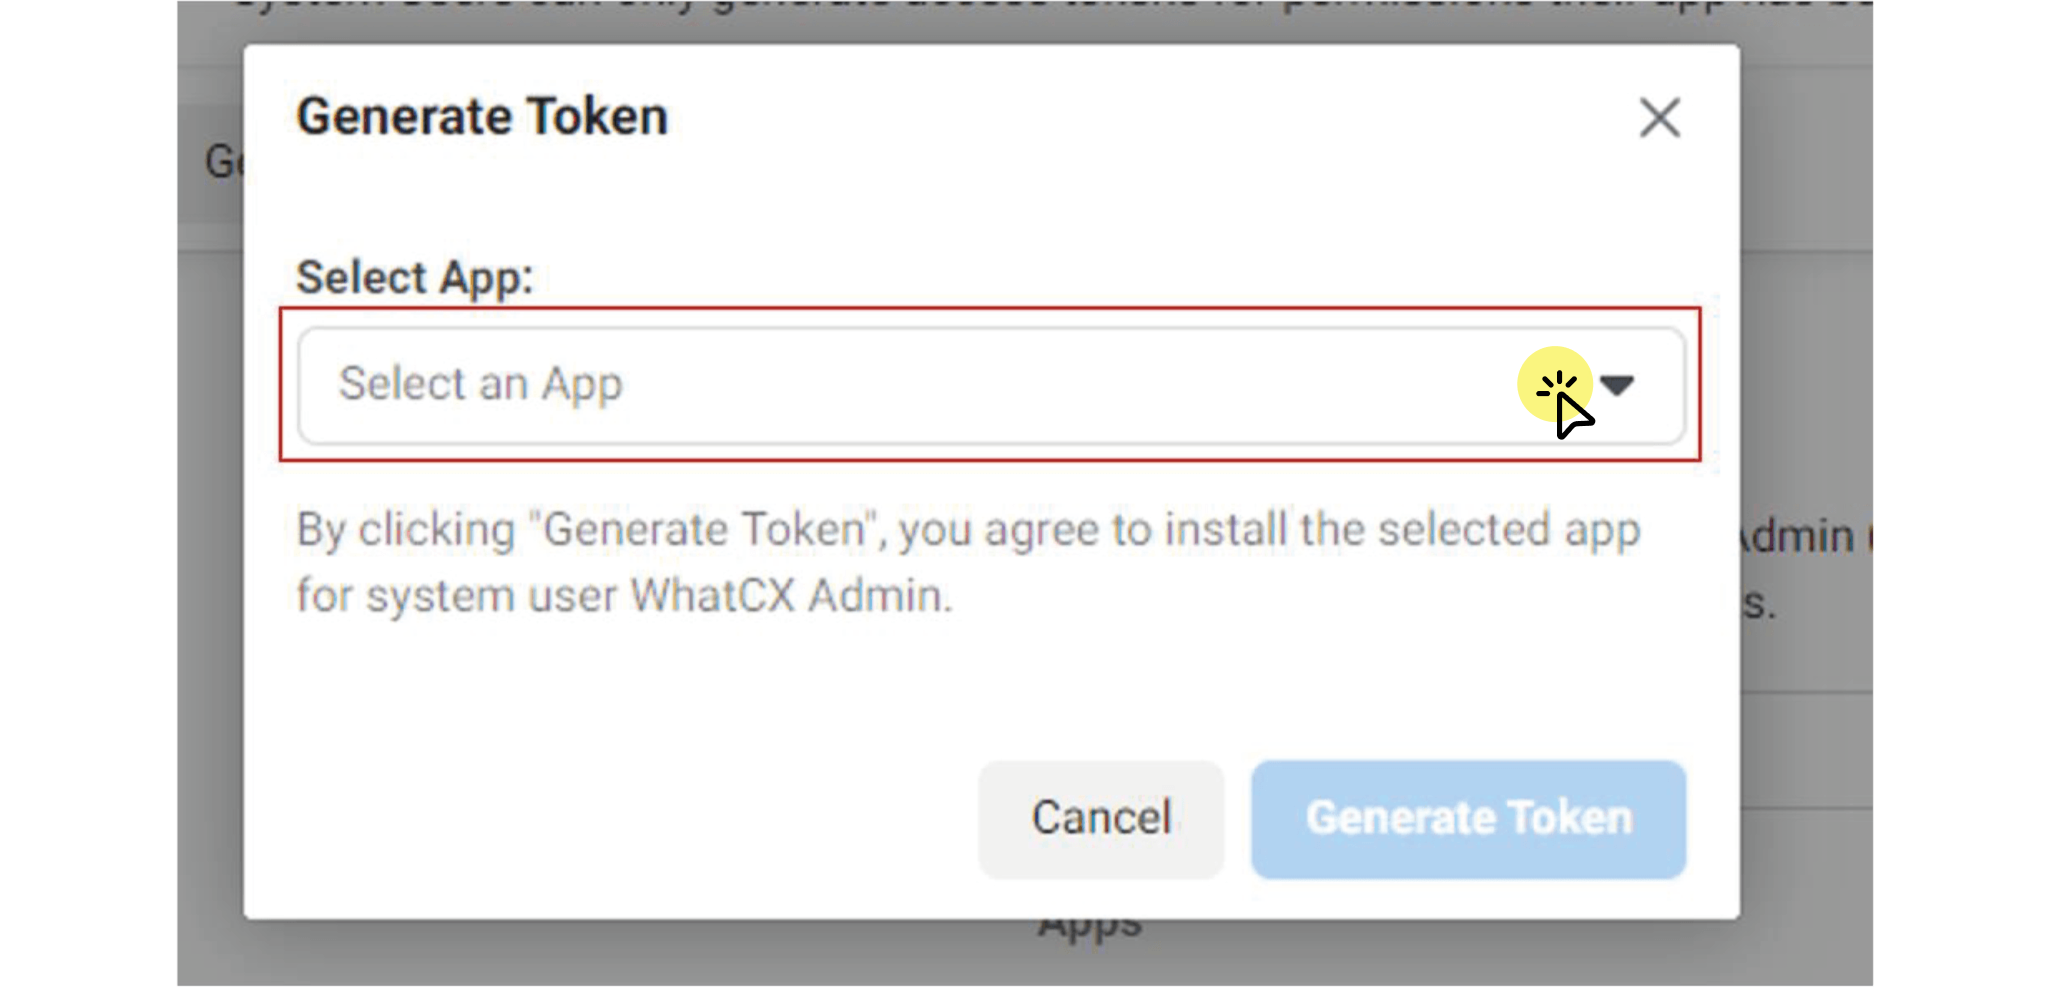
How to create System User?
How to apply for Facebook Business Manager Verification?
FAQs
How to manage chat in conversation module?
Setup Contact Tags & Custom Fields
Using WhatCX
Invite Users & Setup Teams
Setup Contact Tags & Custom Fields
Have your first Conversation on WhatCX
Schedule your first Broadcast
Onboarding Process
Free Plan
What are the pre-requisites to start using the Free Plan?
Connect your WhatsApp Cloud API
How to create FB Business Page?
How to connect a FB Business Page to FB Business Manager?
How to apply for Facebook Business Manager Verification?
How to enable WhatsApp in Developer App?
How to create a Developer App?
How to get Phone Number ID?
How to create System User?
How to enable WhatsApp in Developer App?
How Pricing Works
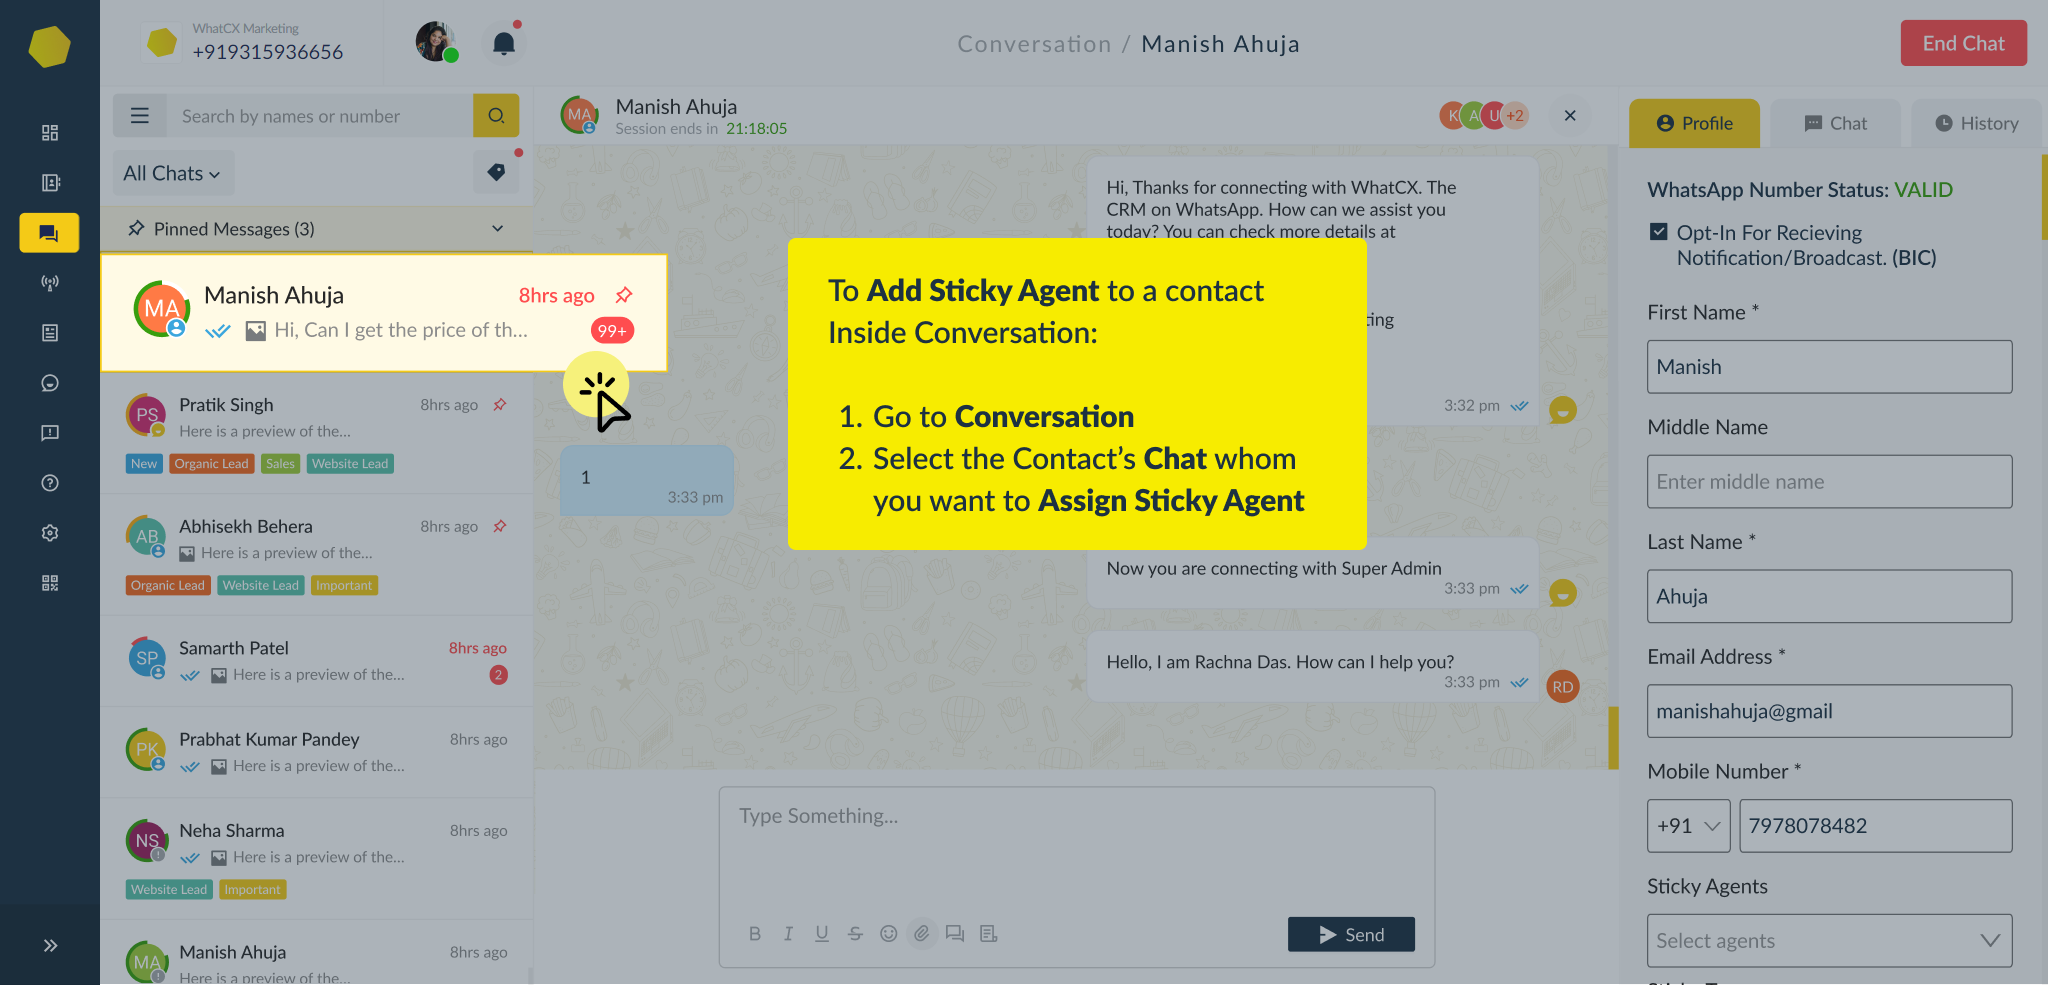
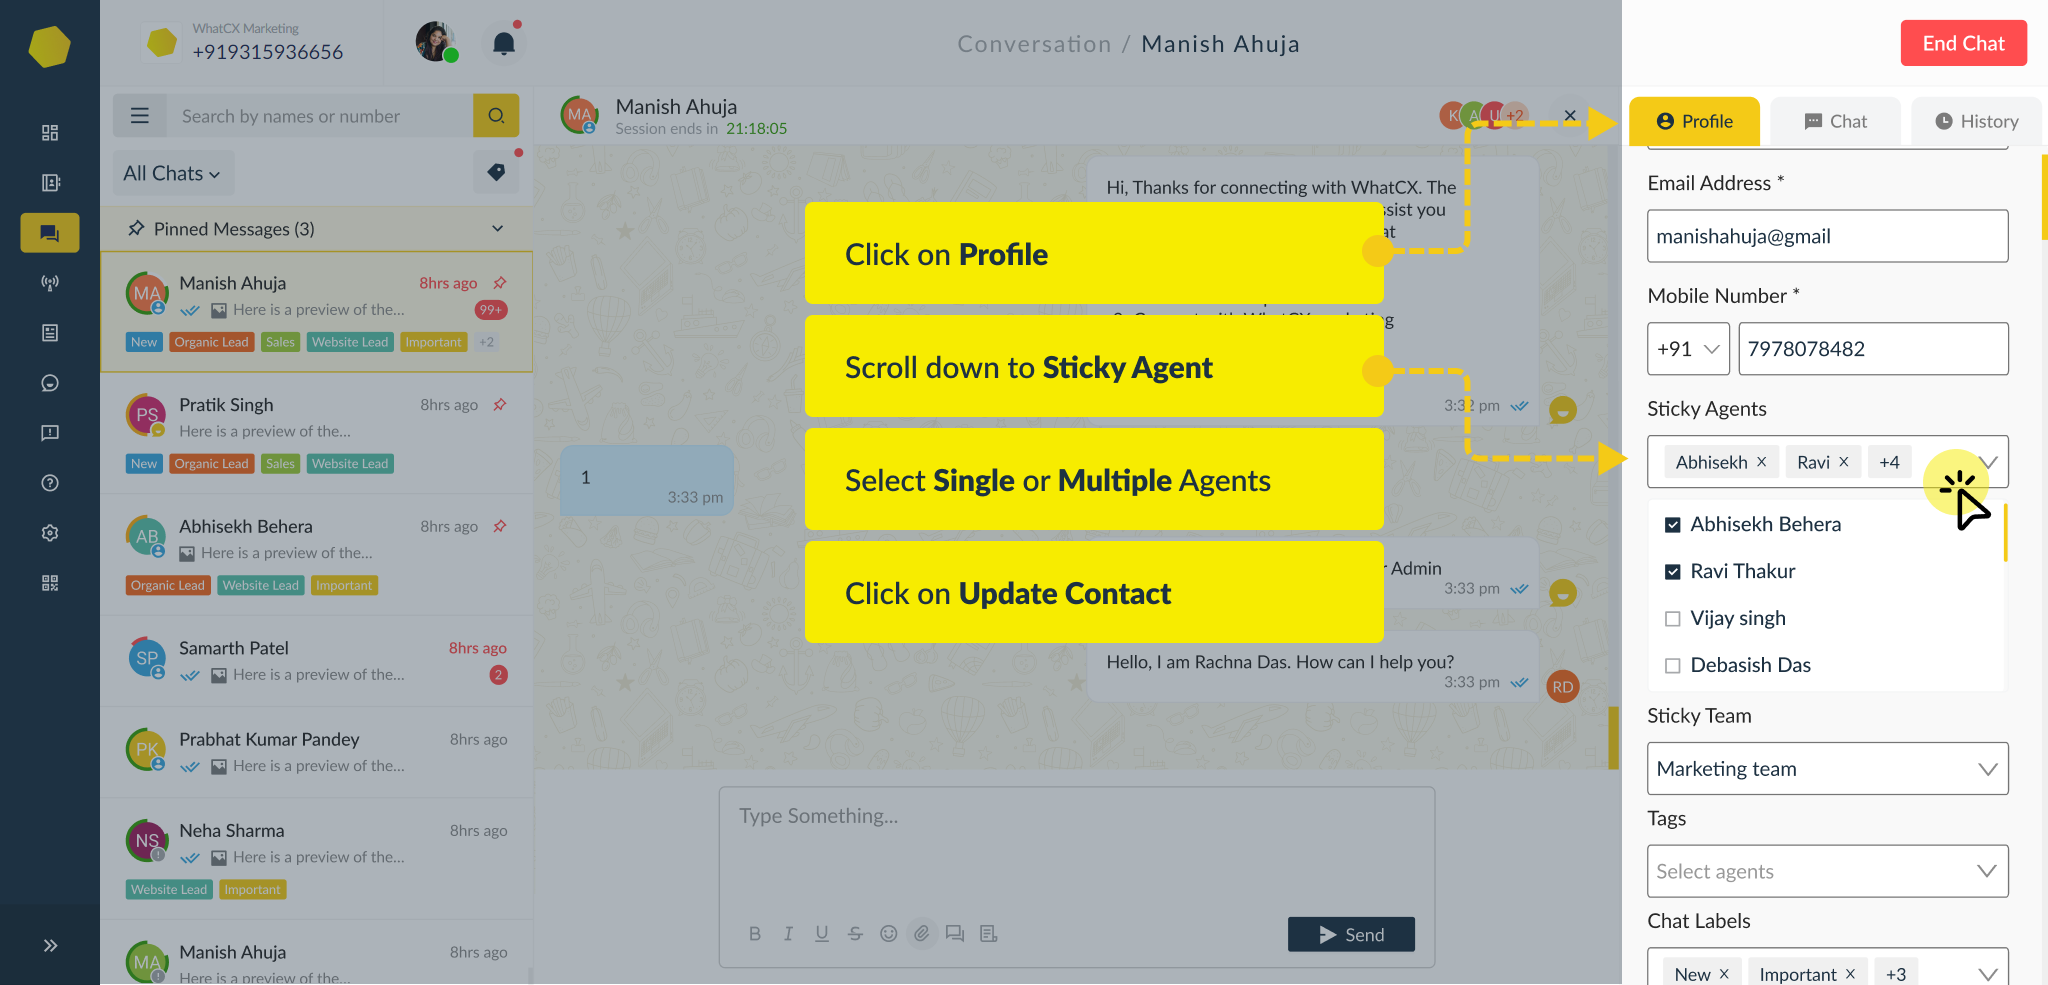
How to update Contacts Profile, add Sticky Agents & Tags?
Modules in WhatCX
Create & Import Contacts
API Docs
Have your first Conversation on WhatCX
How to create a Developer App?
Conversation Flow
Daily Broadcasting Limits
How to schedule a Broadcast?
How to get Phone Number ID?
Billing & Wallet
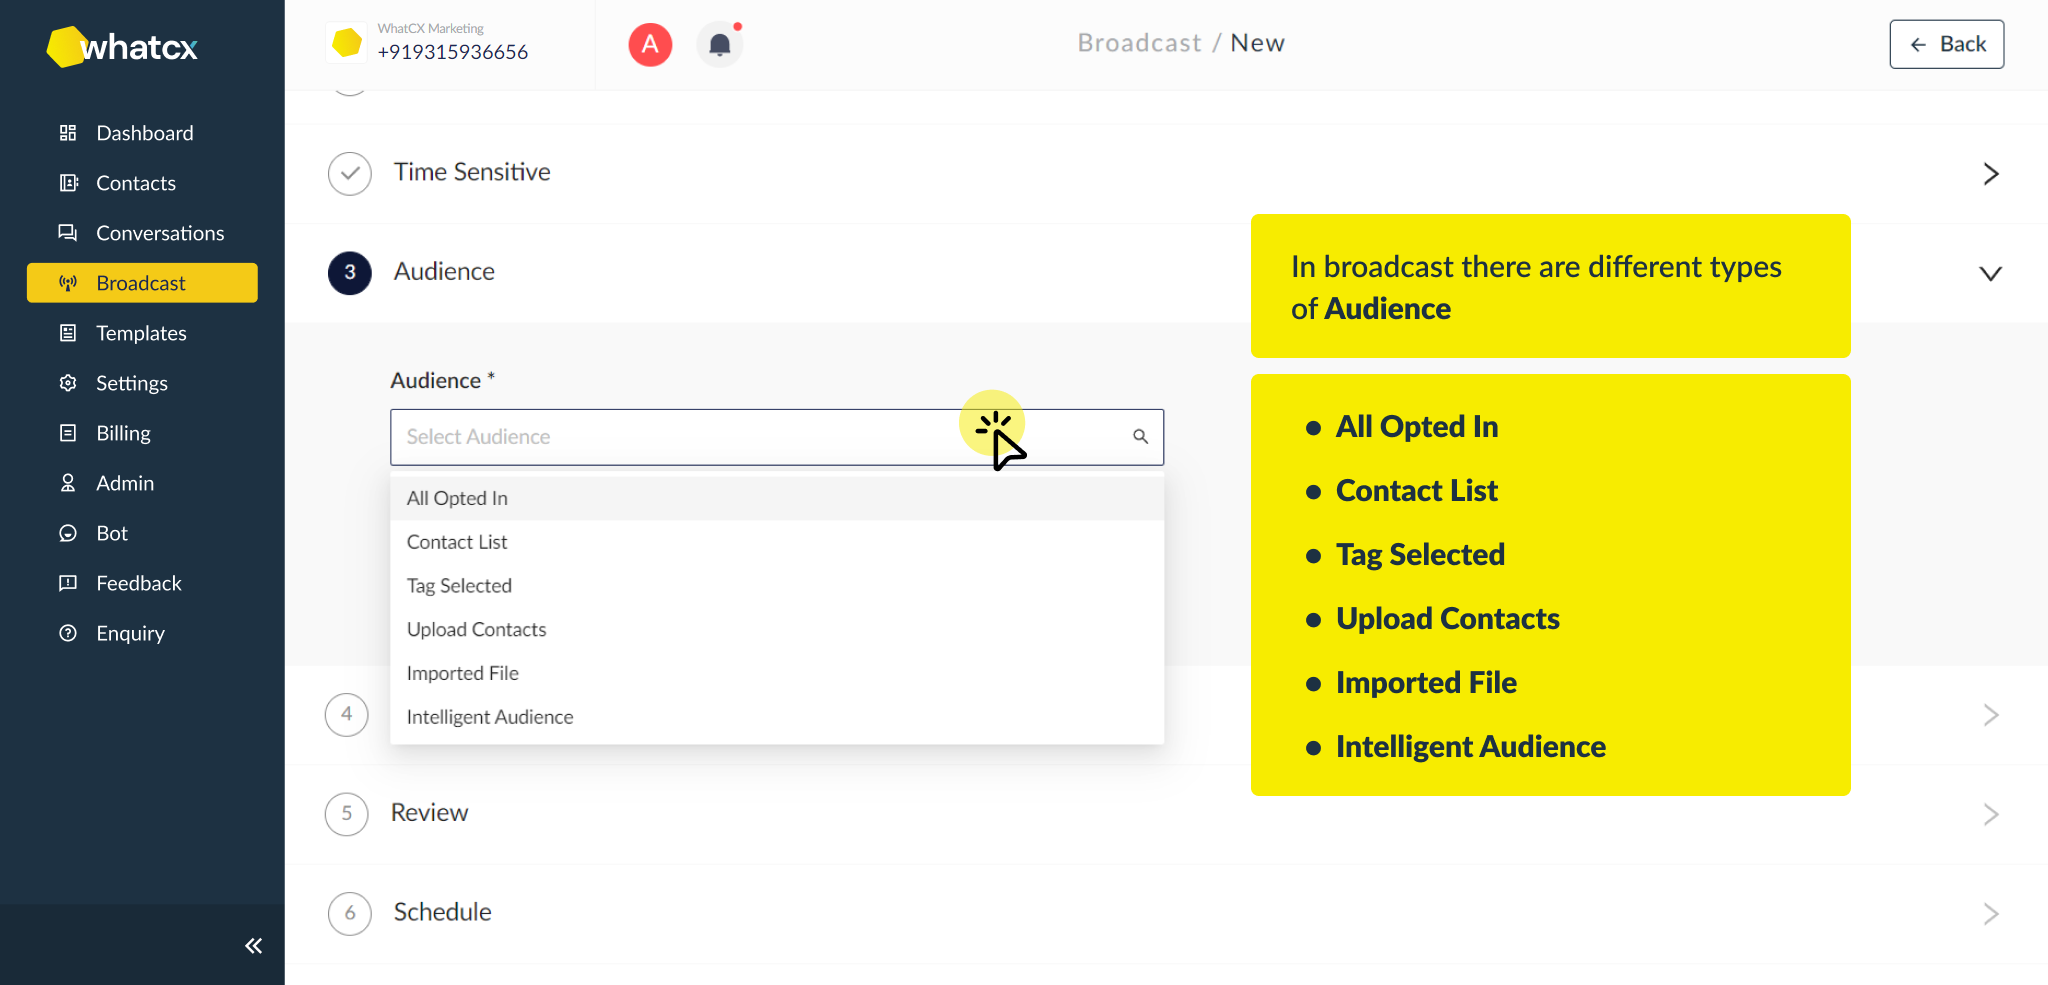
What are the different audience types in Broadcast?
Template Management
Schedule your first Broadcast
How to get WABA ID?
How to Create Templates on WhatCX?
Glossary
Register for Cloud API
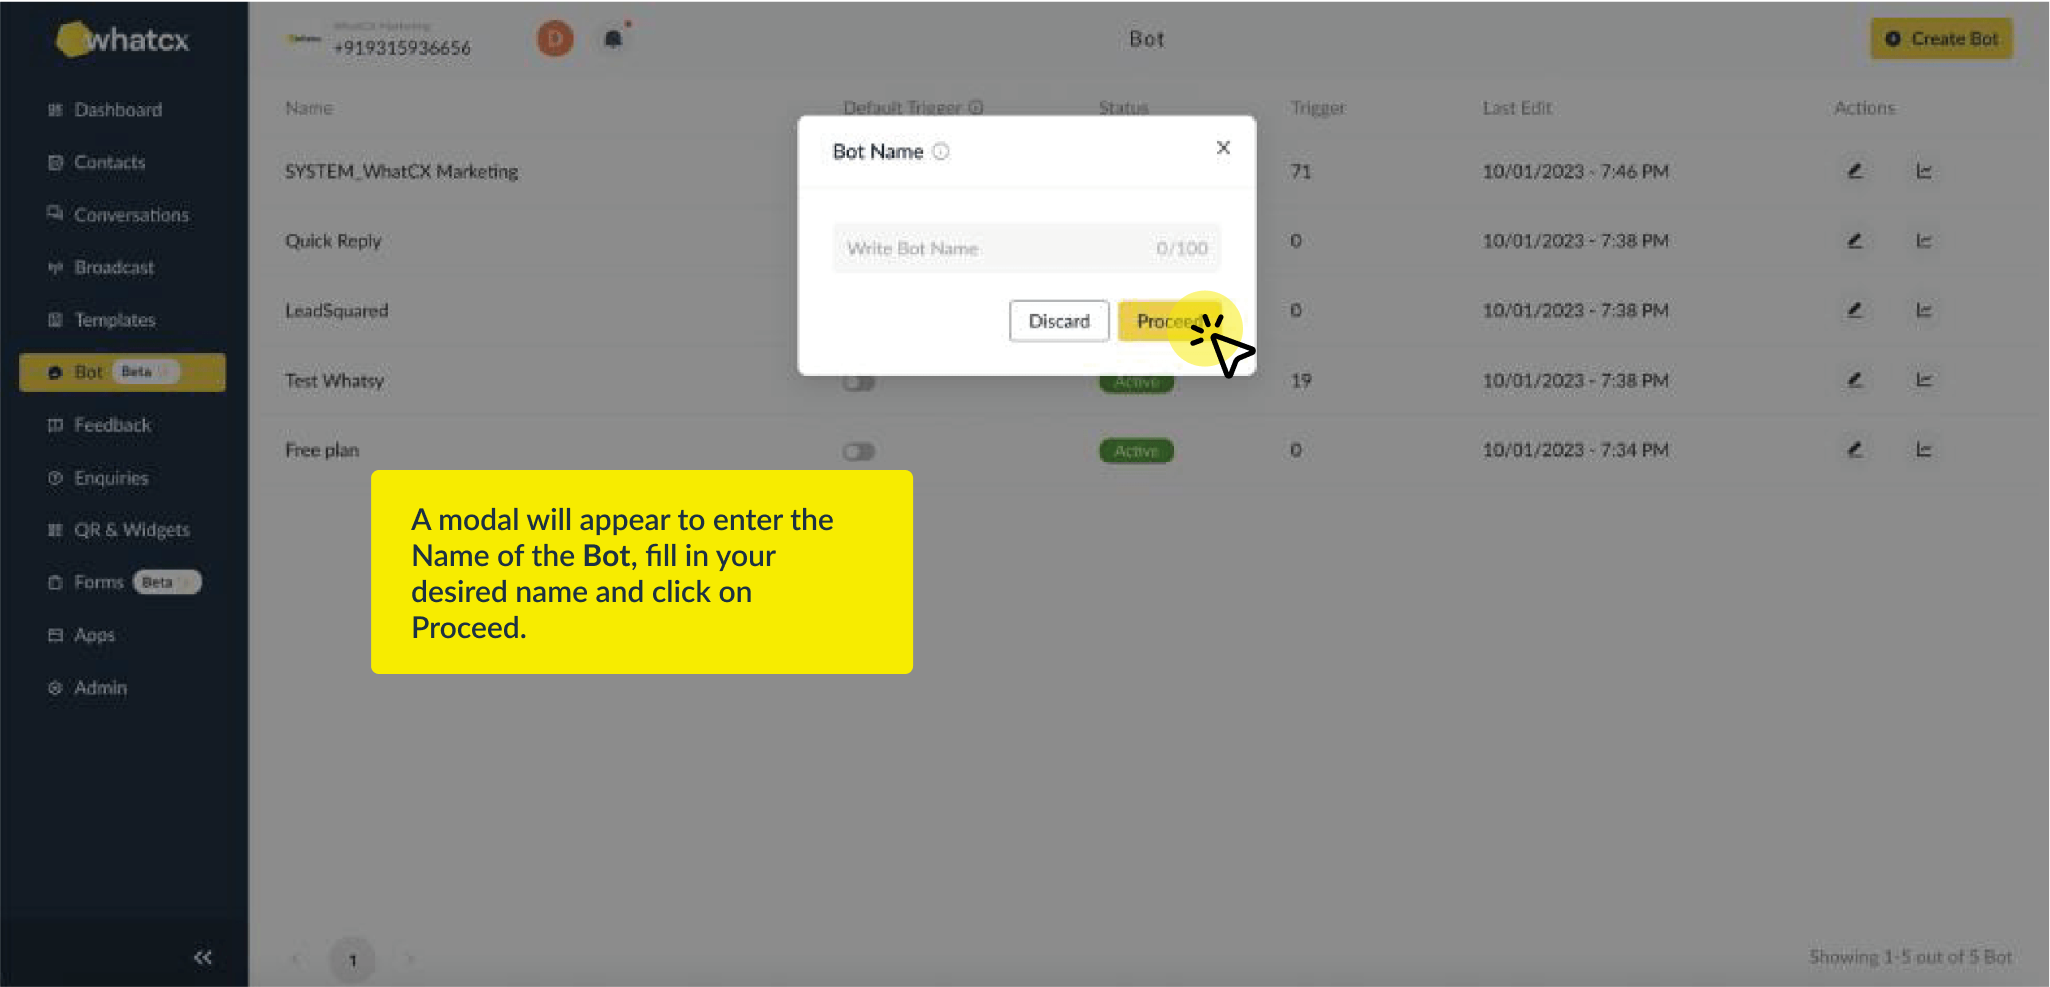
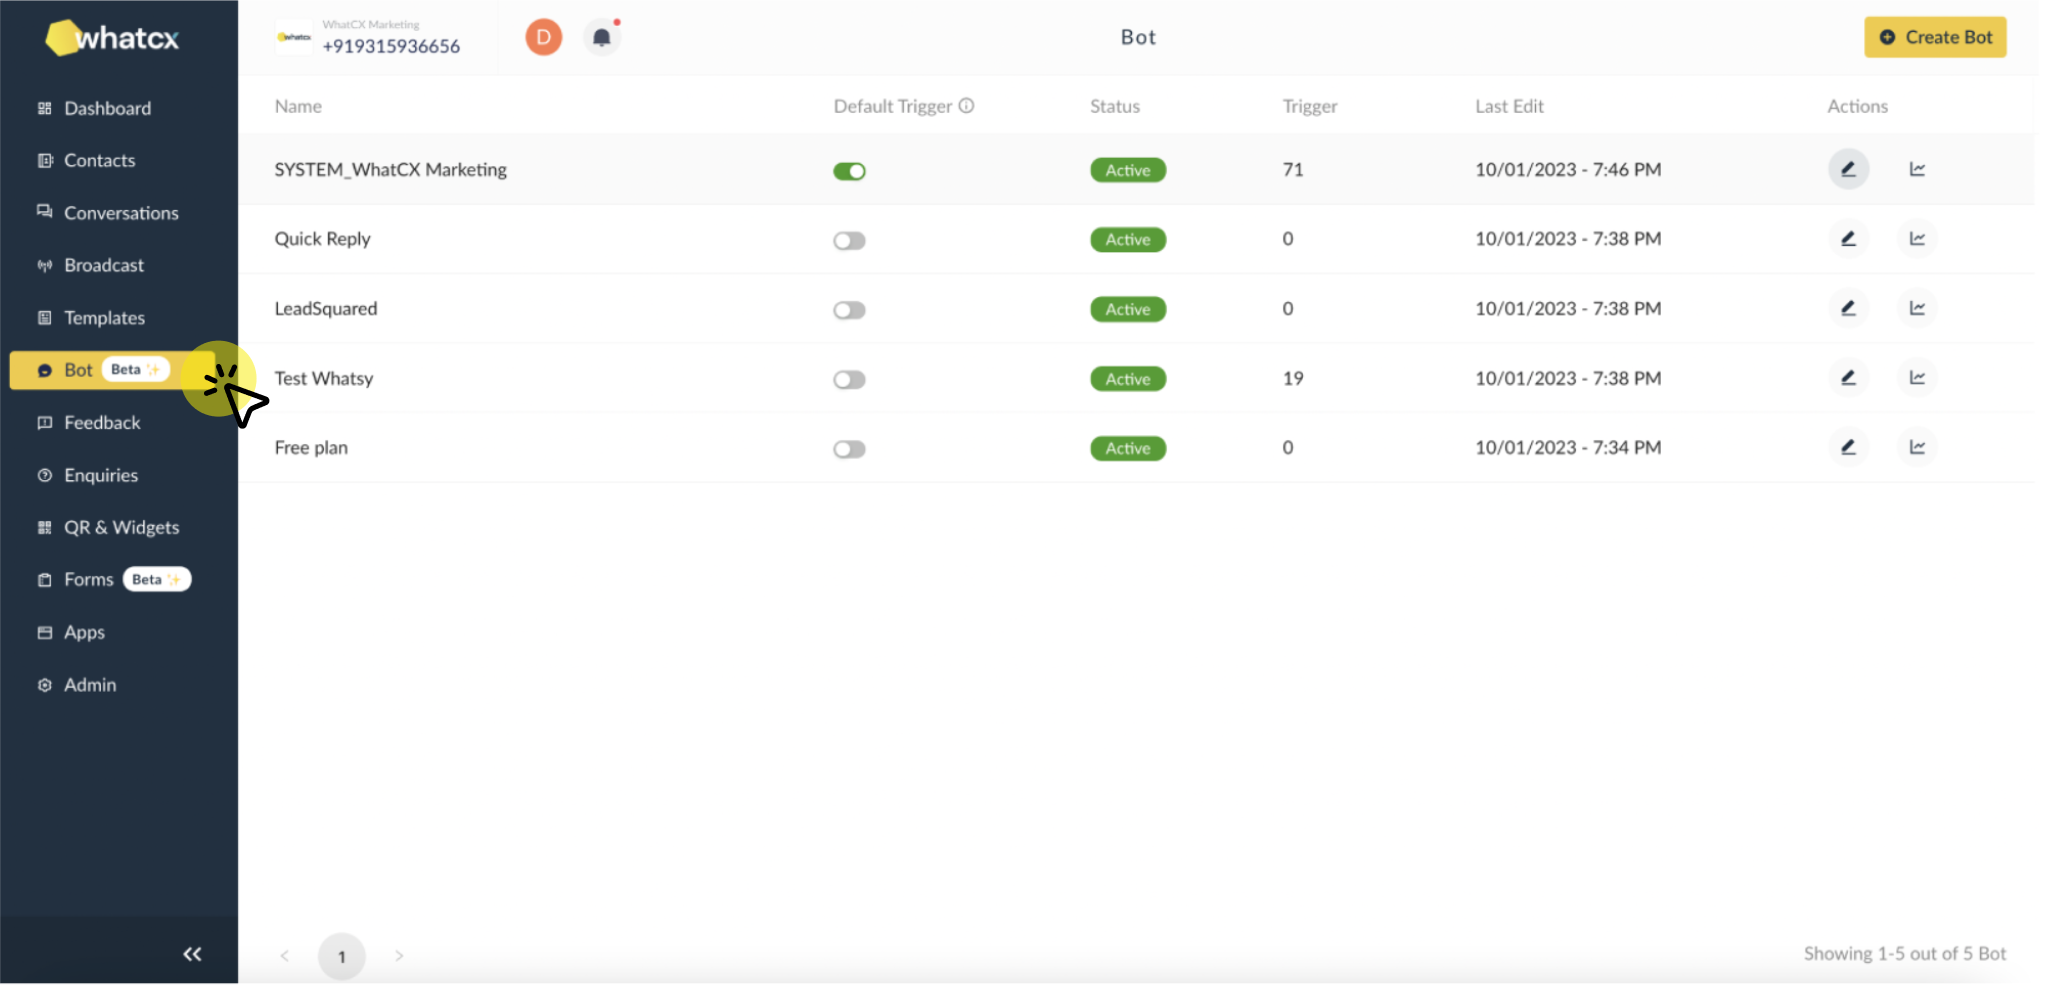
Setup your first bot
Supported API Providers
How to create QR & Widgets?
Contacts
How to add Contacts manually?
How to import contacts and map the CSV?
How to apply Advance Filters and create a Contact List?
How to create System User?
How to customize your QR & Widget?
Conversations
How to manage chat in conversation module?
How to update Contacts Profile, add Sticky Agents & Tags?
How to add Asset?
How to apply for Facebook Business Manager Verification?
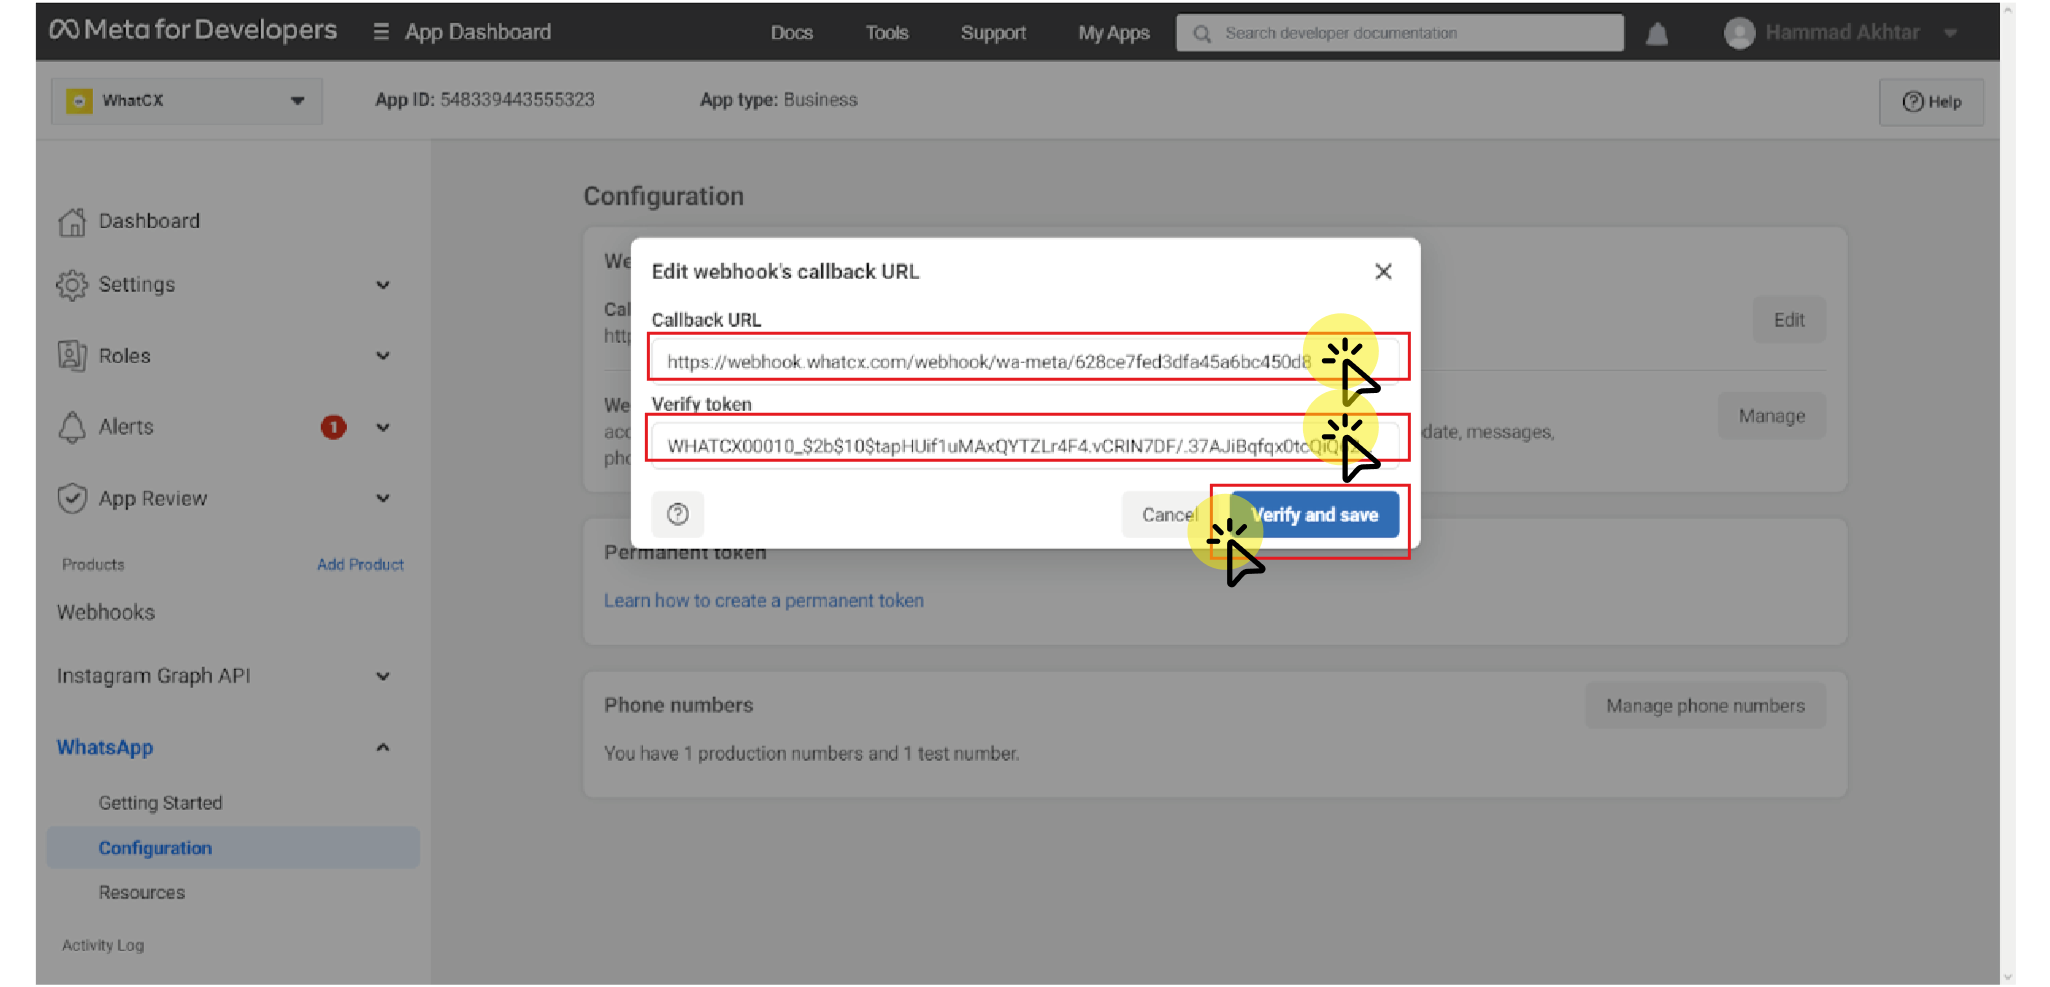
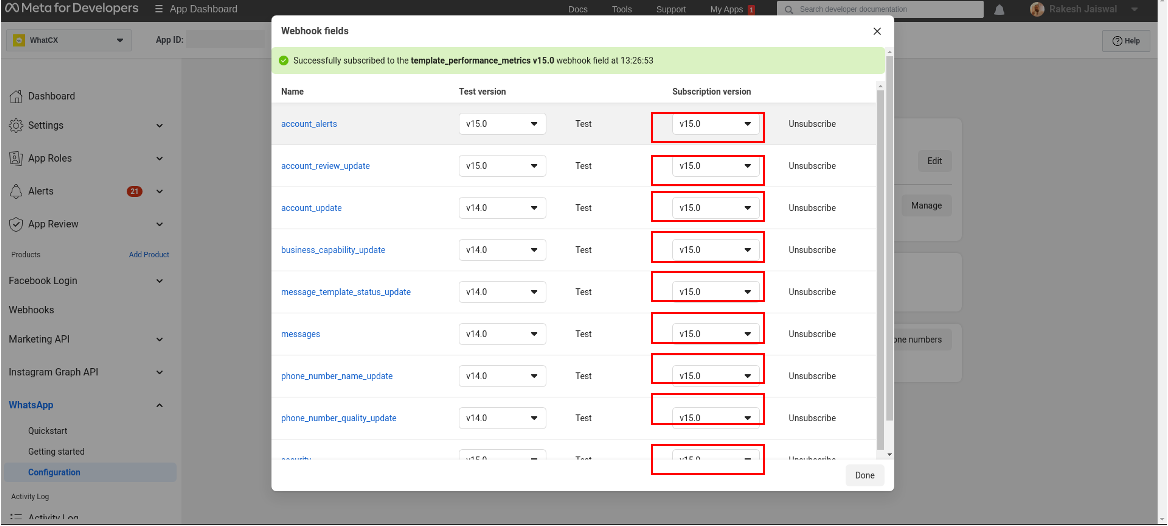
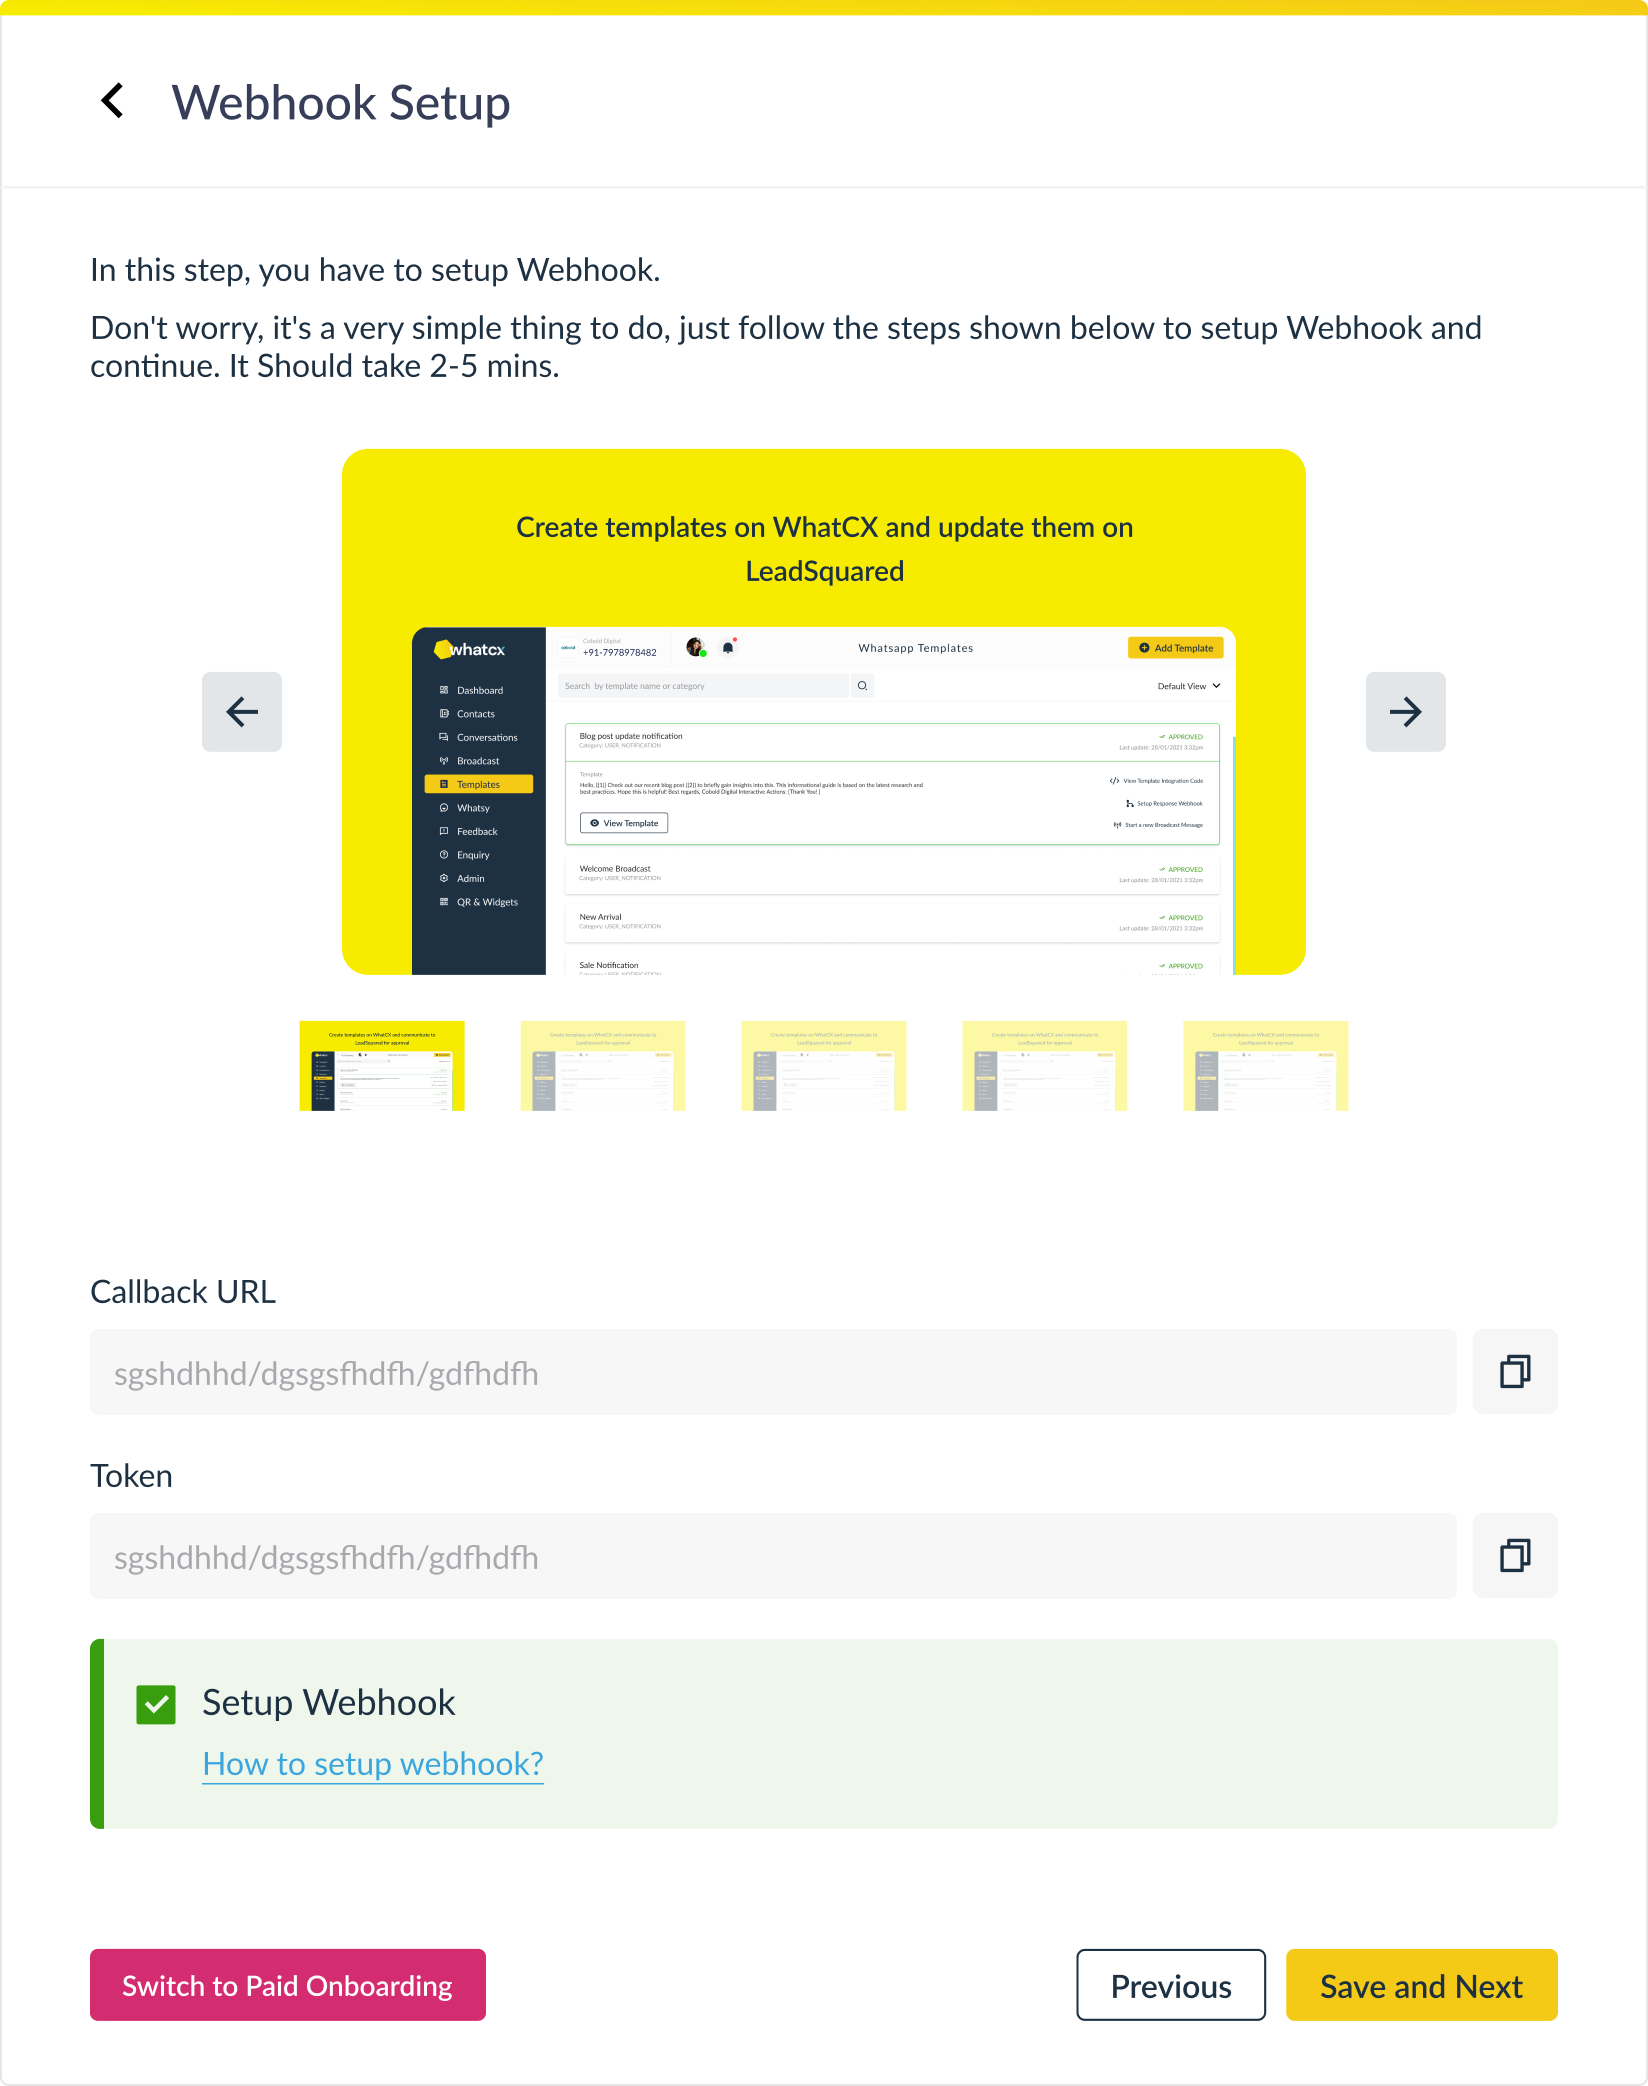
How to setup Webhook?
How to create a Bot?
Broadcast
How to schedule a Broadcast?
What are the different audience types in Broadcast?
What are the eligibility requirements for a WhatsApp Business API?
Templates
How to Create Templates on WhatCX?
What to do if the verification button is not visible when applying for Facebook Business manager Verification?
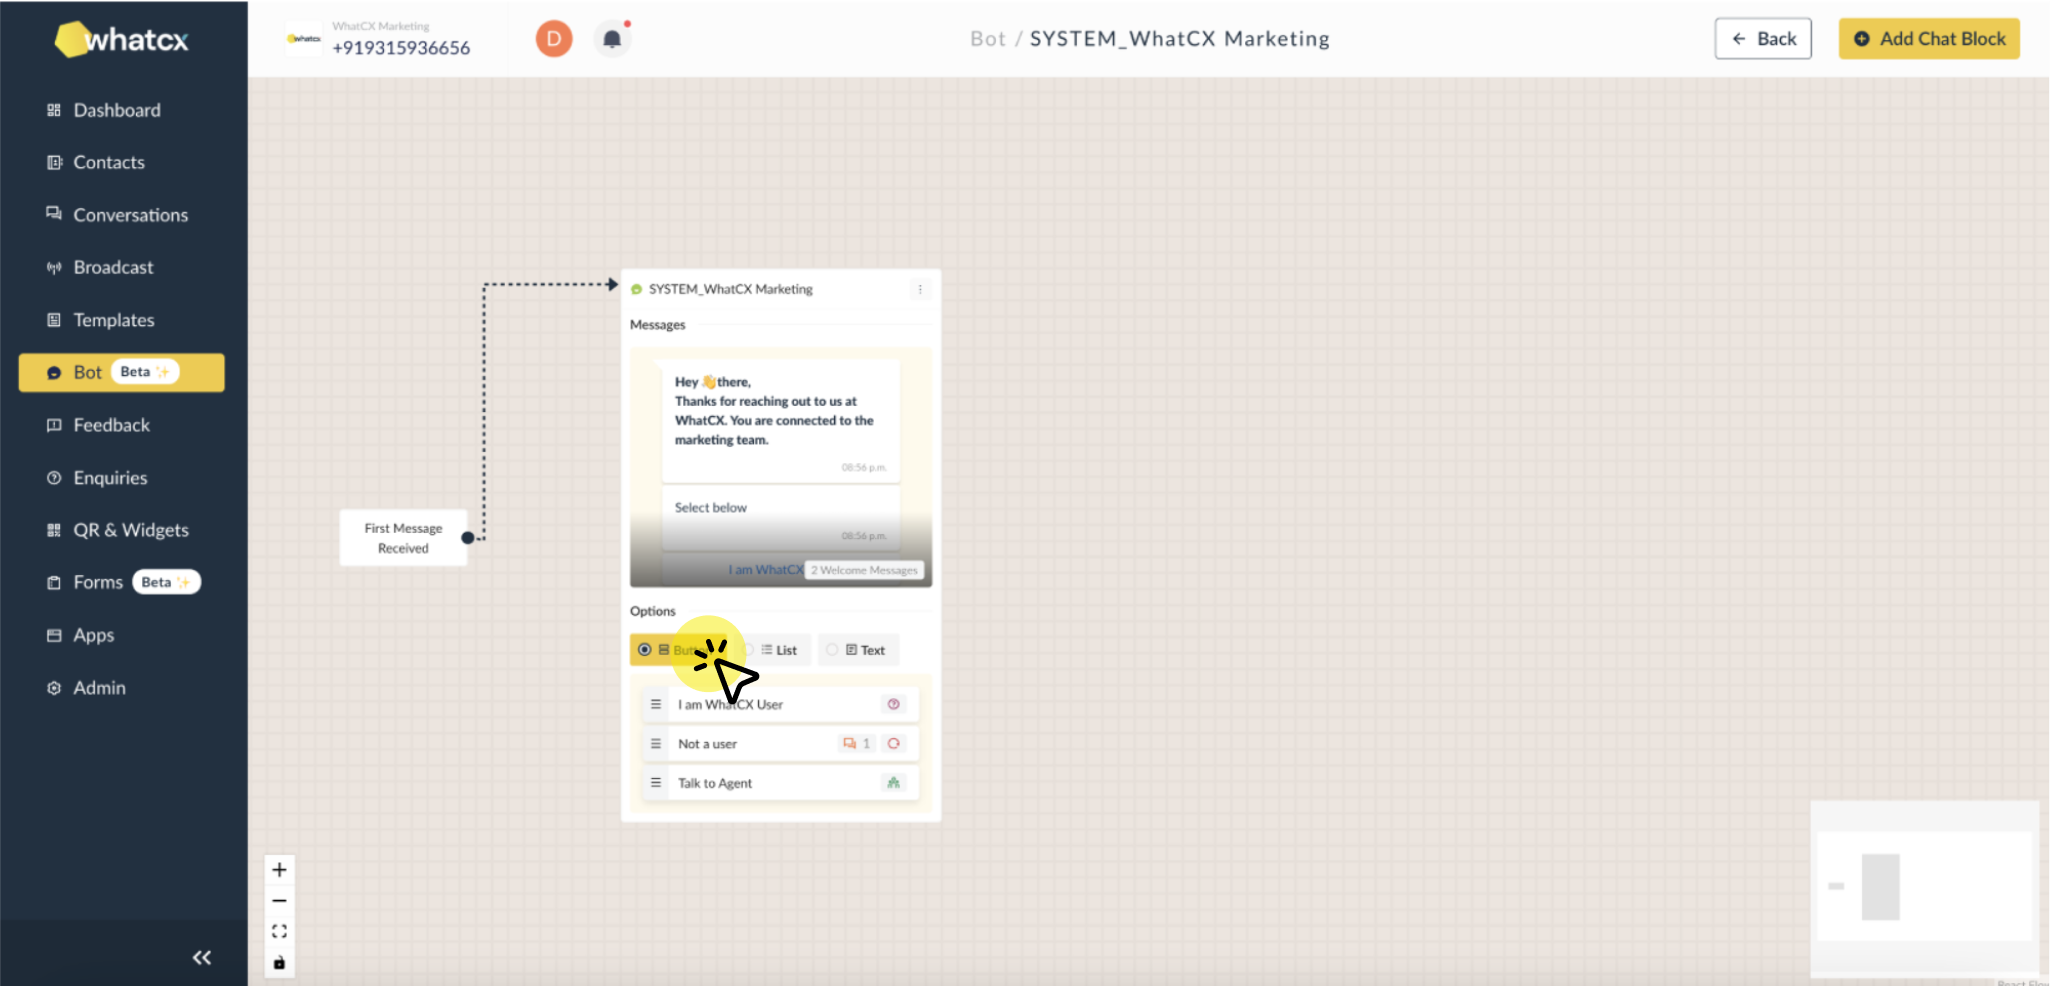
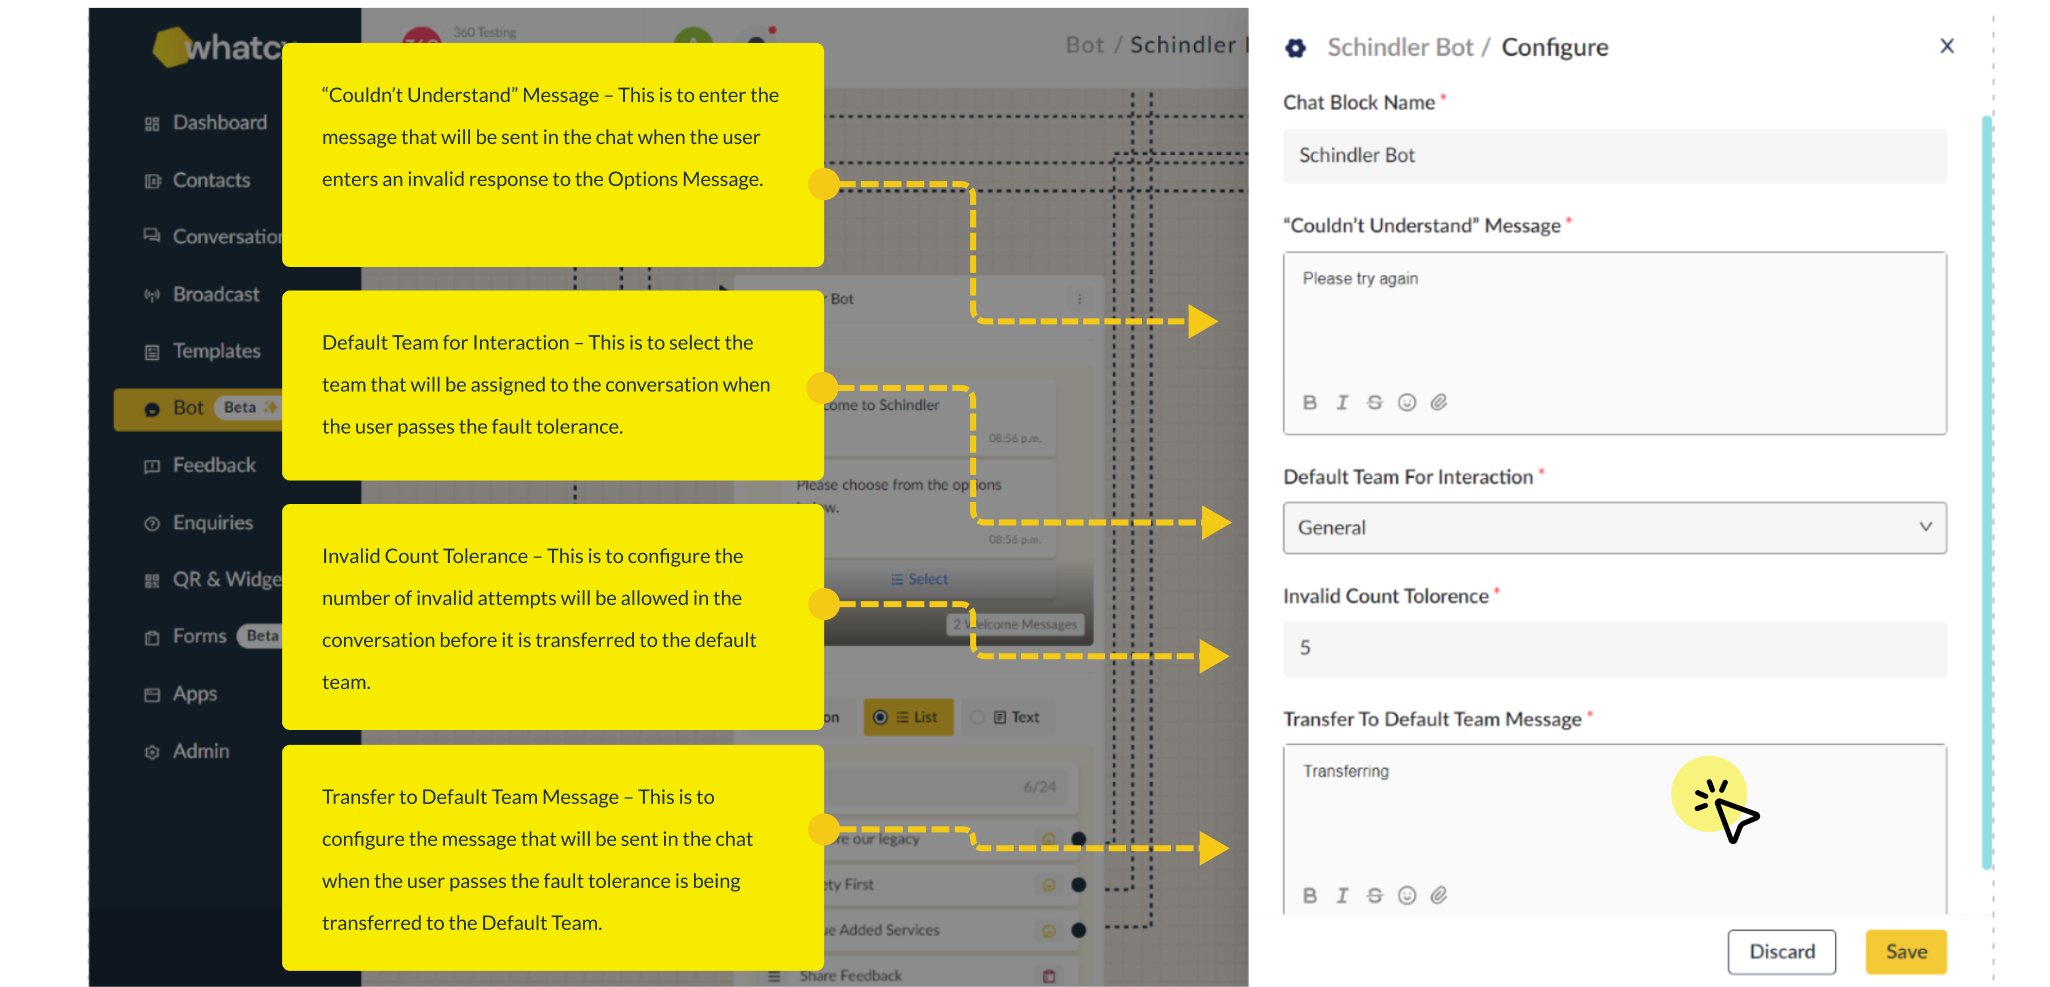
How to create a Chat Block?
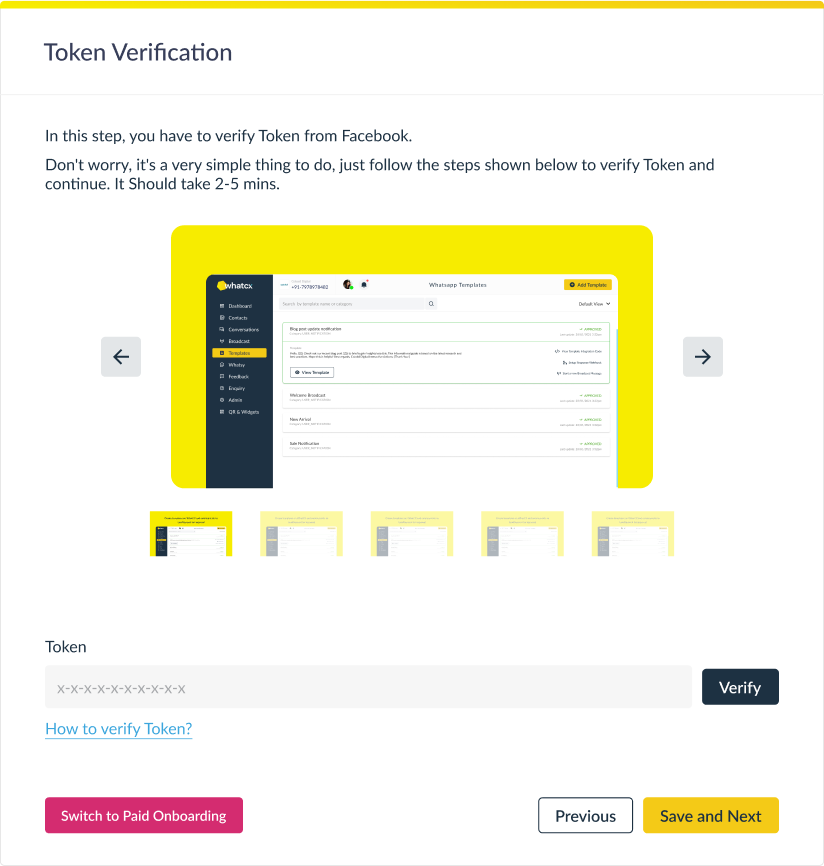
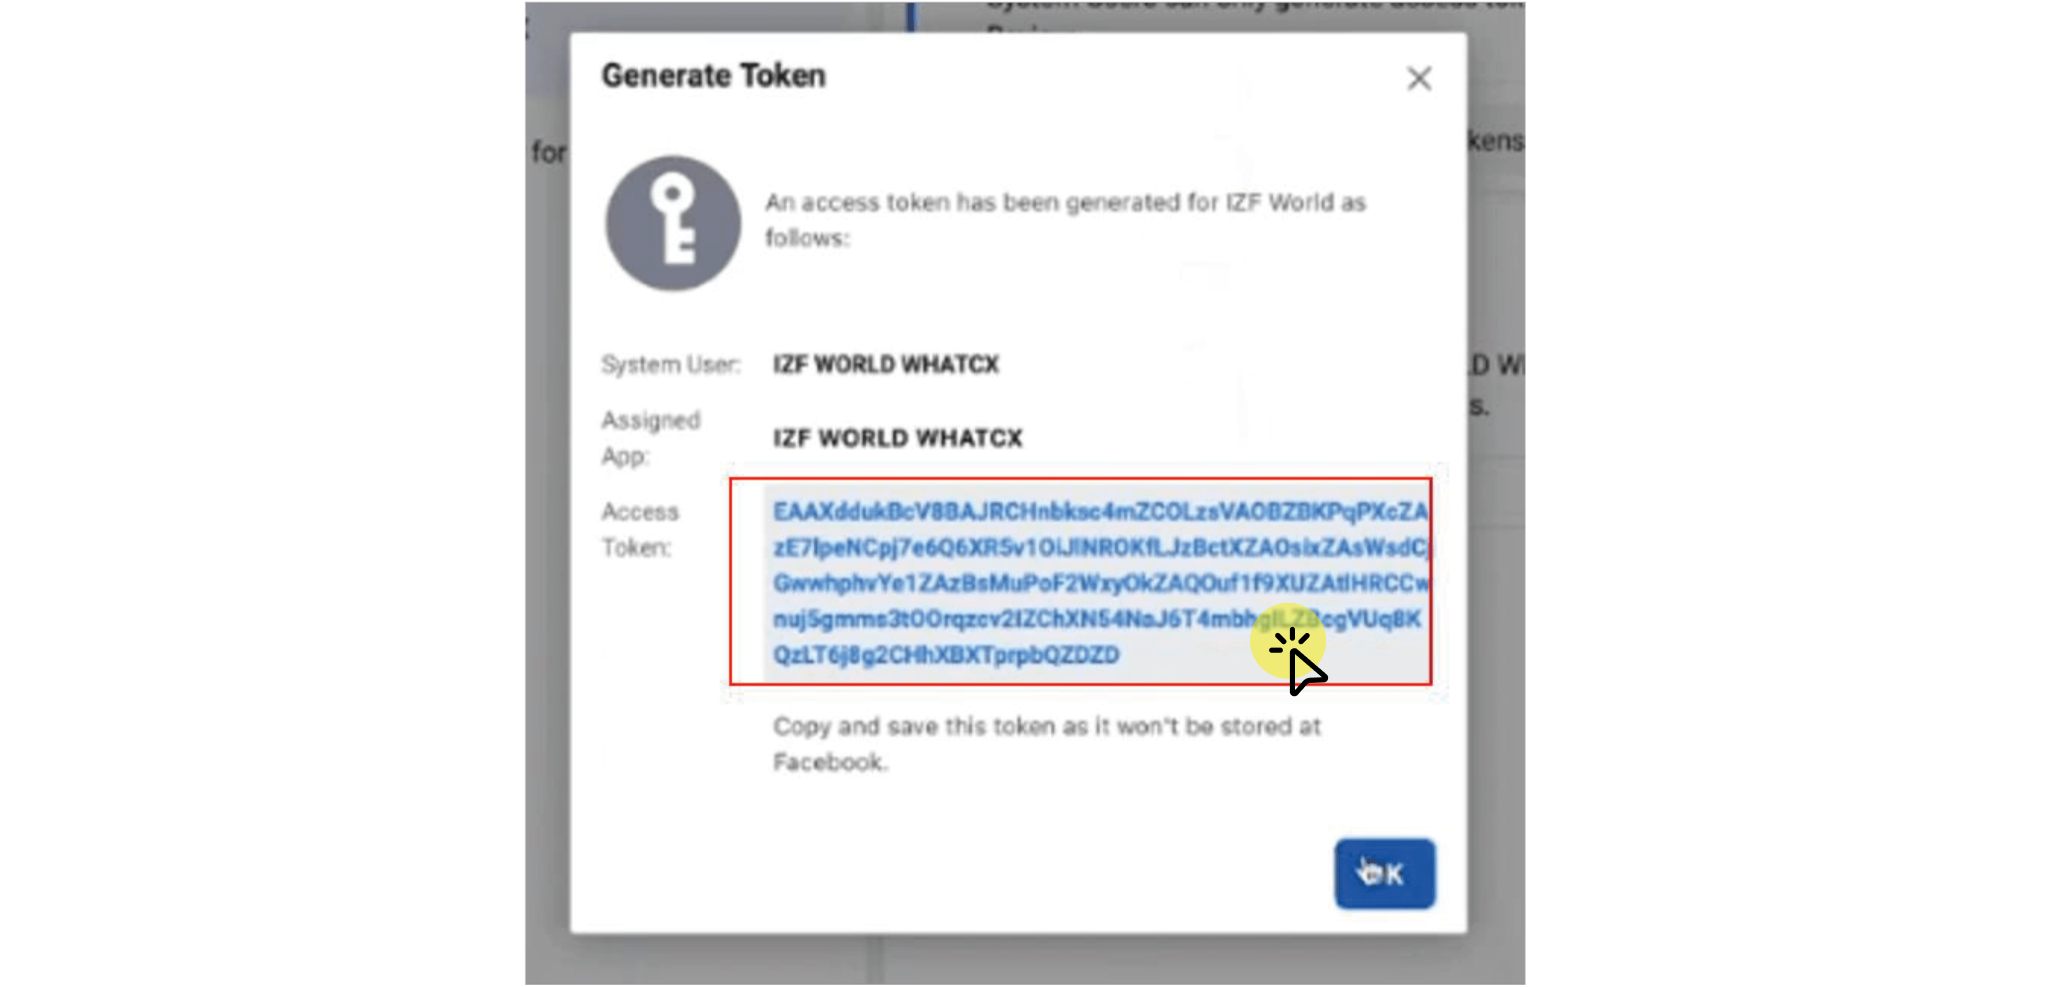
How to verify token?
QR Codes & Widgets
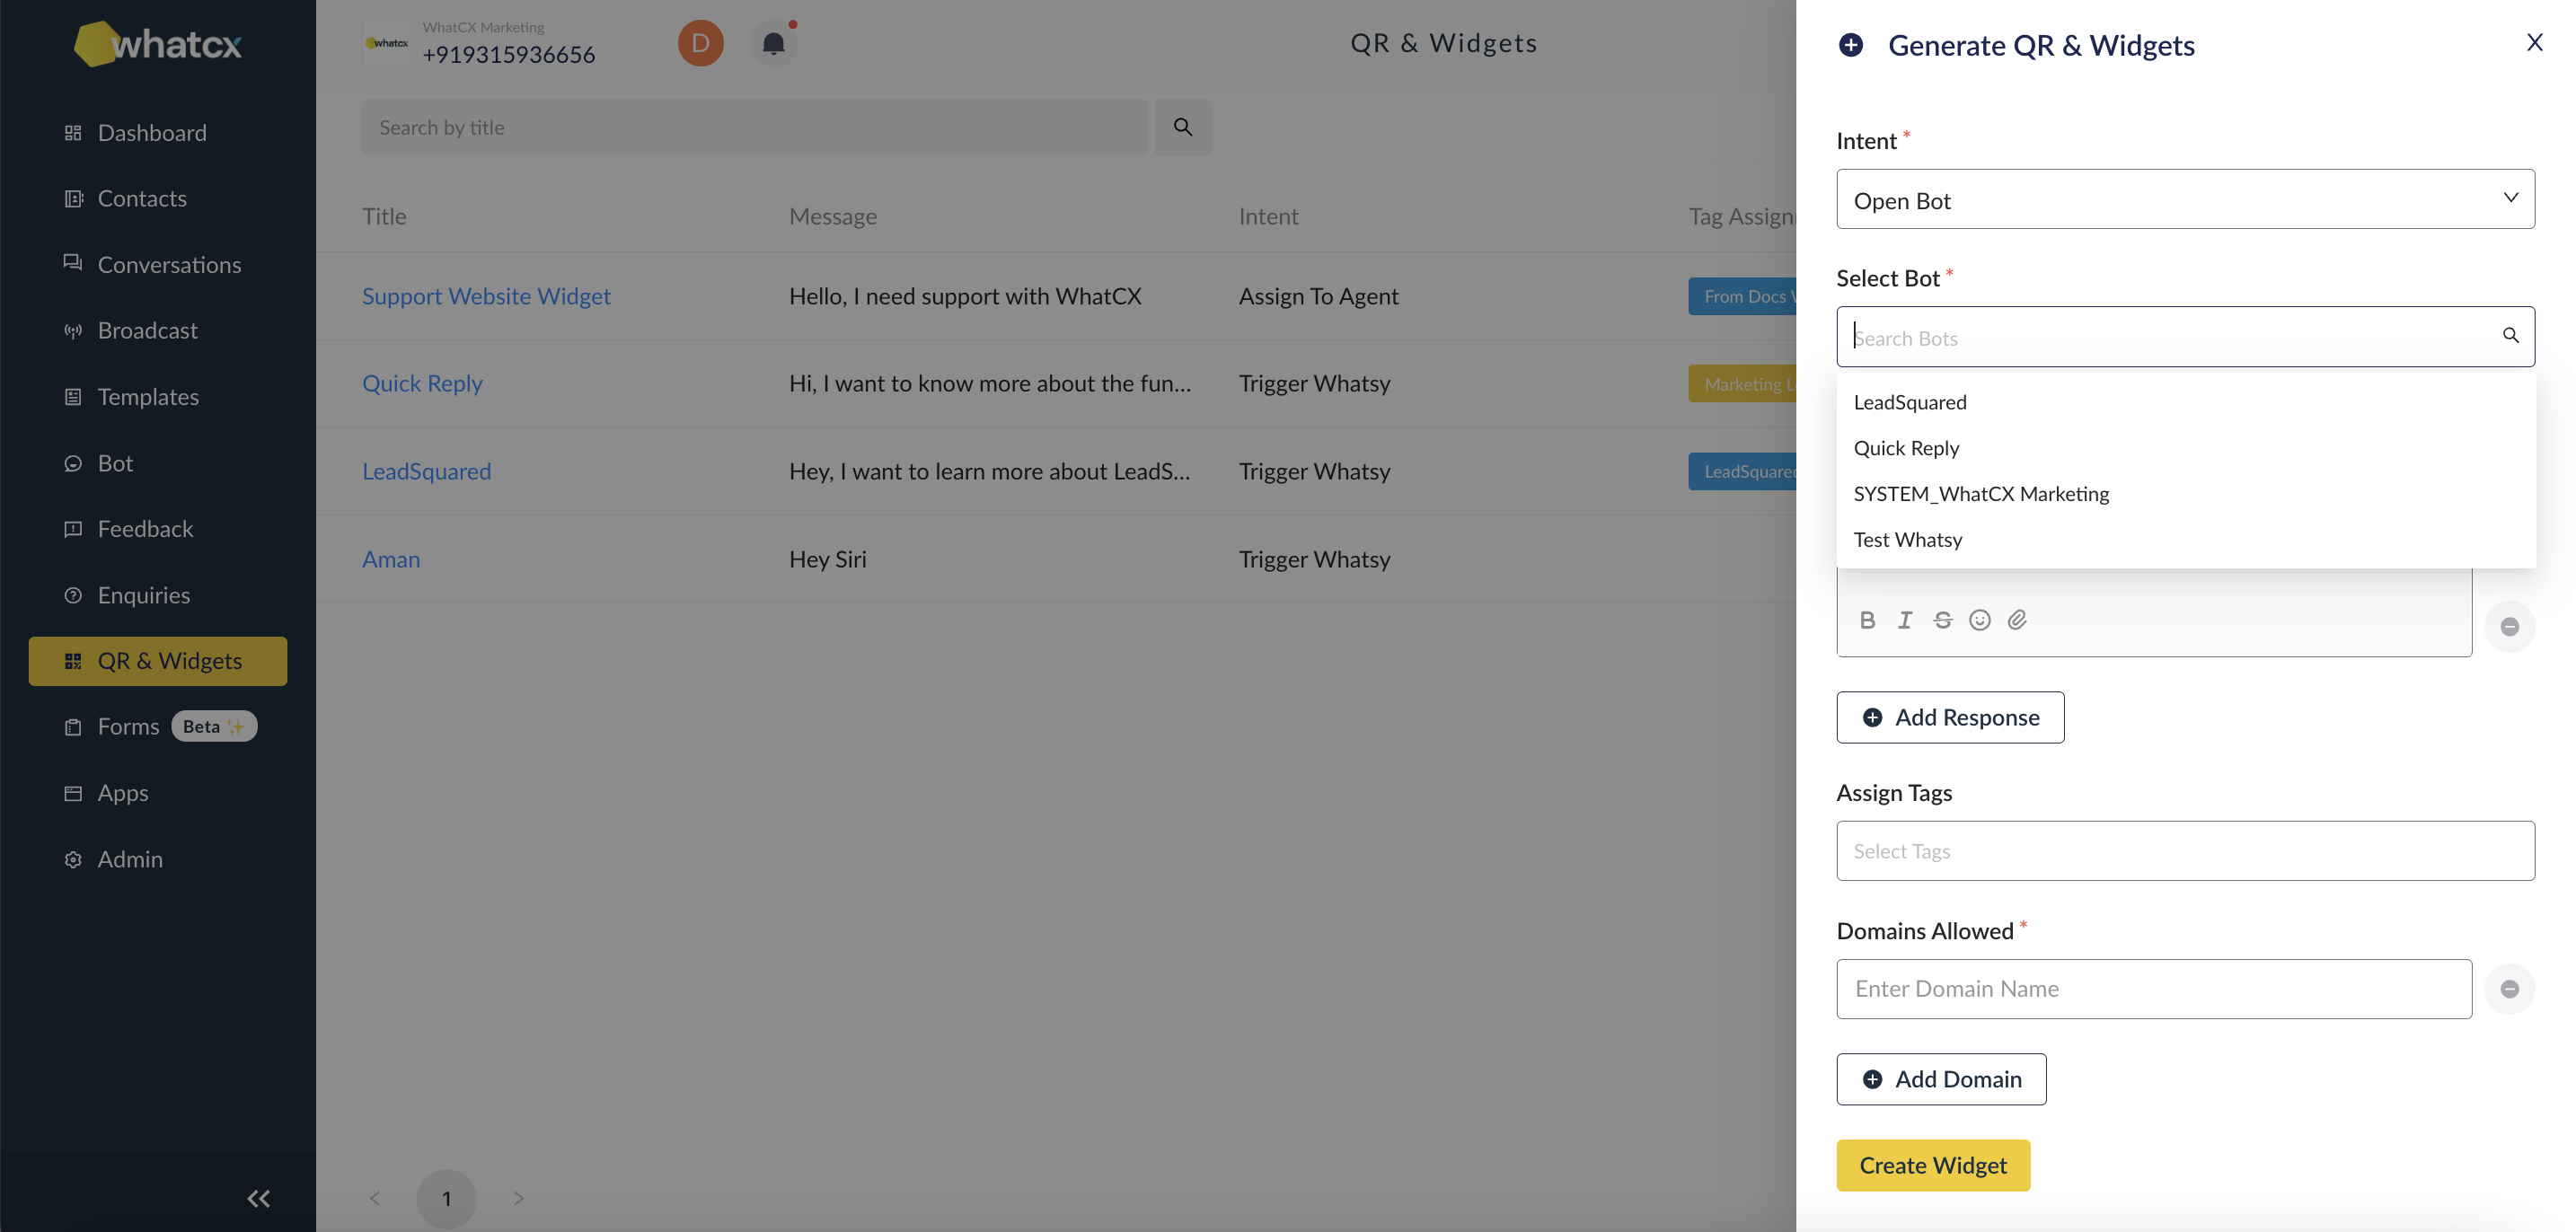
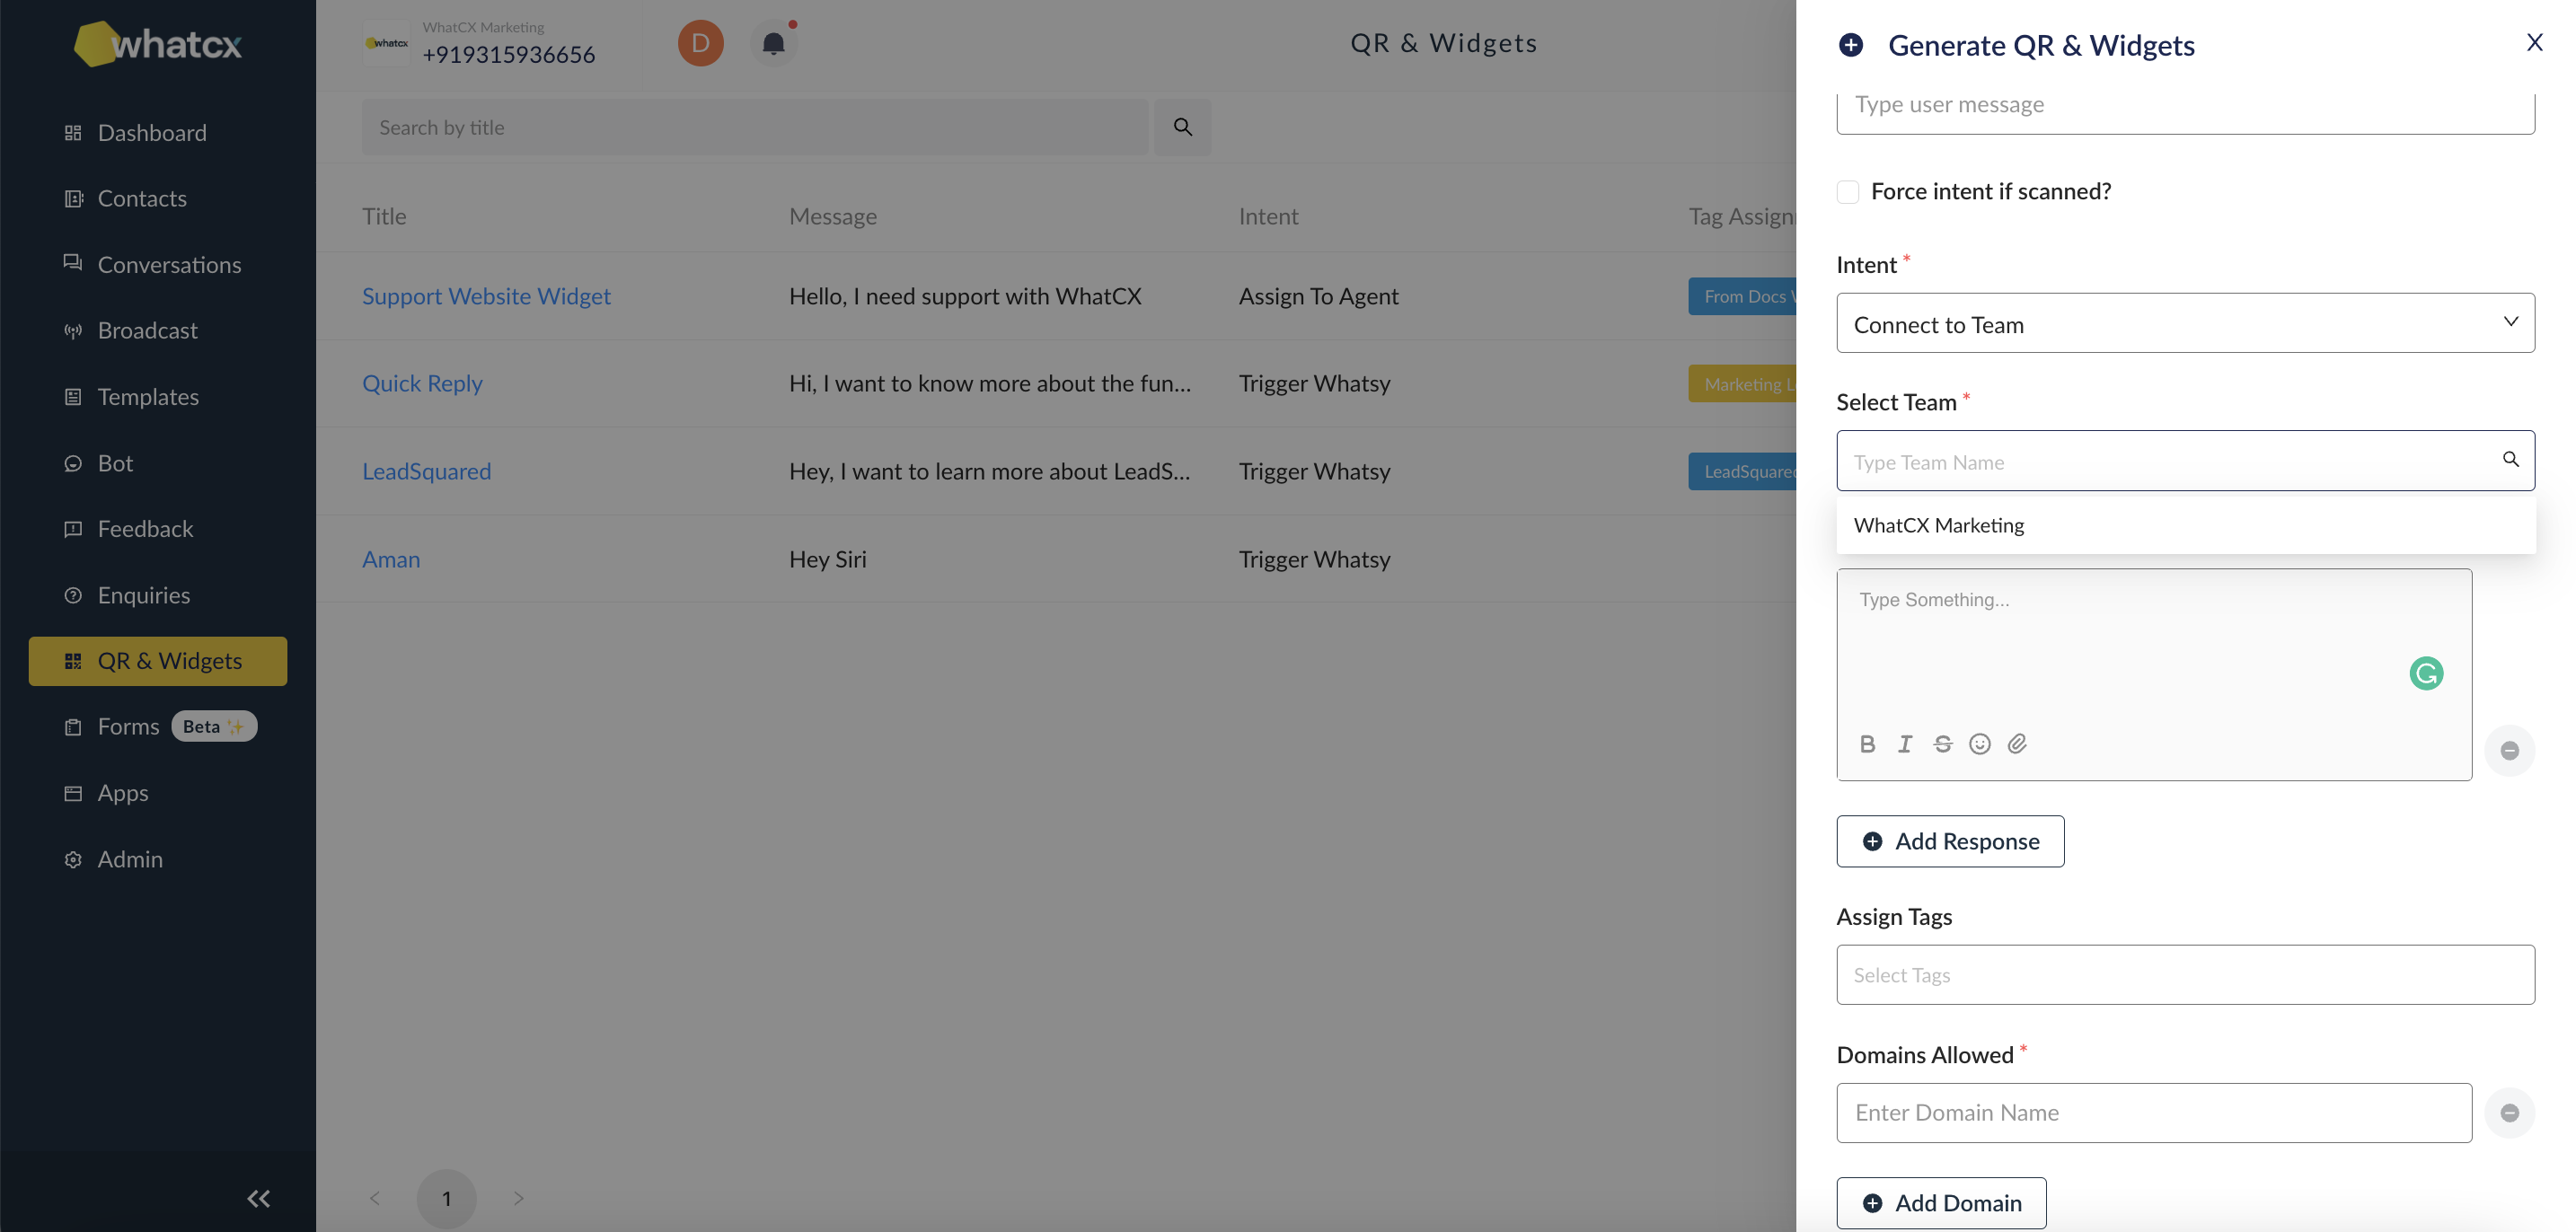
How to create QR & Widgets?
How to customize your QR & Widget?
Steps to Onboard on Meta
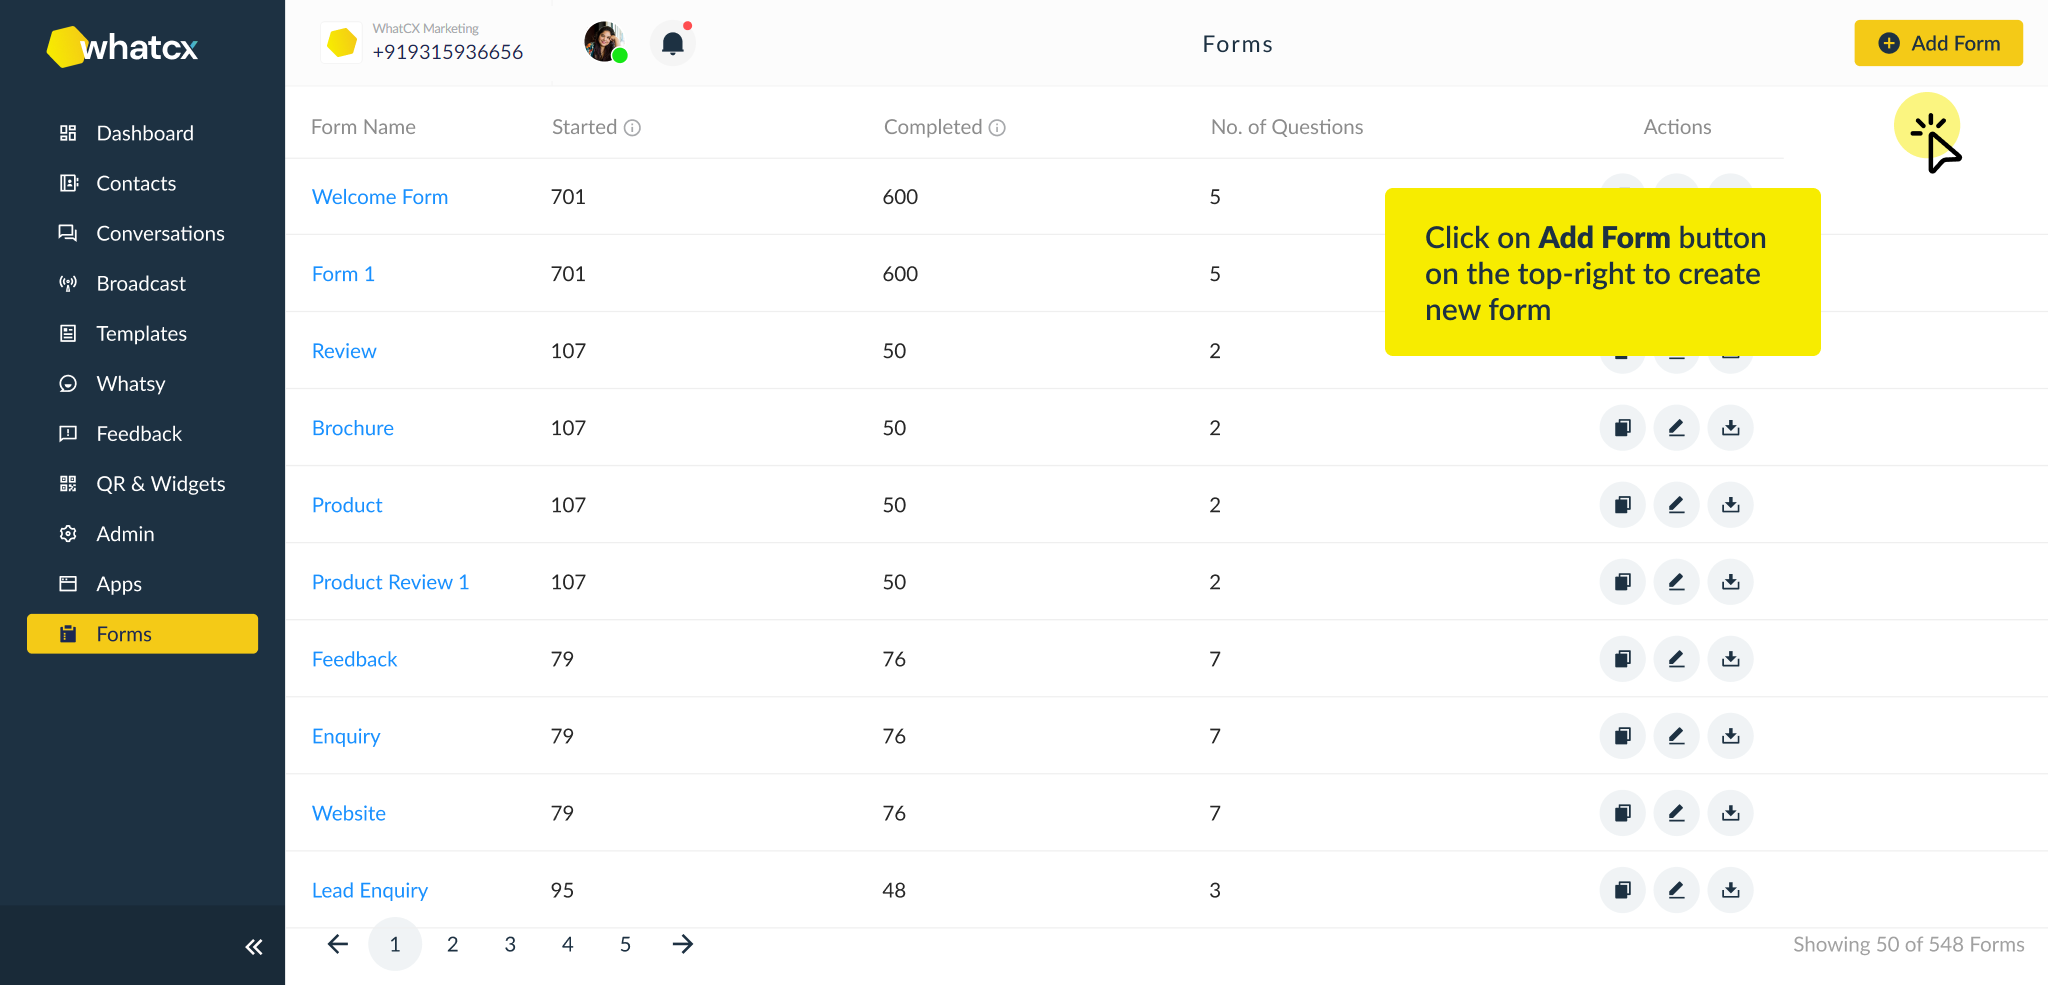
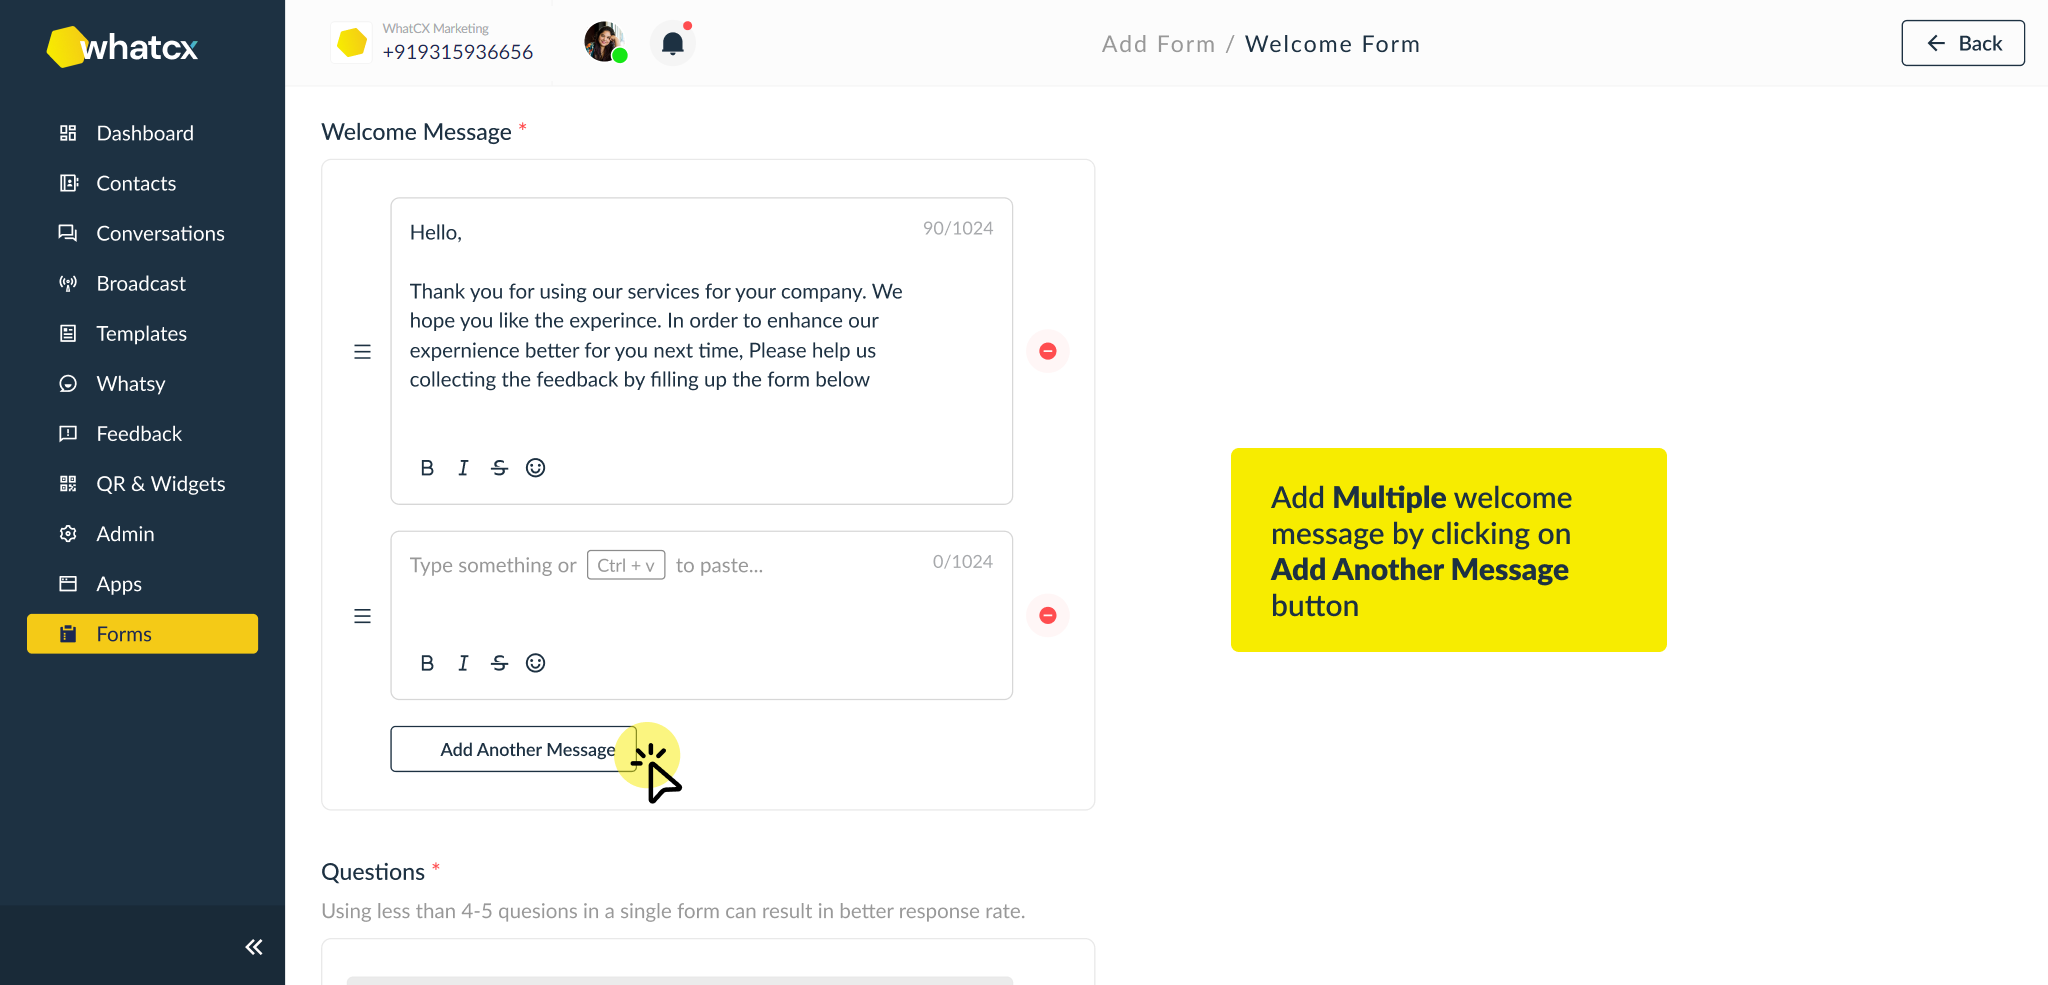
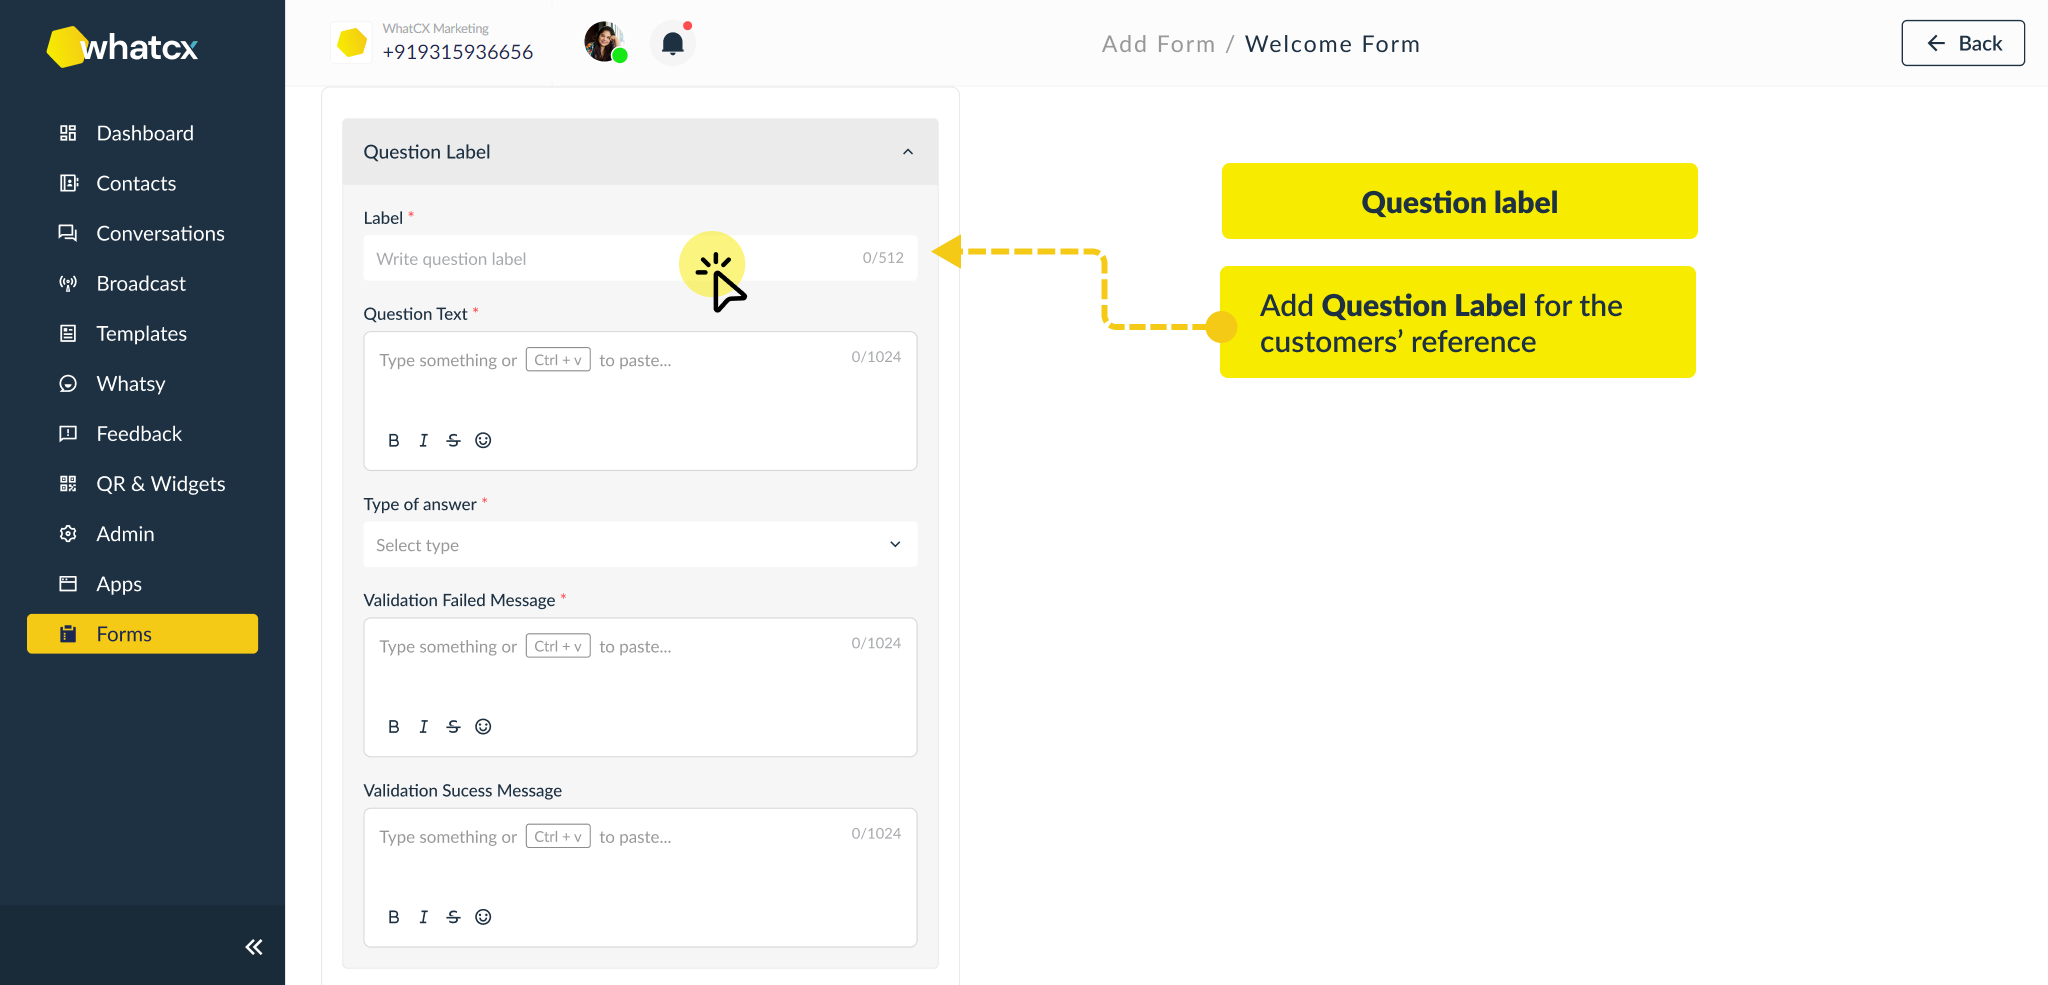
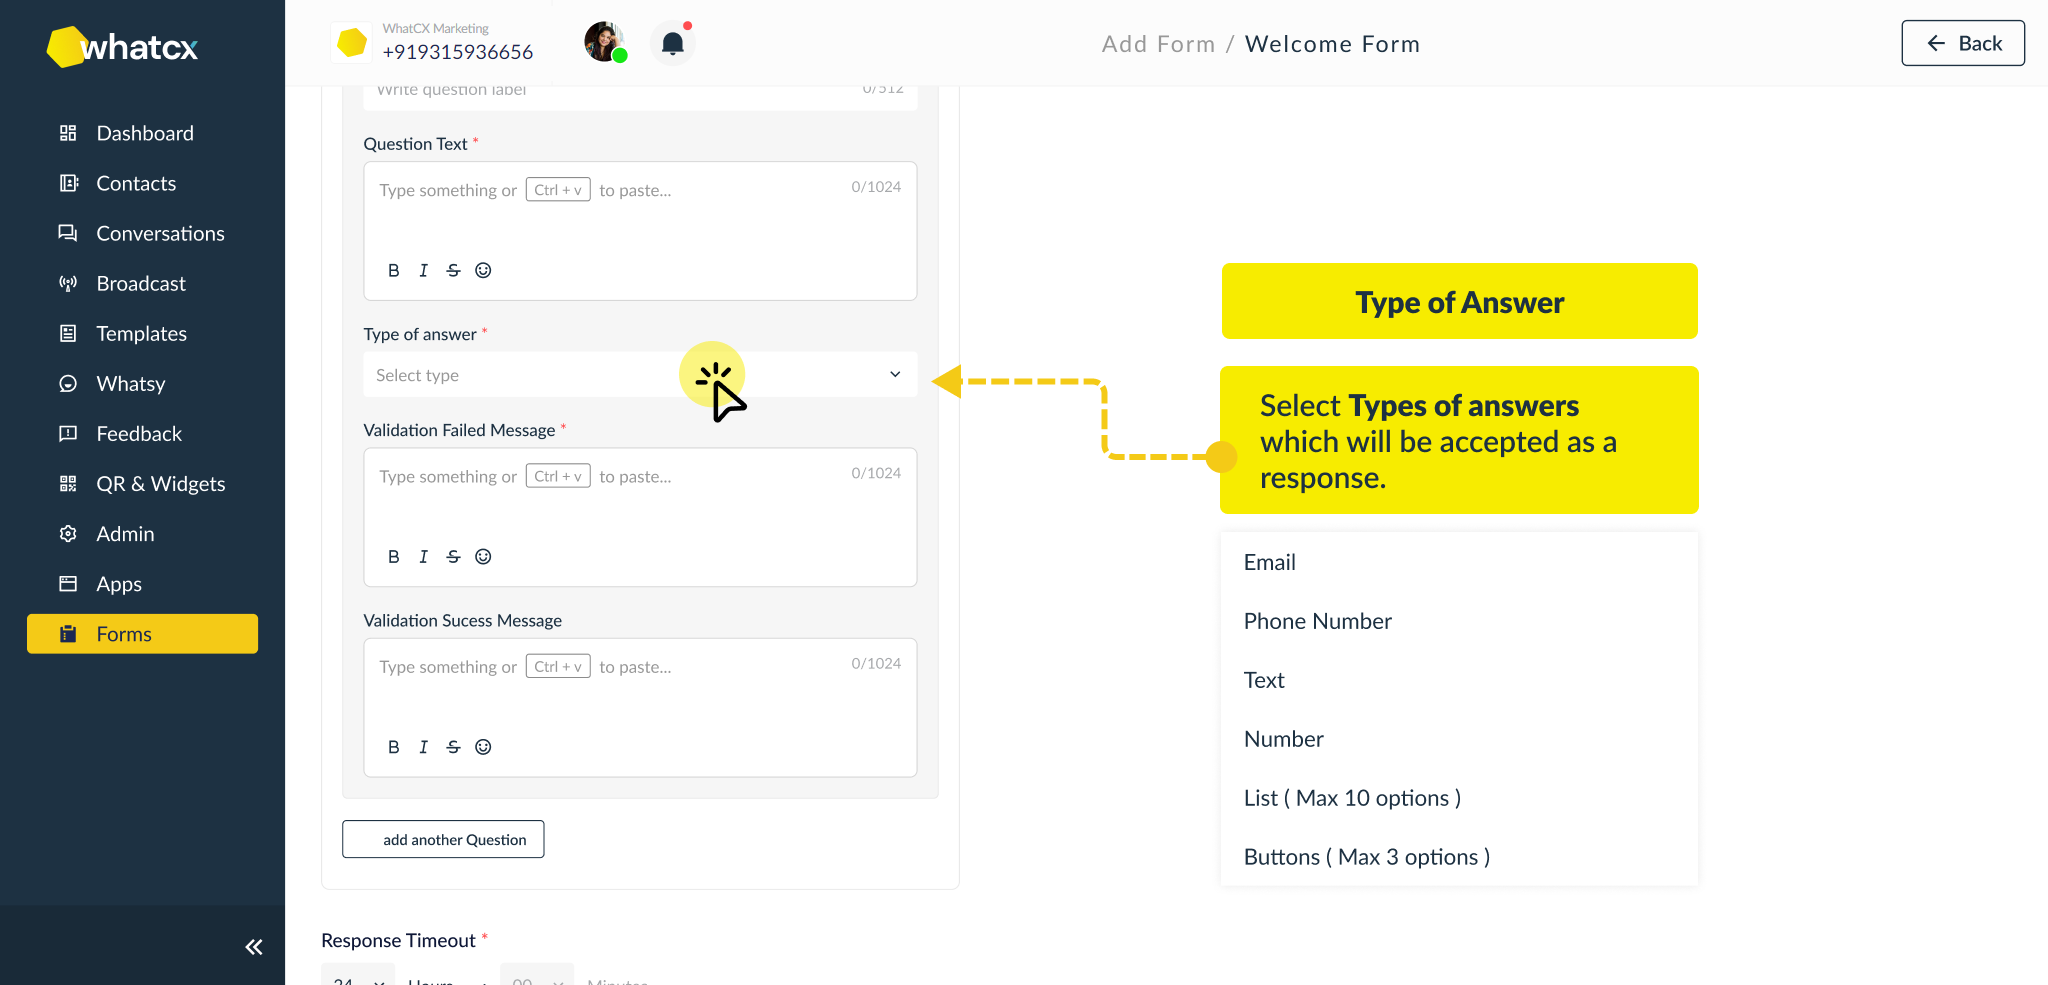
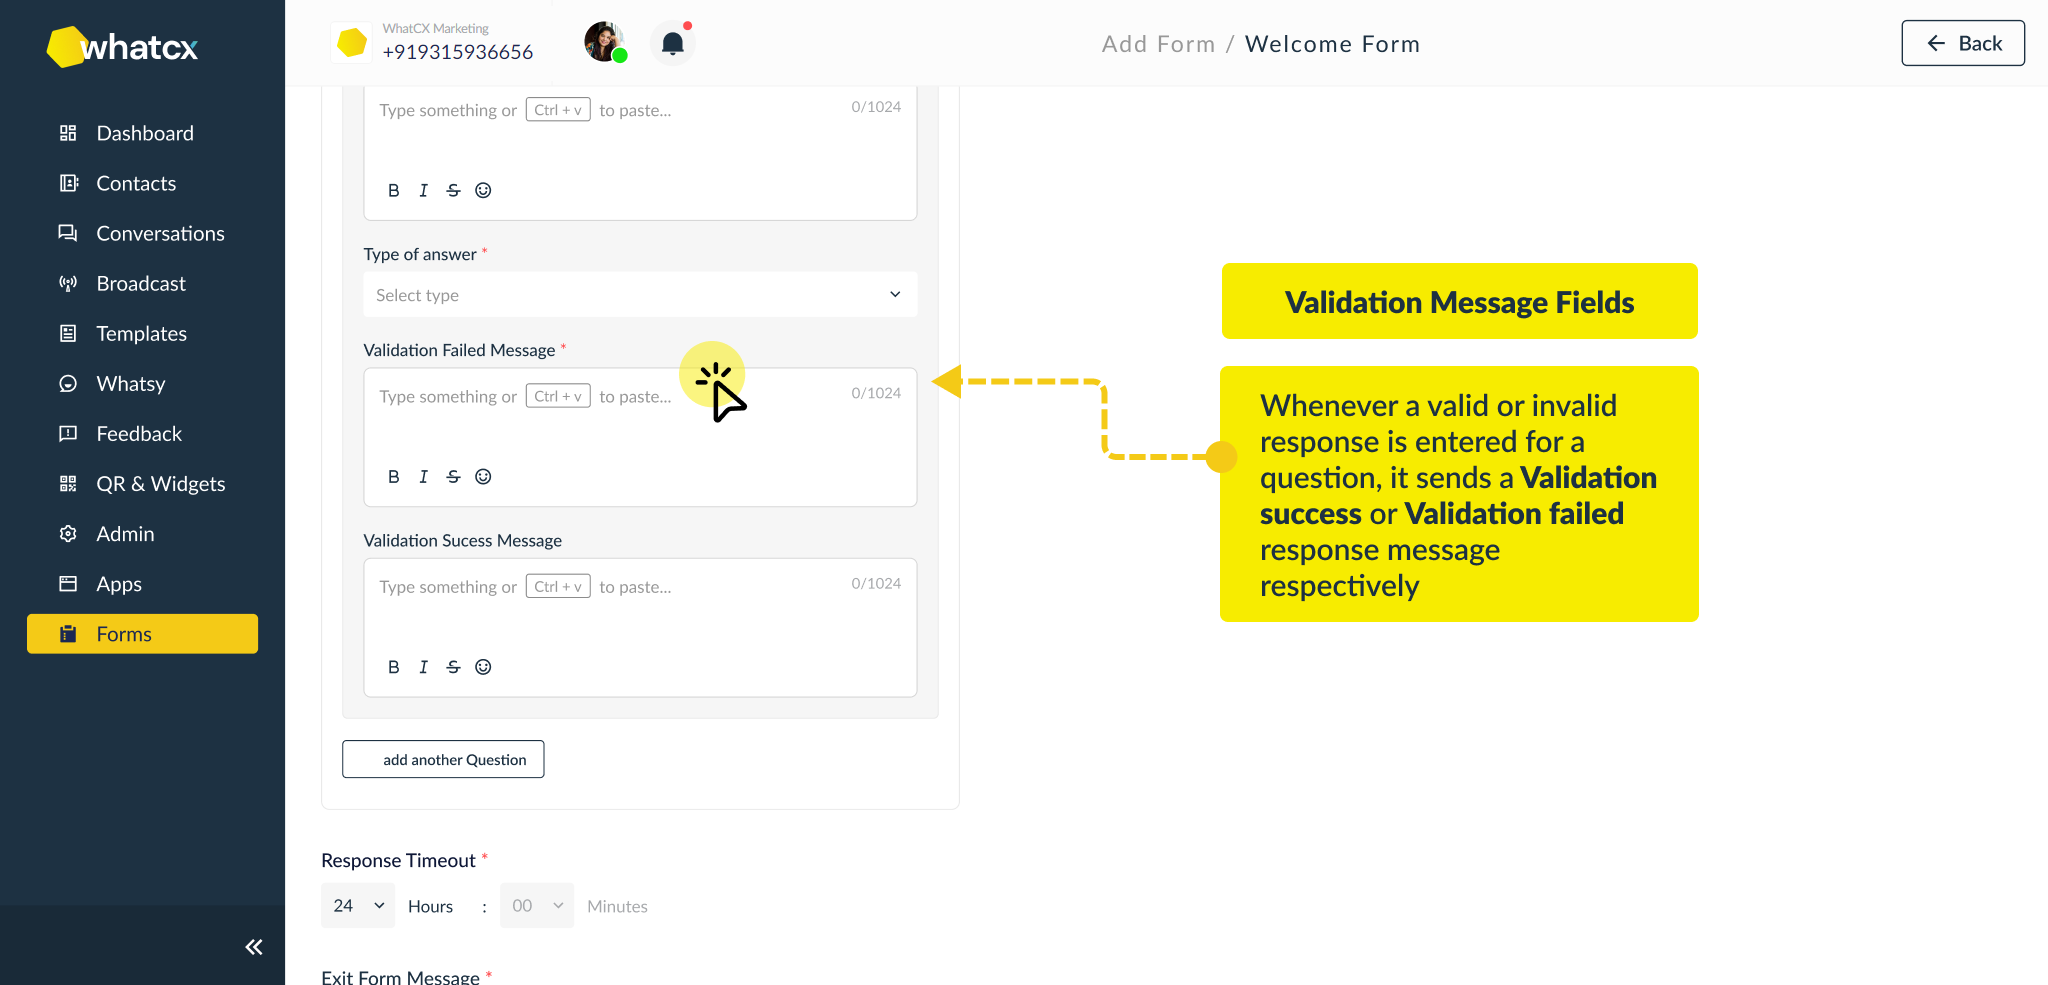
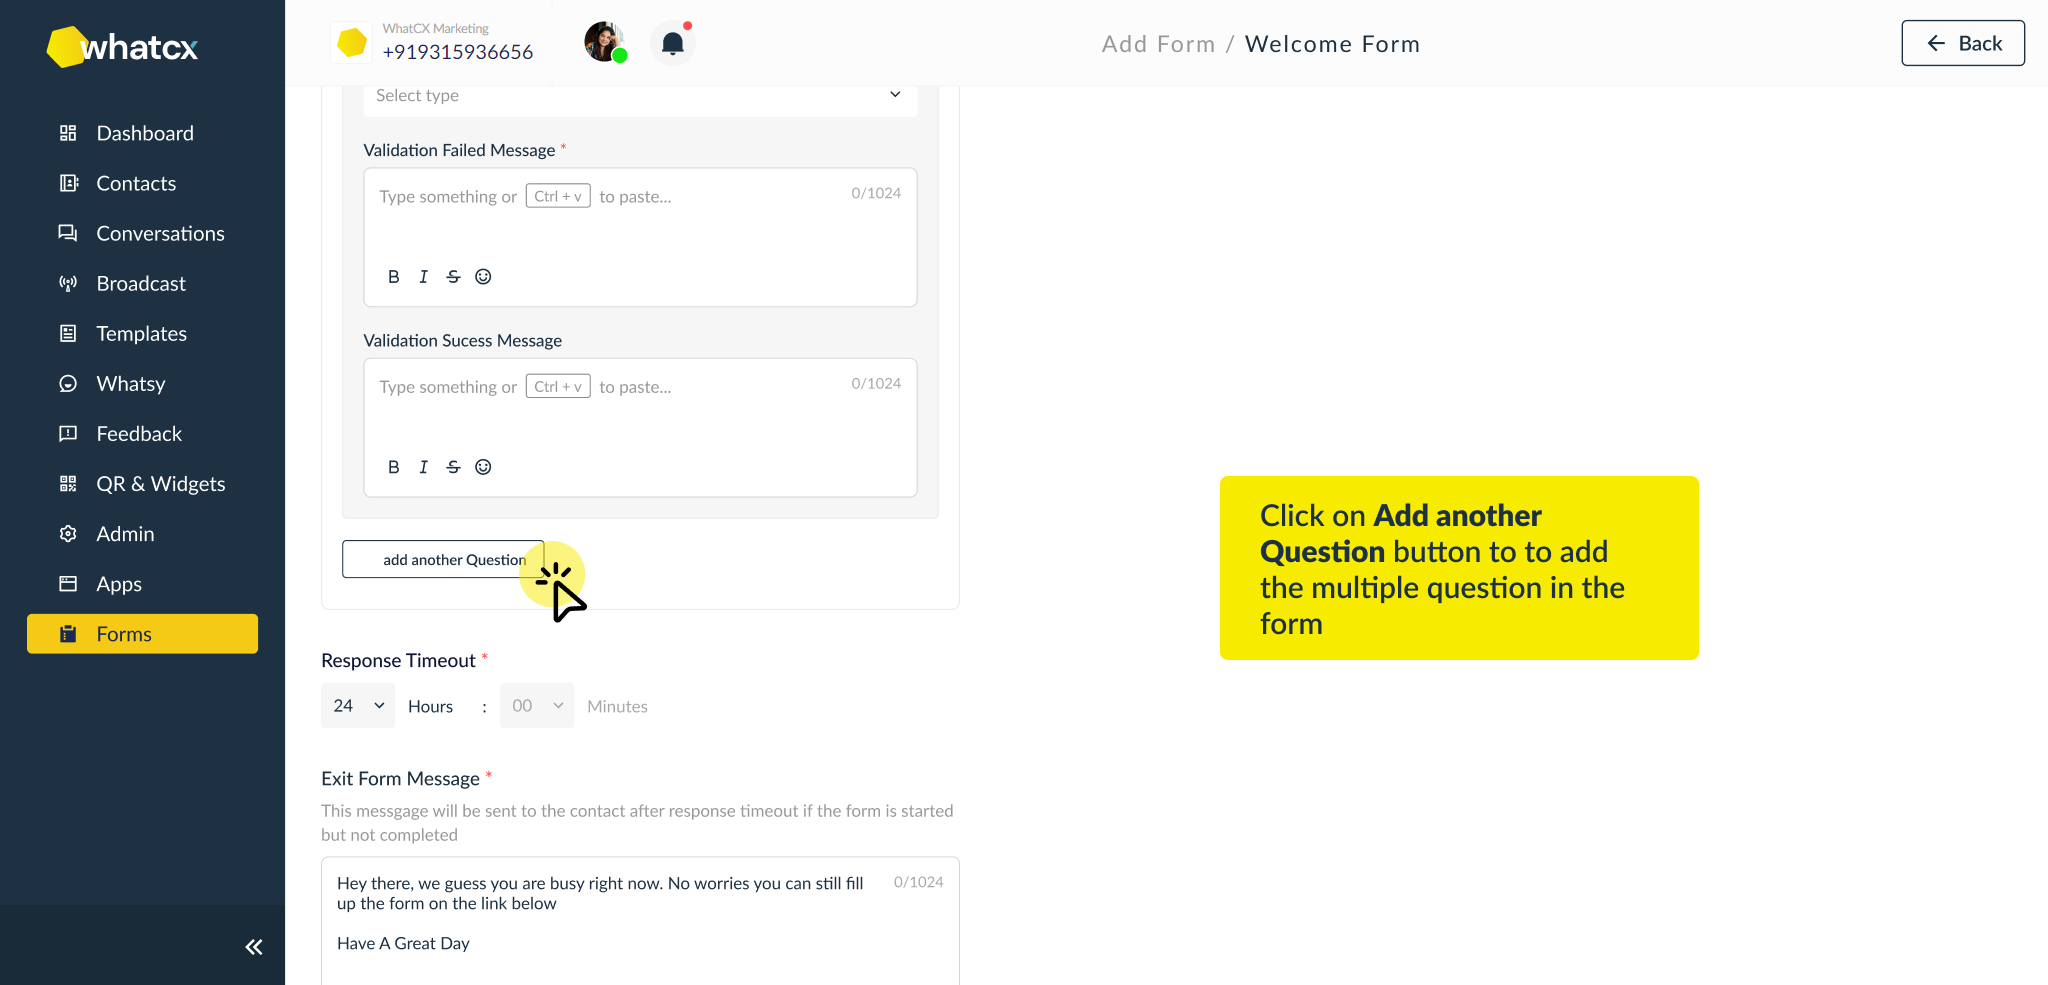
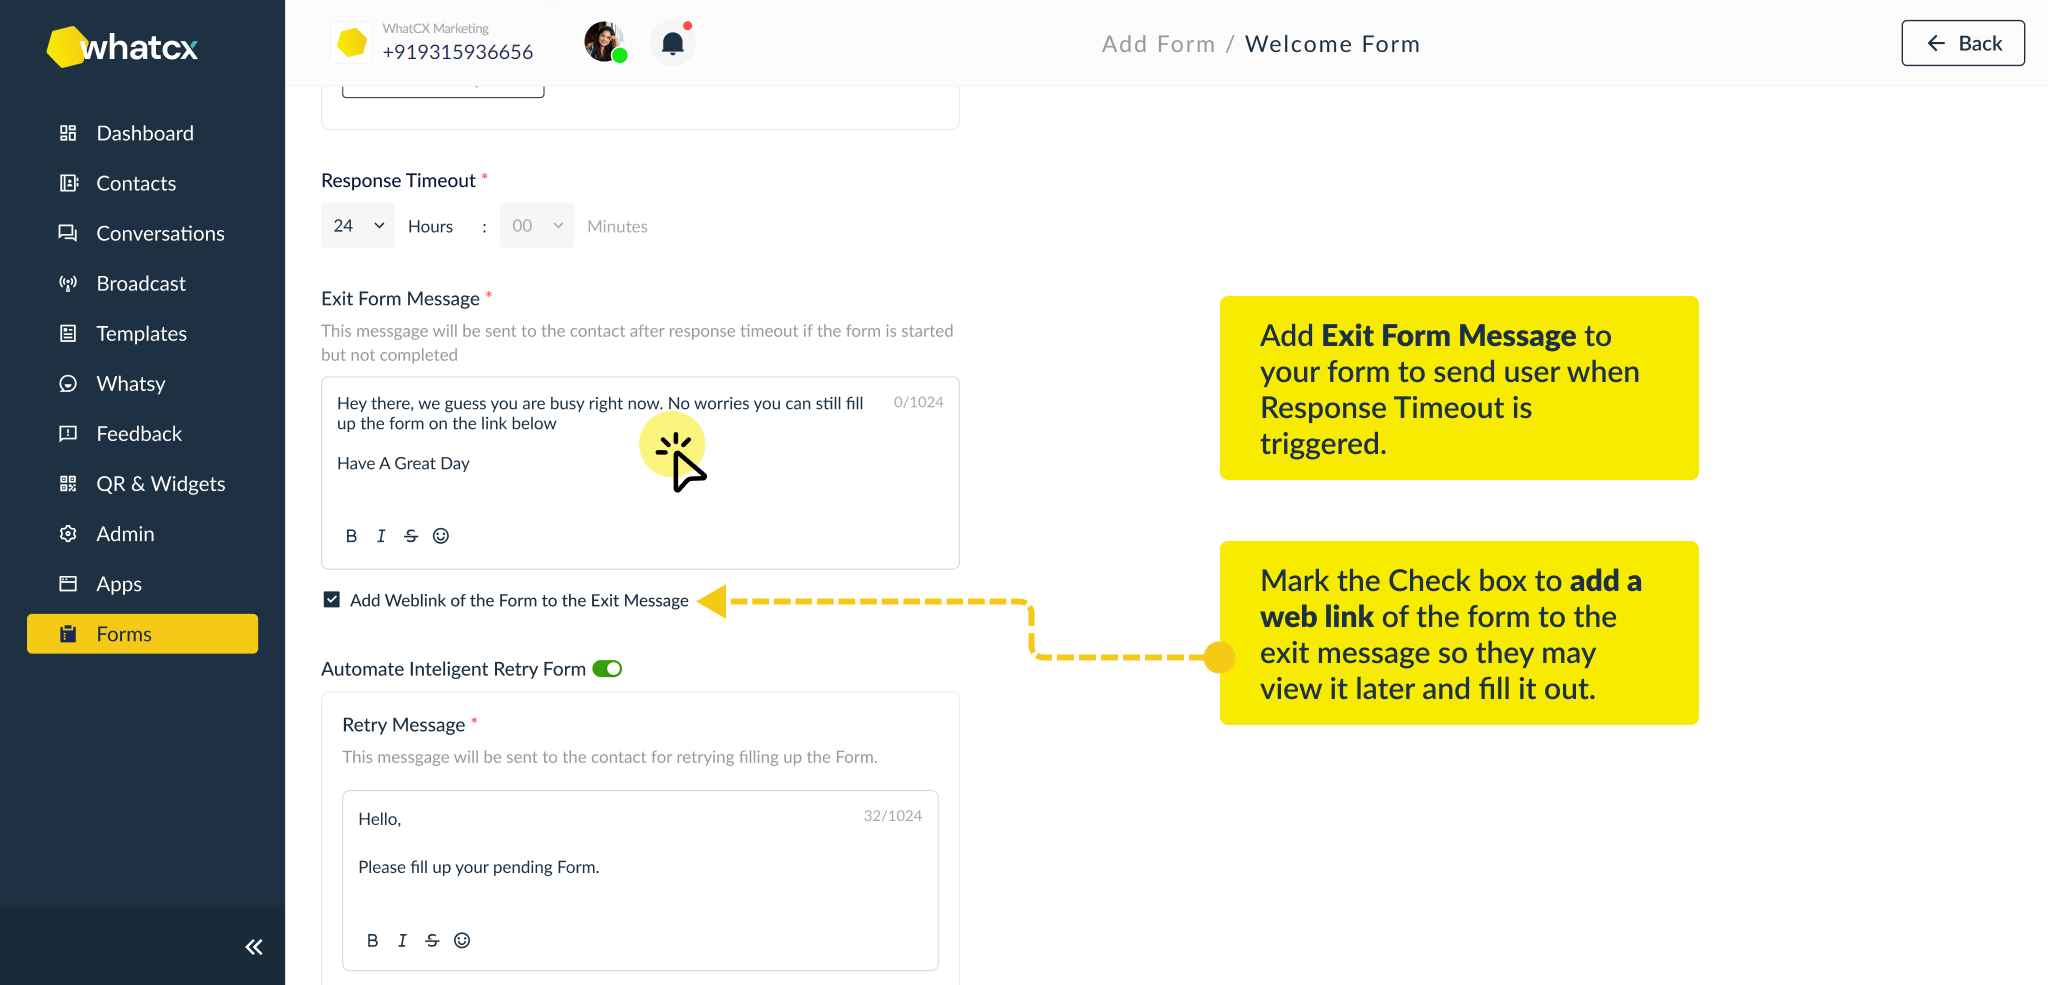
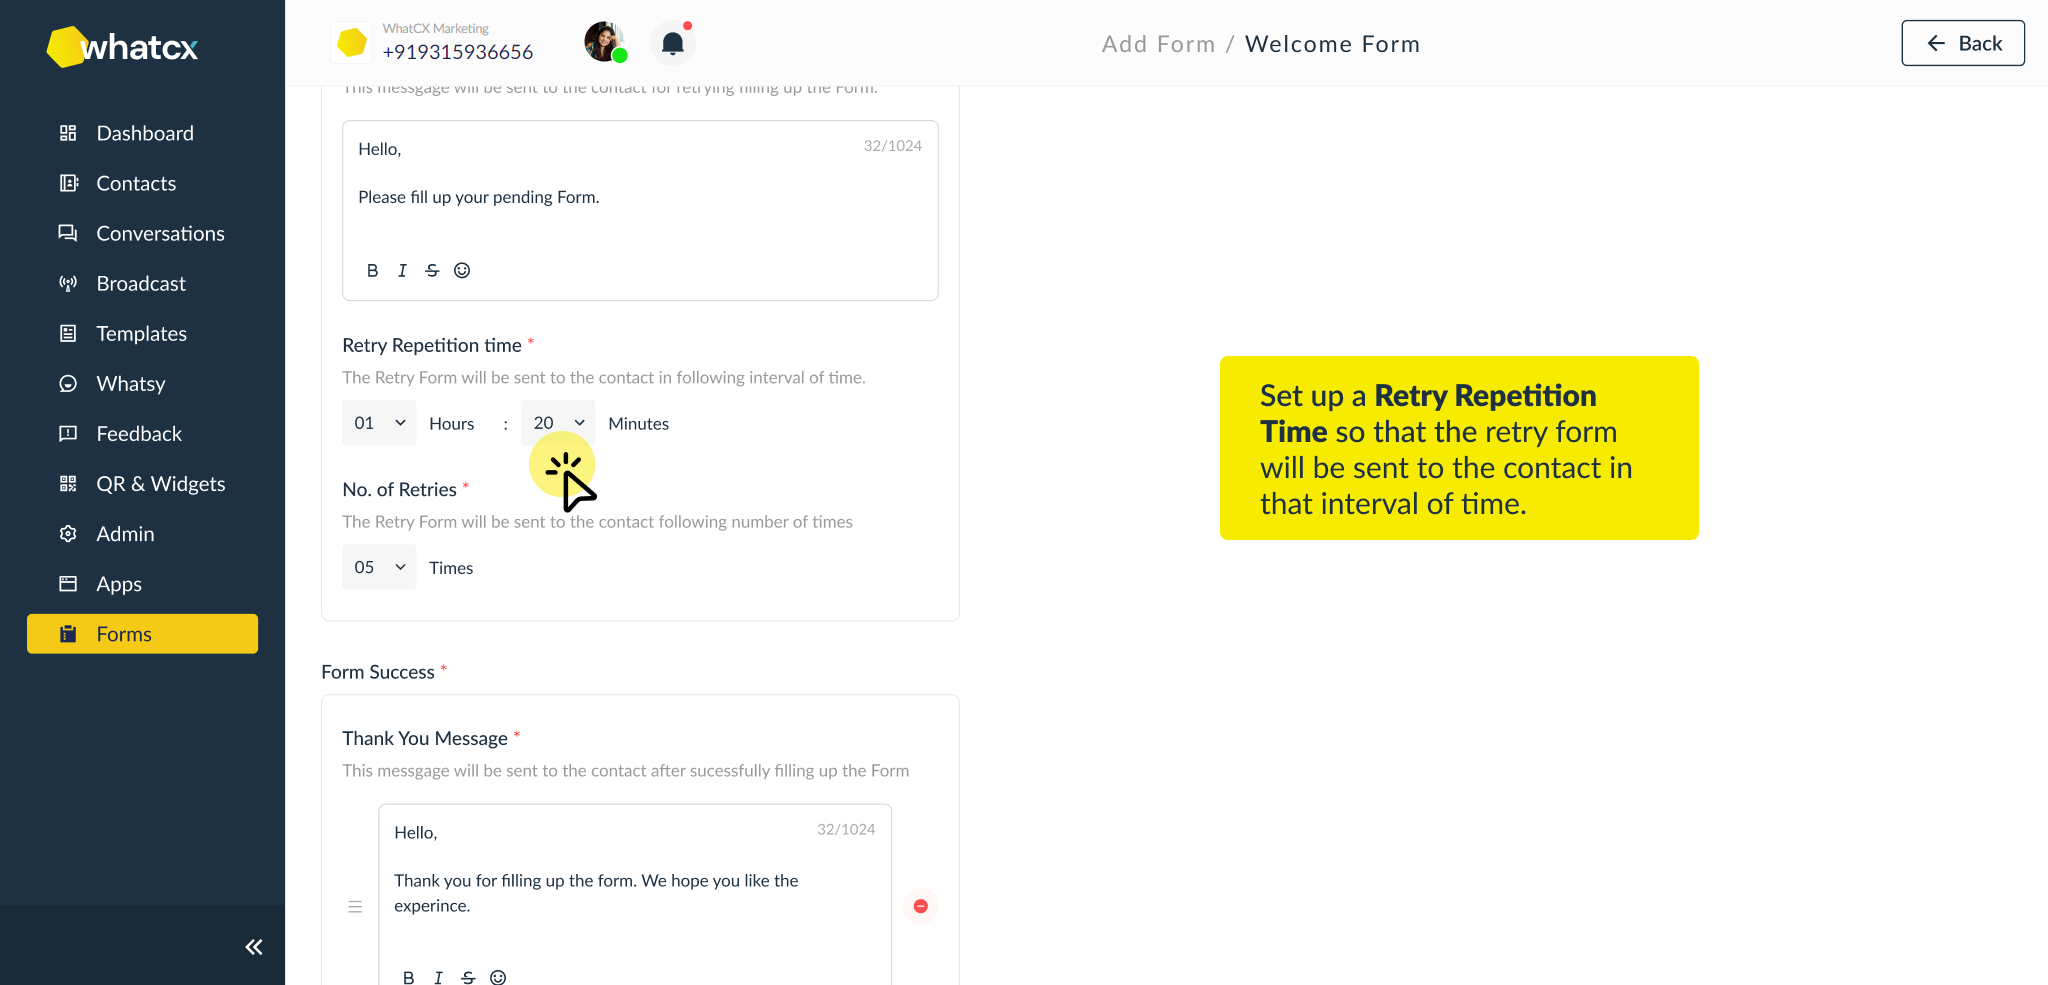
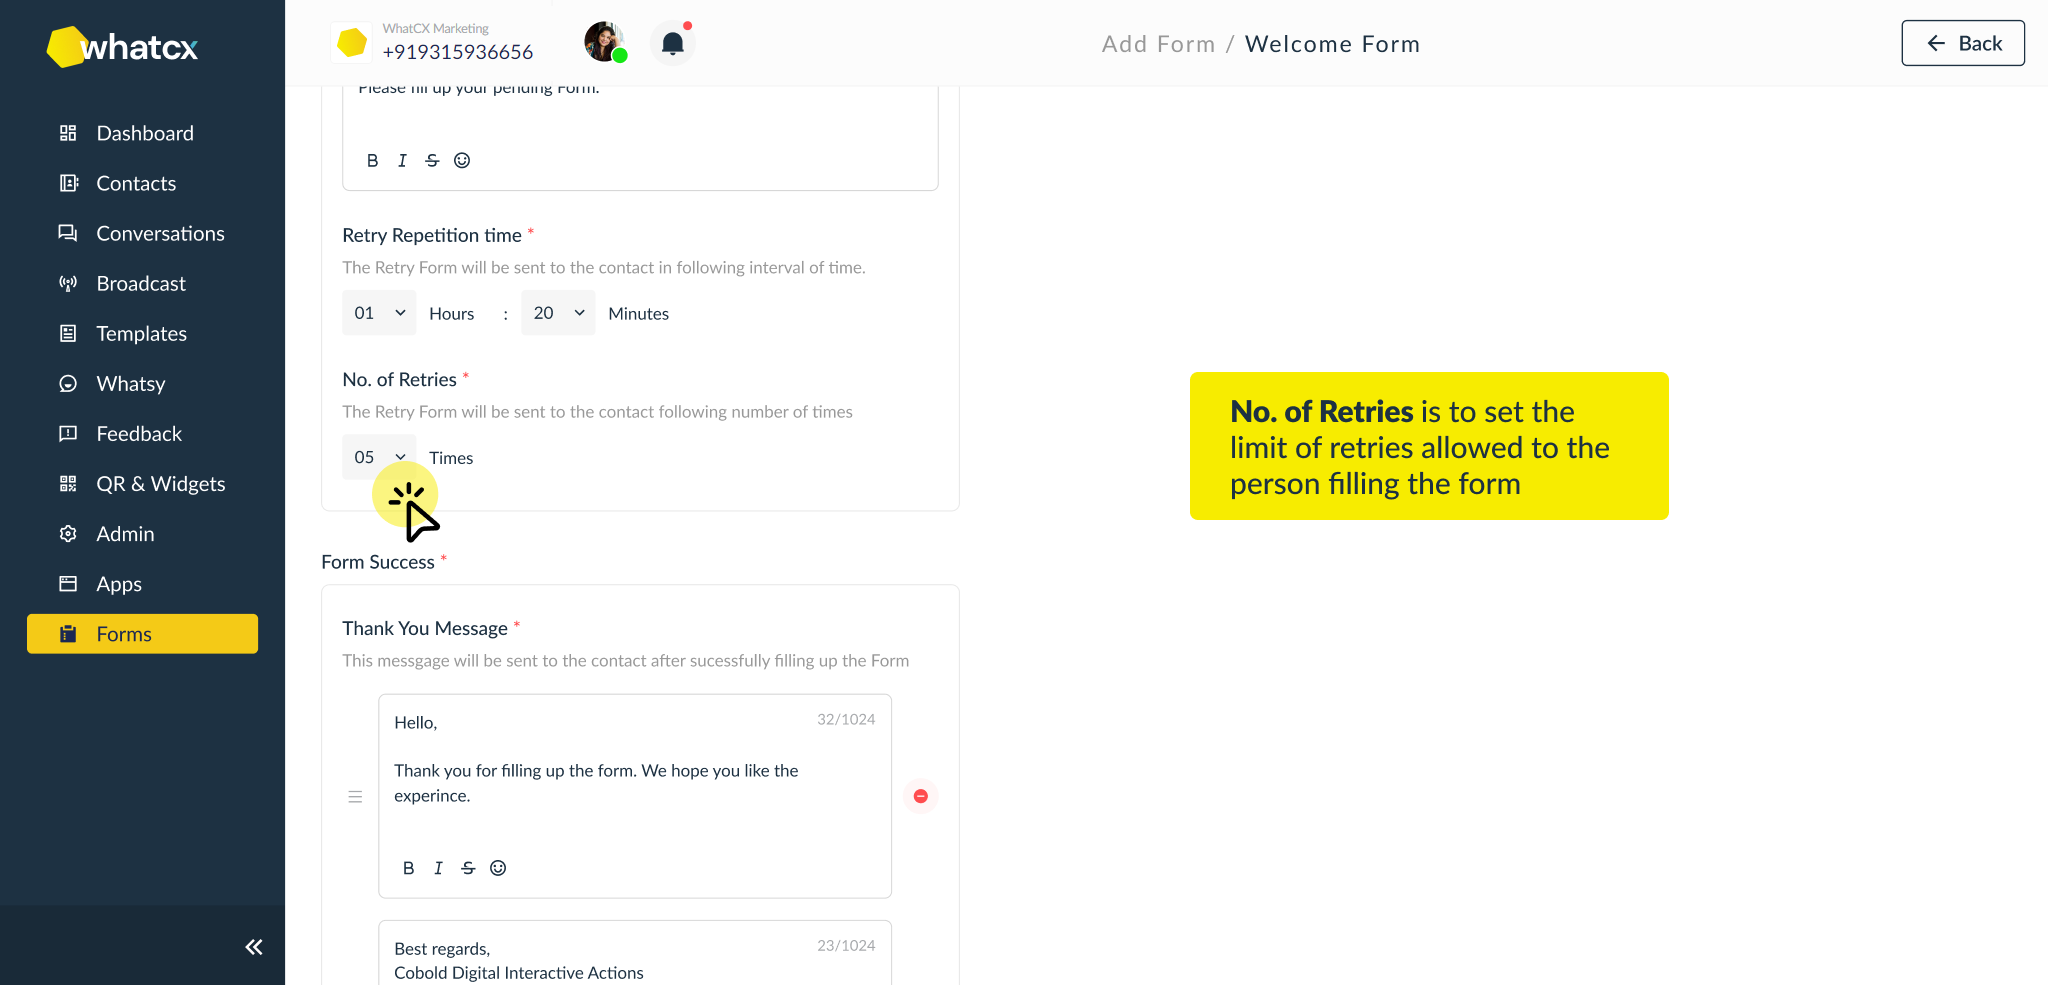
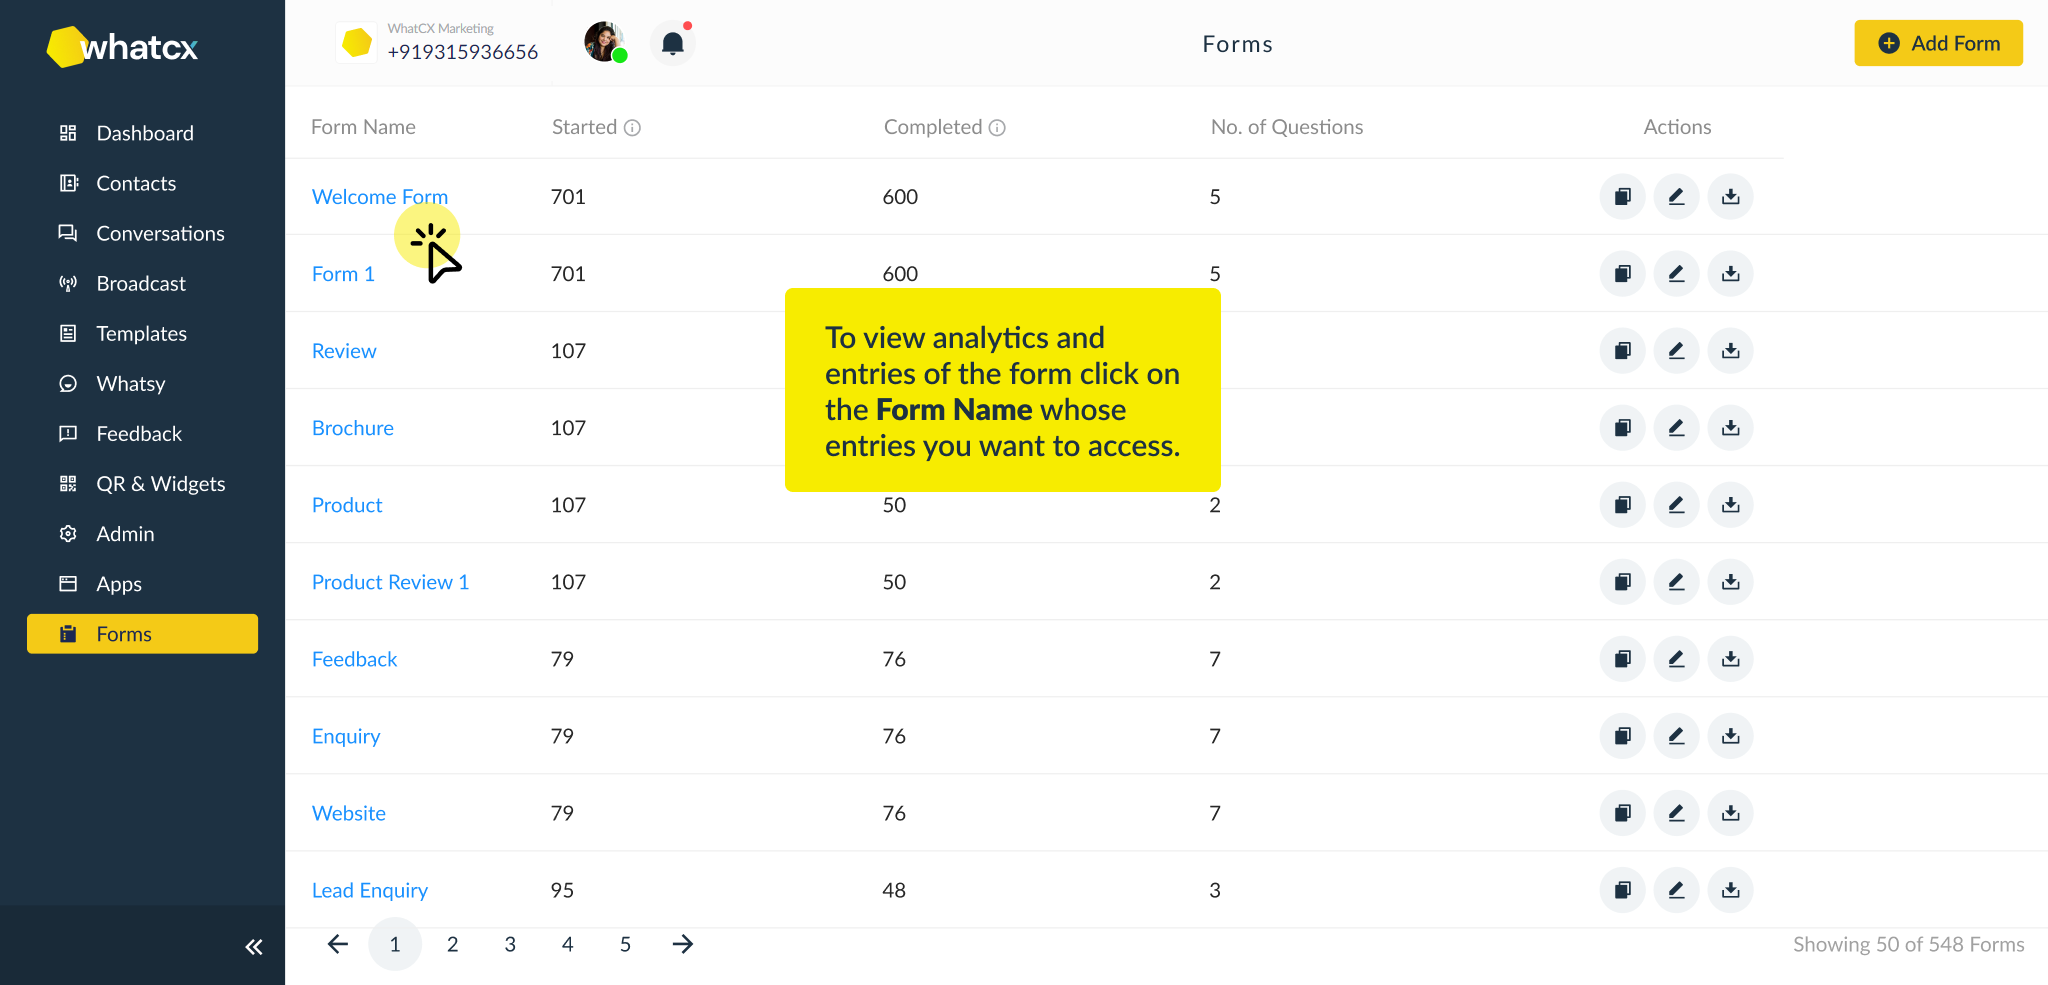
How to create Forms?
Setup Payment on Meta
Bots
How to create a Chat Block?
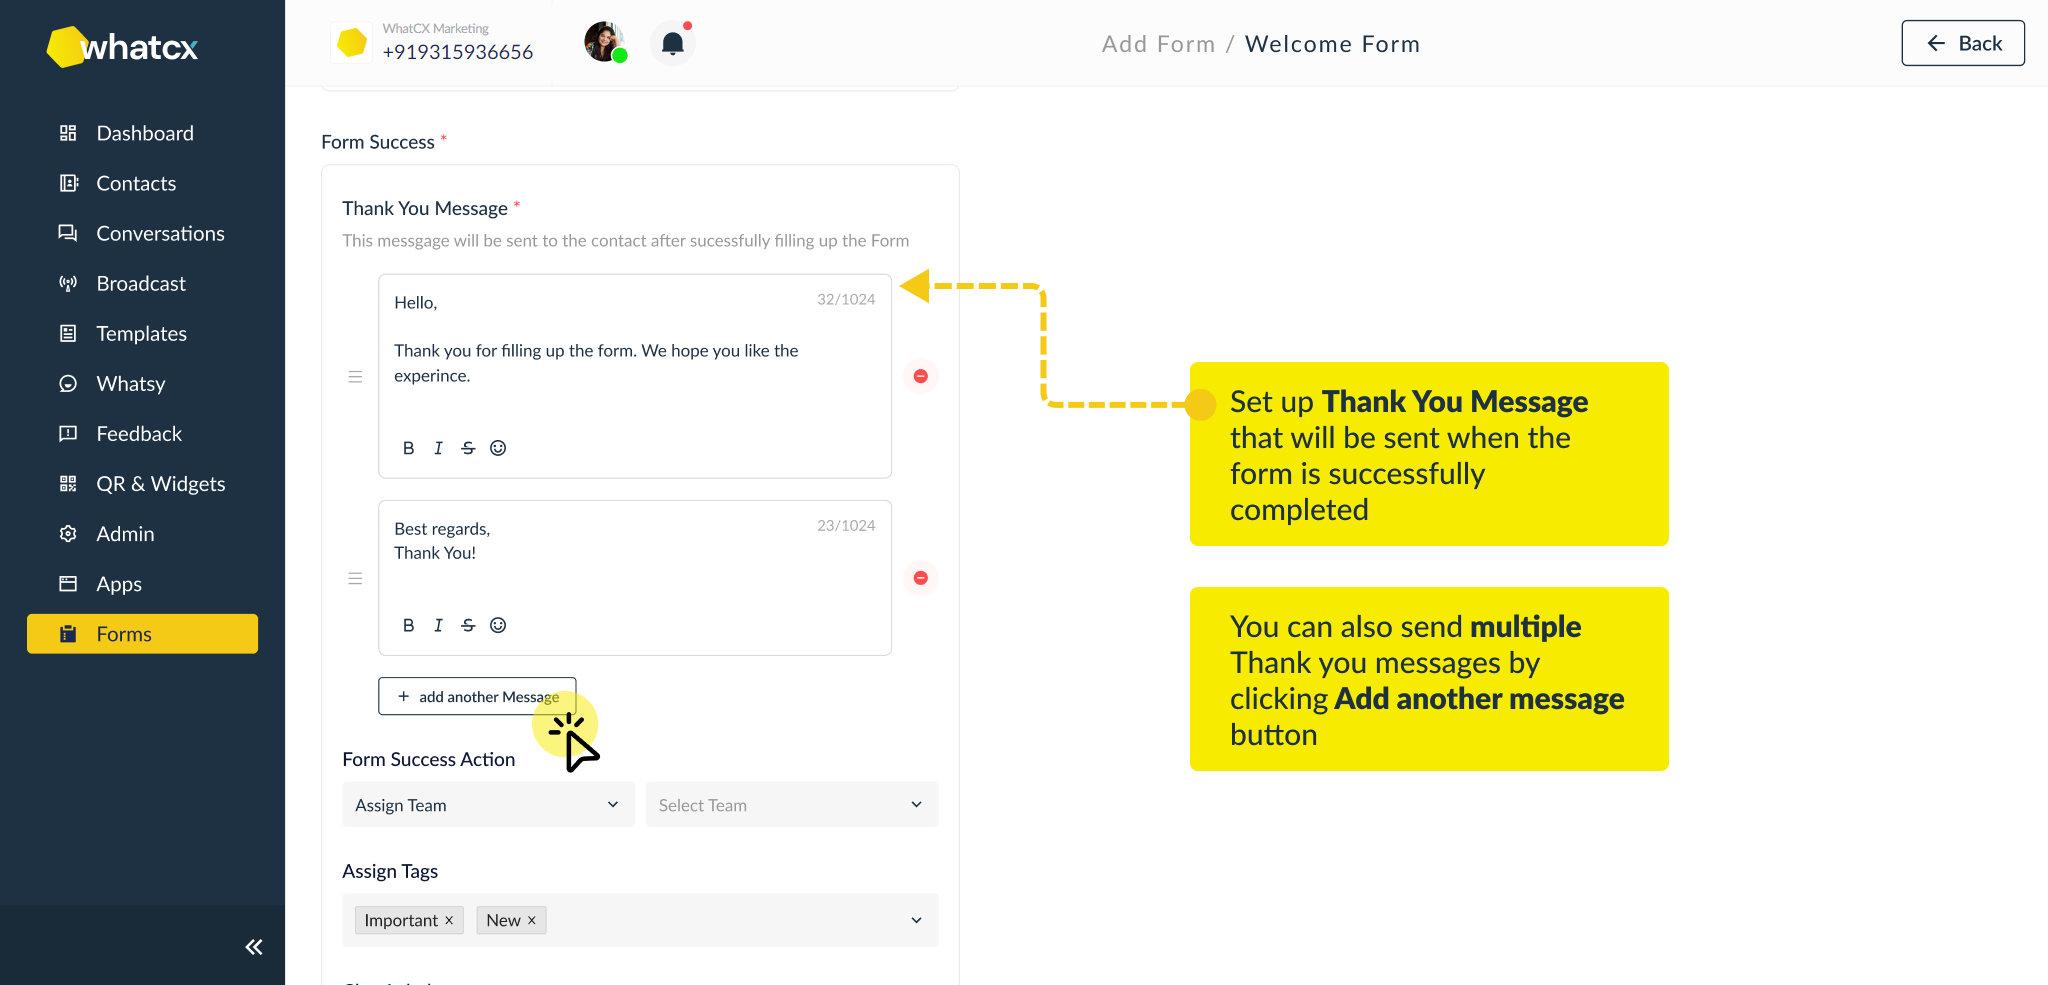
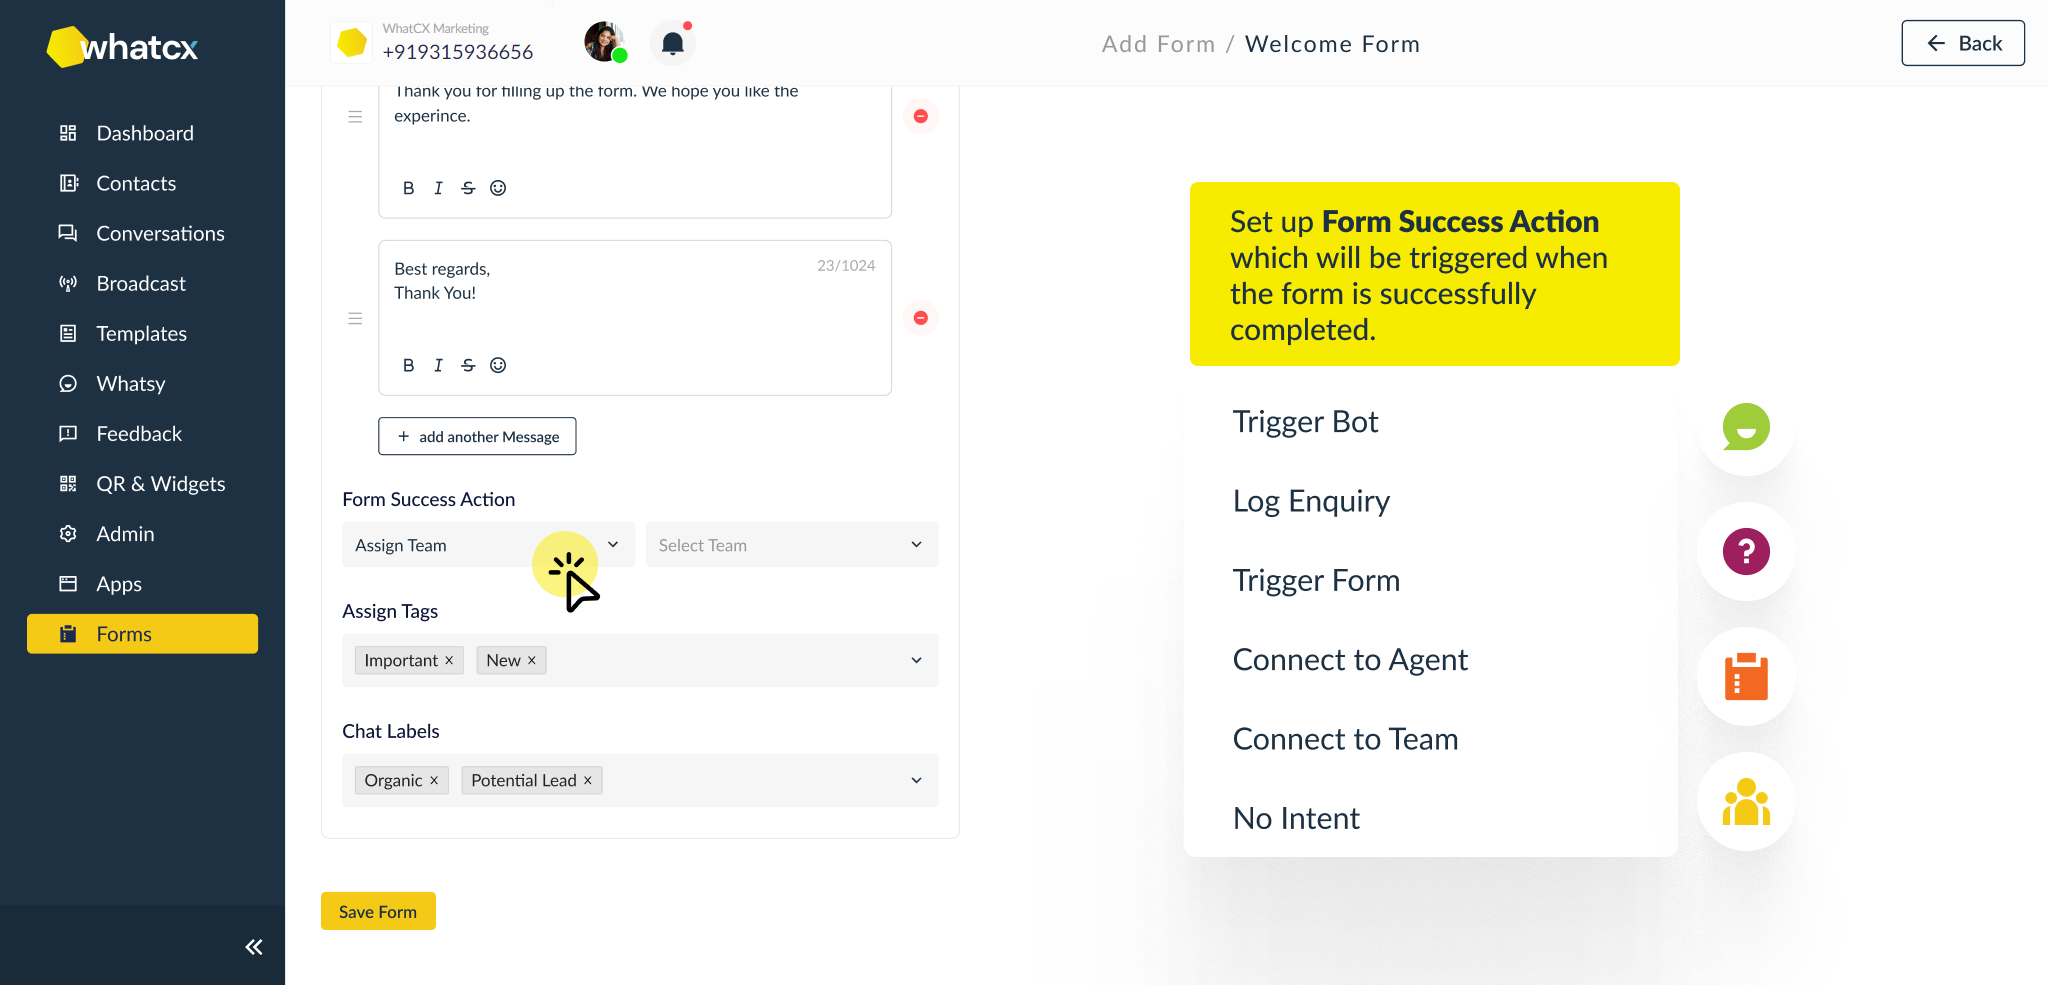
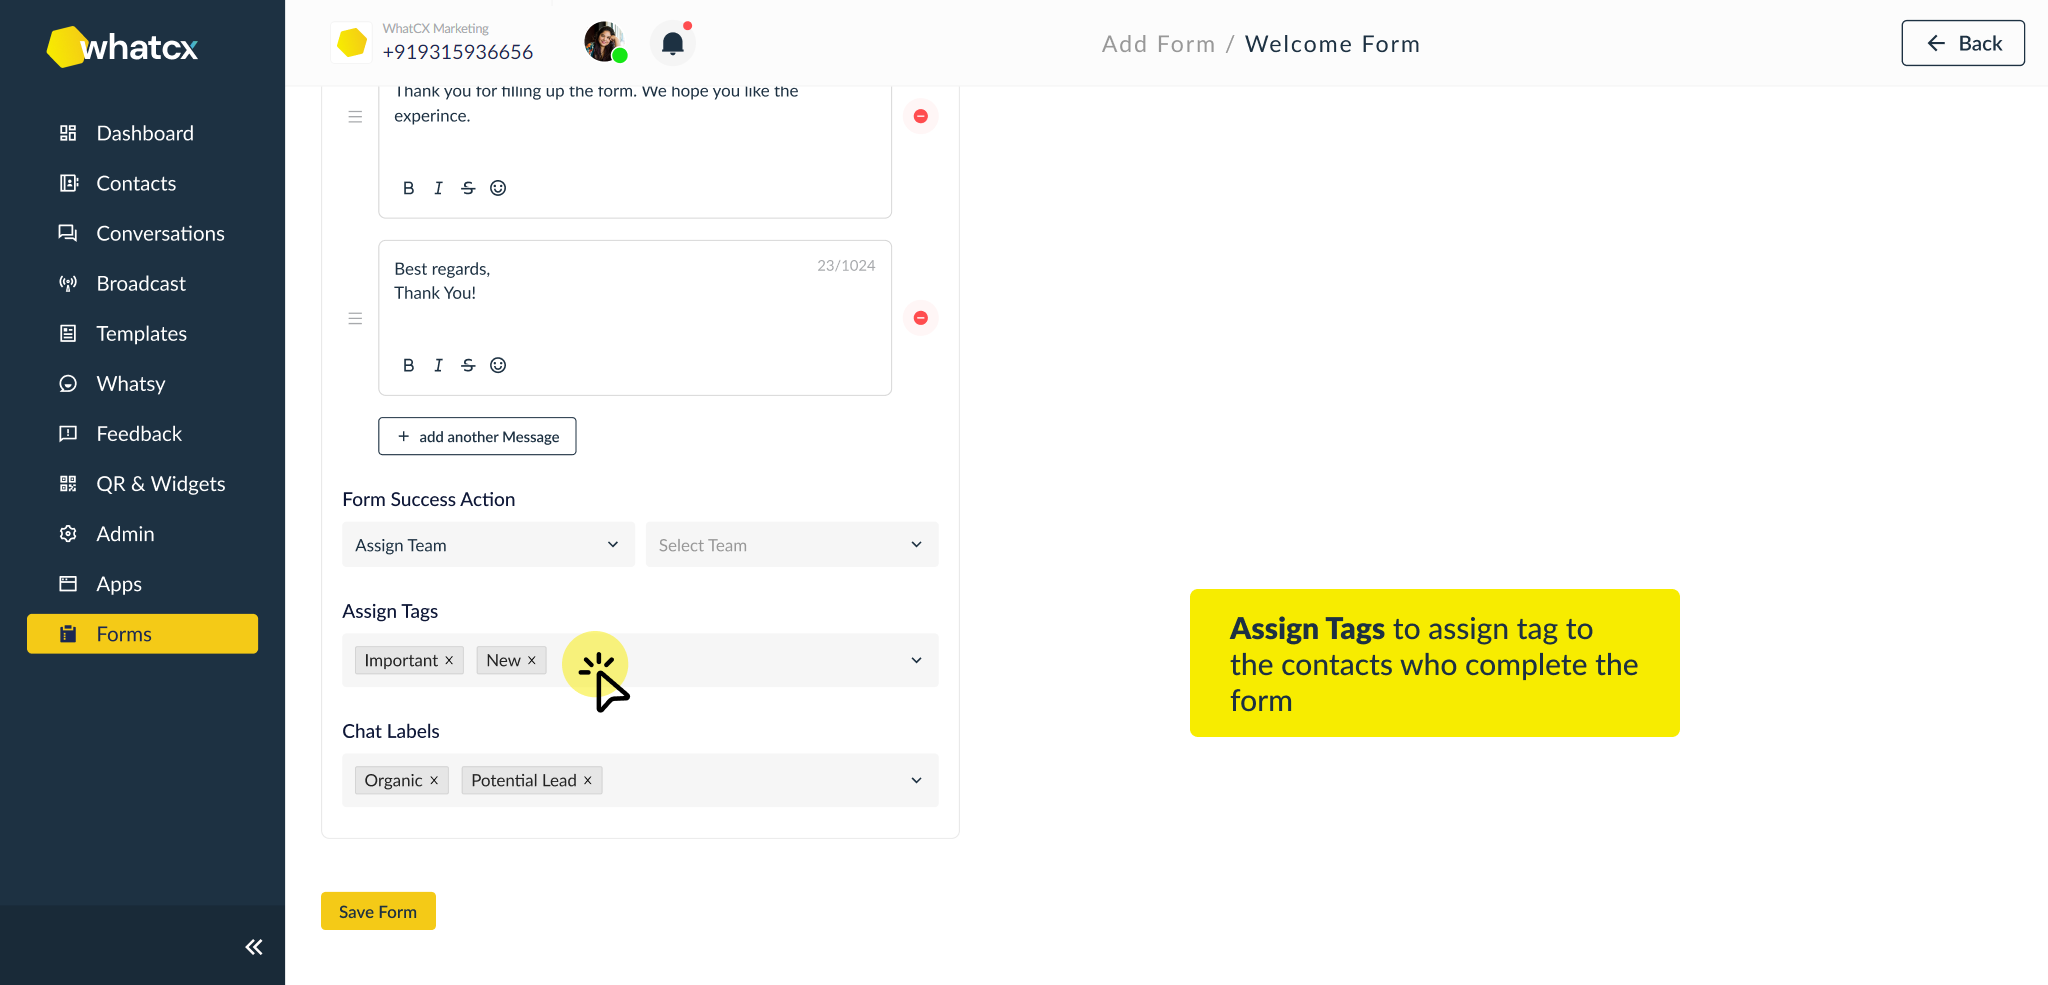
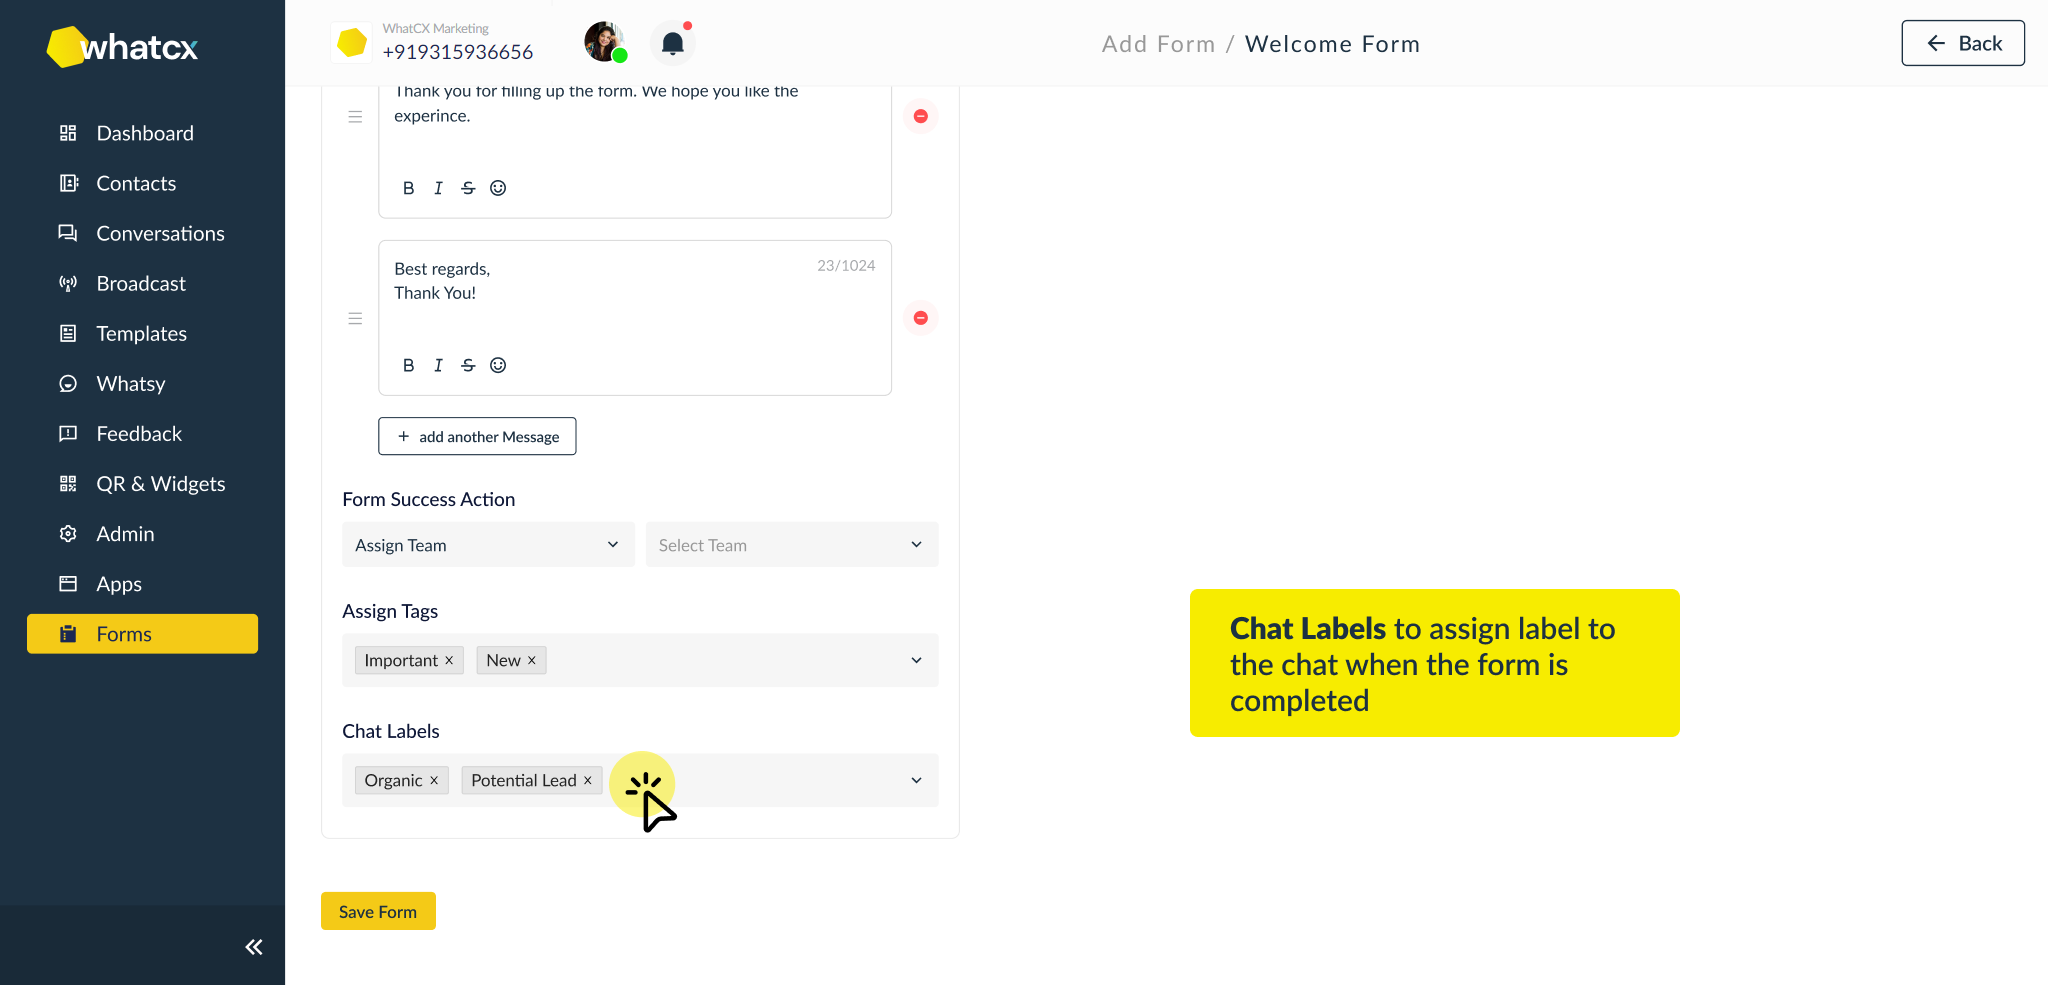
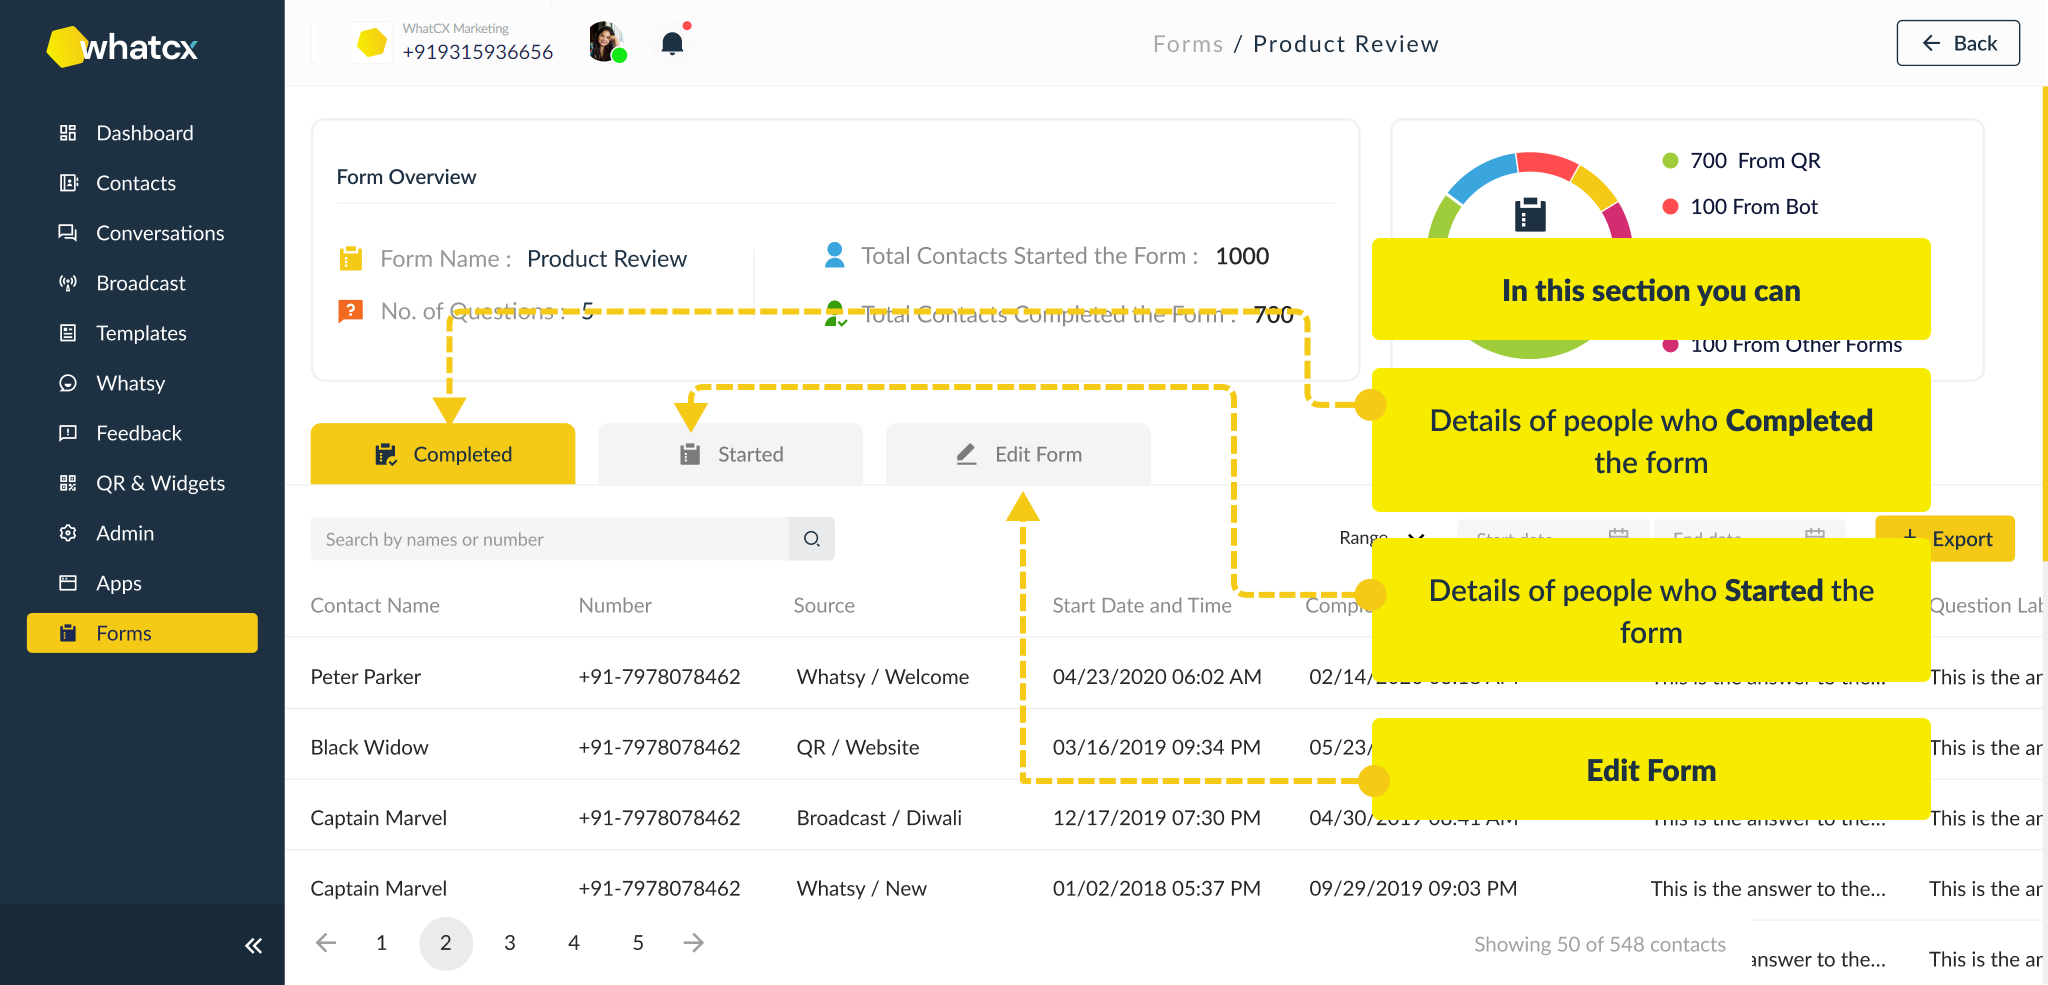
Benefits and Use Cases of Integrating Forms
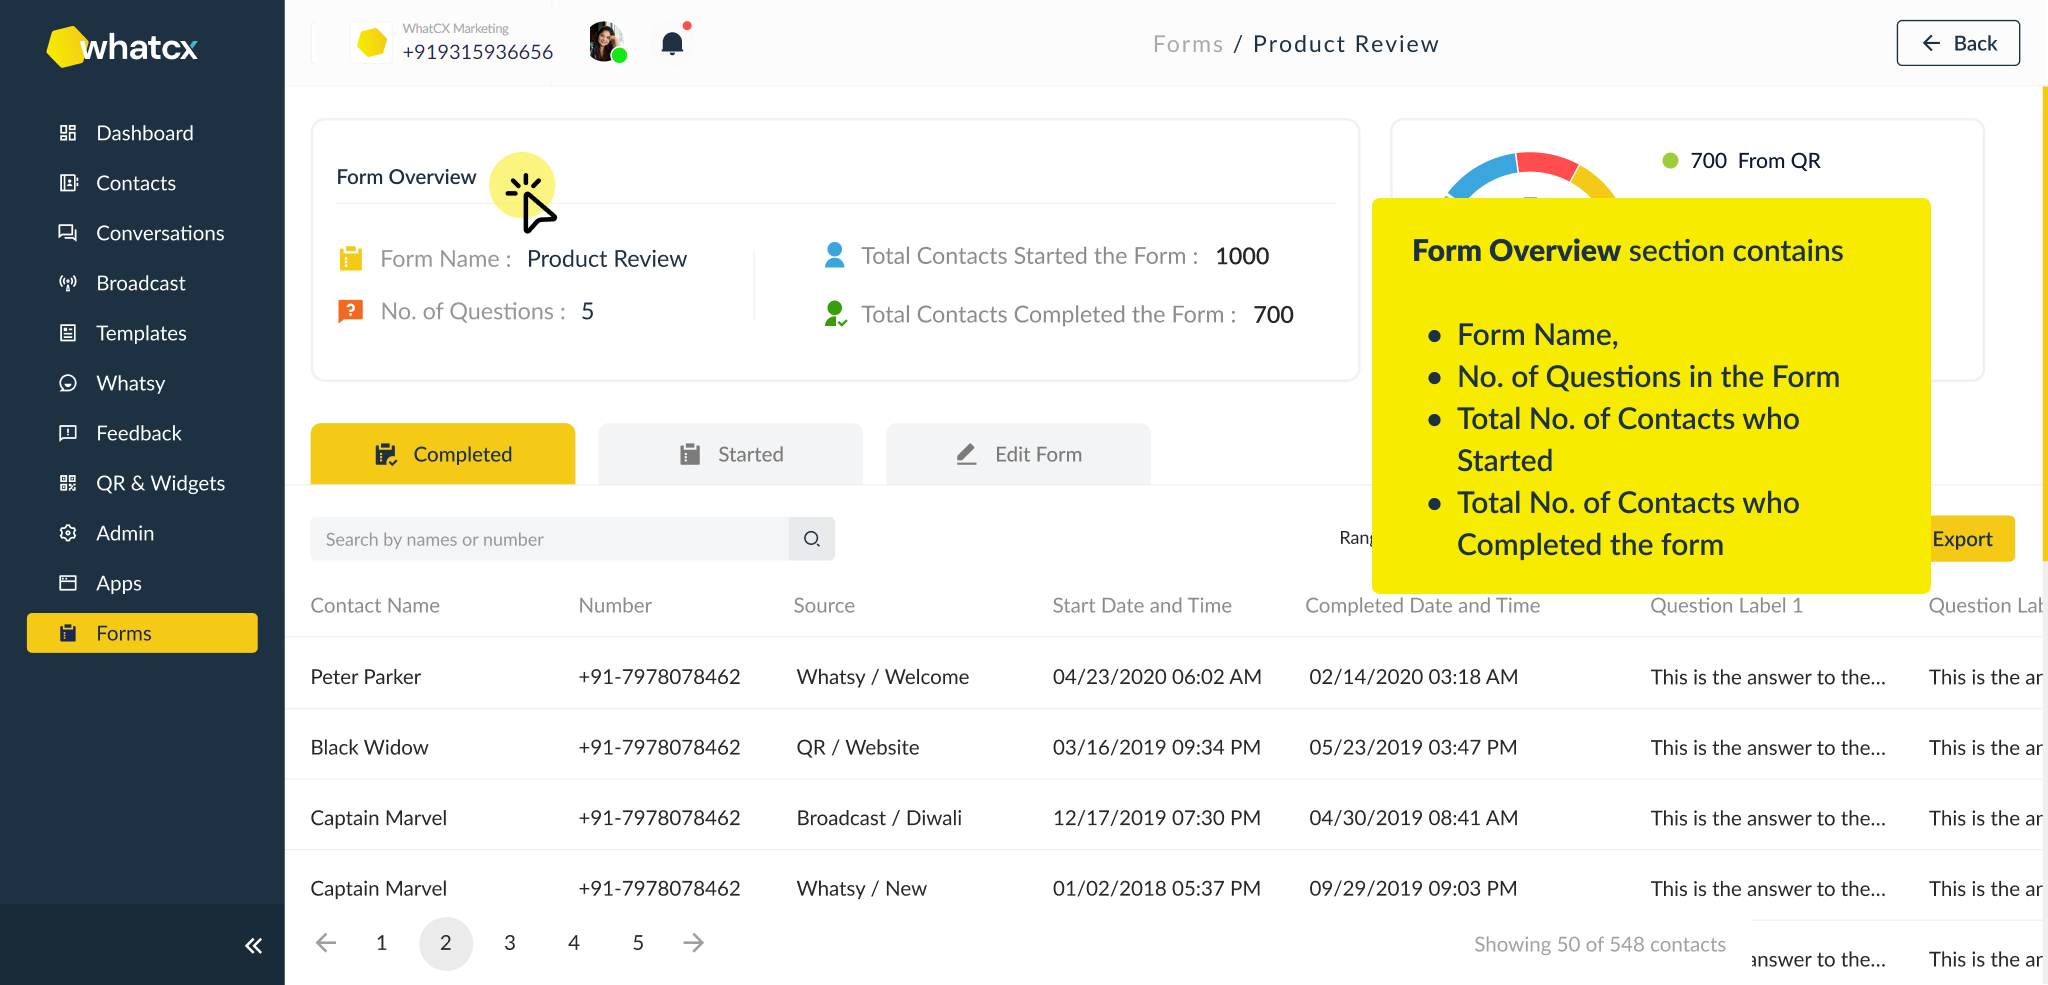
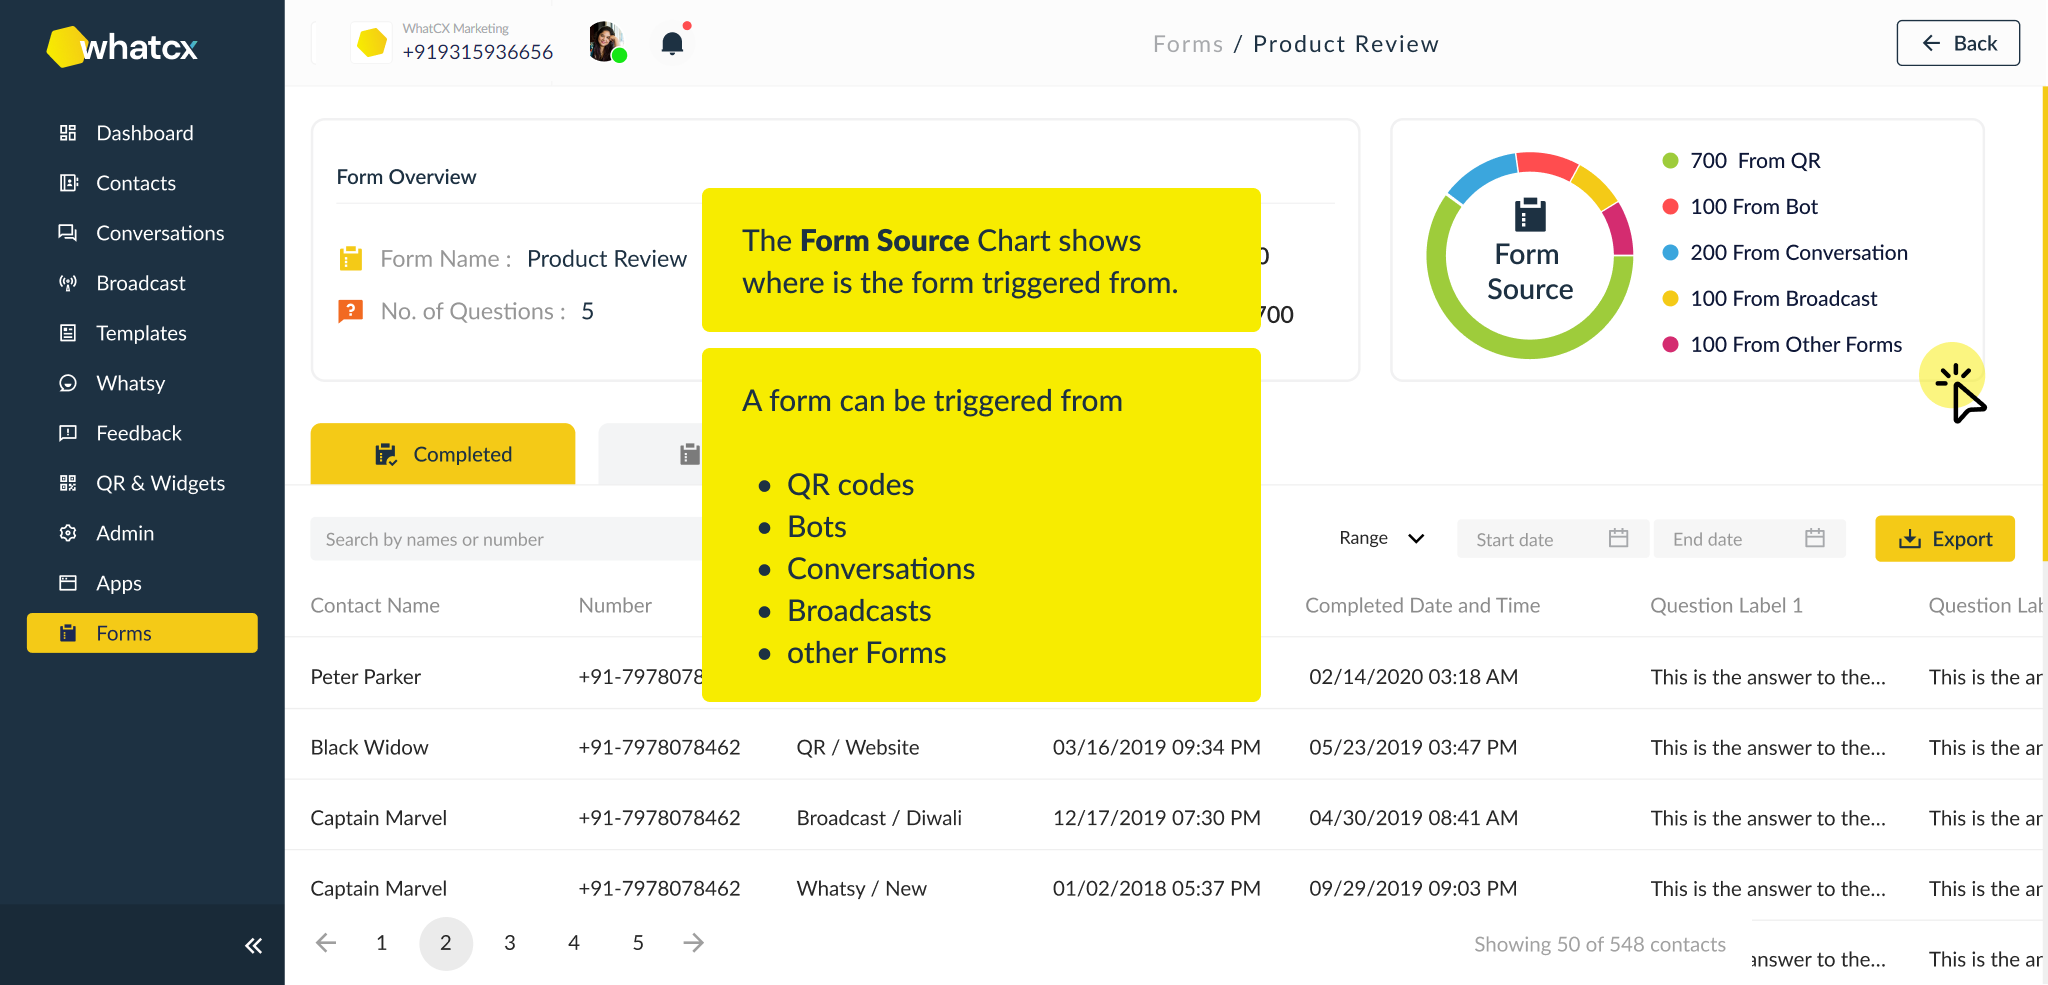
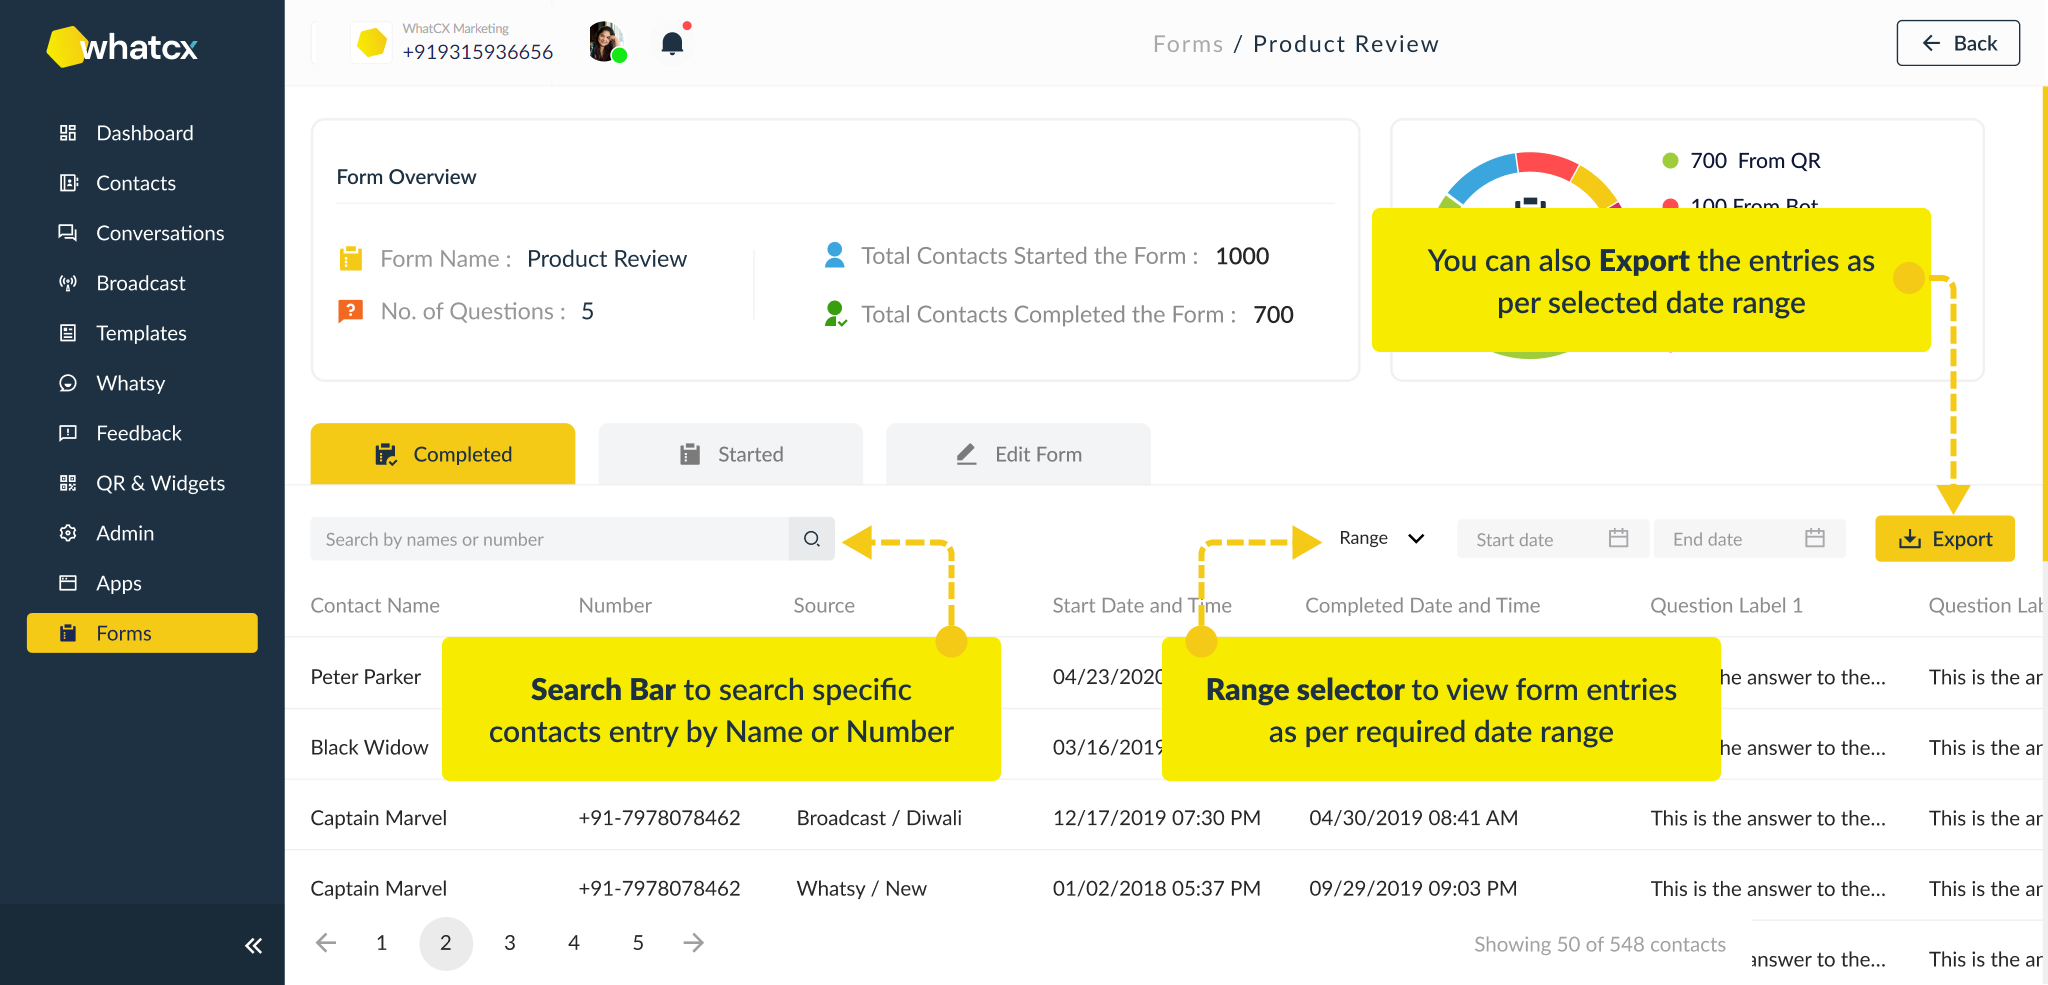
Form Data and Analytics
Forms
Benefits and Use Cases of Integrating Forms
How to setup Office Hours?
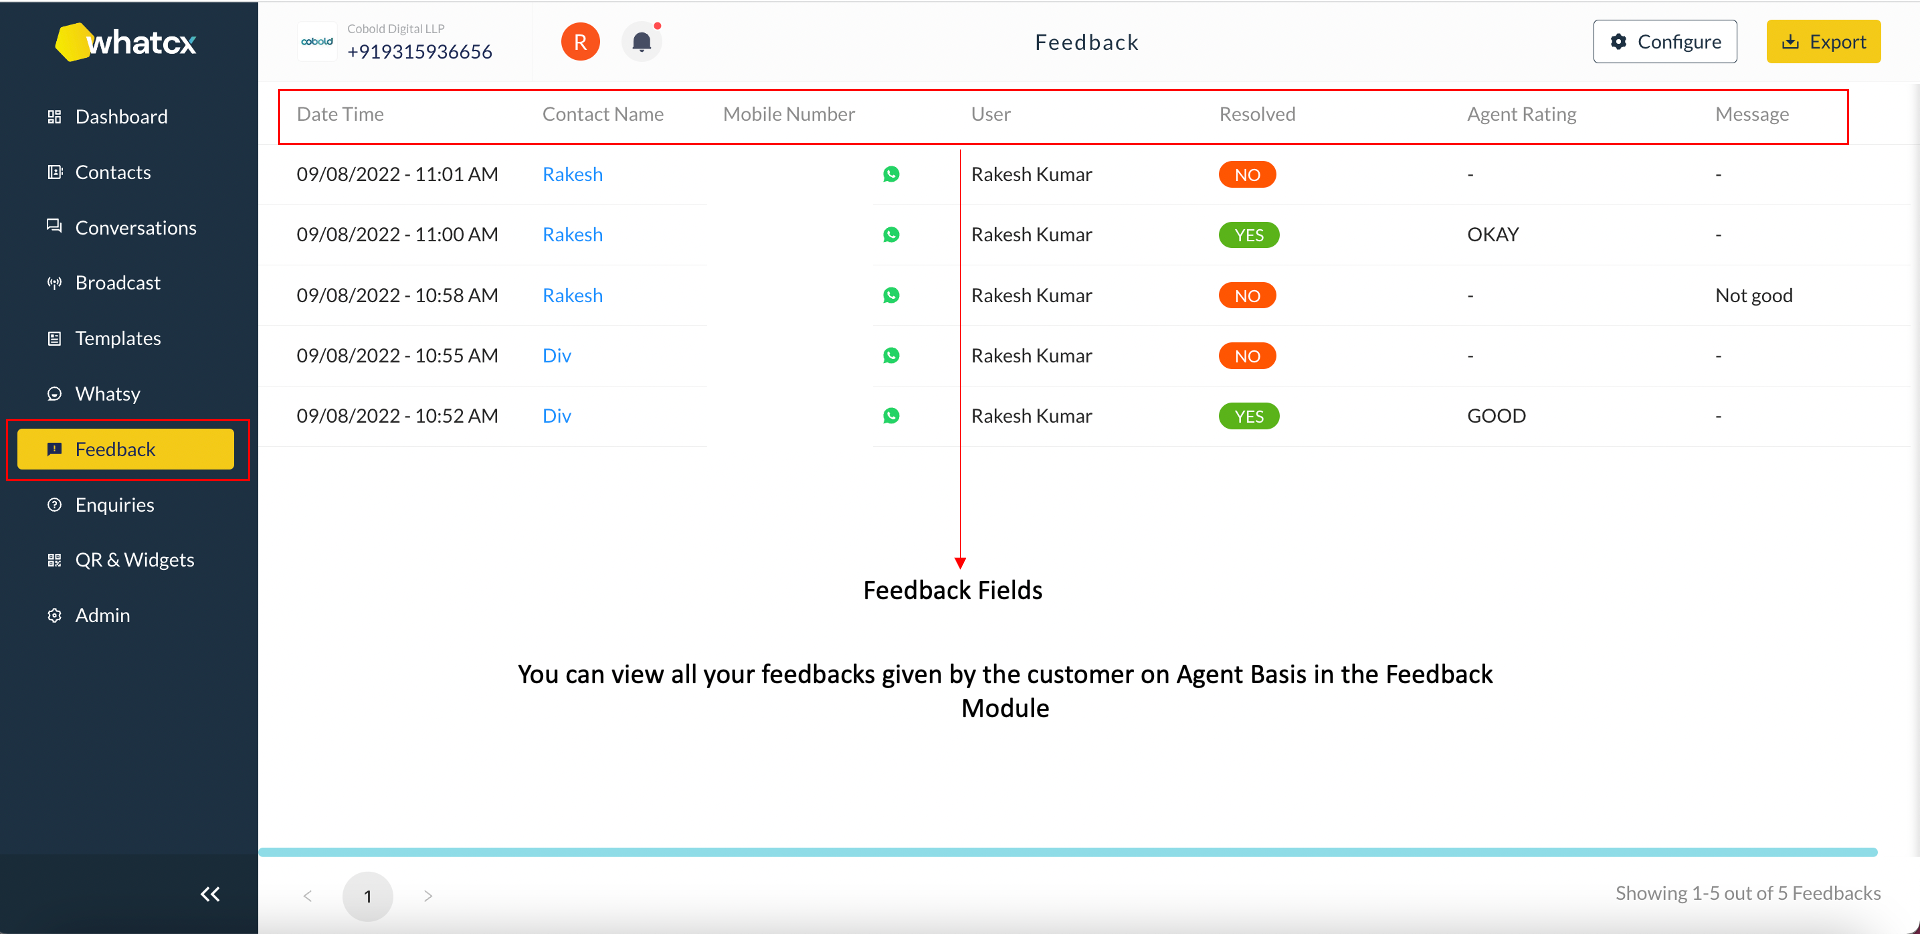
Feedback
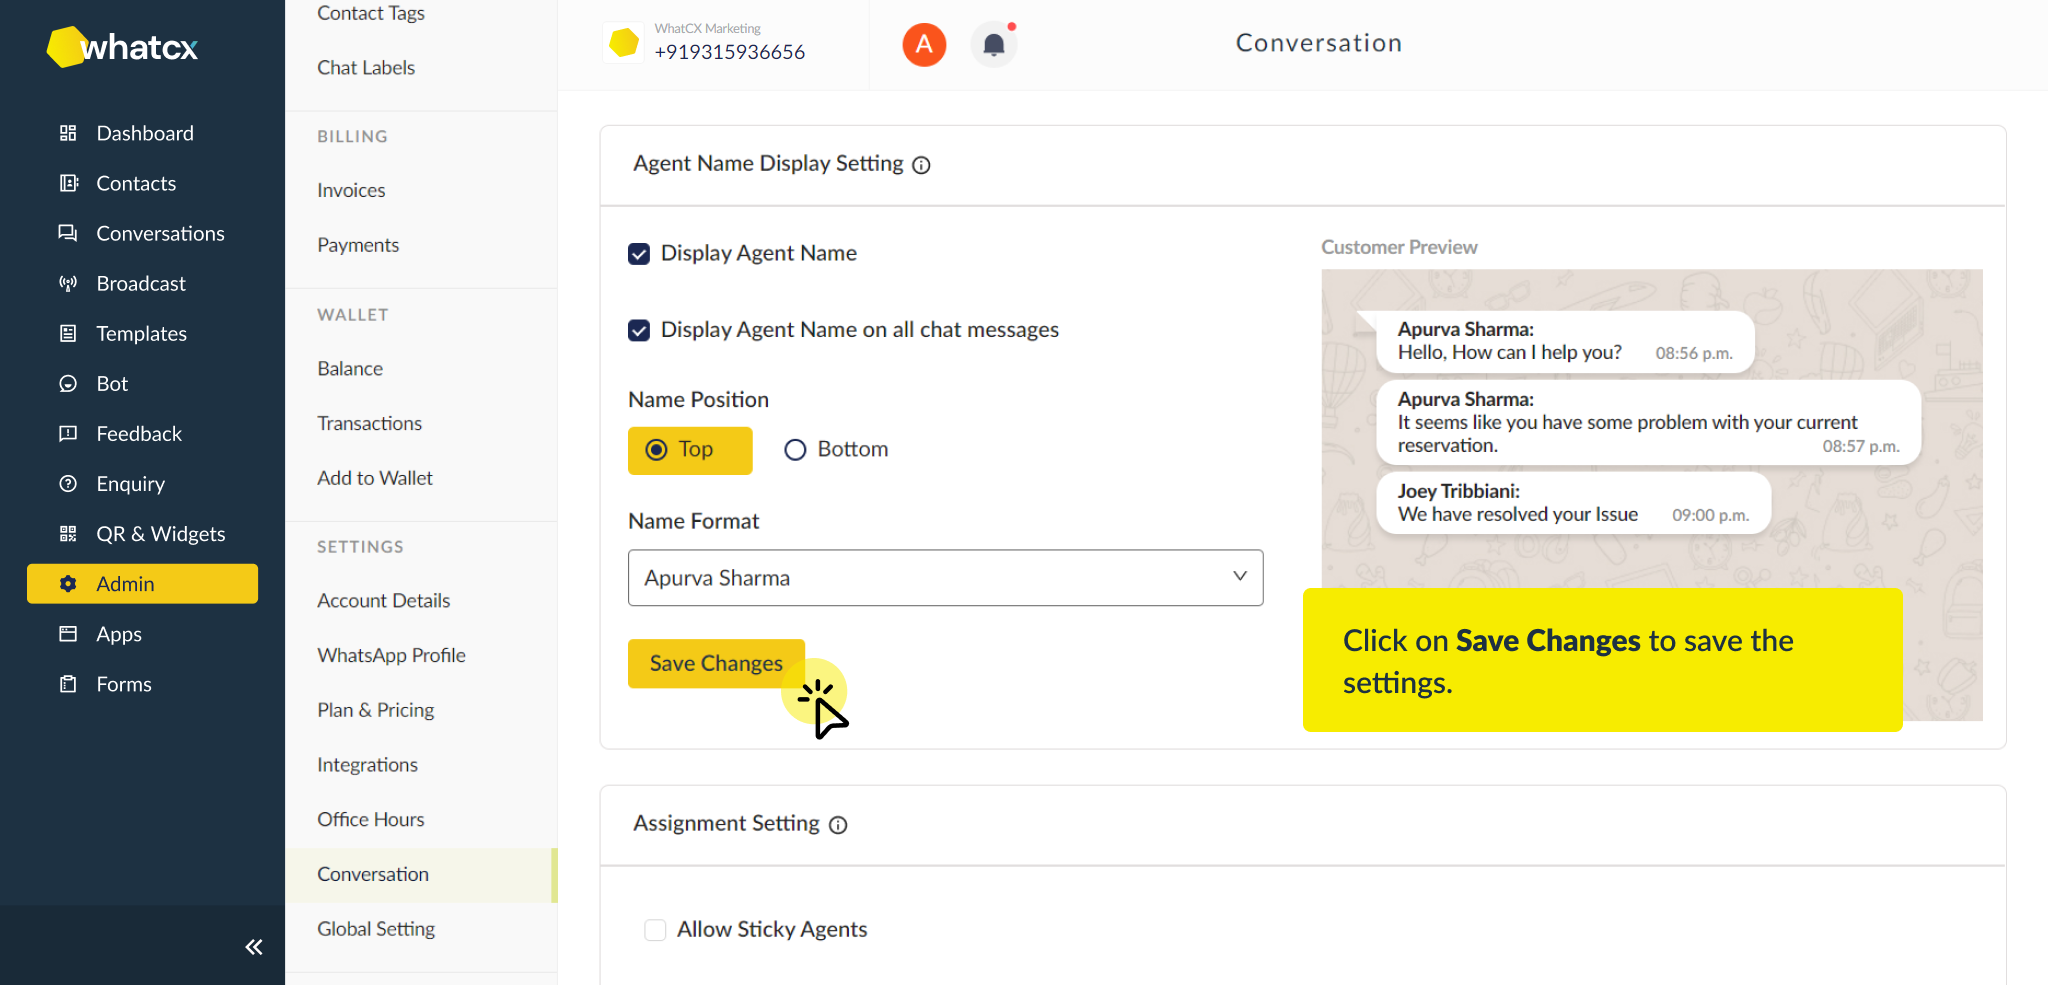
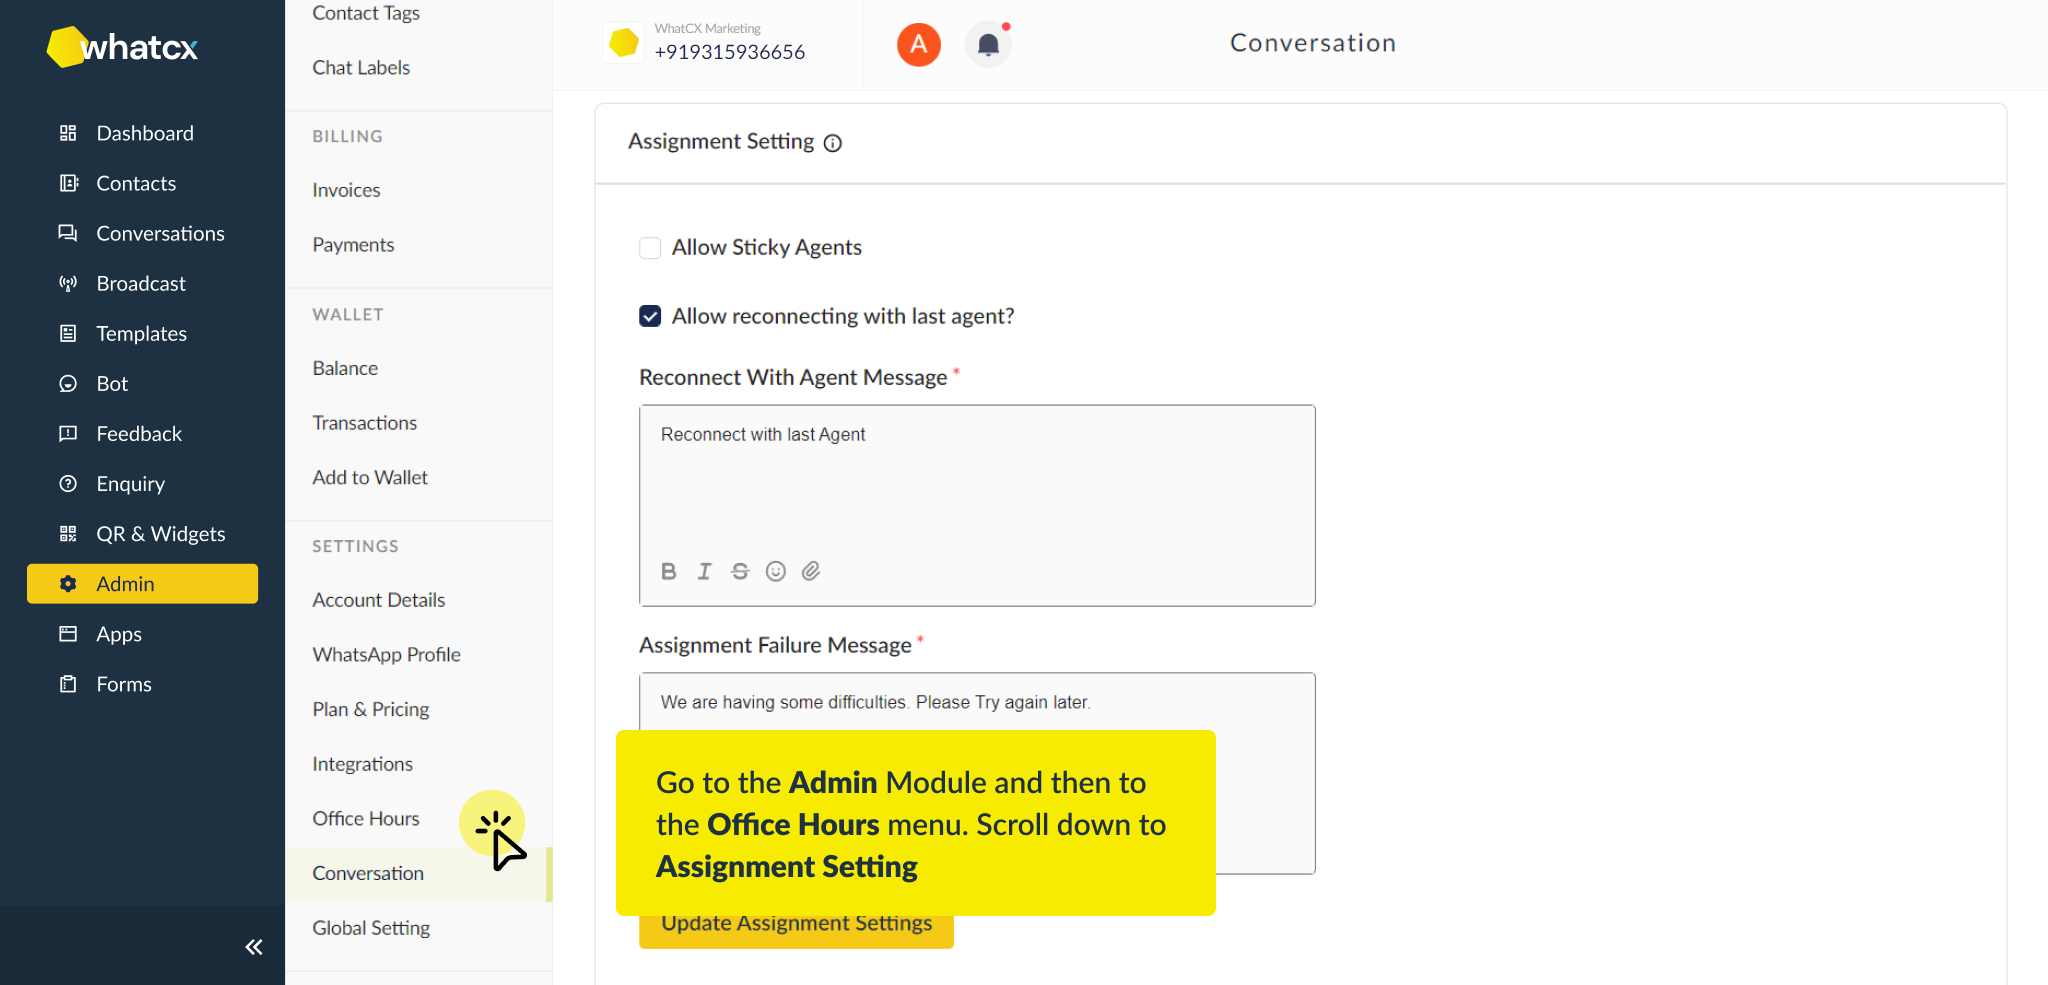
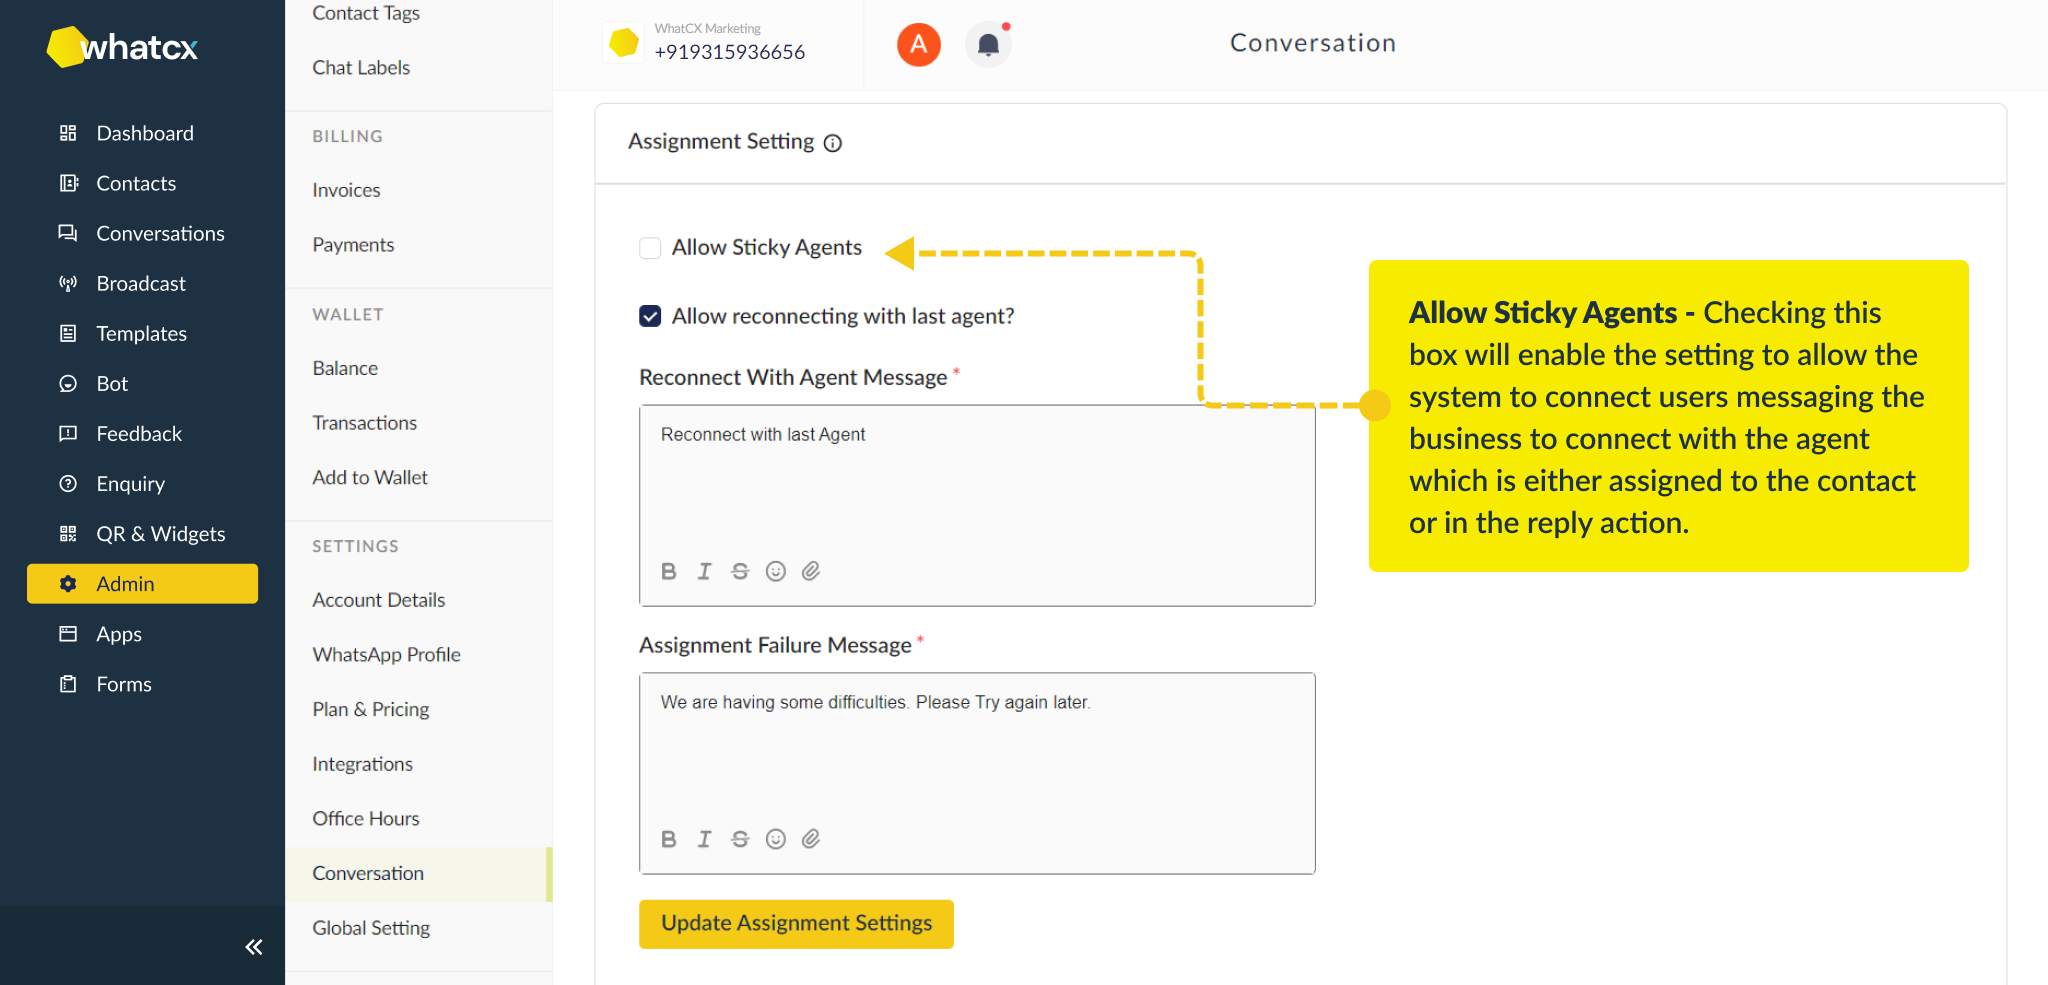
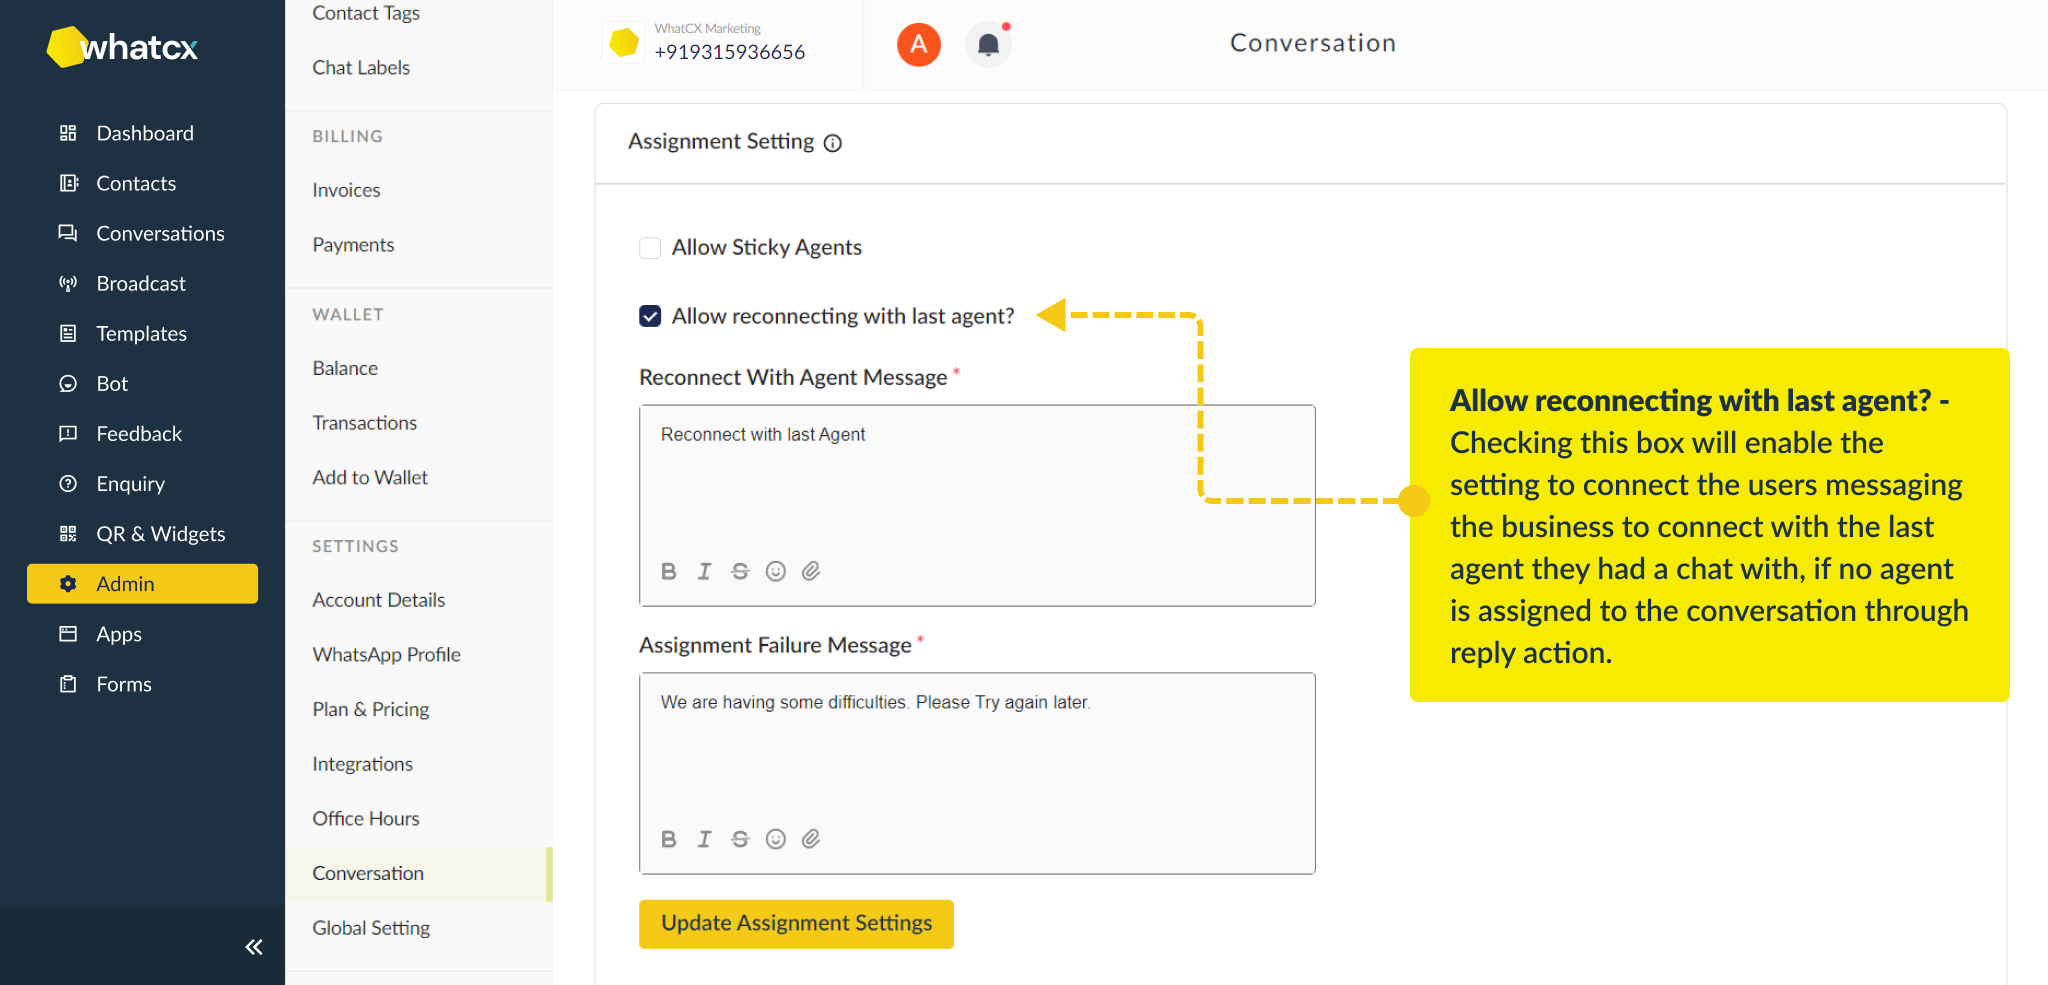
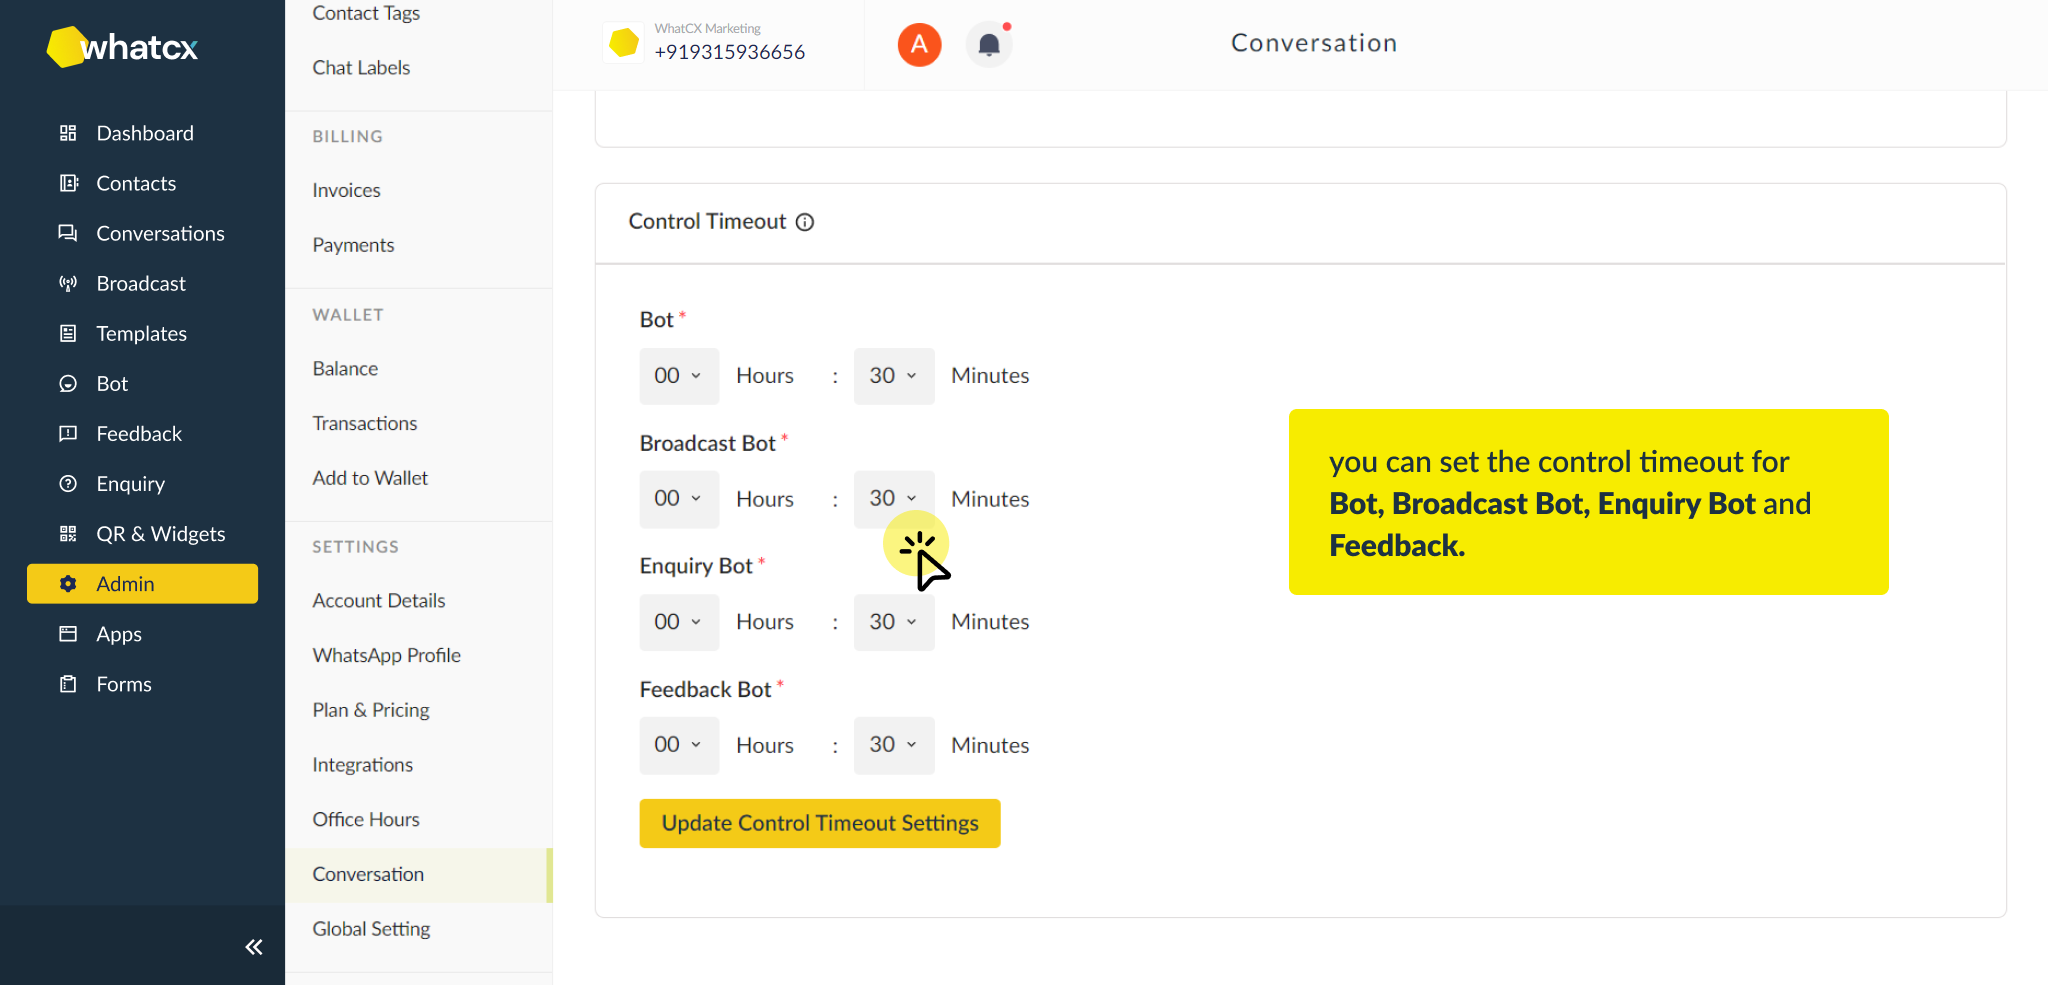
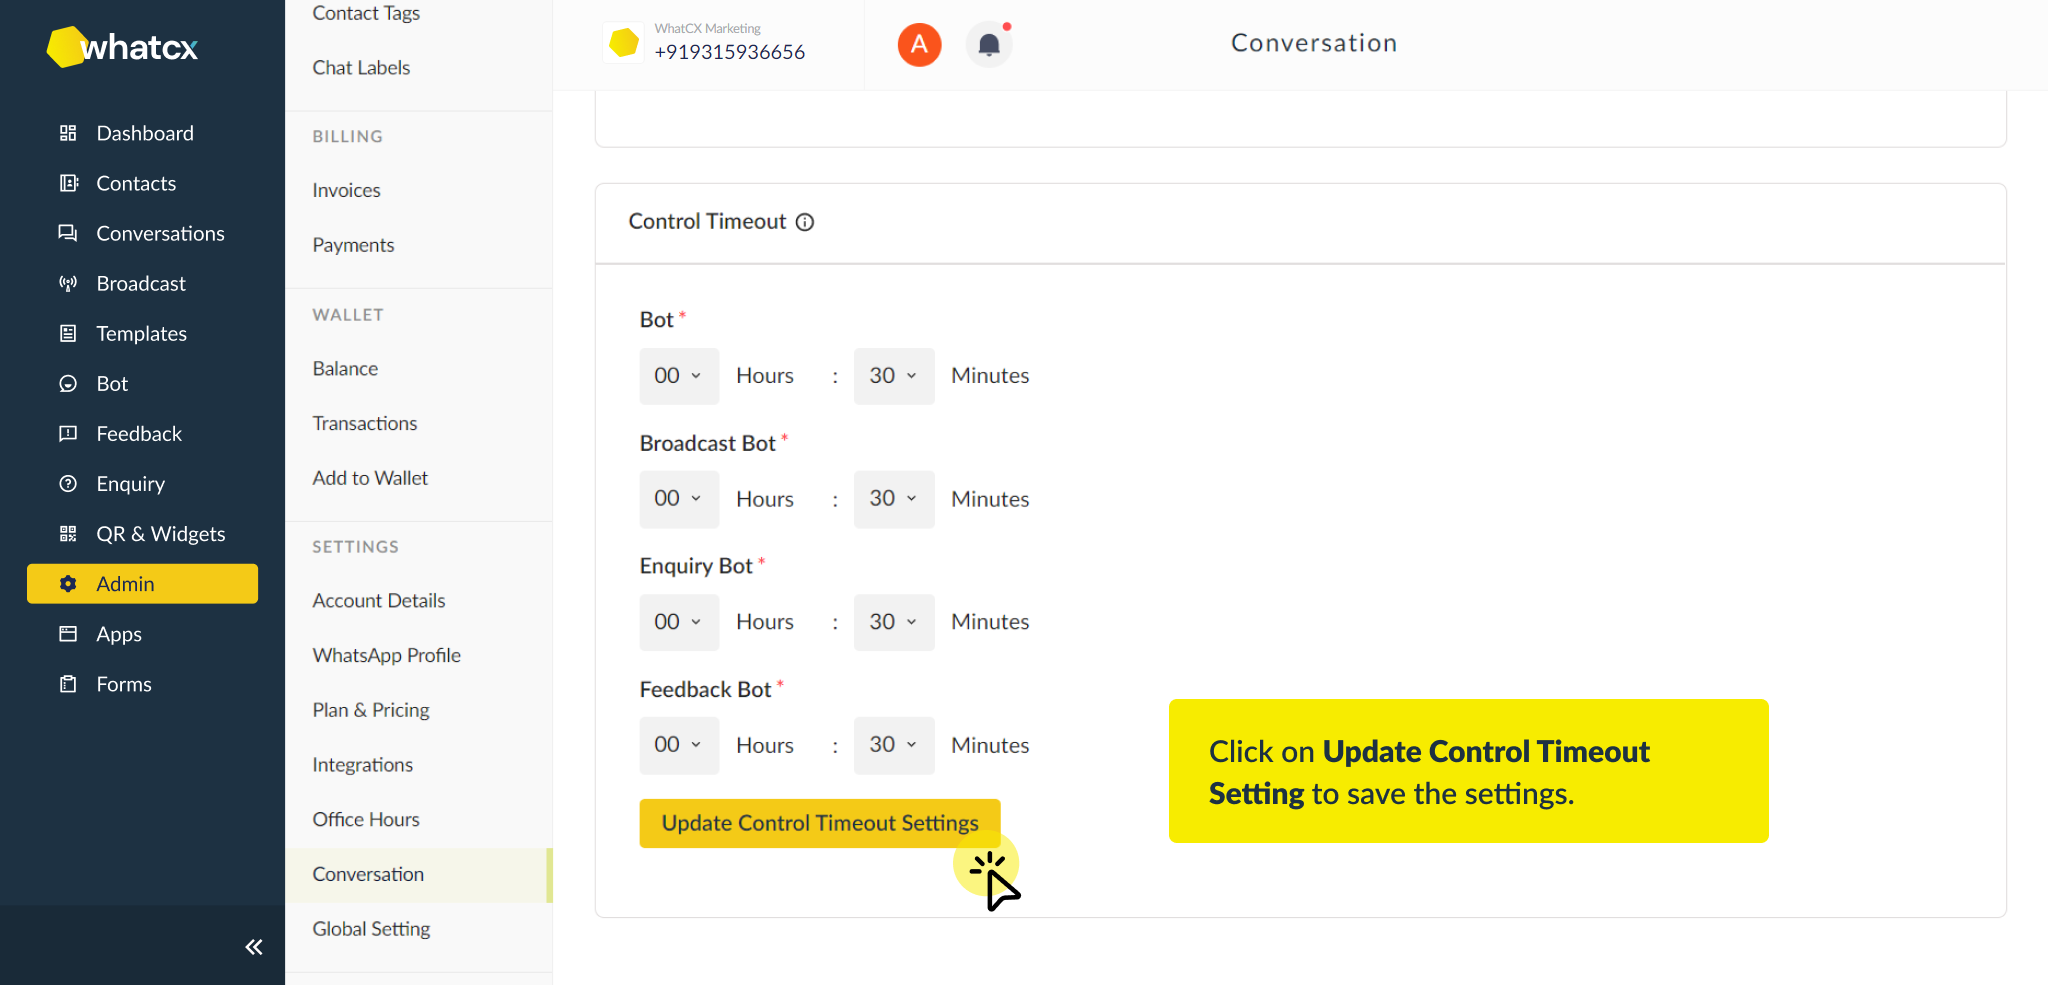
How to configure Conversations settings in Admin?
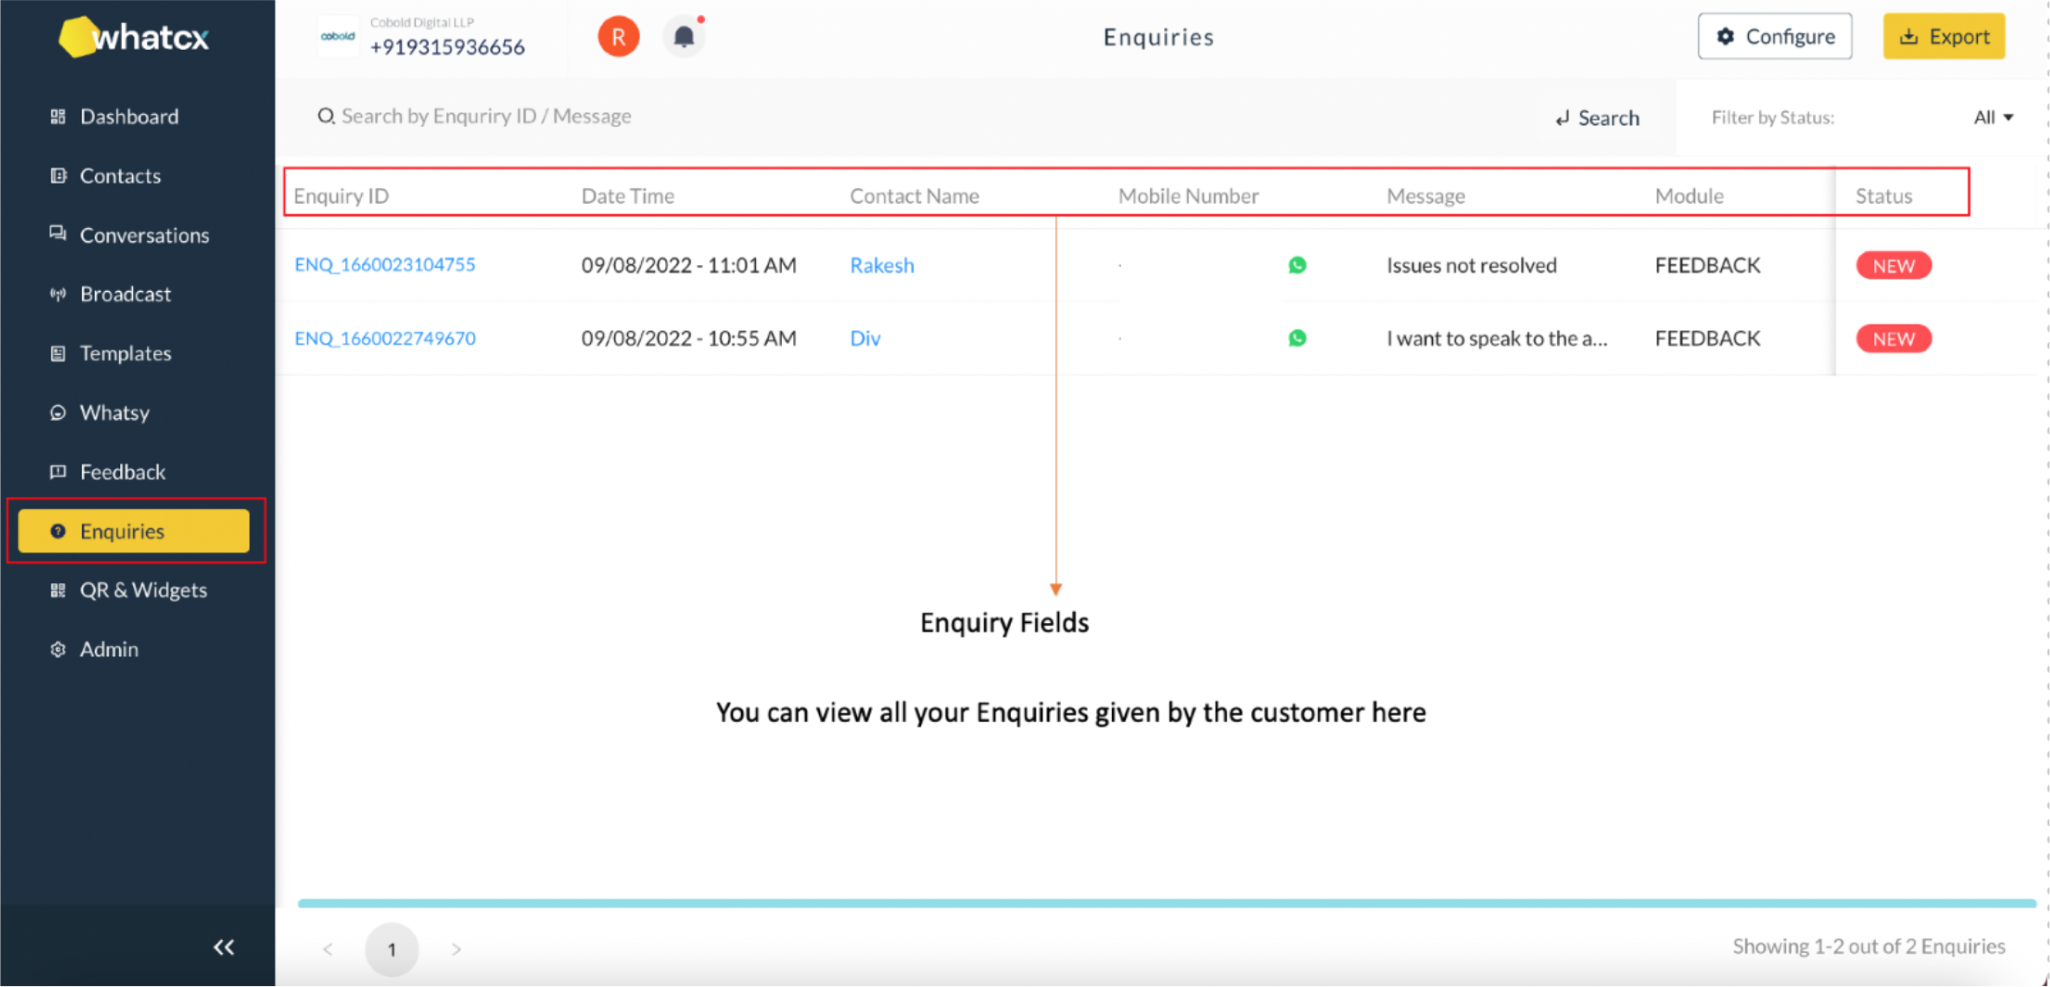
Enquiry
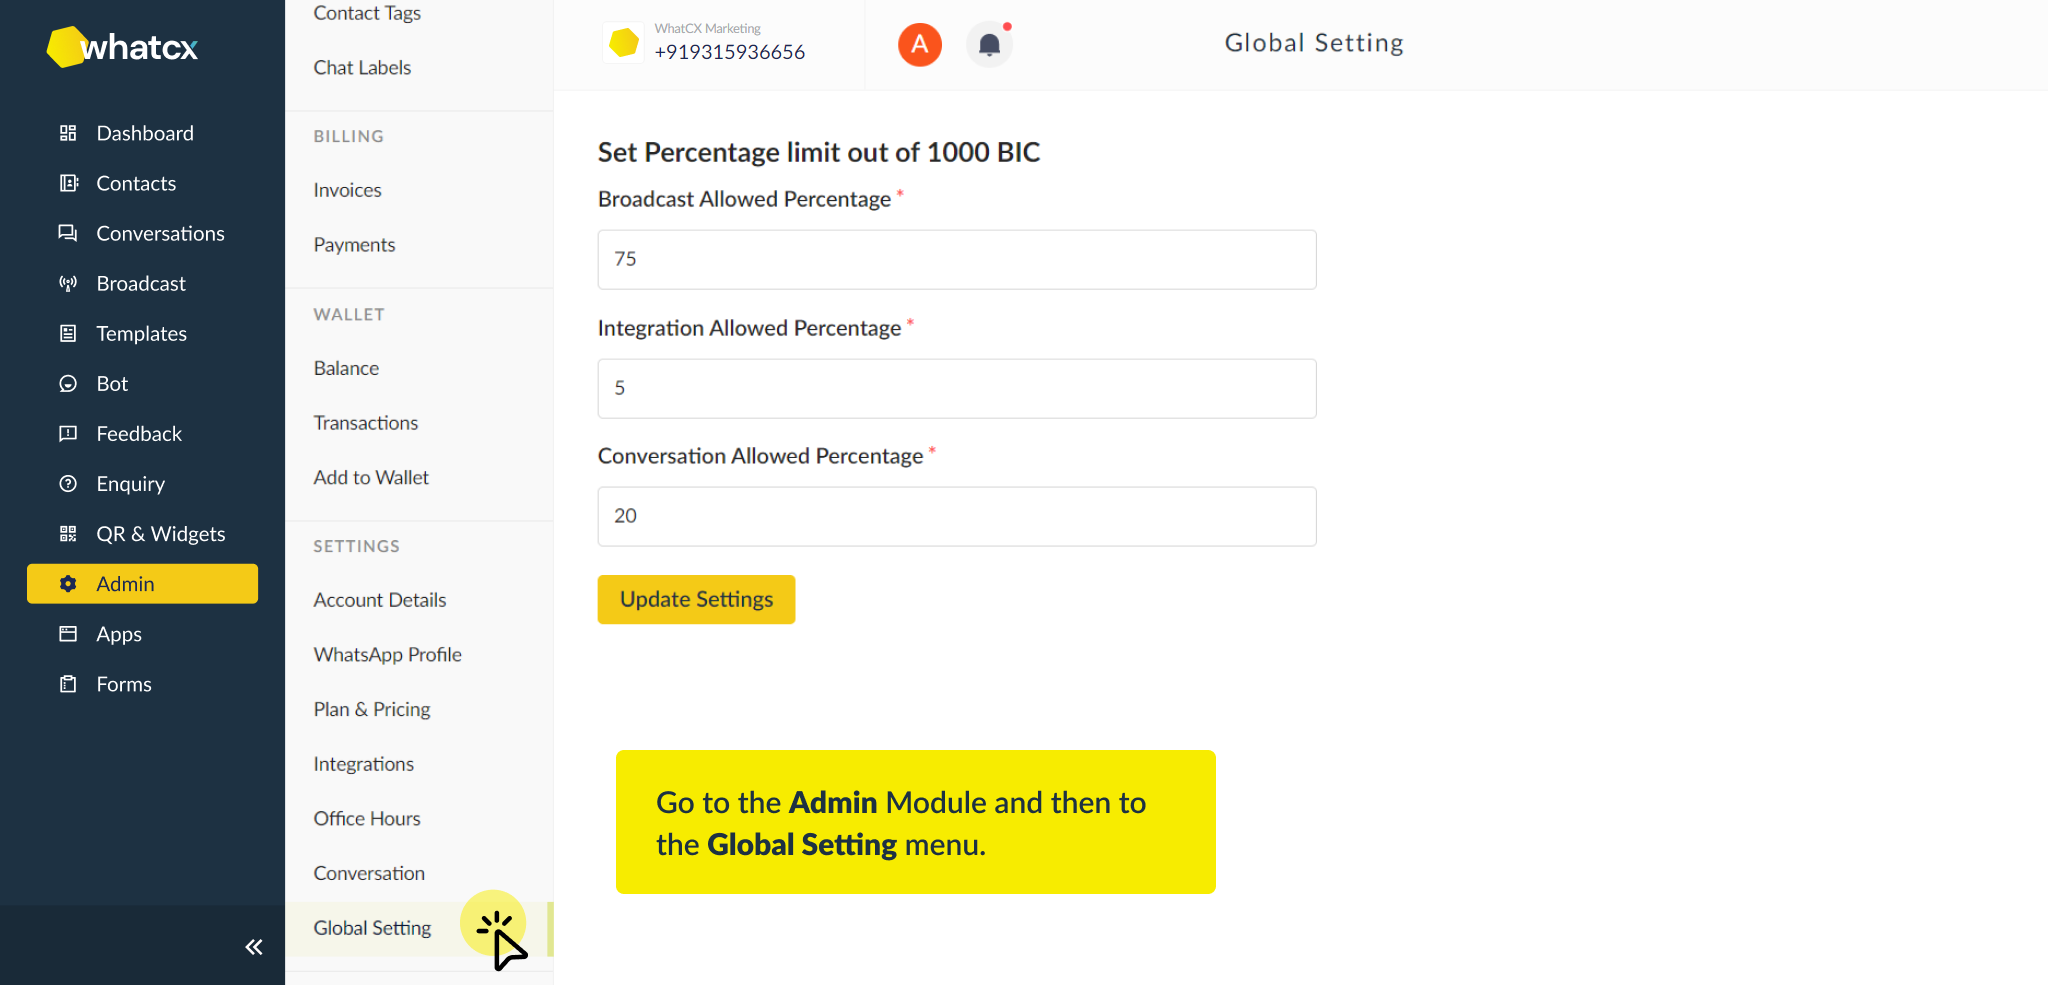
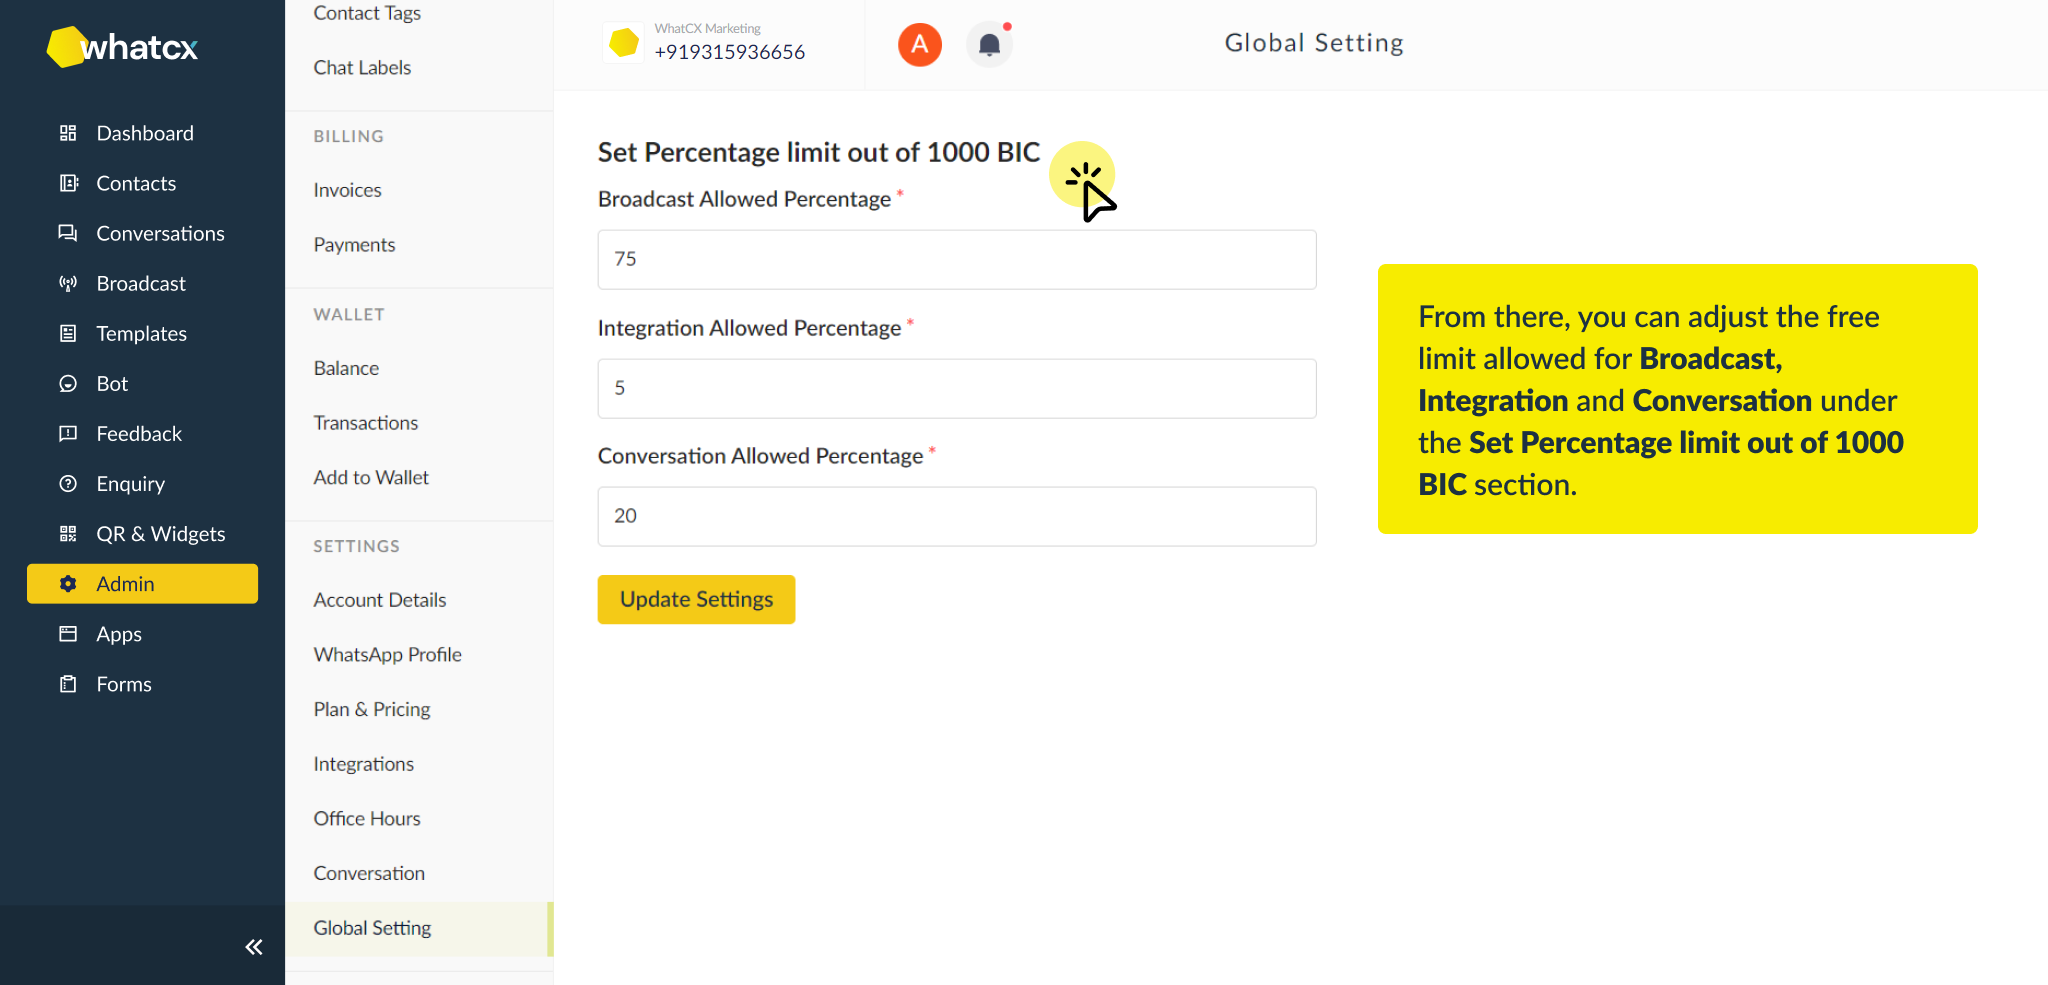
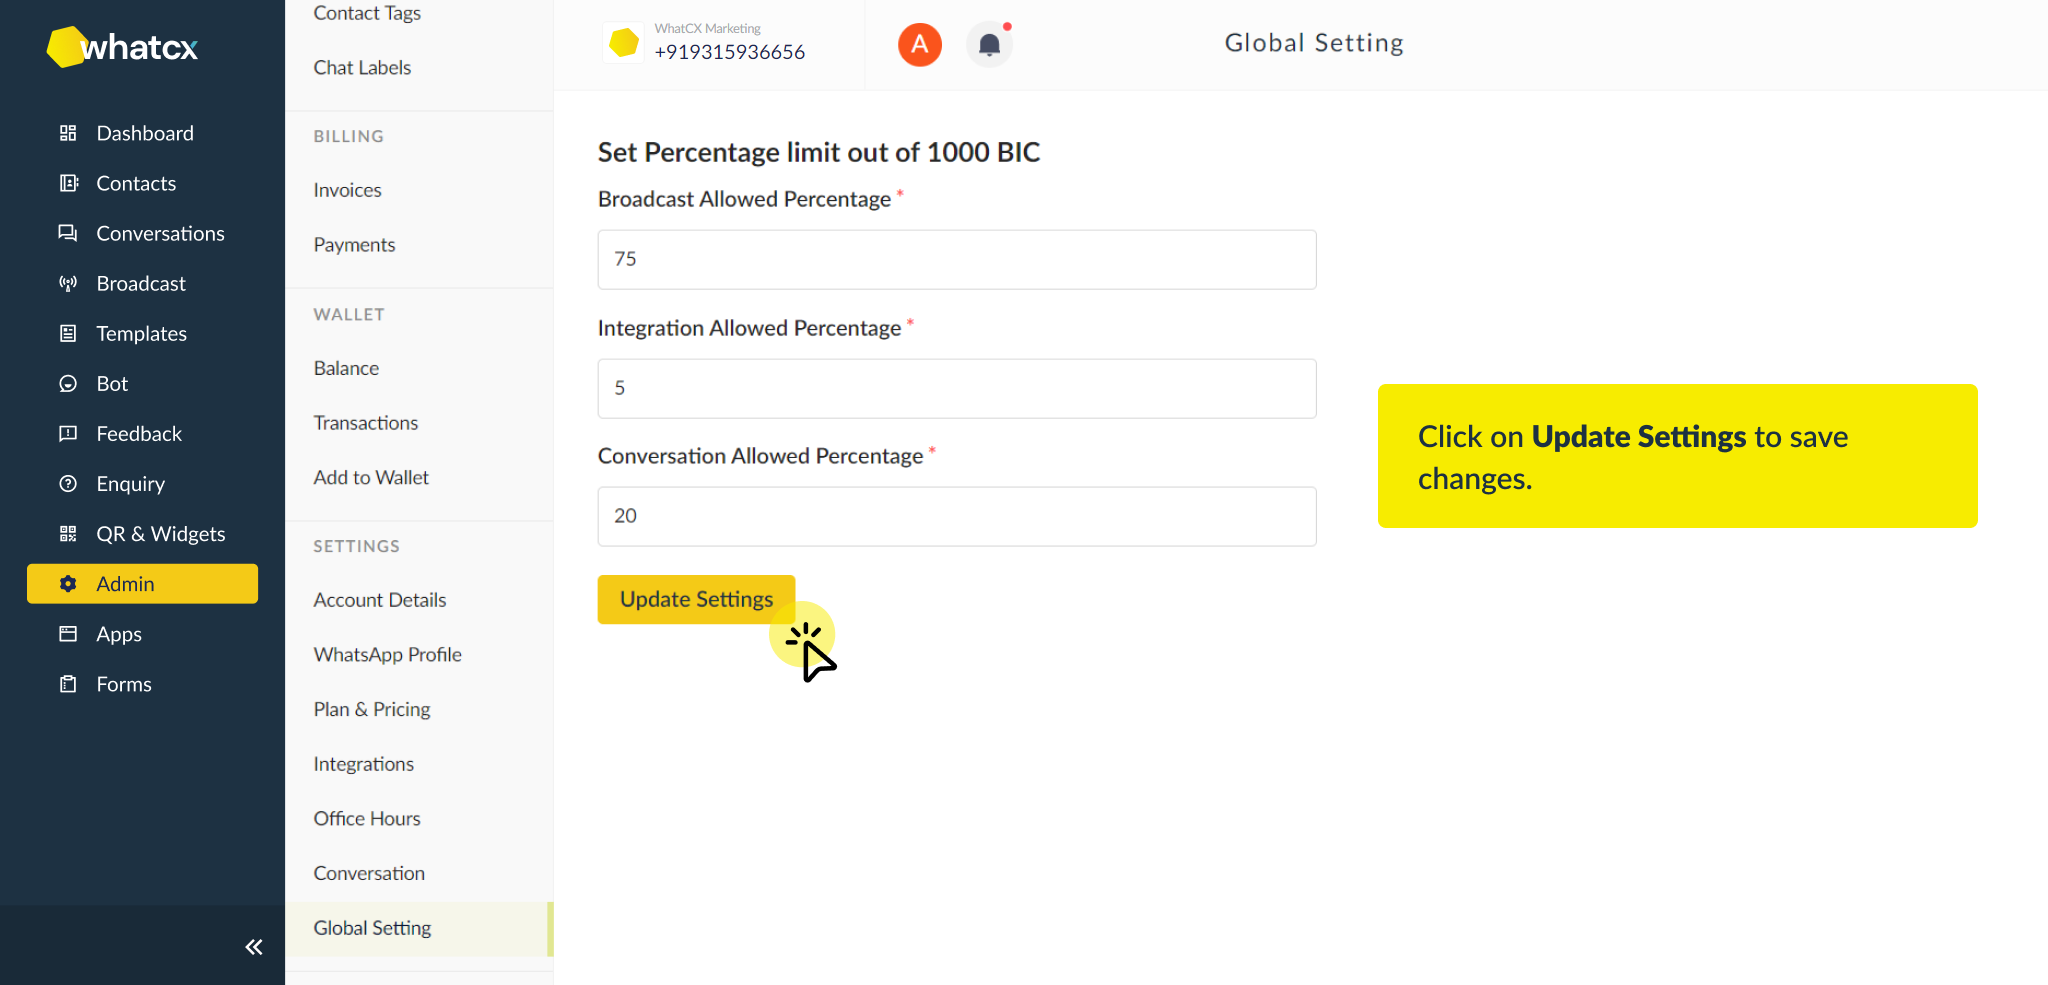
How to configure Global Settings?
Admin
How to setup Office Hours?
How to configure Conversations settings in Admin?
How to configure Global Settings?
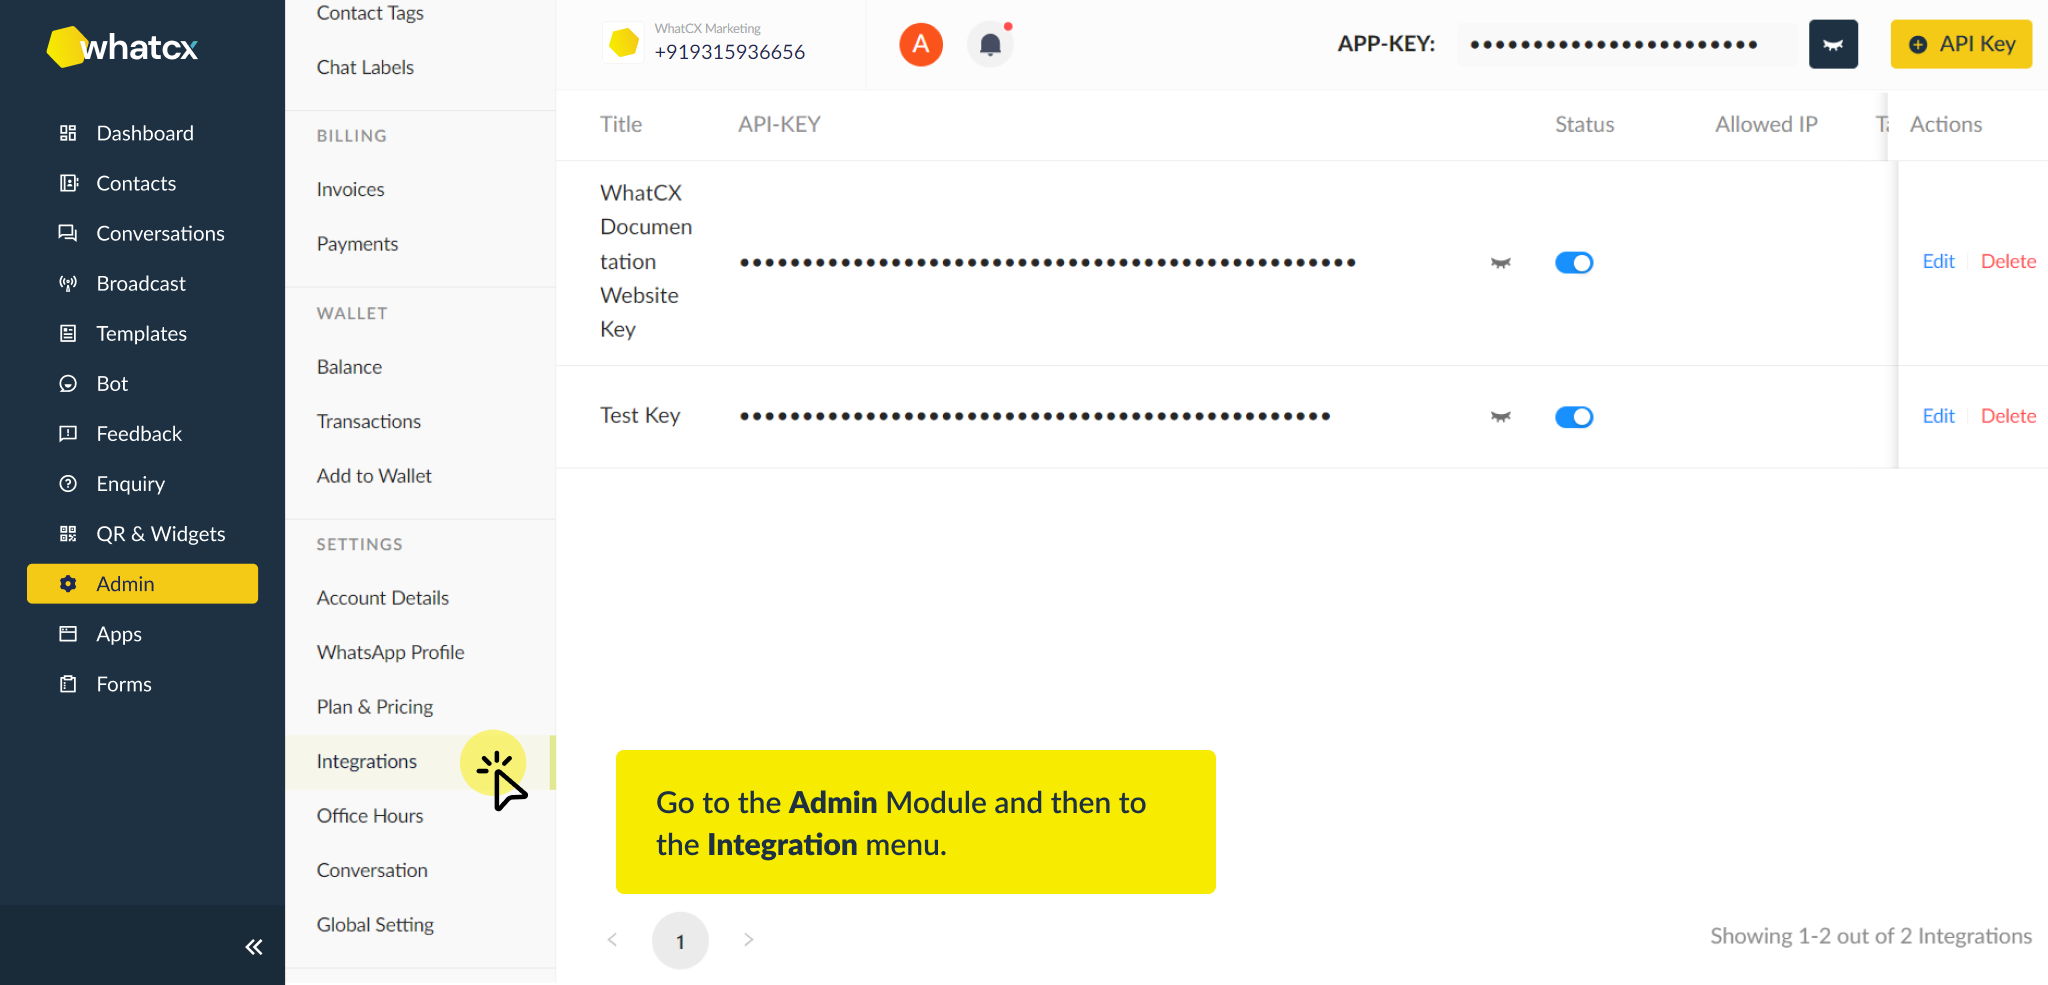
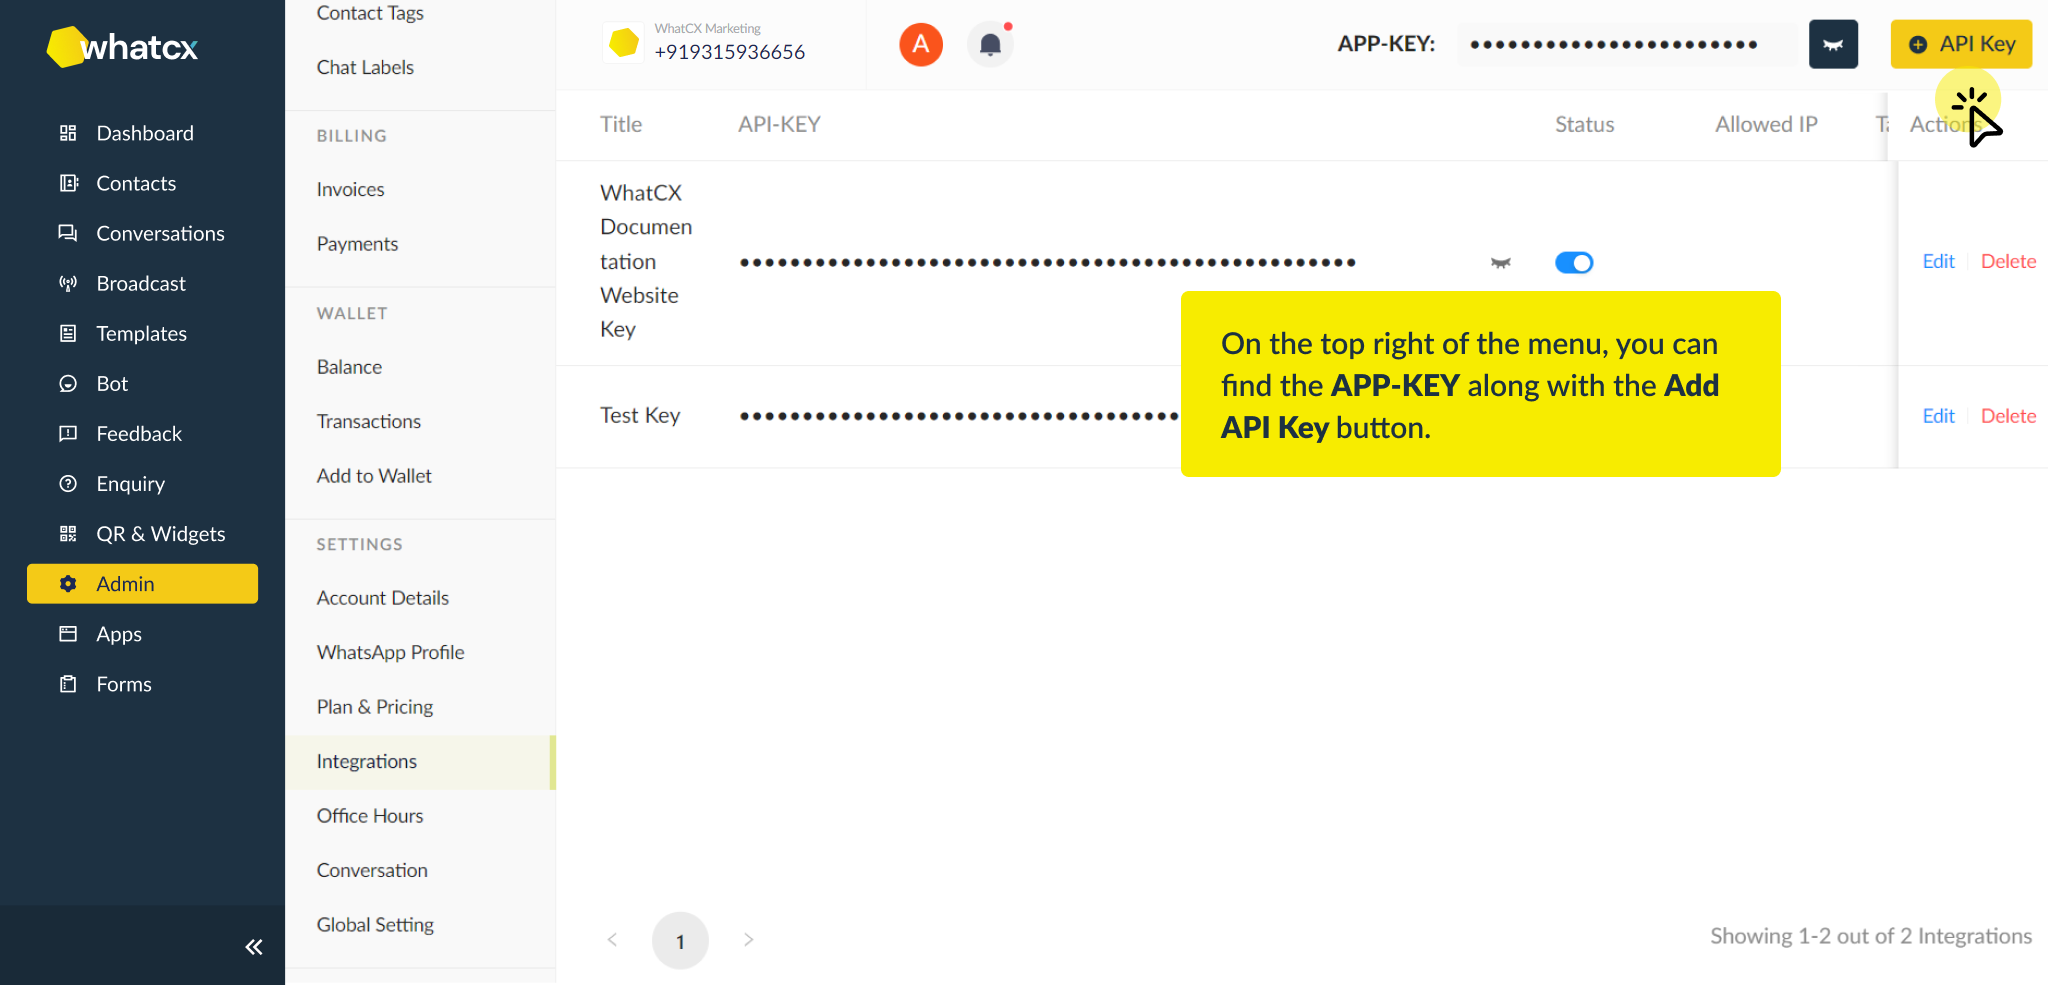
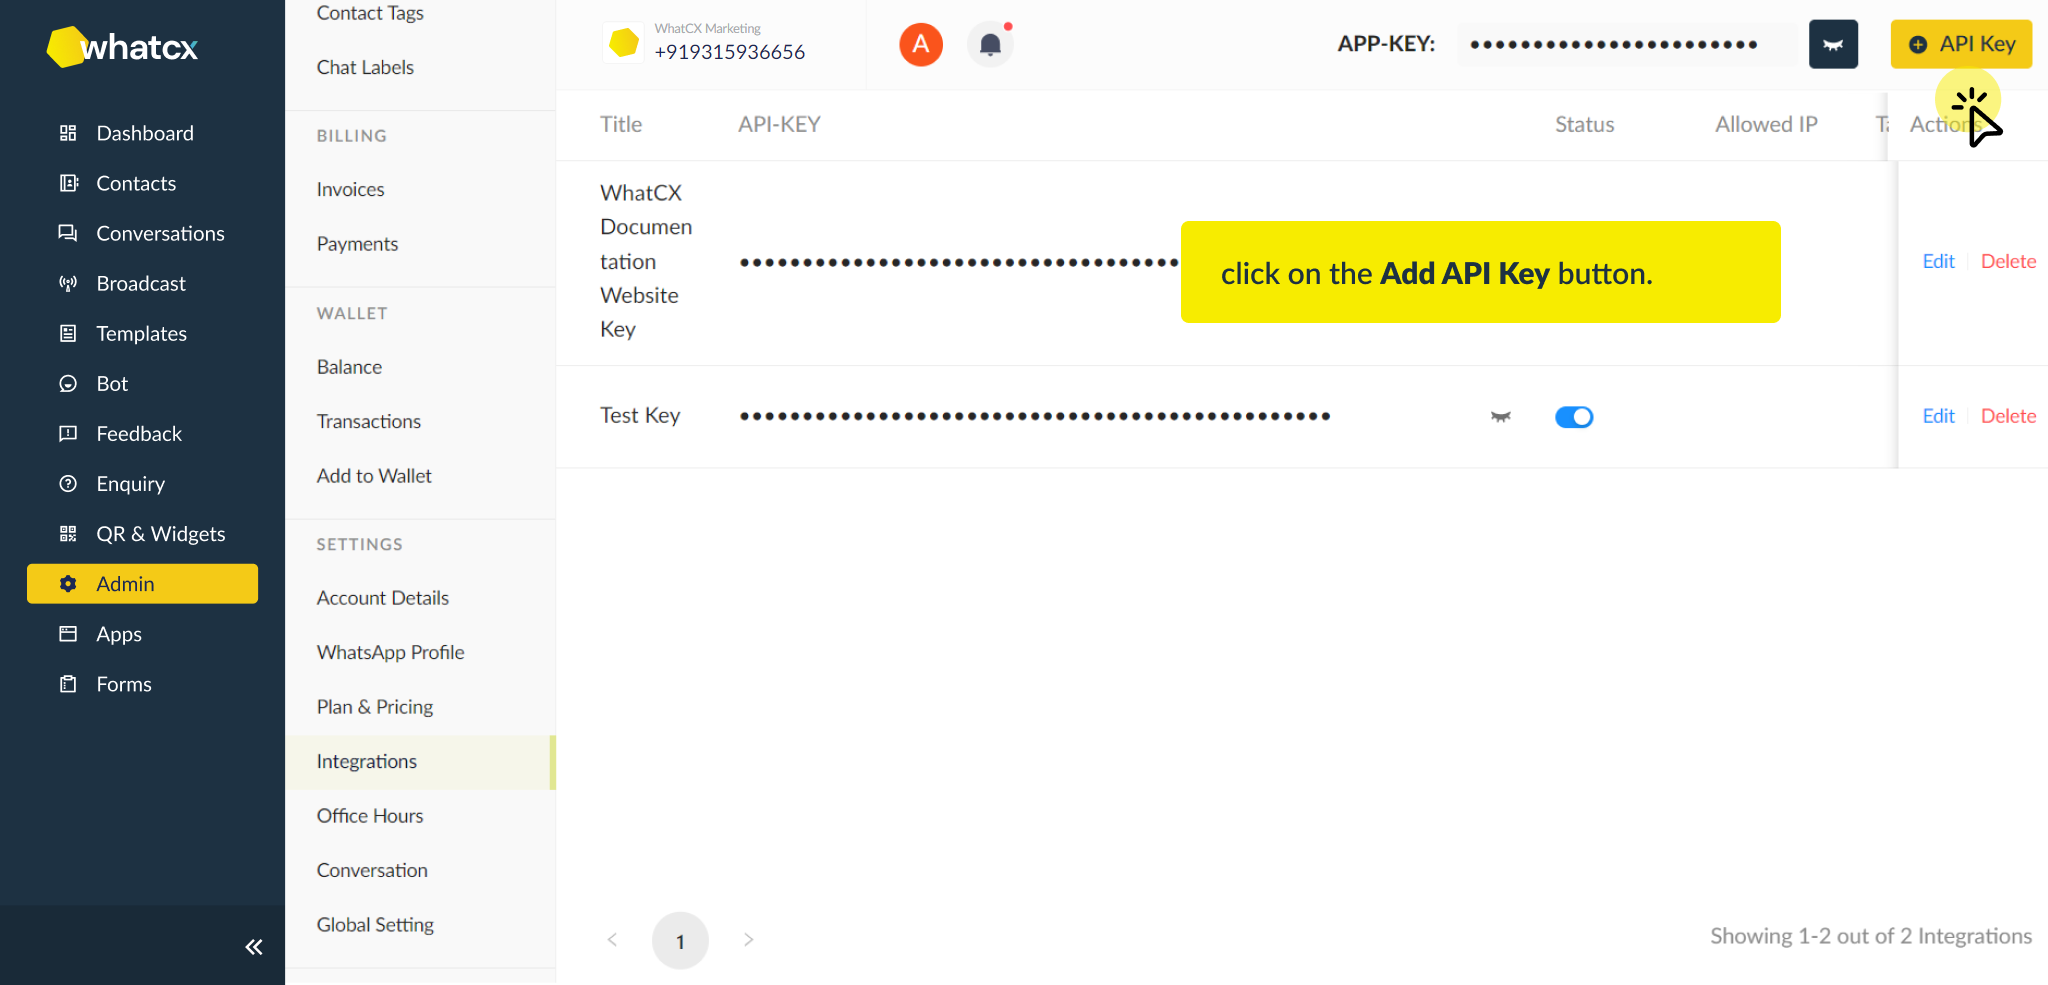
How to configure Integrations?
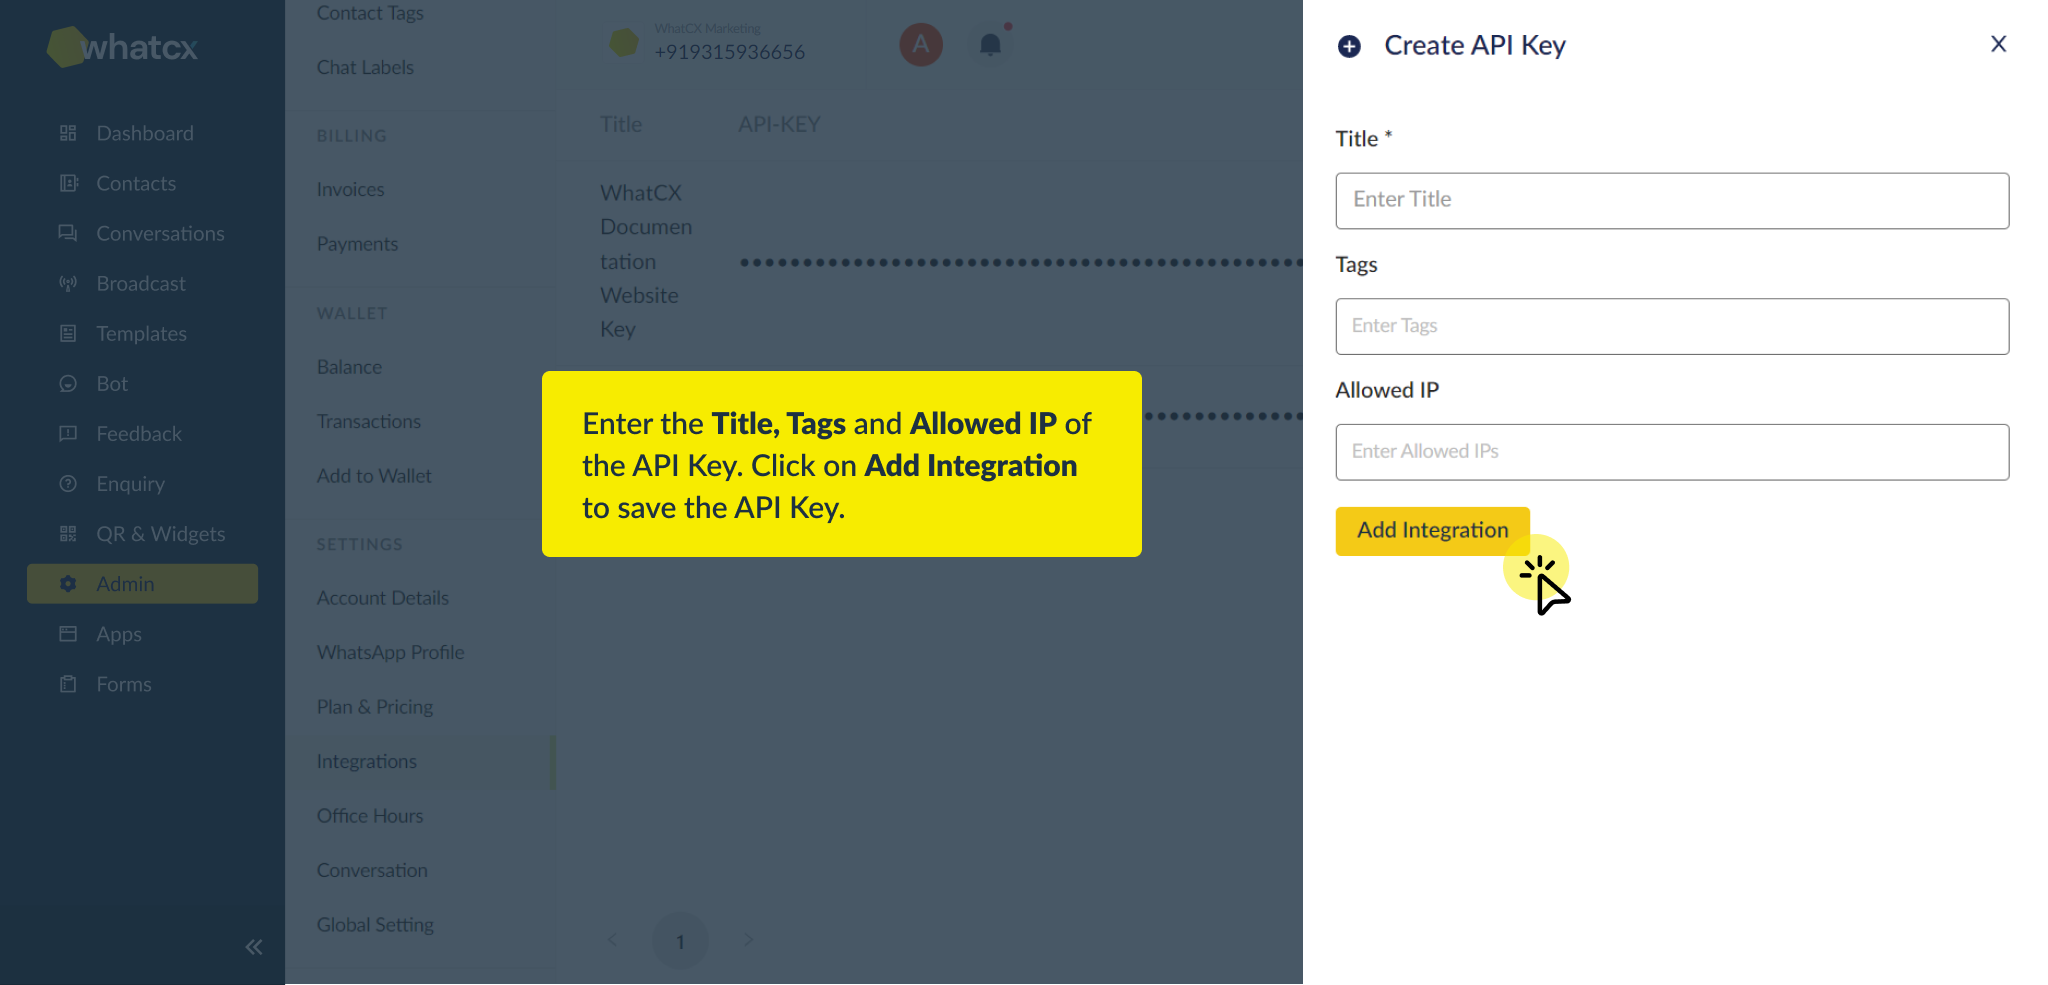
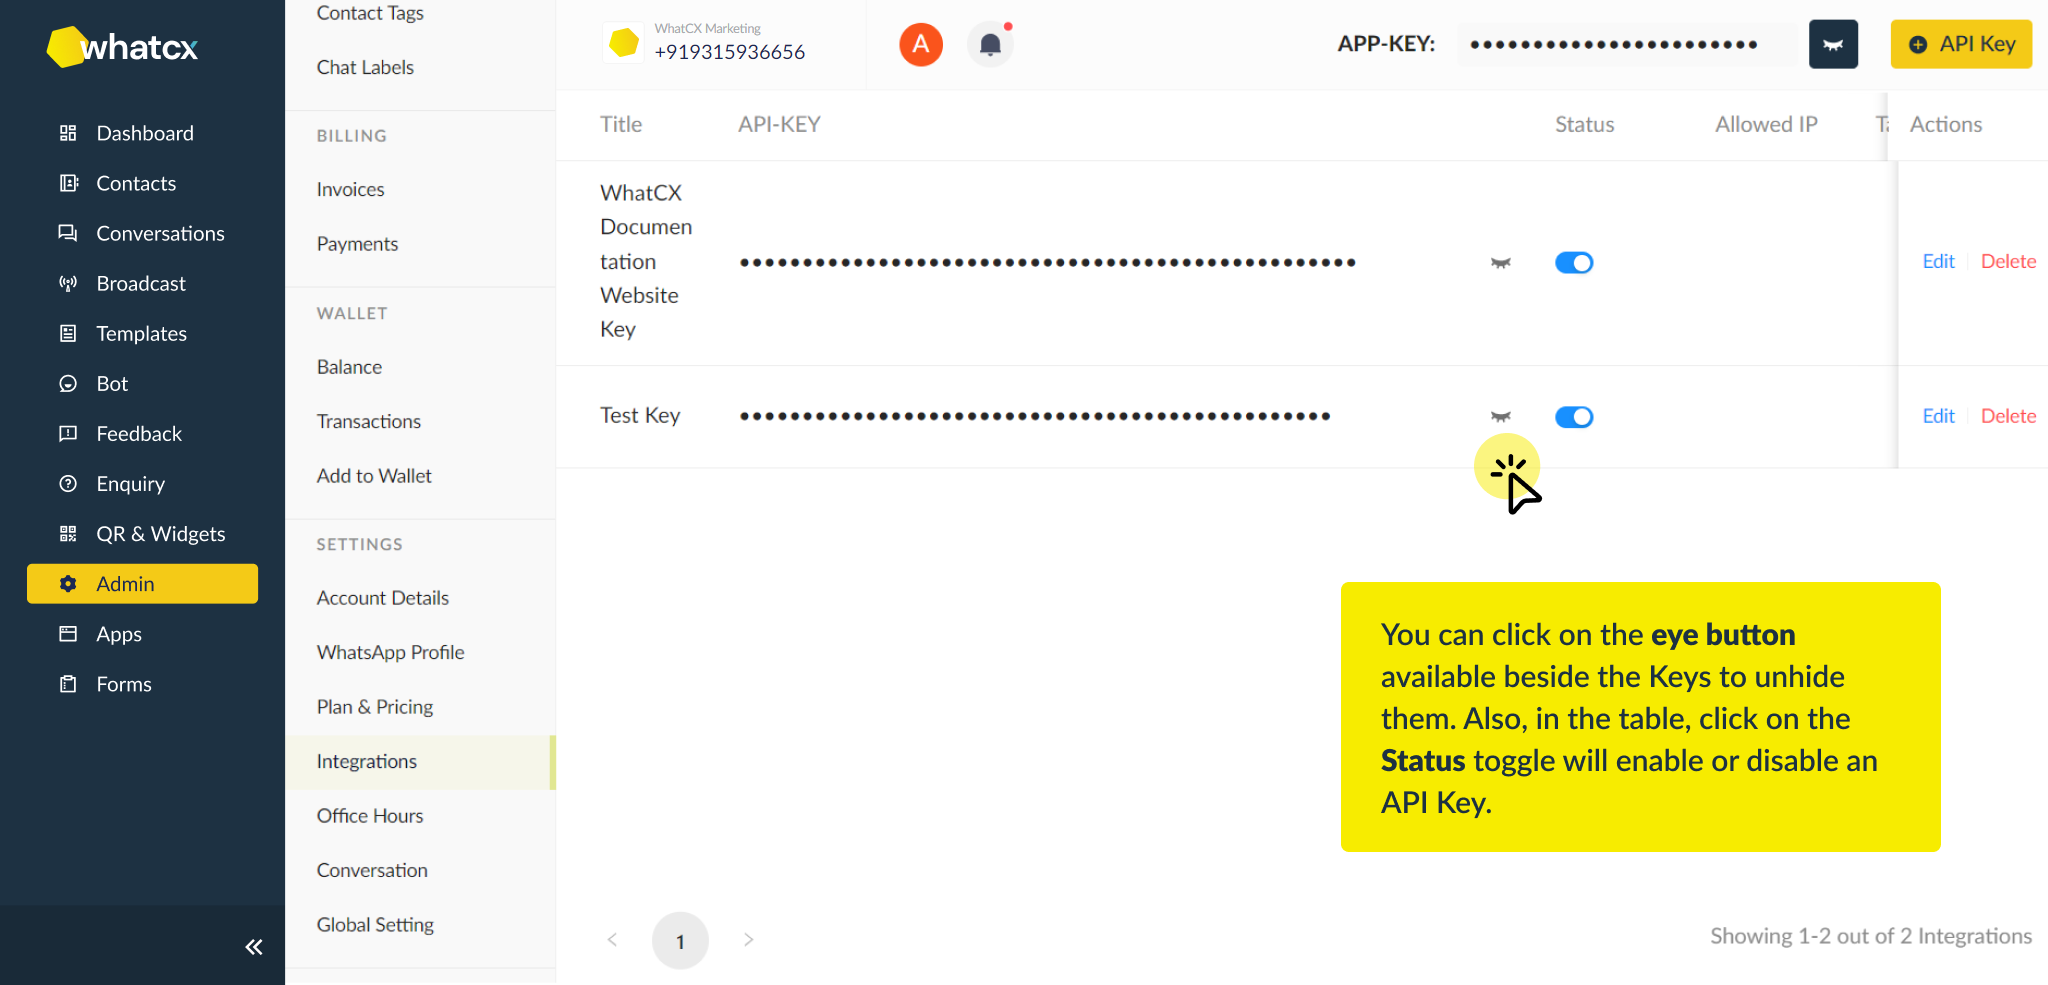
How to configure Integrations?


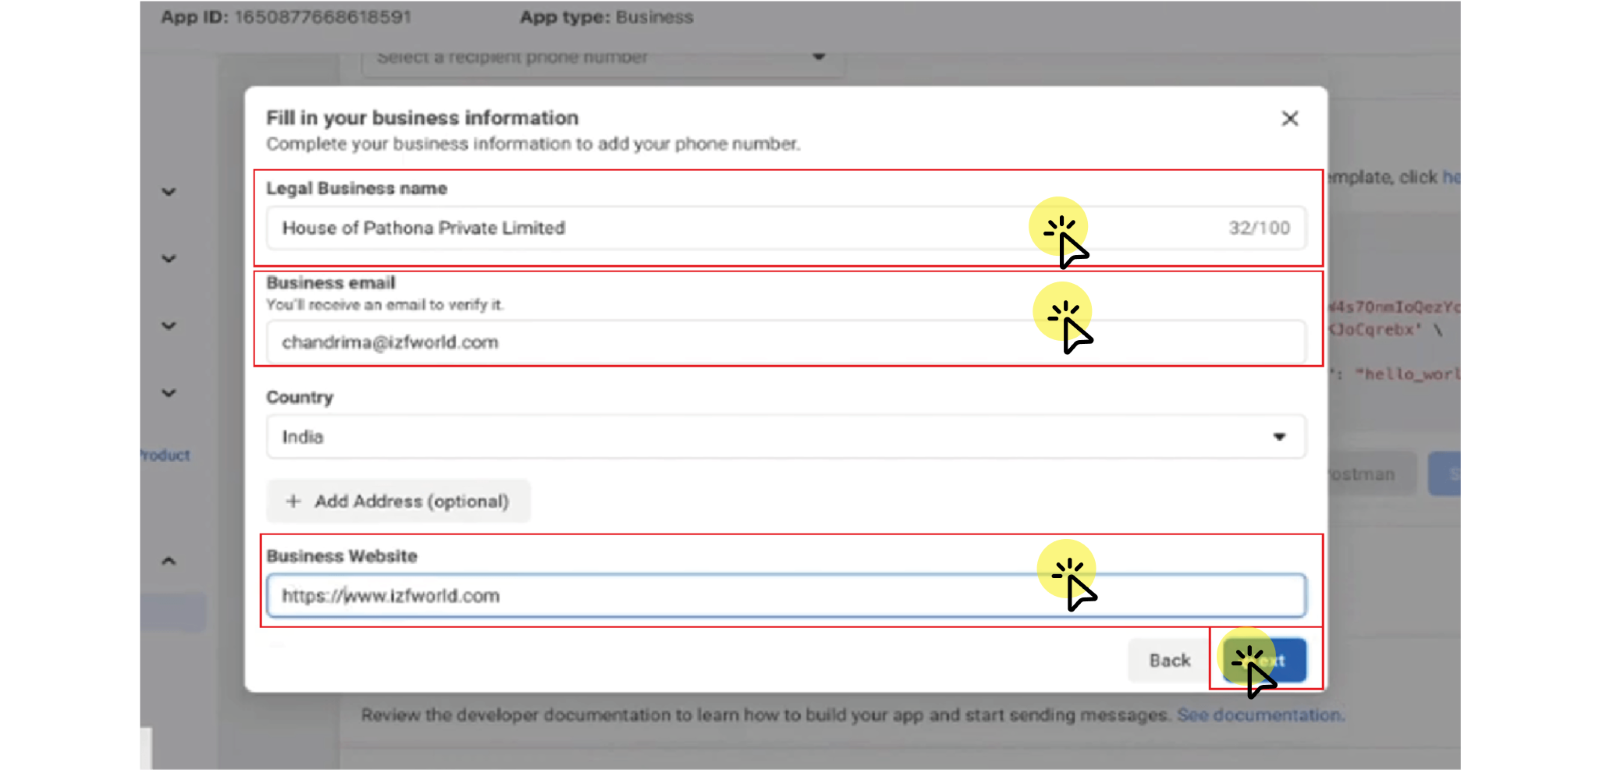
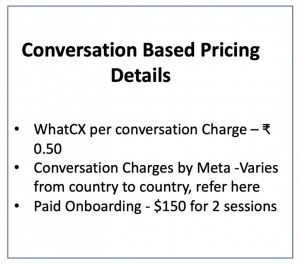
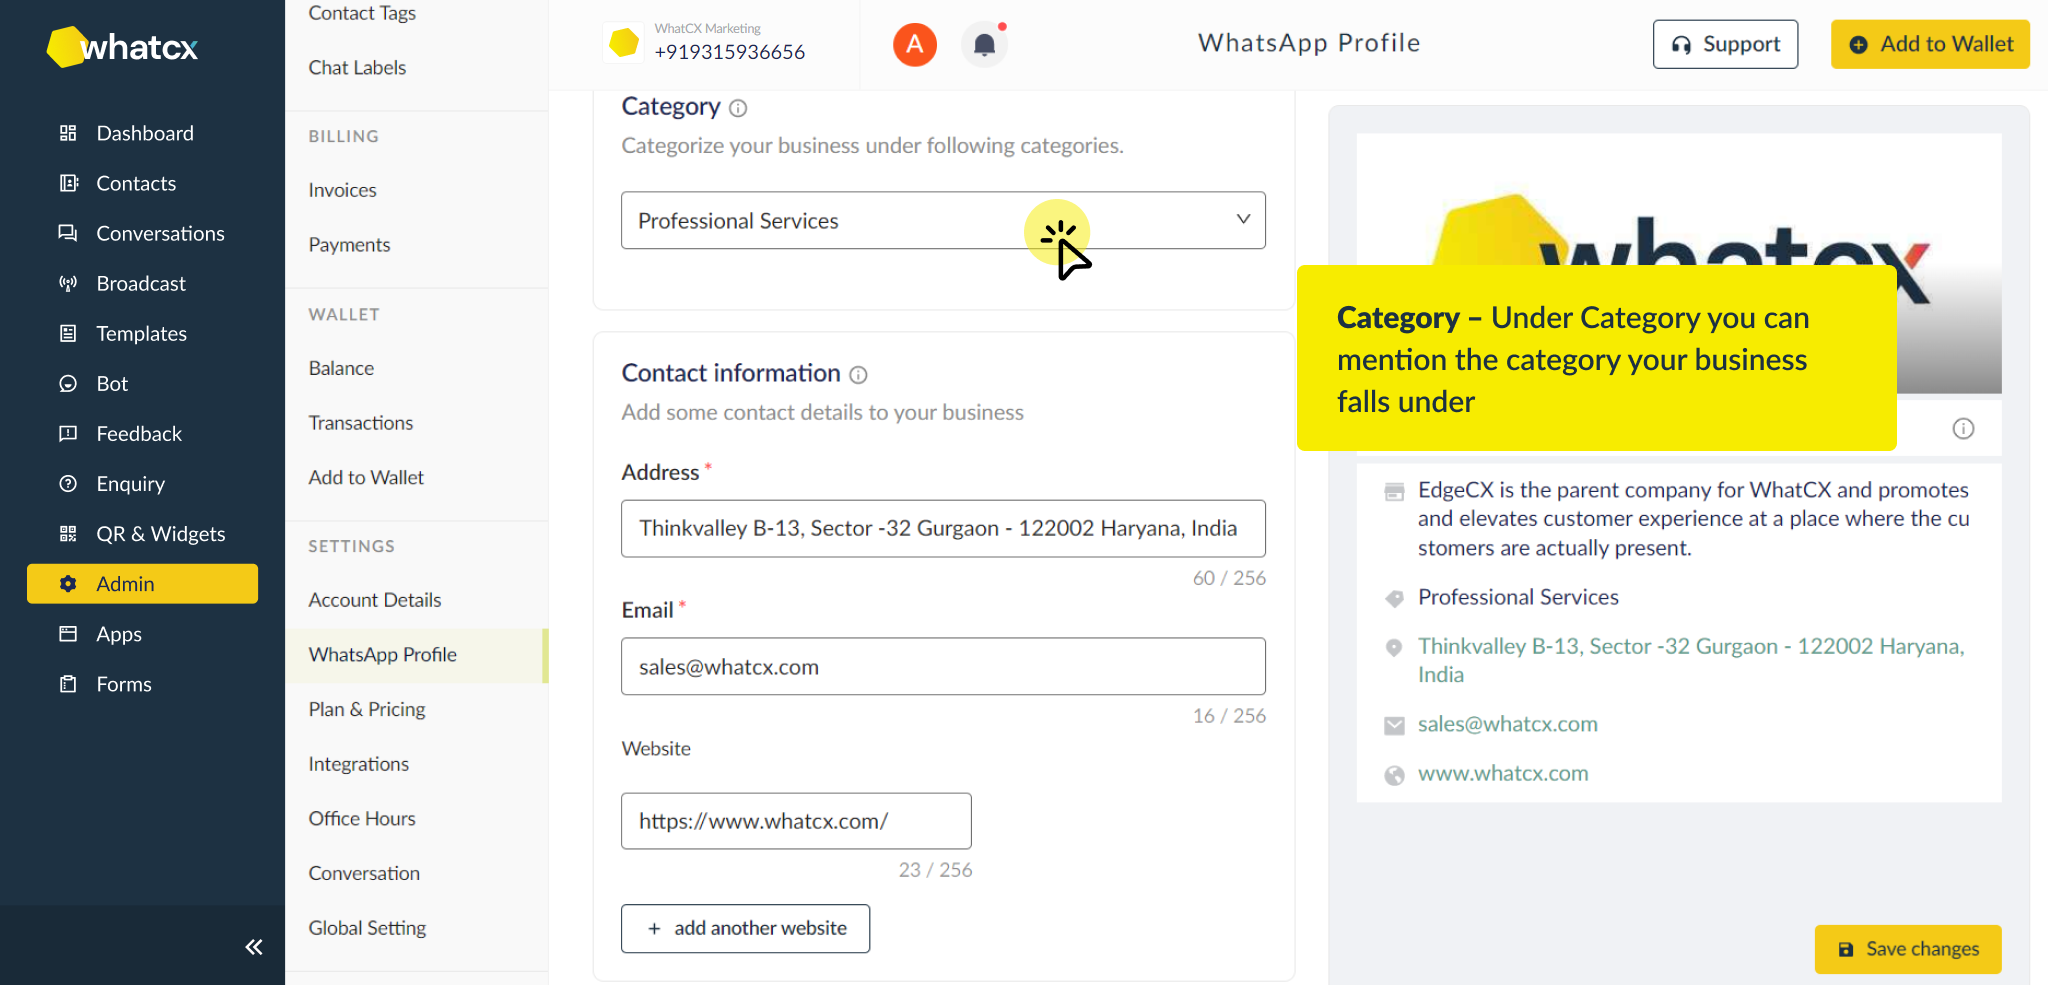
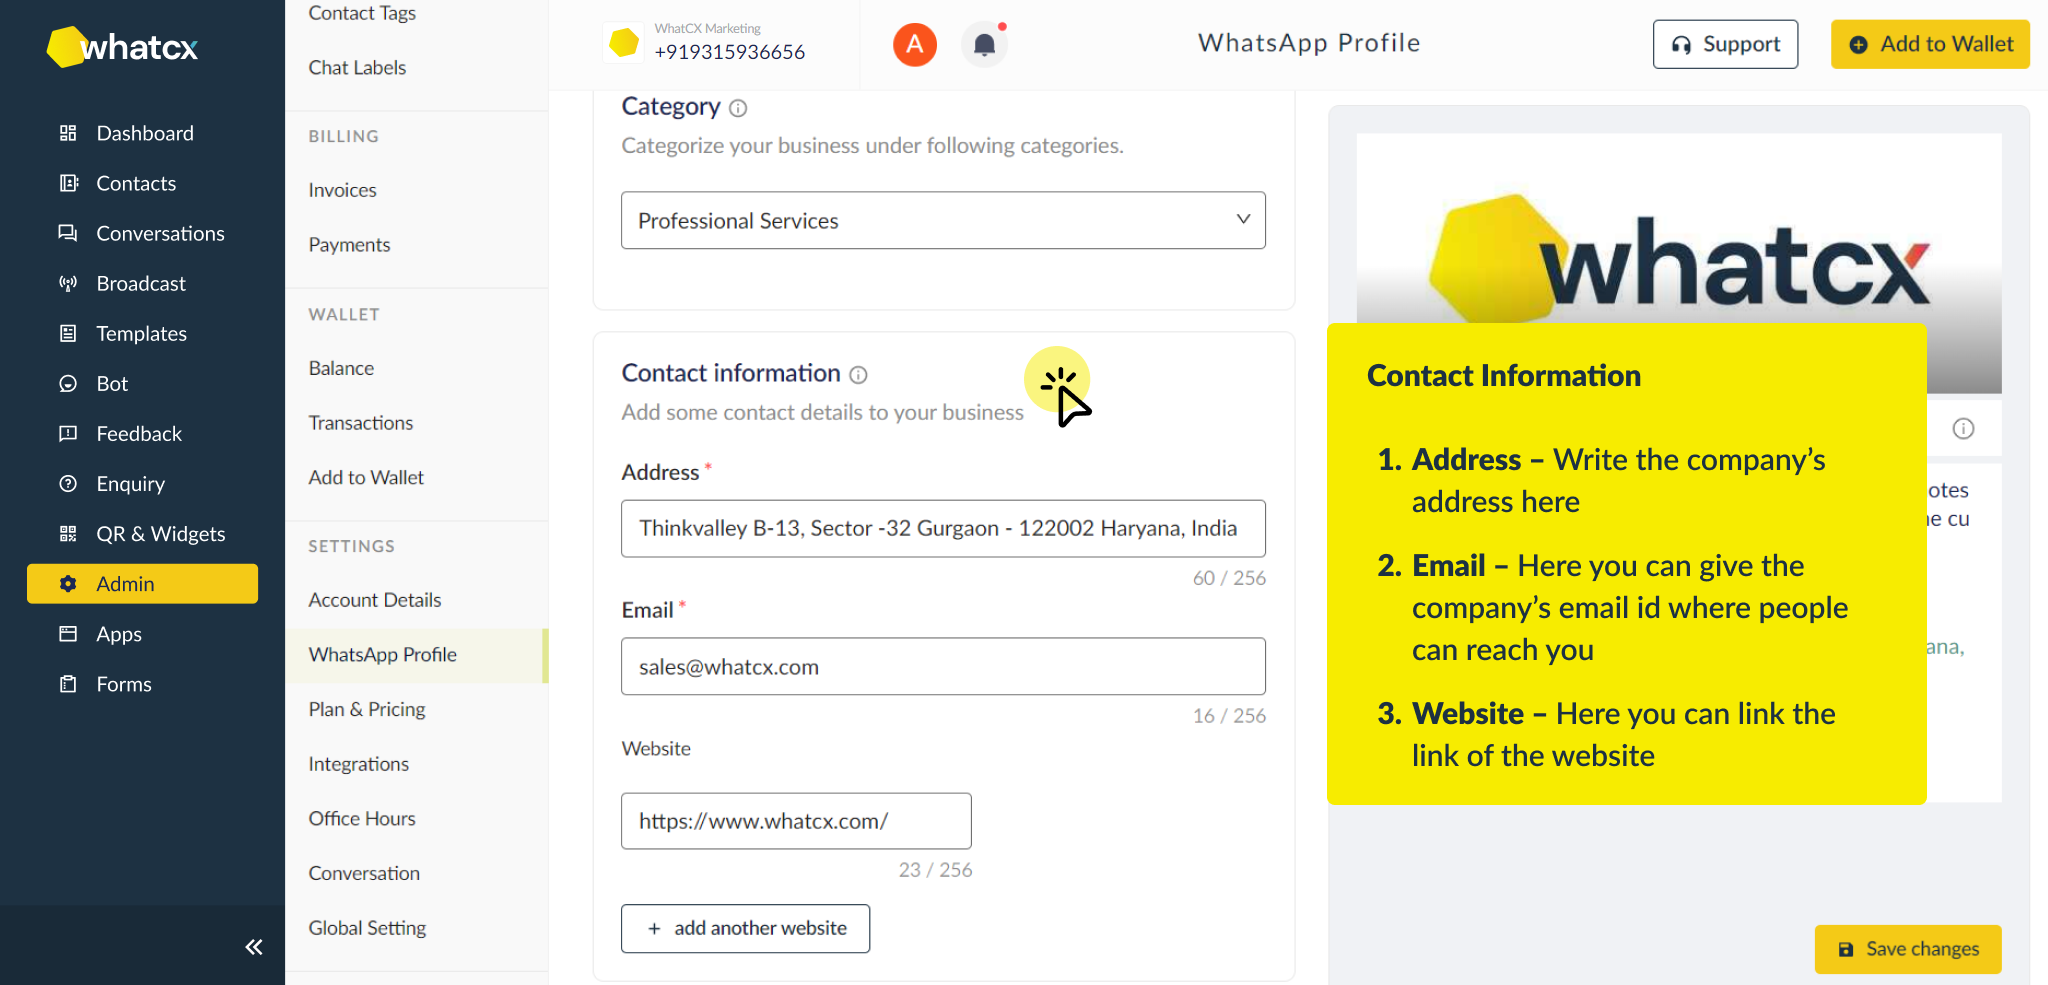
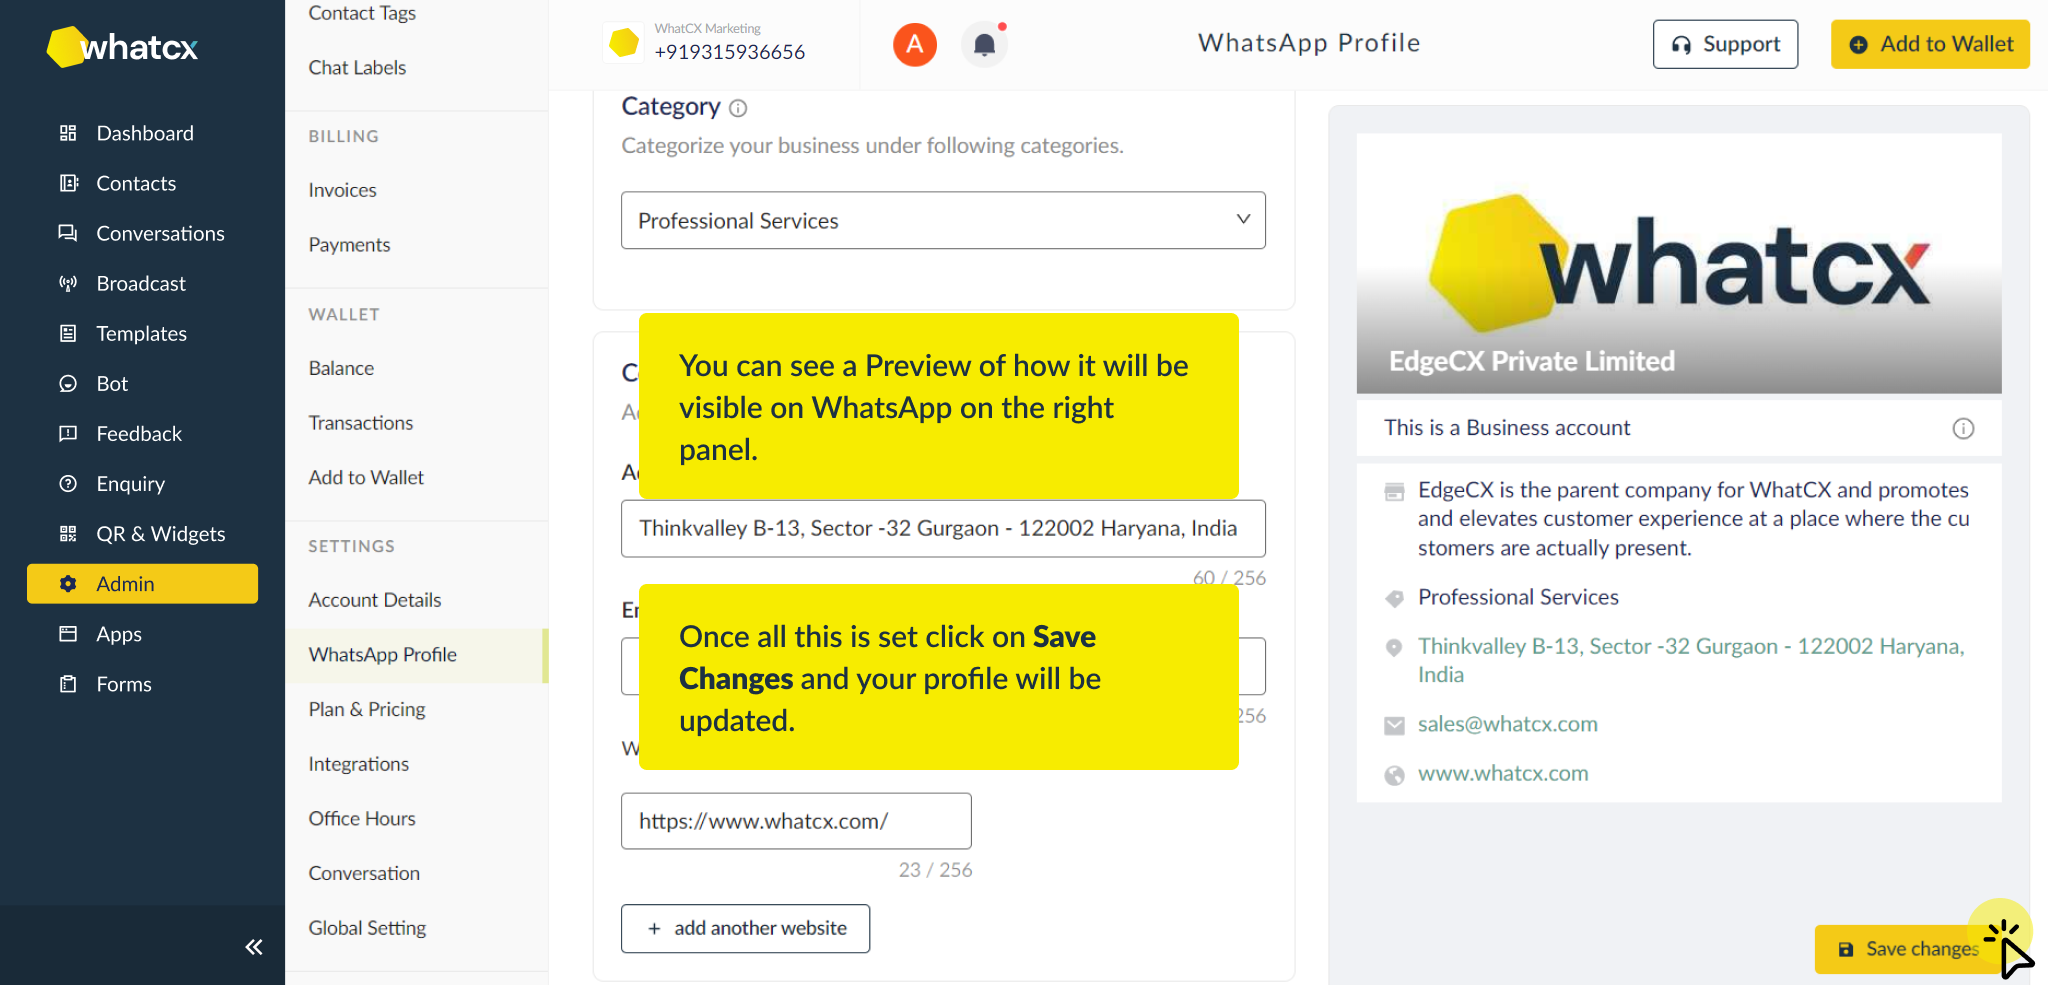
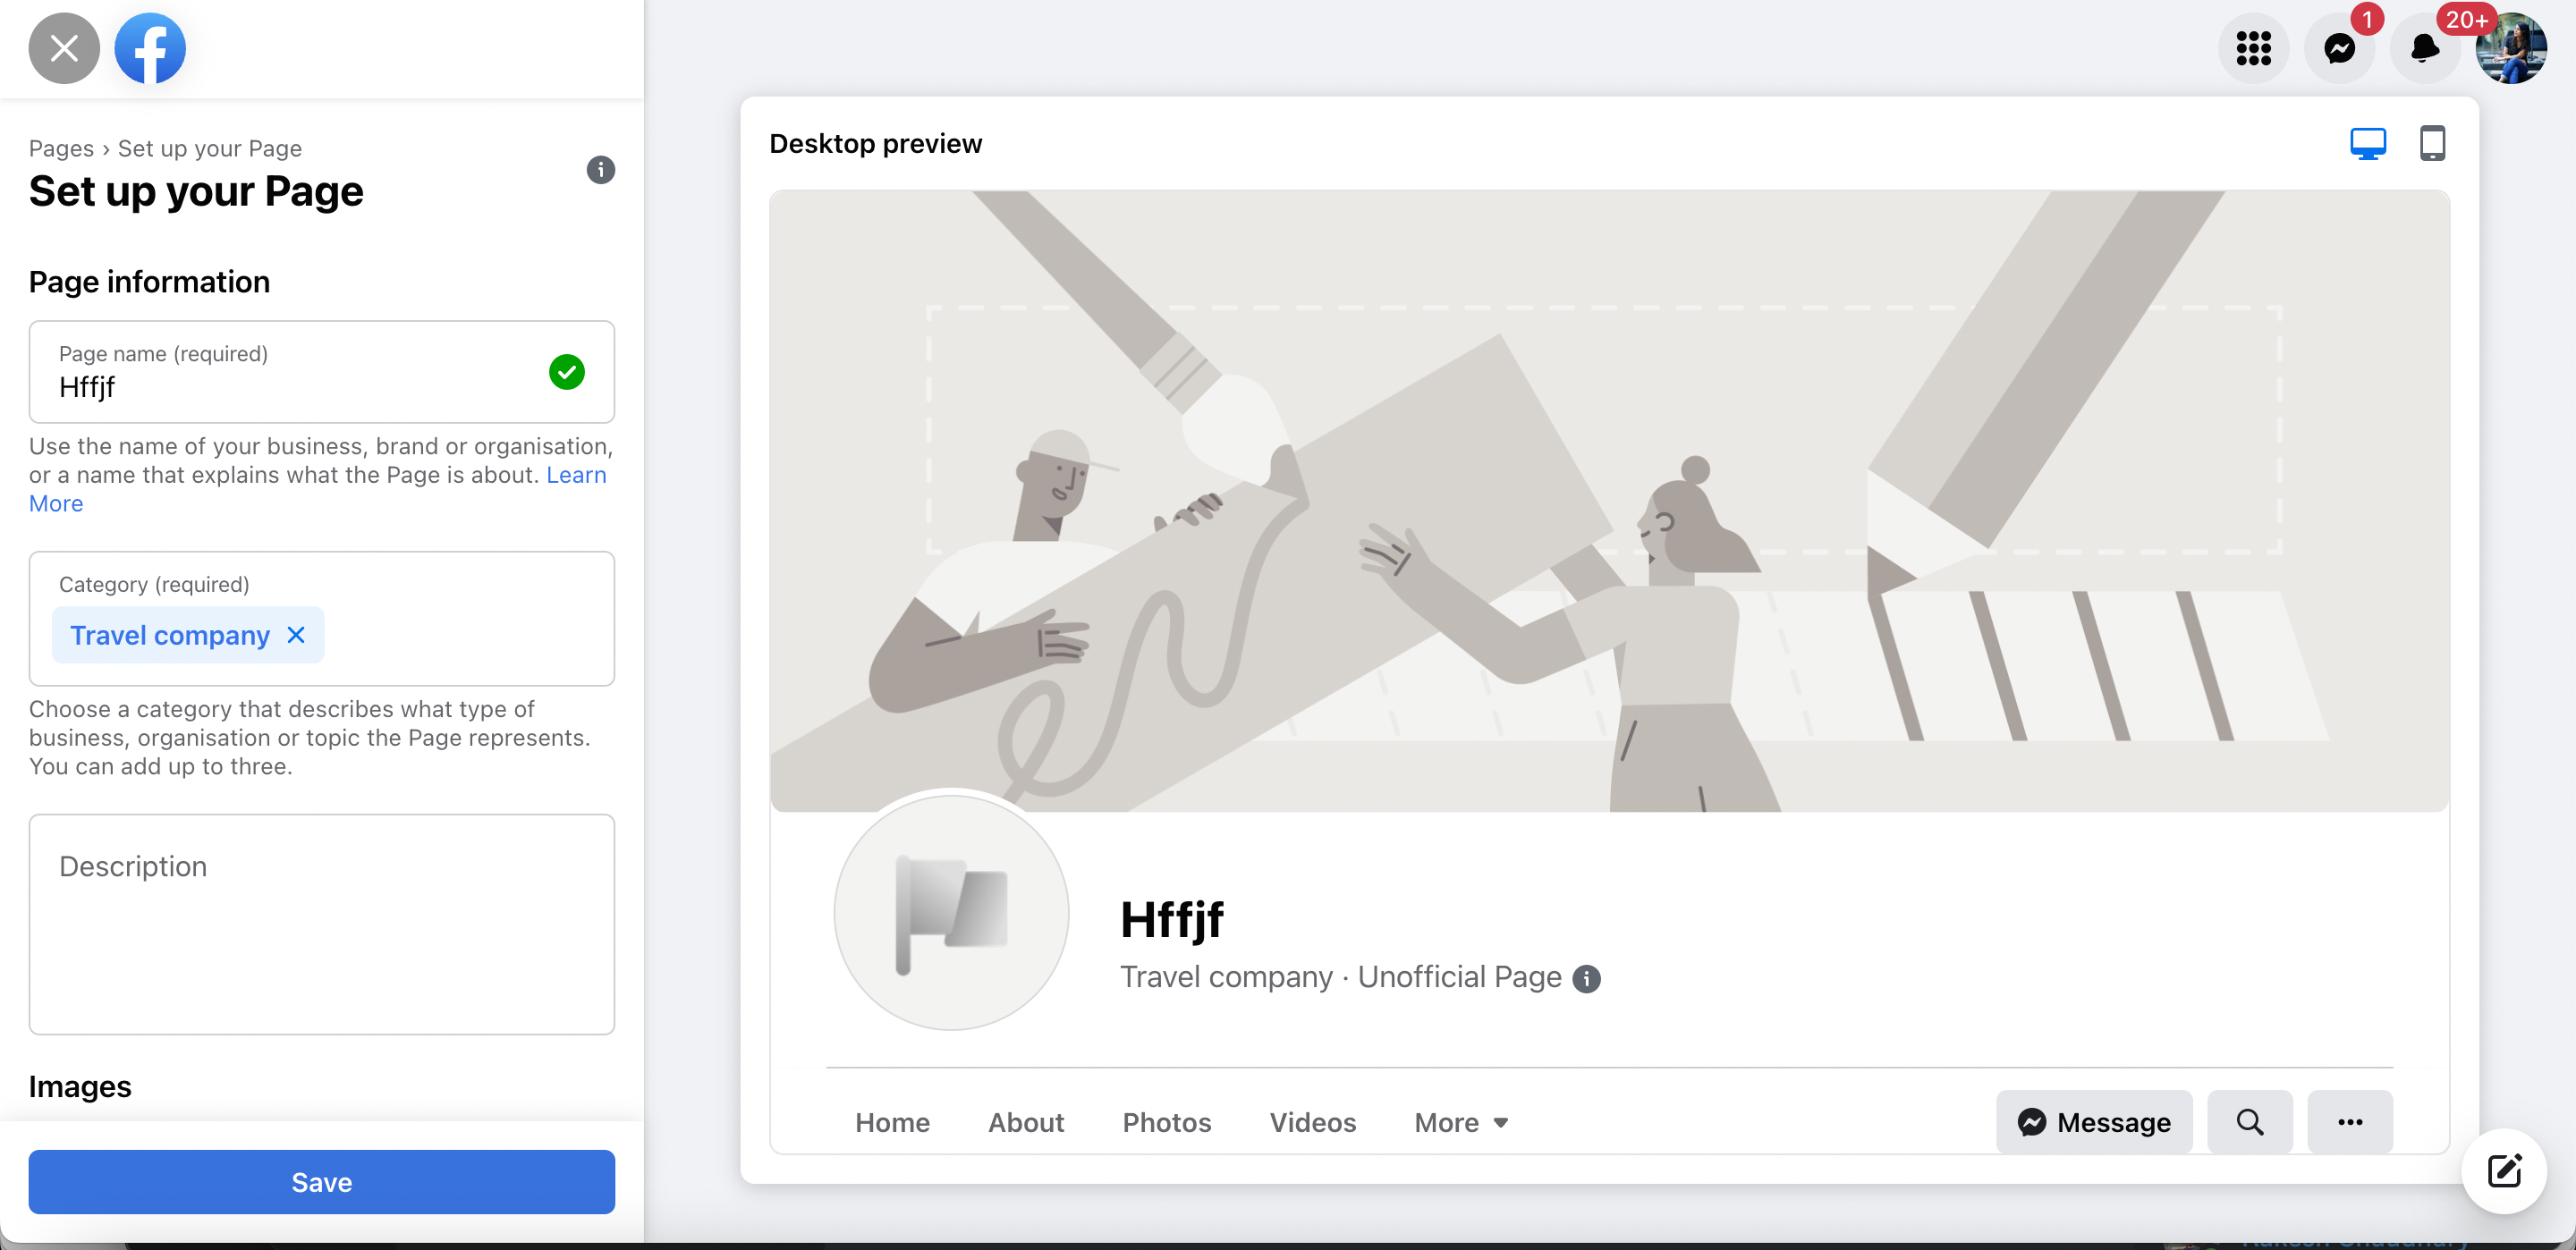
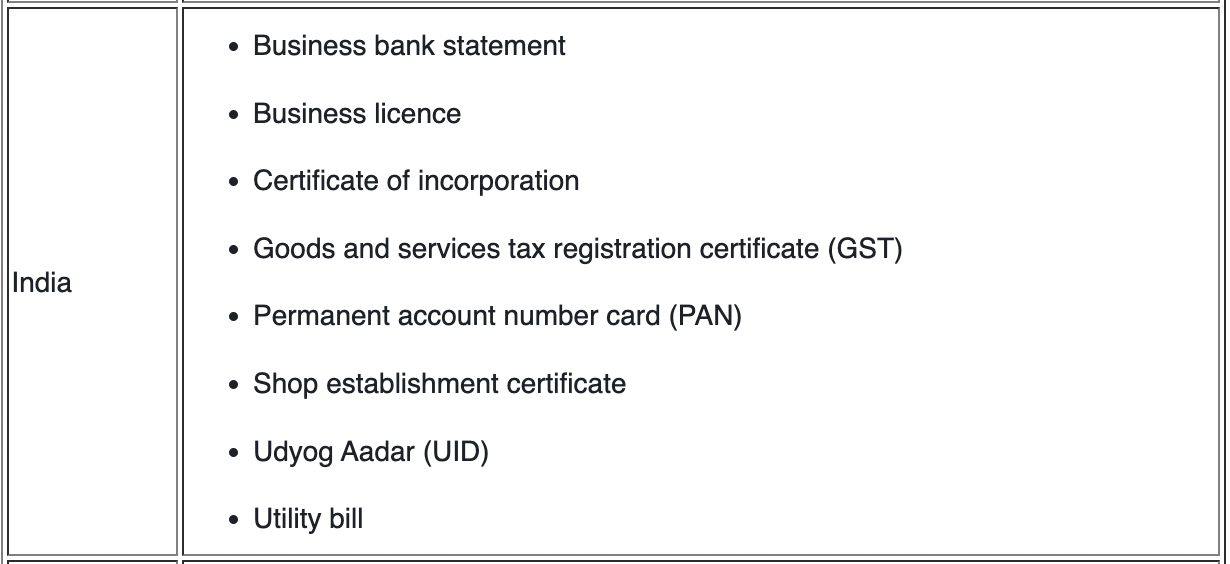
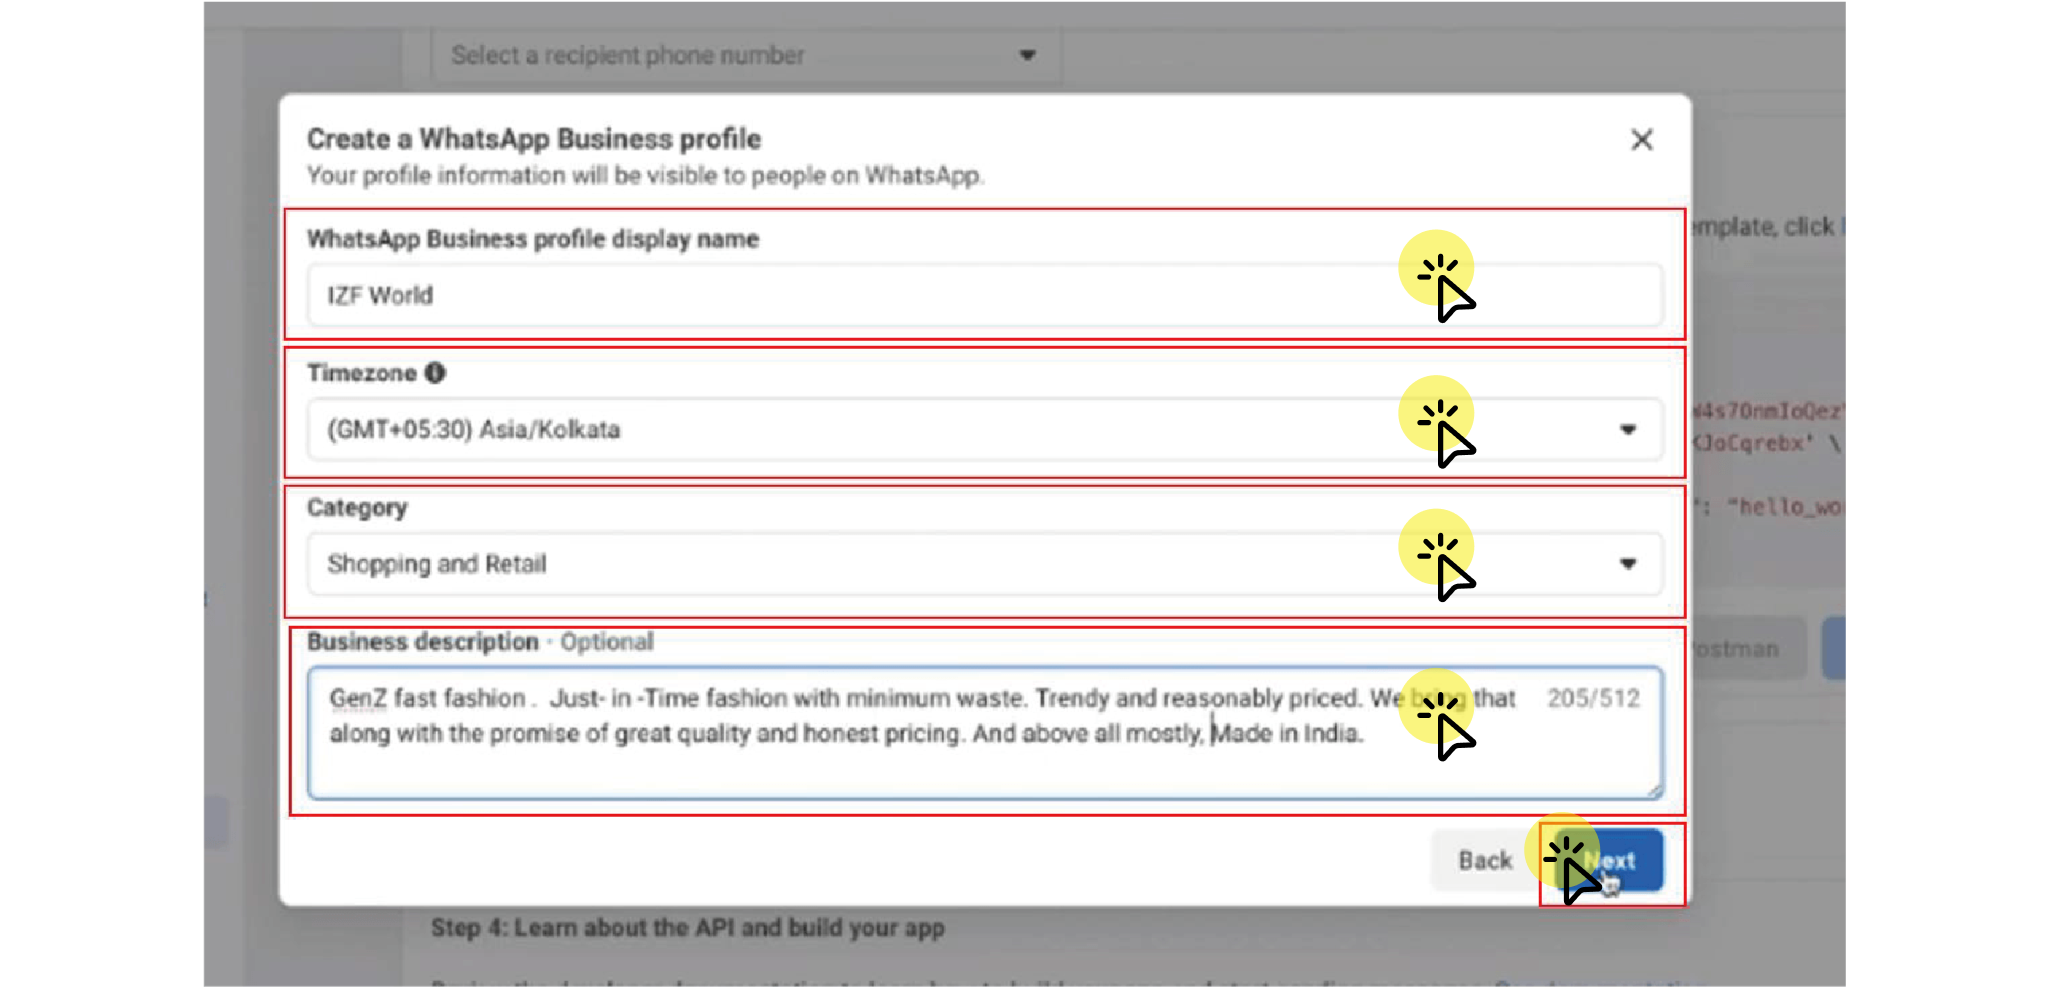
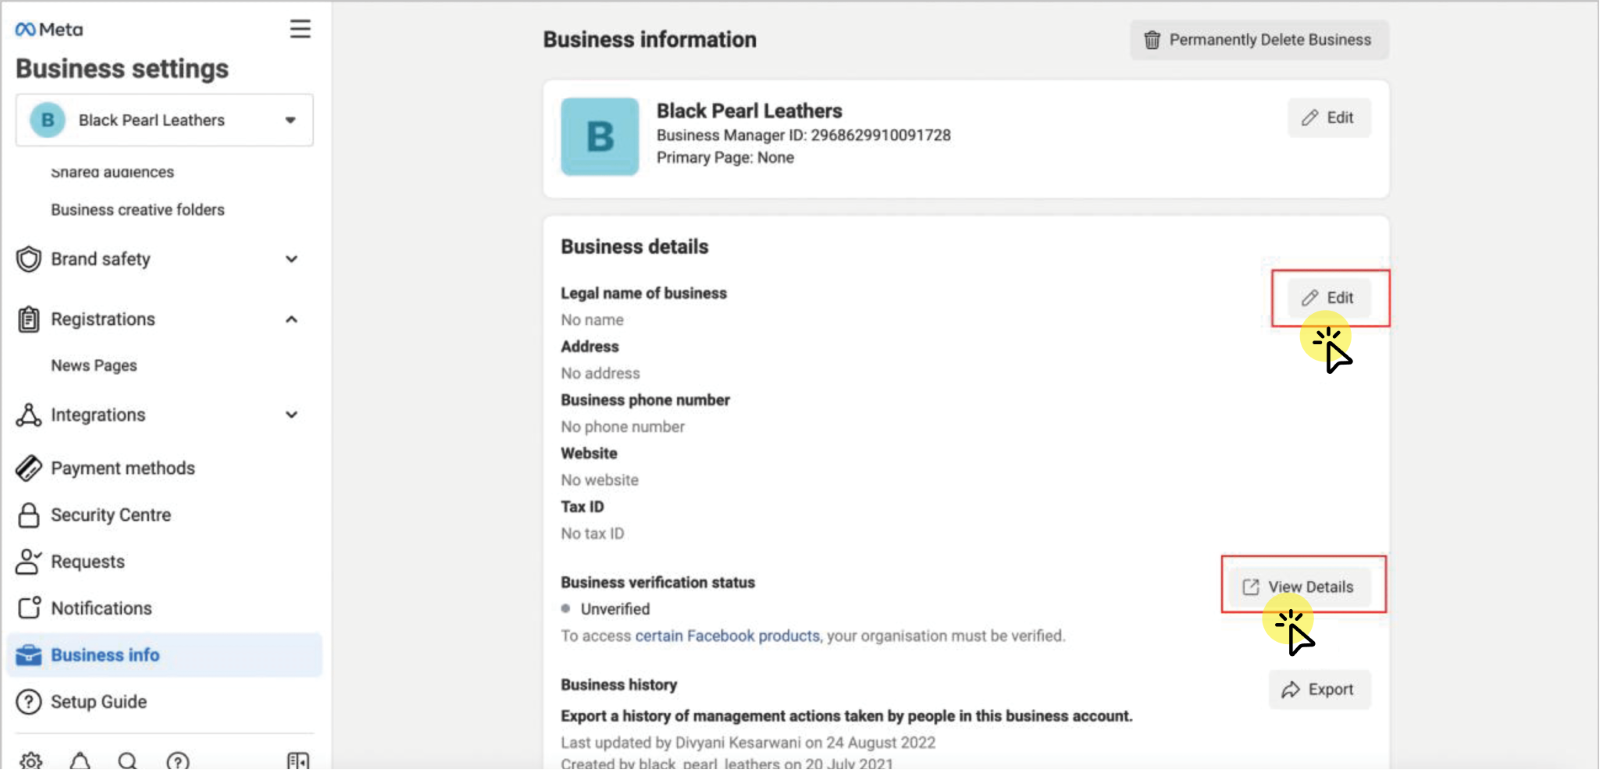
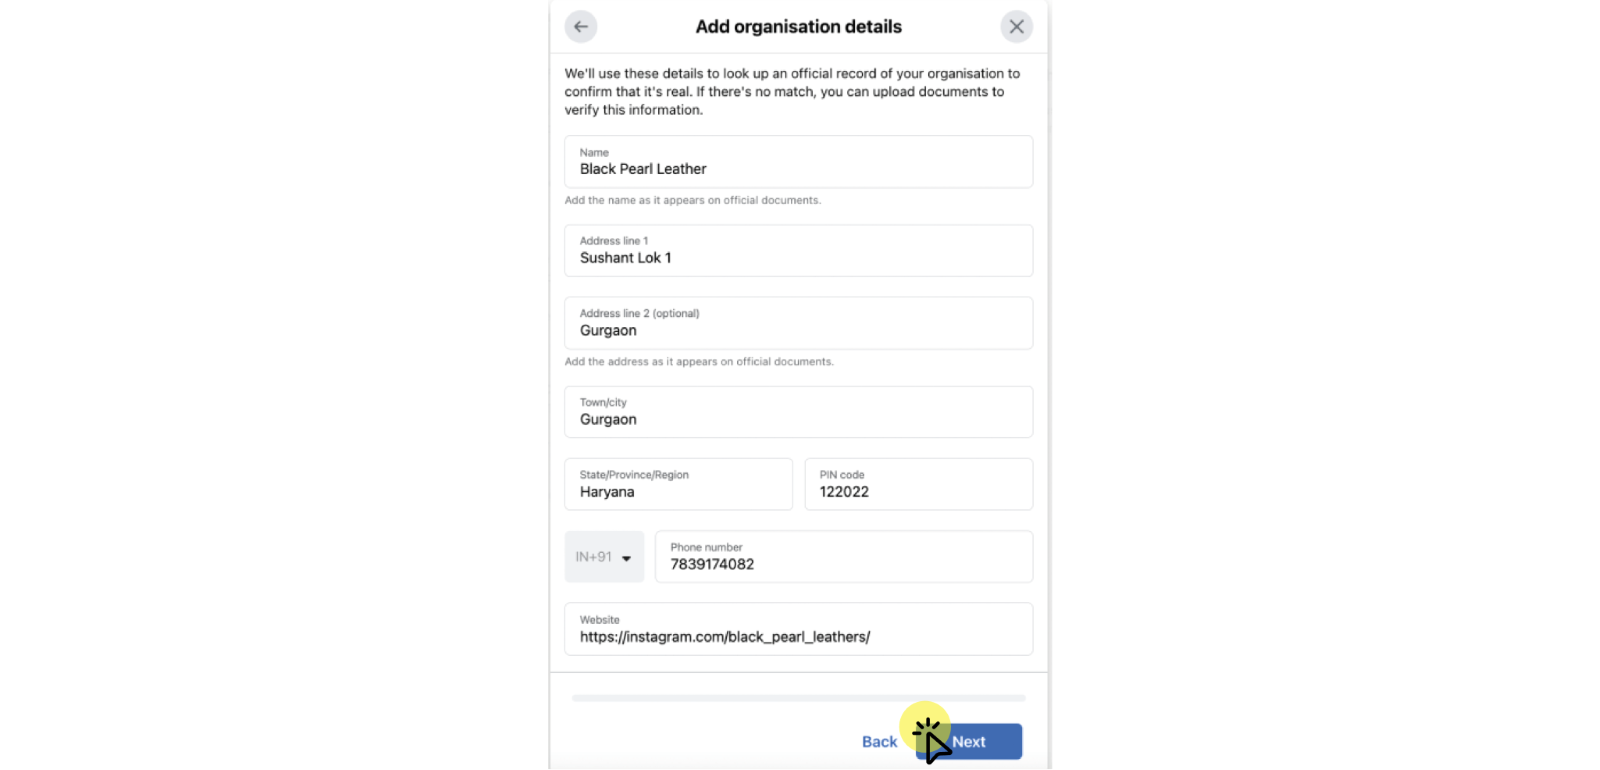
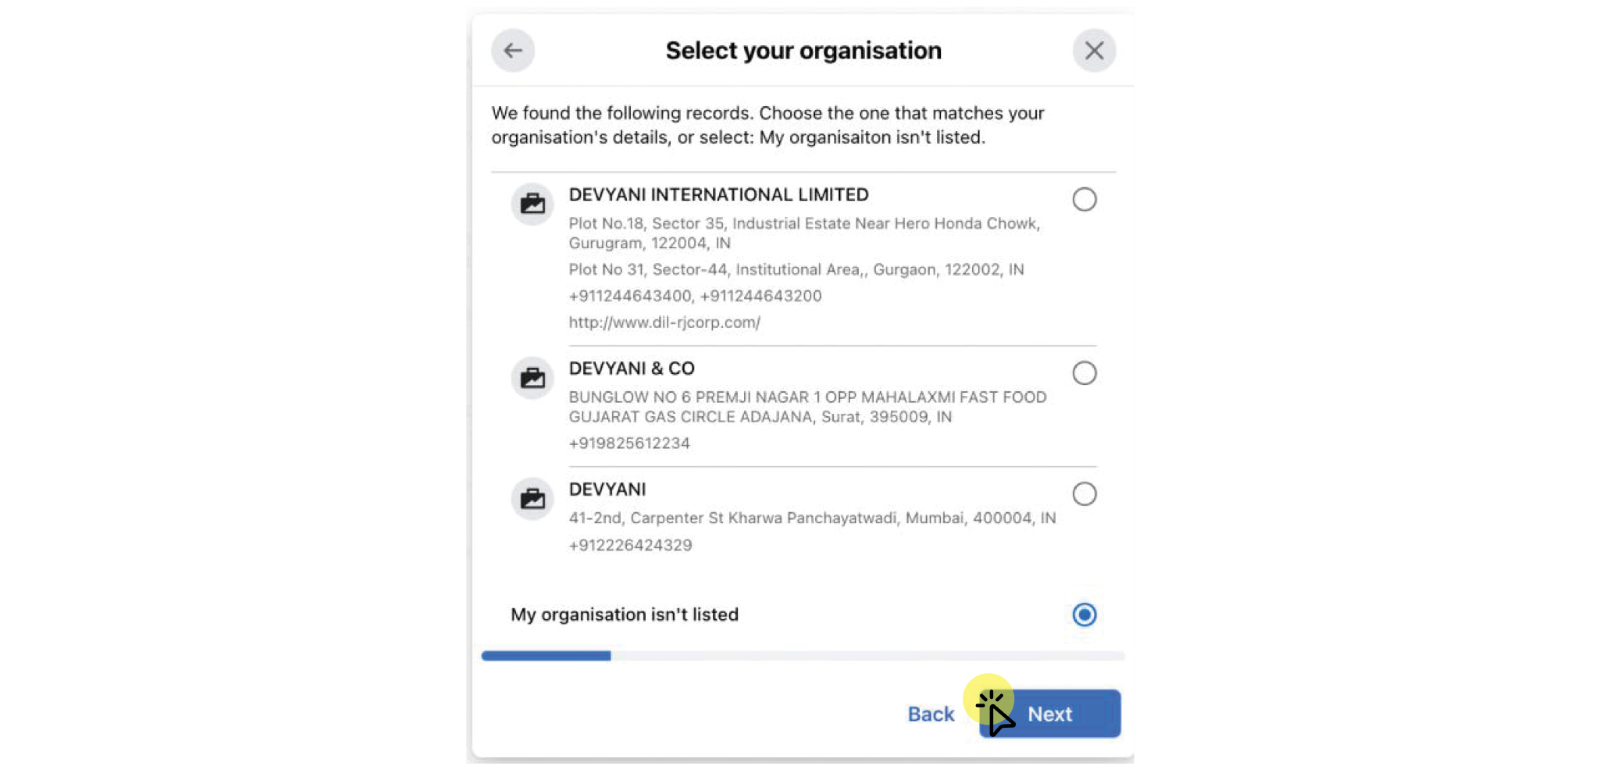
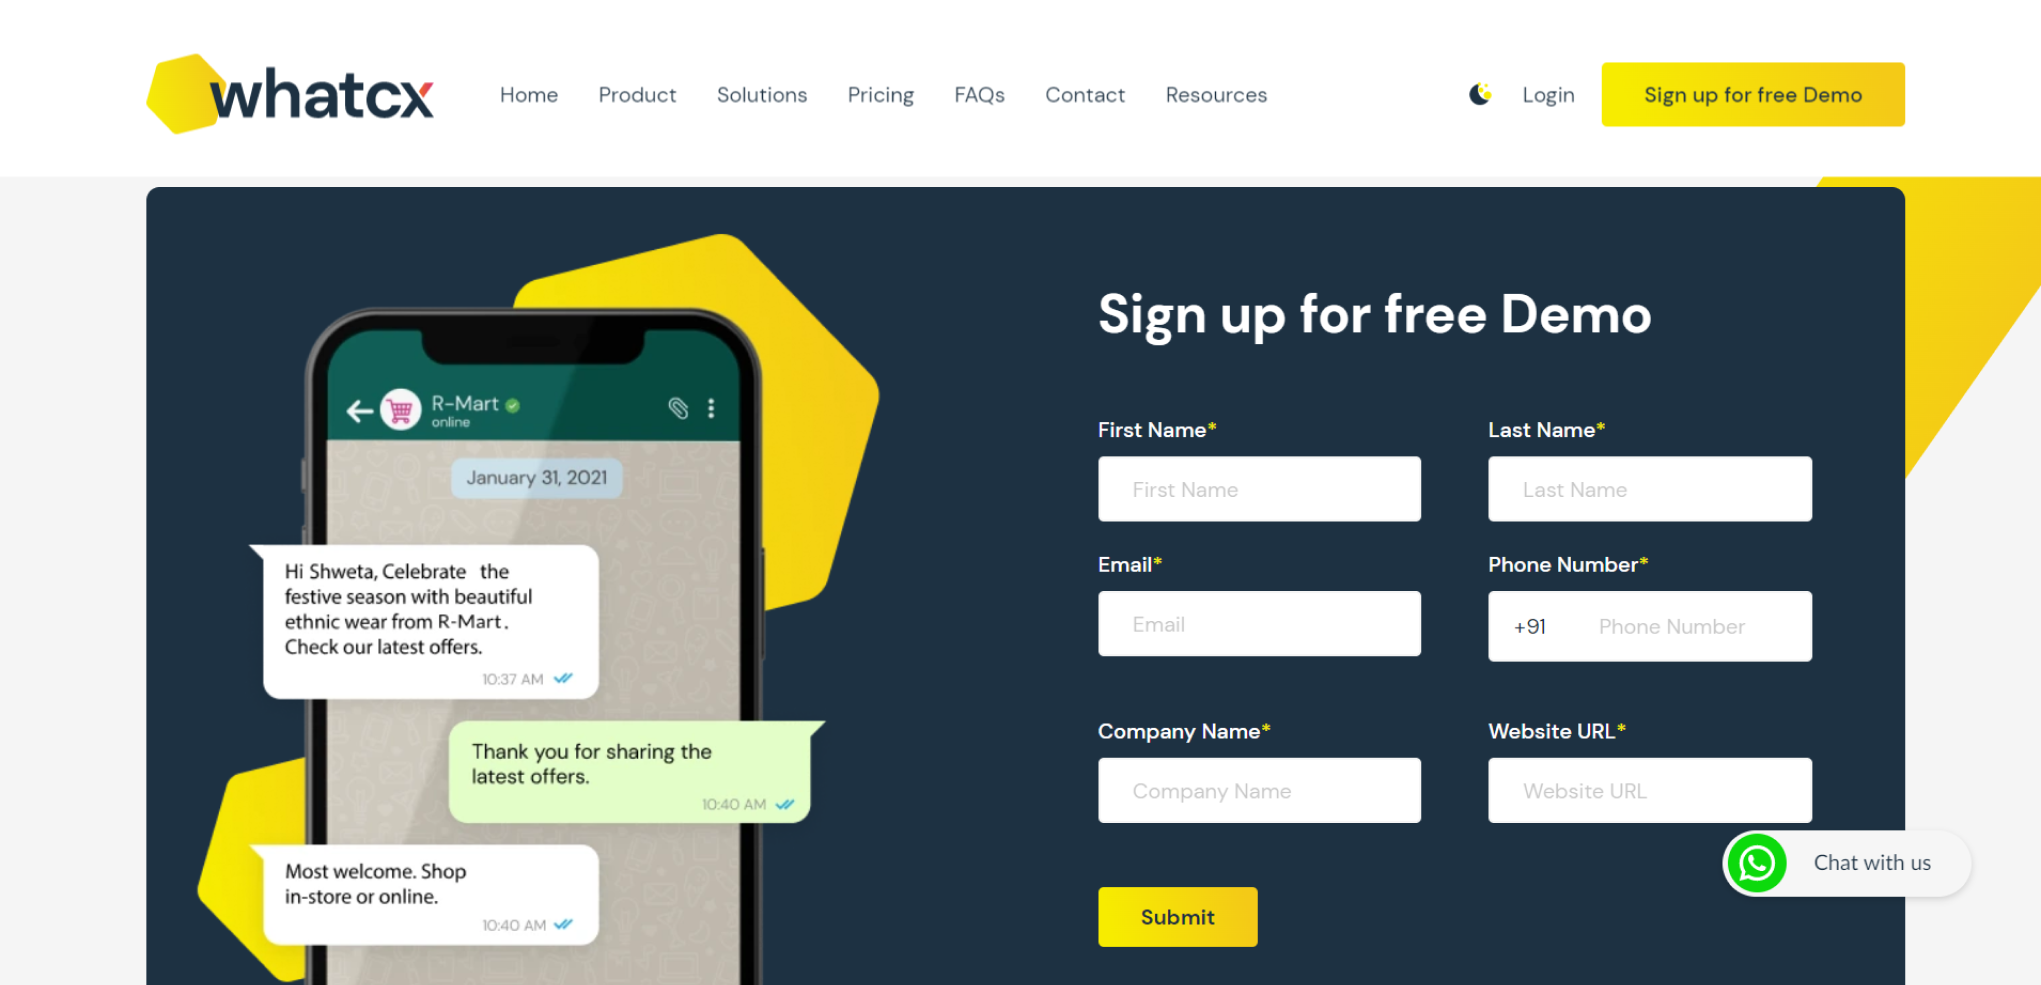 Simply state a few essential business information, such as:
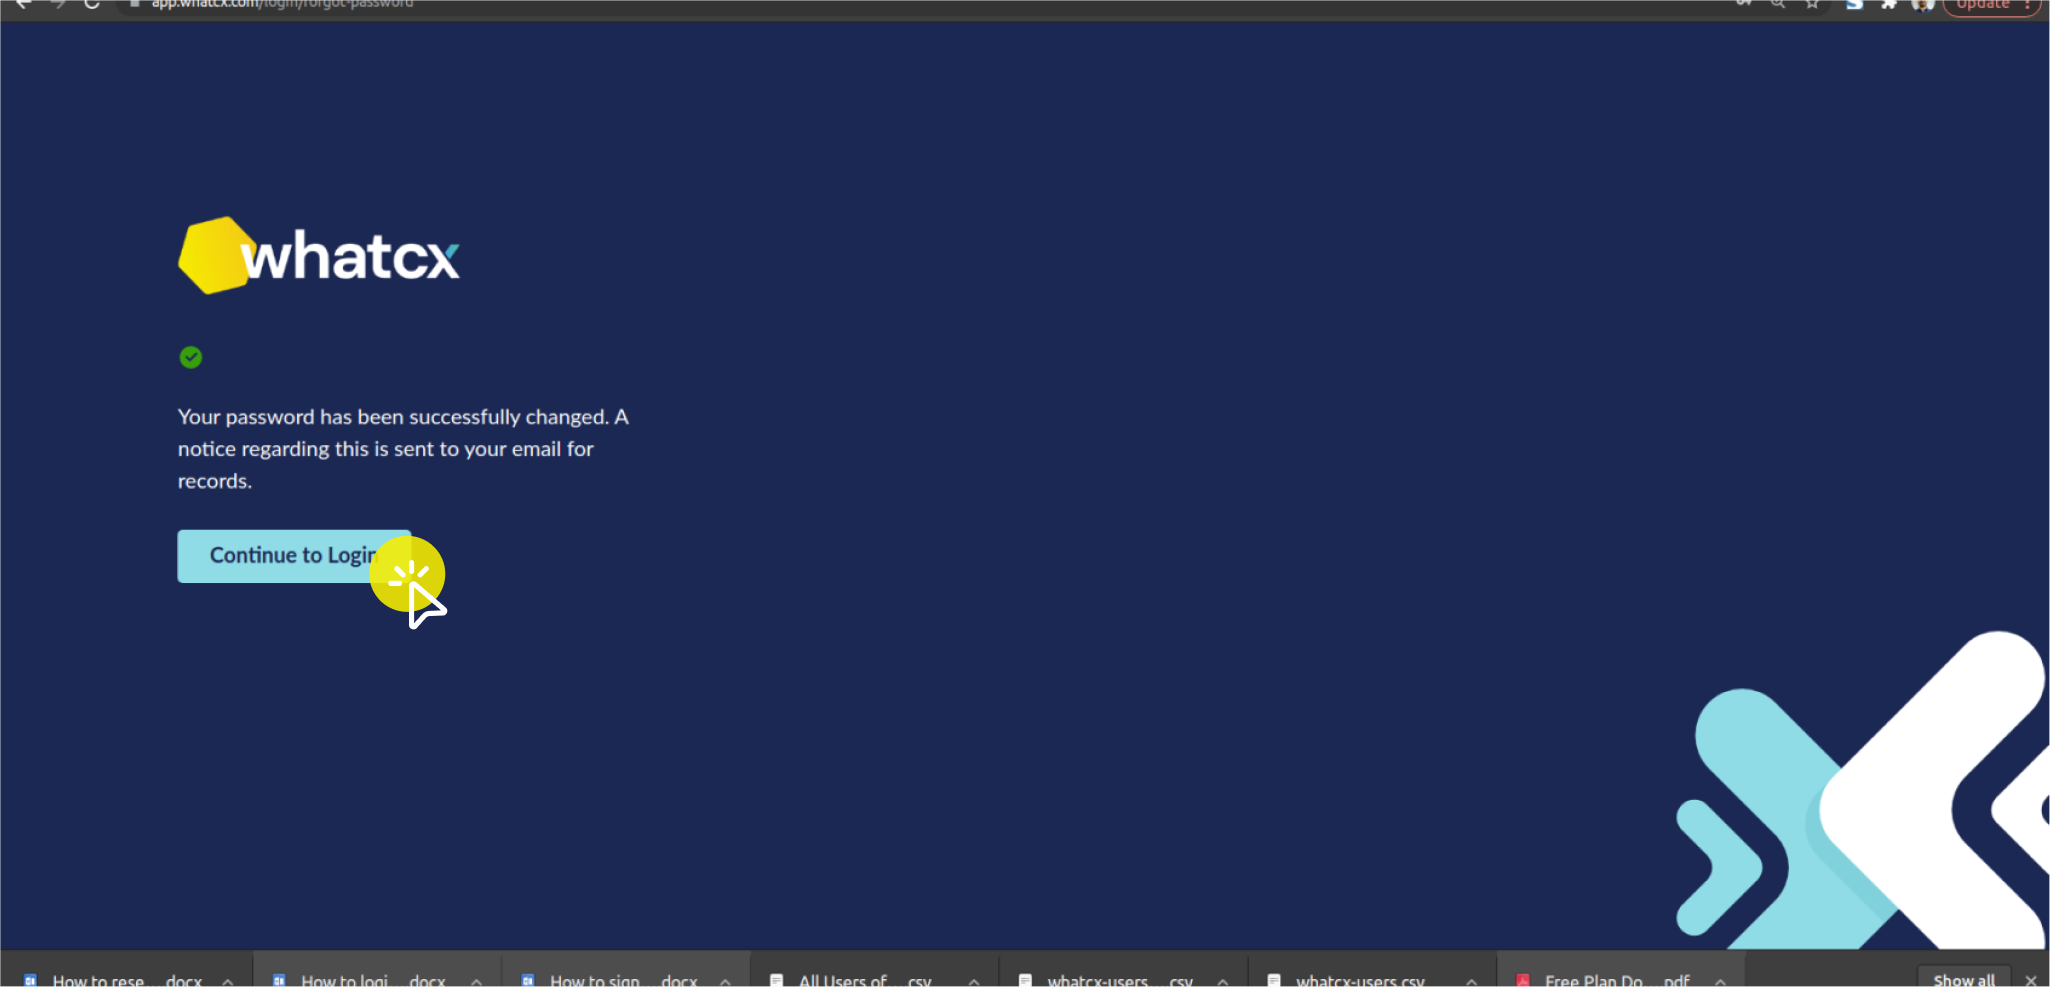
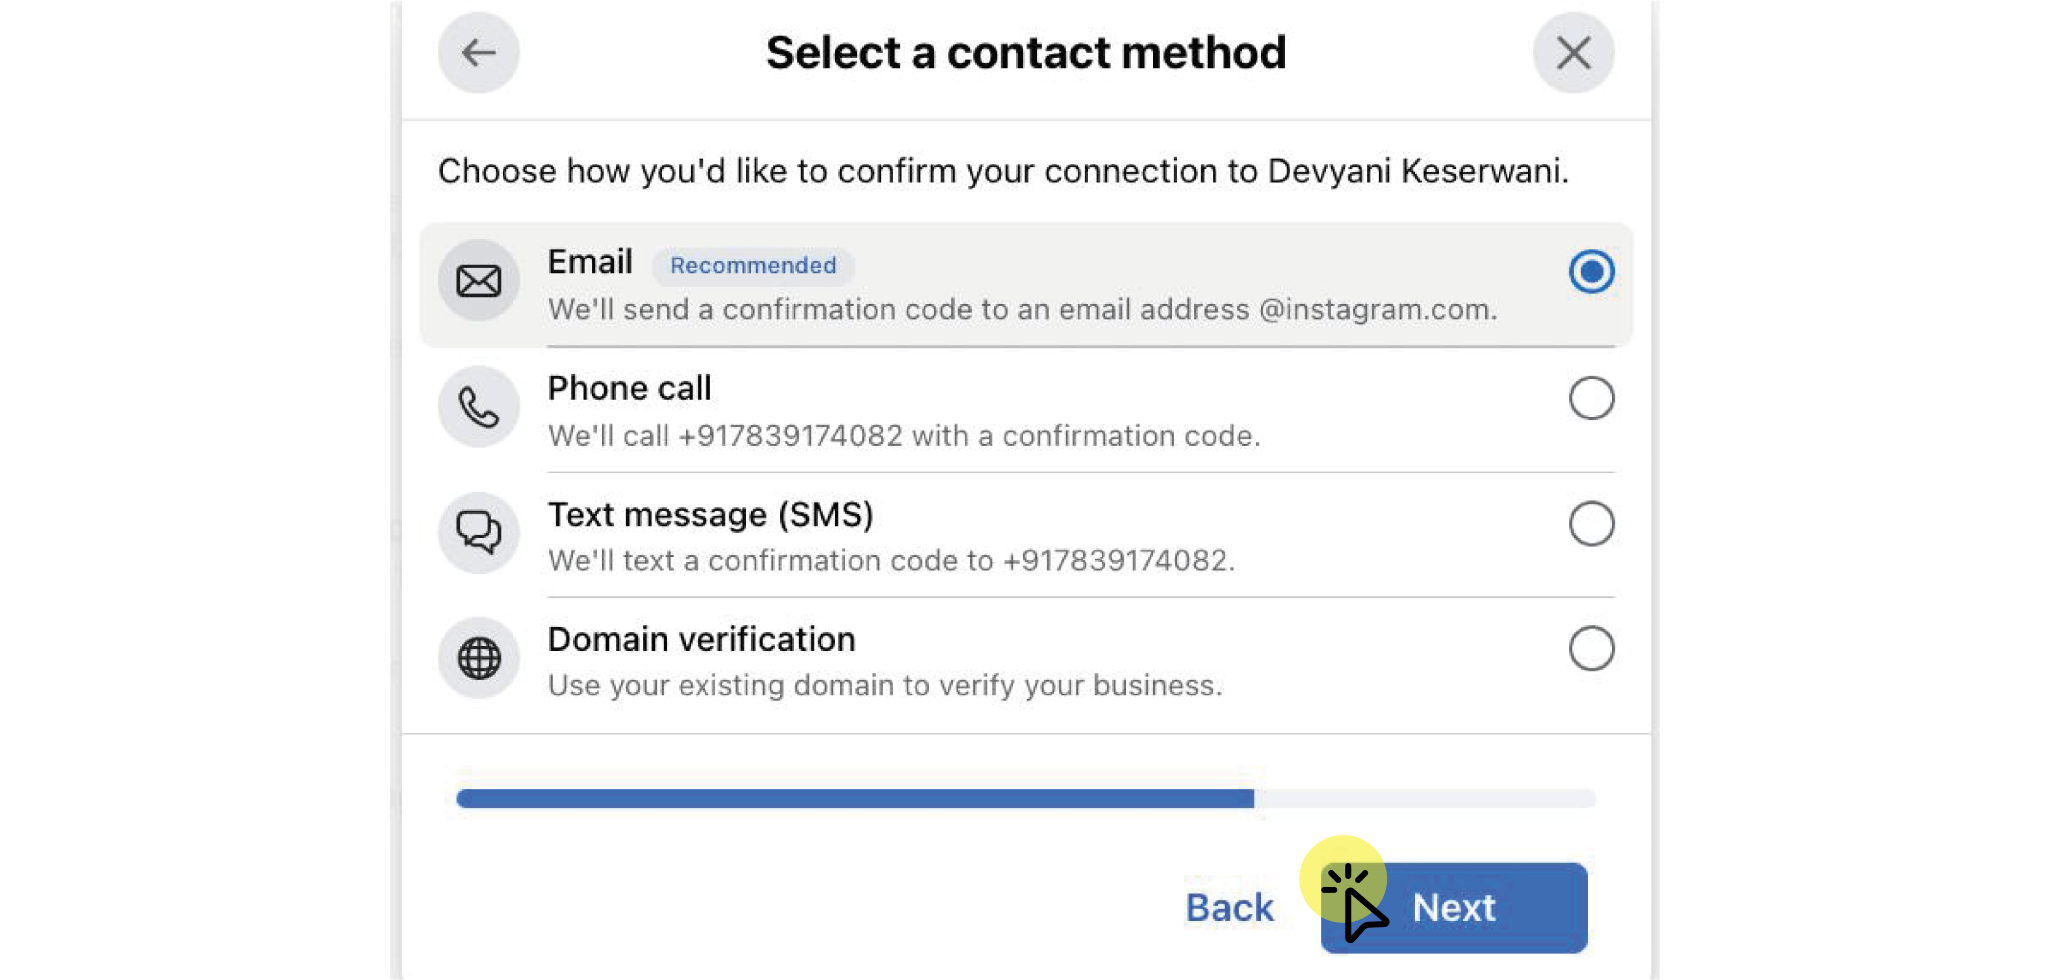
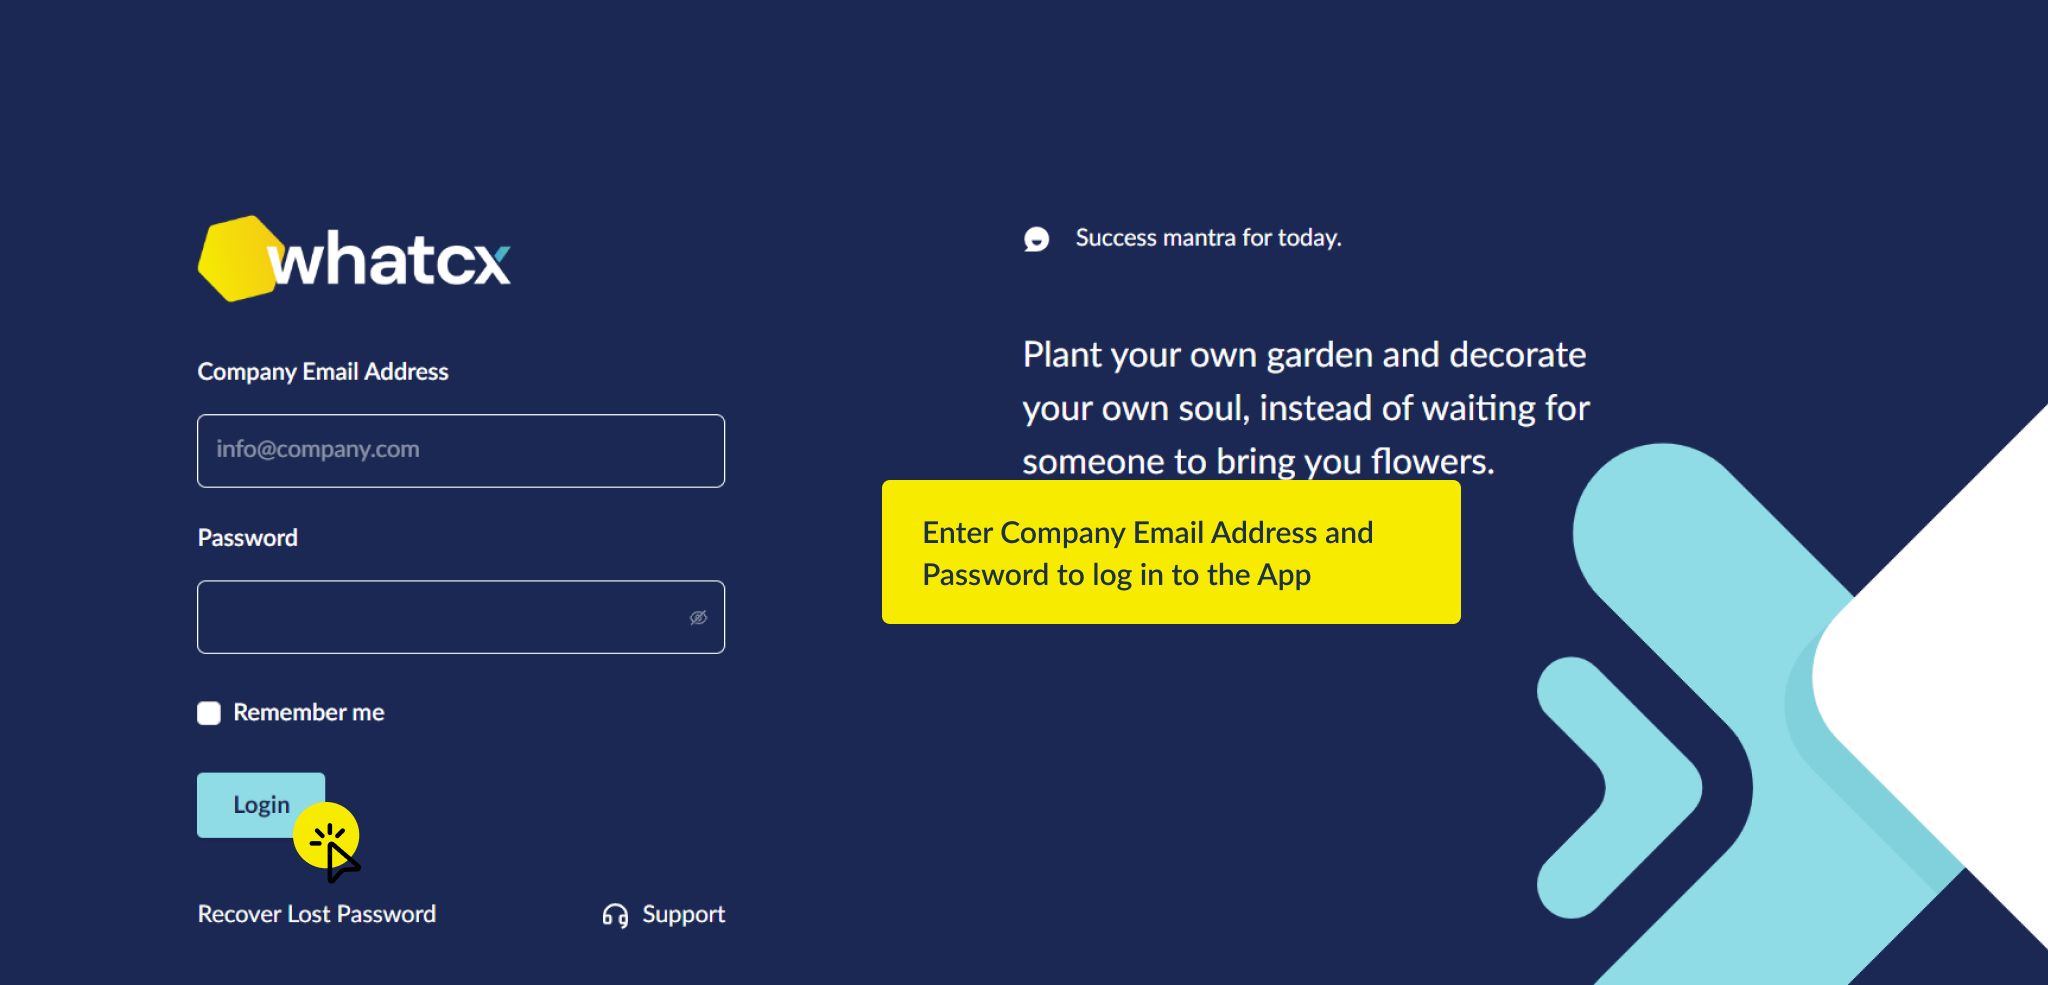 If you can’t recall the password you used to sign in to your WhatCX account, you can reset it by clicking on Recover Lost Password shown in the above image.
 2. Click on Recover Lost Password
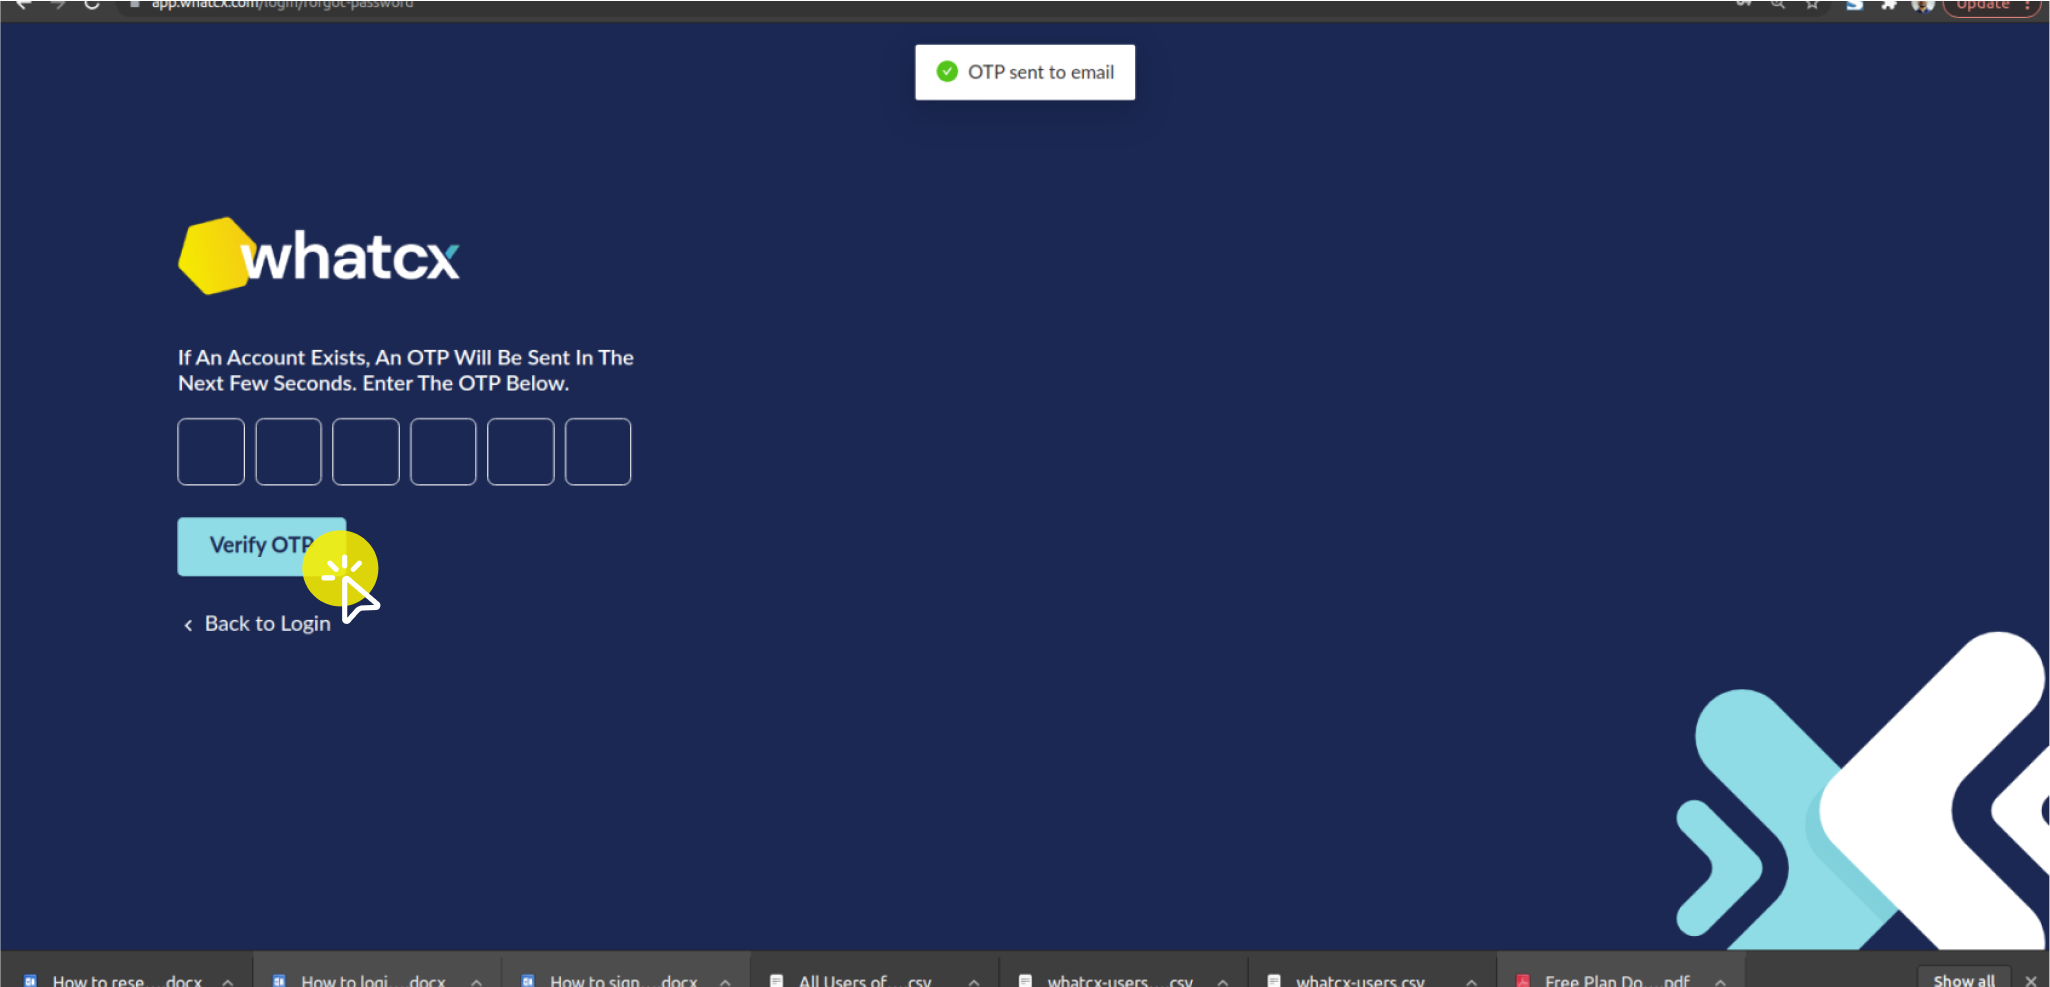
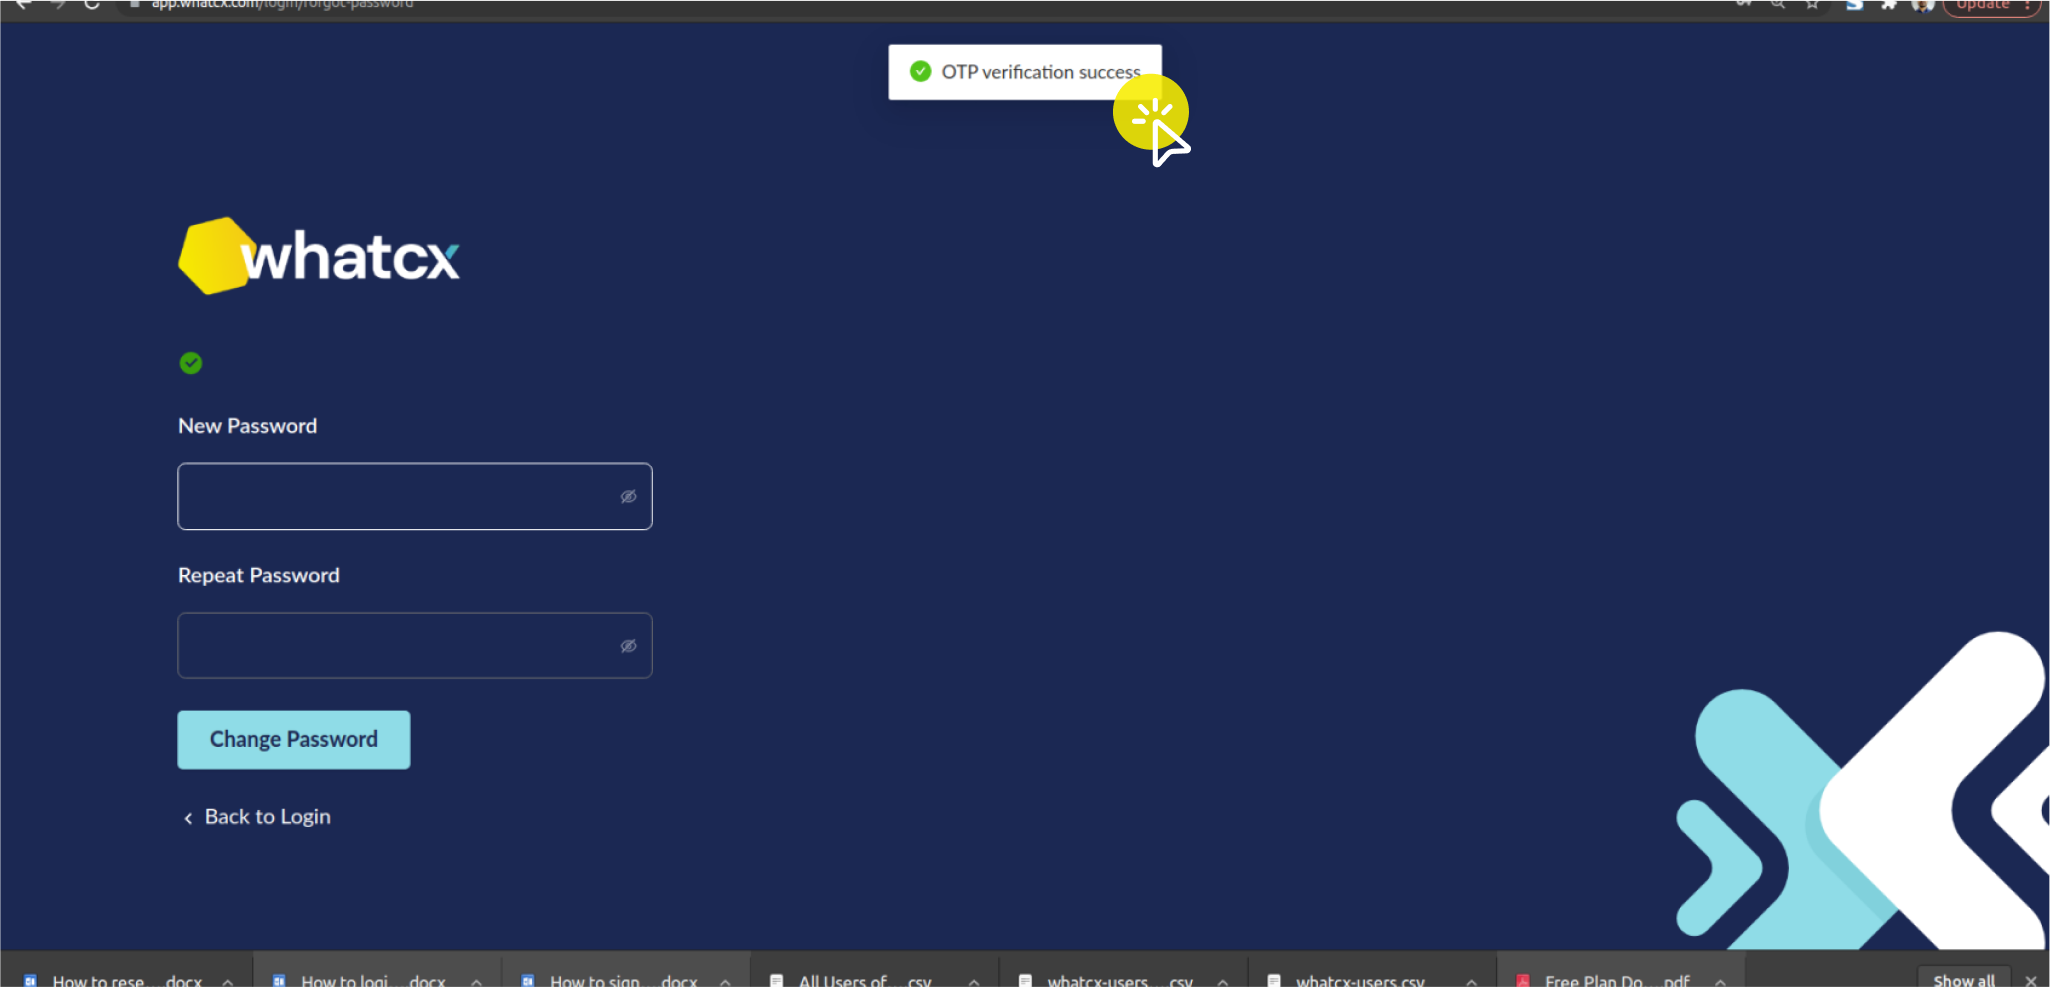
 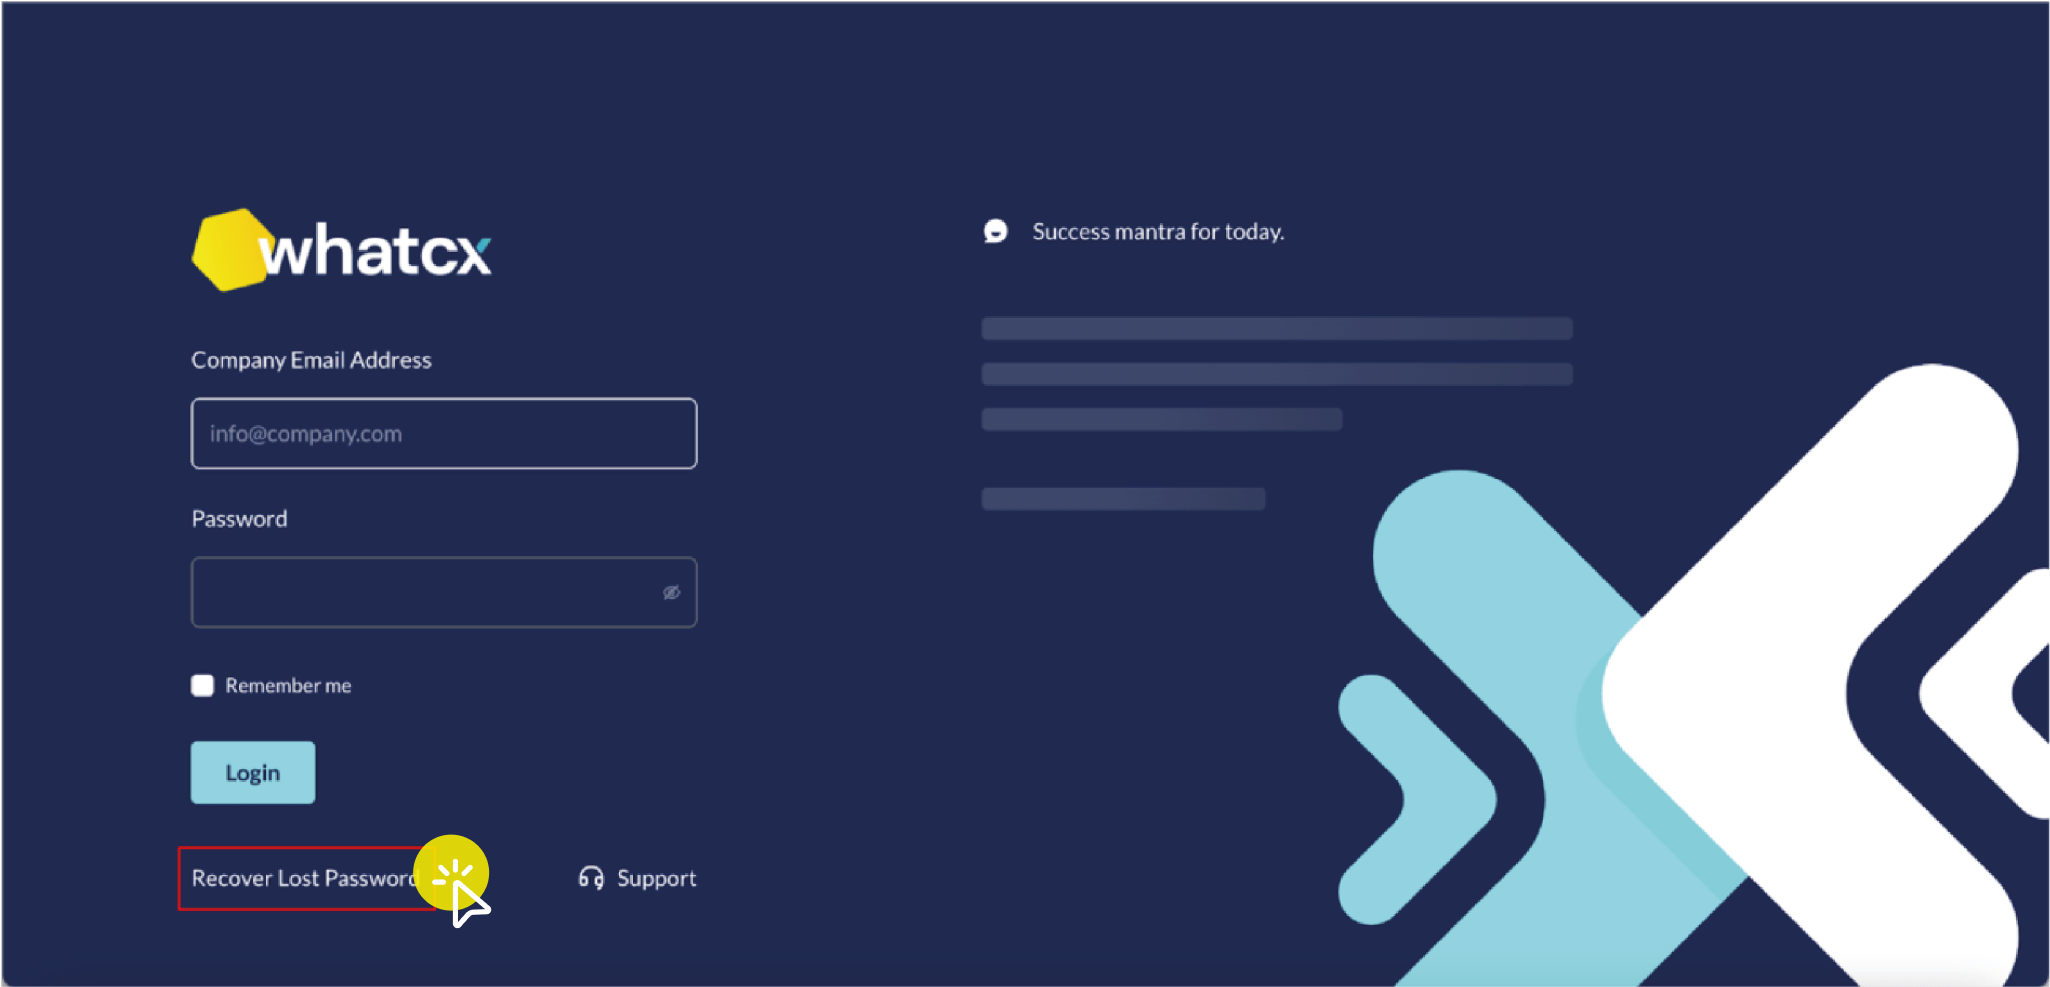 3. You will get a password-reset link in your email right away
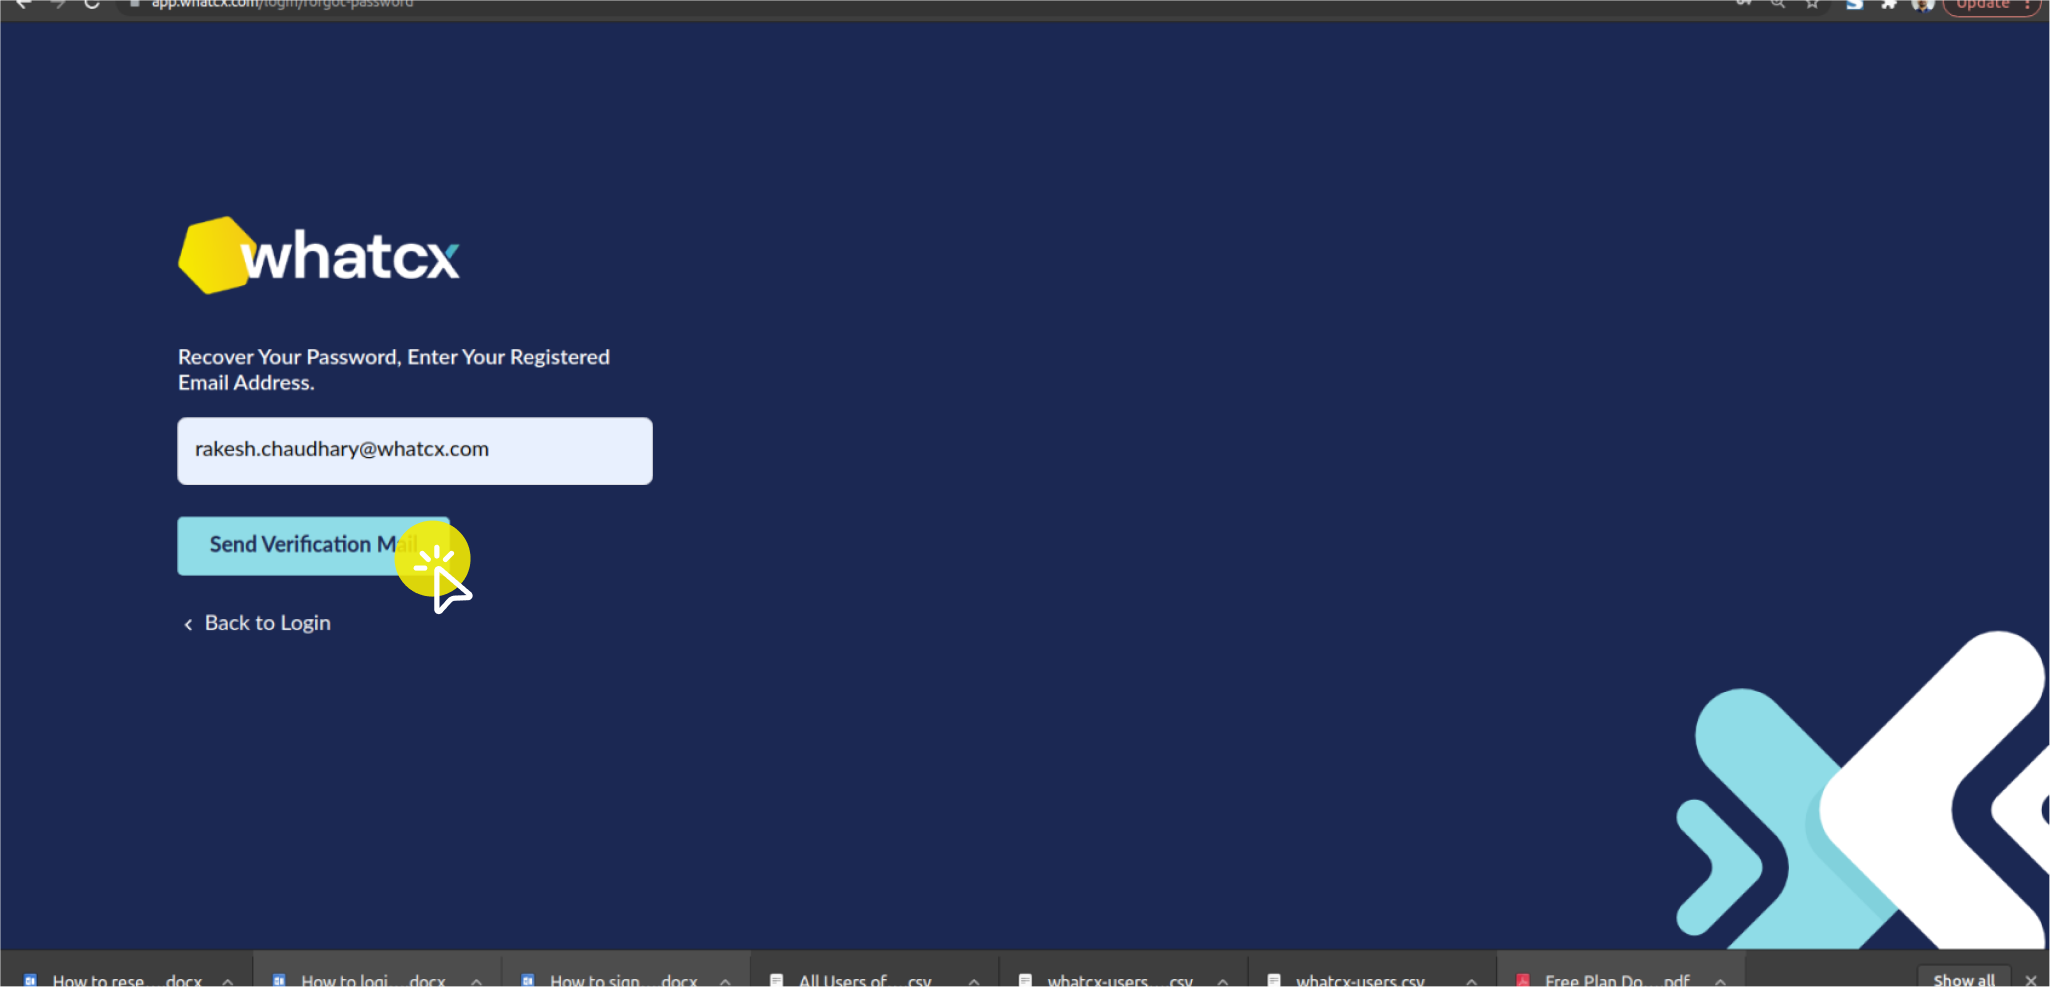
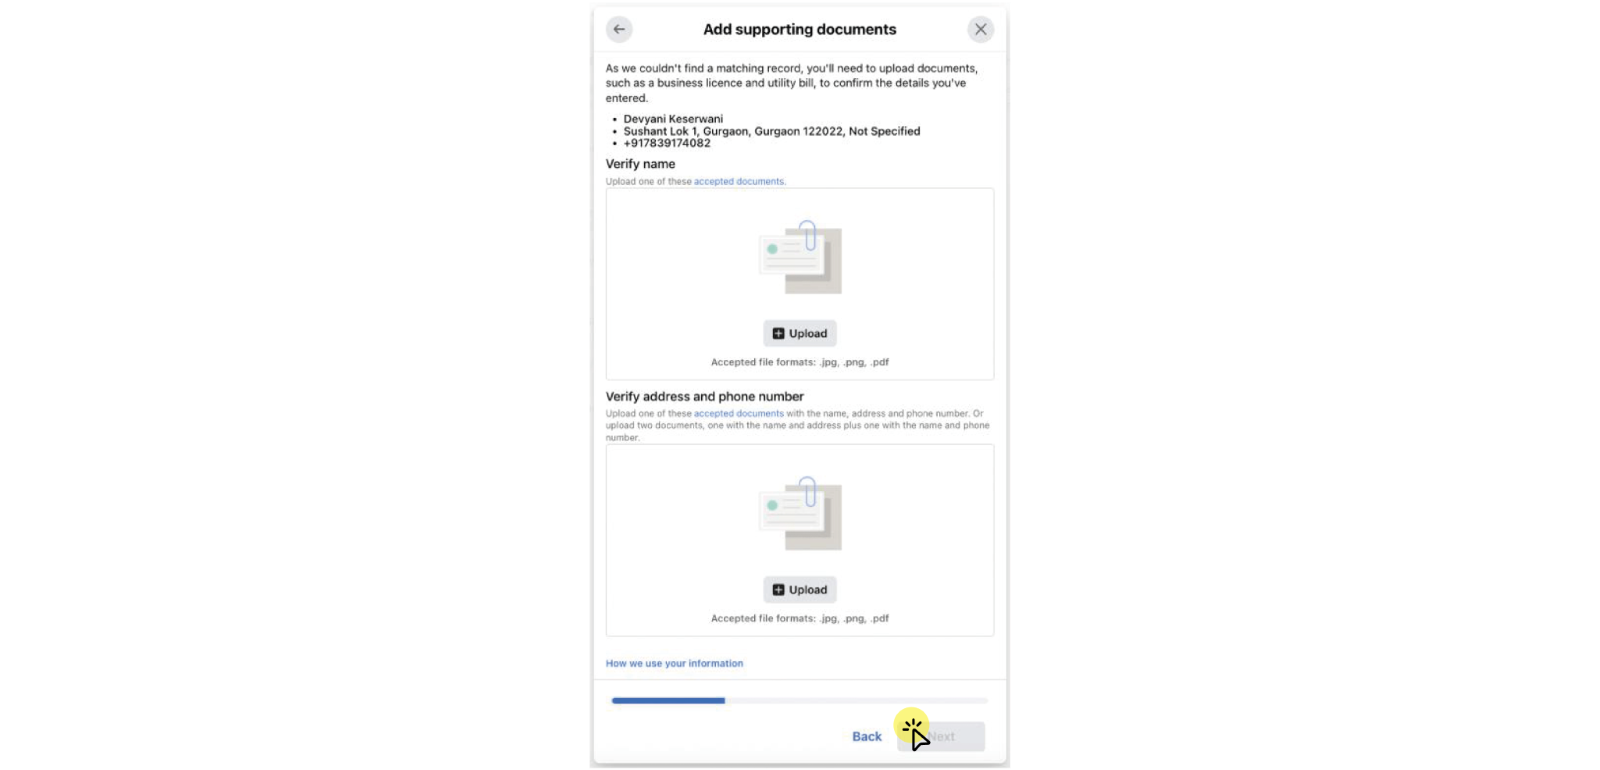
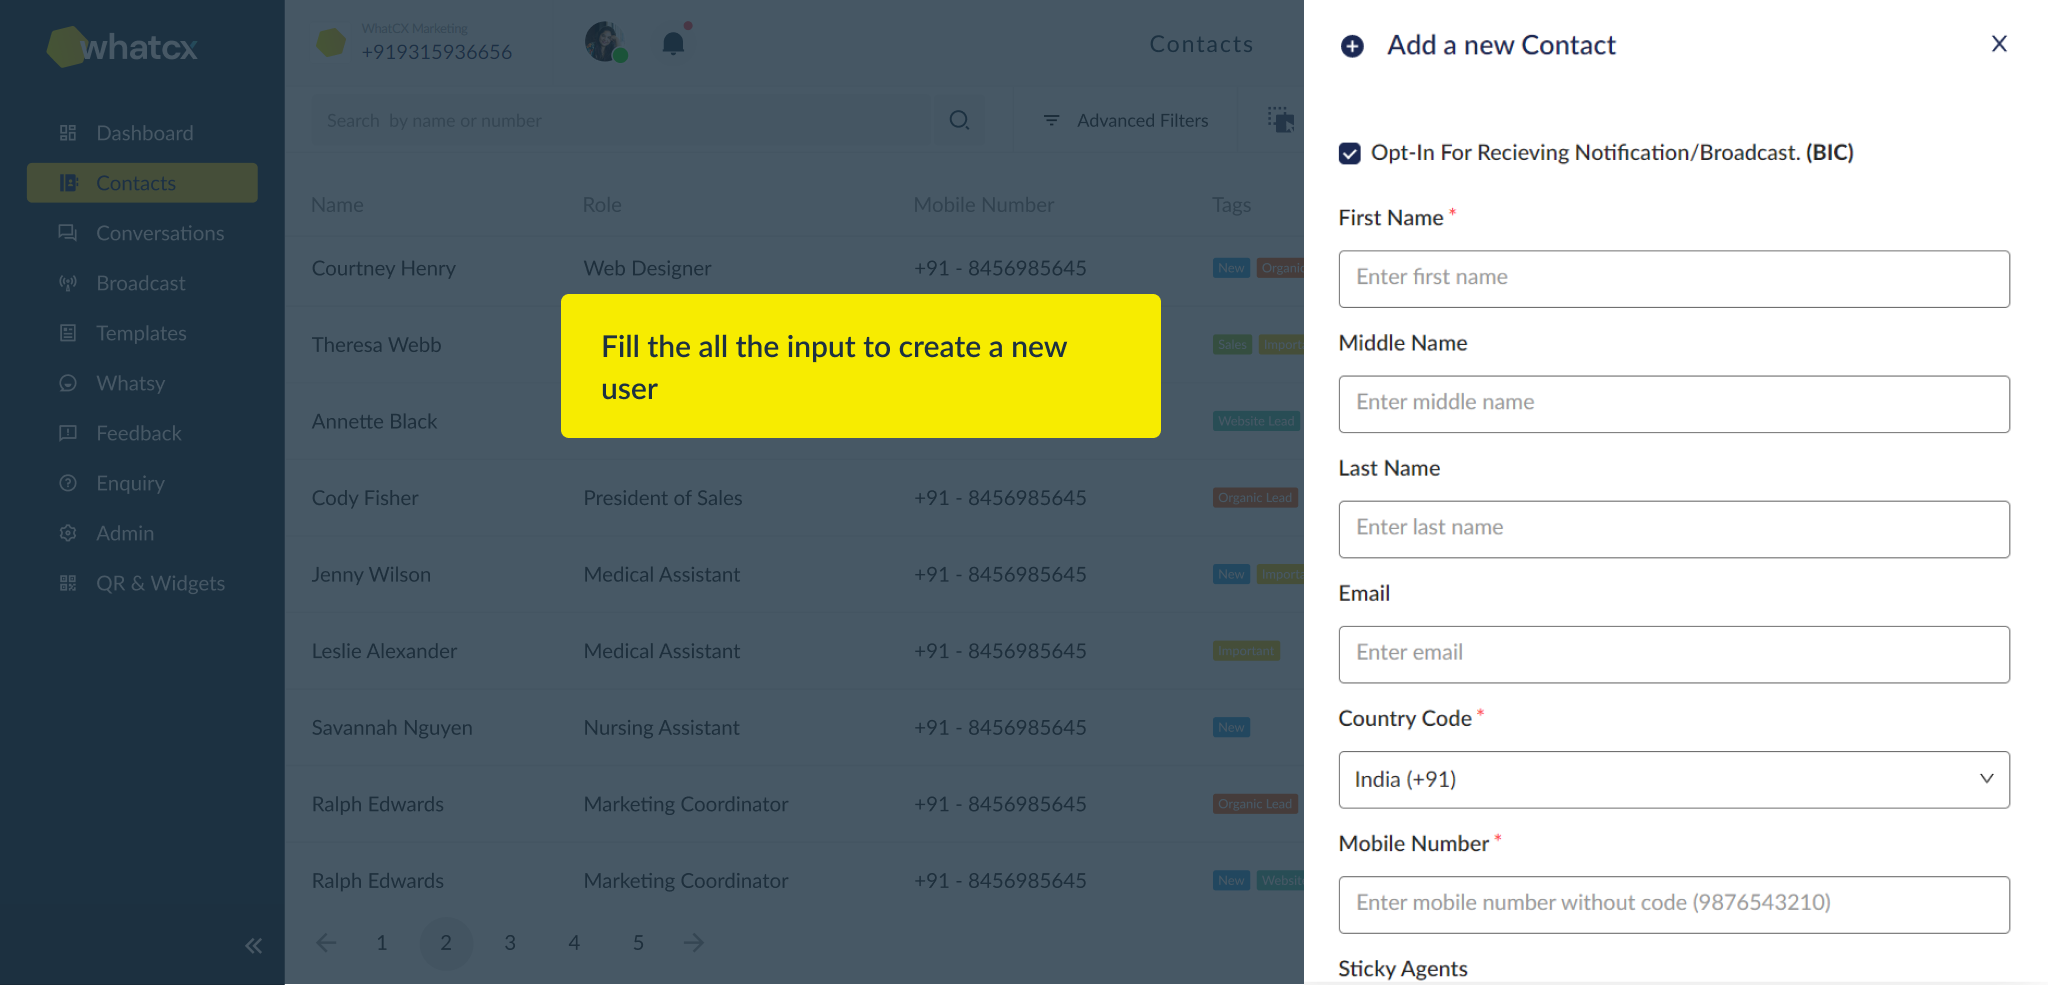
 2. Click on Add Contacts and enter the contact’s details like in the screenshot below. Enter all the information you have for that particular contact like Name, Email, Country Code, Mobile Number. You can also assign Sticky agents for the contact.
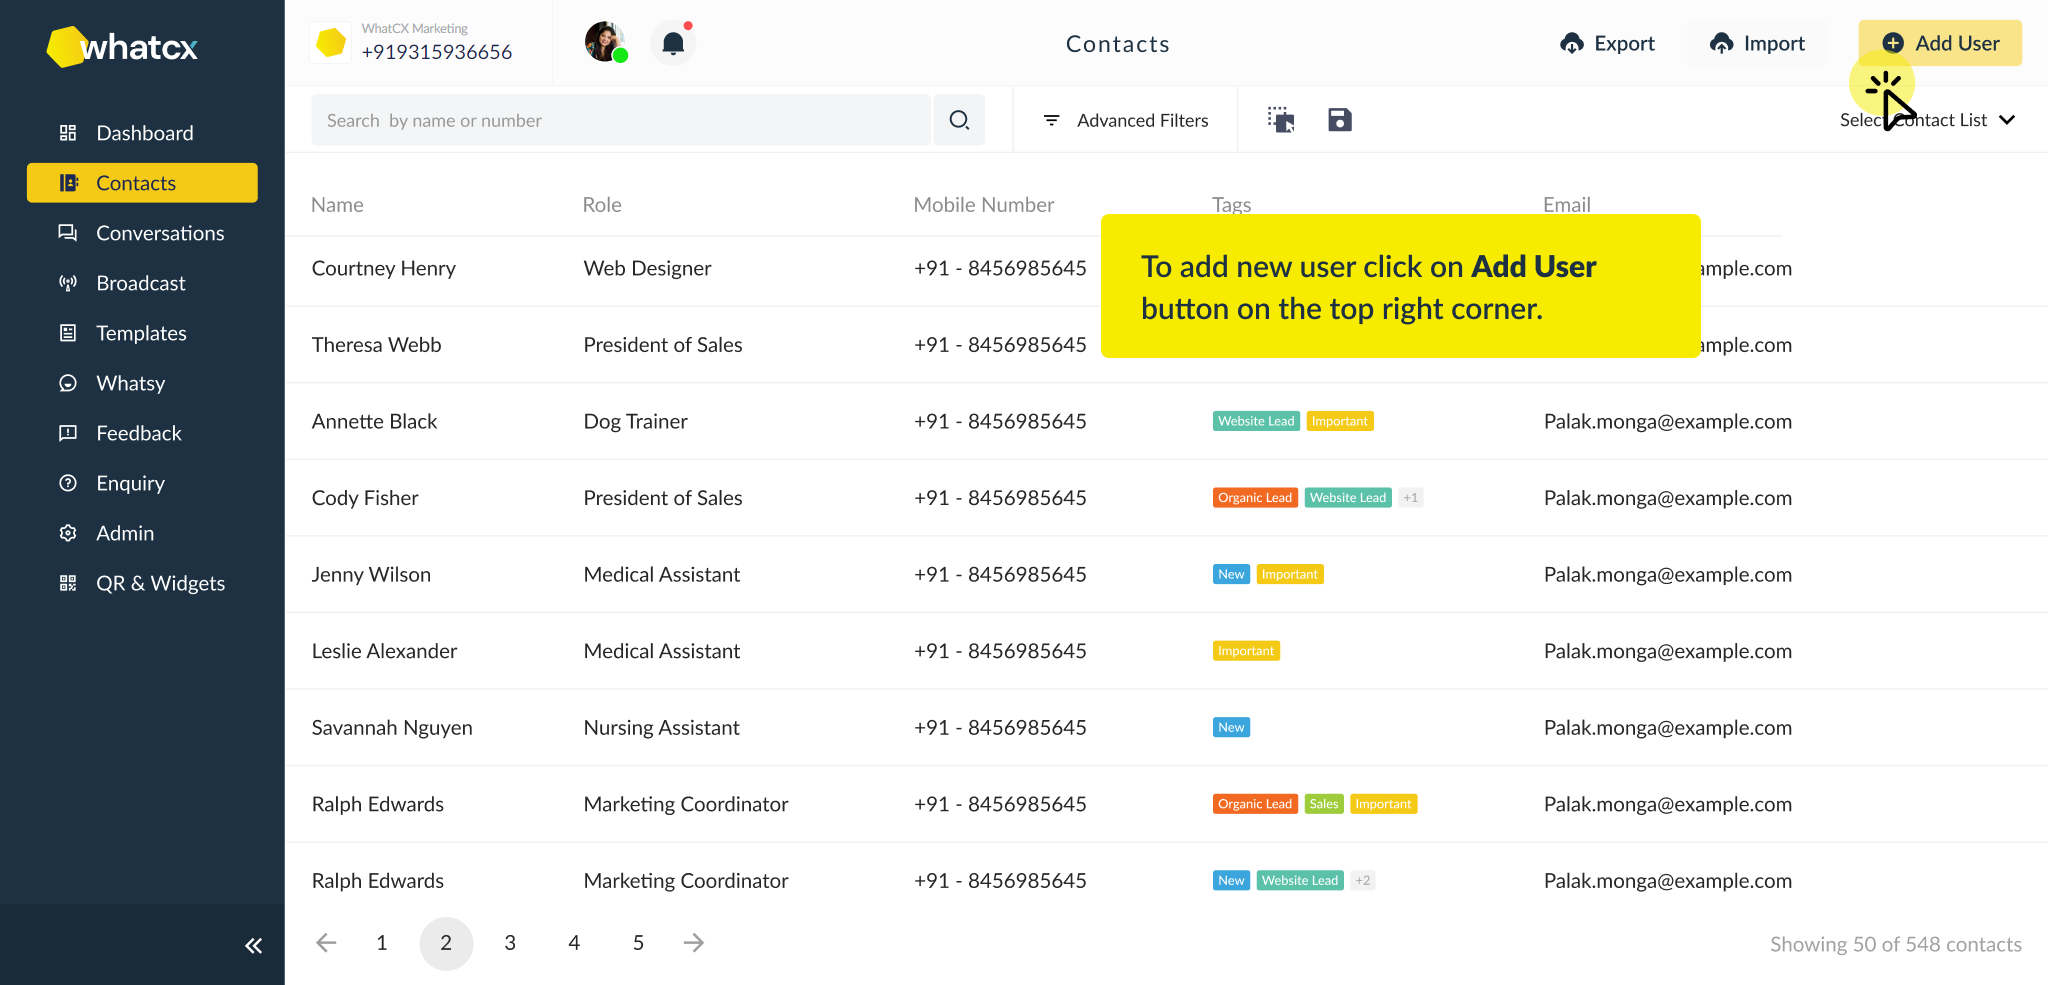
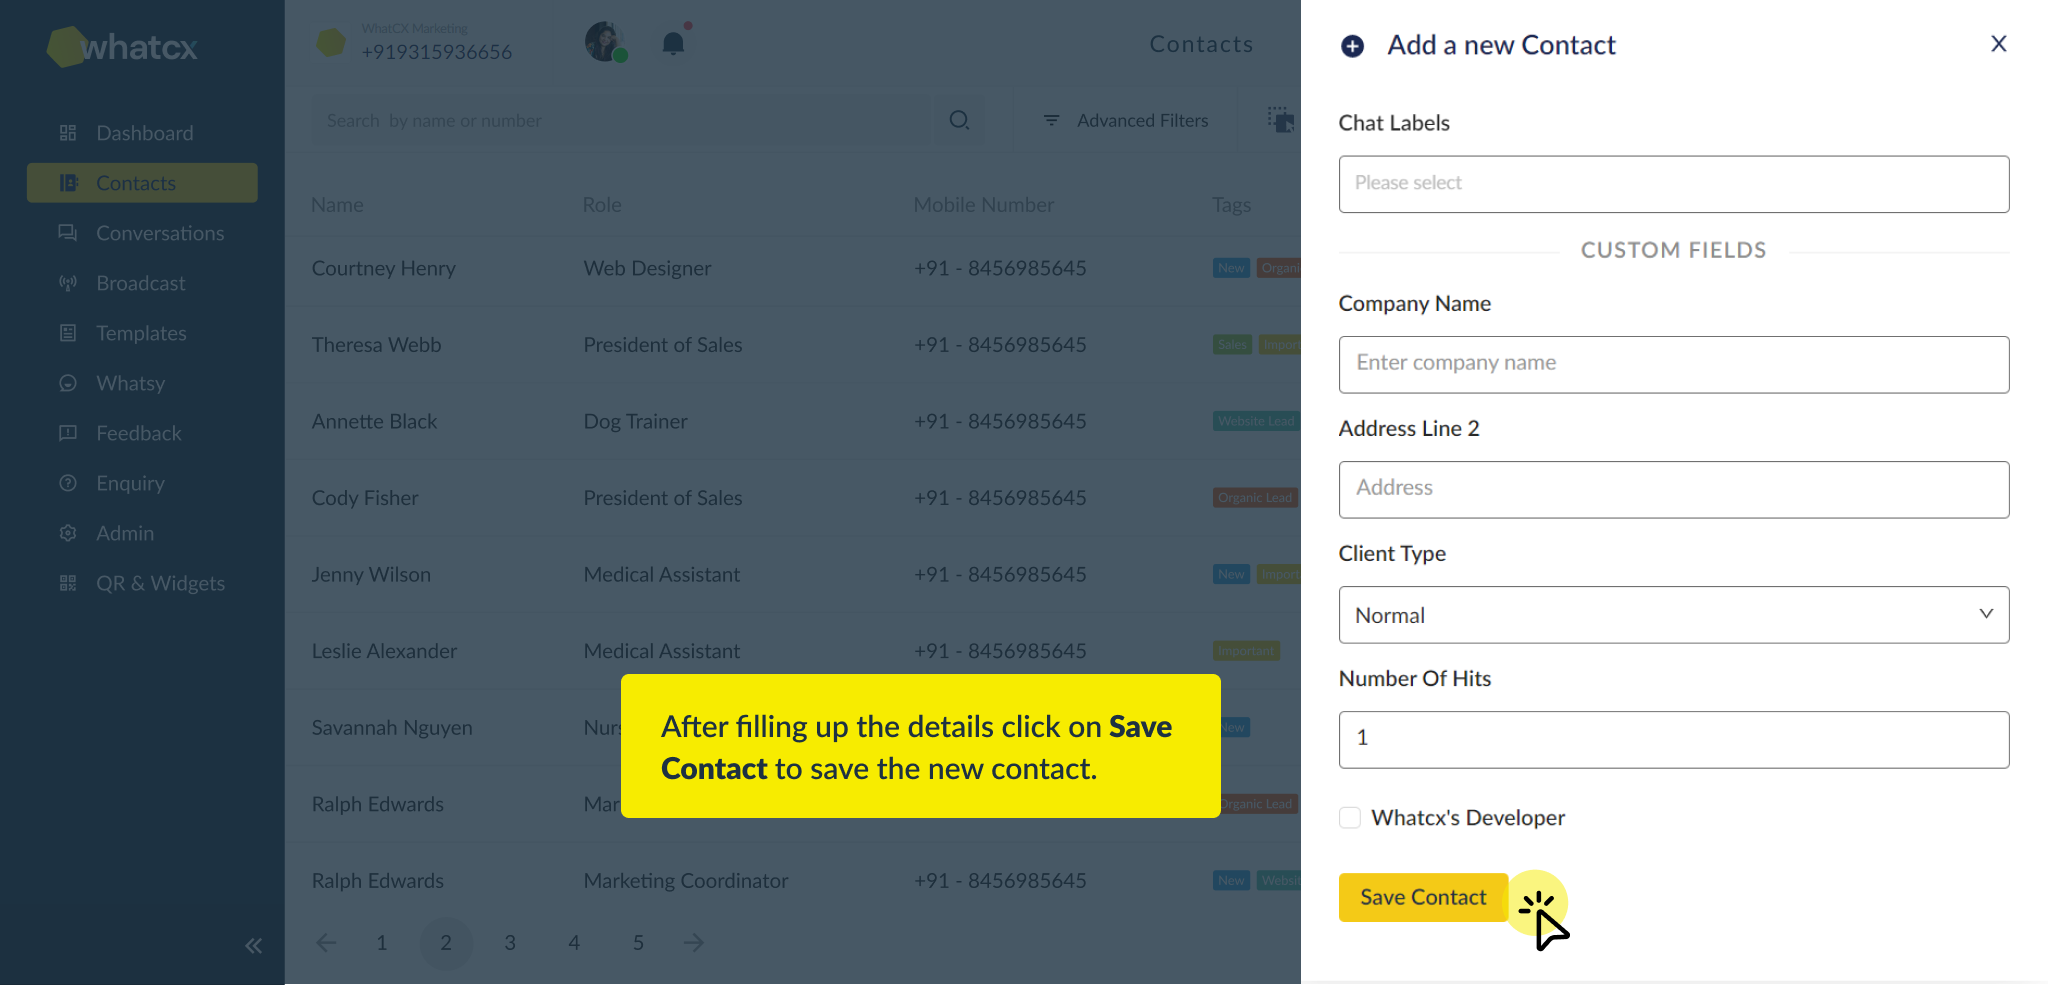
 3. Post entering the details click on ‘Save Contact’ and the contact will be created.


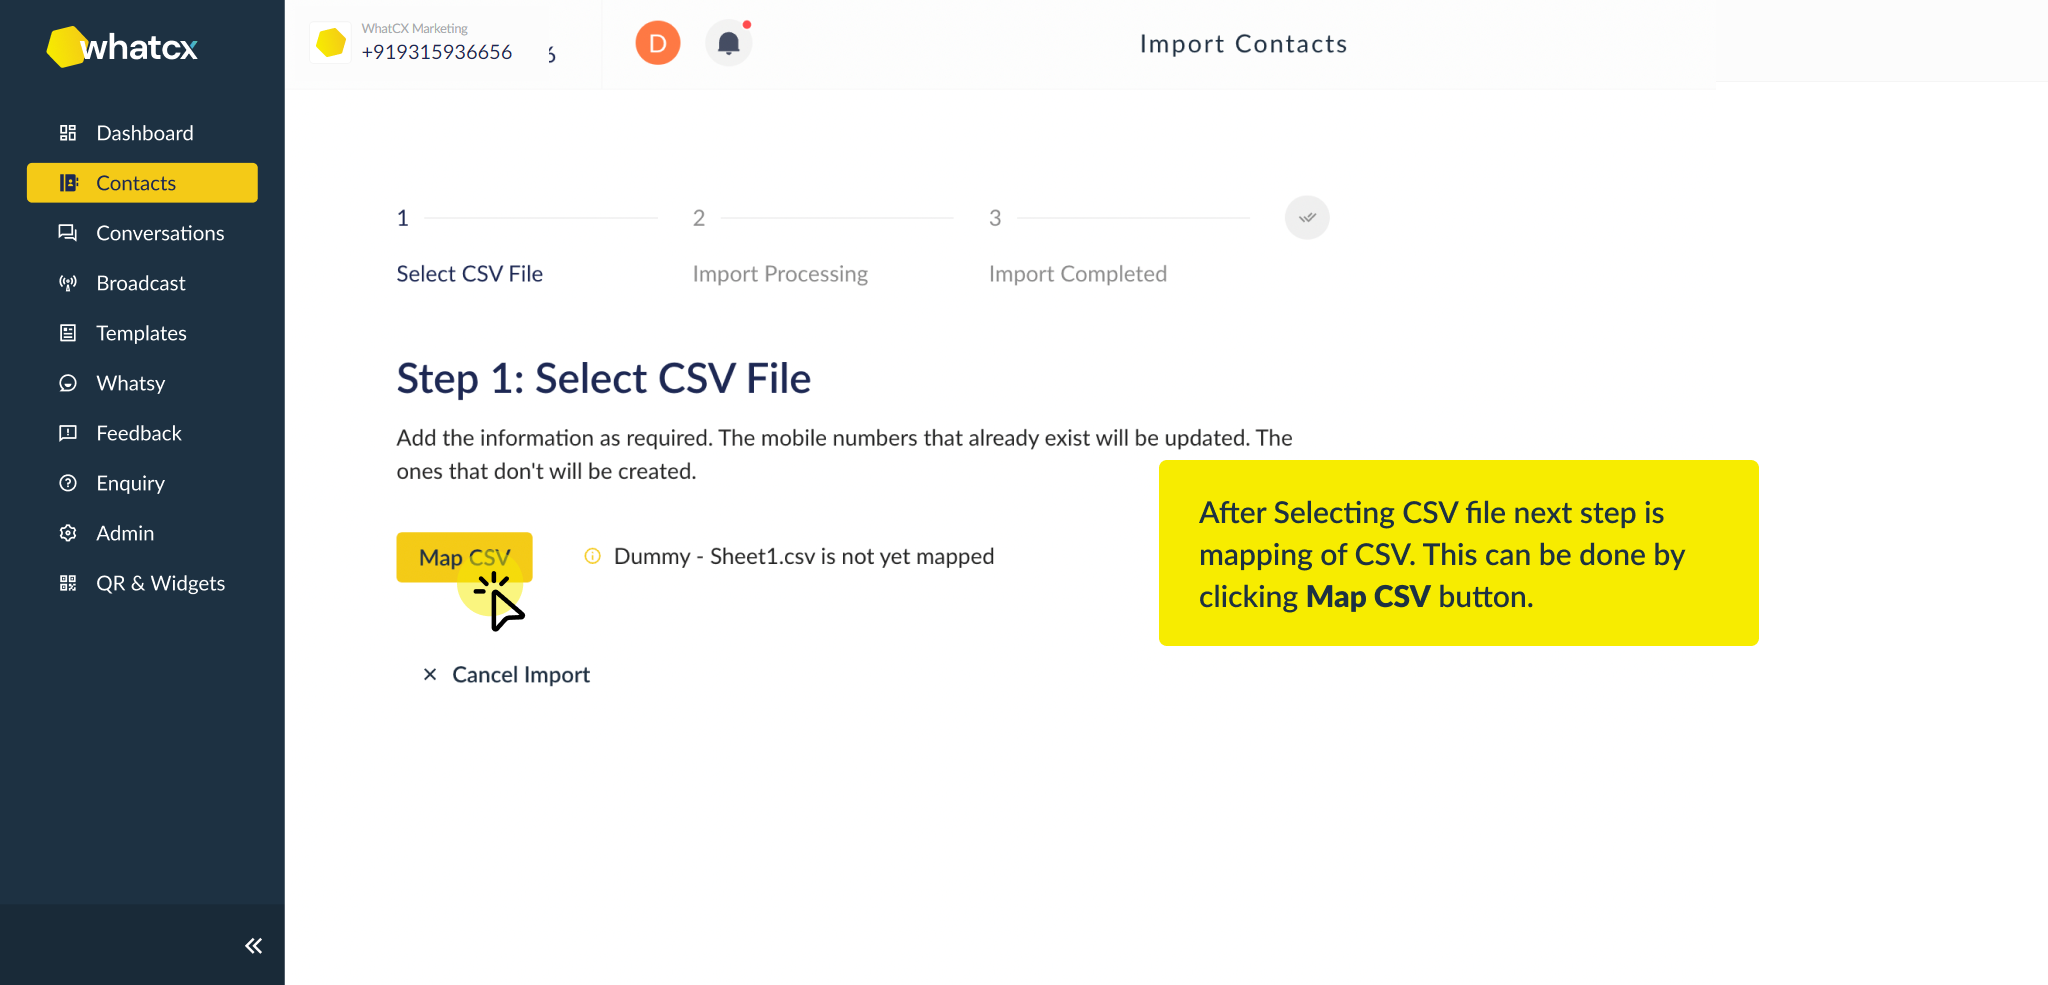
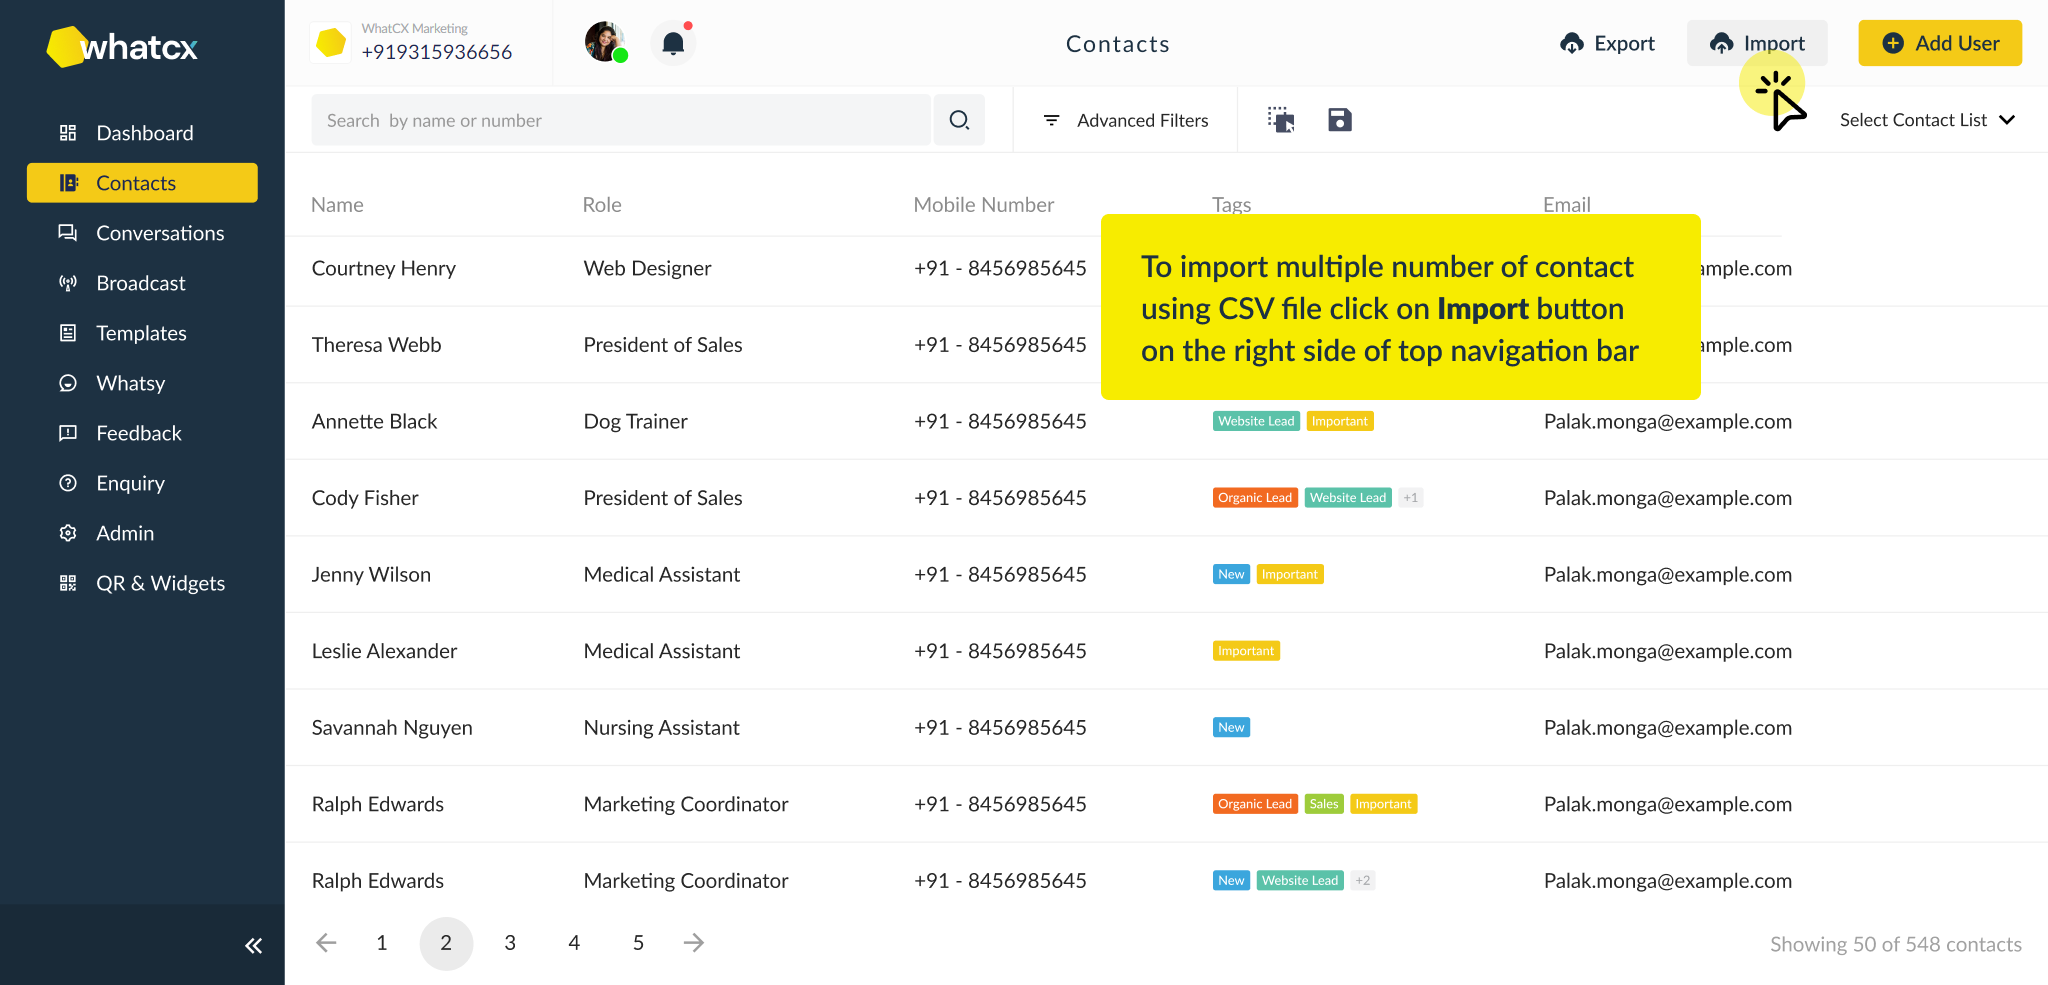 2. Select the file you want to upload
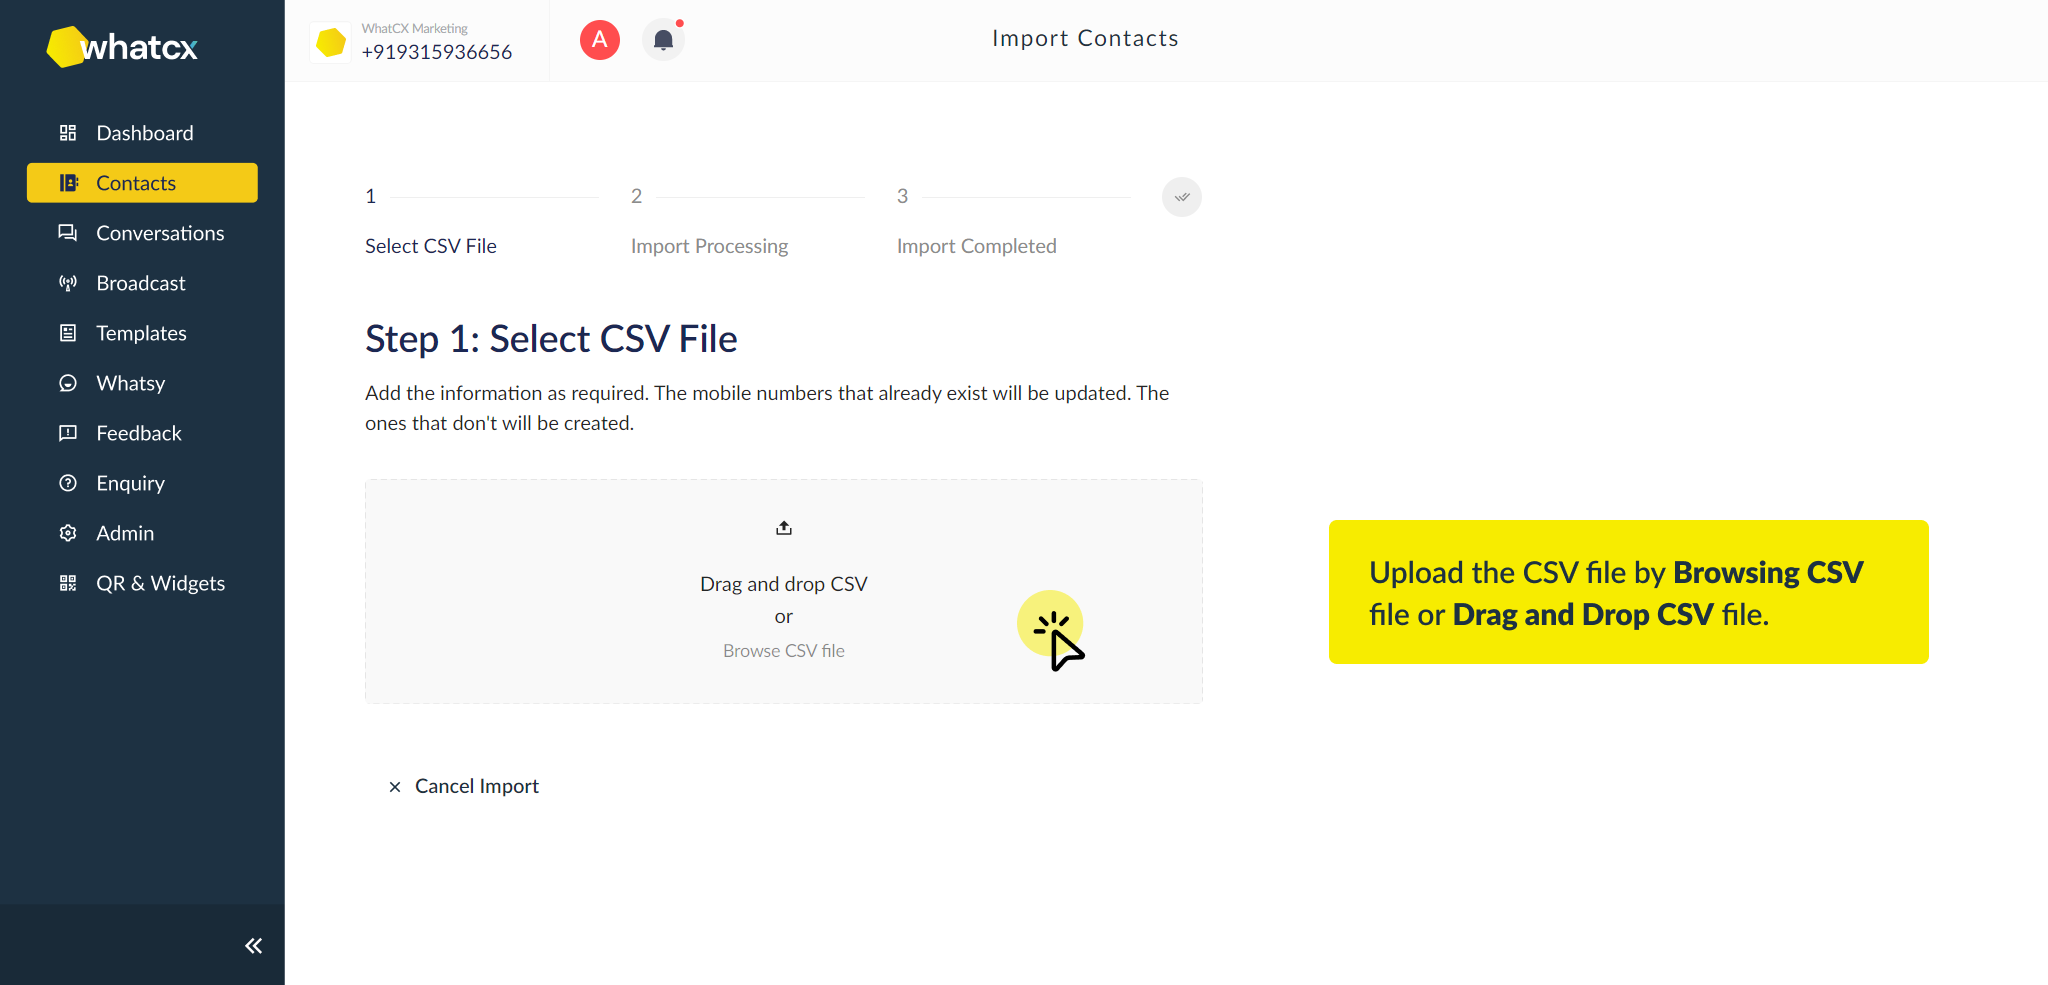
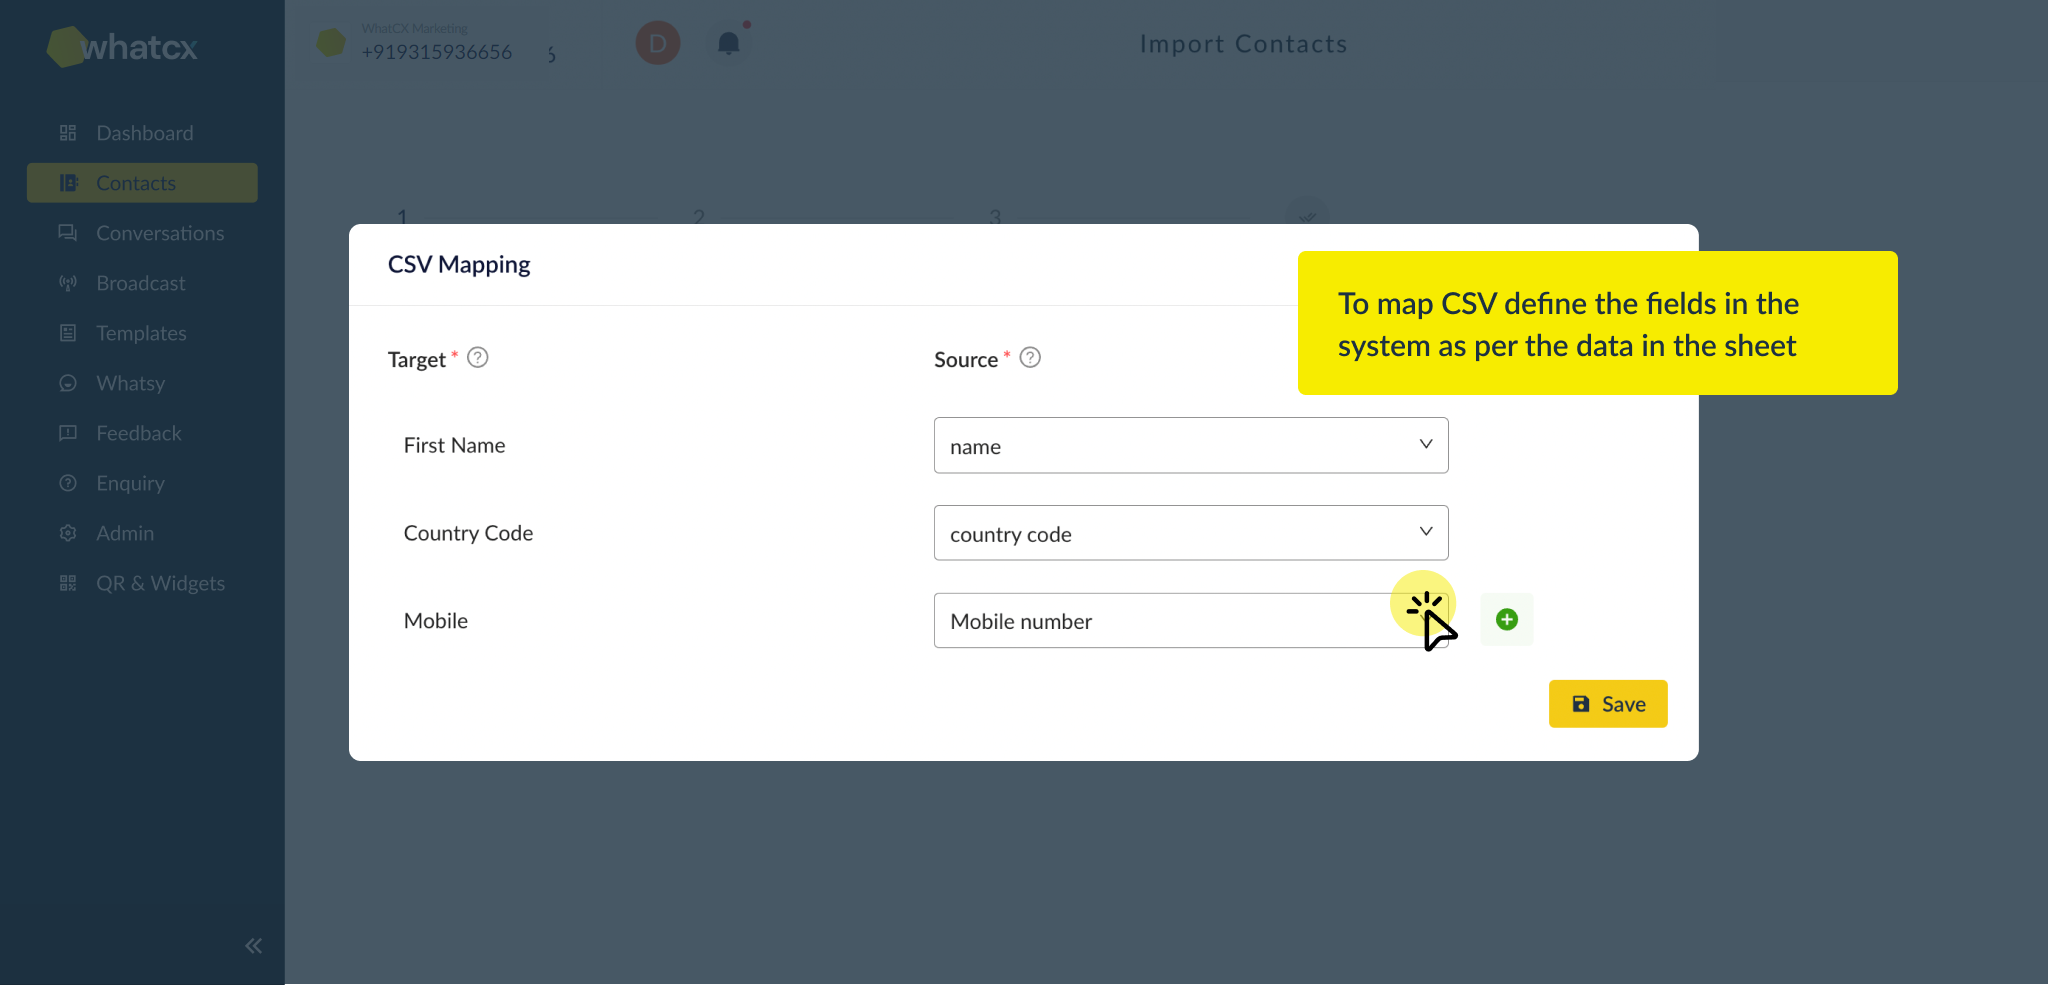
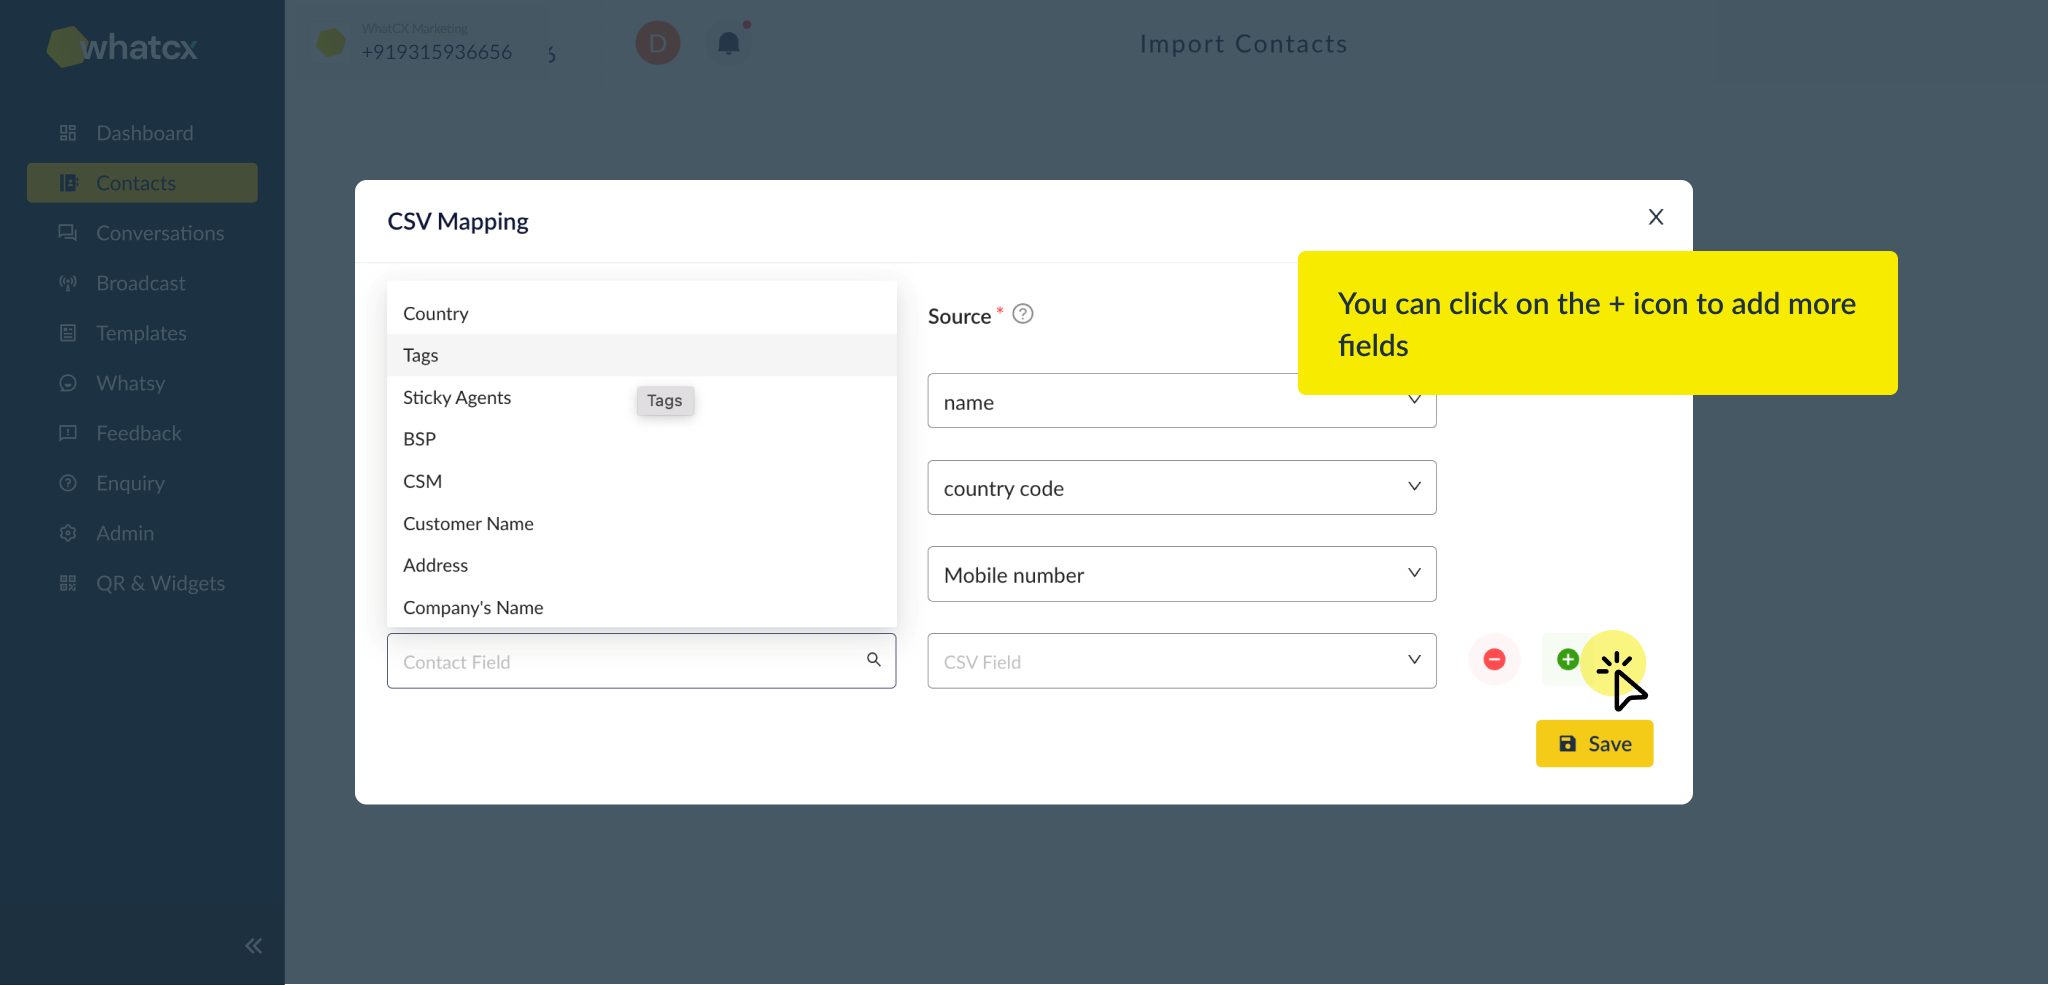 6. Once you are done with mapping your CSV file. Click on Save and Continue
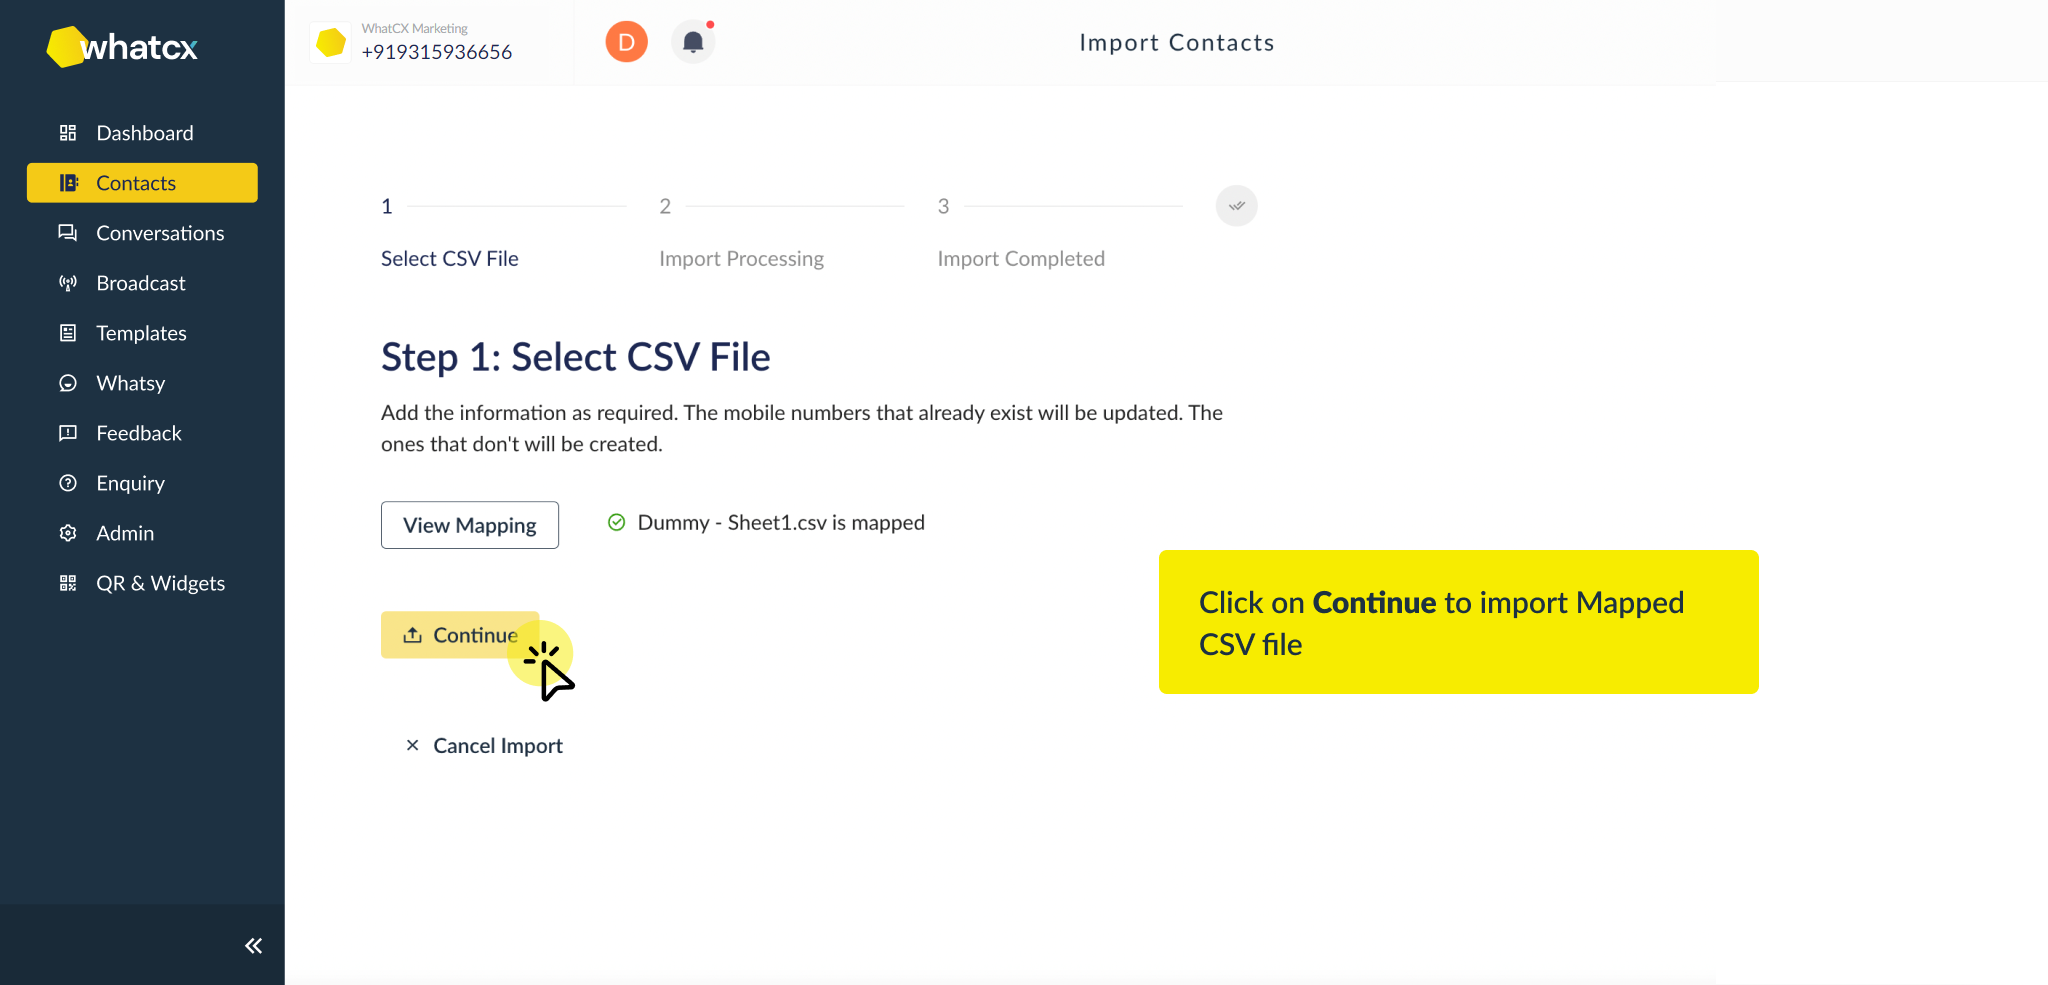


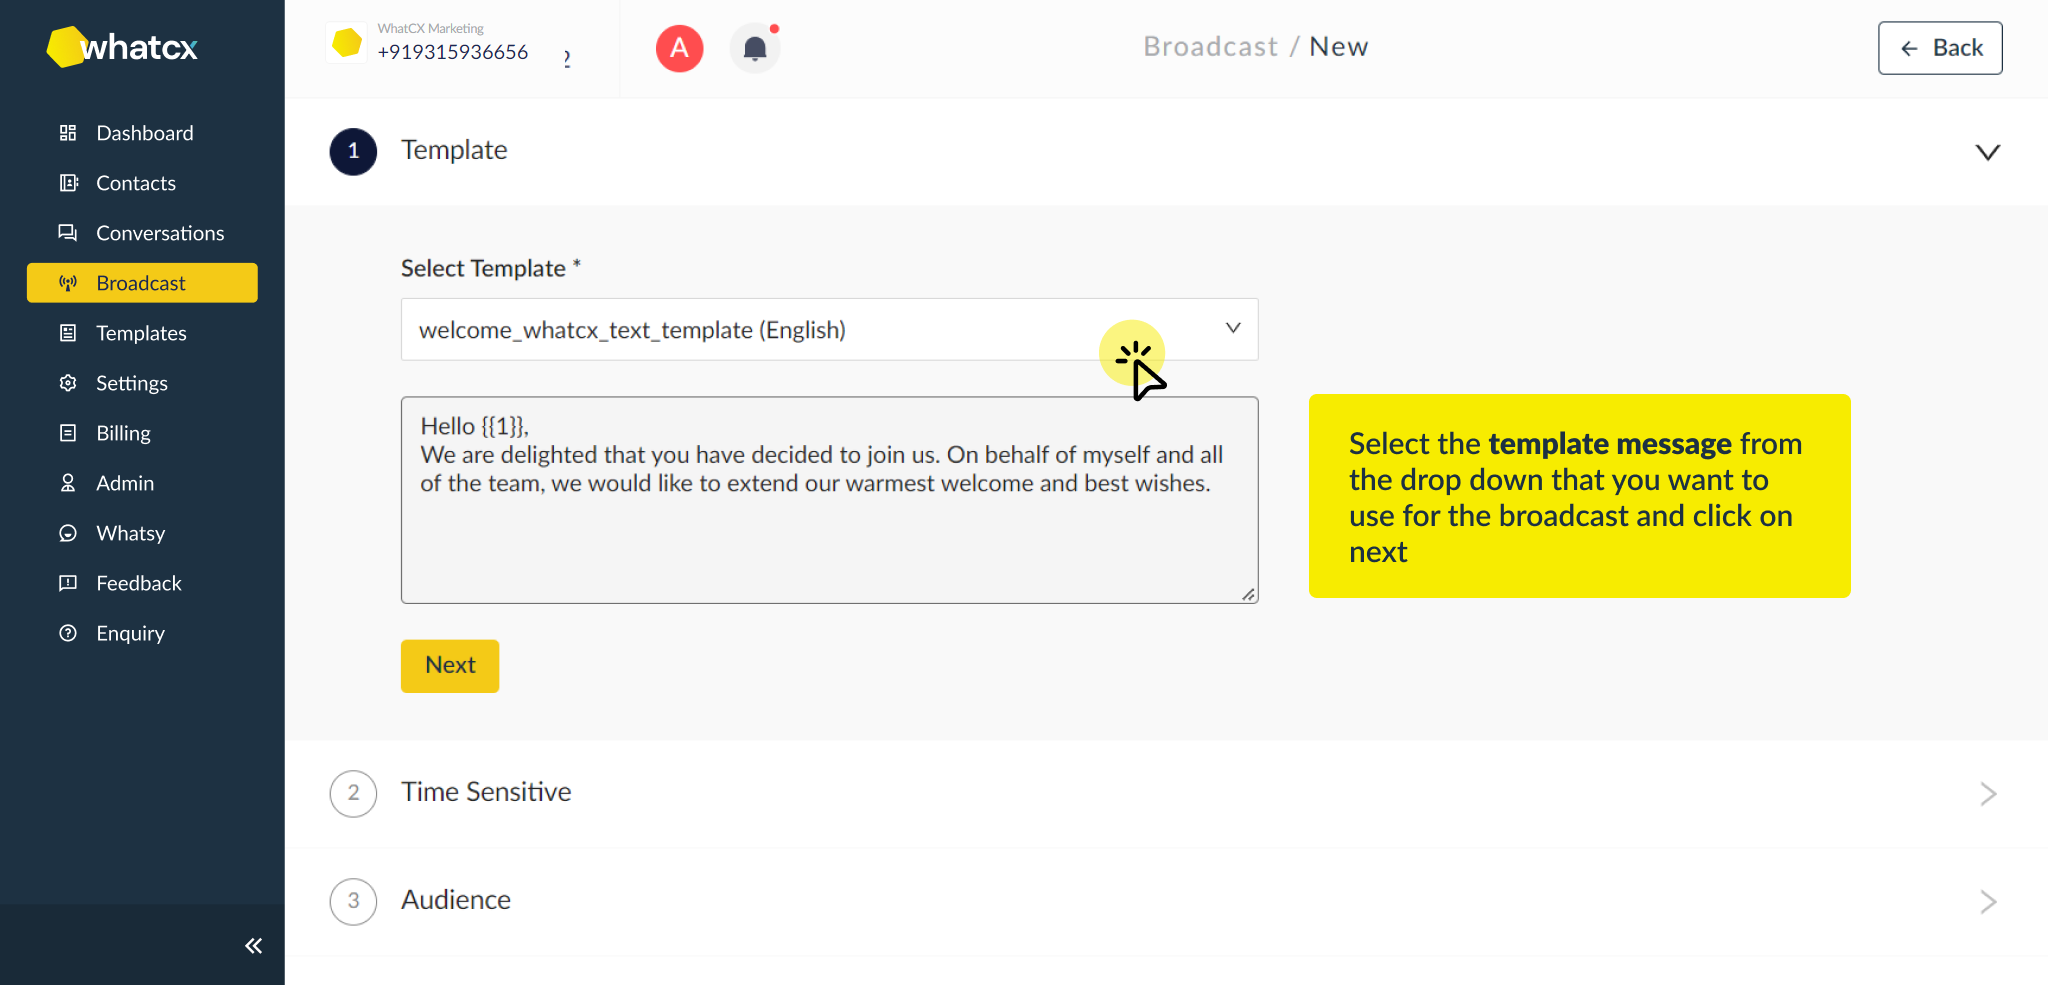
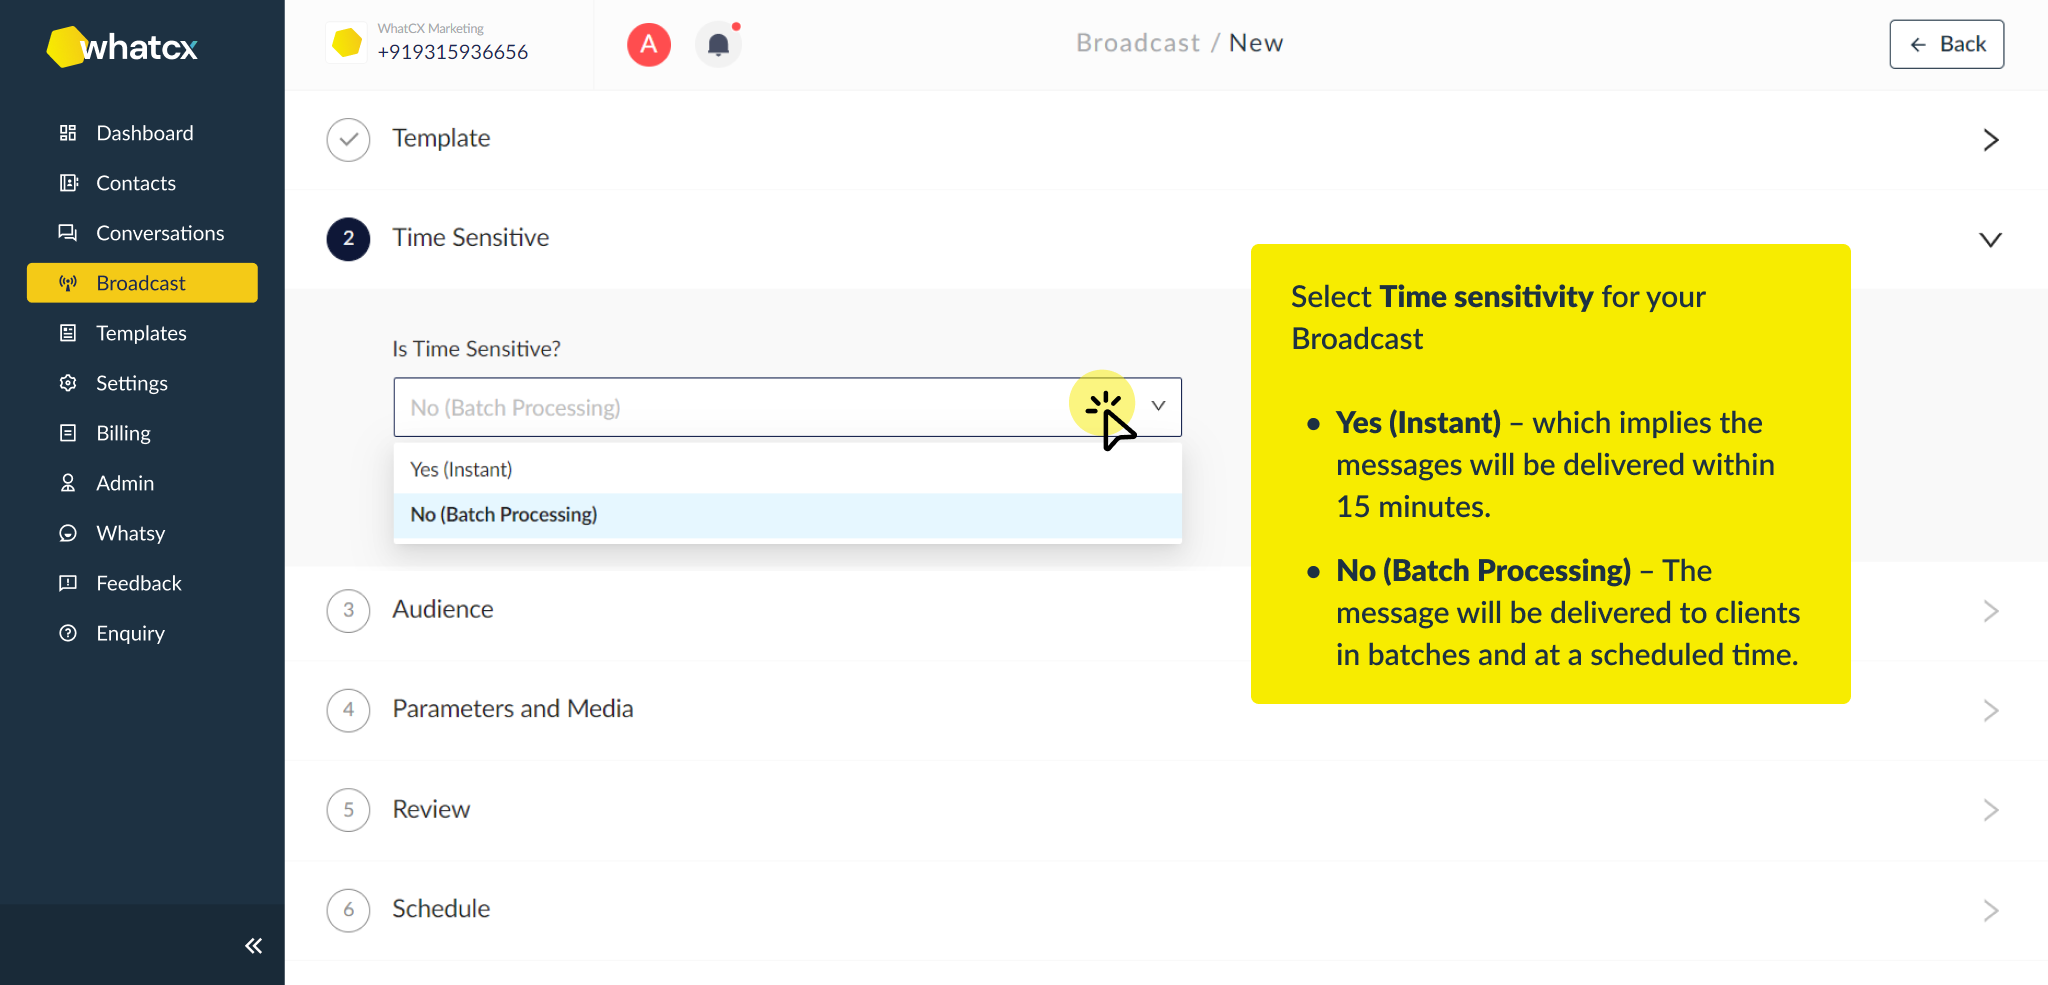
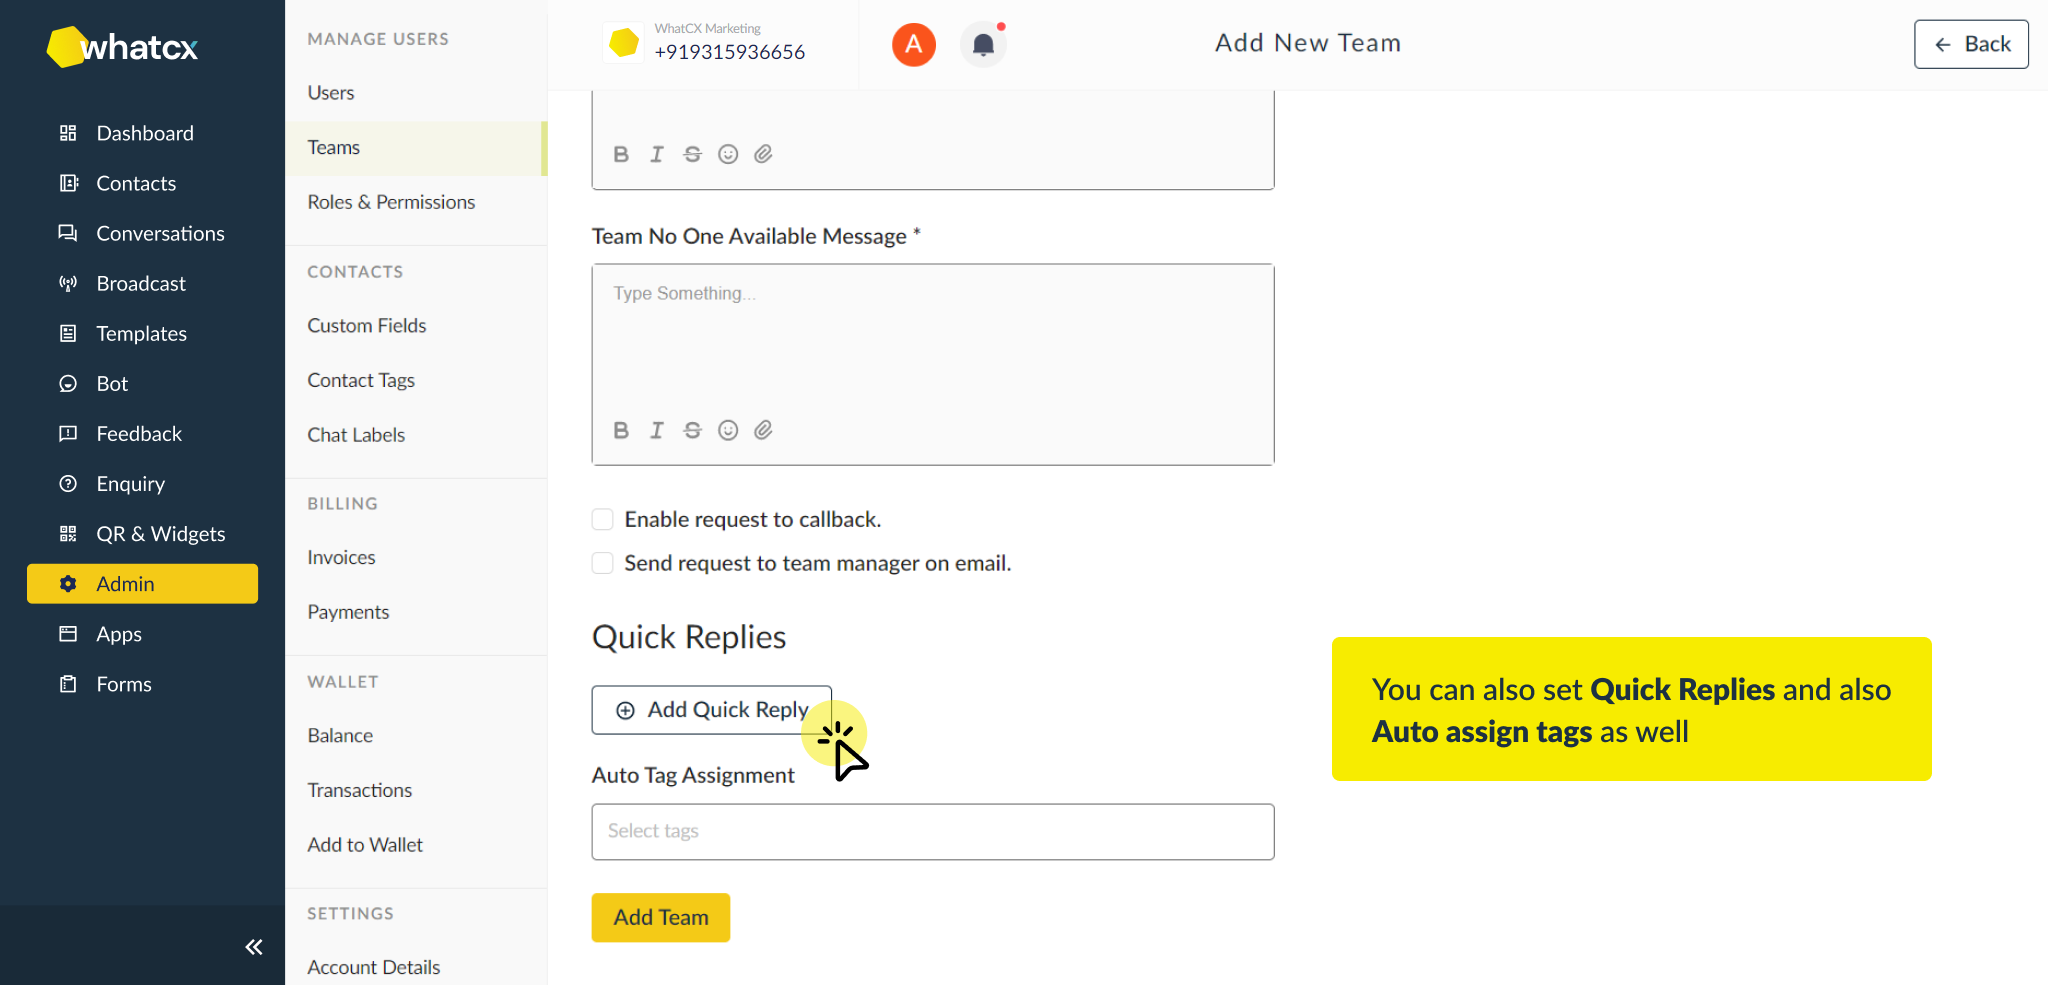
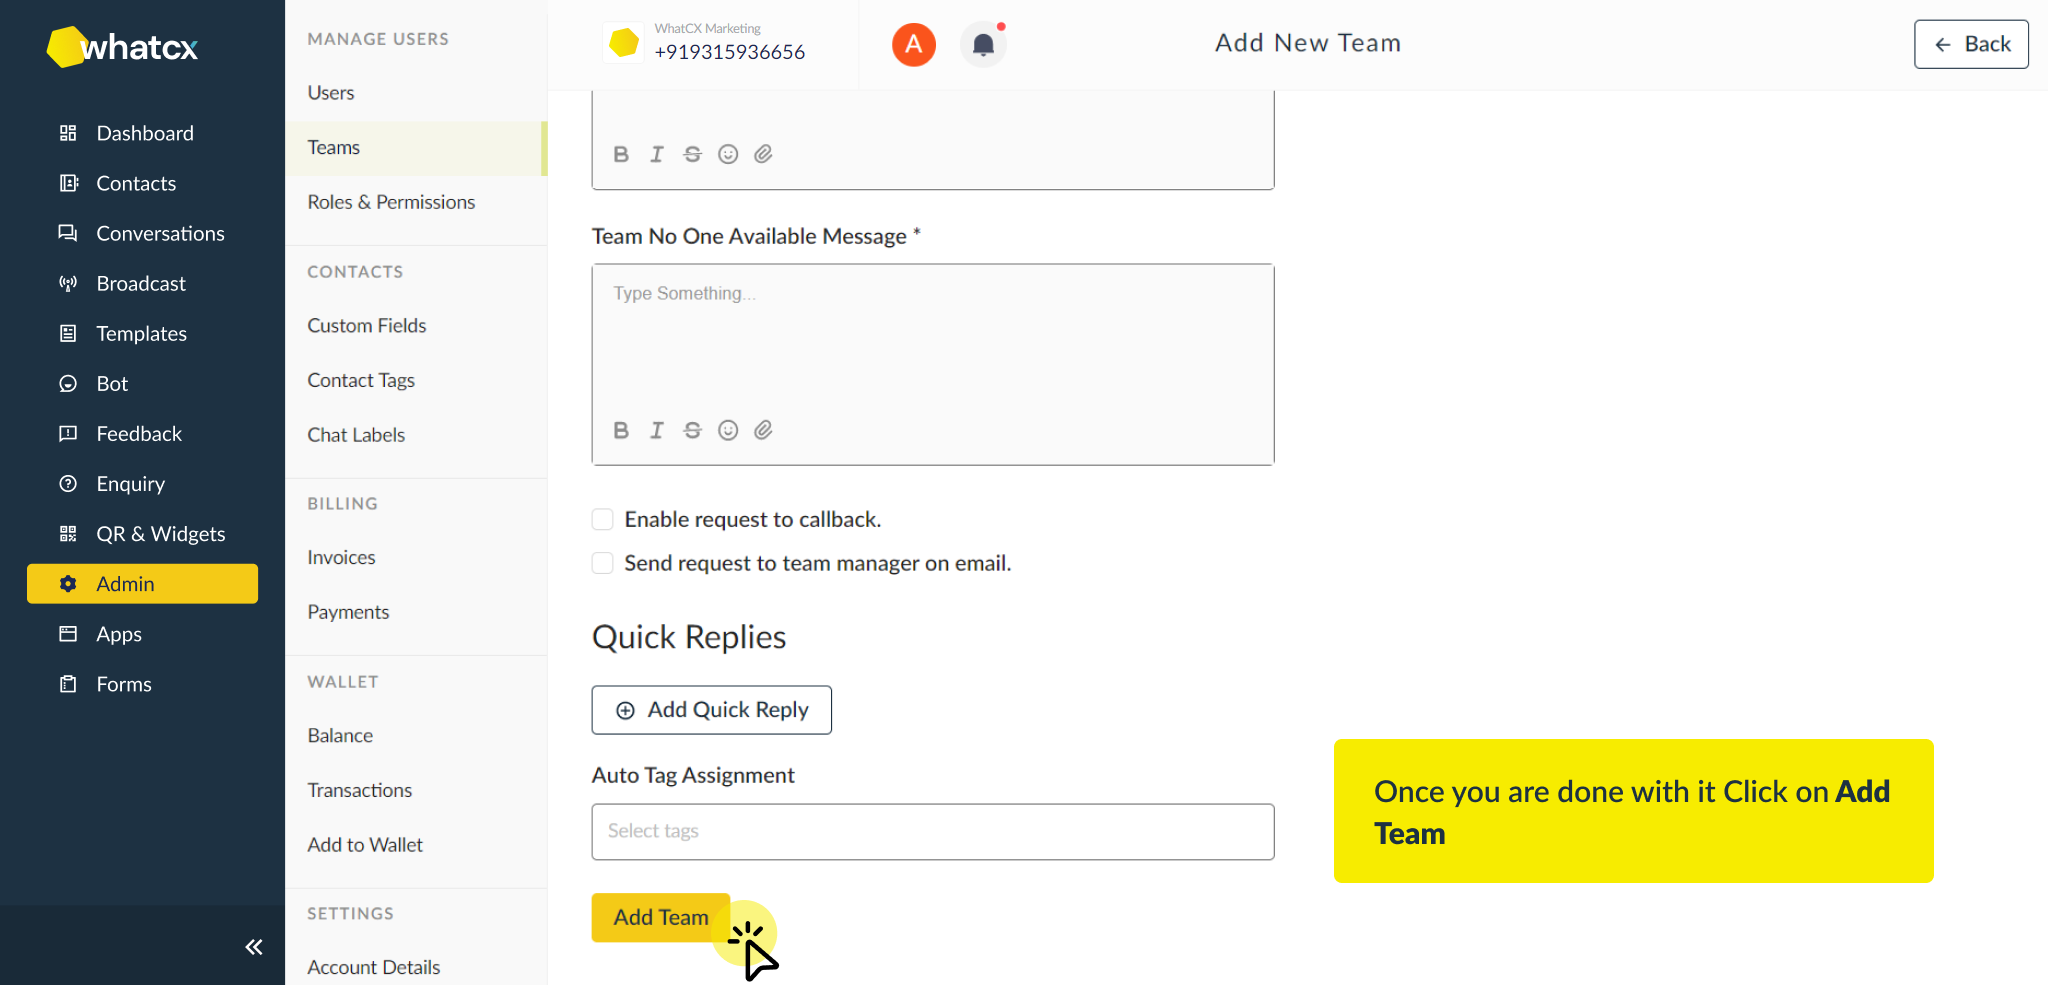
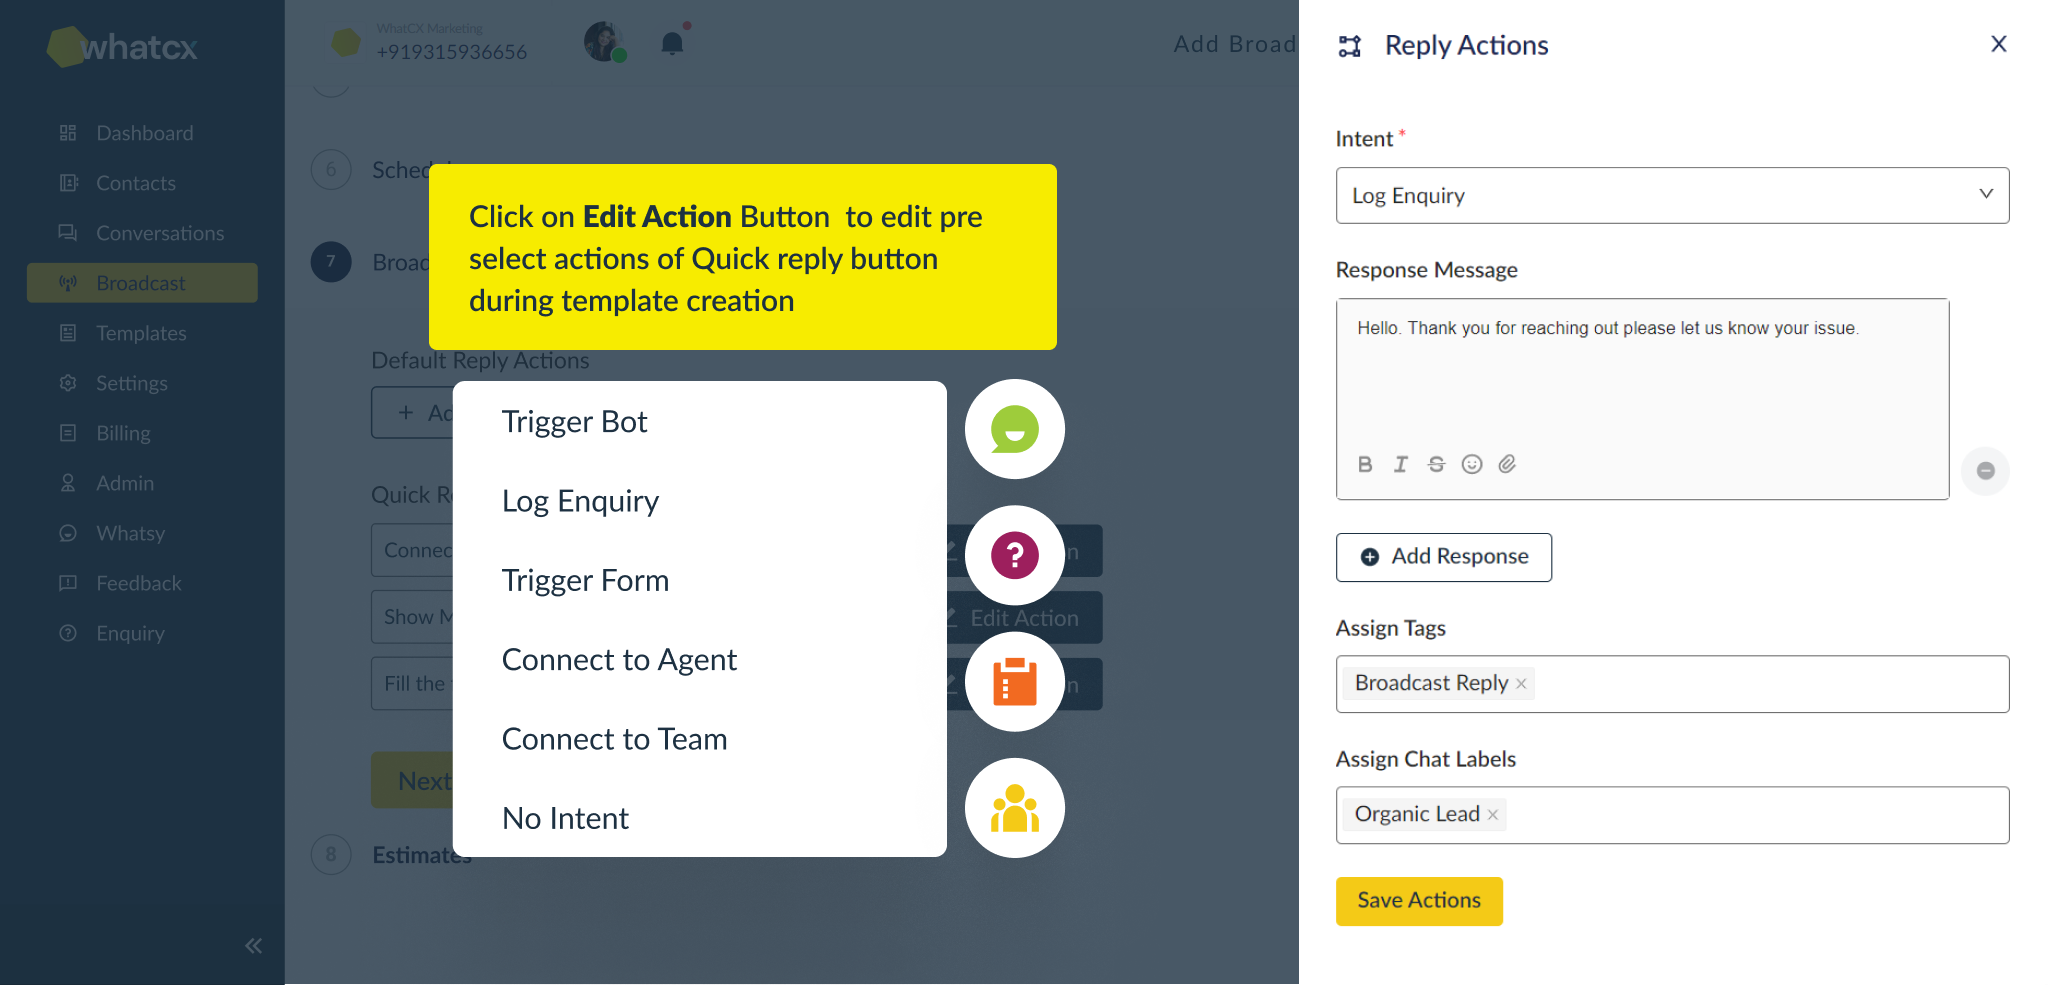
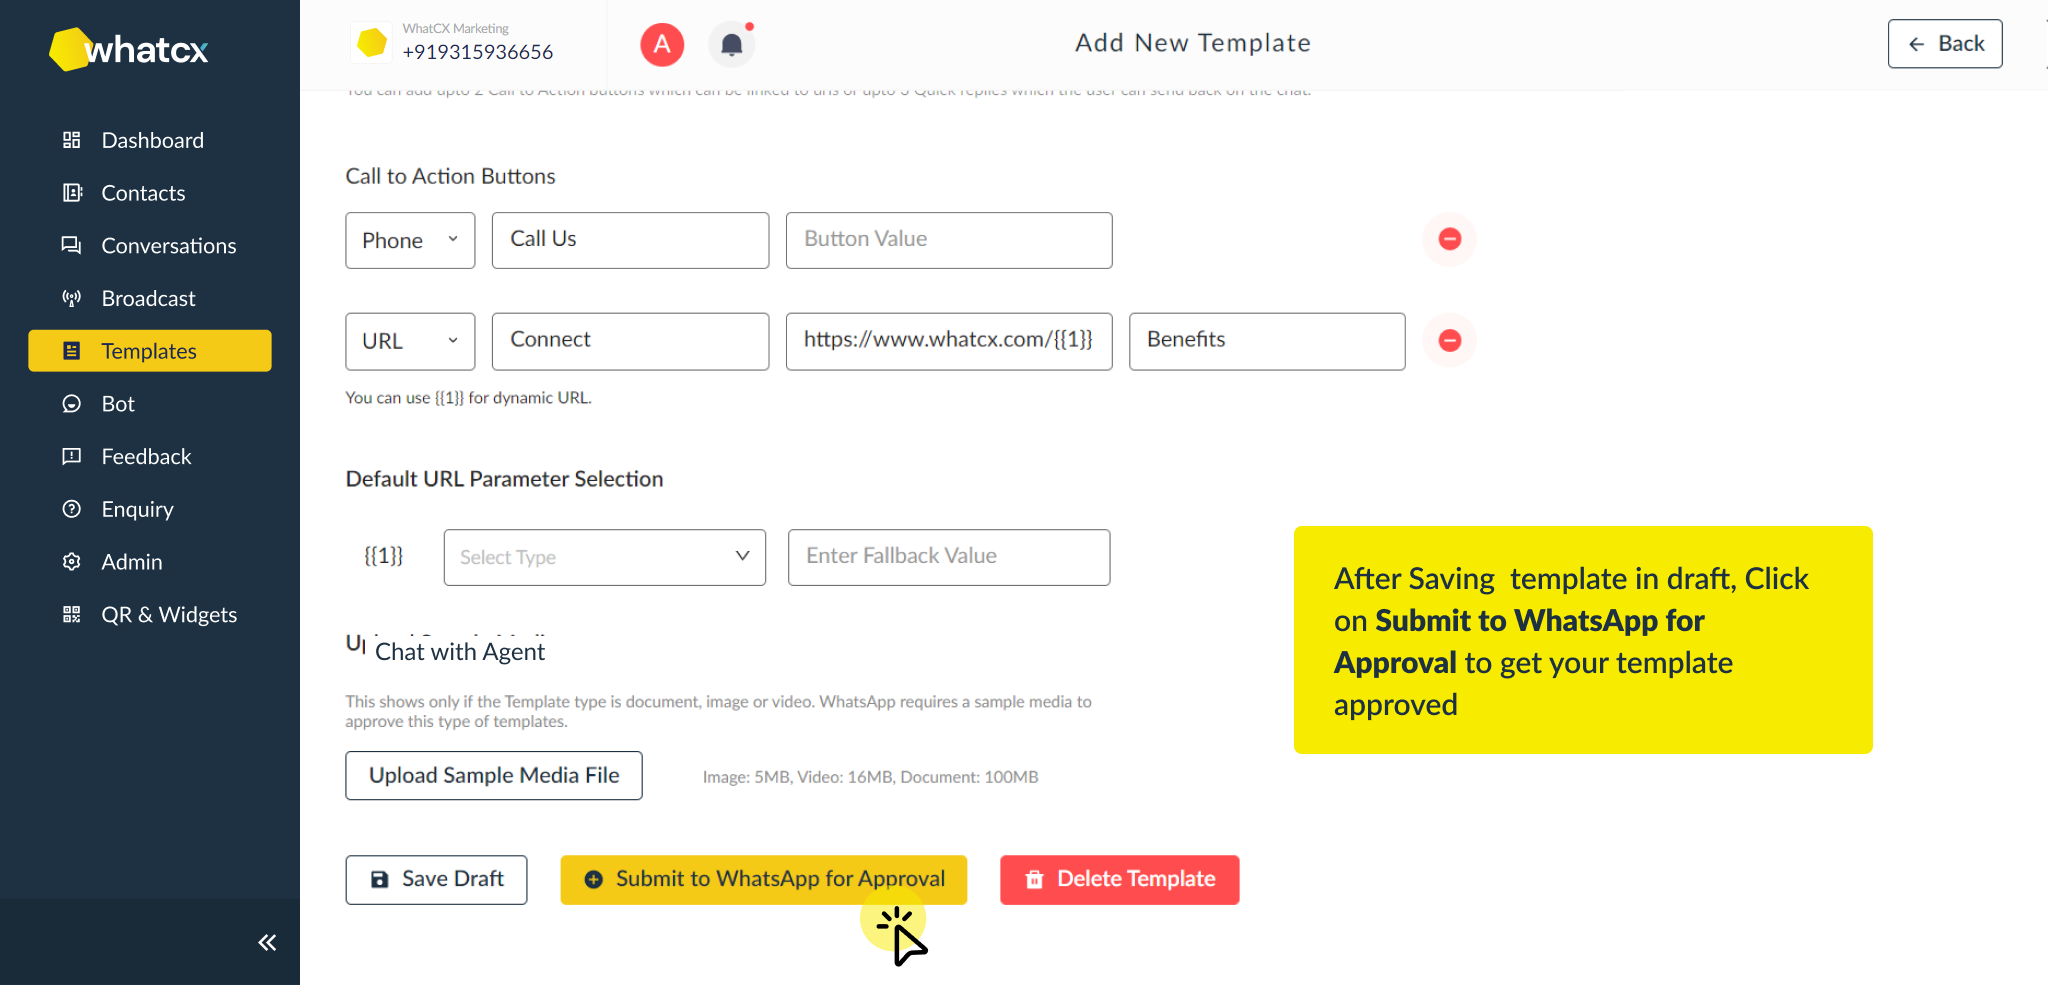
 5. After choosing the audience, enter the message in the “Parameters and Media” box.
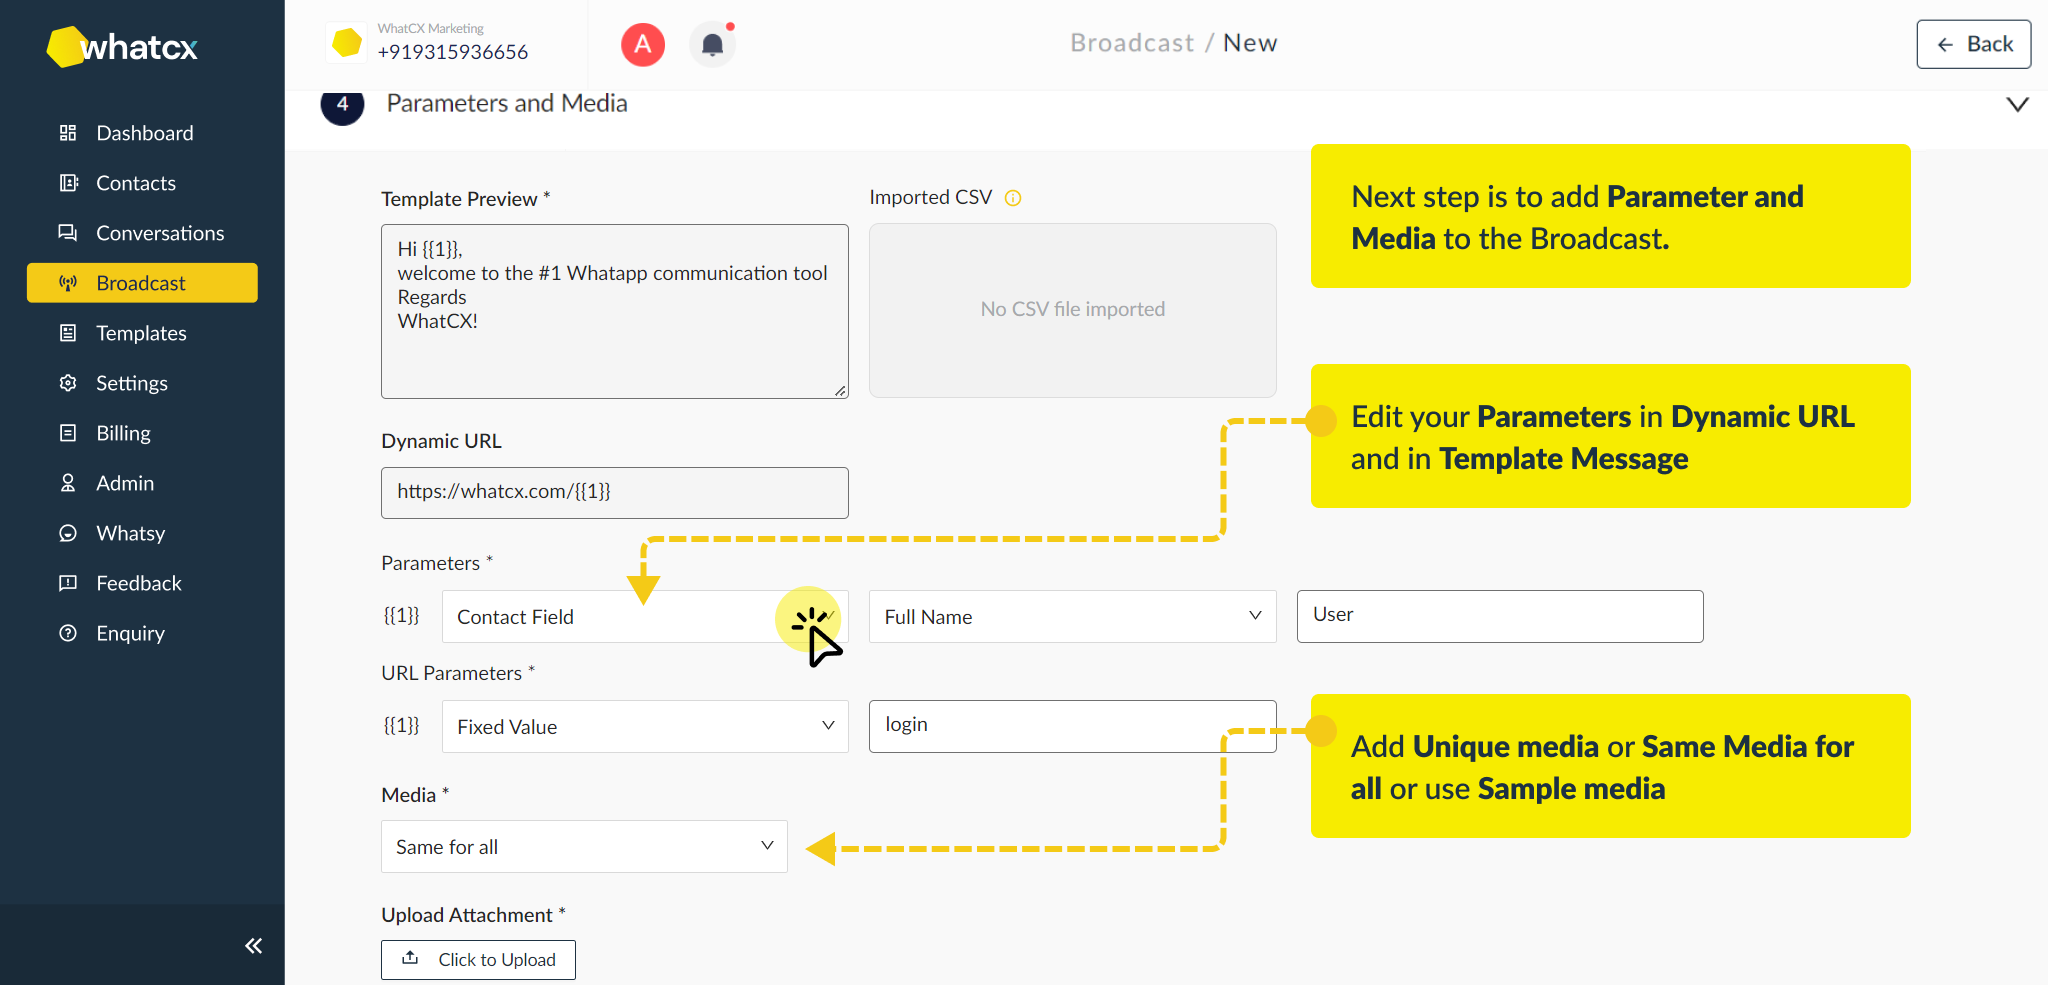 6. Post creating your template message and fixing the parameters and media, you now have to review the contacts. In the ‘Review’ section, you can edit the contact details if you want or can delete a contact from the list.
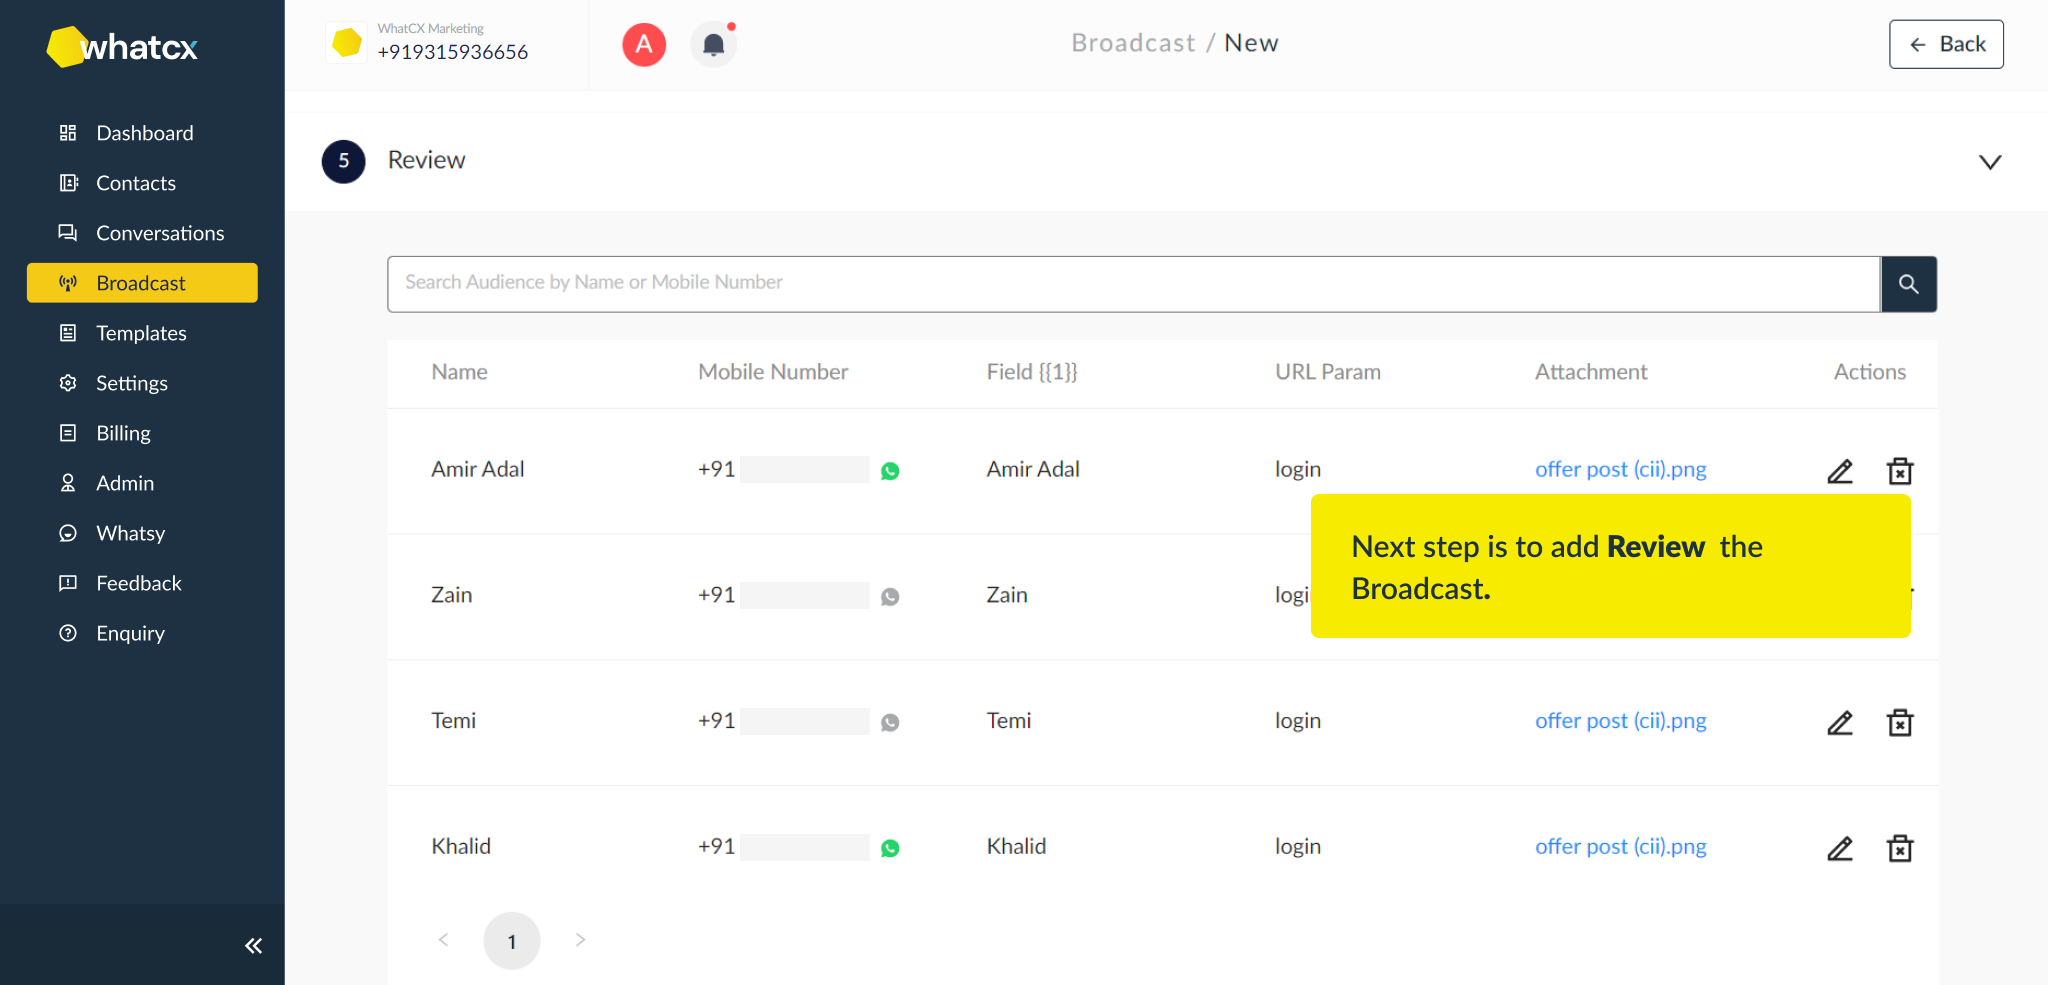
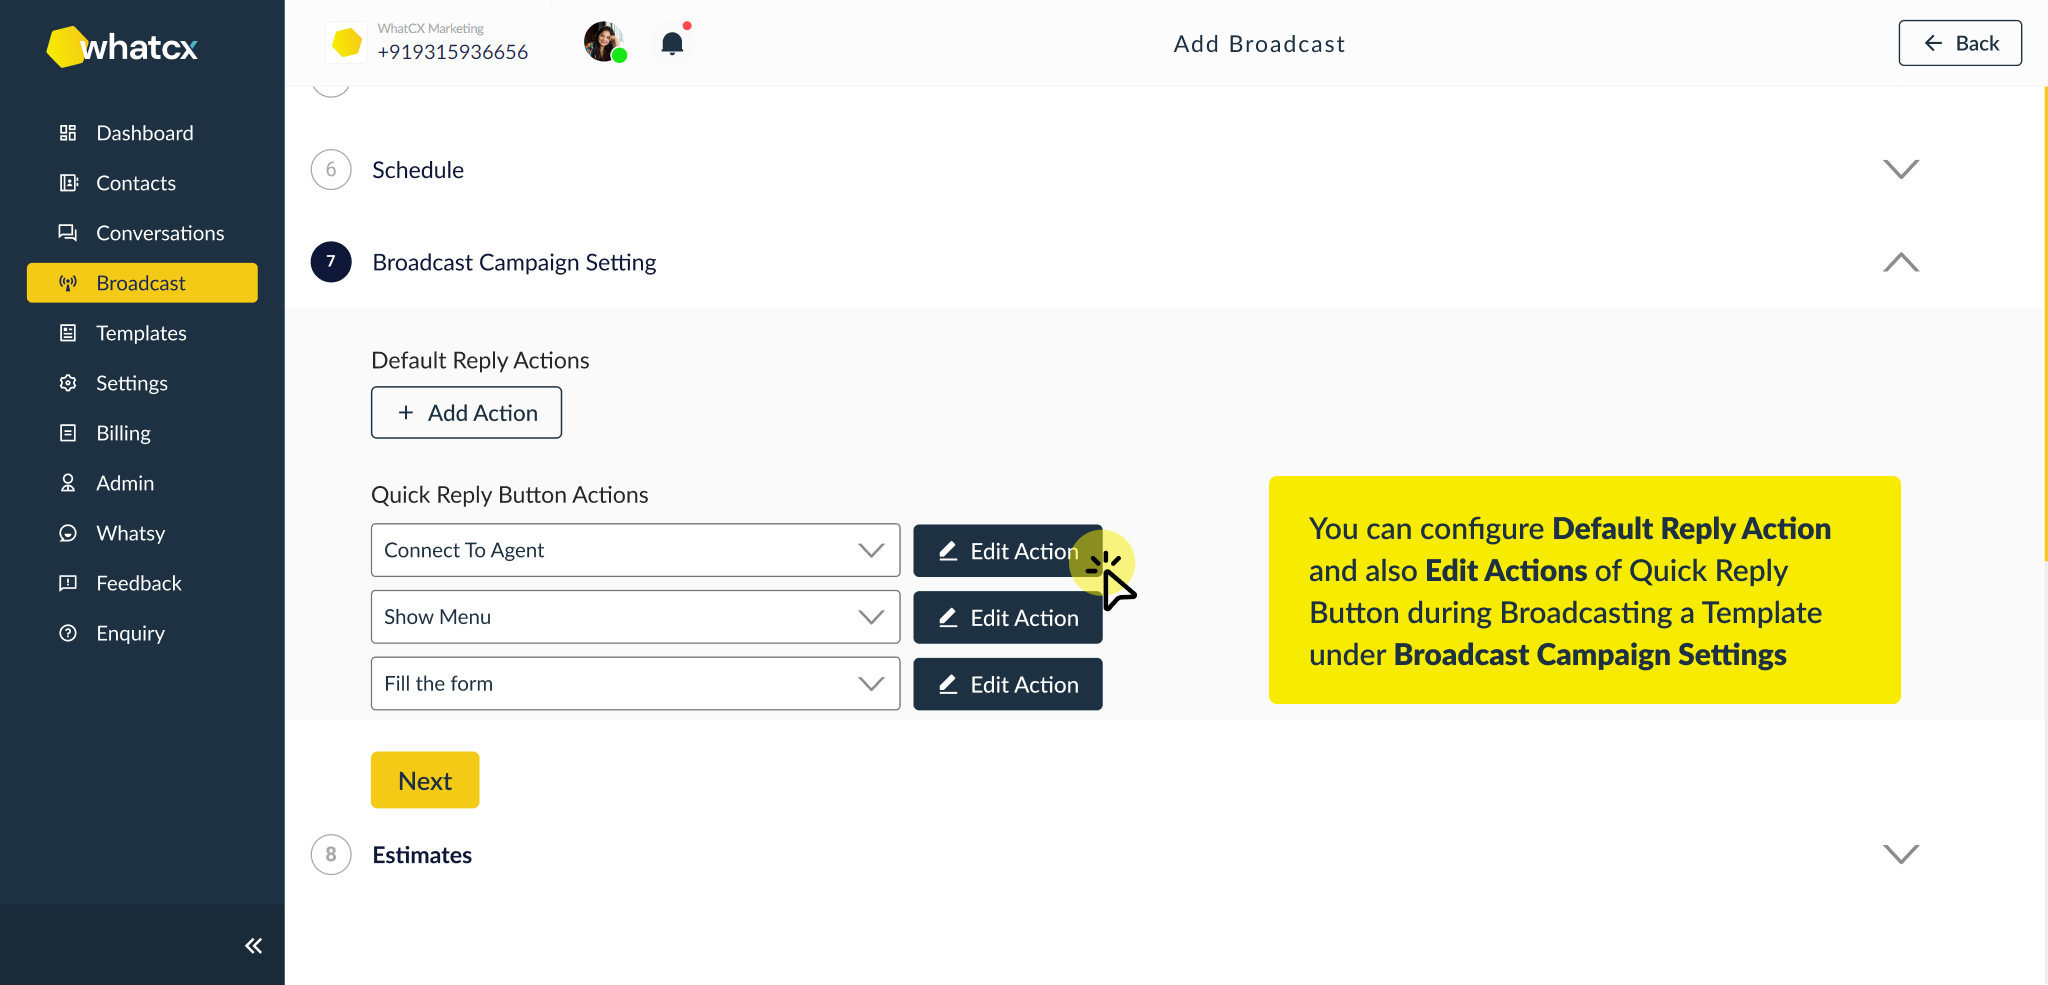
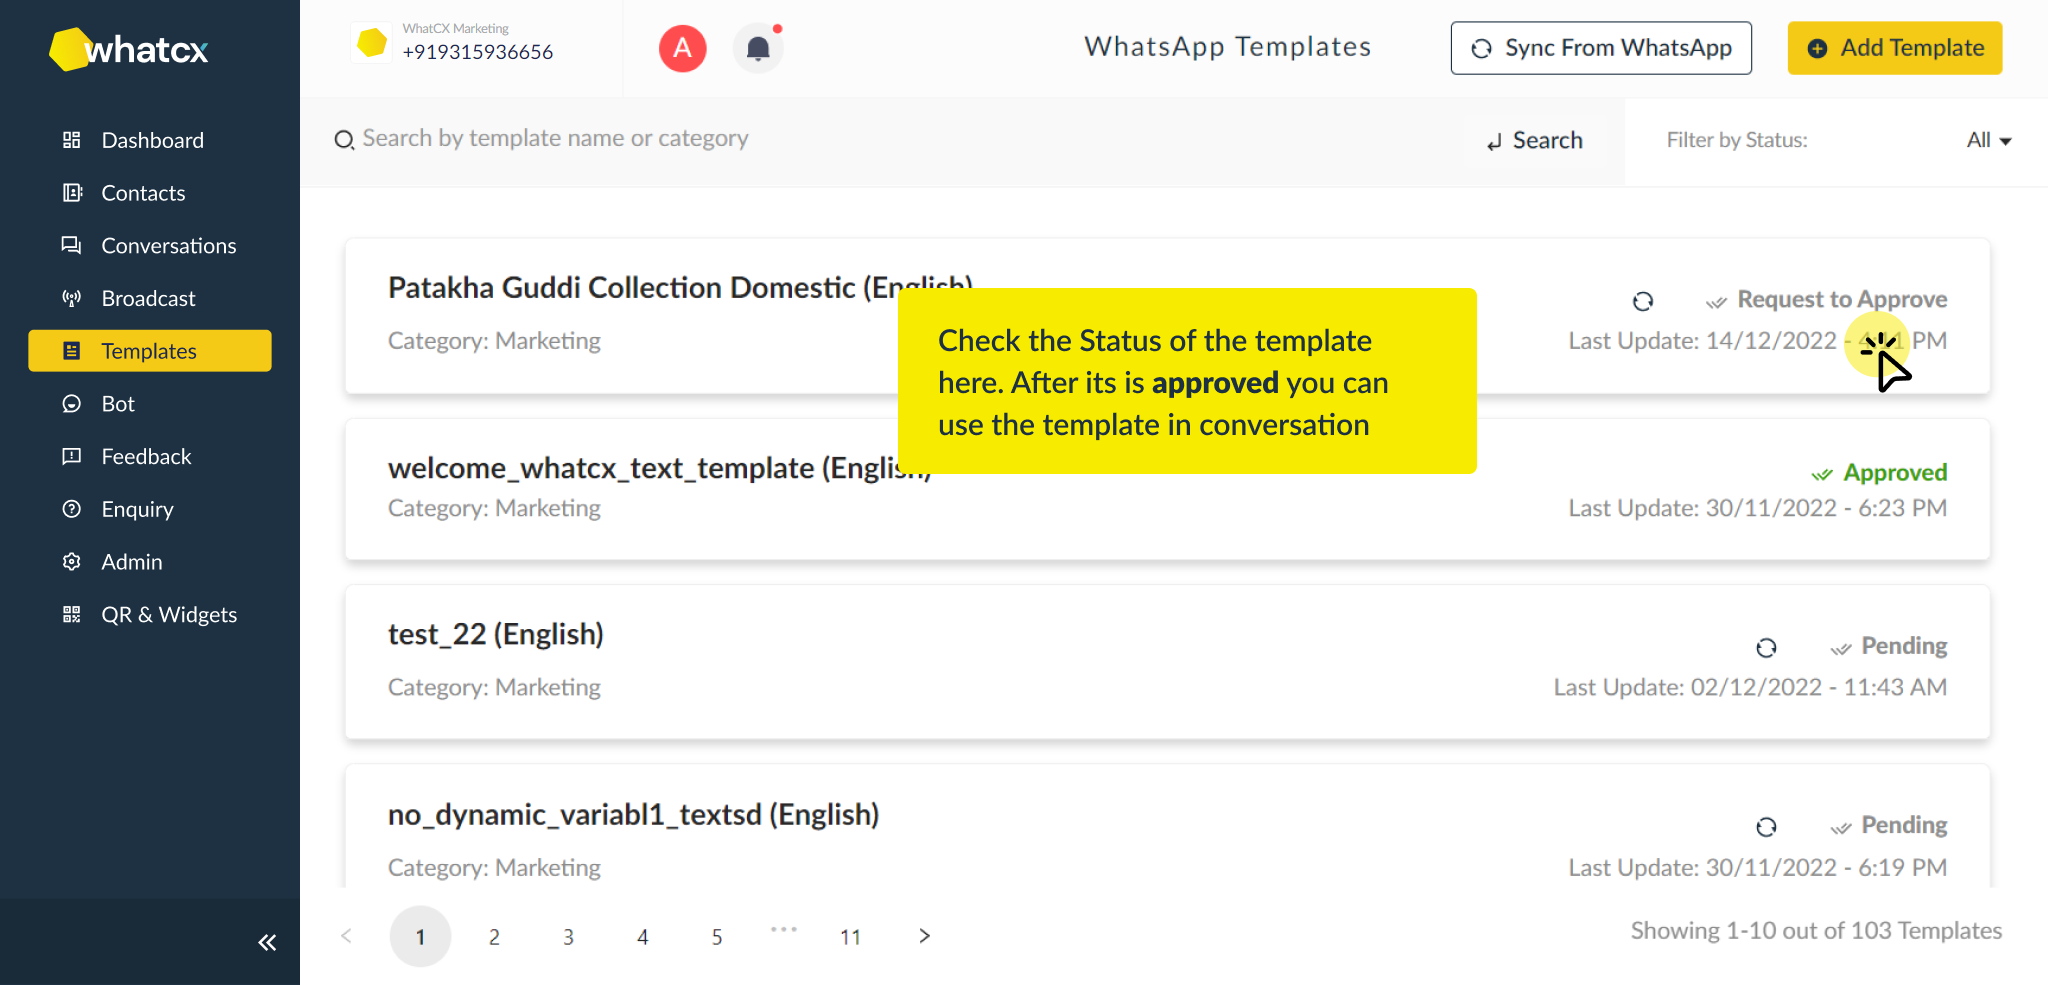
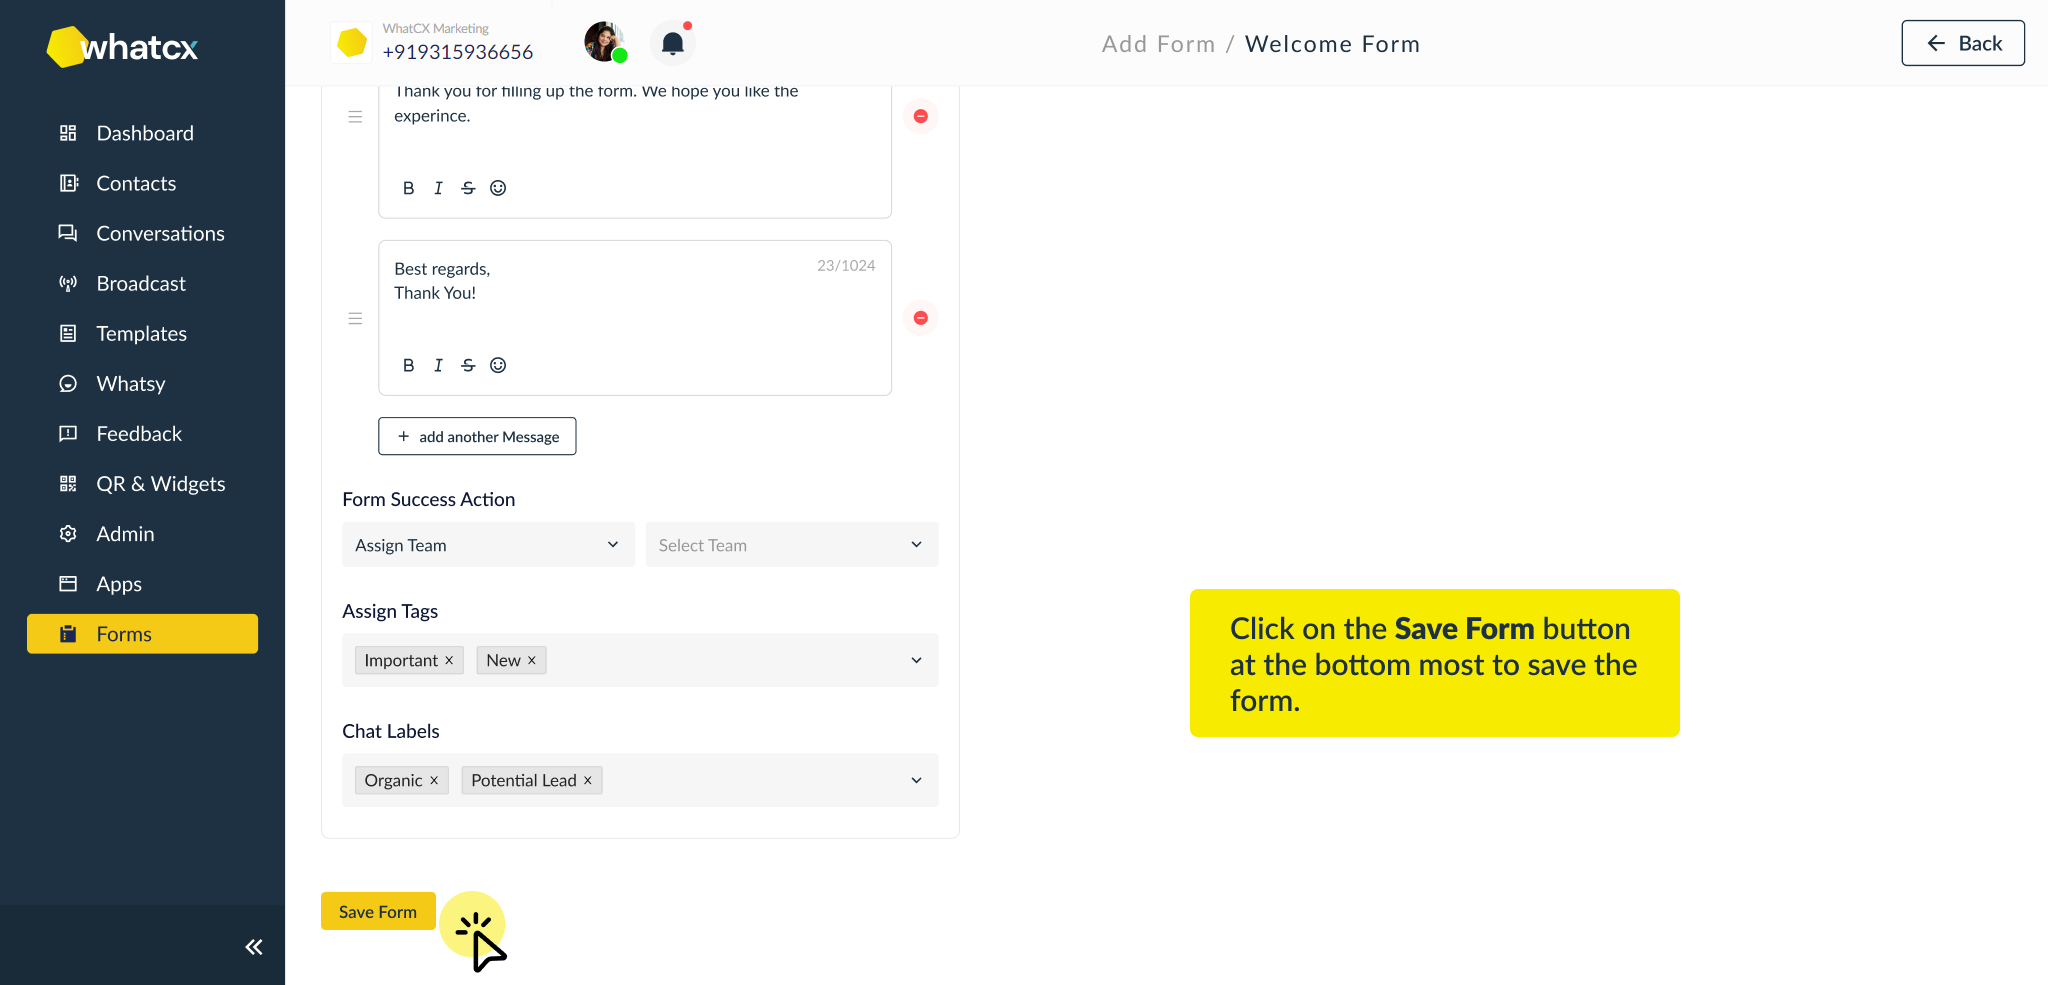
 9. Once you have set the Broadcast Campaign settings you will reach the final step which shows you the campaign estimate.
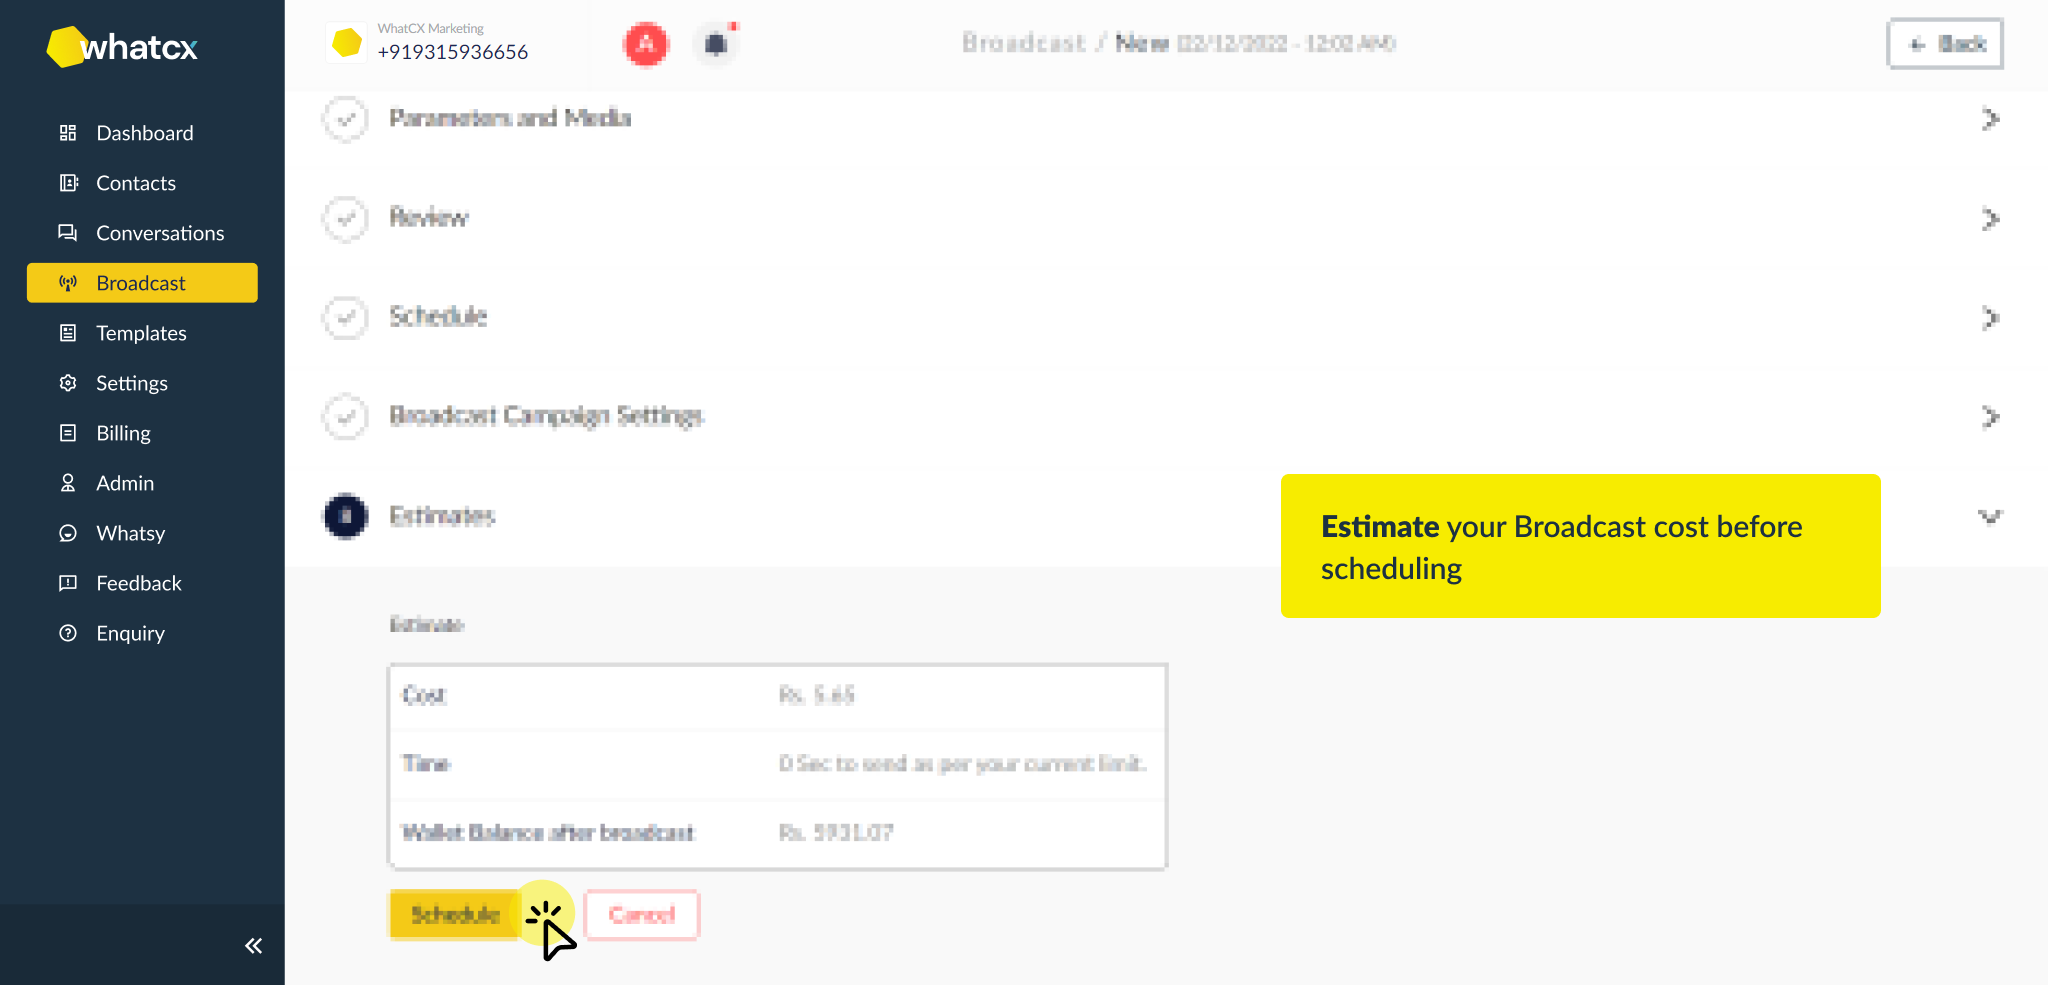


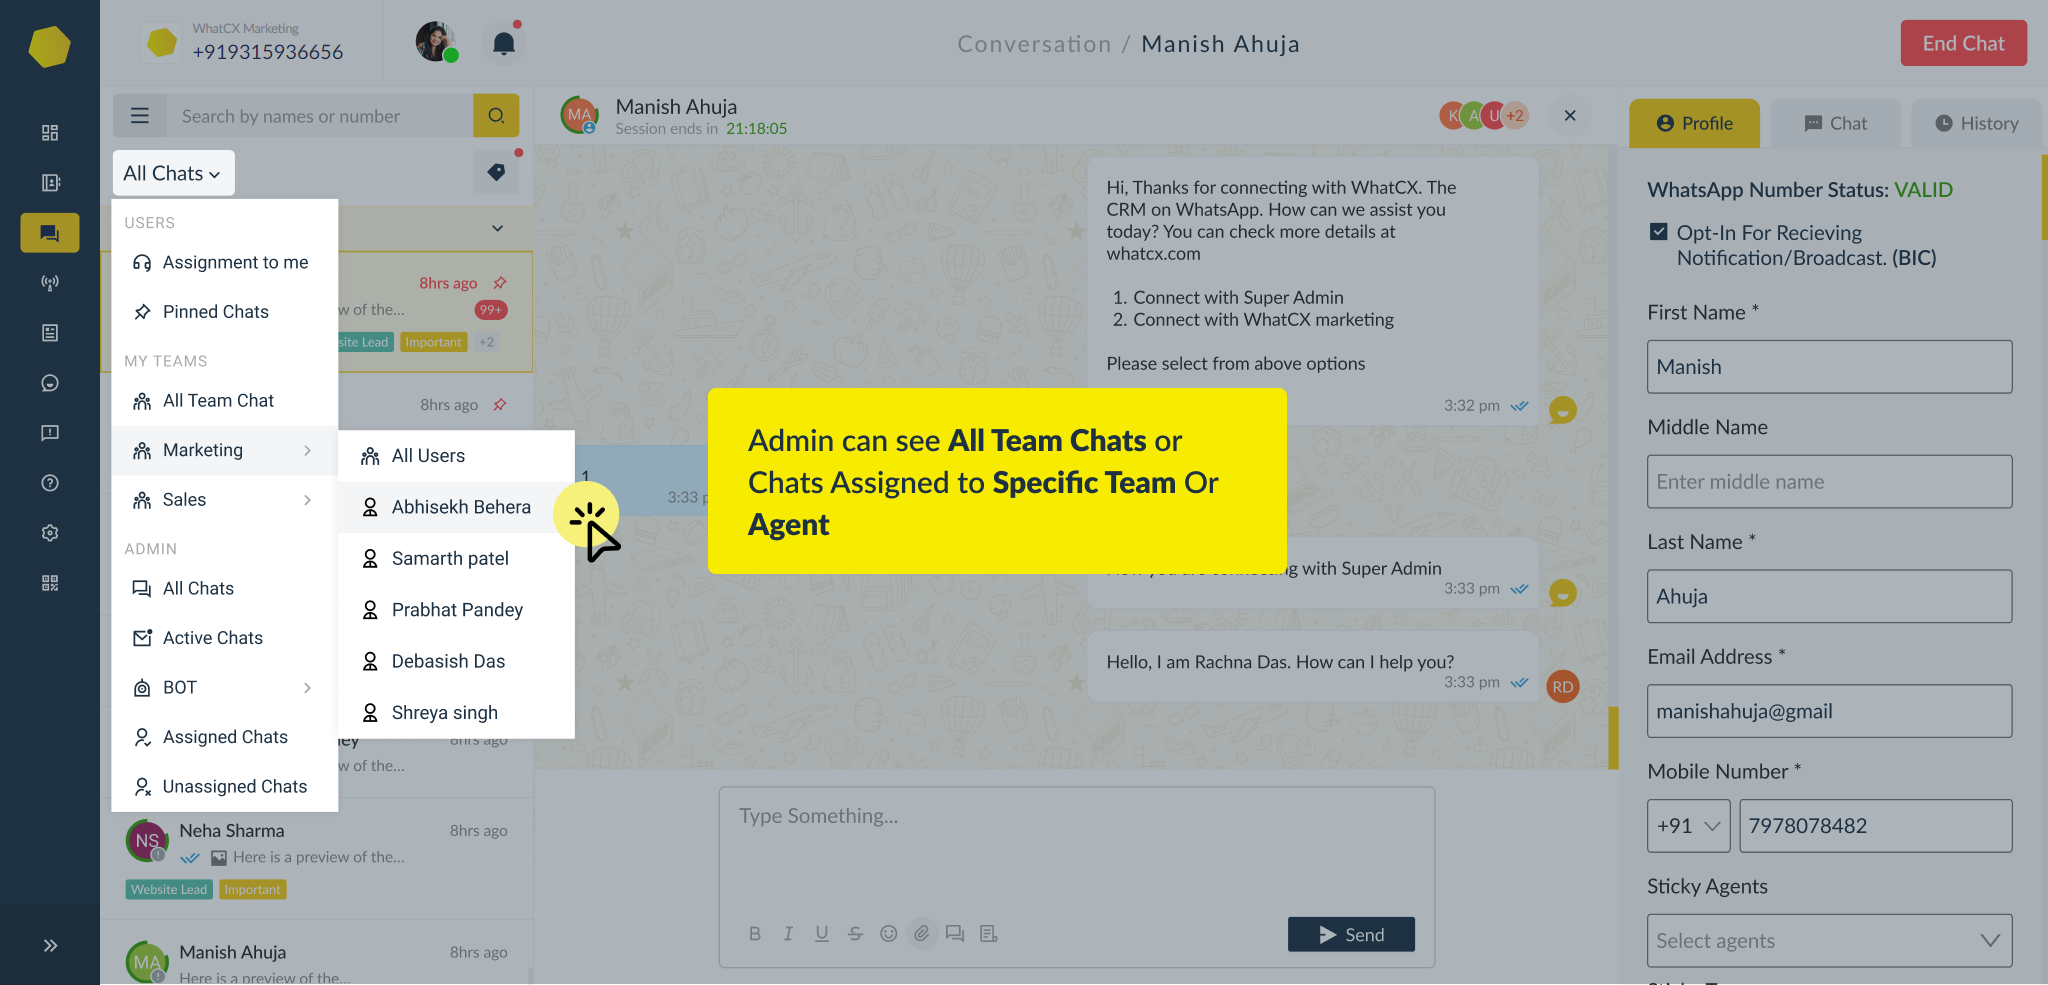
 2. Admins can check all Team chats and Agent Chats by clicking on ‘All Chats’
 3. You can use chat filters like Active Chat sessions, Assigned chats, Unassigned chats
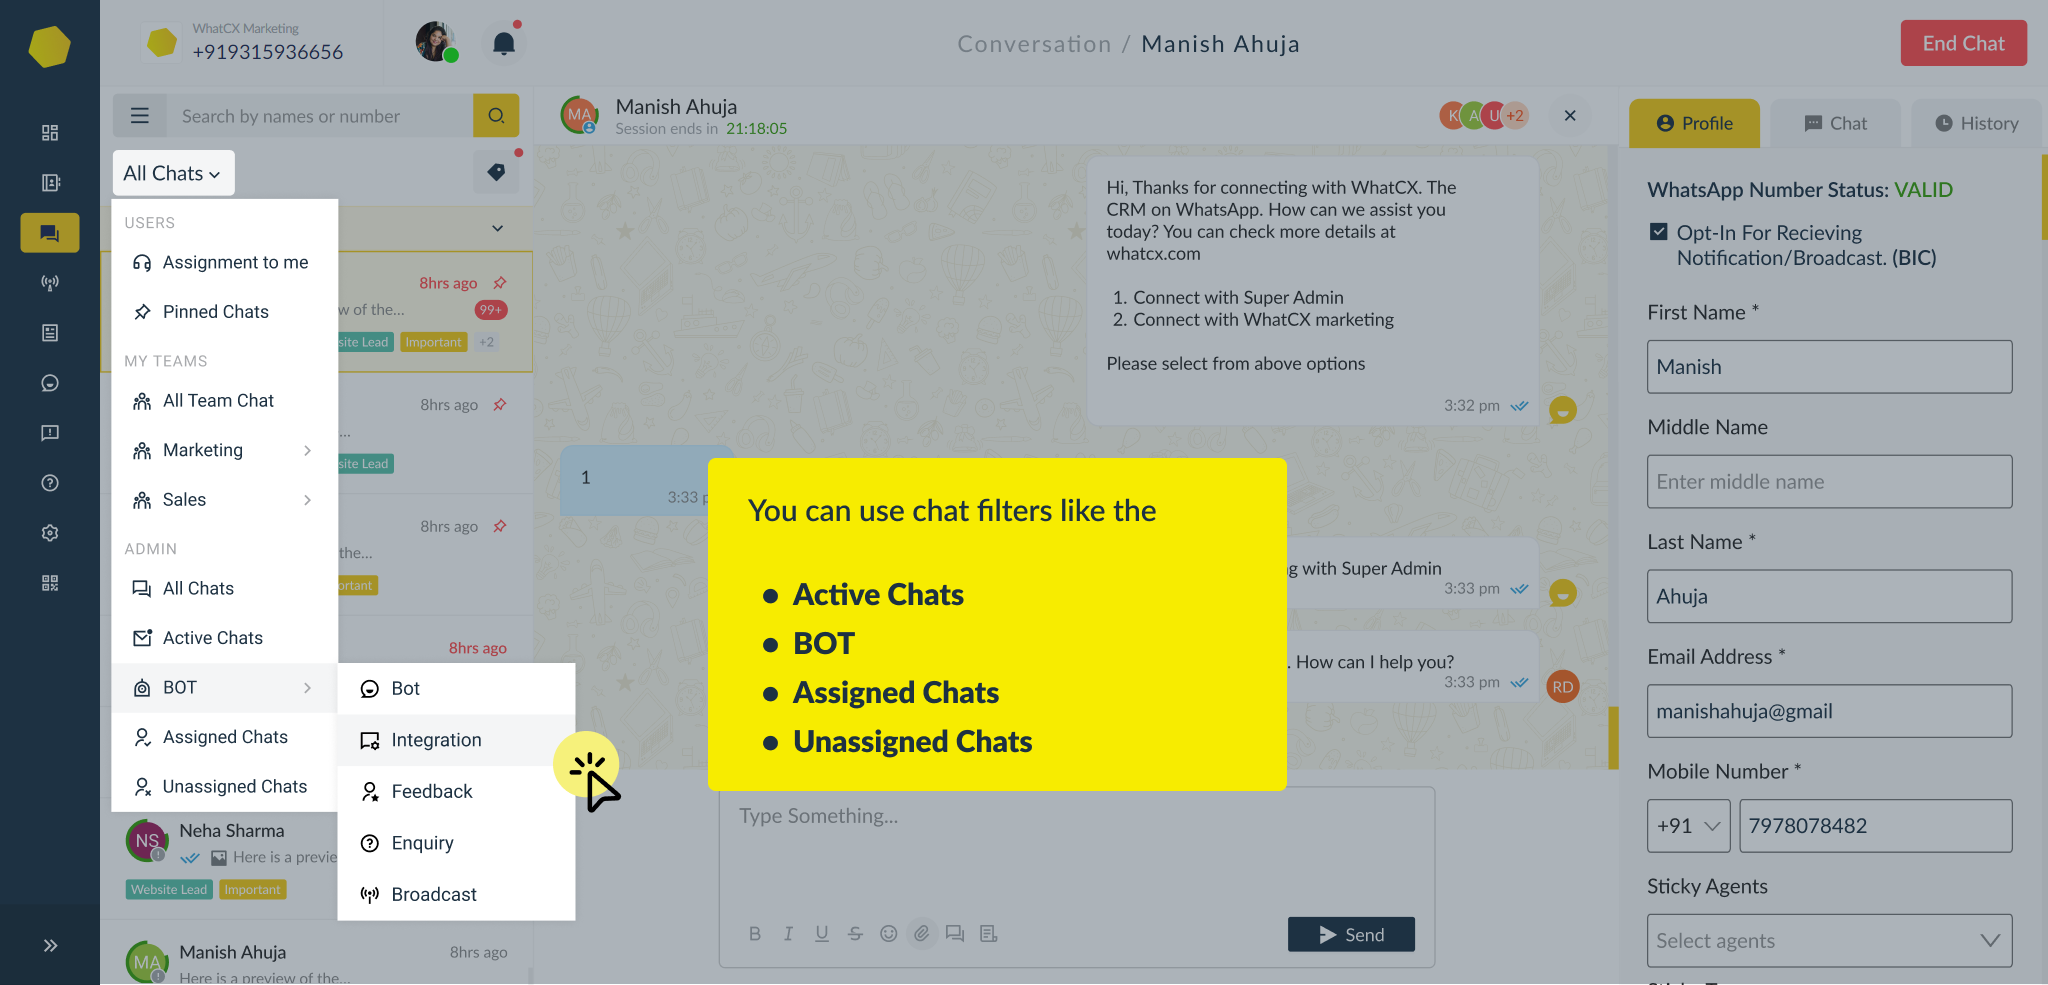

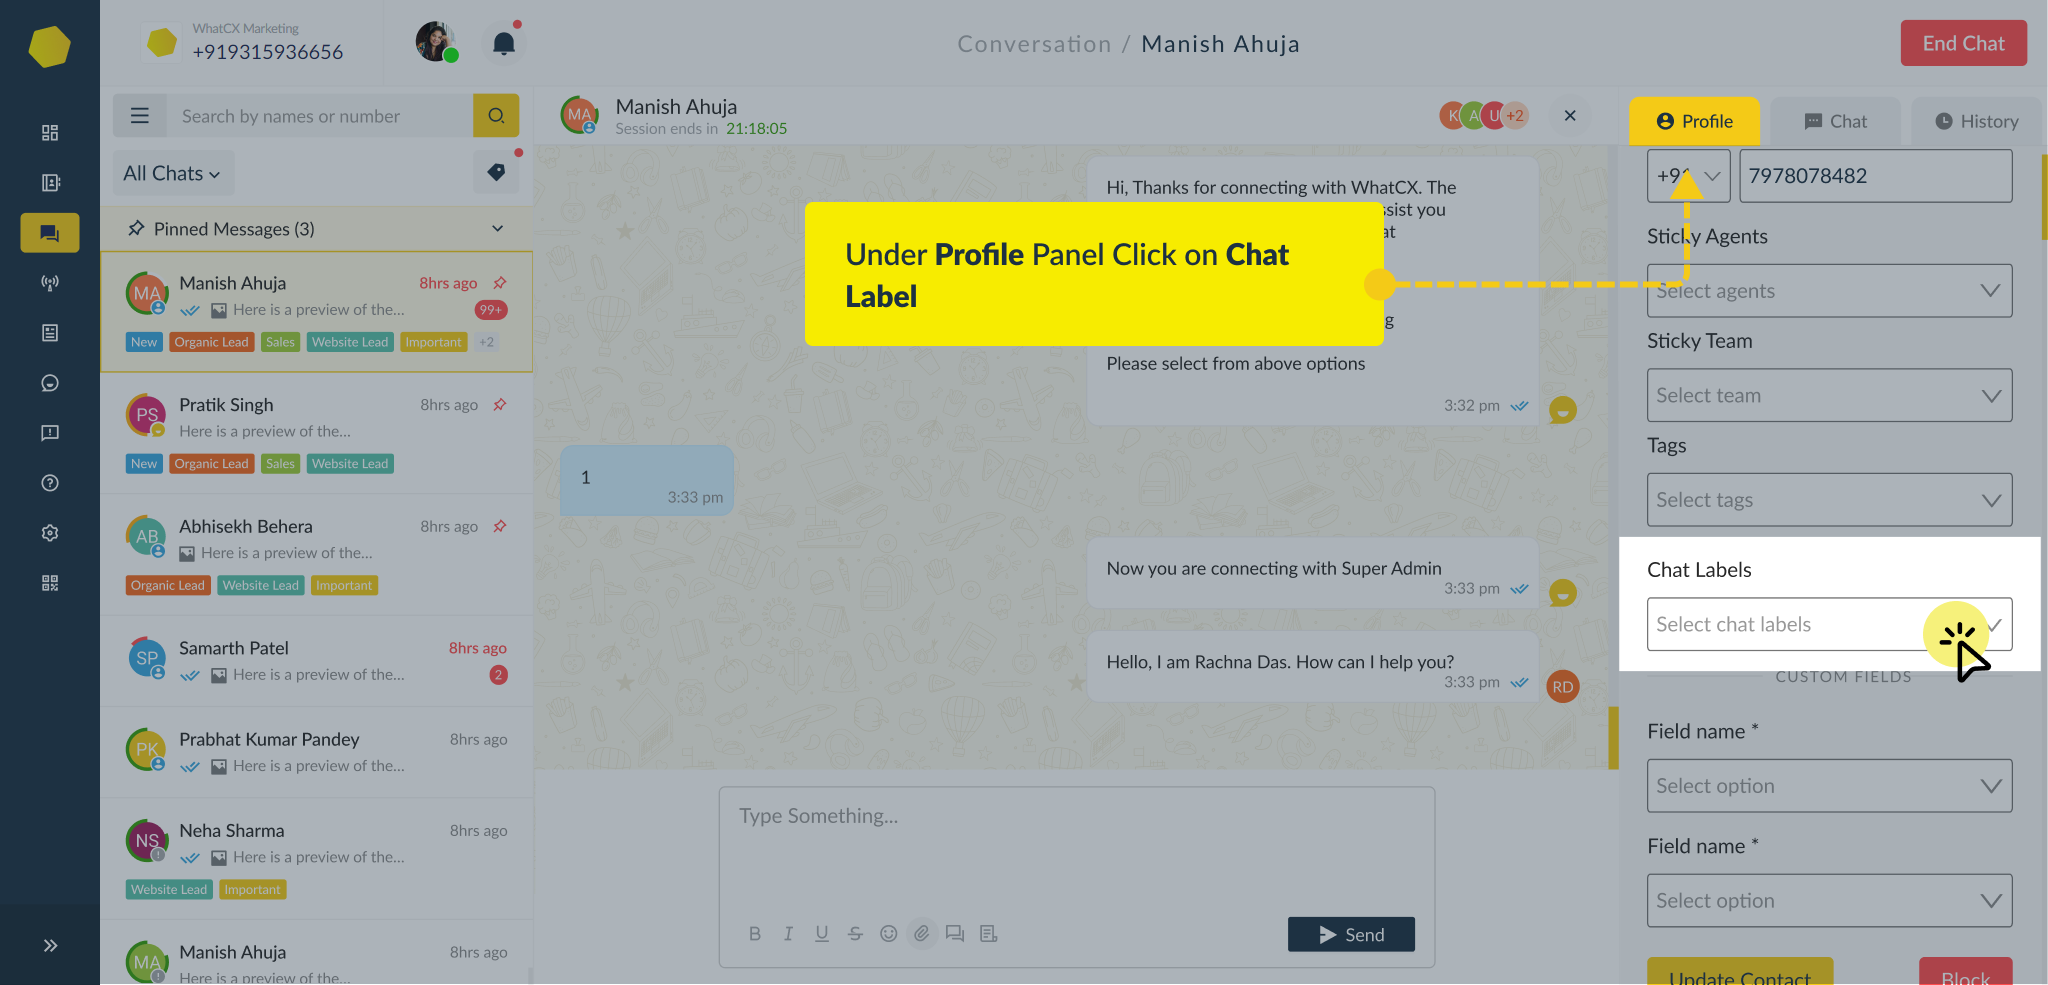
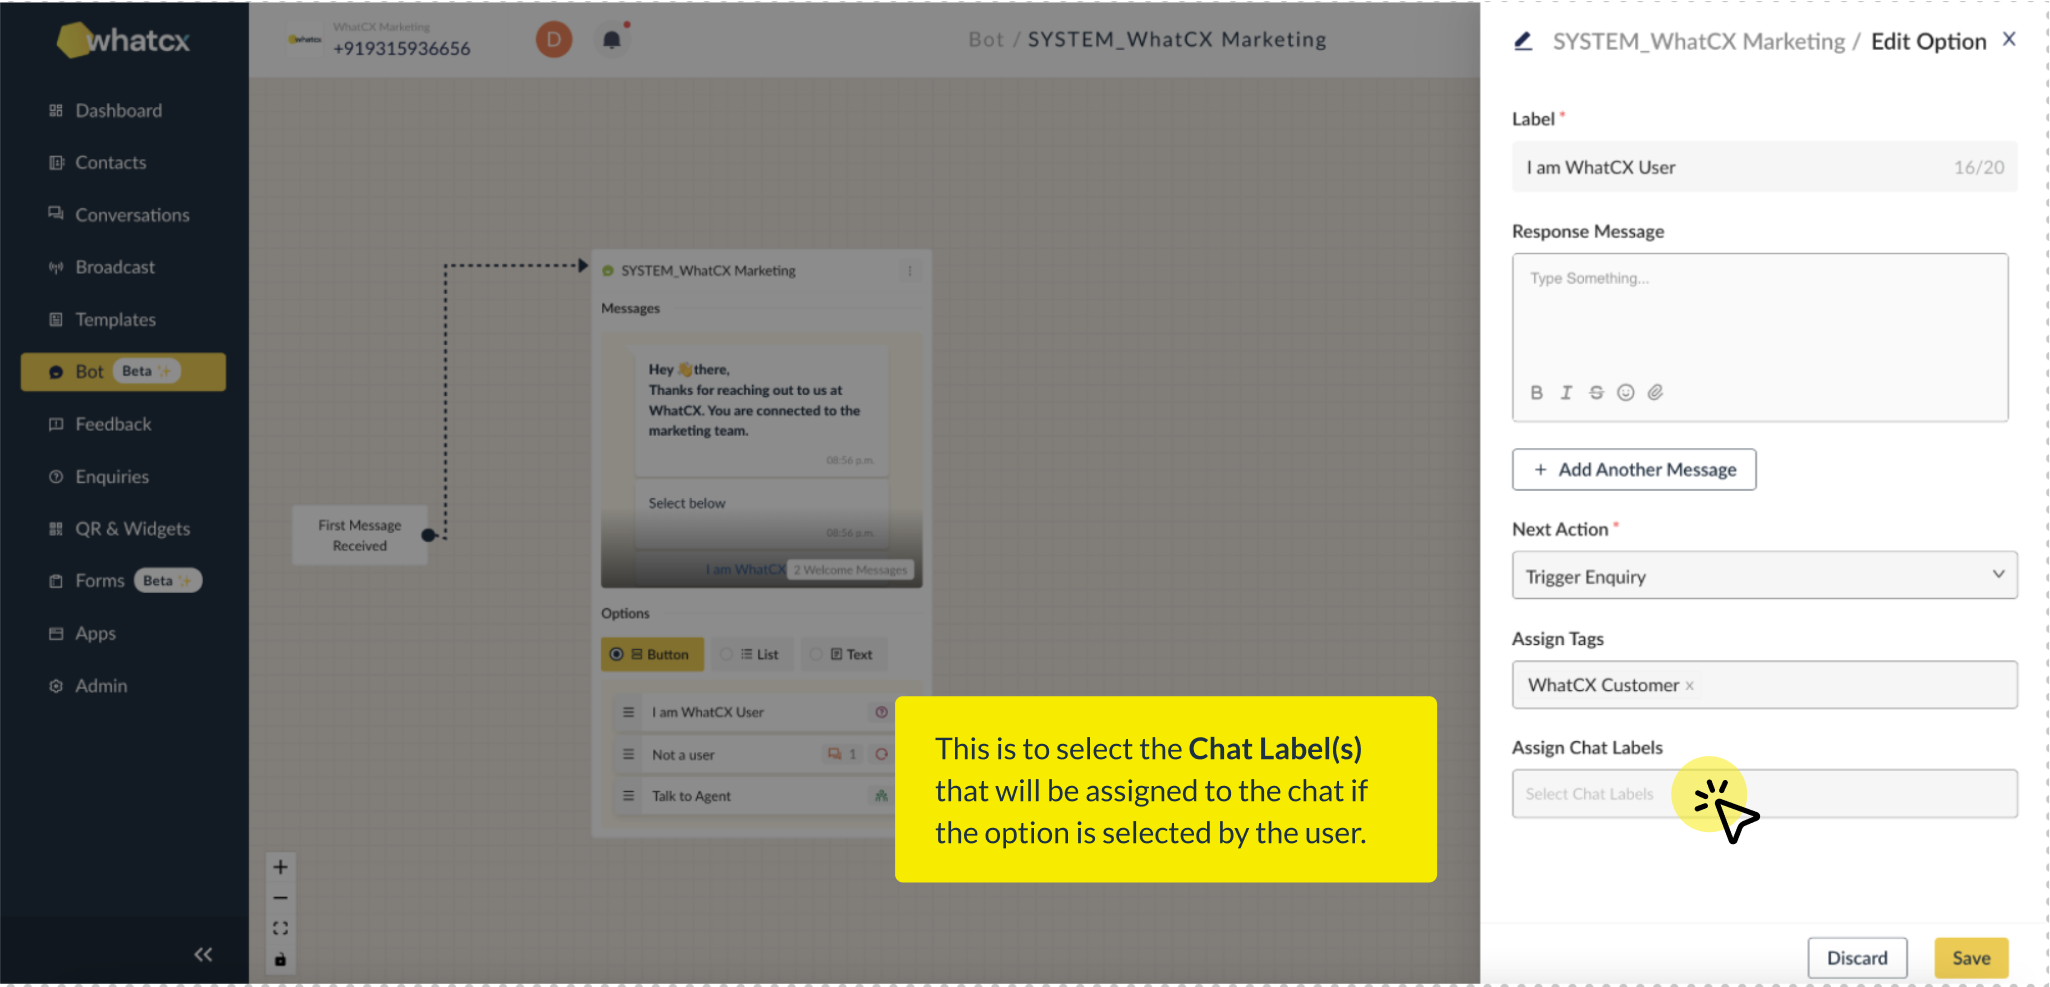
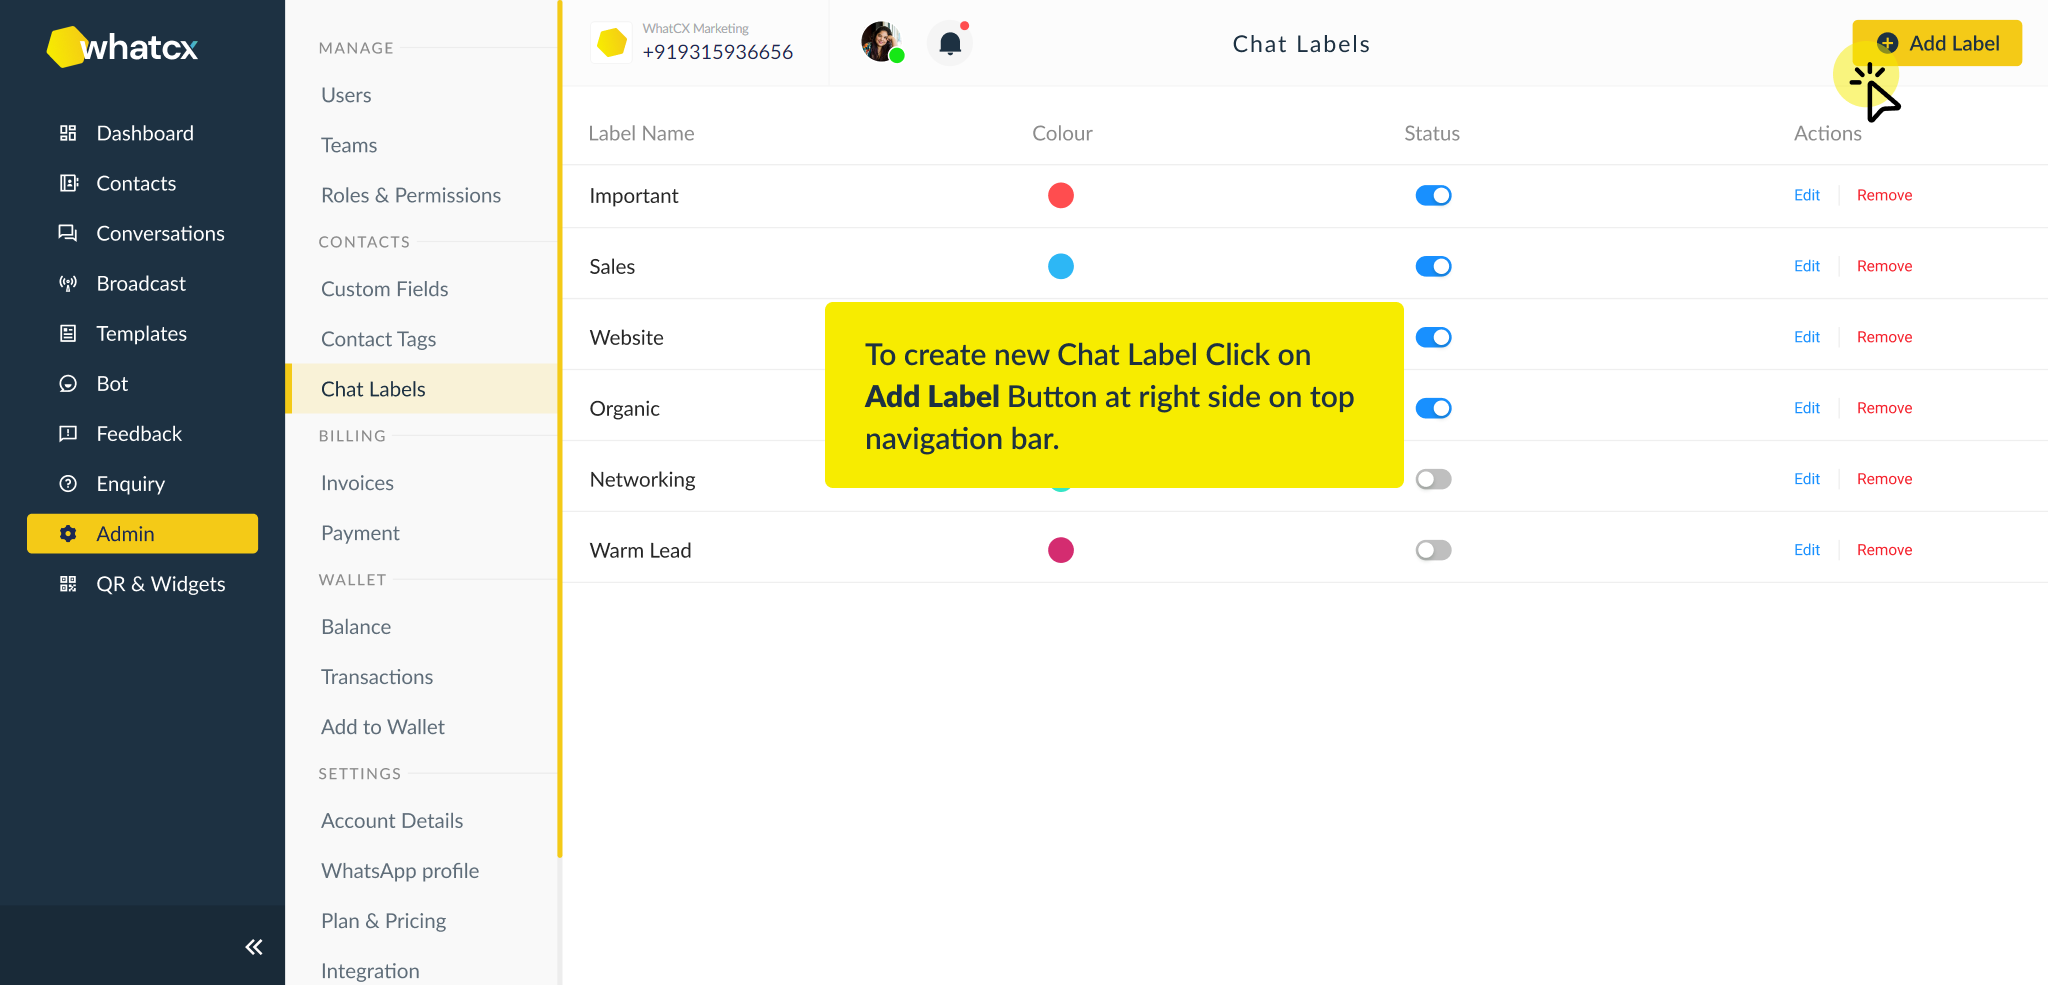 3. Click on Add Label, Give your Chat Label a Title. It could be anything depending on your business needs. You can choose the Label colour by clicking on ‘Color’ and then Click ‘Create Label’
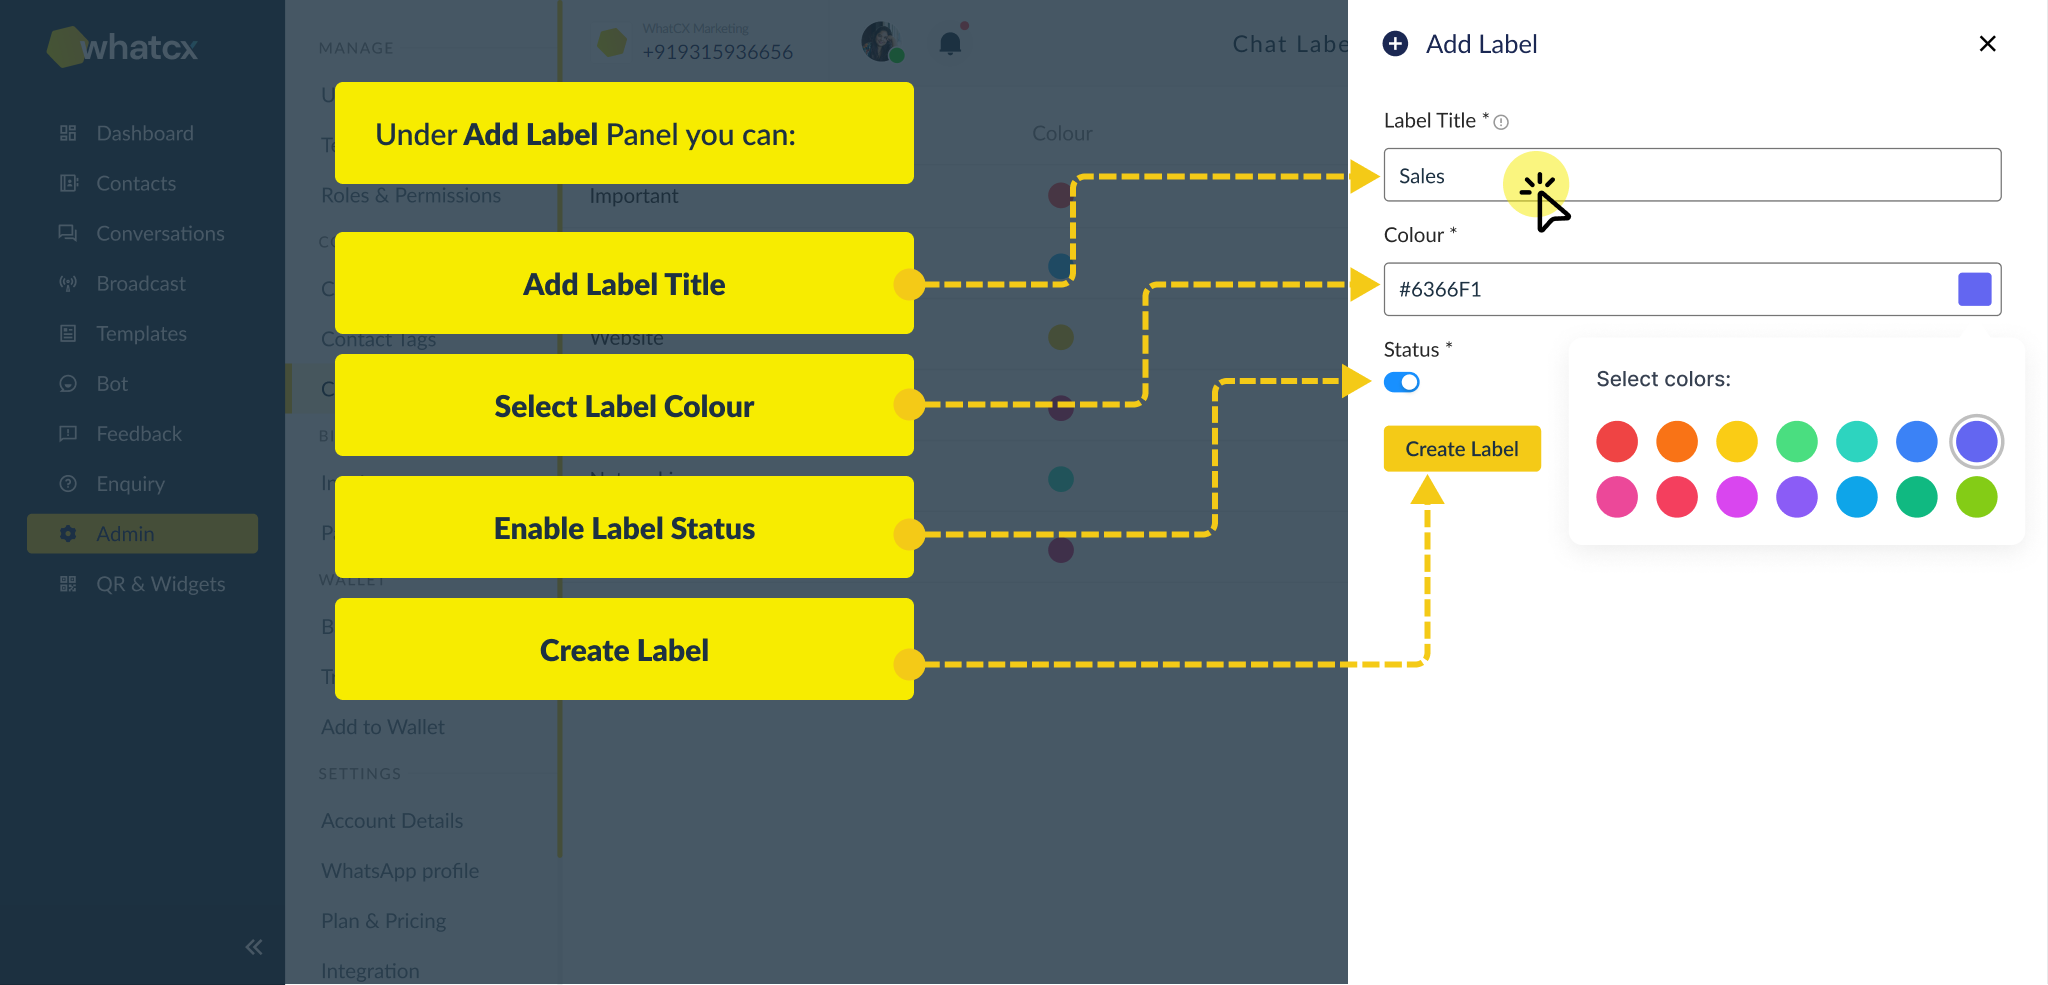
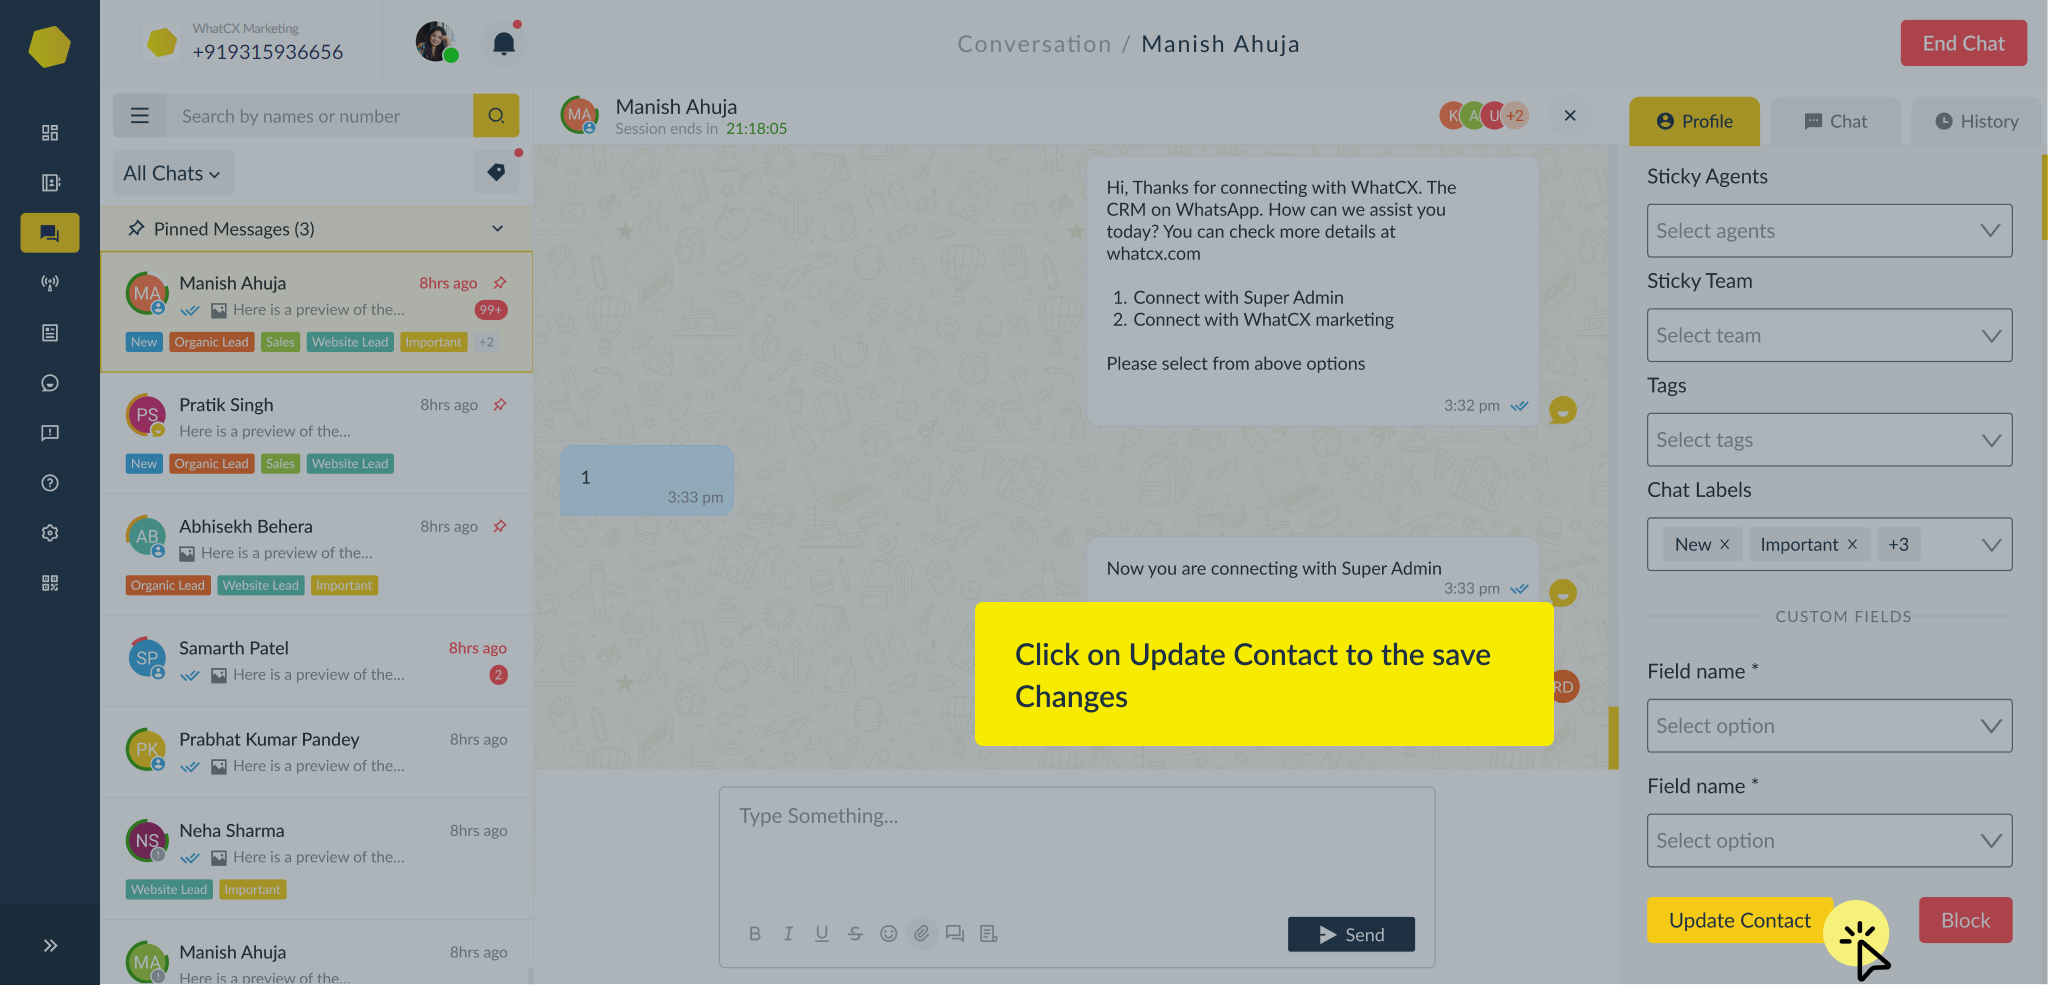
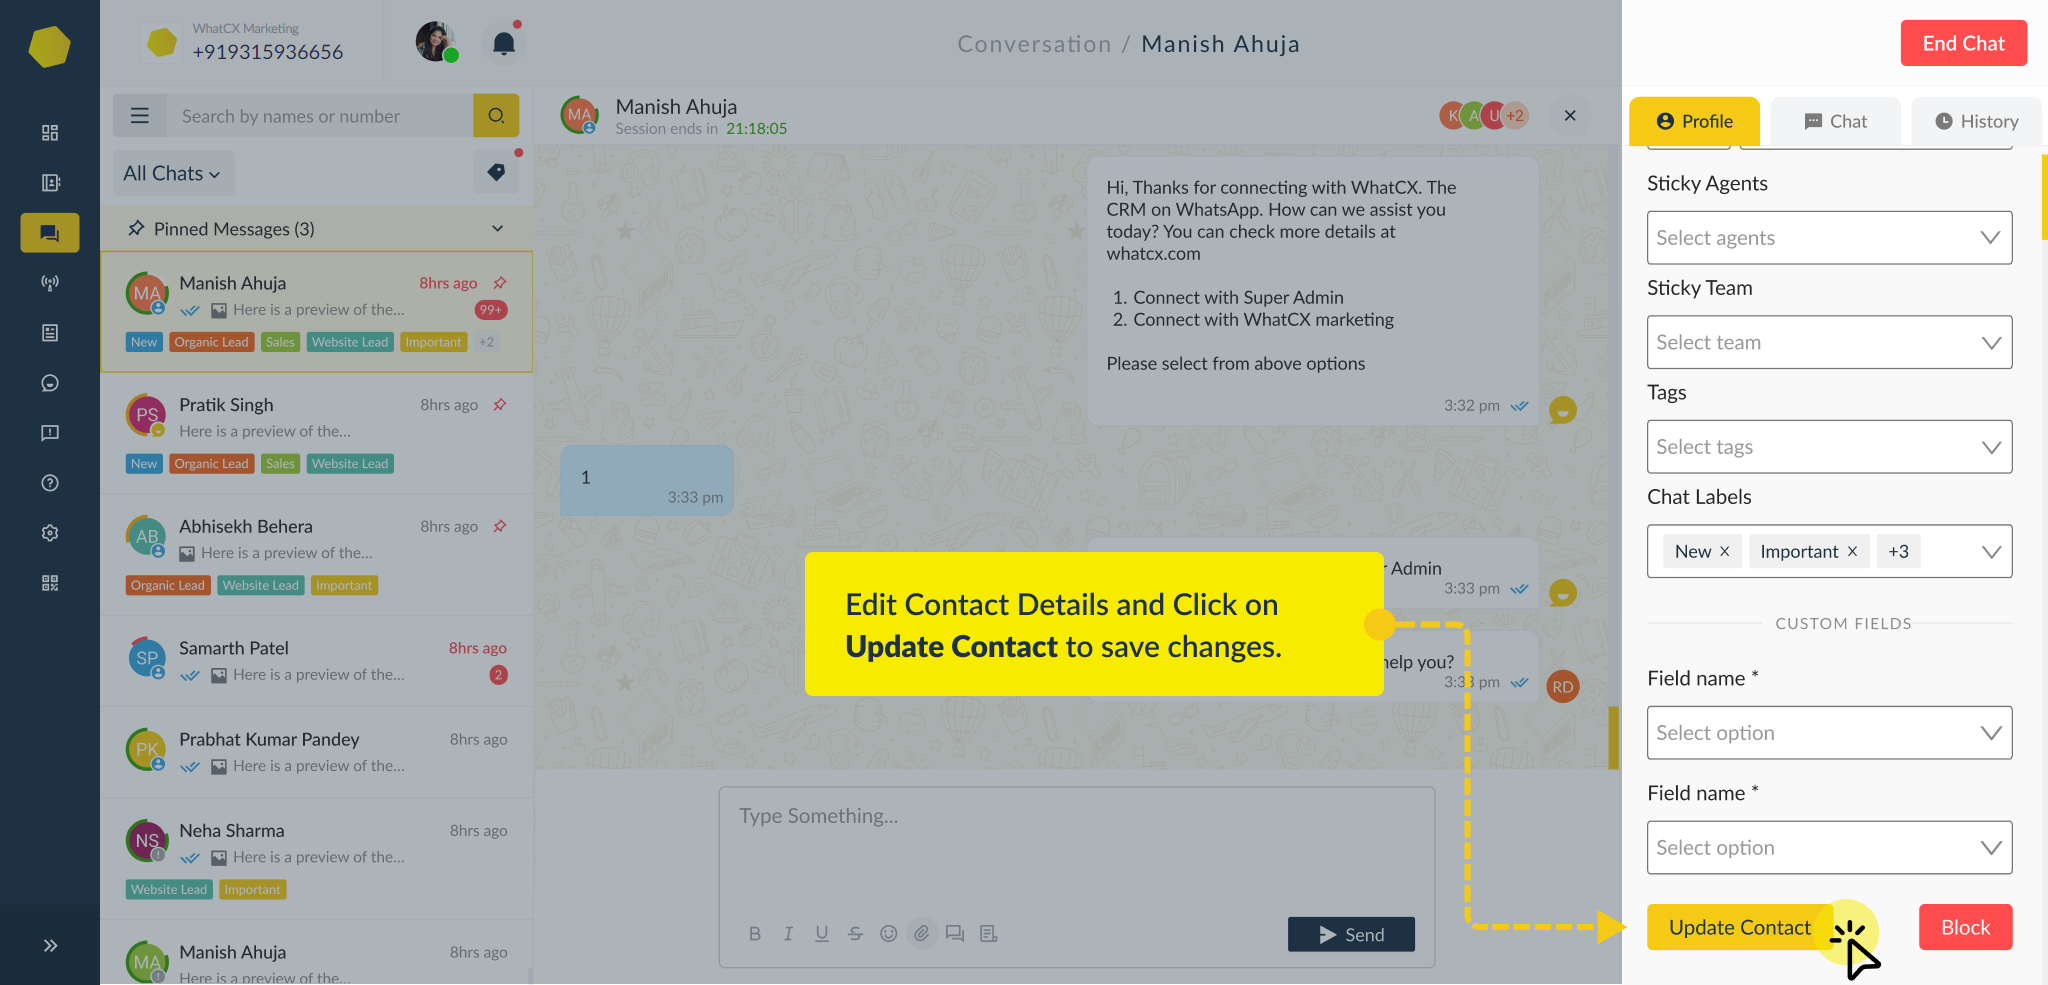
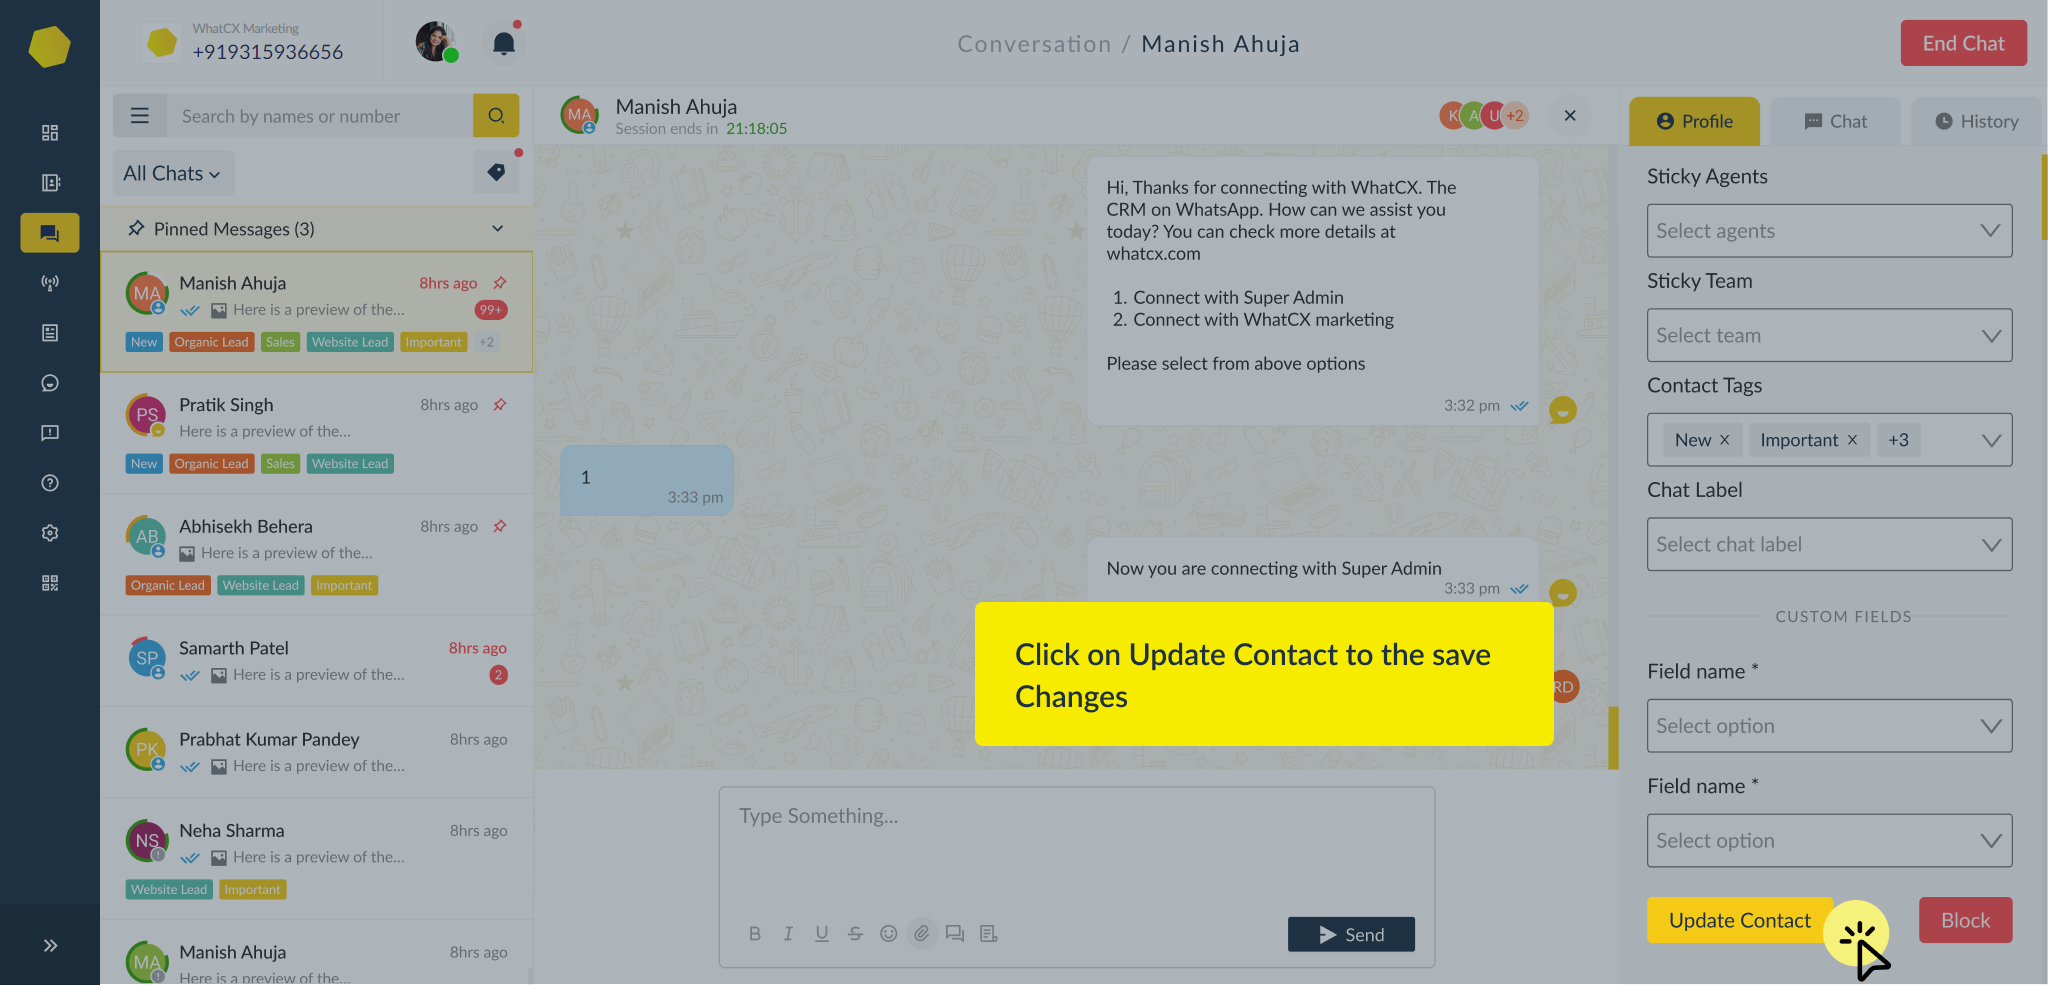
 3. Fill in the customer details and click on Update Contact
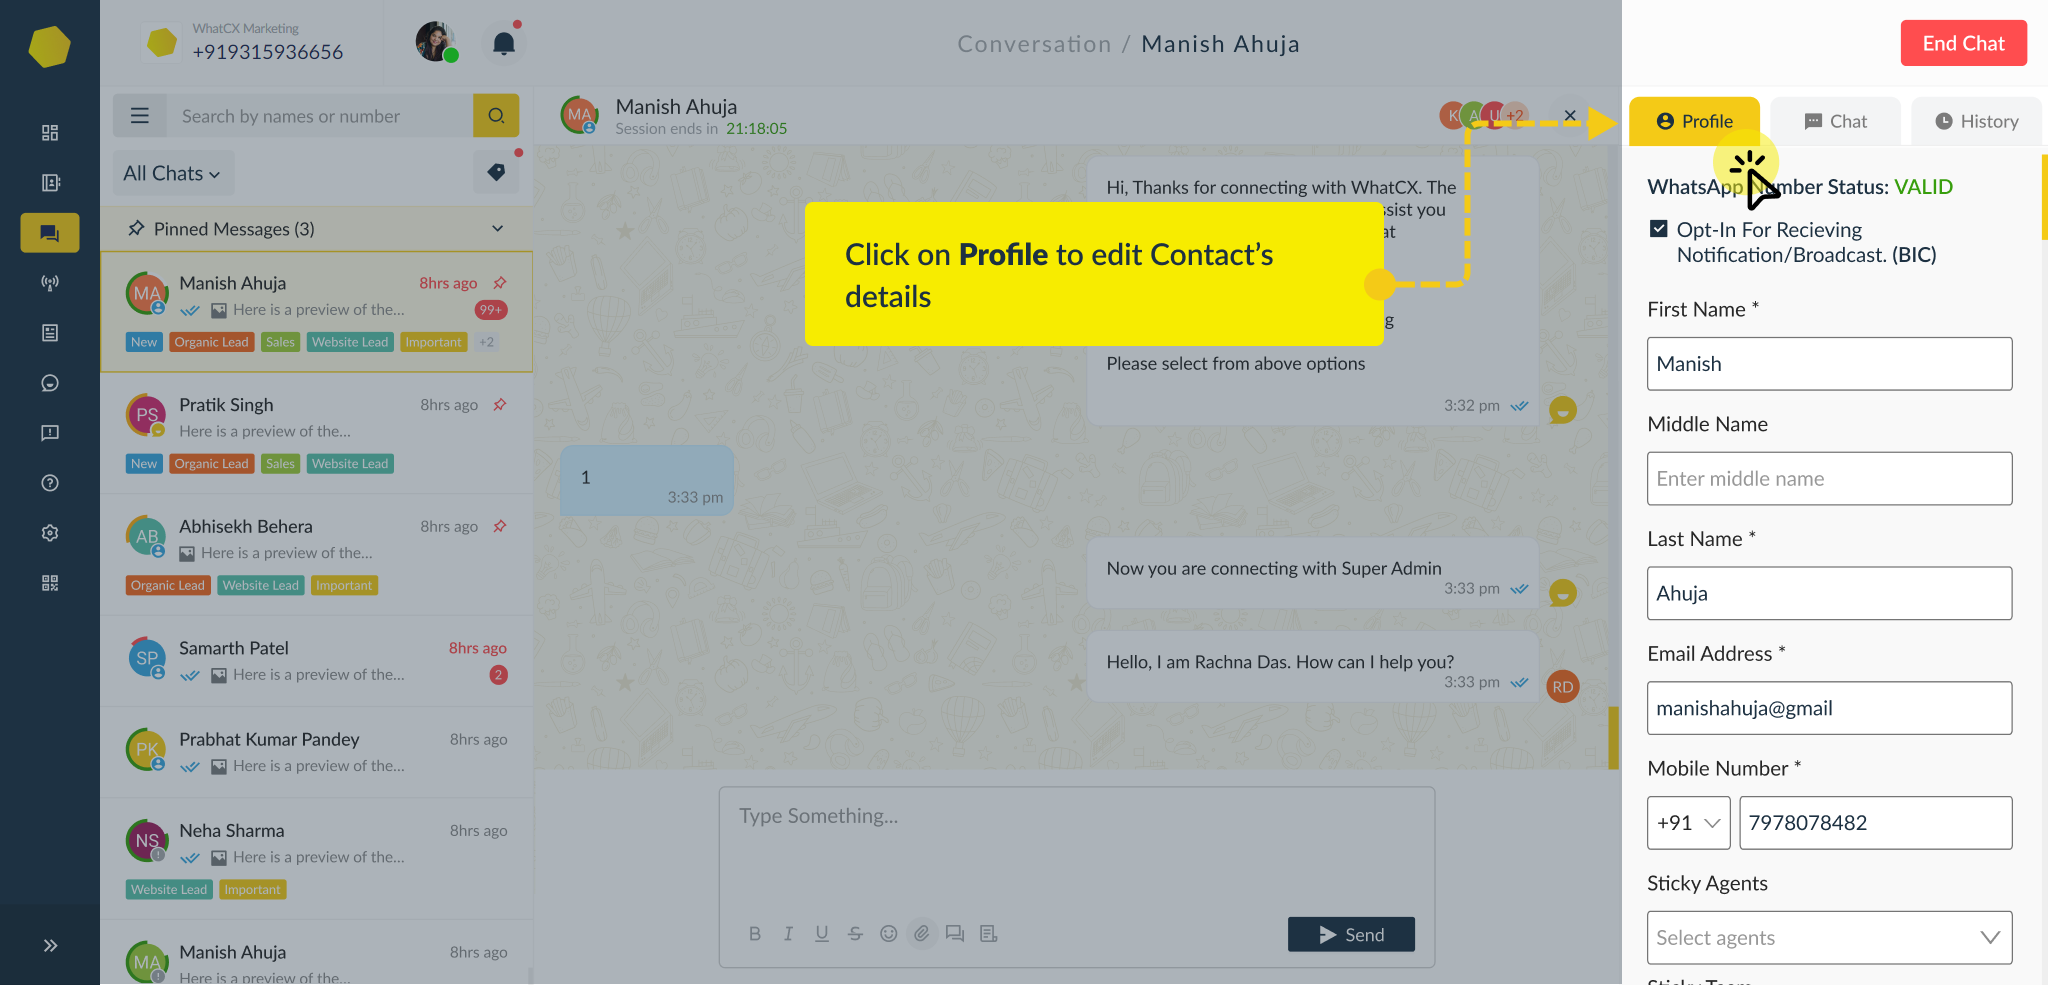
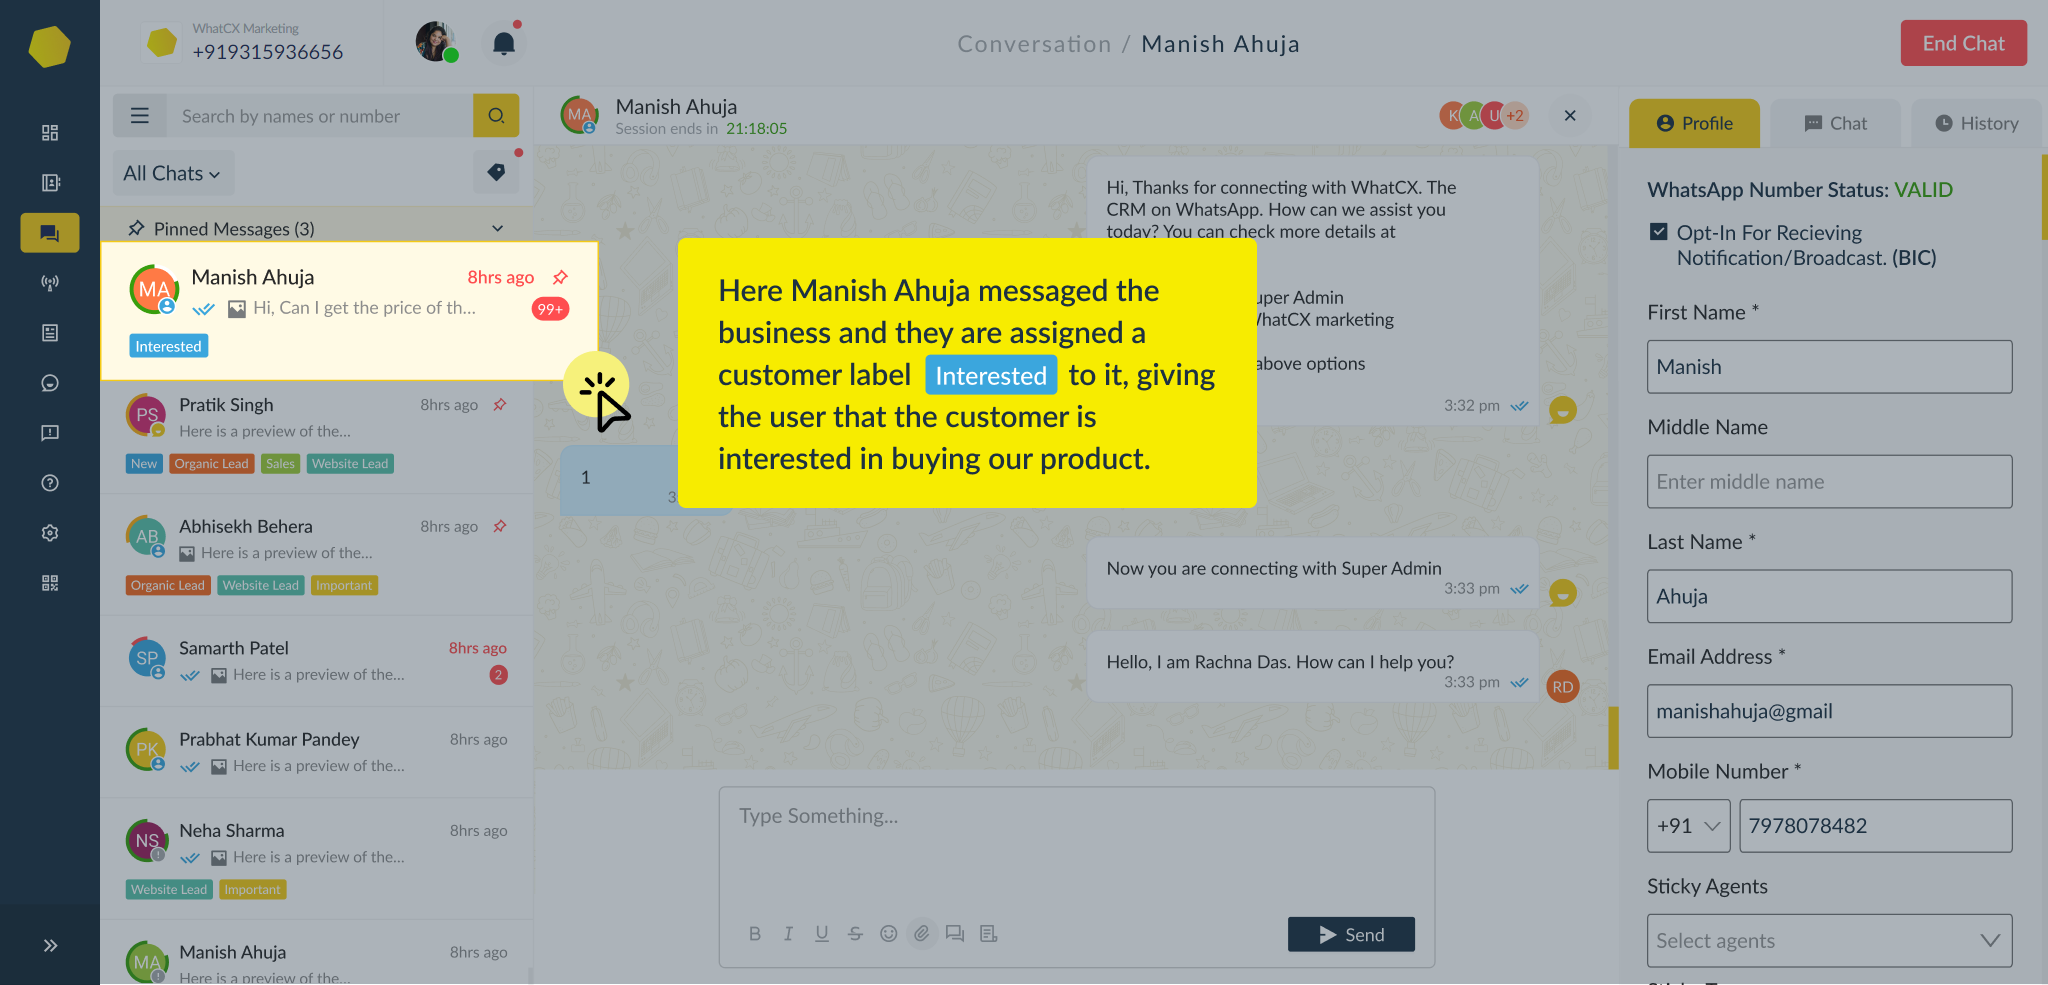
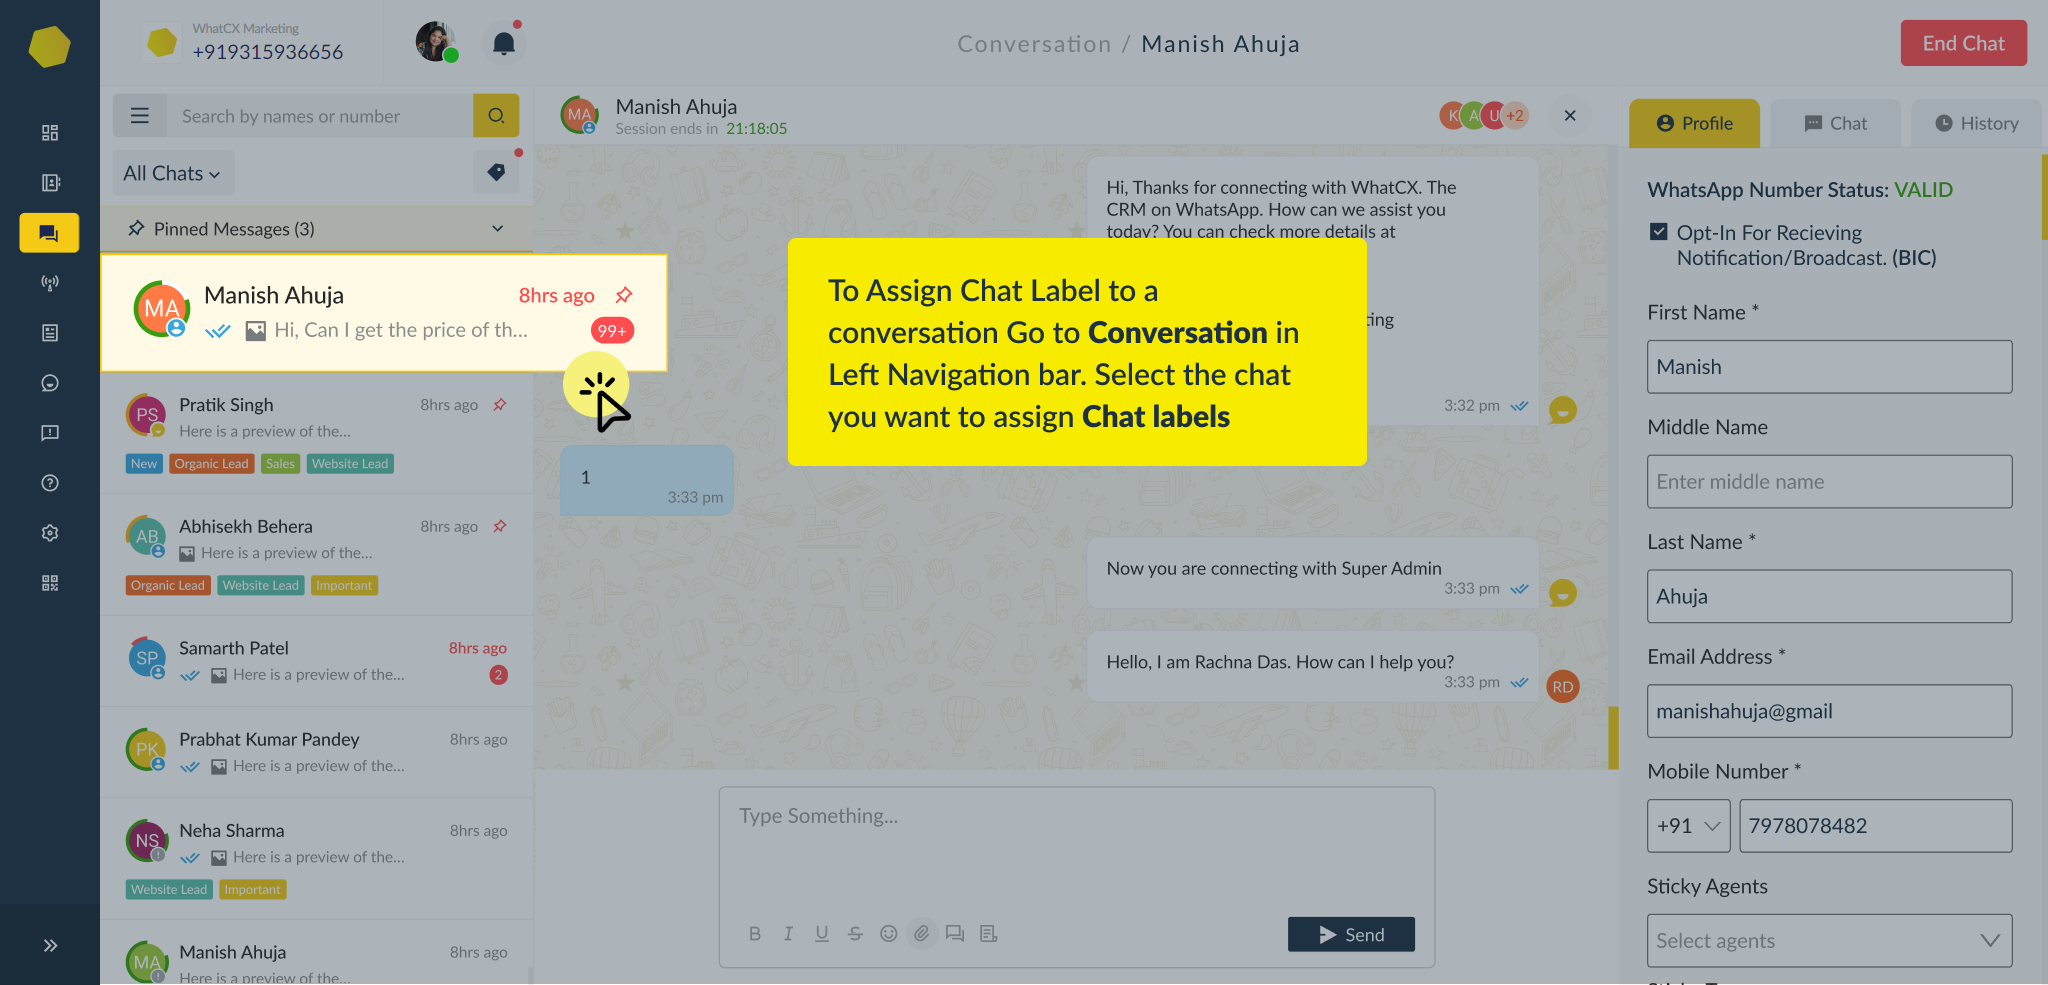
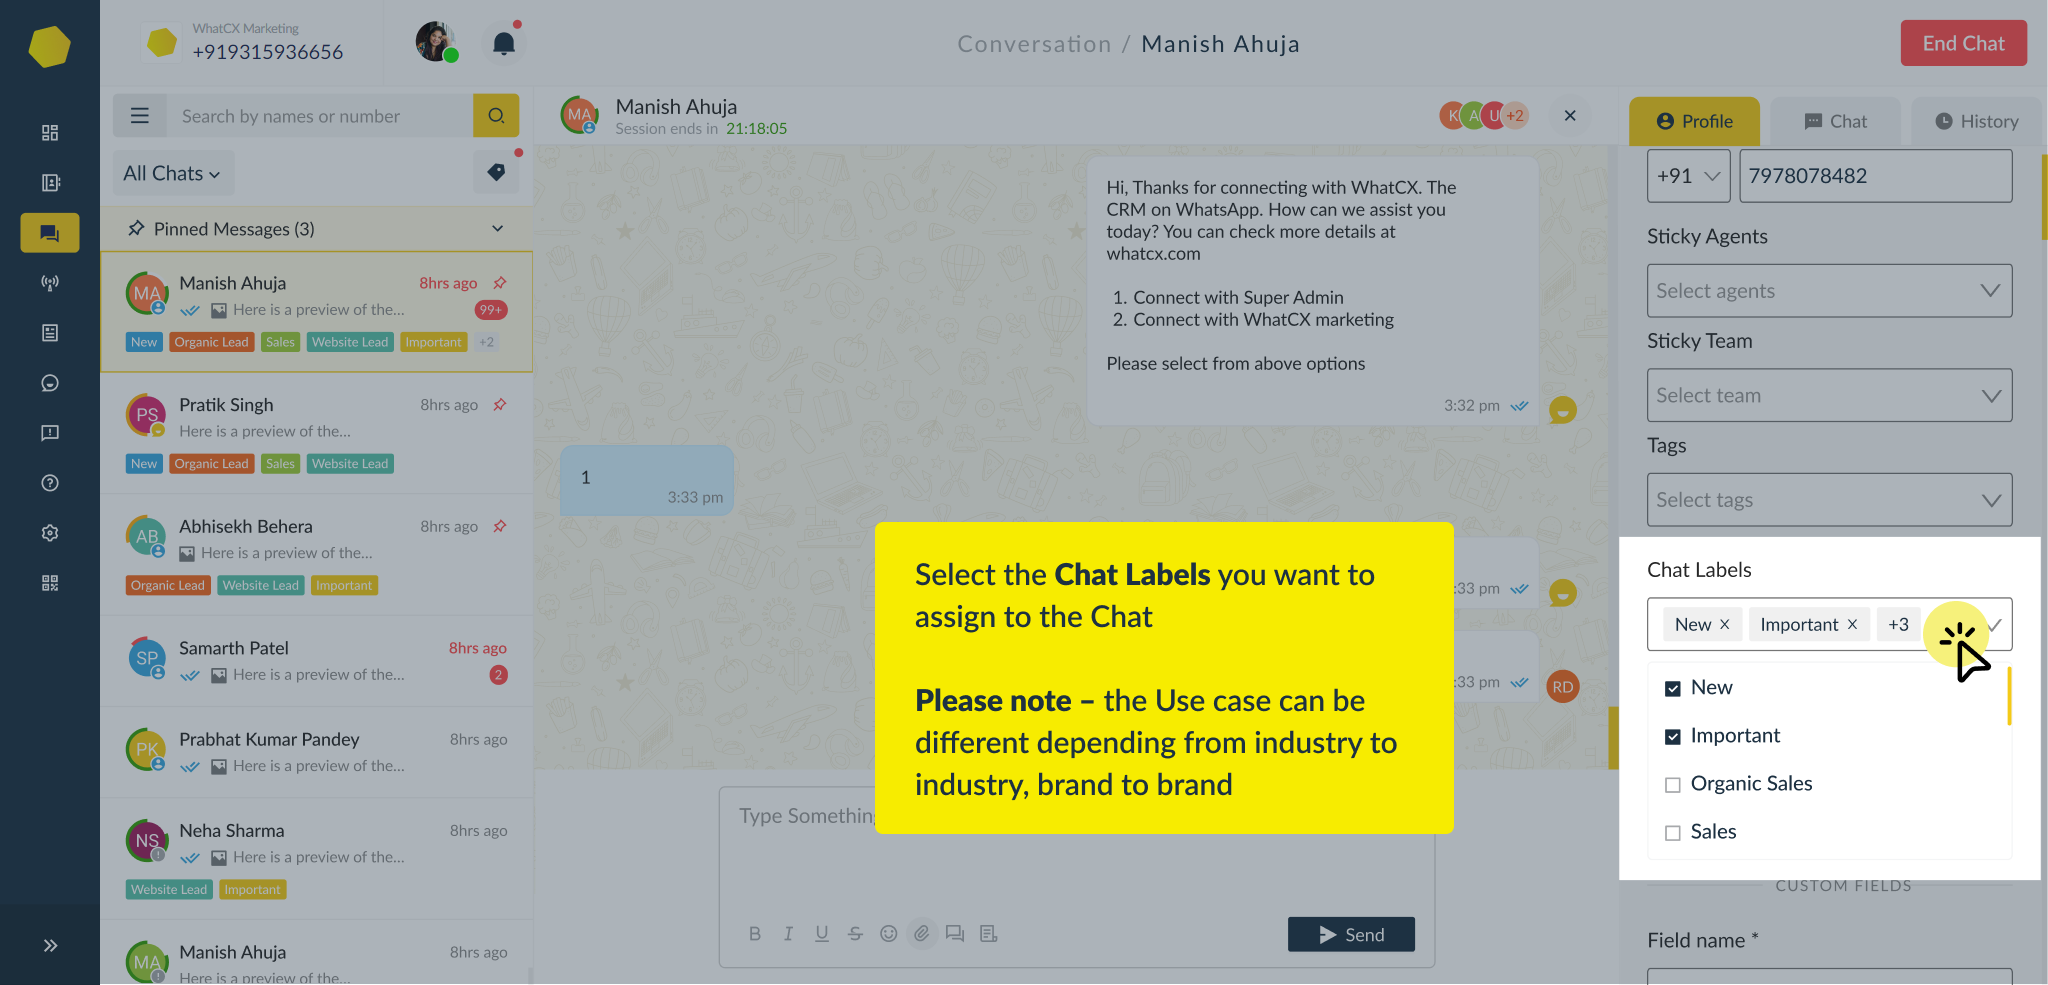
 Once you click on Create Chat labels and proceed to conversations. You can use the Chat Labels to distinguish between your conversations by priority, lead quality etc.
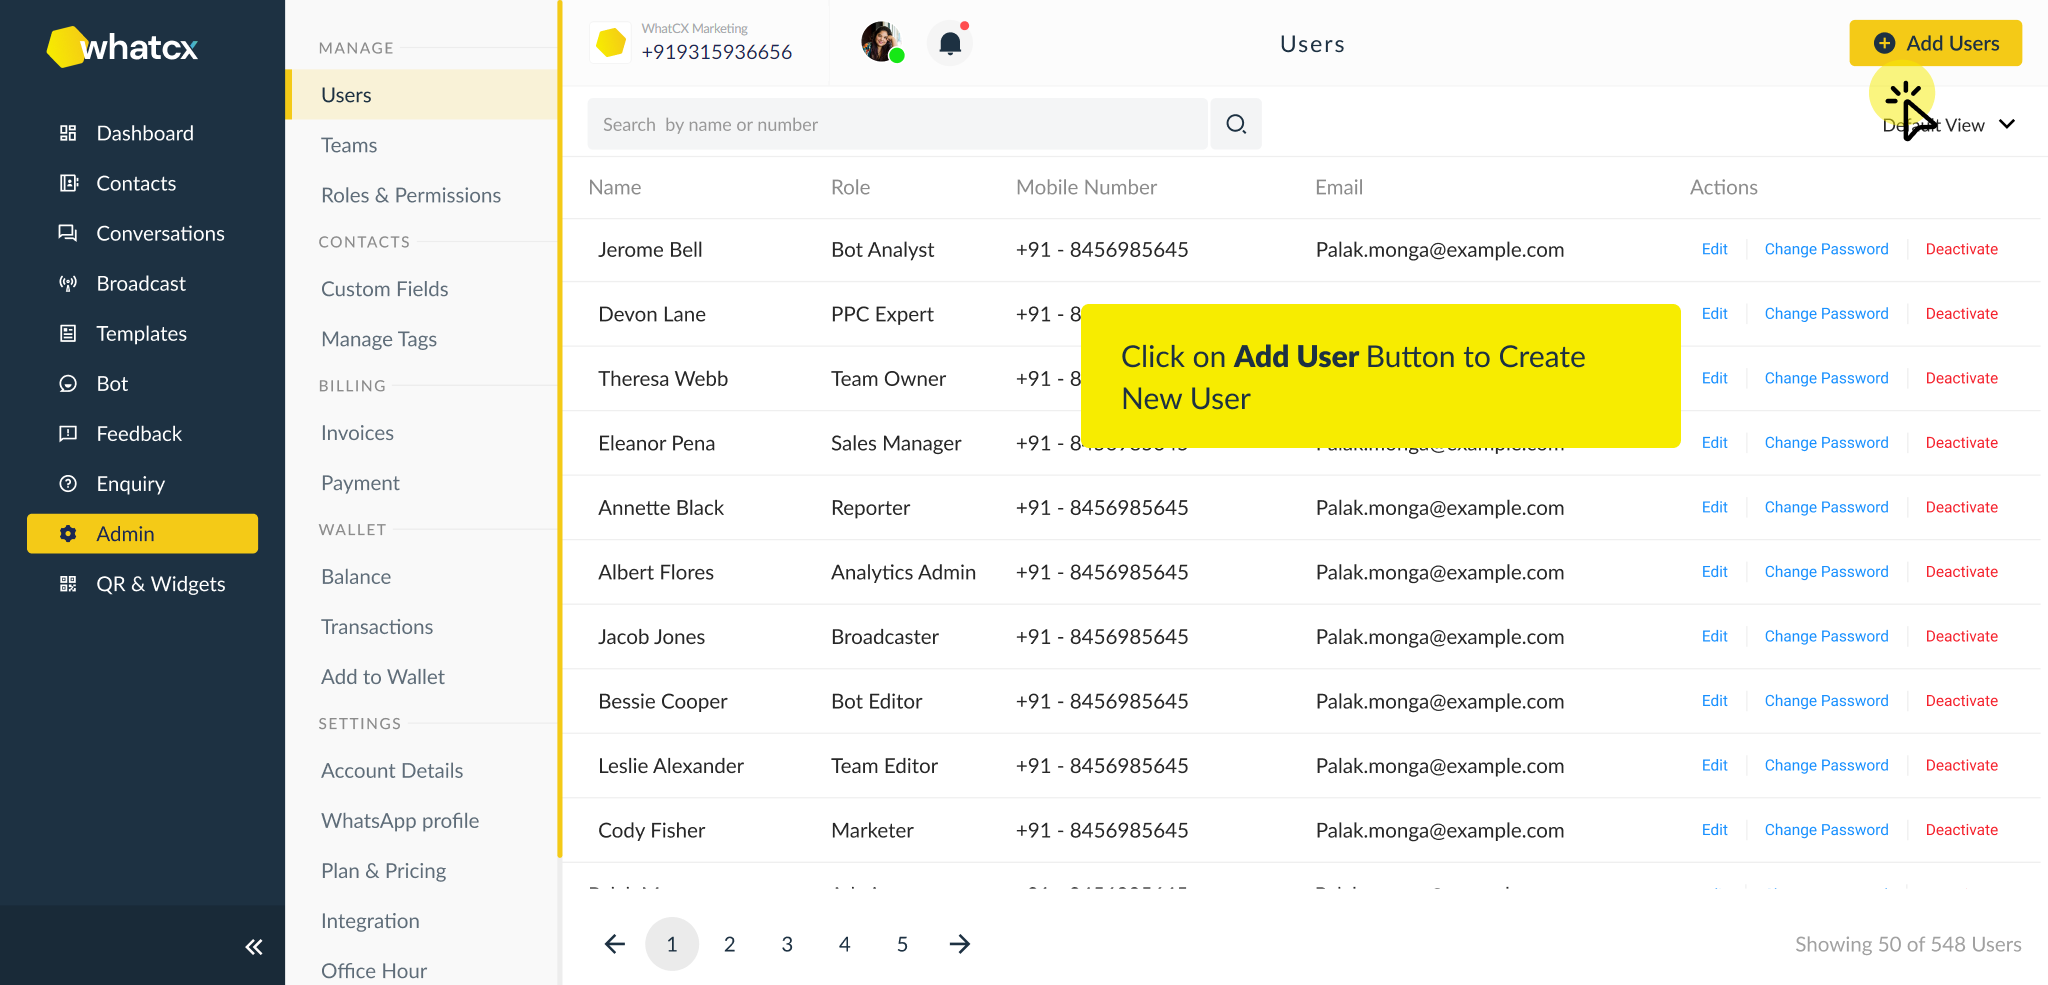
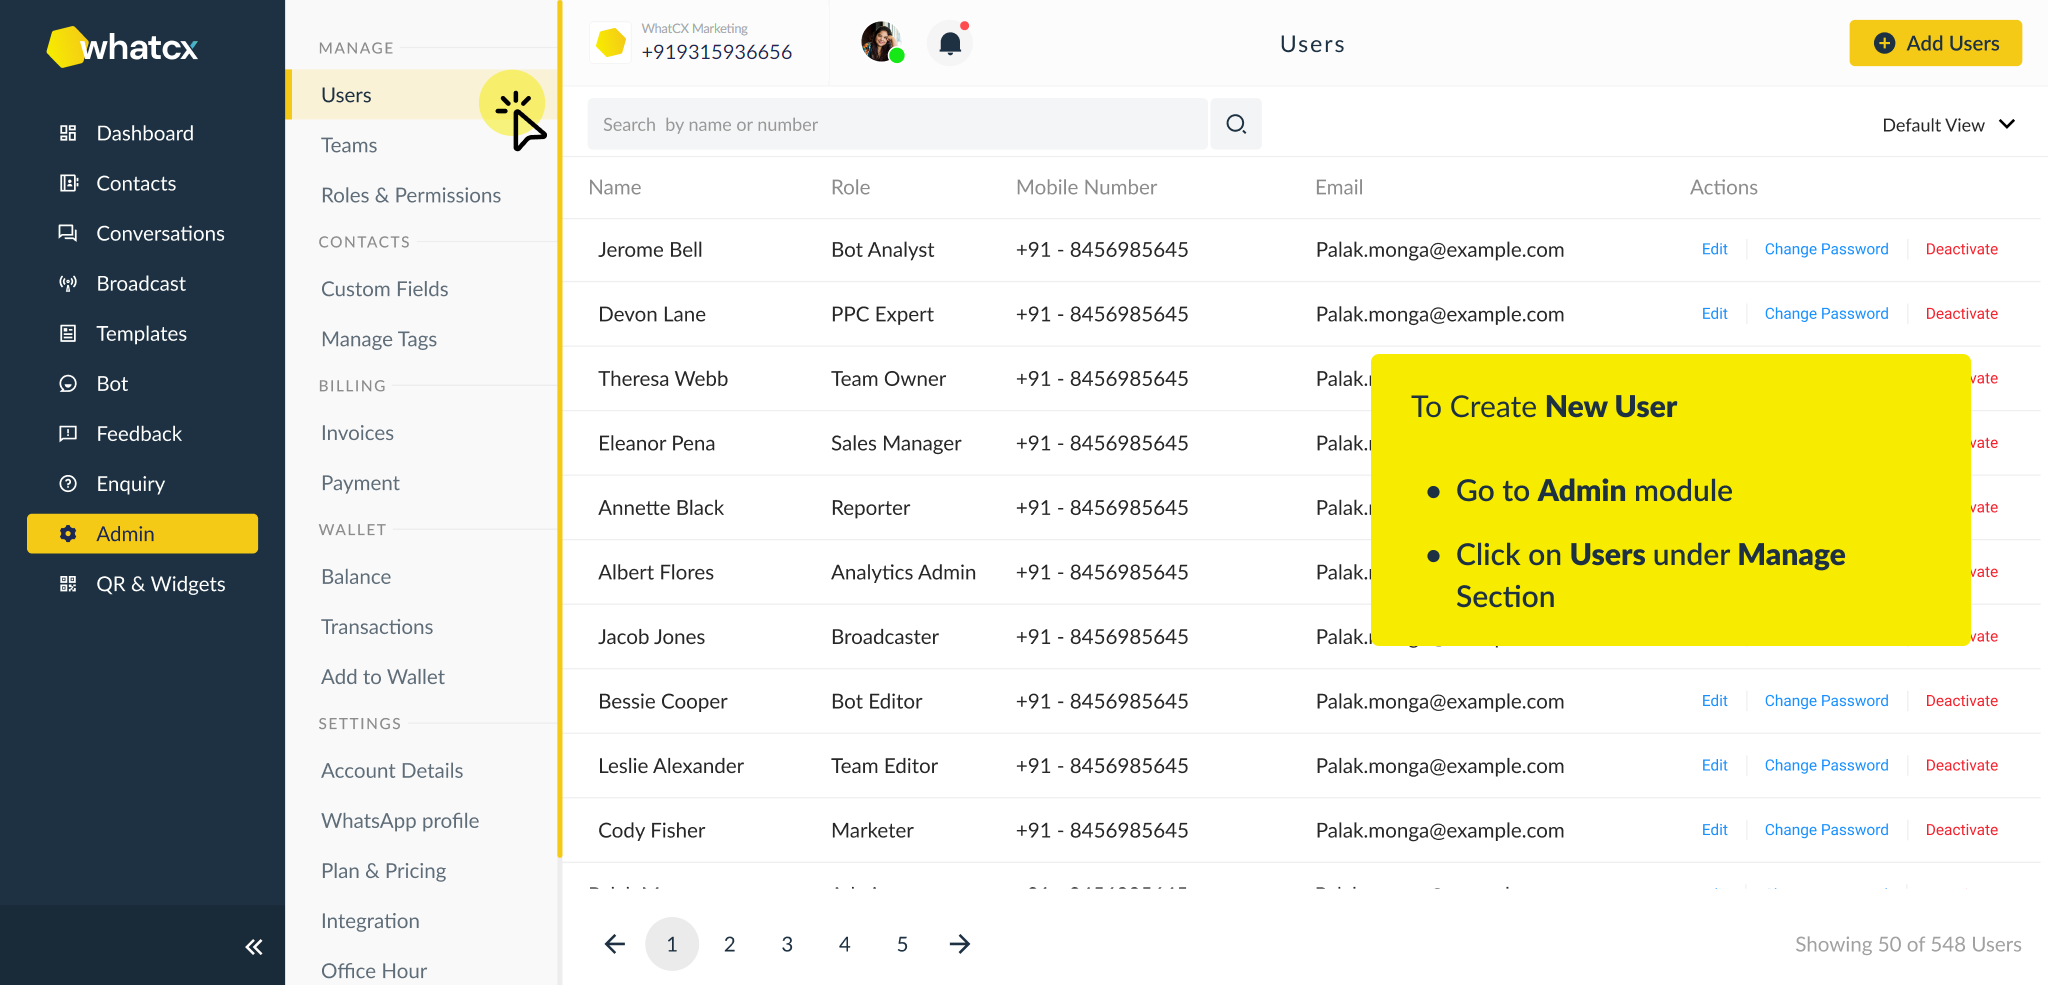 3. Click on Add User
 4. Enter the details and click on Add User, a new user will be created.
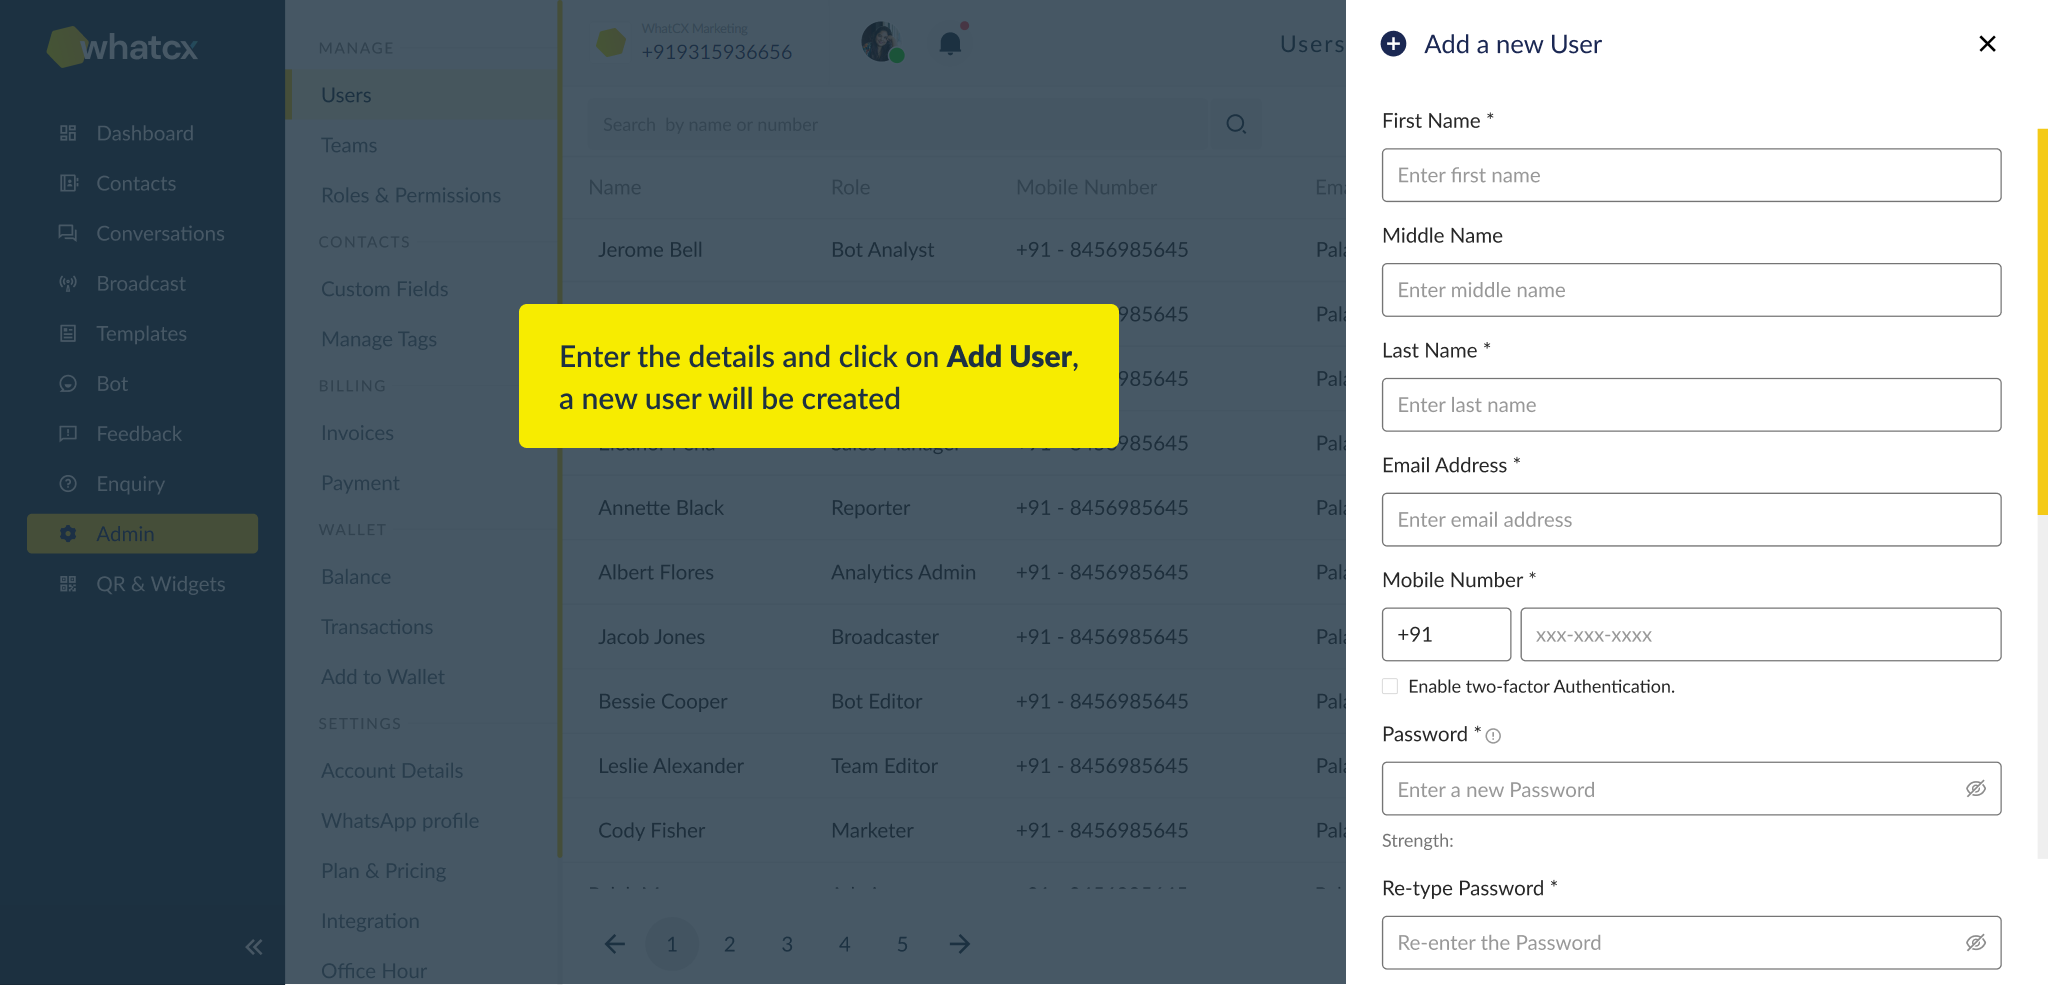
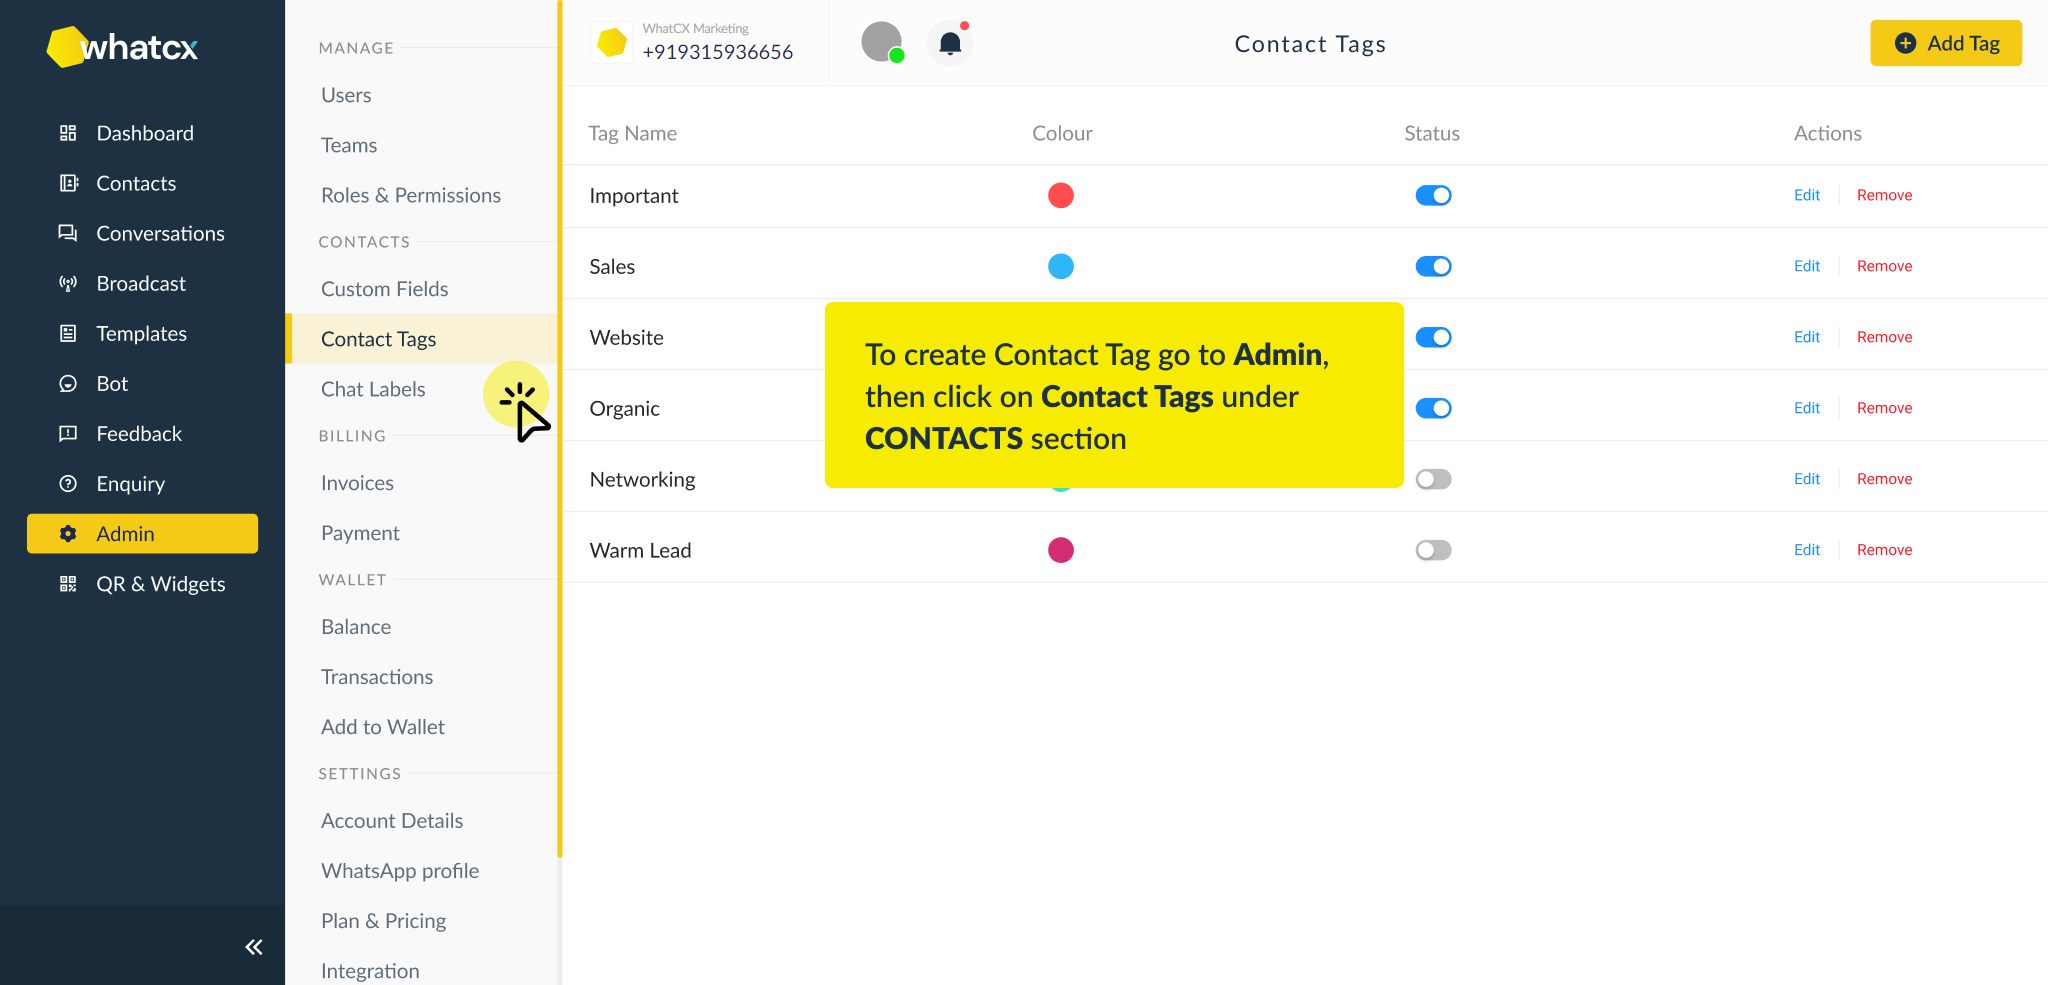
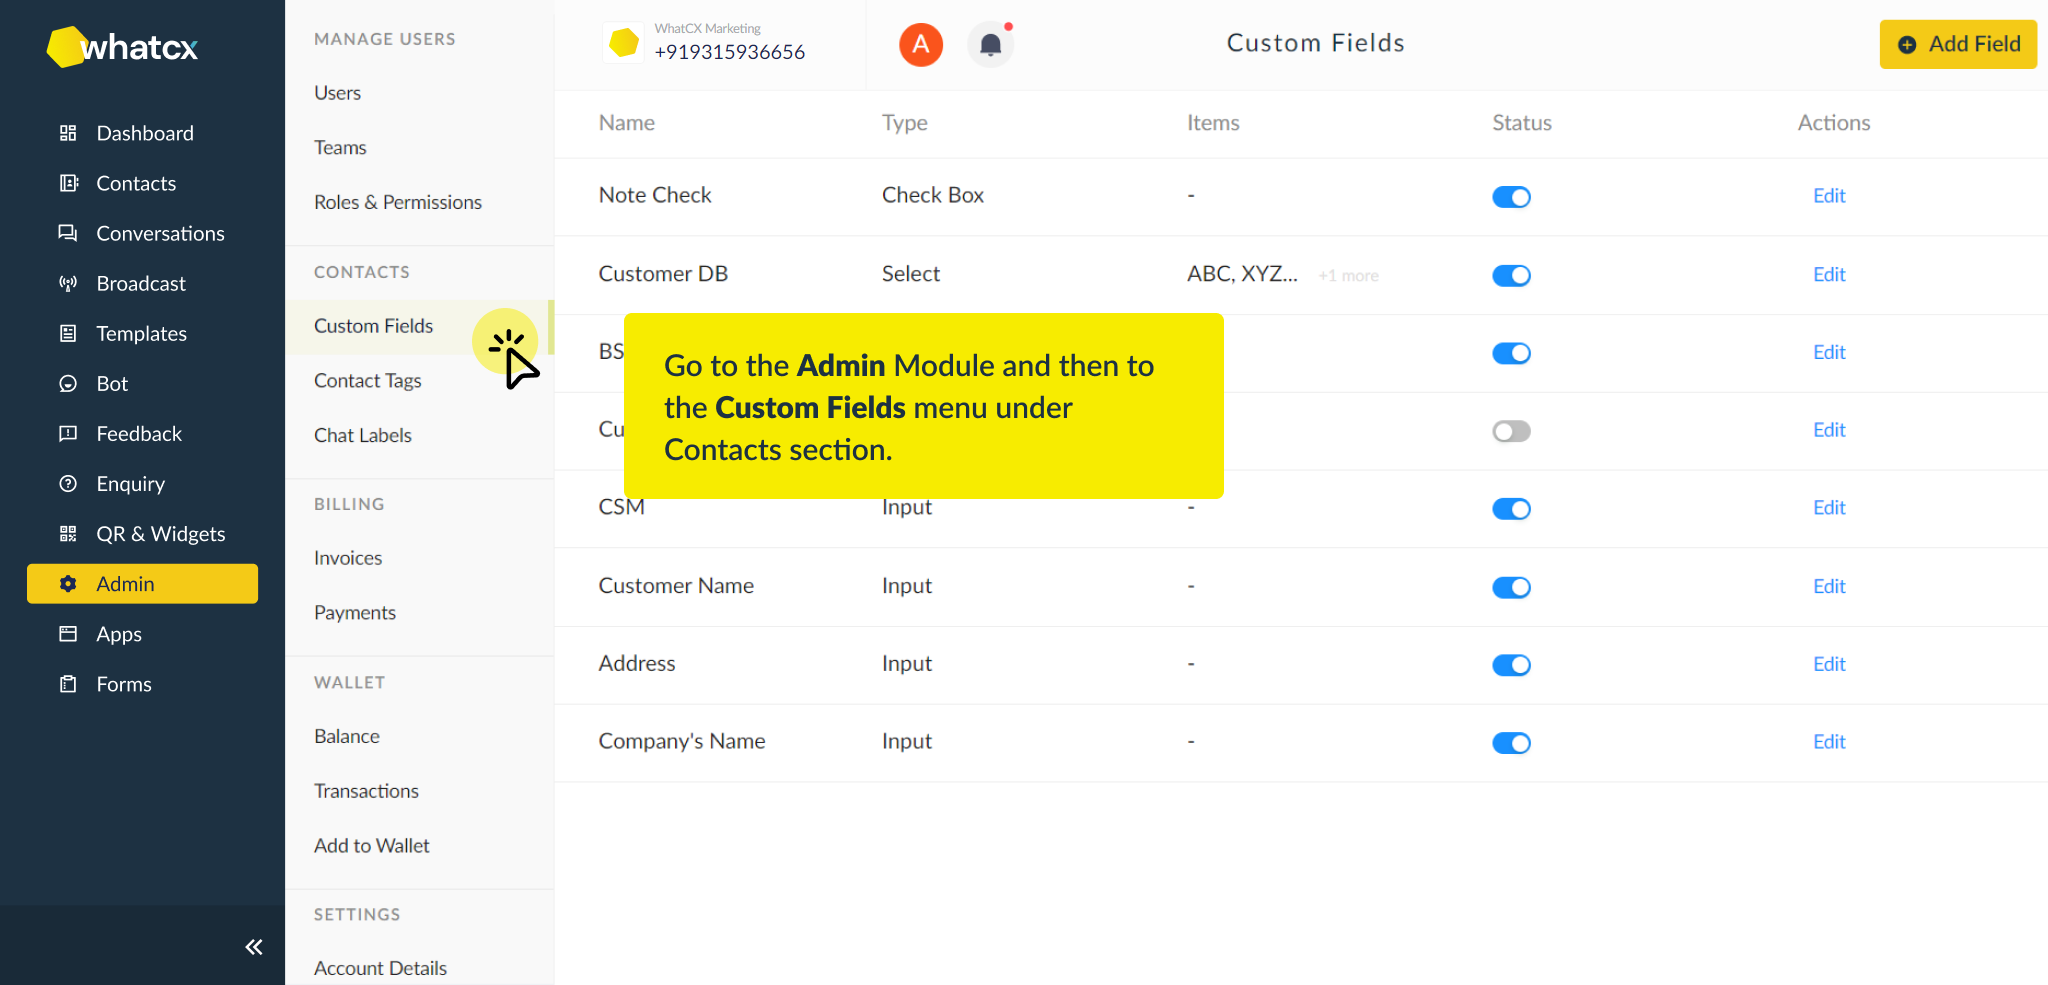
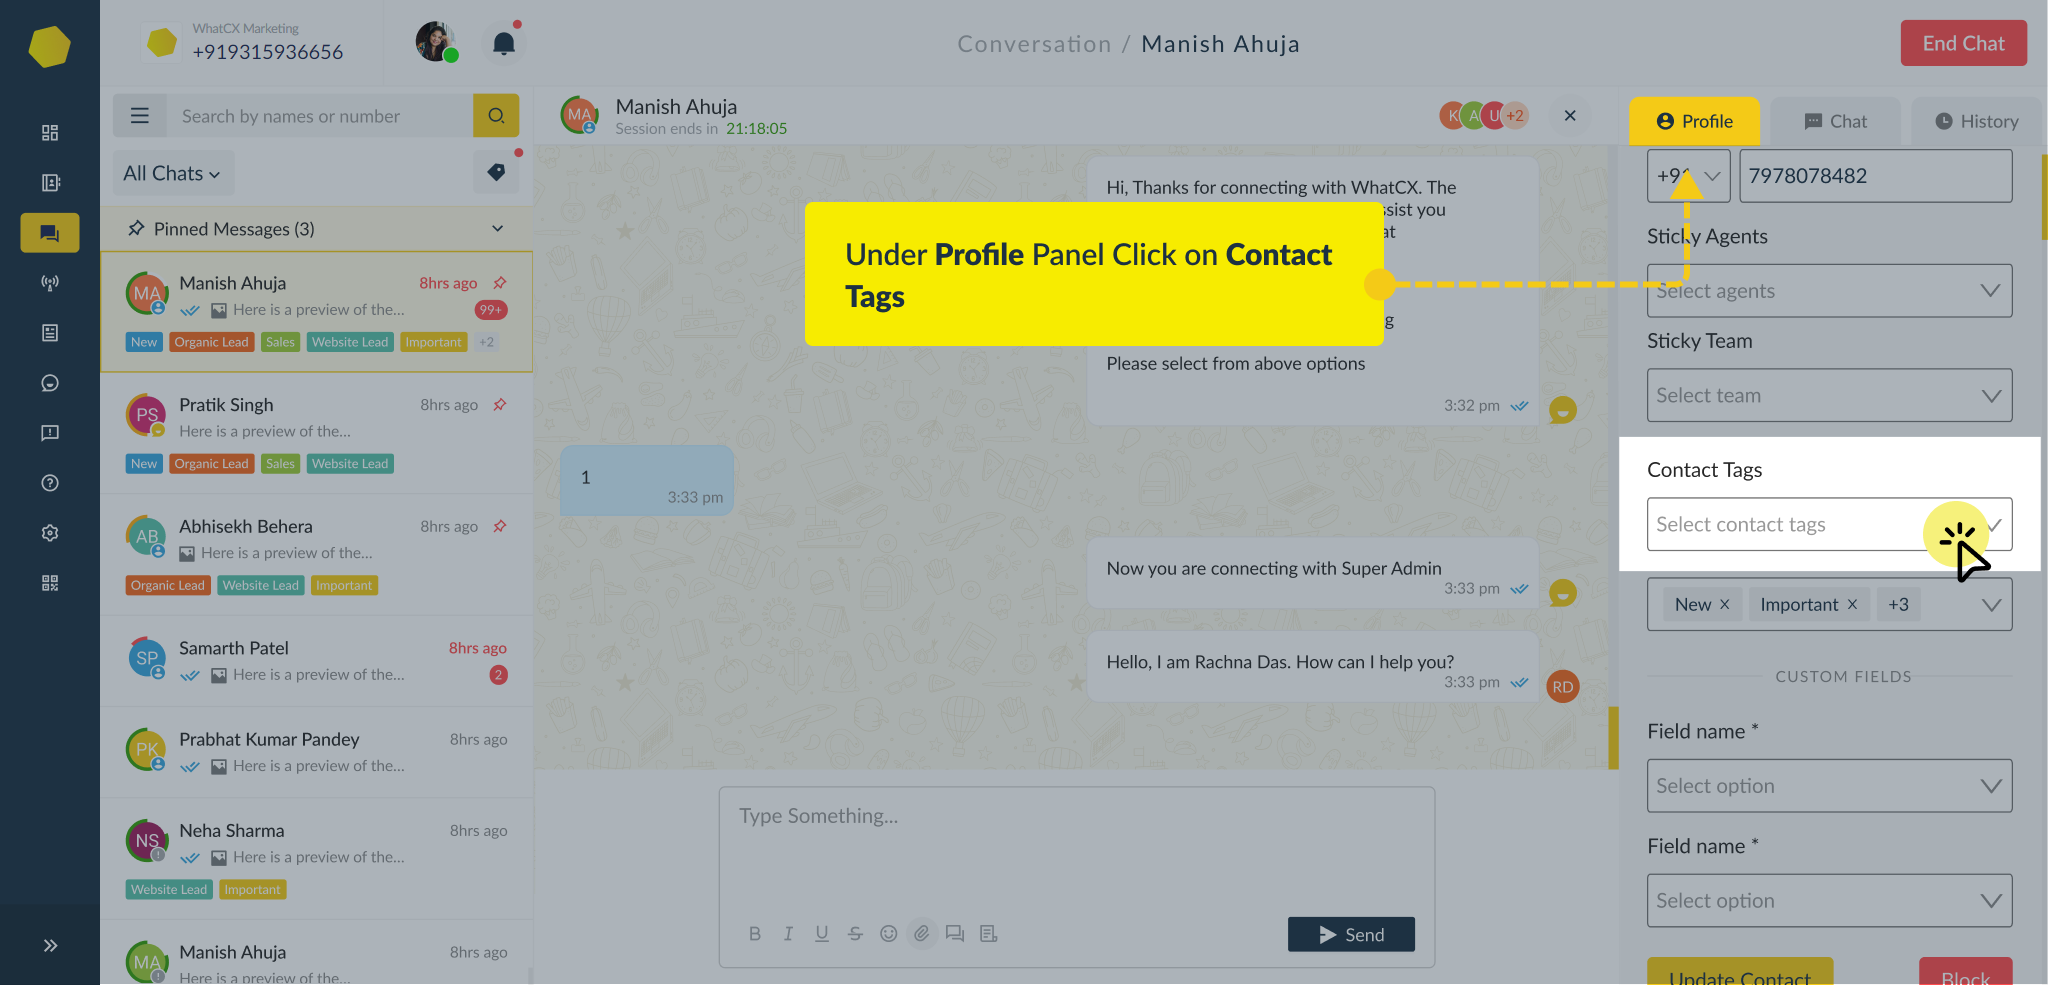
 2. Under Admin, you will find the option Contacts Tags
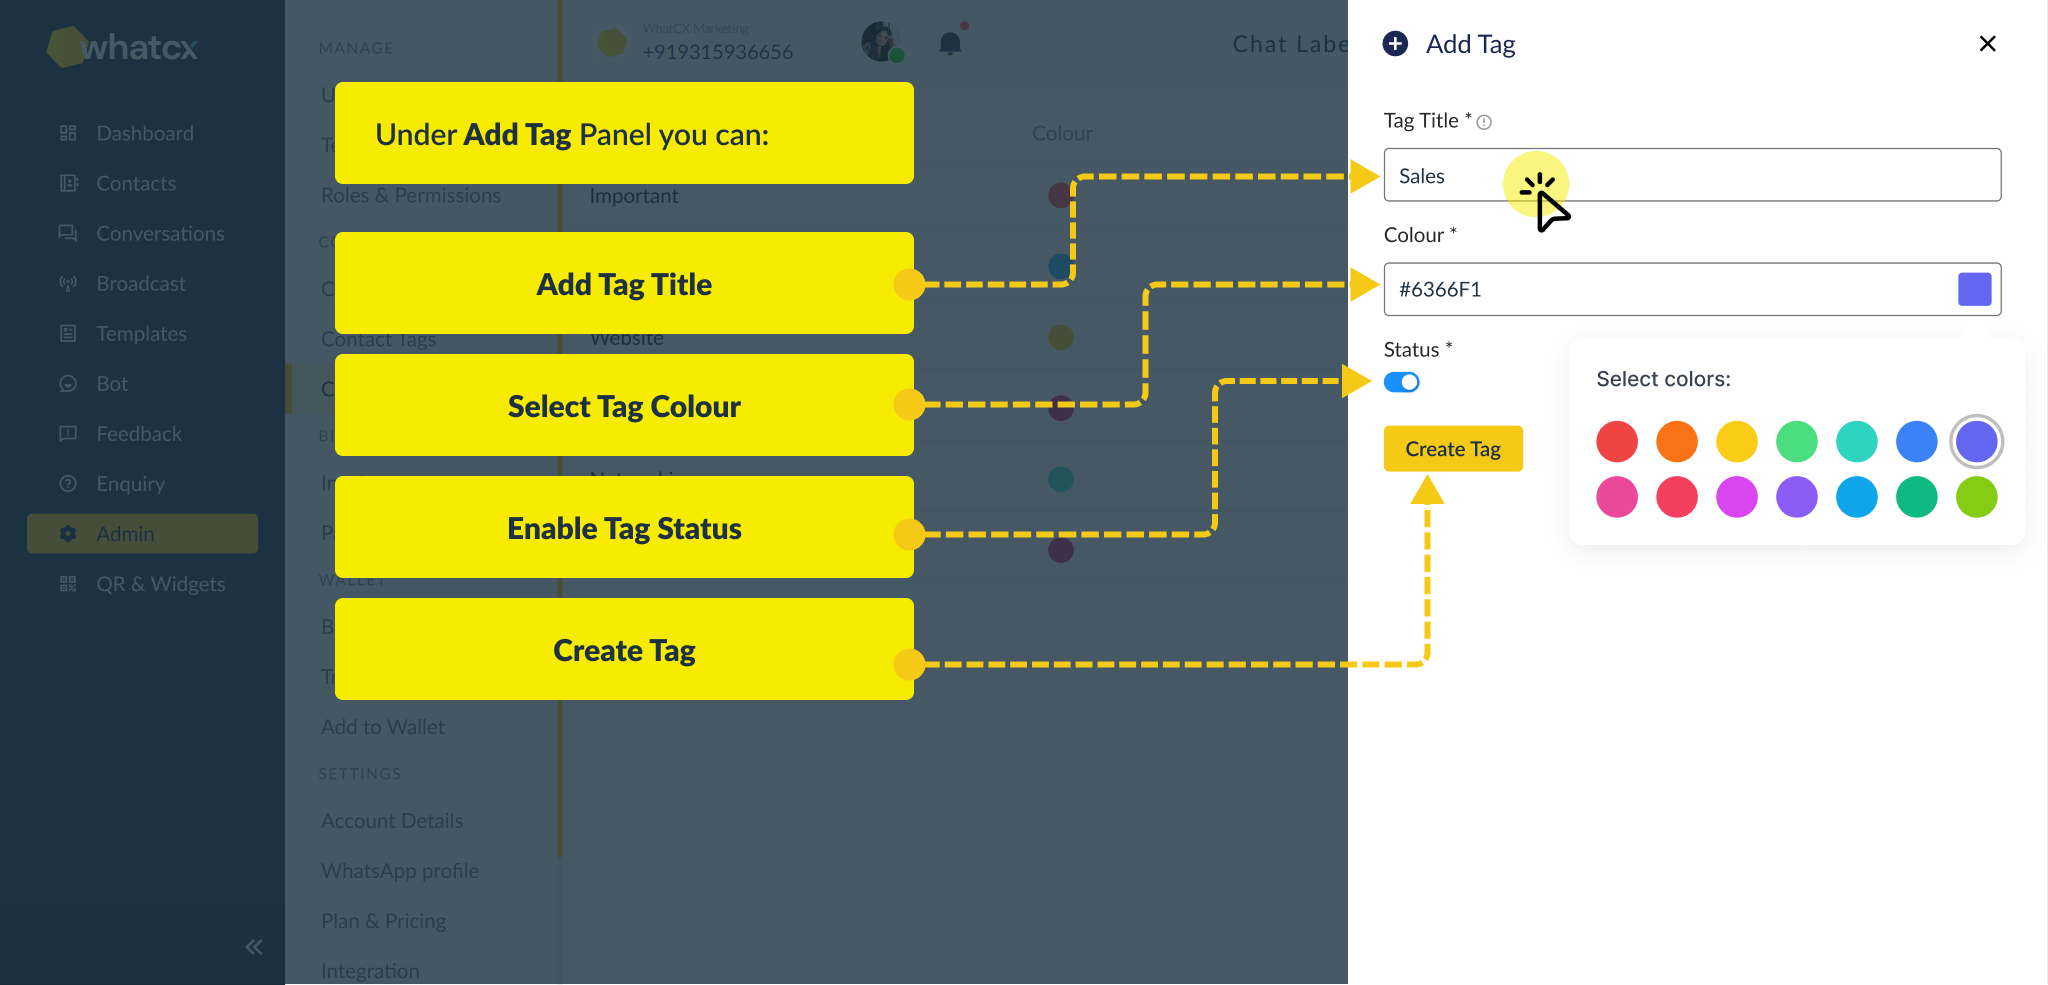
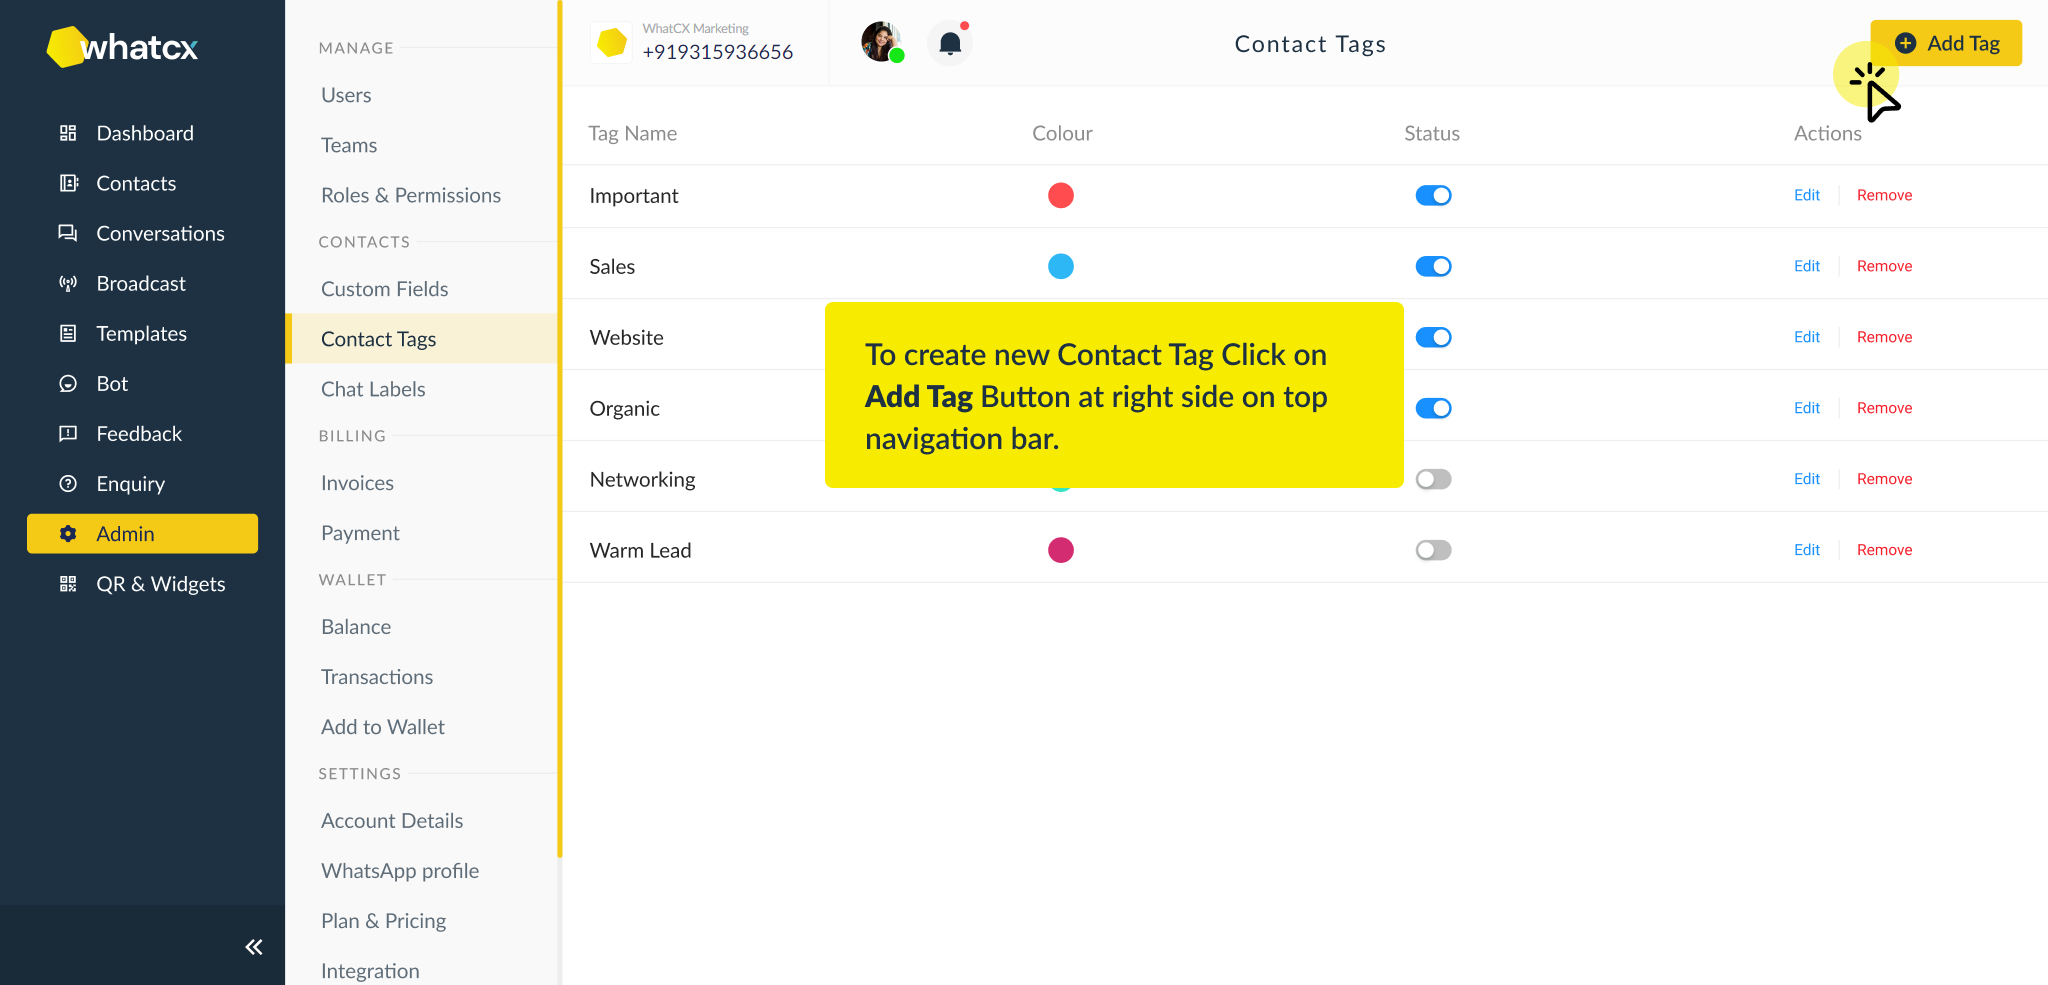 3. Click on Add Tags, and Give your Tag a Title. It could be anything depending on your business needs. You can choose the Tag color by clicking on ‘Color’ and then Clicking ‘Create Tag’
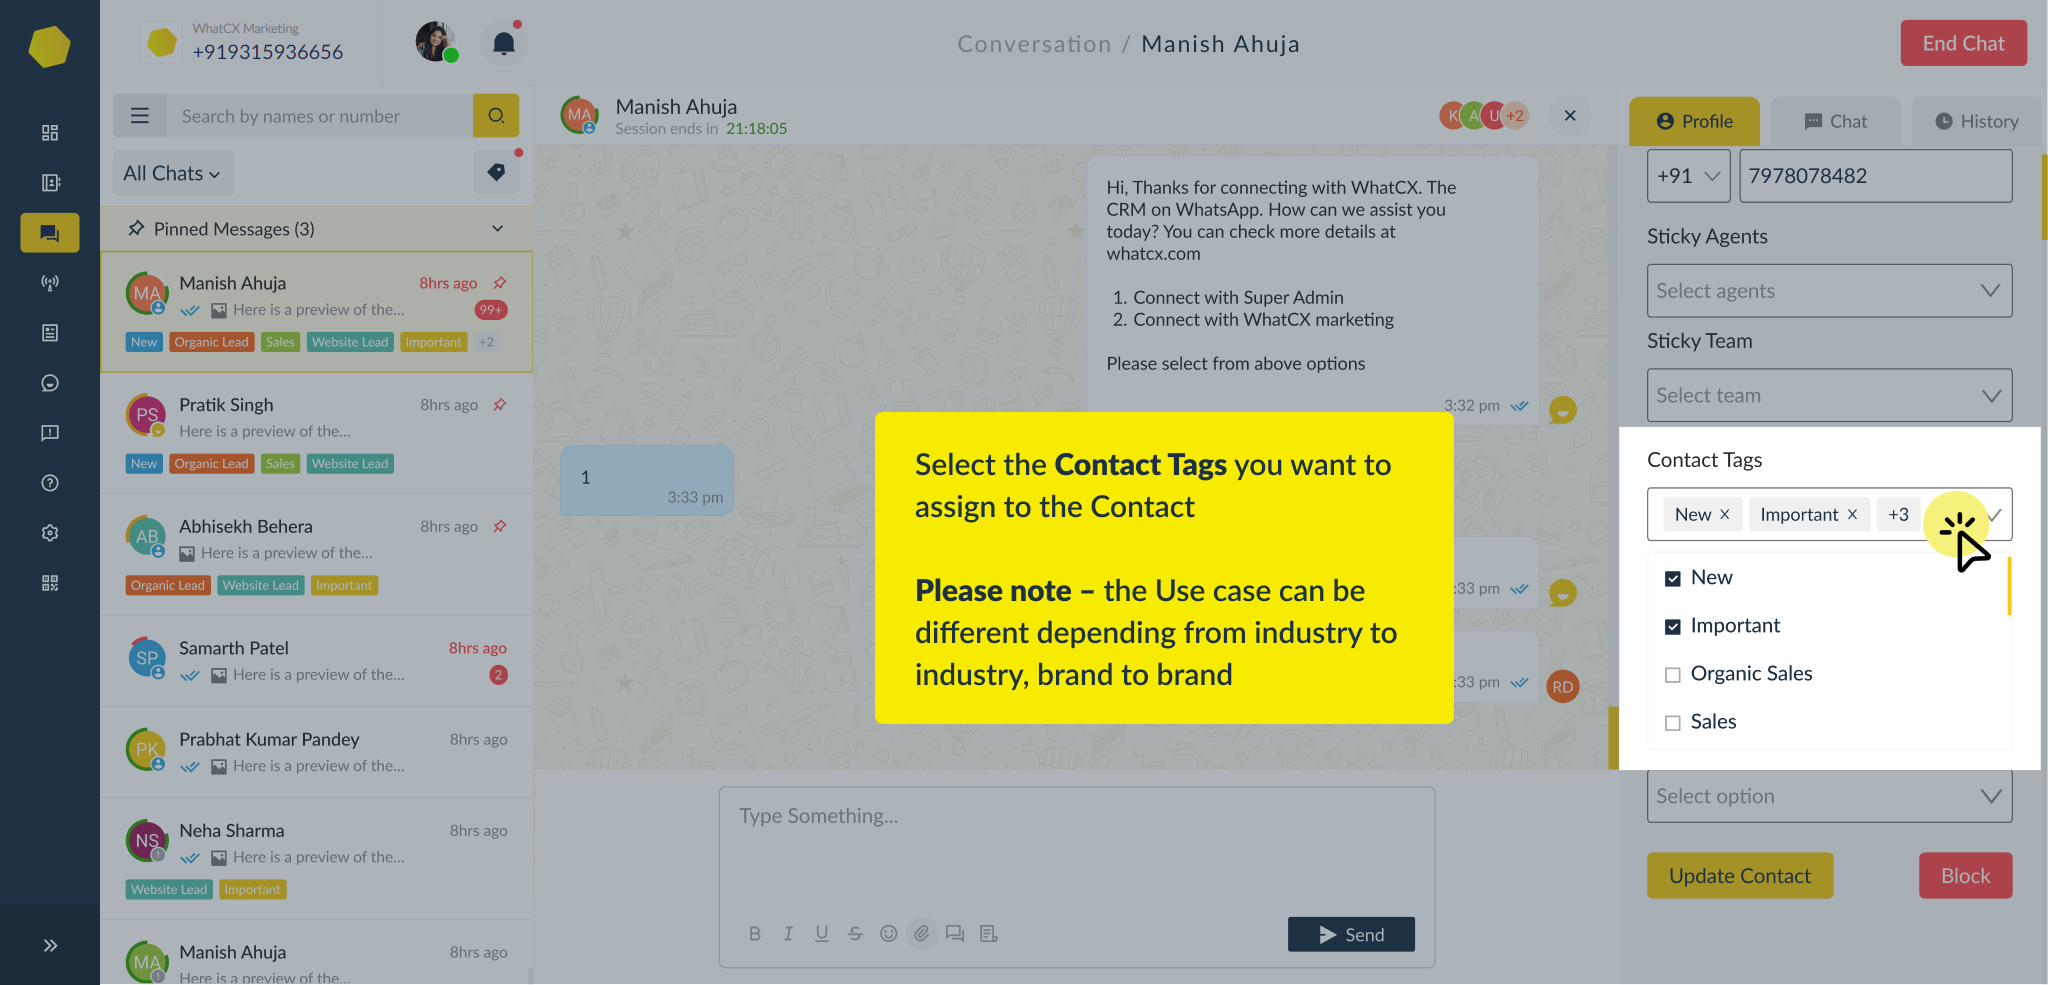
 Once you click on Create Tag and proceed to conversations. You can use the Chat Labels to distinguish between your conversations by priority, lead quality etc.
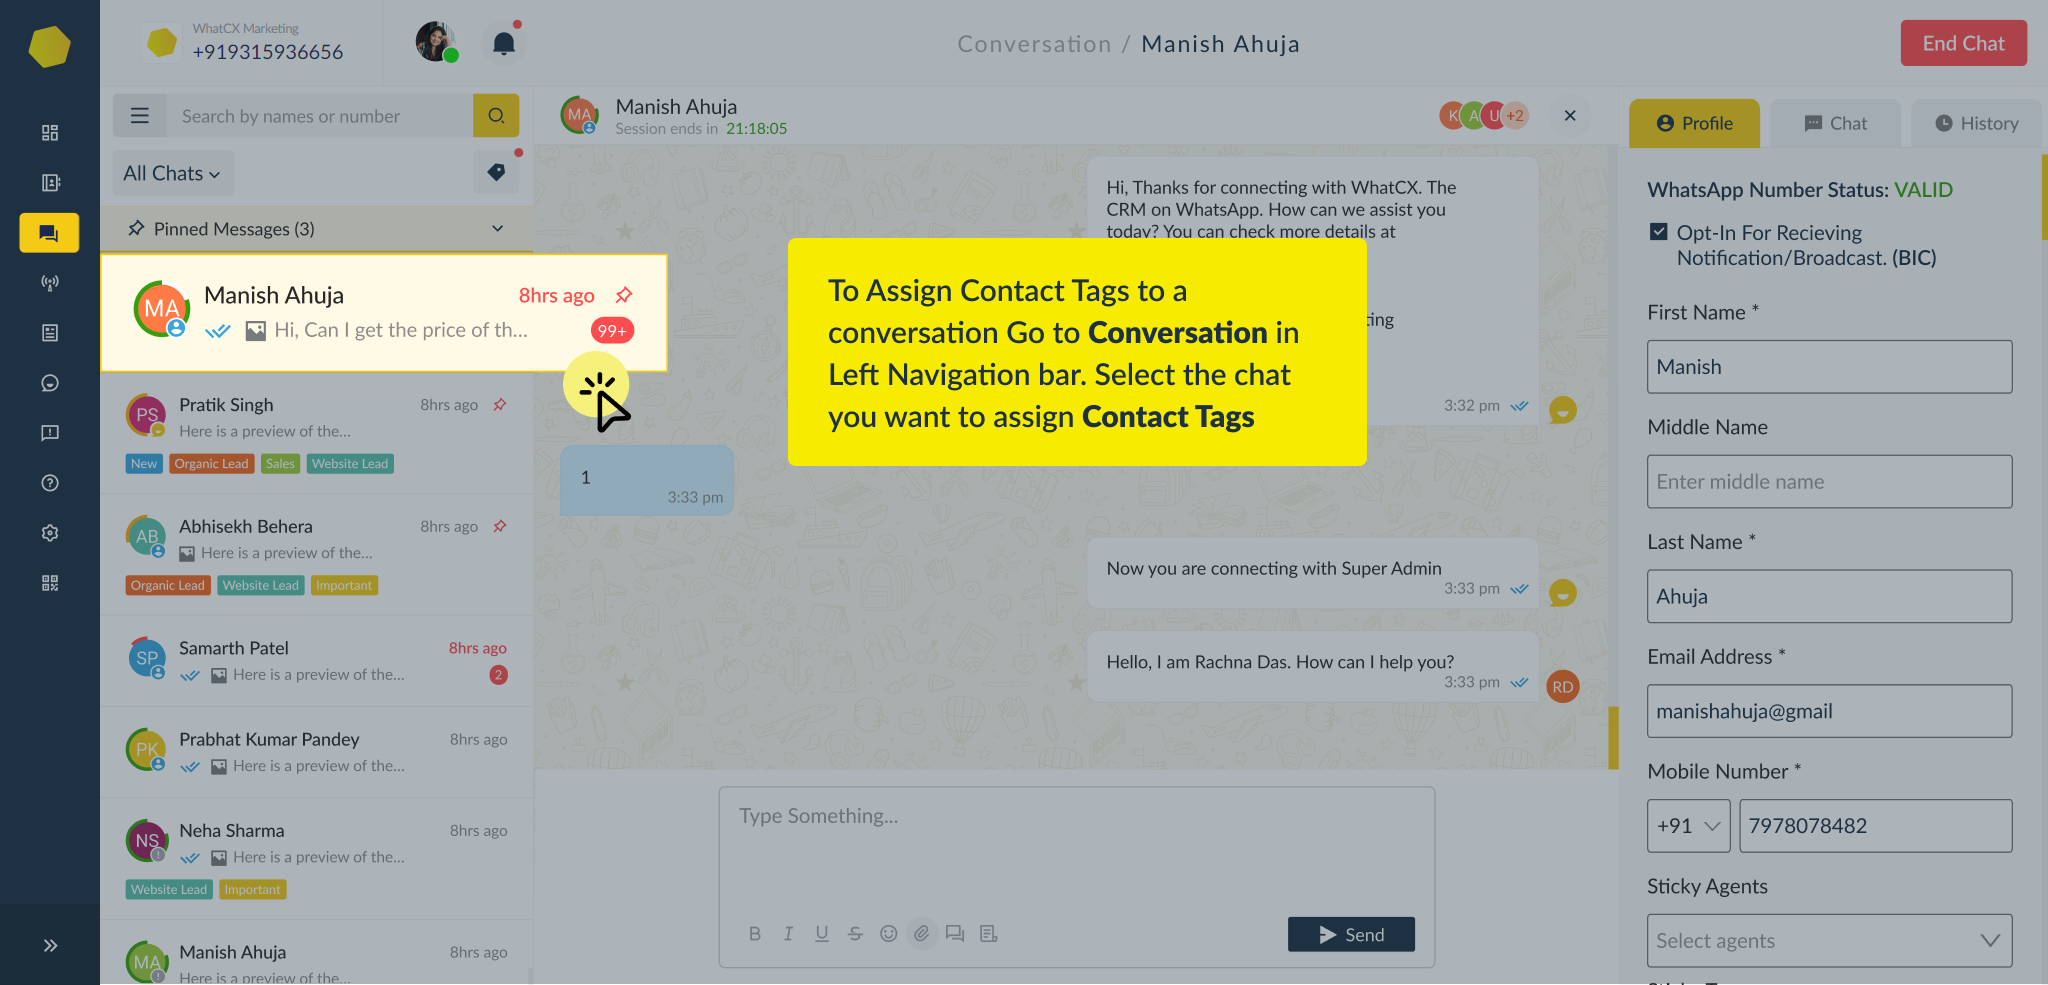


 3. You now click on Configure. Please note that you need to Configure your Feedback templates only in case you want the bots to reply automatically in the Feedback Module
 3. You now click on Configure.
 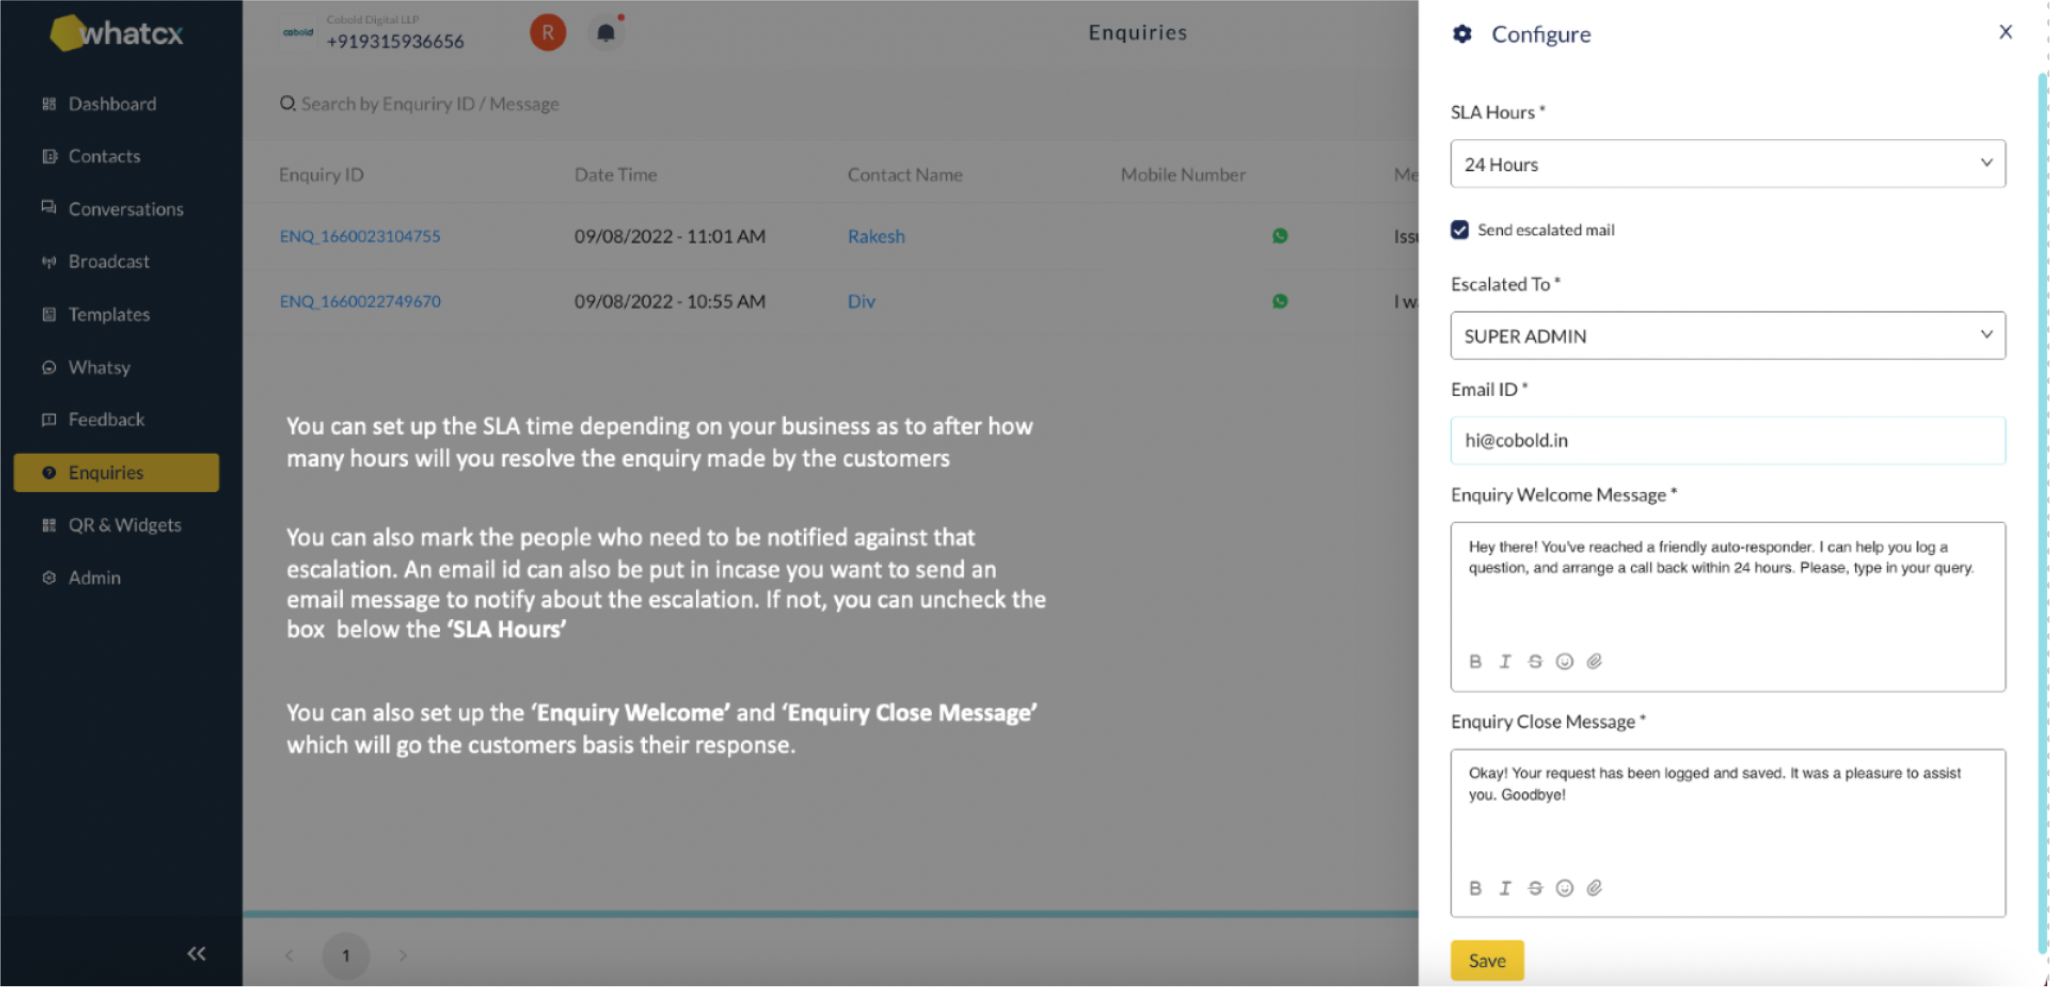 4. Click save. Now all the triggers which will be registered as Enquiry will receive the configured messages.
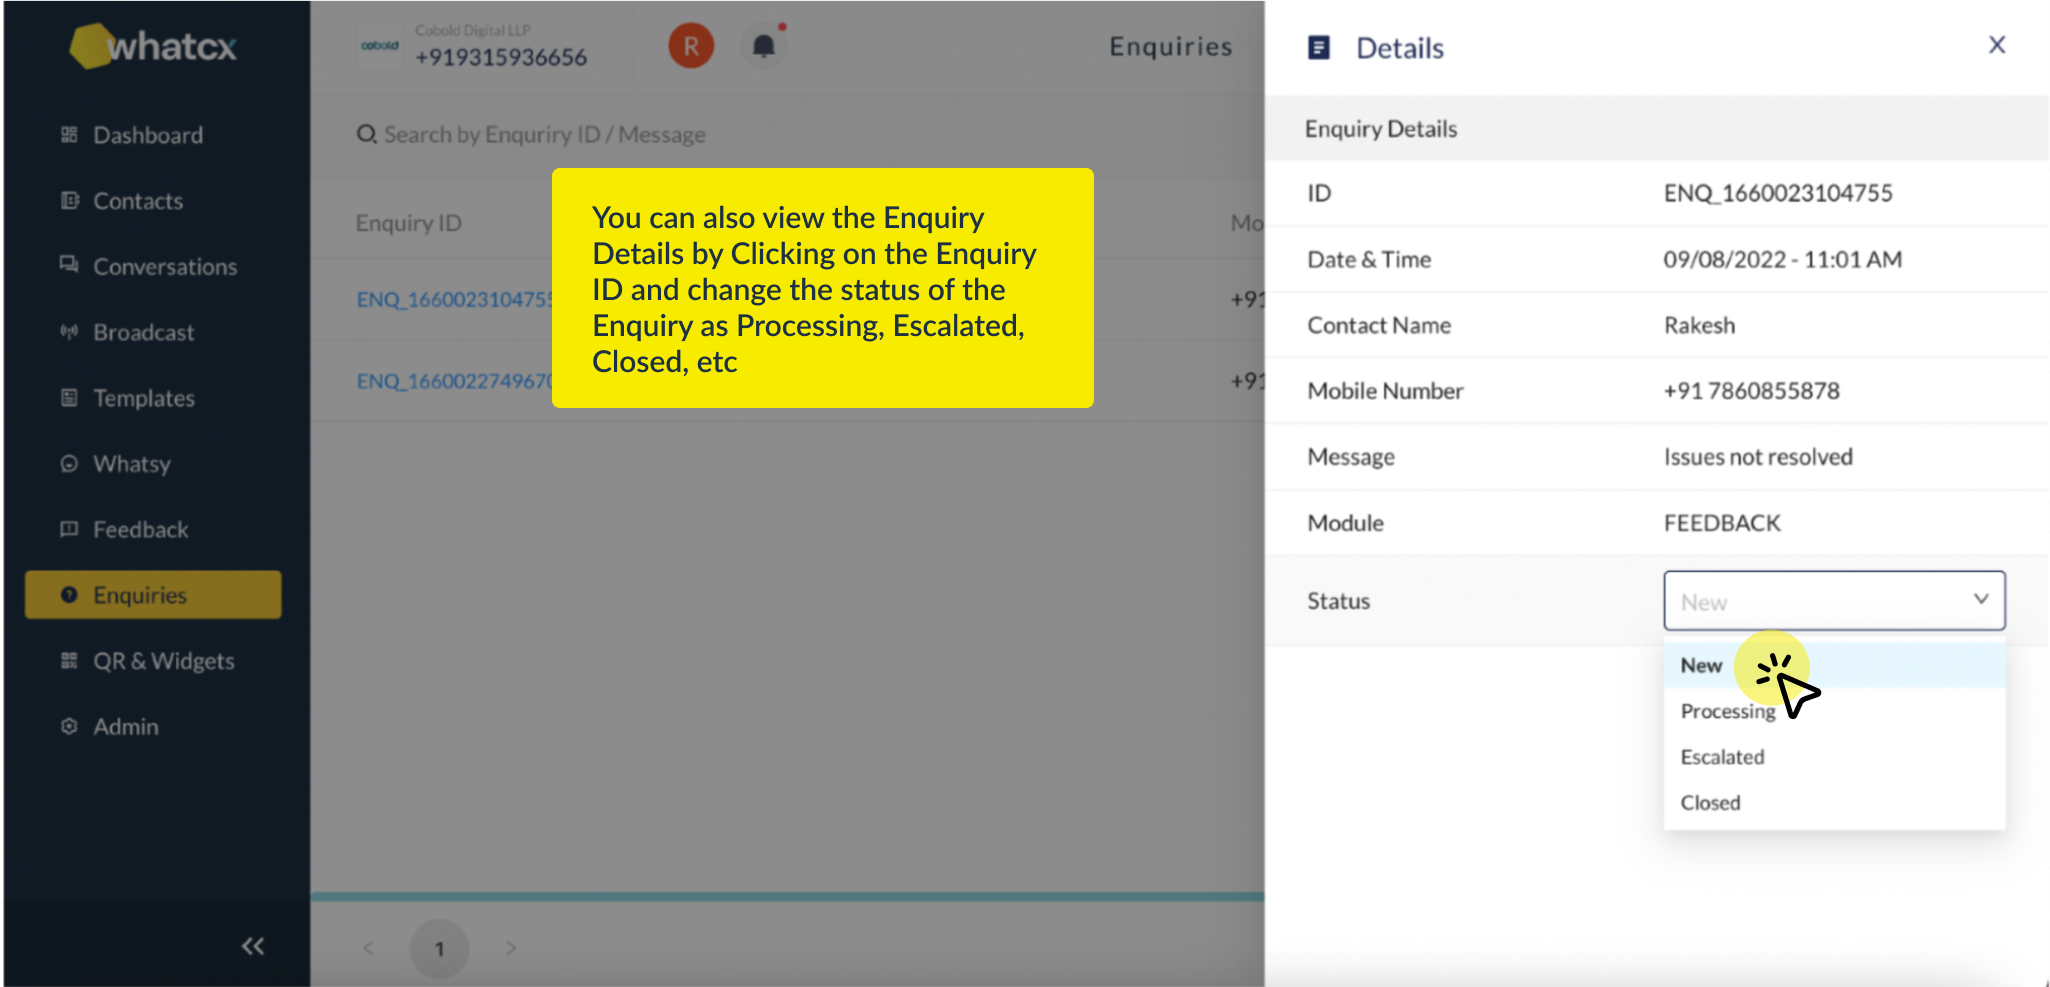


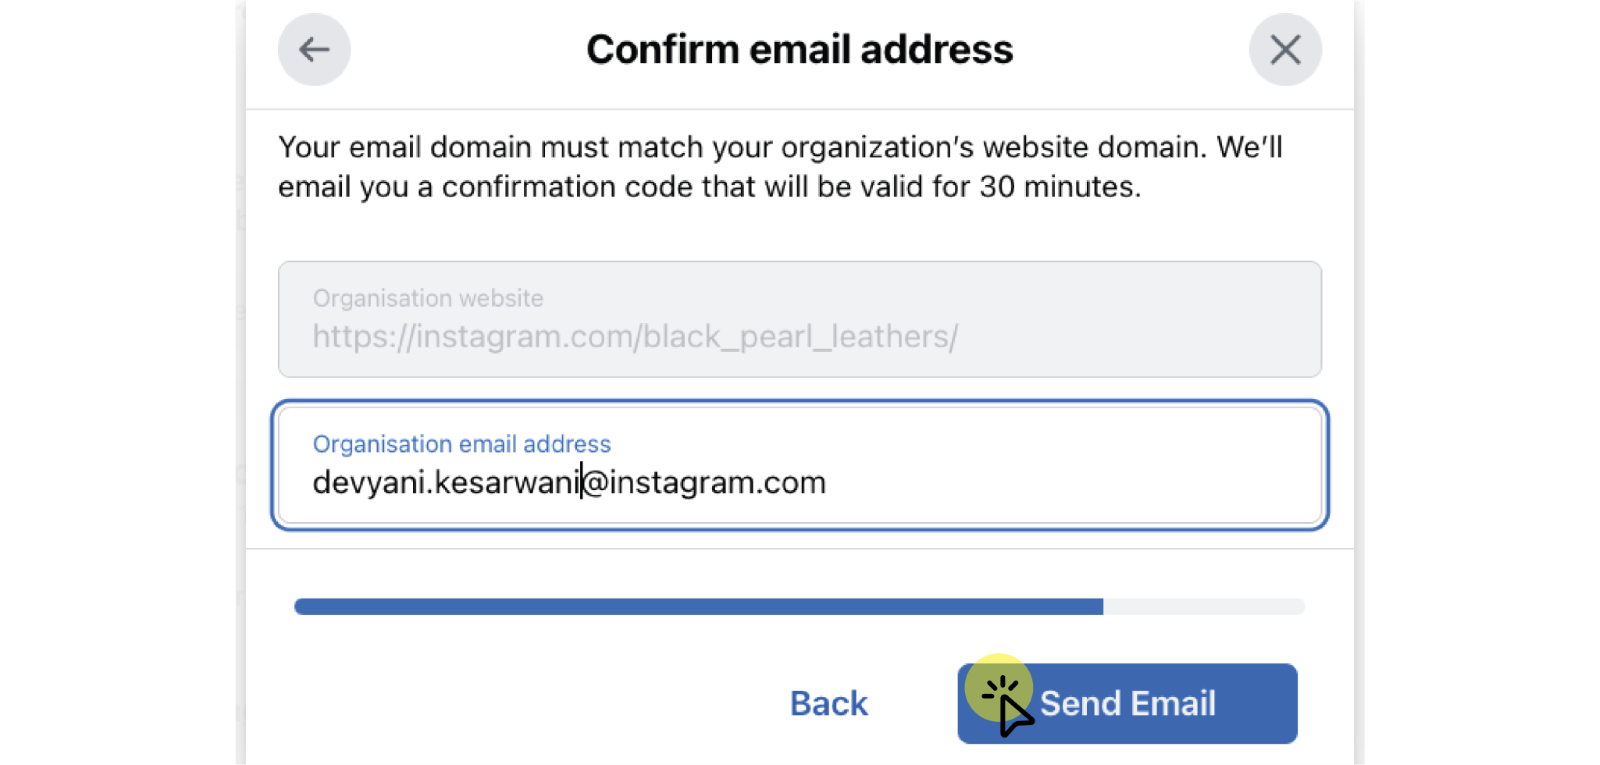
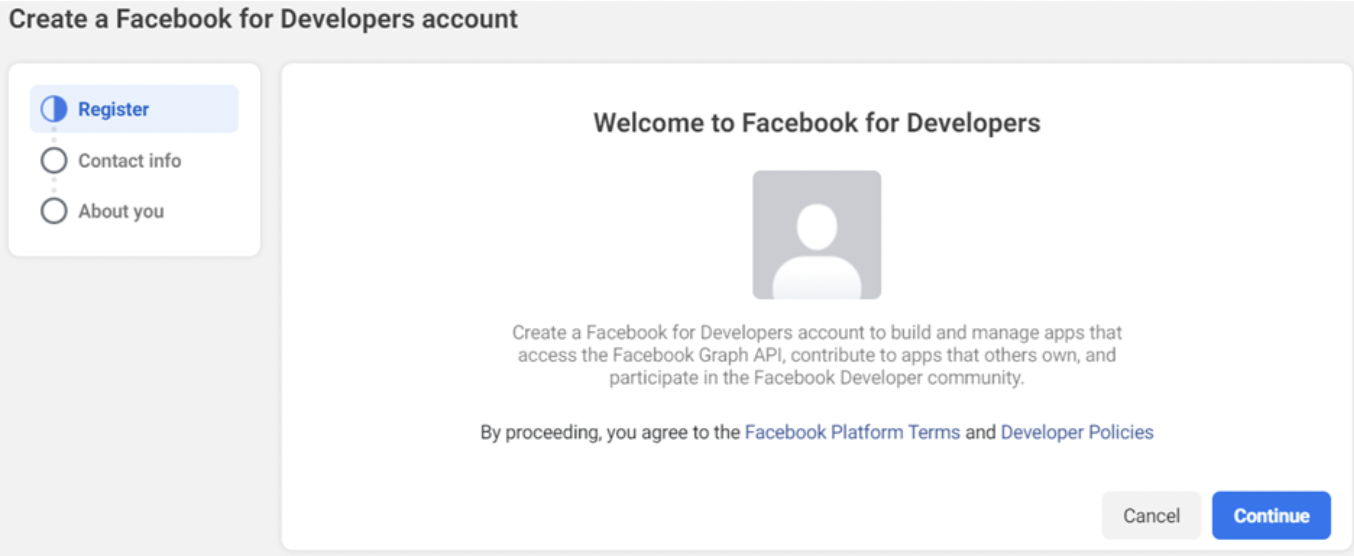 4. After that, you will have to input your legitimate company email address and tick the box next to Facebook’s terms and conditions. The email address you enter must match the one you used to sign up for and validate your Facebook Business Manager account.
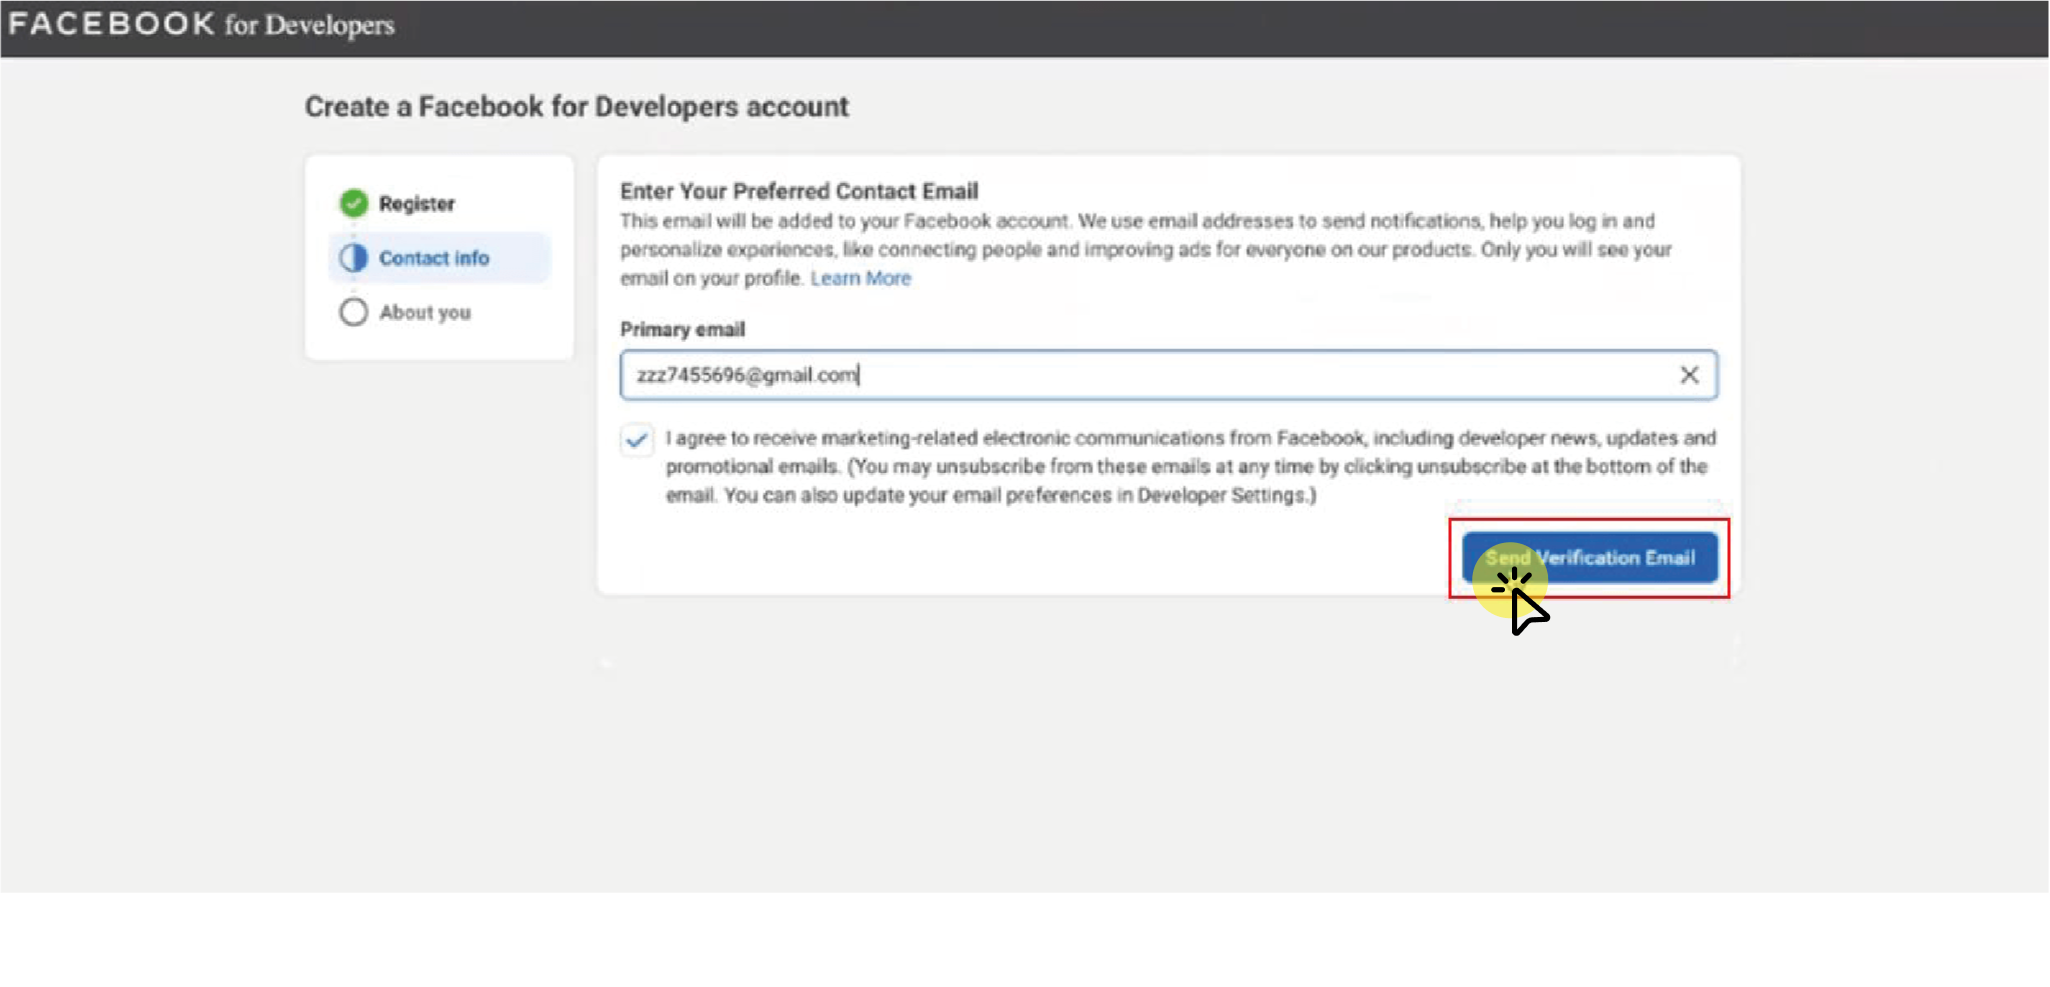
 Once you’ve entered the correct business email address, click “Send Verification Email” to have Meta send you an email to confirm your ownership of the address.
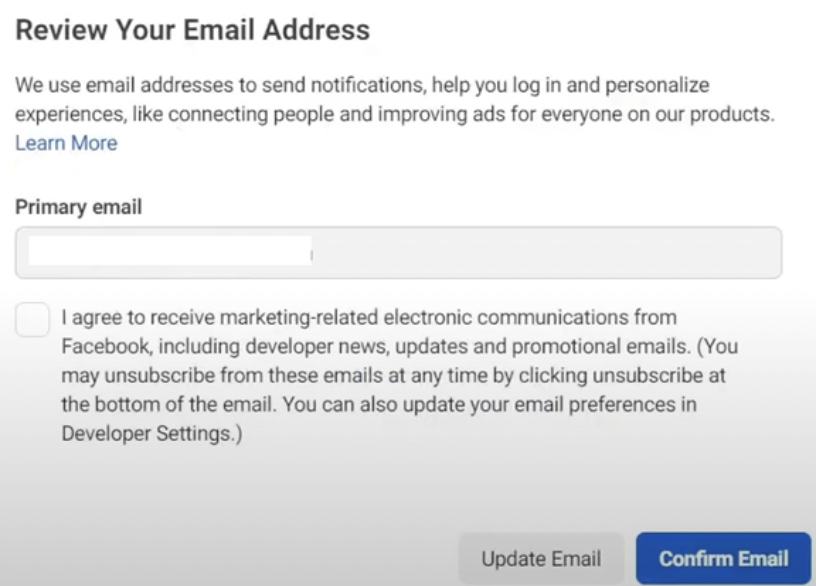 5. To verify or confirm your email address, check your email and click the verification email (or confirmation email, depending on whether you entered the email address earlier).
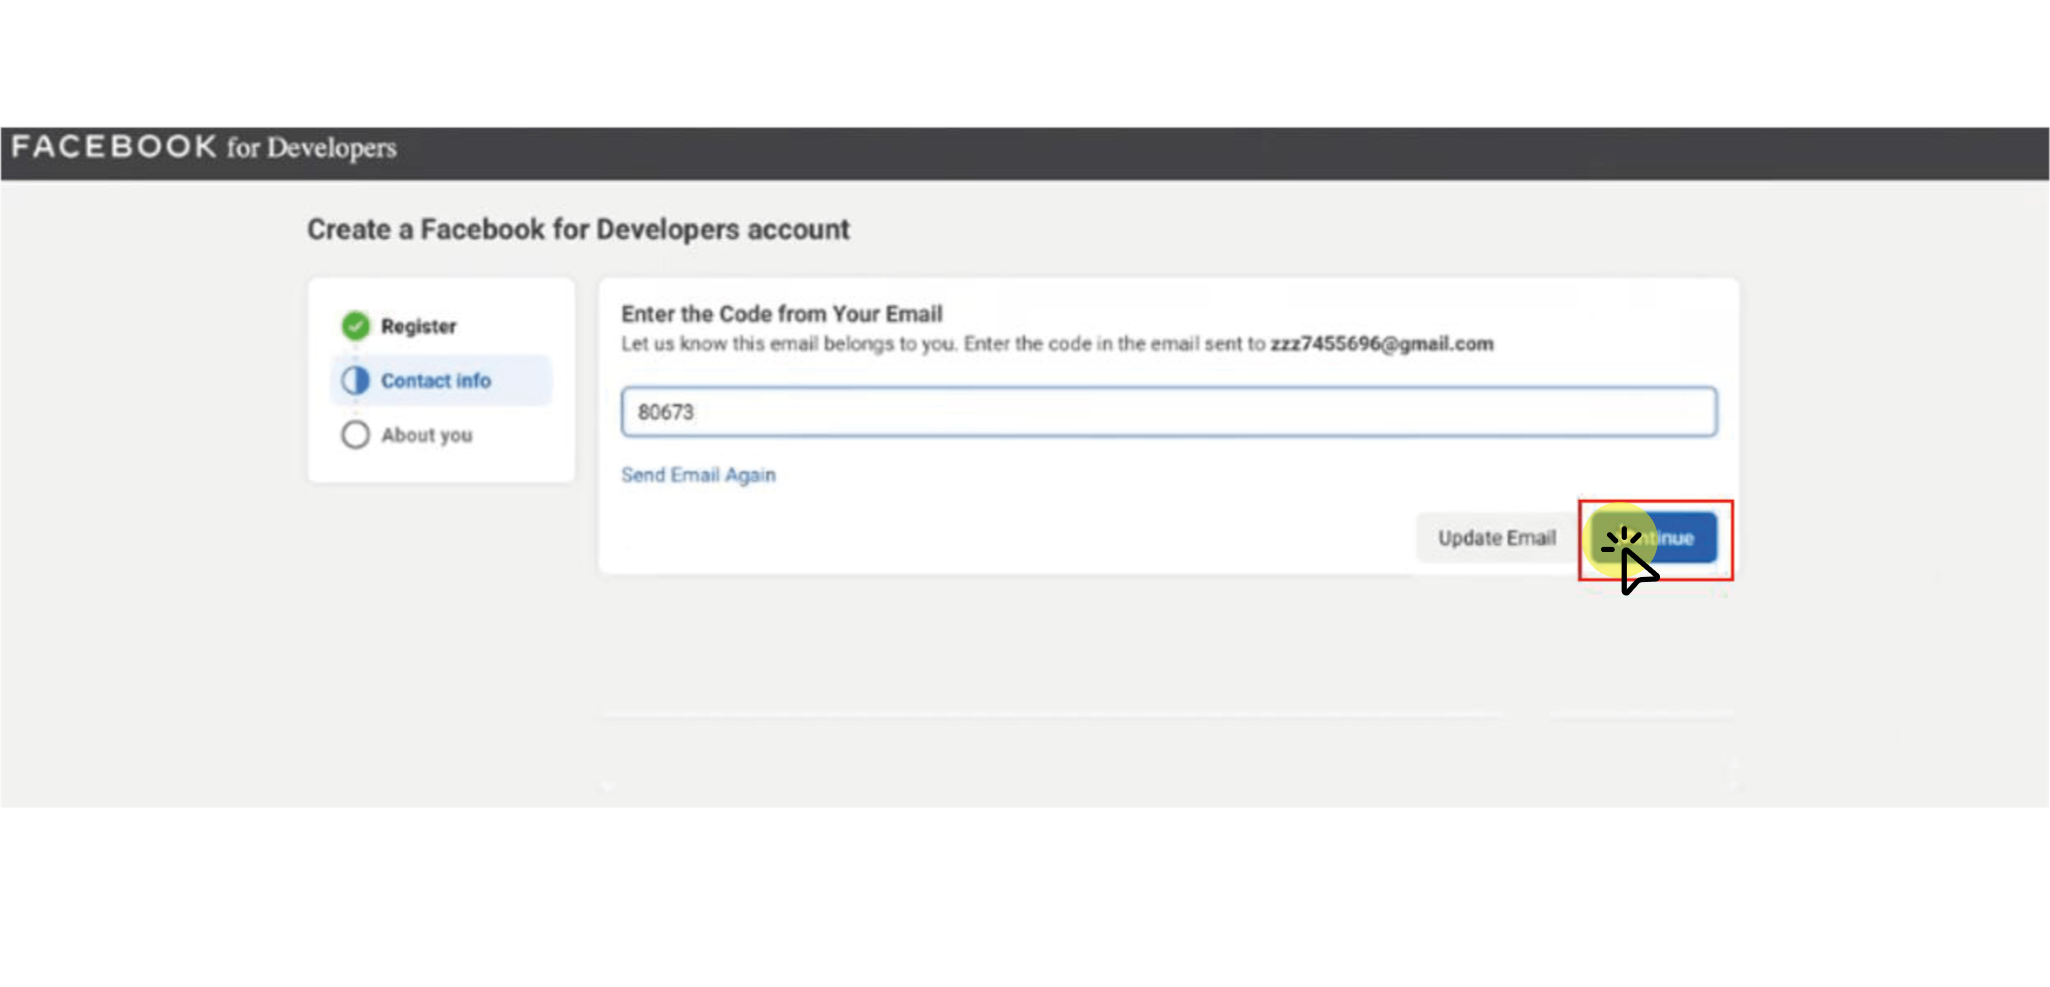
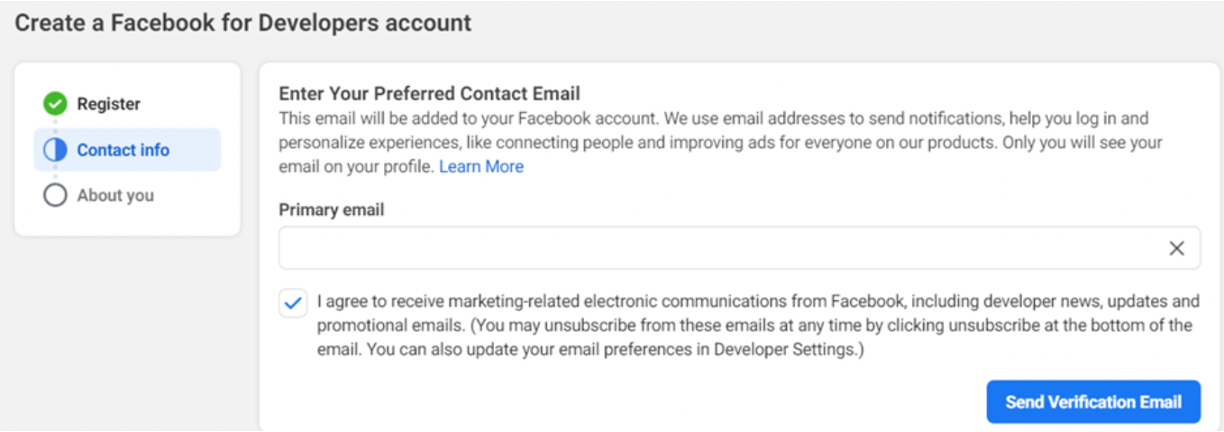 6. Type in the verification code from the email. If you did not get the email from Facebook, click “Send Email Again.”
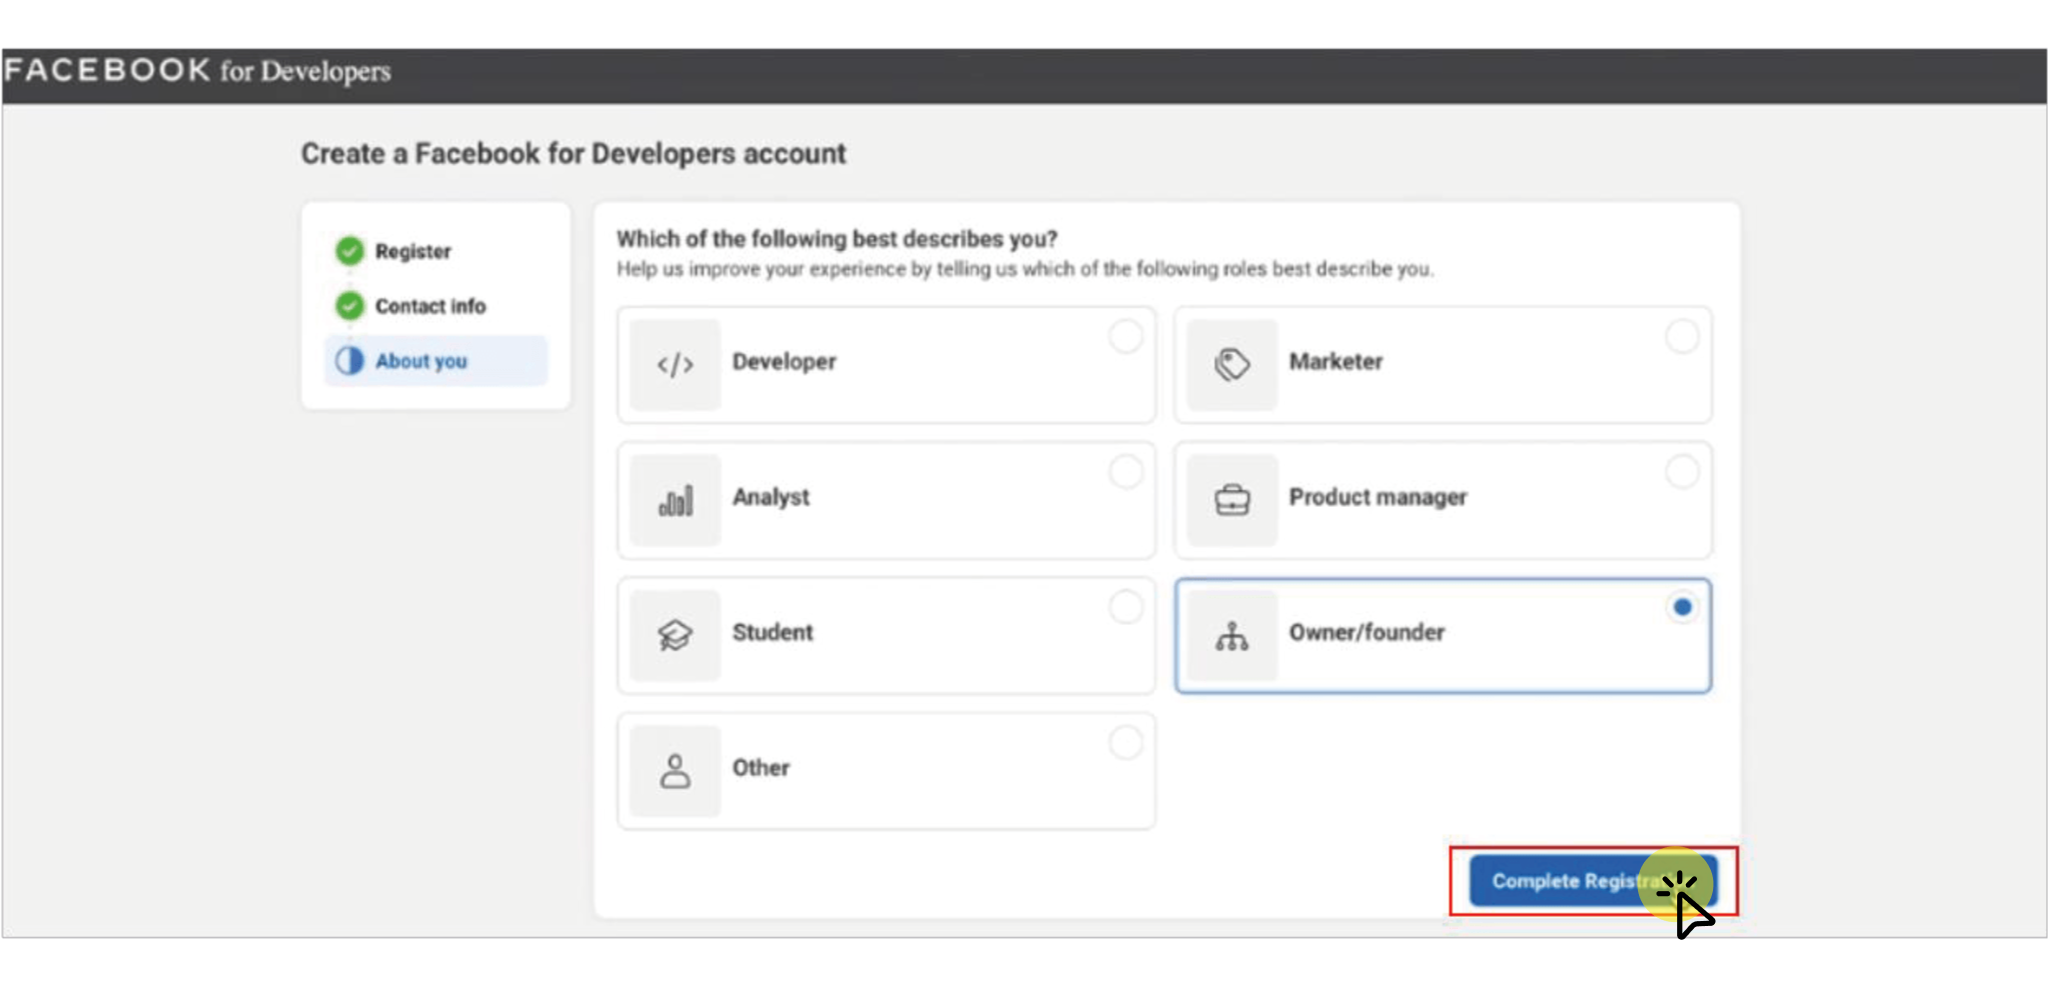
 7. The next step is to choose your role when creating your Facebook for Developers account. In other words, who are you joining up as?
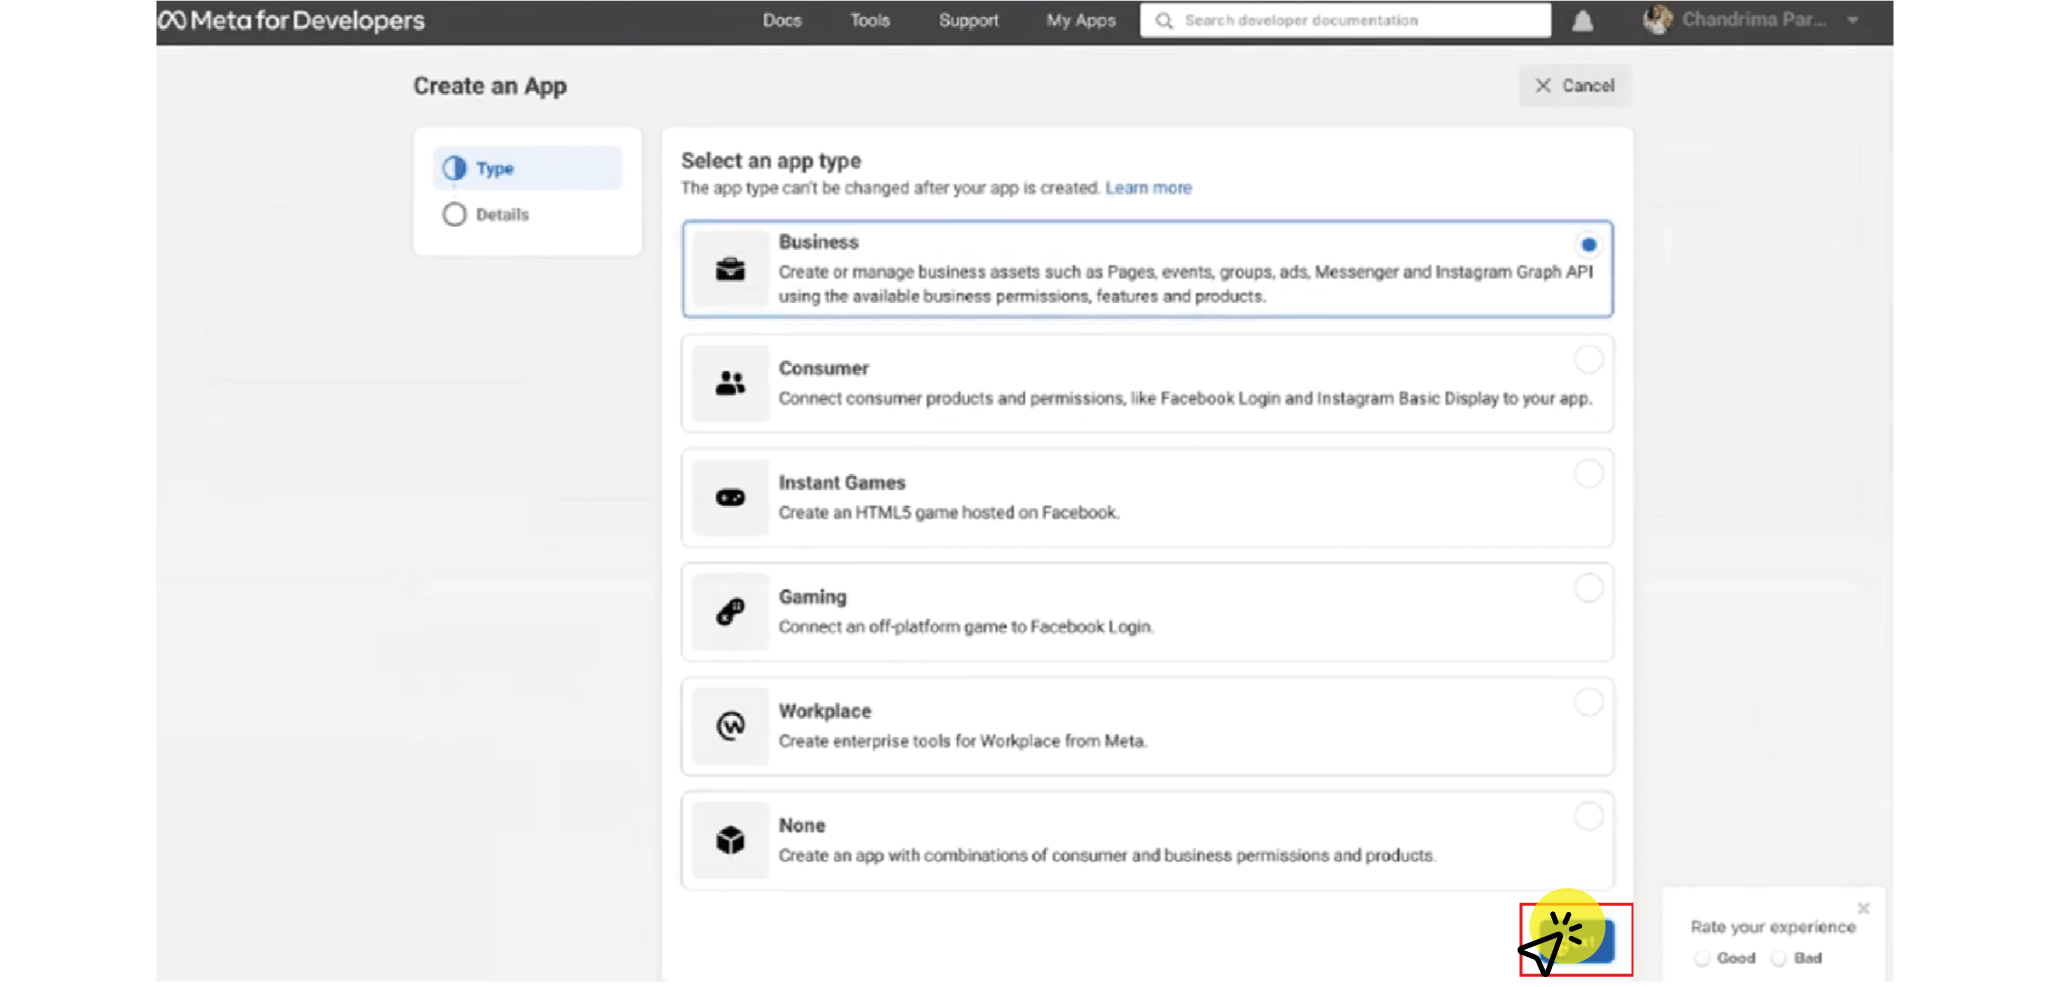
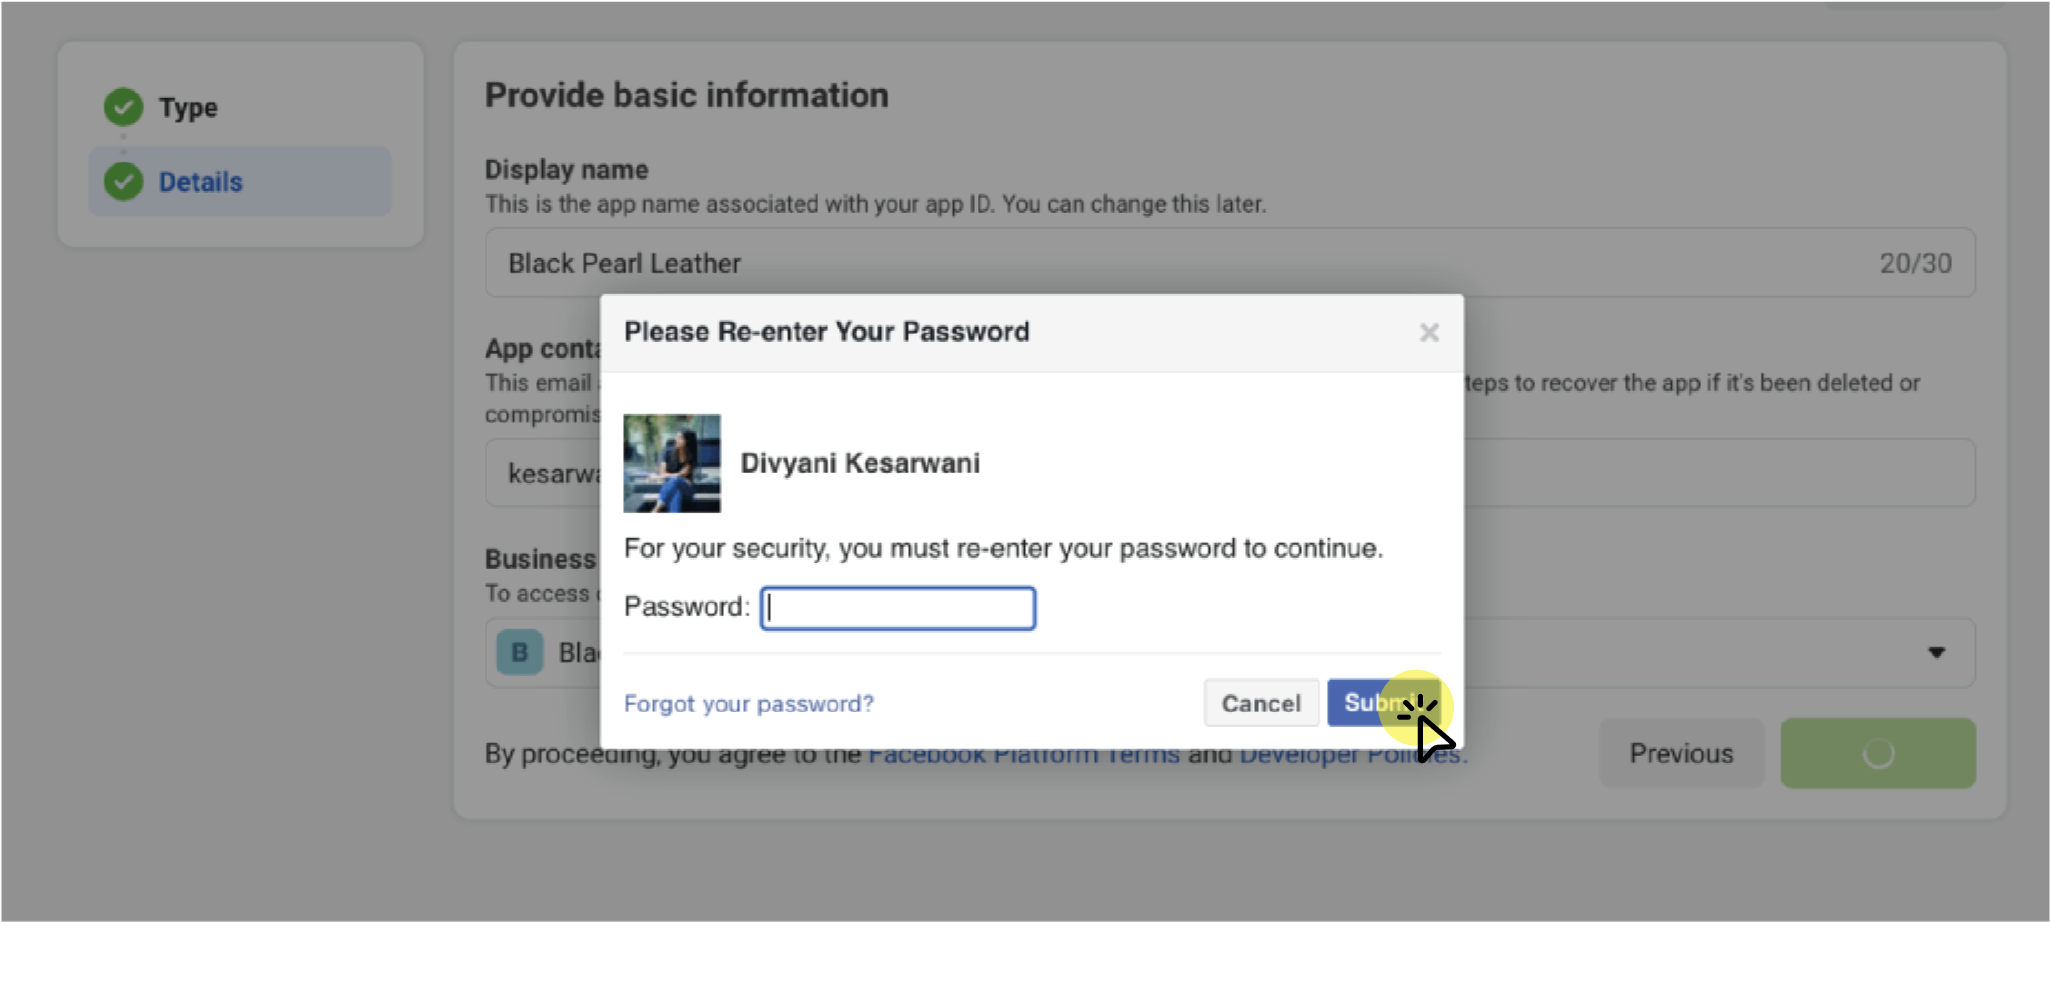
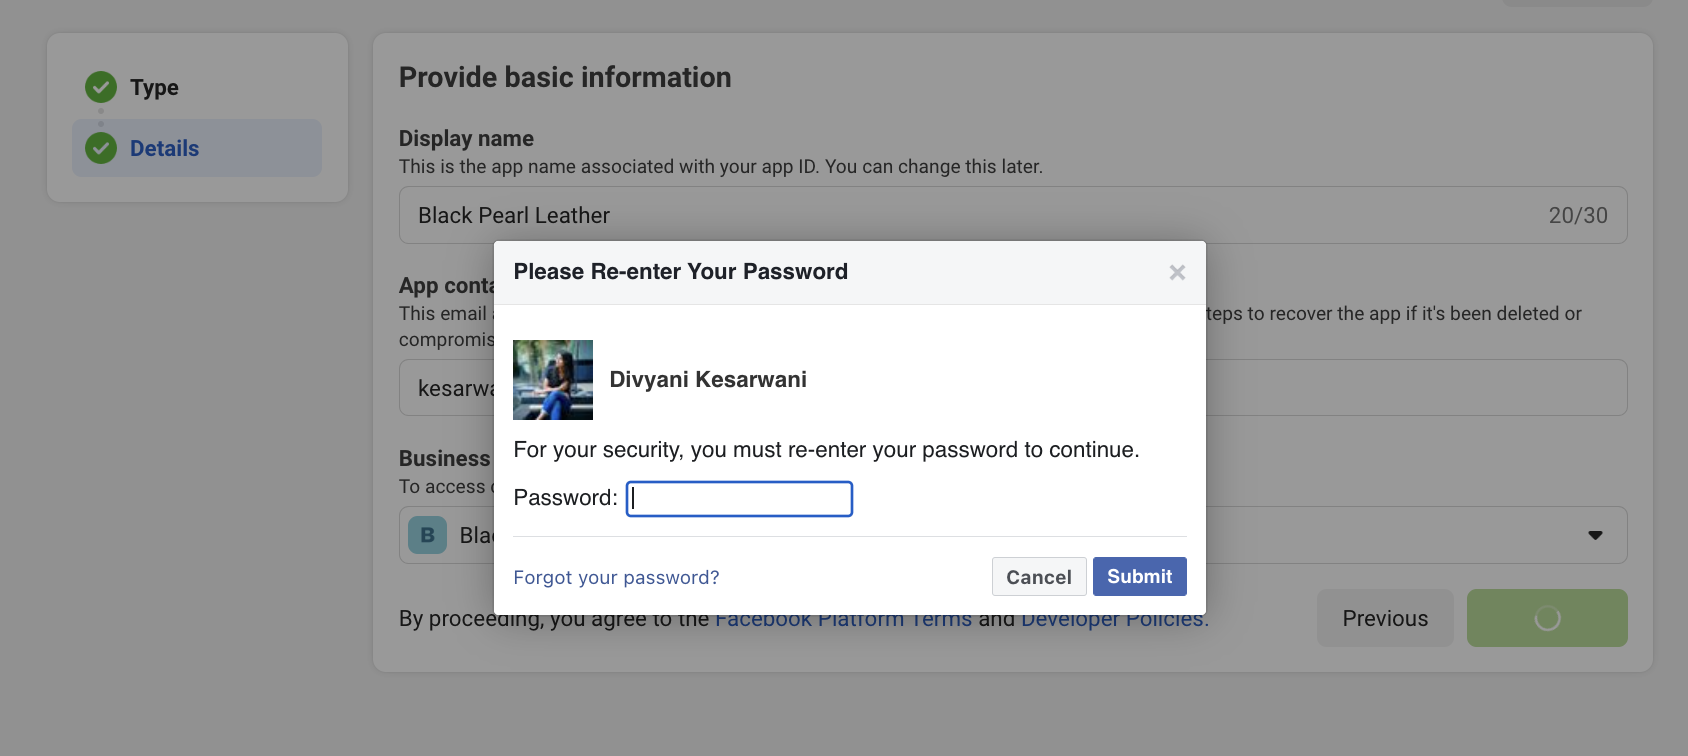
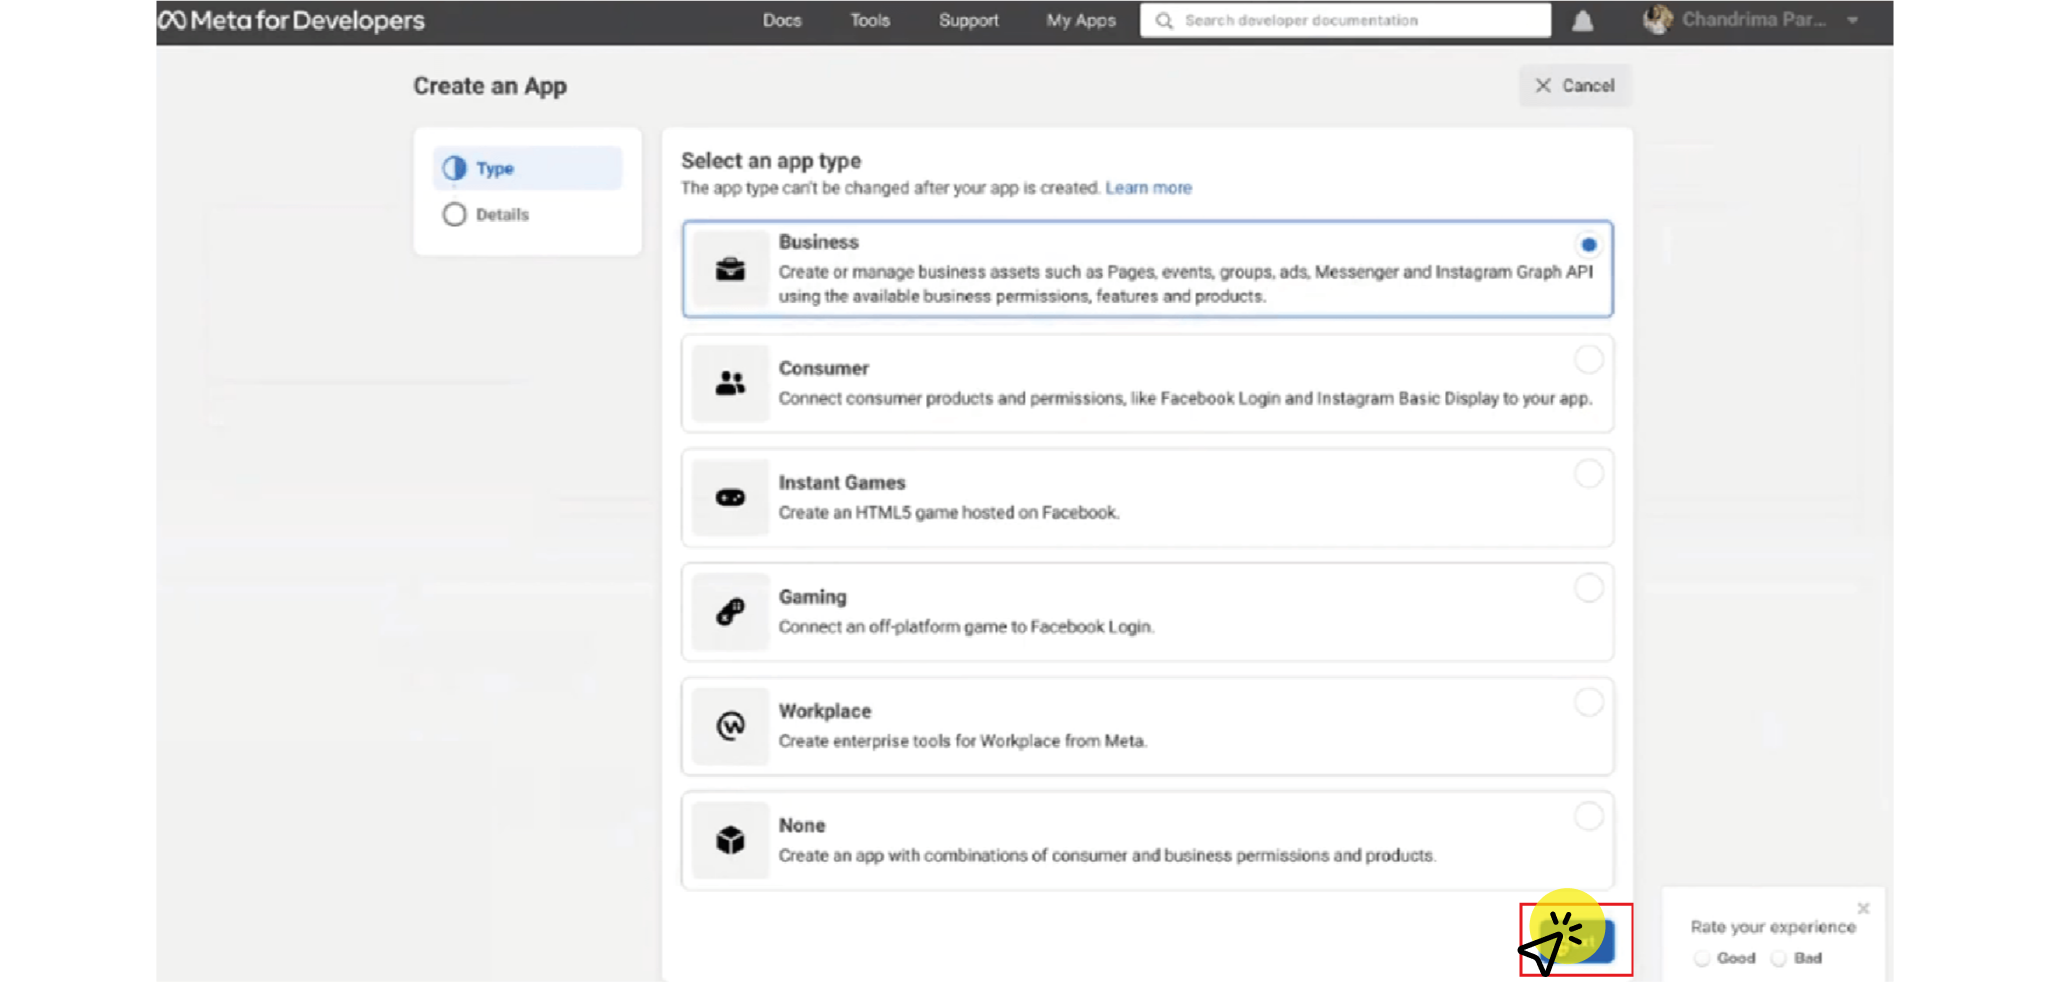
 10. The next step is to give your app a name and input the email address you wish to be connected to it. You can choose any name for the app name, and you should ideally use the email address you used to create your Facebook Business Manager account as the app contact email (for the sake of simplicity, because more email IDs may complicate the registration process). Lastly, select the Facebook Business Manager account that is linked. Select “Create App”. You will have to enter the password to proceed
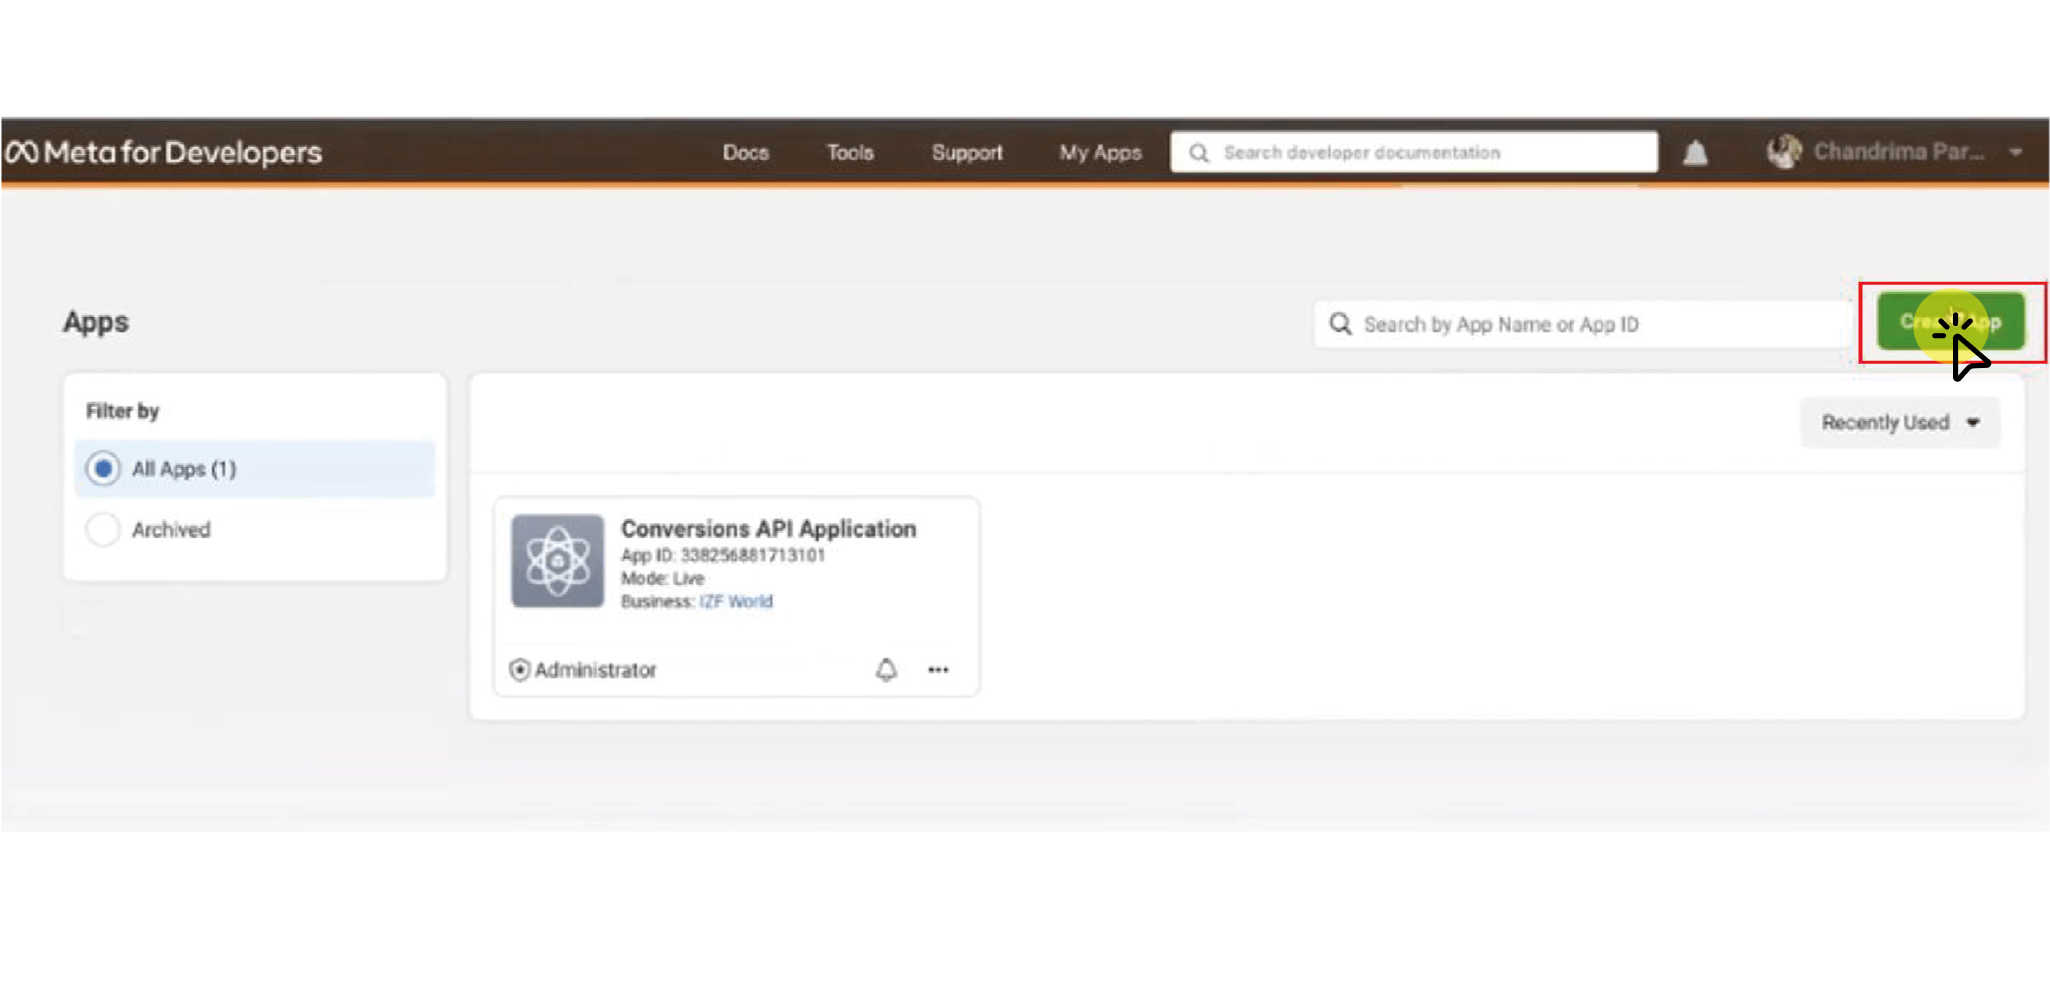
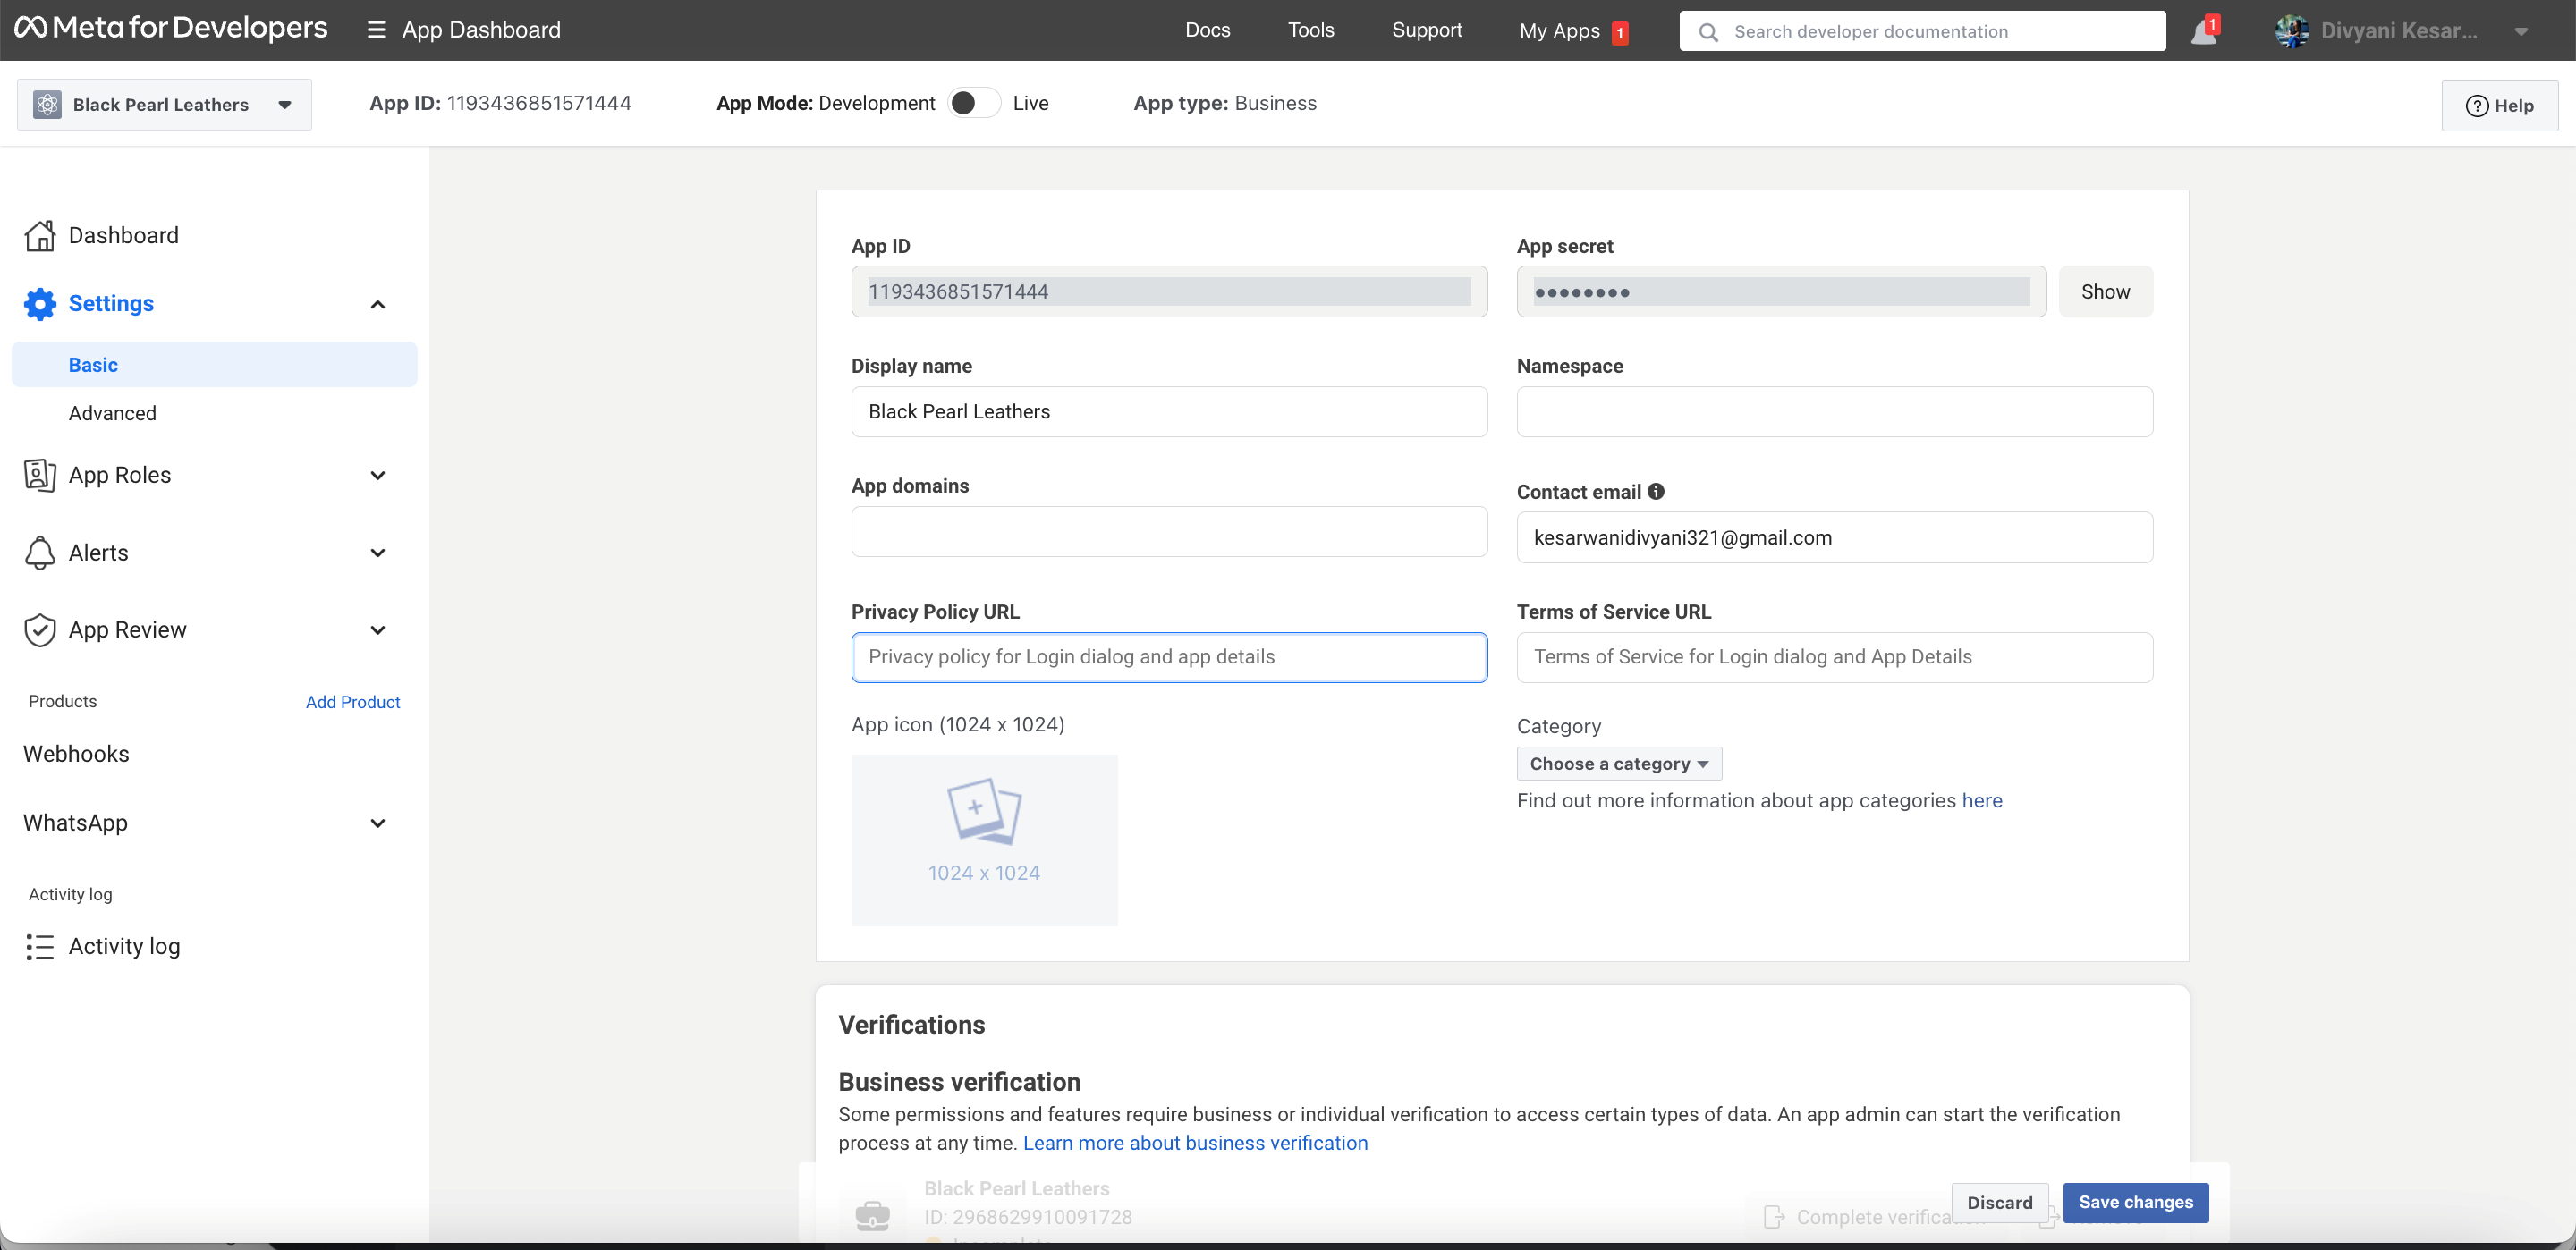
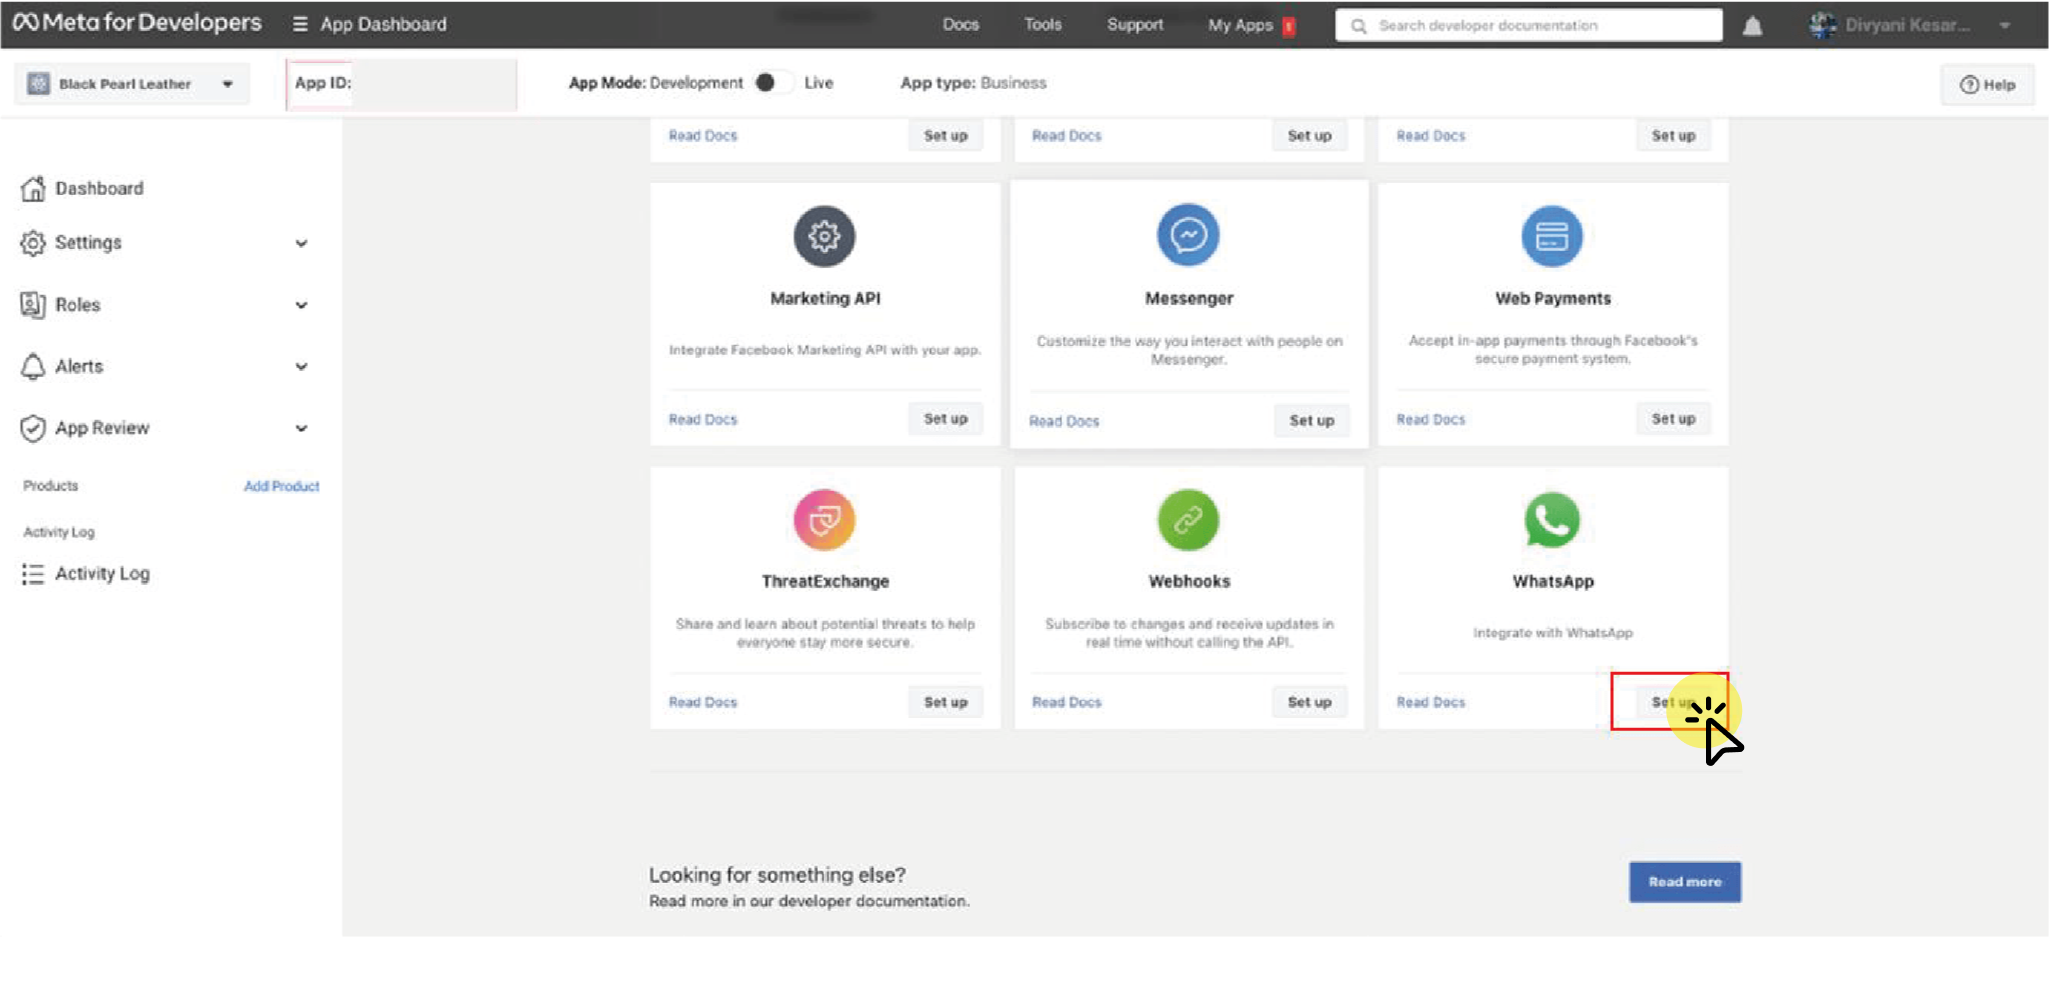
 11. You will be taken to the “App Dashboard,” which is seen below. Simply take a note of the displayed “App ID” and return to your Business Settings. From the menu on the left, select “Apps.”
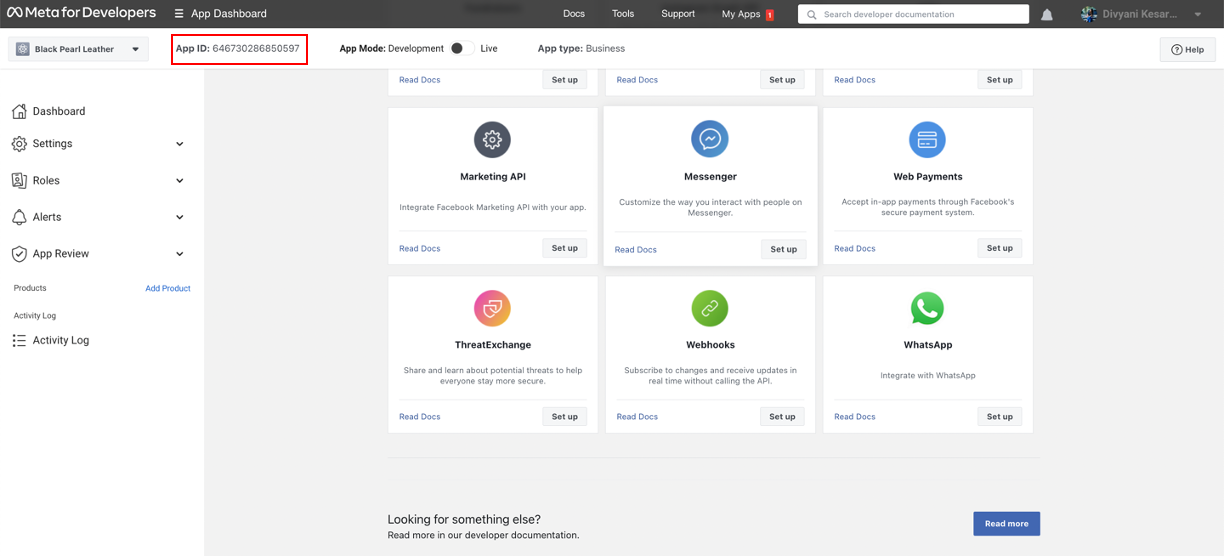

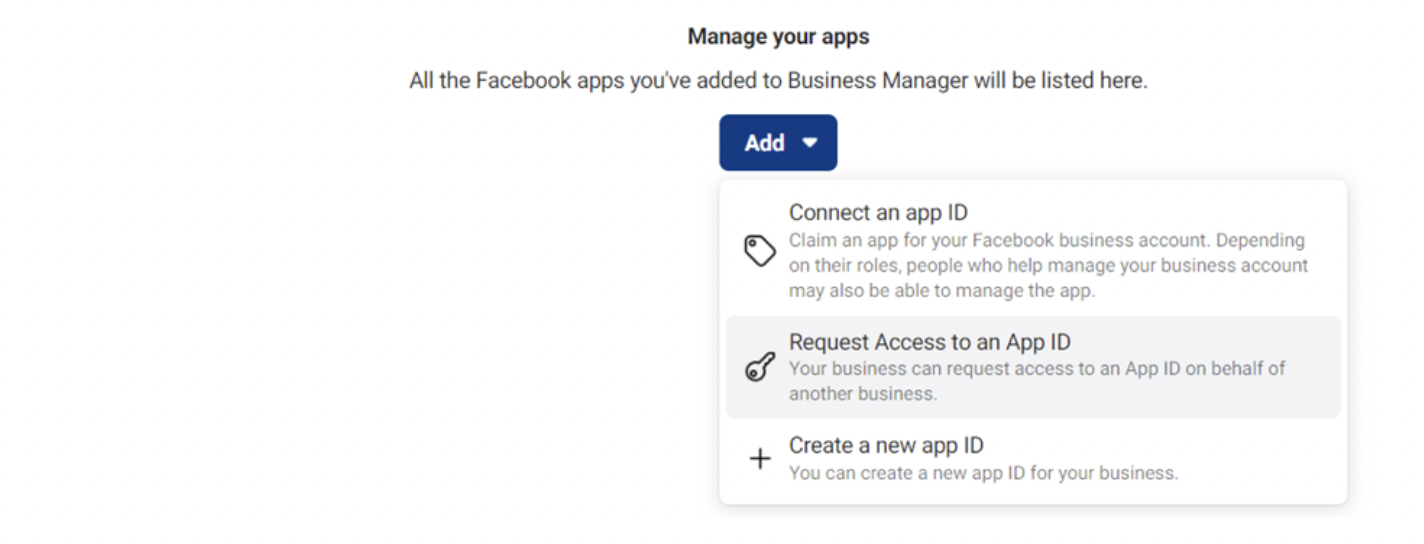 13. Click “Add app” and then paste the App ID that you copied from your Facebook for Developers panel into the appropriate section.
 14. Since you are the app’s admin, your request will be immediately authorised. Select “OK.” Refresh the page now, and the added app should appear.
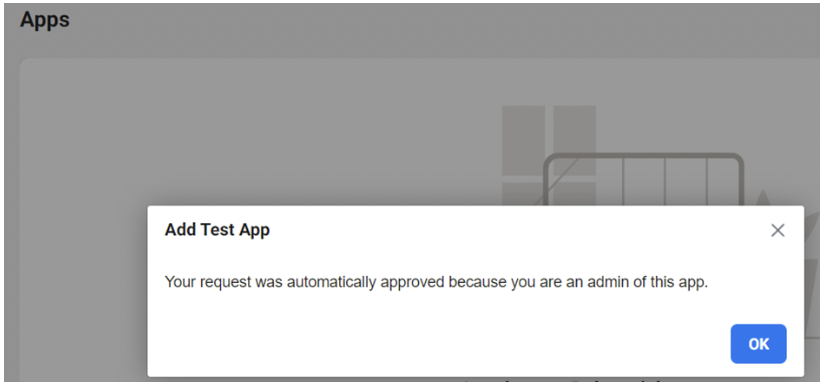
 Follow the below steps to proceed –
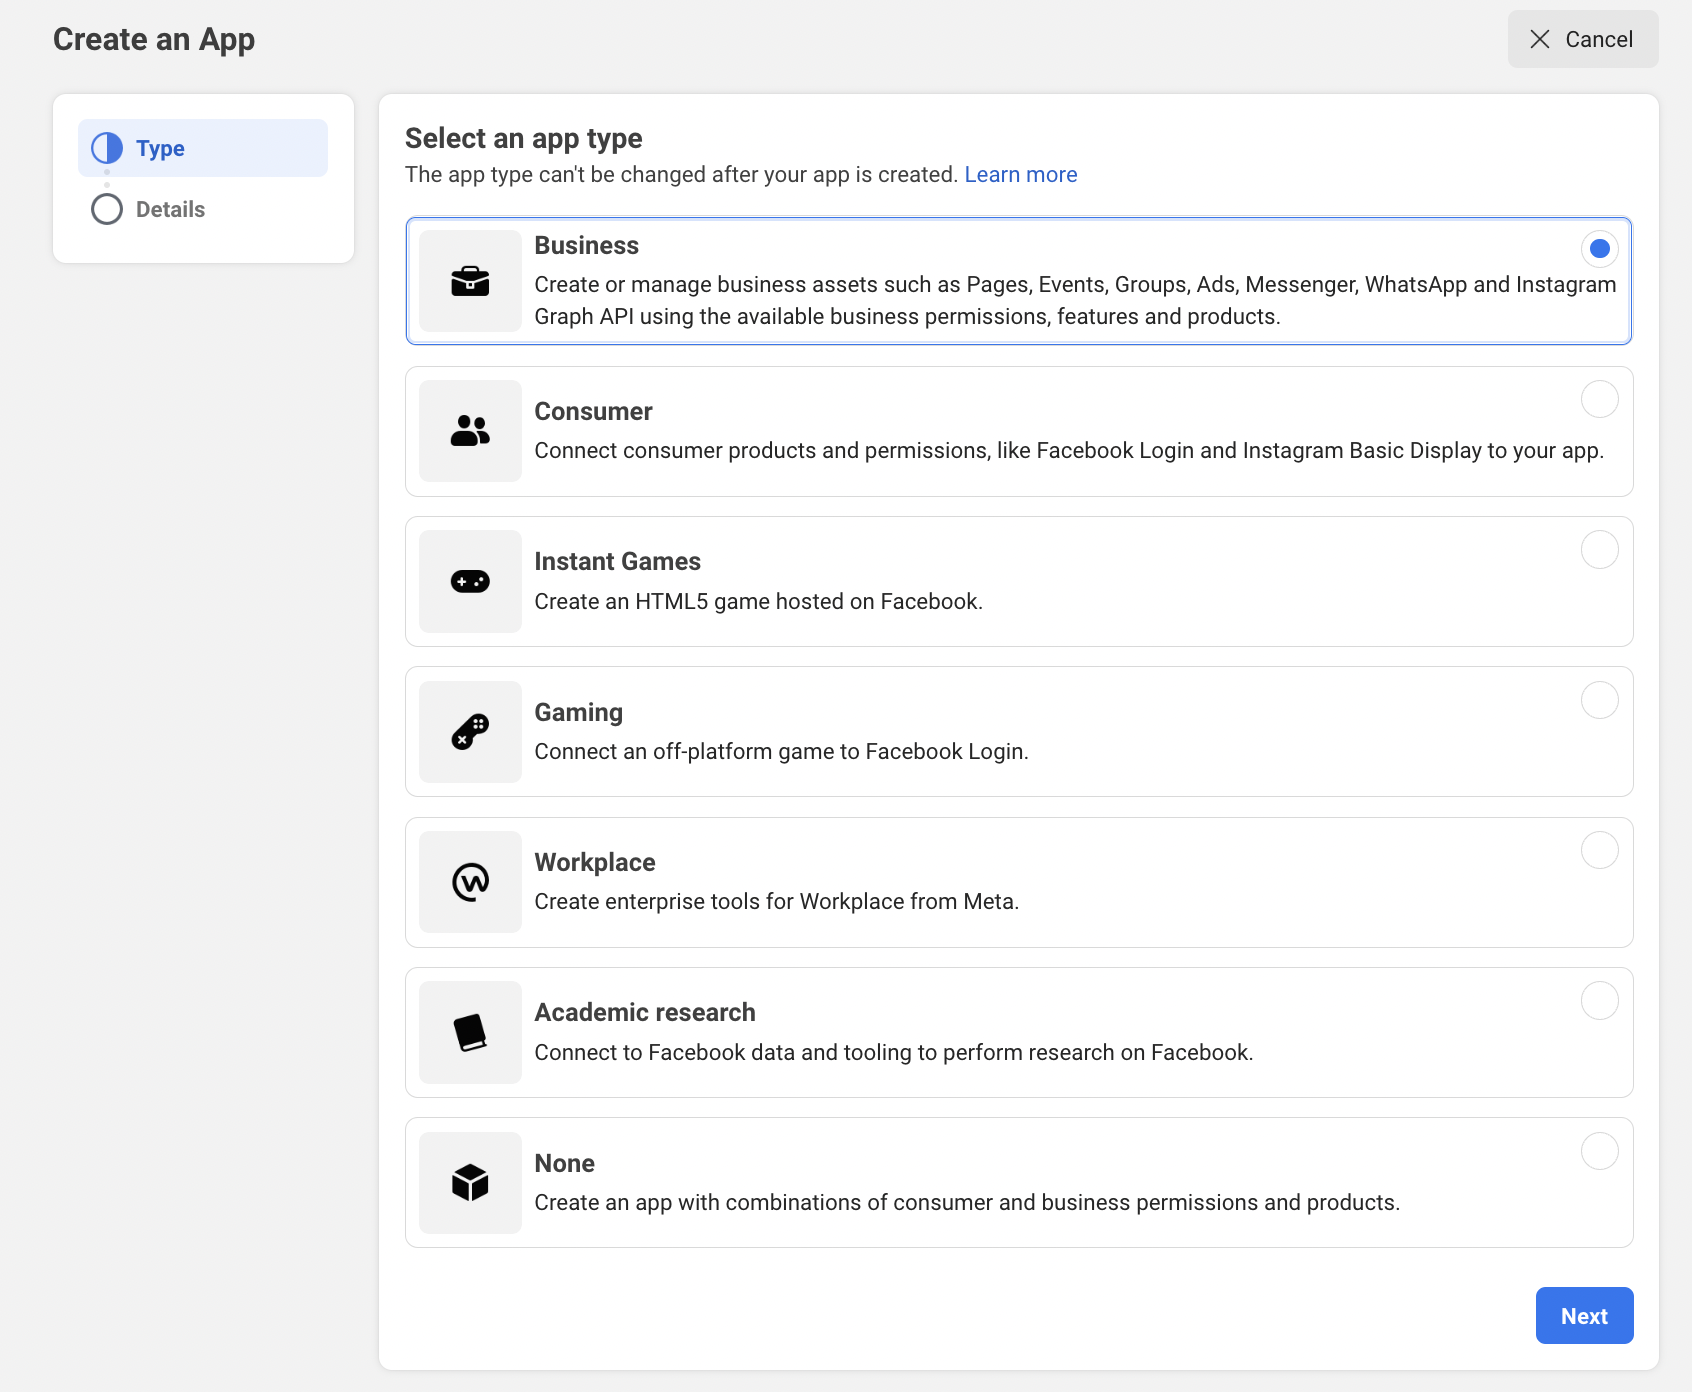 2. The next step is to give your app a name and input the email address you wish to be connected to it. You can choose any name for the app name, and you should ideally use the email address you used to create your Facebook Business Manager account as the app contact email (for the sake of simplicity, because more email IDs may complicate the registration process). Lastly, select the Facebook Business Manager account that is linked. Select “Next.”
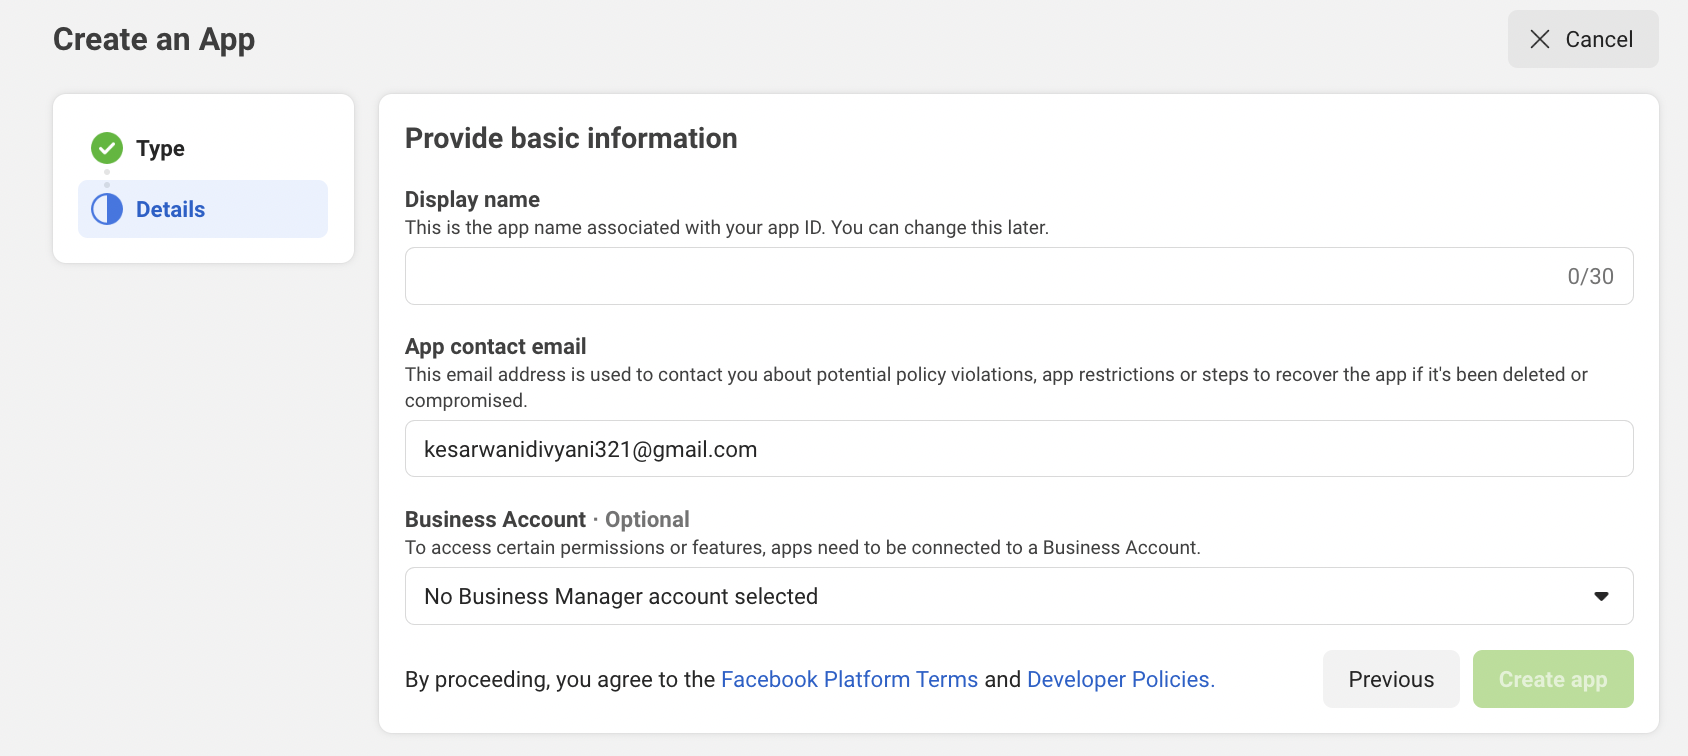 3. Go to App Review on the left side, click on Permissions and Features and click on “Request Advance Access”
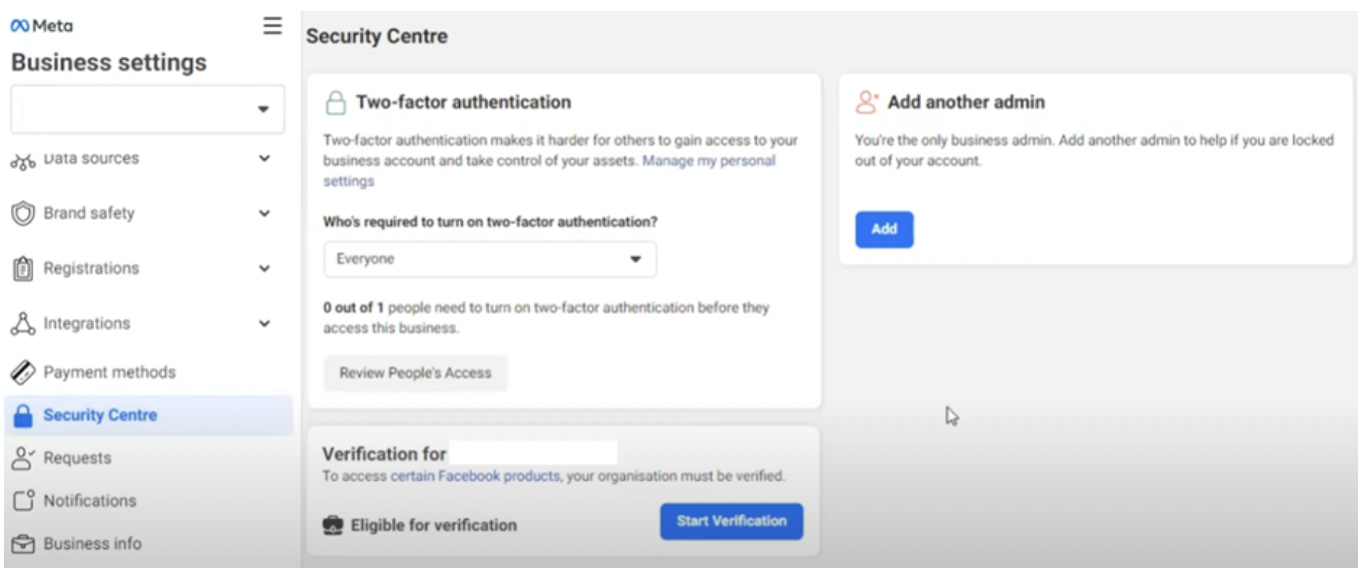
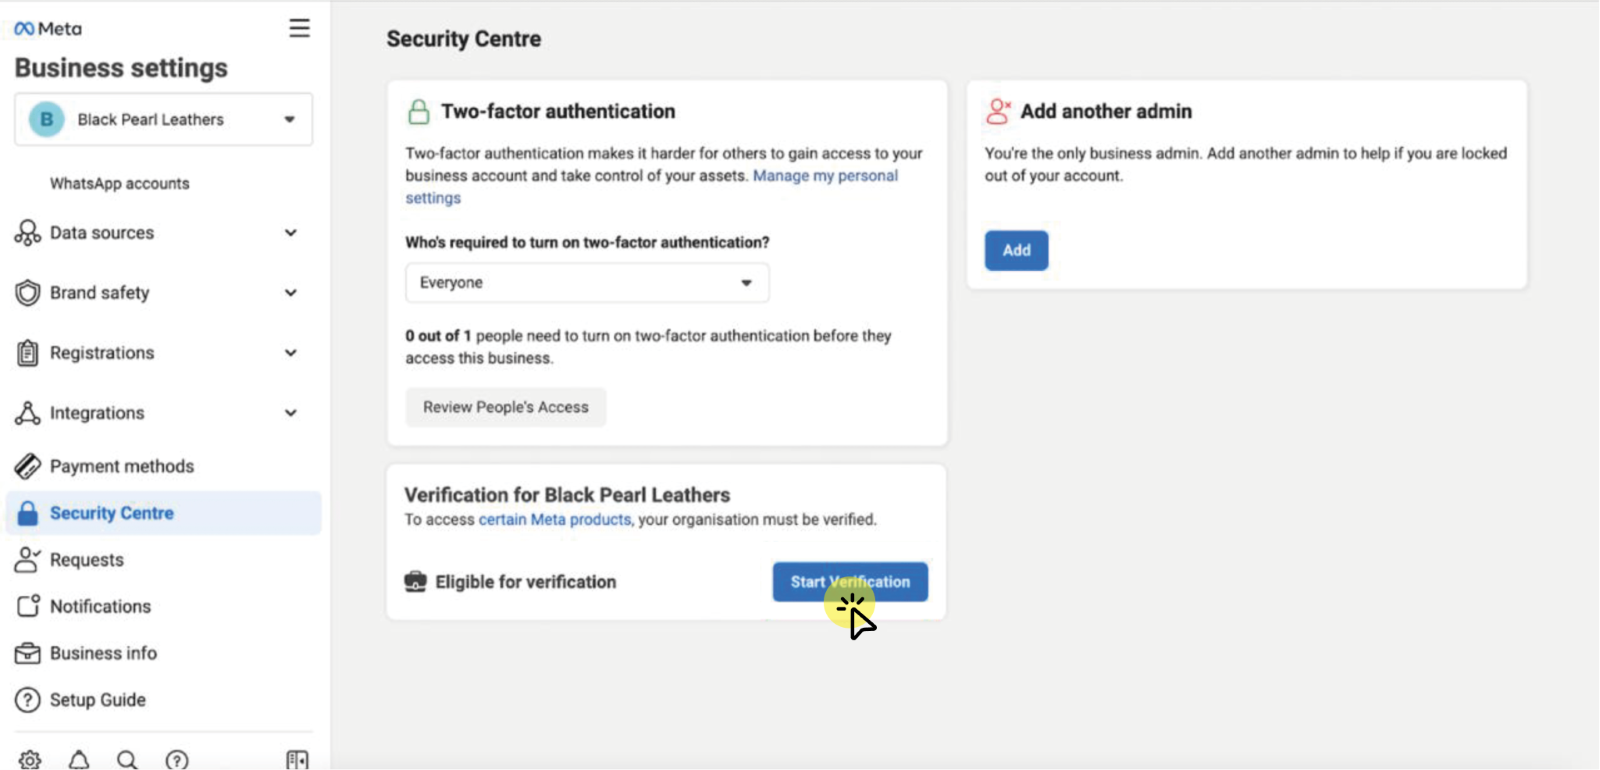
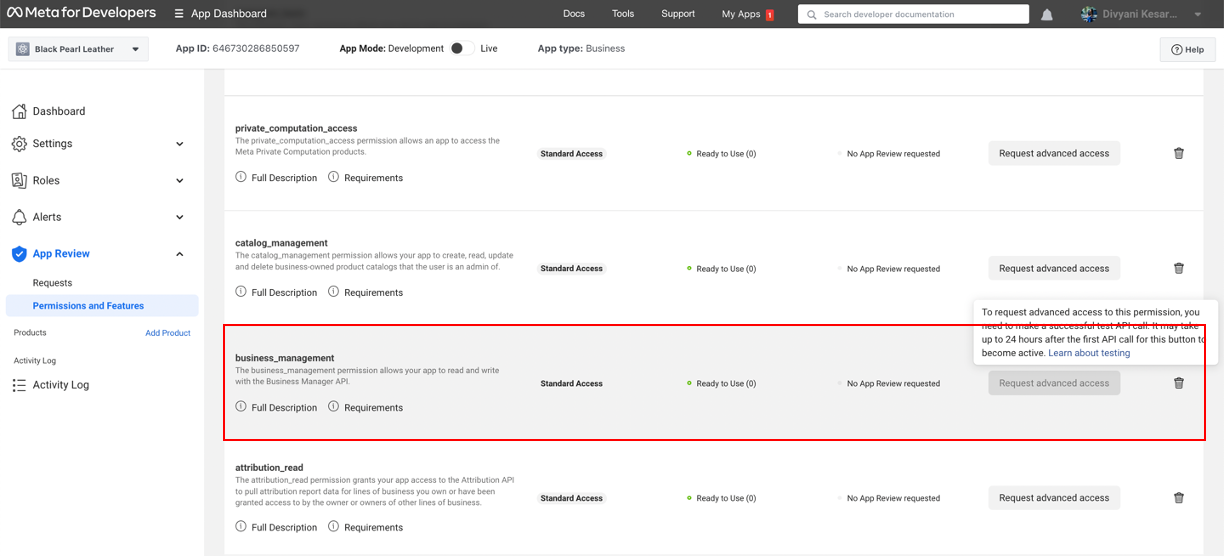 4. Refresh the page after selecting “Security Center” from the menu on the left, and the option for verification should appear.
 2. Once you have login with your Facebook account, click on ‘Get Started’


 11. Now you have to select the Business Account and click on ‘Continue’
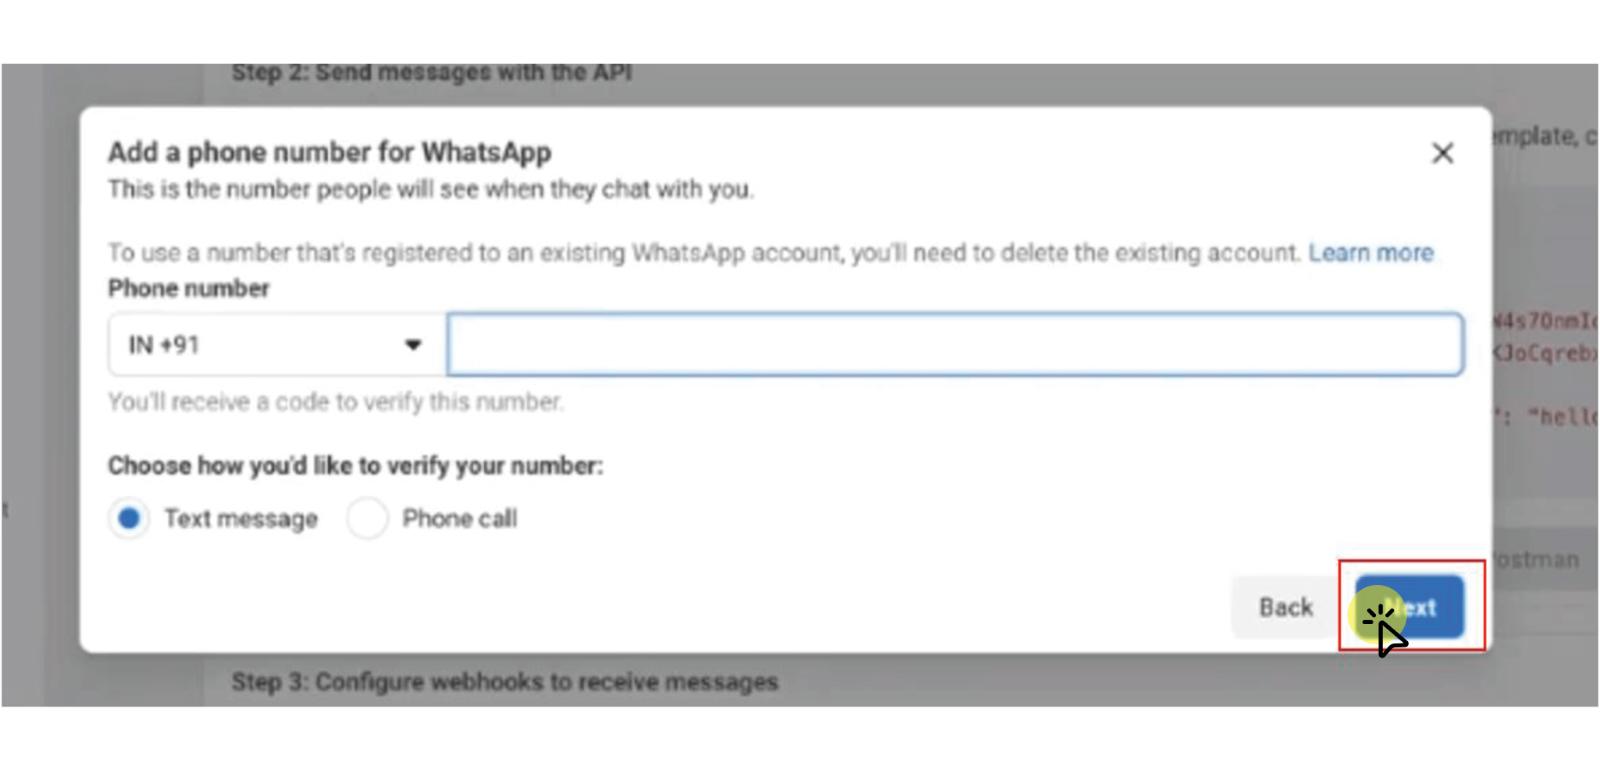
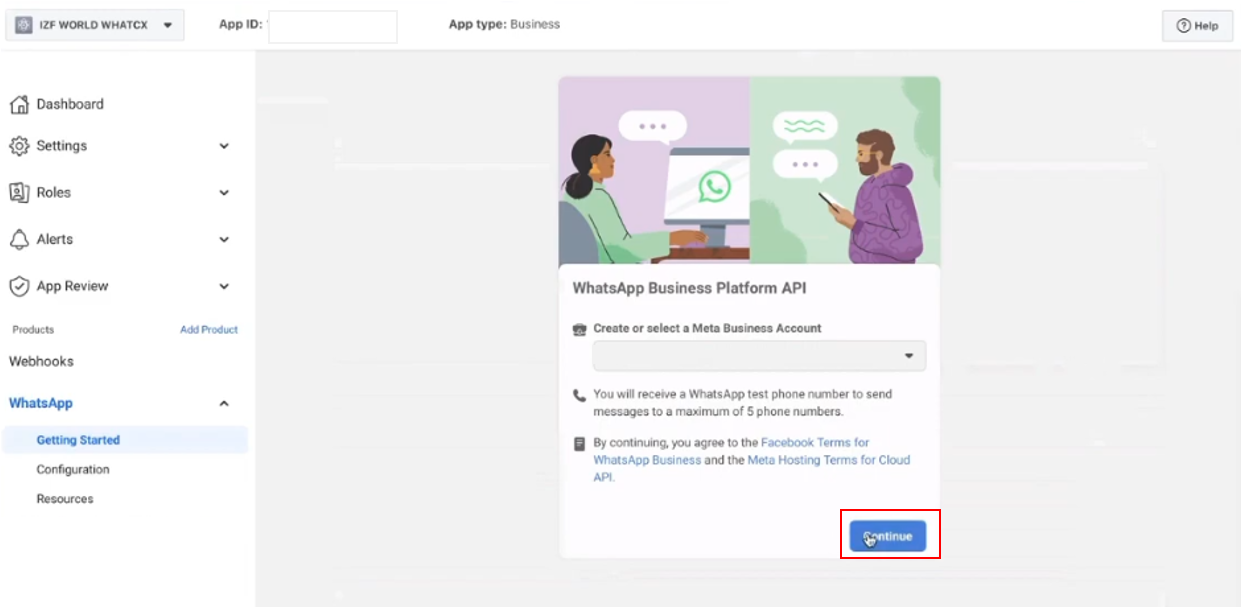 12. You will now have to scroll down and enter your phone number which you want to use for WhasApp communication.
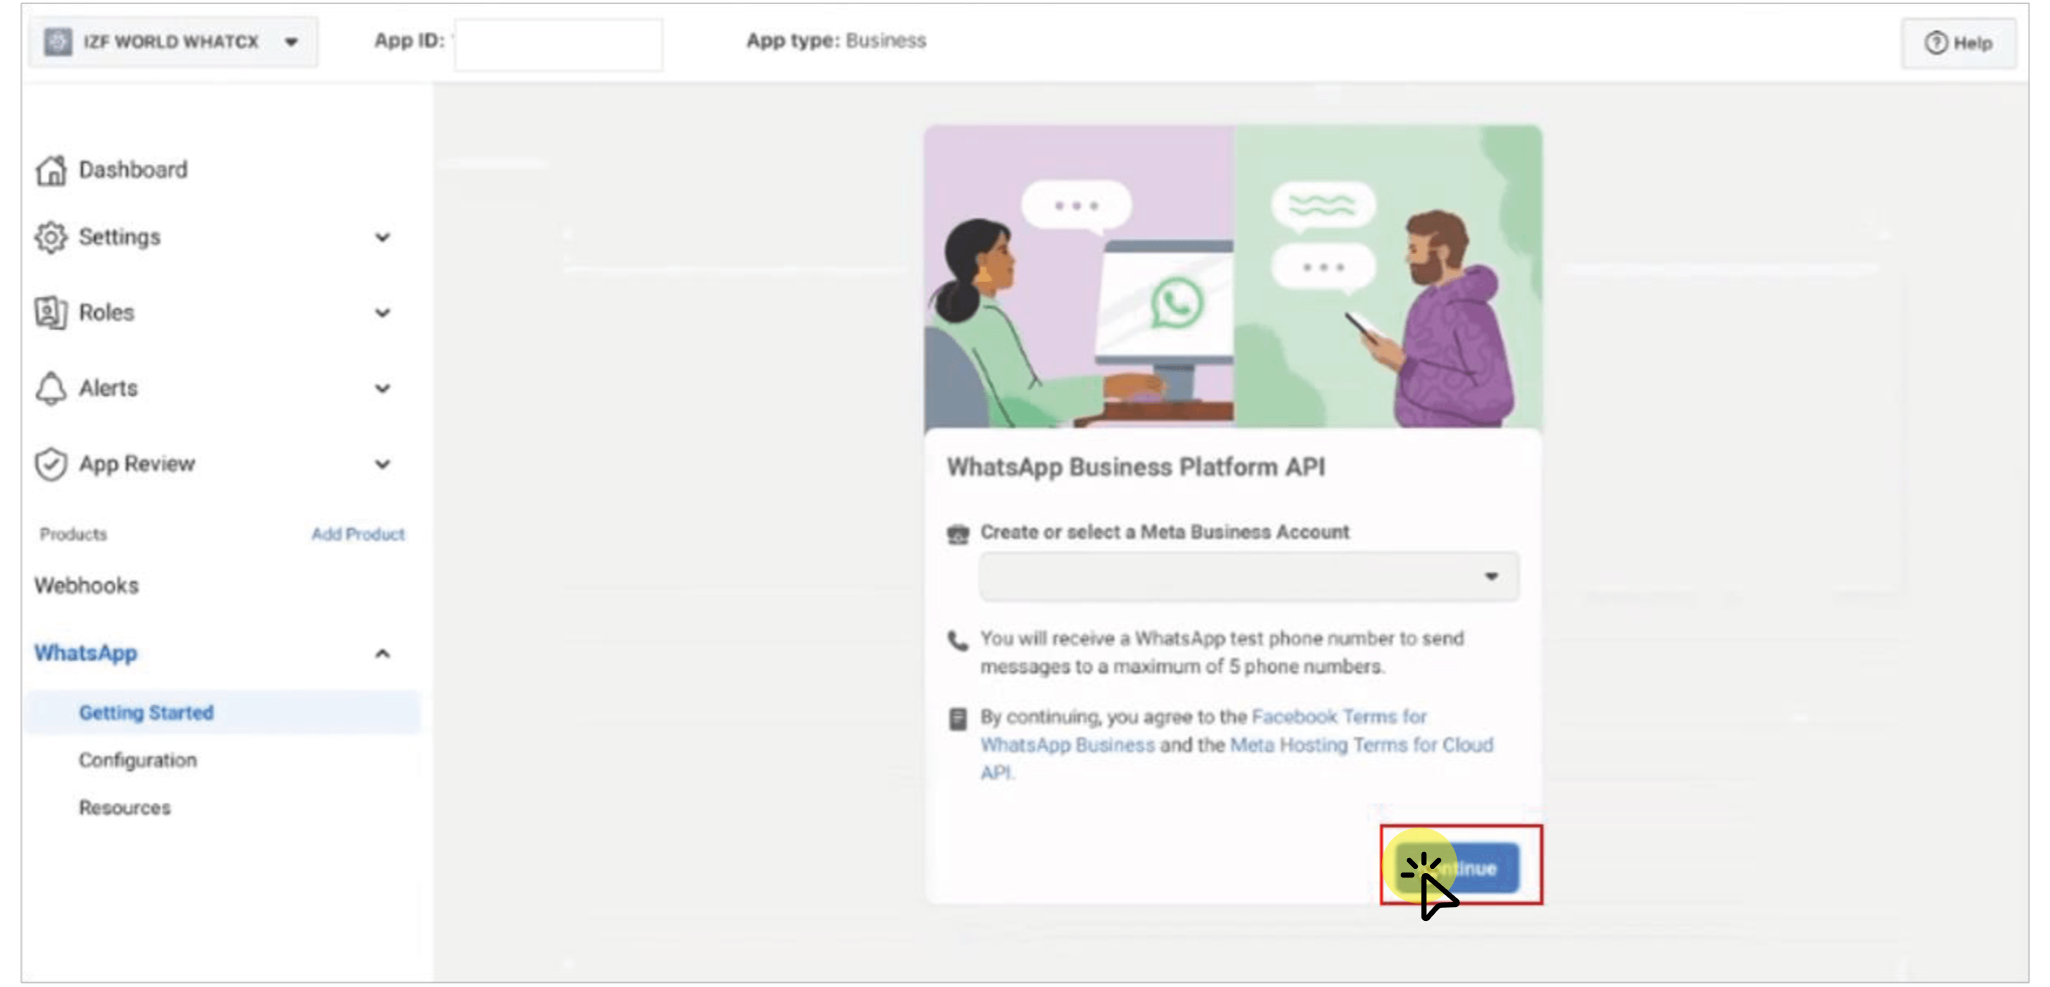
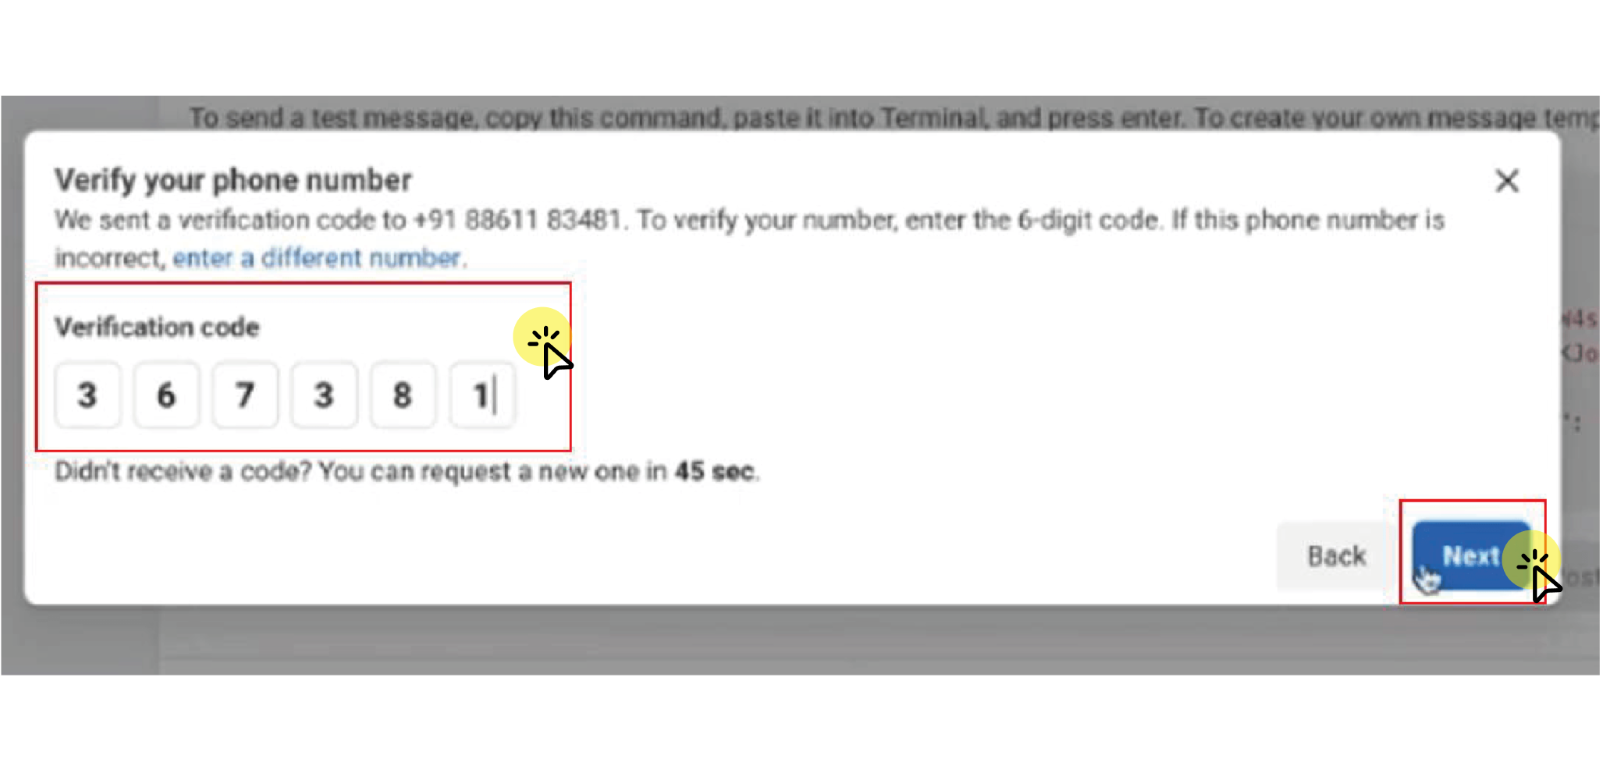
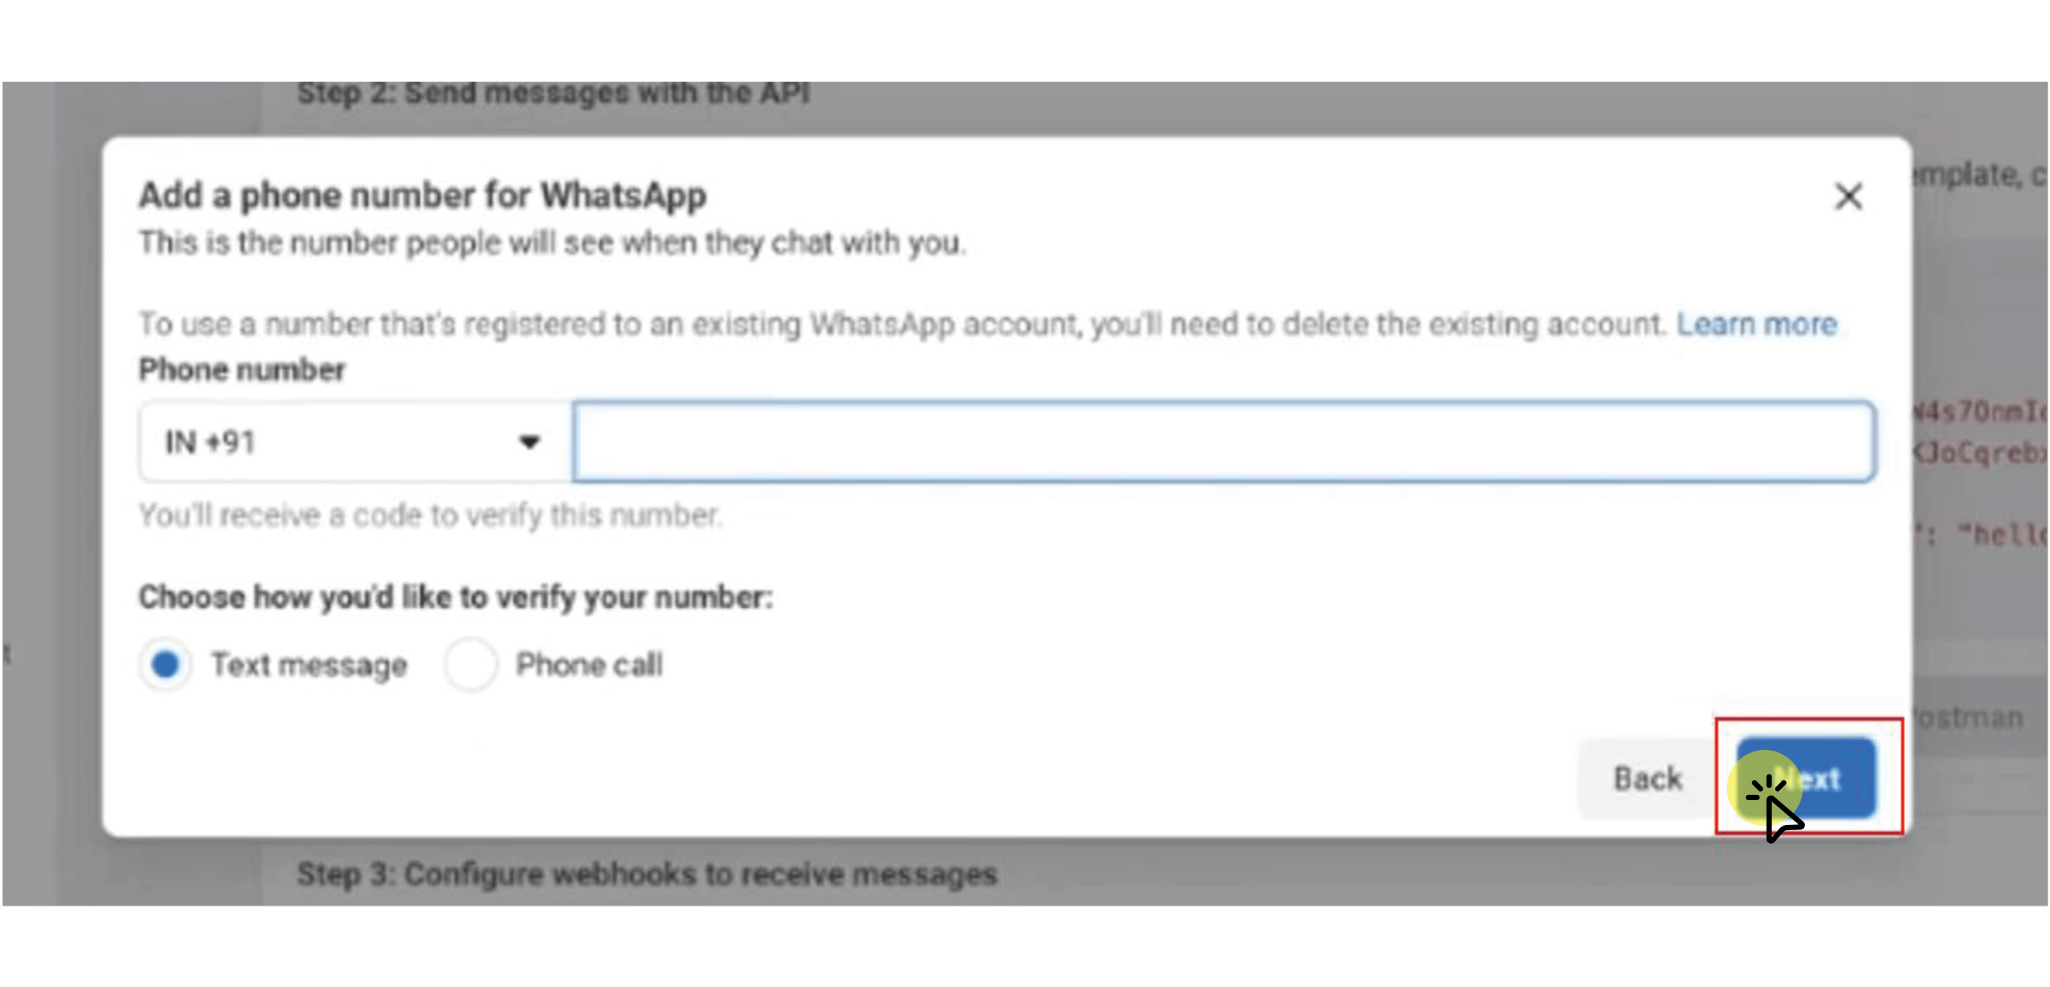 16. Enter the OTP received and click Next.
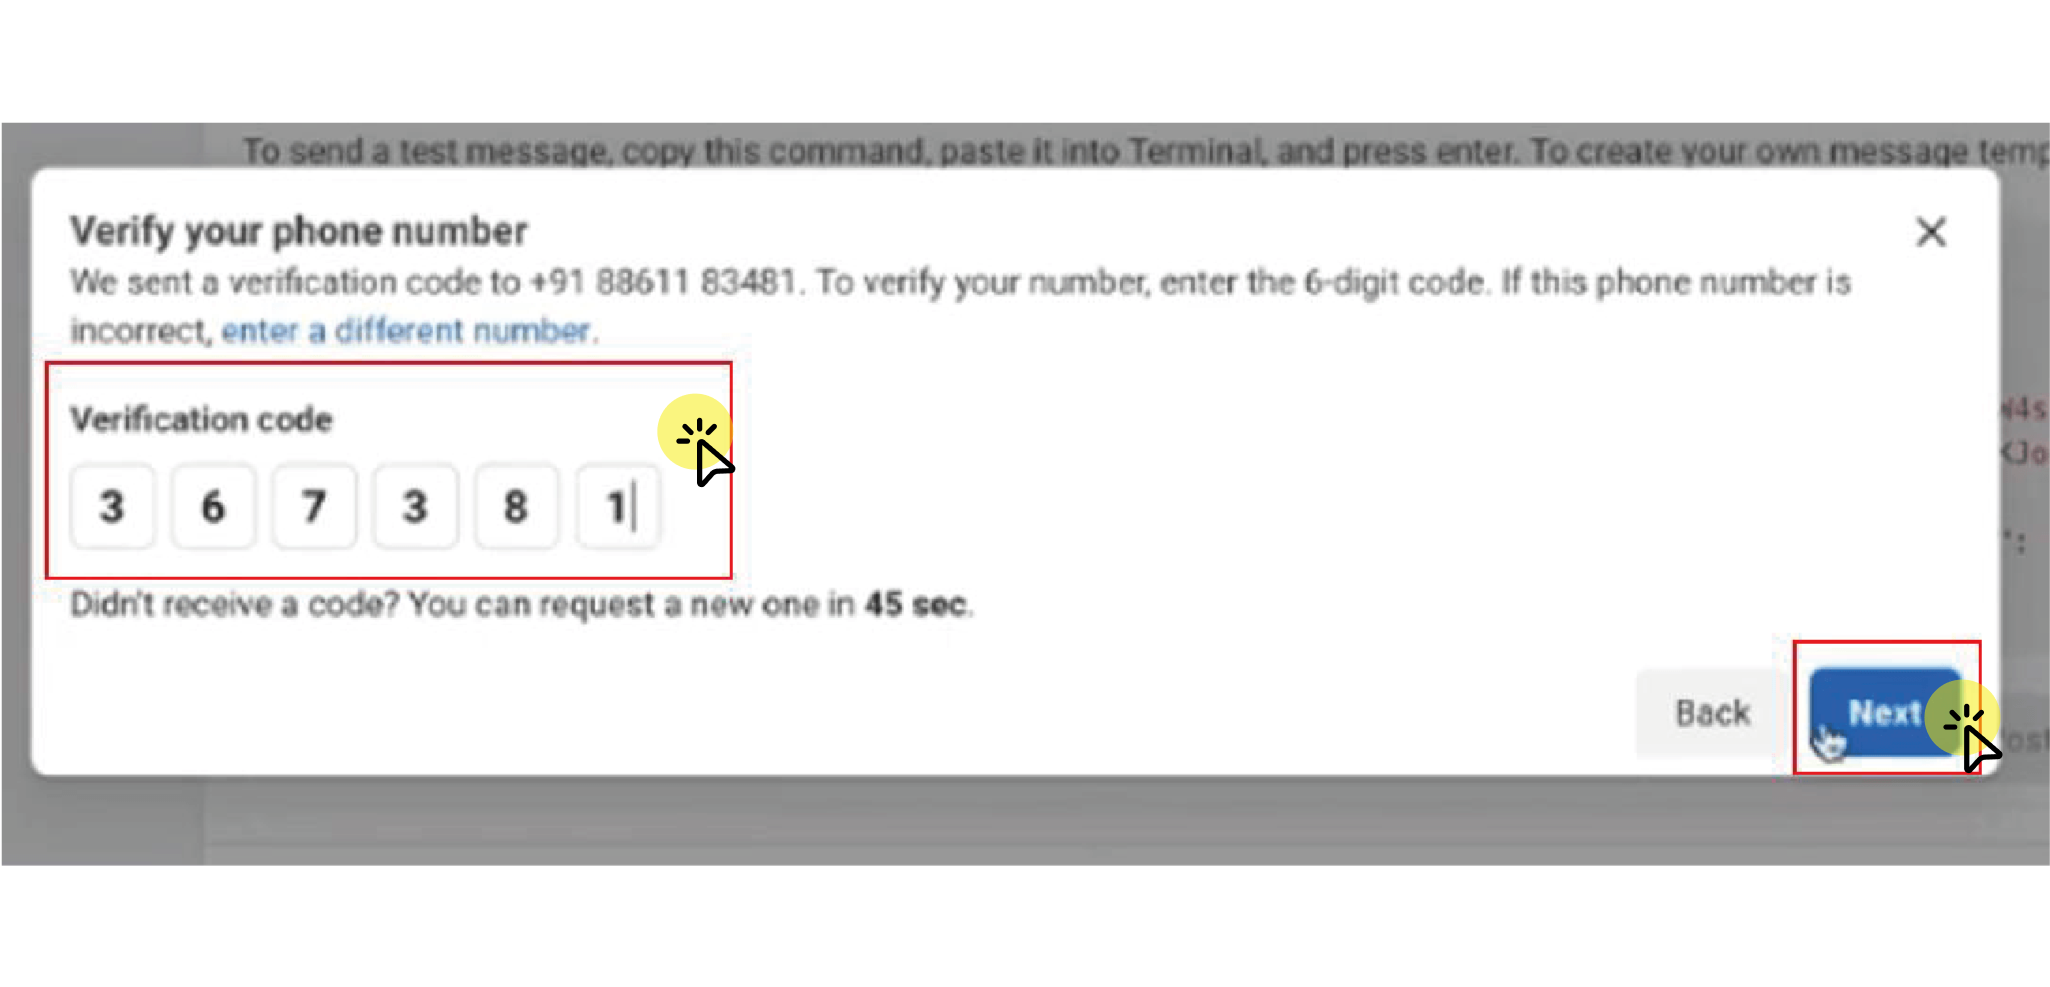


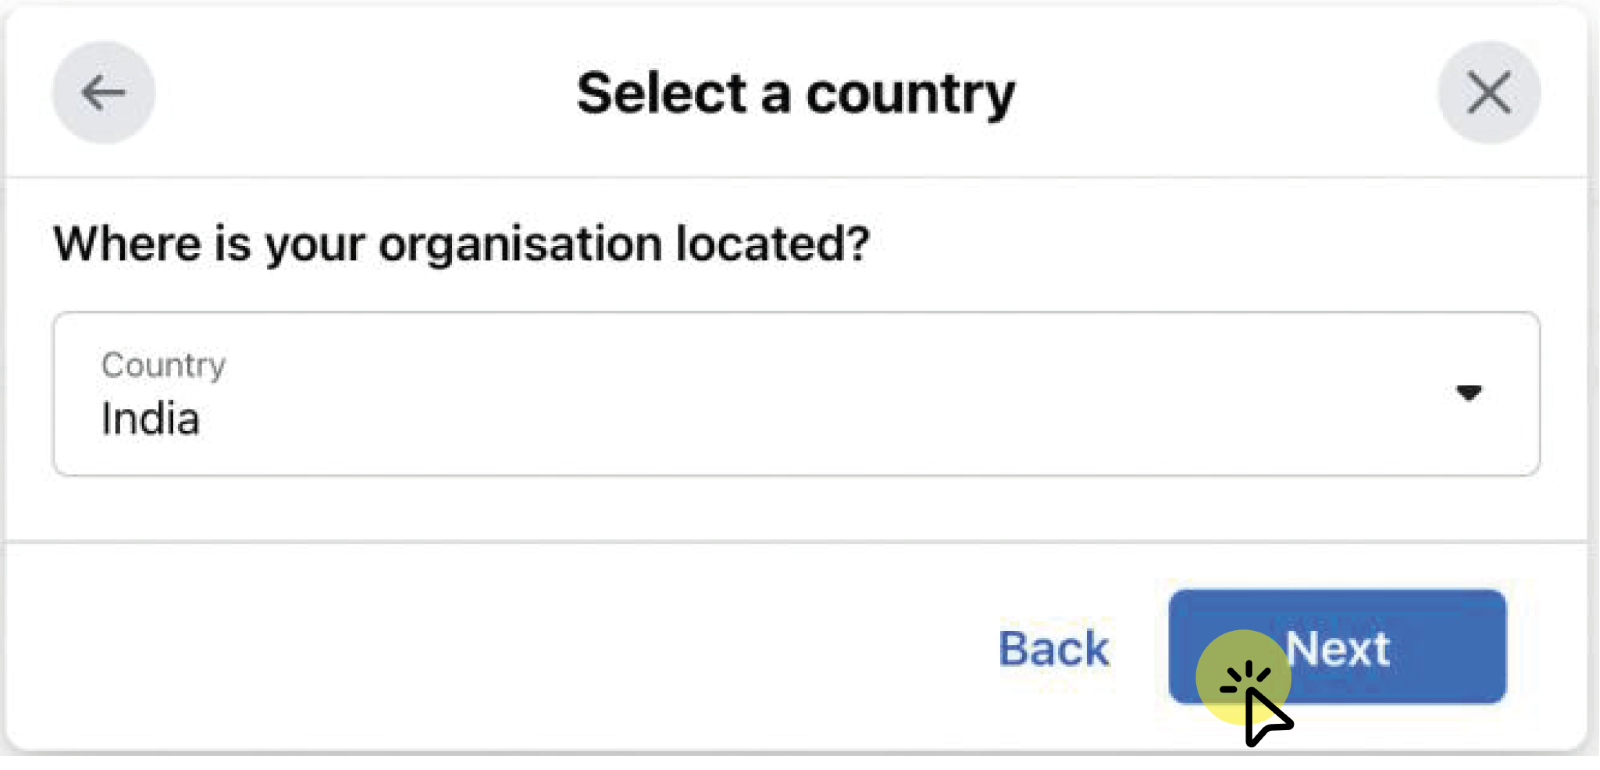
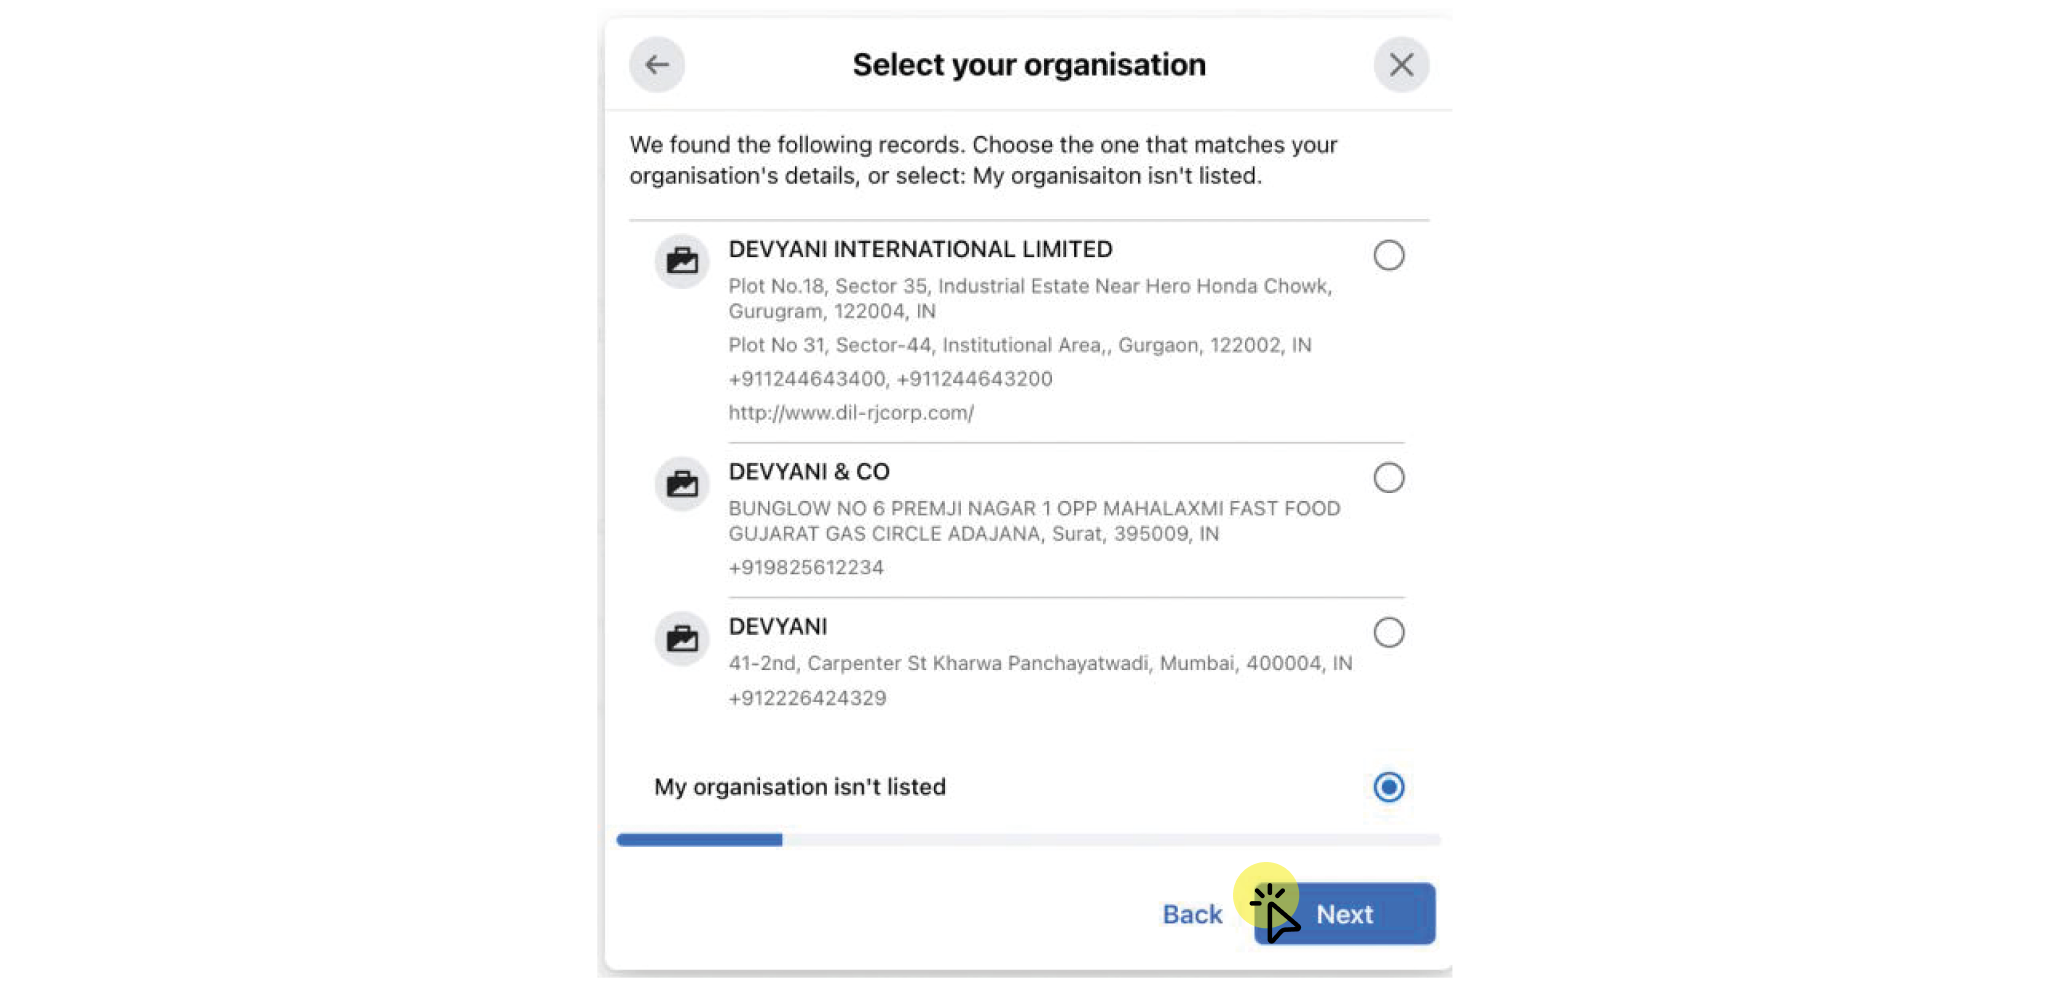
 7. Now, Facebook will compile a list of businesses that match the data you just provided.